 dnk17
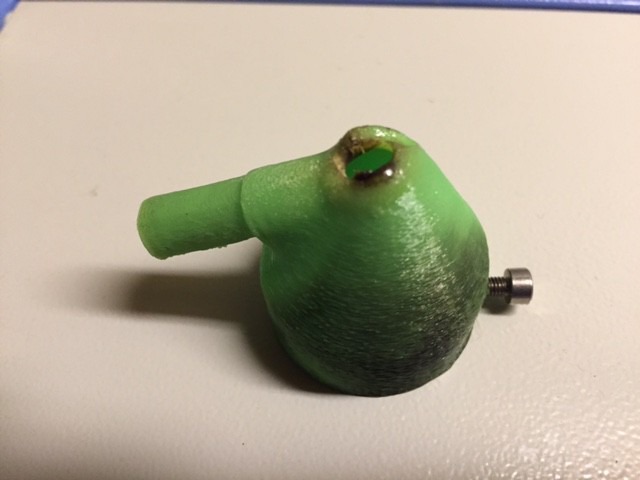
dnk17My wife makes fun of me for all the "Chinese" packages I get in the mail. Well today was a banner day! When I got home there were three little yellow envelopes with Chinese characters on them. The first was a cheap ($20) blue tooth smart watch (I'm not sure what I will do with it), and a flow switch. But more importantly a new laser head for my K40 arrived. It is nothing special, just one of the the generic machined 18mm air assist heads. I bought it as a replacement for my 3d printed one from Thingiverse.com. The 3D printed one worked great for quite some time, but after a couple of flareups it was starting to look worse for wear and it was time for an upgrade.
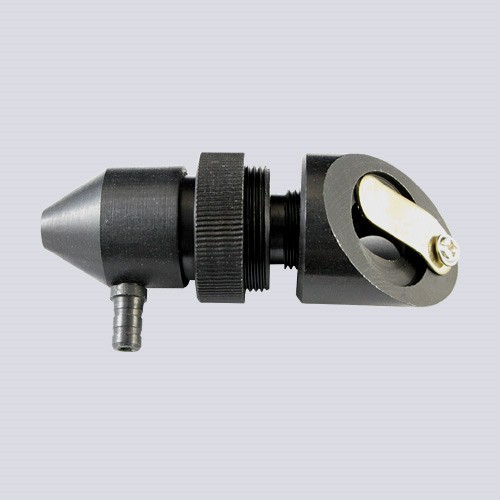
I have been using an air assist for quite some time now and I have to say is it makes a huge difference in the cutting ability and edge quality. Adding an air assist should be every-bodies first upgrade to any K40.
Since I was a little late getting home from work I wasn't planning on spending much time on clock tonight. But I wanted to at least look into what I needed to do to install the new air assist.
So I fed the kids, pet the dogs, kissed my wife and headed into the basement for a little bit and to put some things away. Installing the air assist looked to be pretty straight forward, so I thought I would just do it. Once I had it installed I needed to re-calibrate the optical path to compensate for any changes needed for the new head. Long story short, so much for not spending much time in the basement. A couple of hours later I had drawn up and made the rest of the cabinet for the clock.

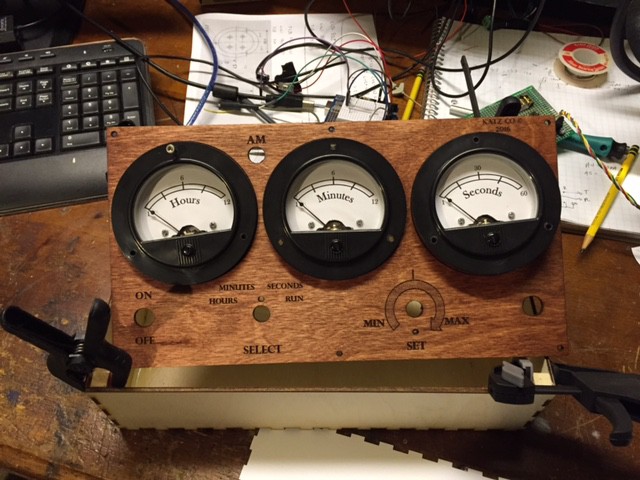
The box was designed in LaserDRW (files attached) an cut out on the cutter (with the new air assist :). It's a simple box with 10mm x 3mm tabs used for joinery. Above is a picture of it glued up and clamped. On the table are some card stock prototypes that I cut first to make sure of the design. Everything went well and the box went together easy. But I did make a rookie mistake , in my excitement instead of measuring how deep I needed the box to be to fit everything in, I took a guess and made it 70mm deep. I lucked out that the meters fit in OK, but it will be a little tight with the PCB in there also. But it should work, even though a little more space would have been nice.
Oh I also rummaged around the basement and found some old Mahogany stain and used it on the face plate. Its a little red, but should look OK when clear coated. I am still debating about just cutting a new face plate and using a different stain.
Discussions
Become a Hackaday.io Member
Create an account to leave a comment. Already have an account? Log In.