Close
0%
0%

binaryClock

A nerdy clock with LED’s including an ATmega328P, a RTC and everyone’s favorite WiFi-Chip.

Similar projects worth following
There are a lot of ESP8266 clocks and weather stations with small I2C OLED/LC Displays out there. But I wanted to build something a bit more unique. So I started building this binary clock. I laser cut some acrylic and wood plates. Then I designed the electronic schematic, soldered the components on a prototyping board and screwed all parts together. After some days of coding and debugging the clock finally works.

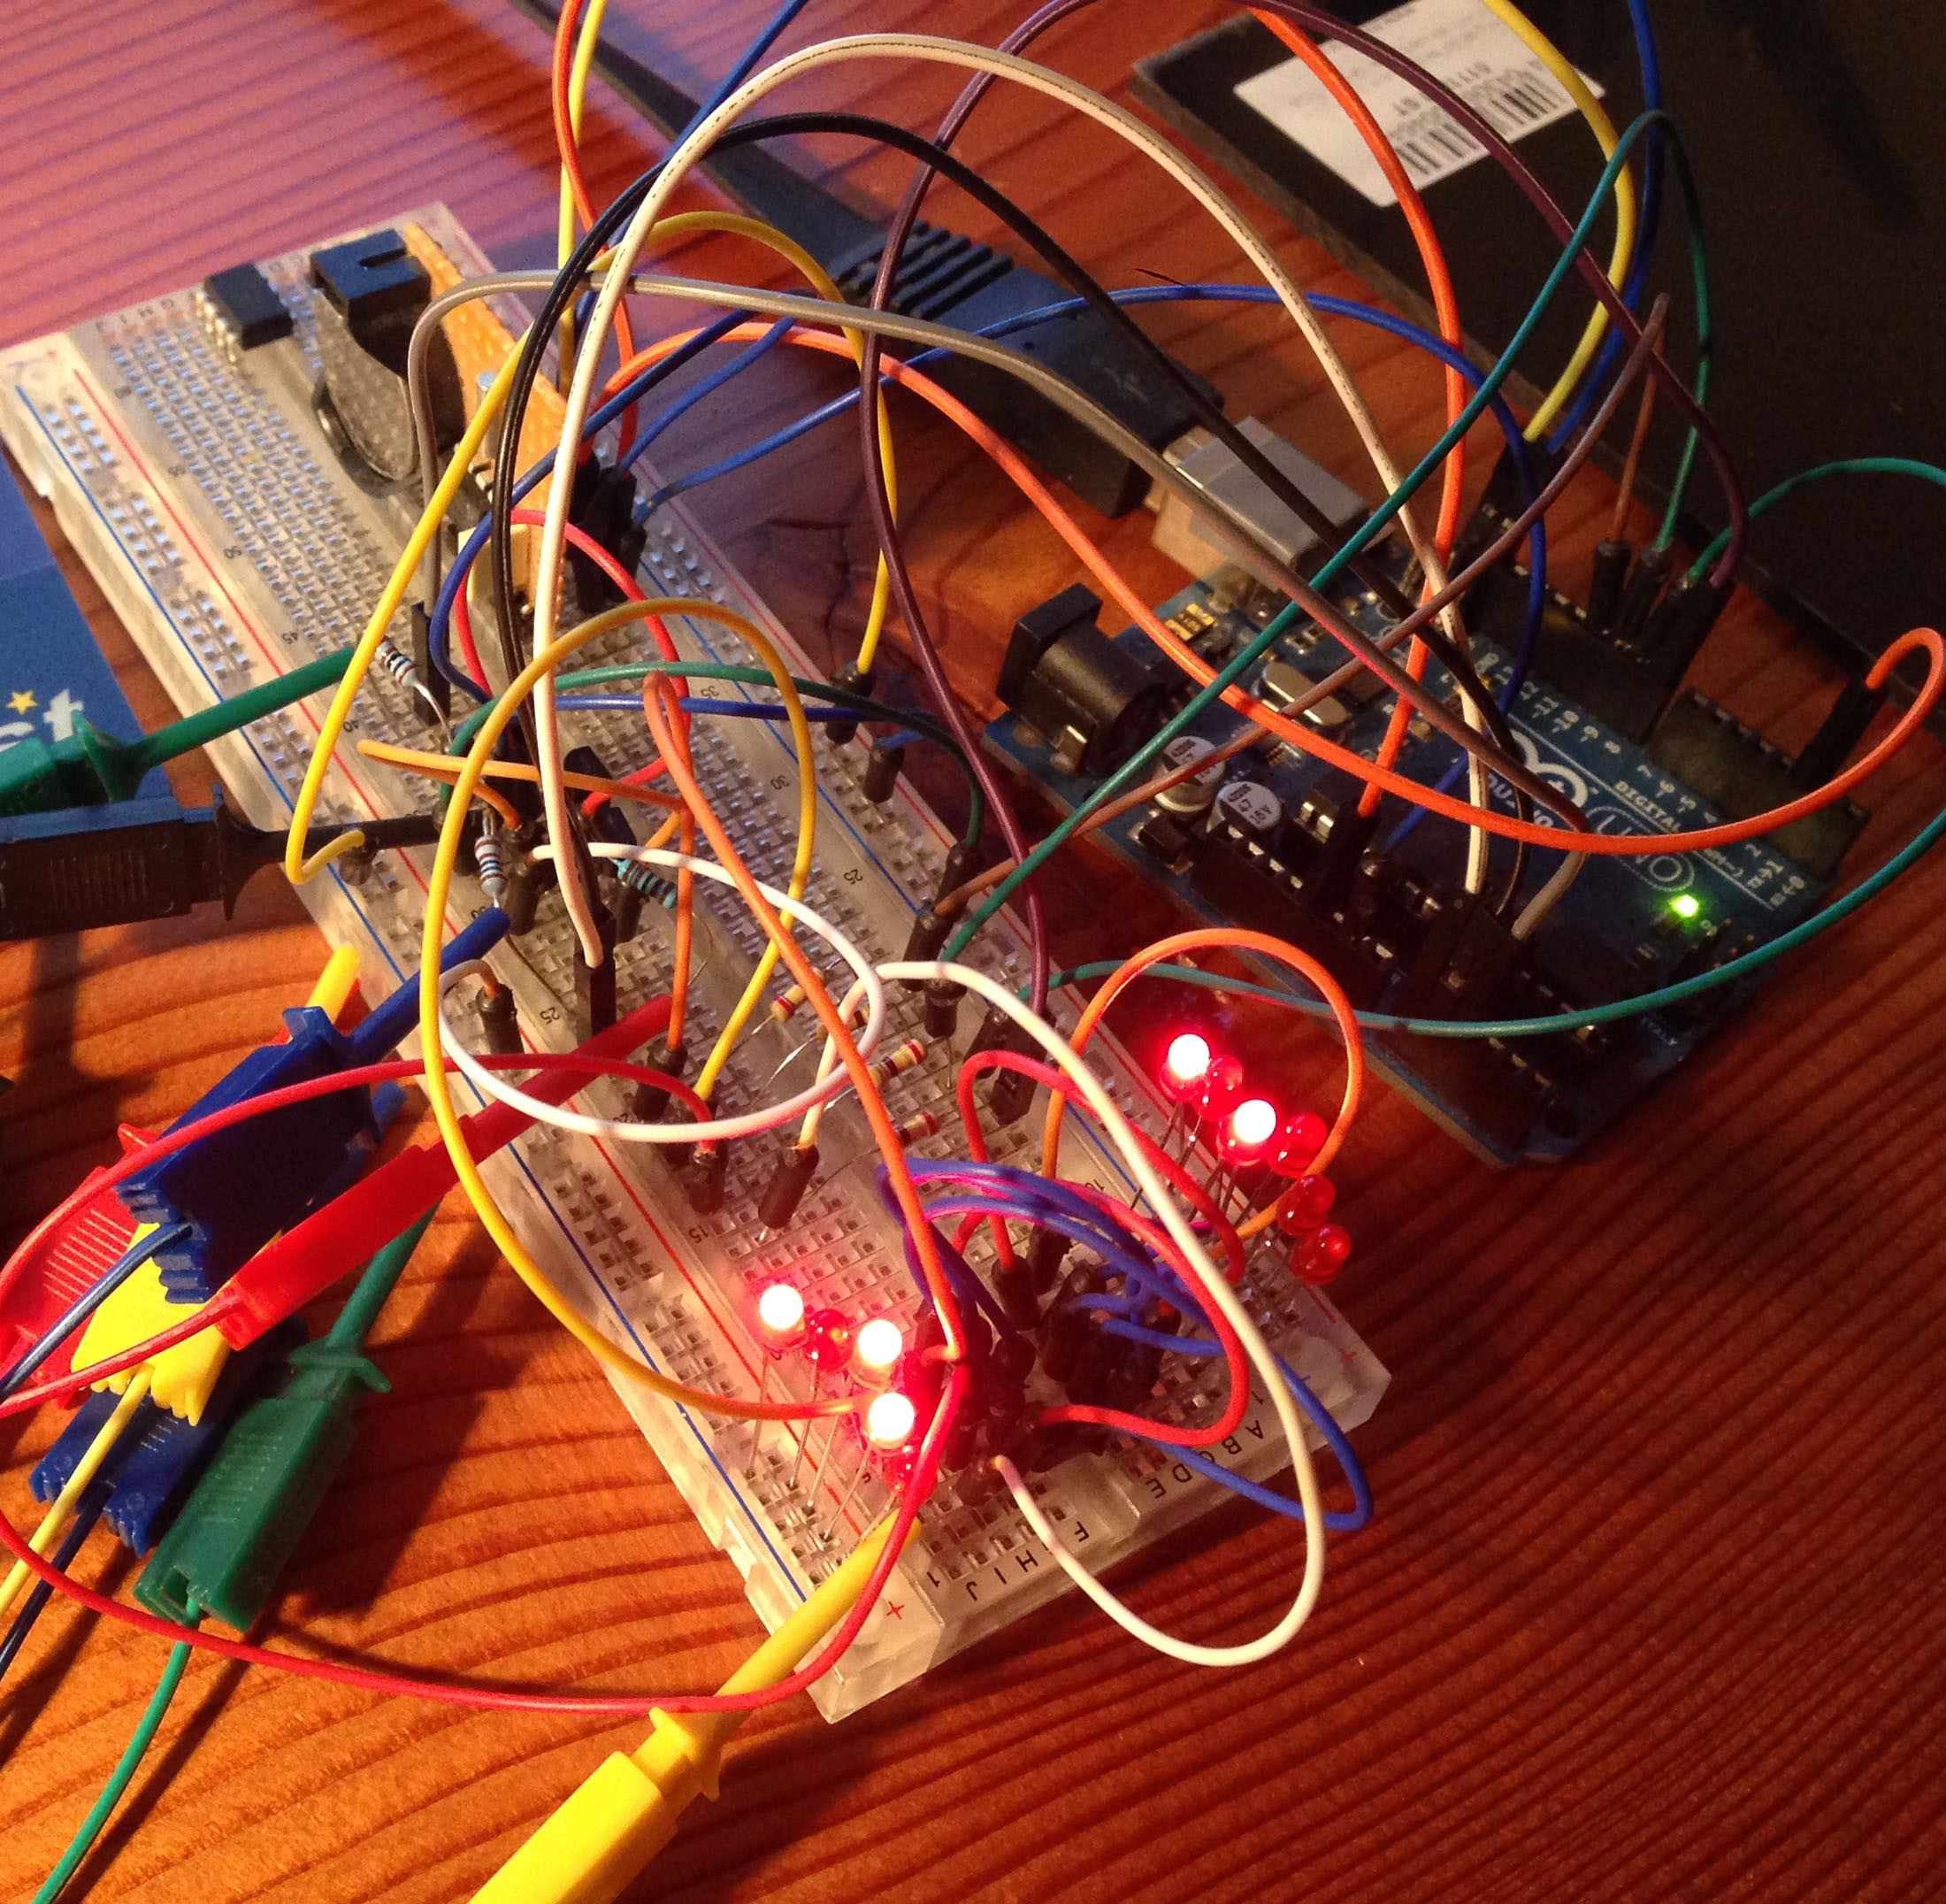
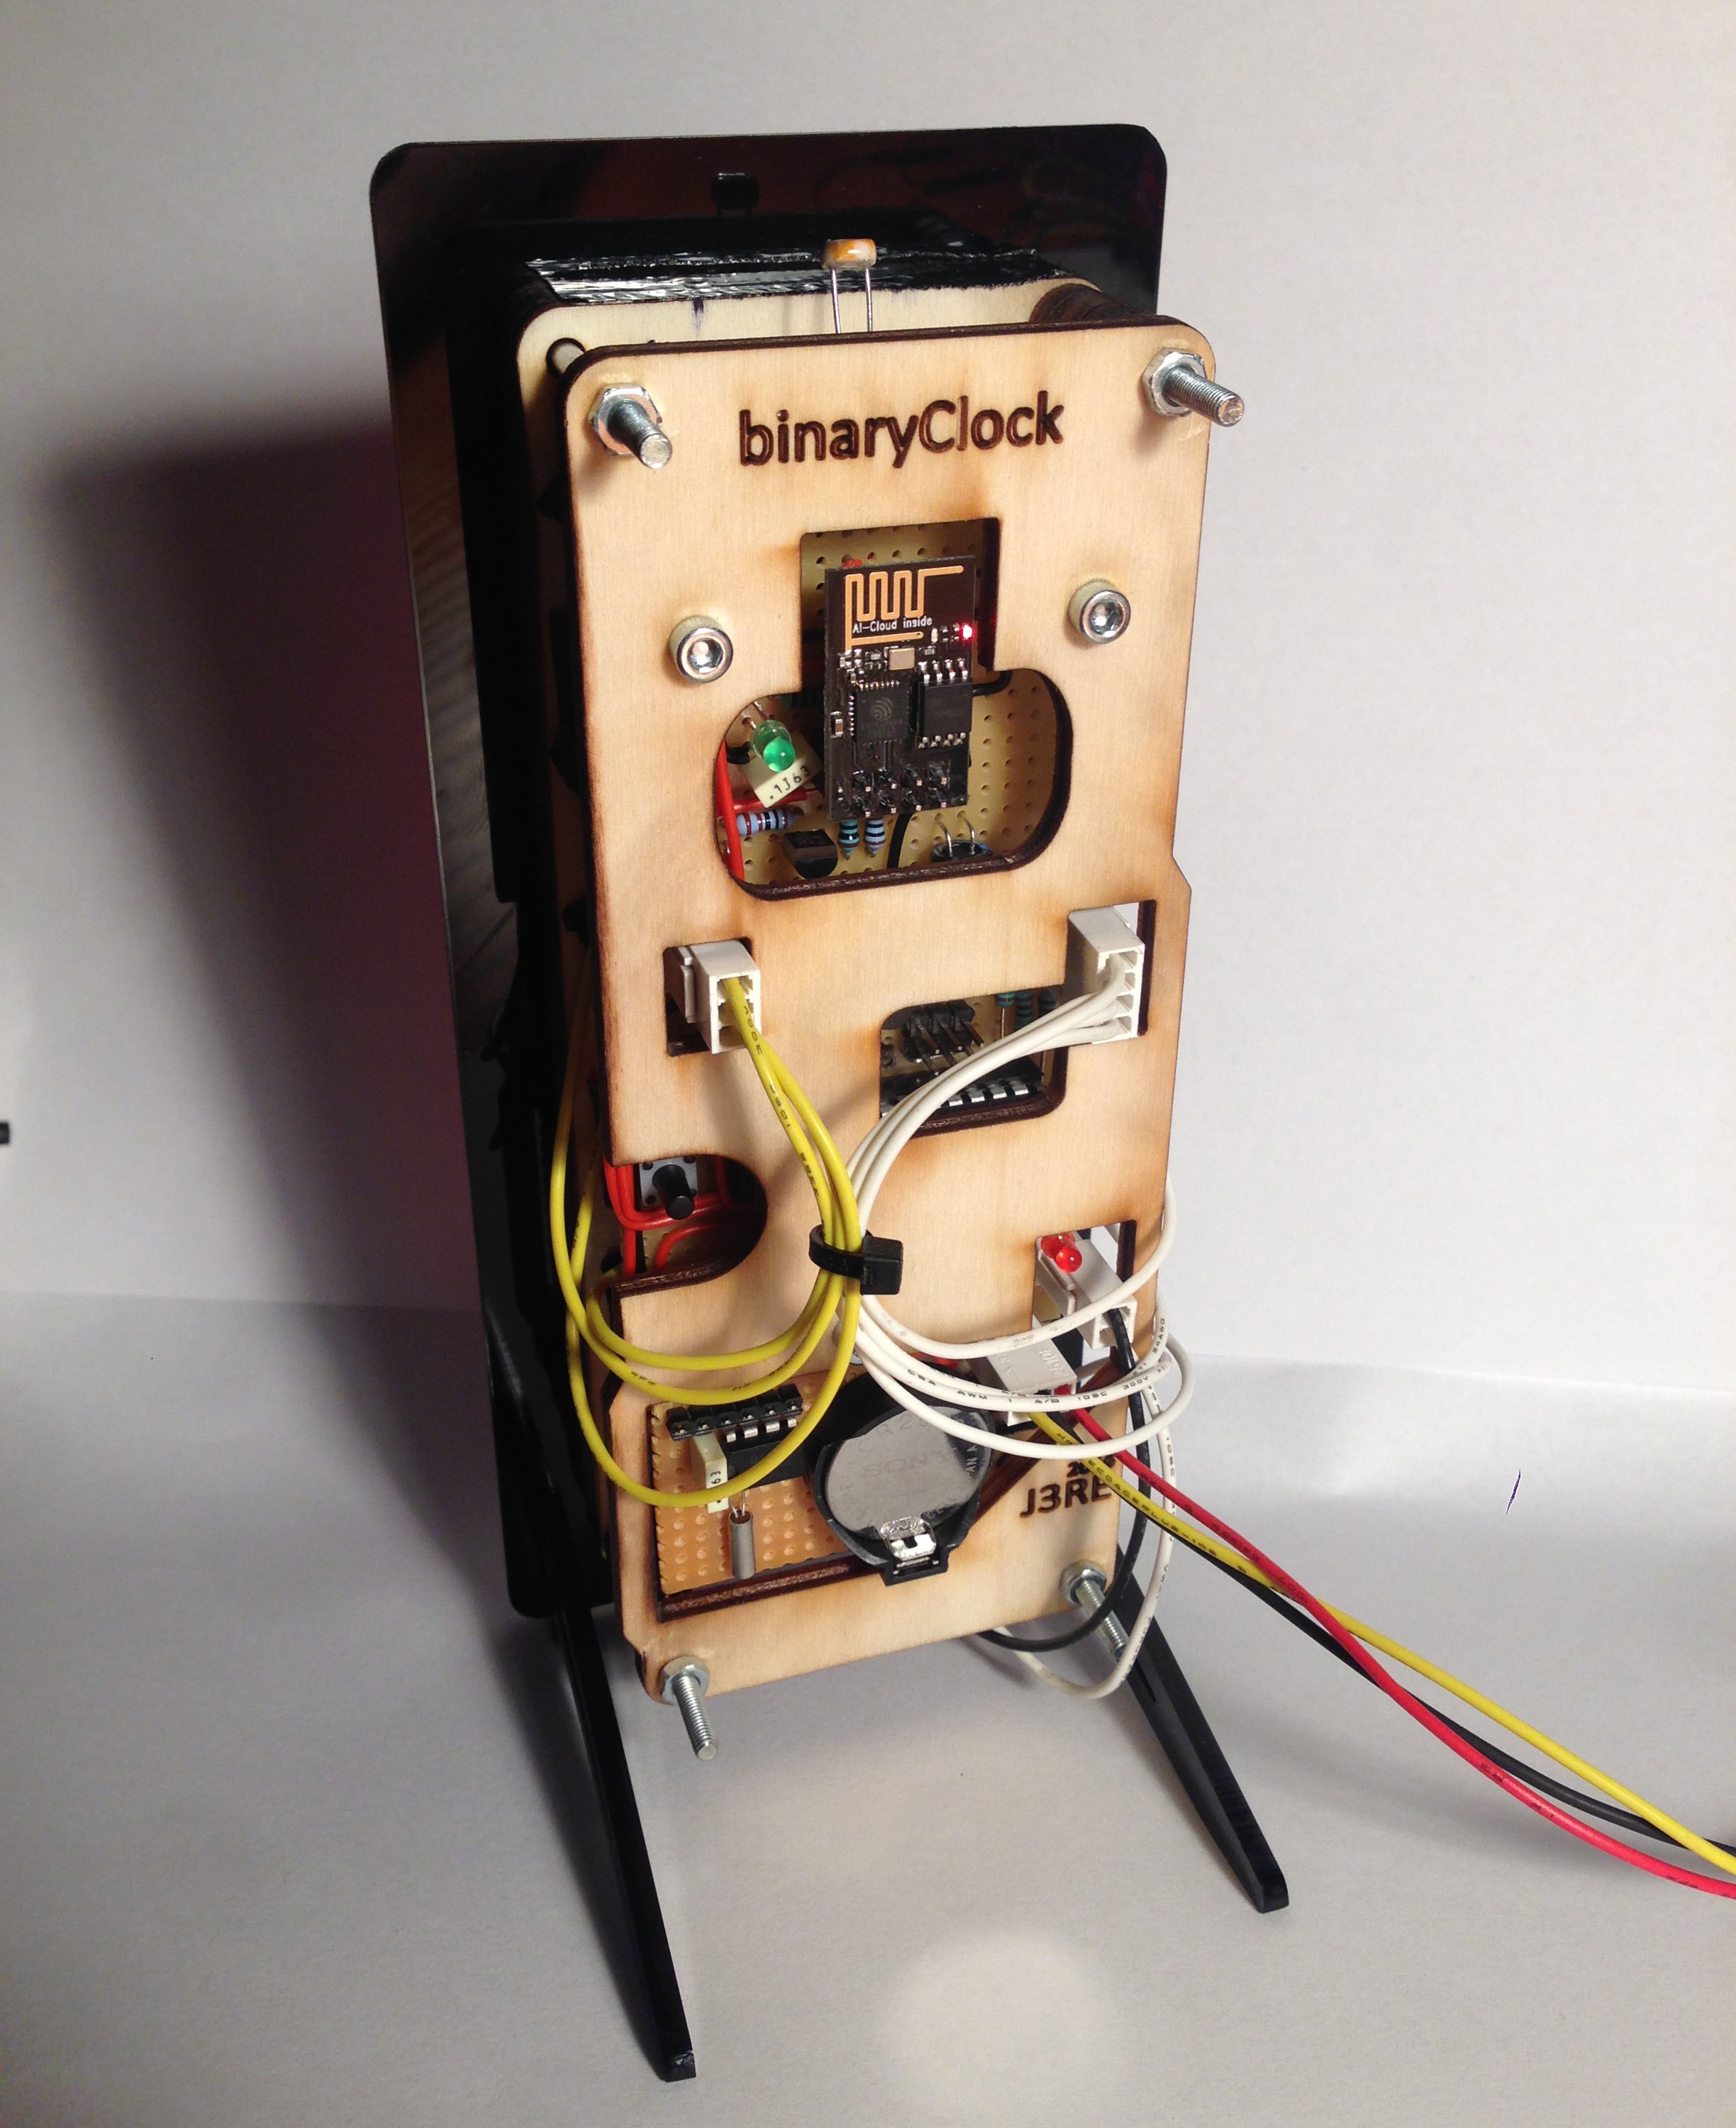
The ATmega328P is the brain of the clock. The chip has enough pins, so there is no need to use shift-registers or something similar. The red LED’s are multiplexed in a 4x3 arrangement (4x anodes, 3x cathodes) and a RTC is connected via I2C-Bus.

A light dependent resistor is connected via a voltage divider to an analog capable pin of the ATmega, for setting the right brightness of the LED’s according to the surrounding brightness.

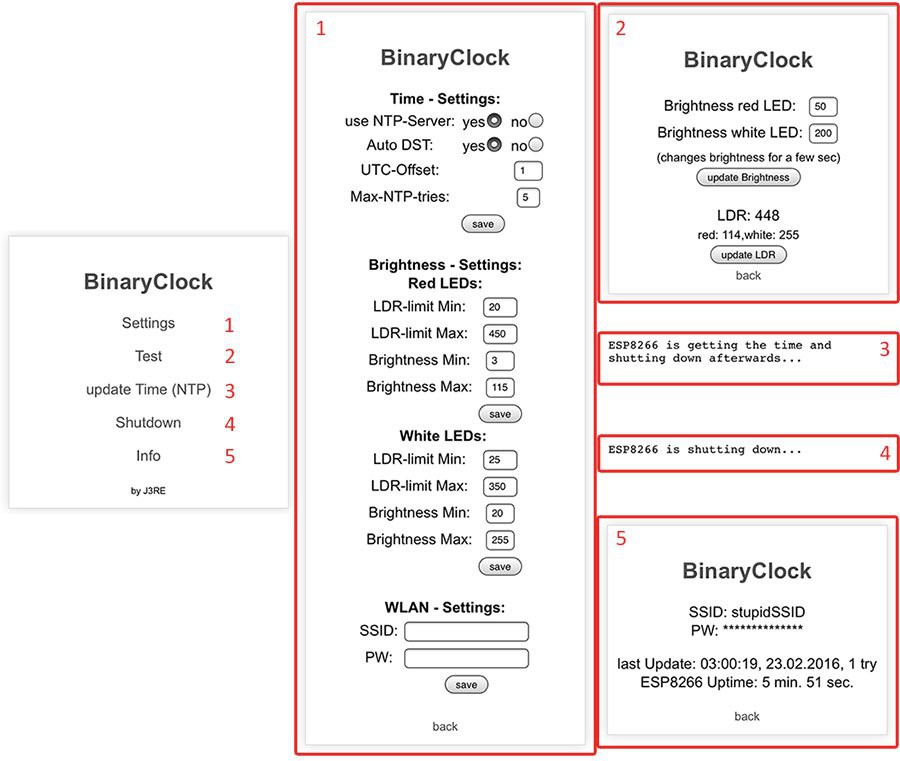
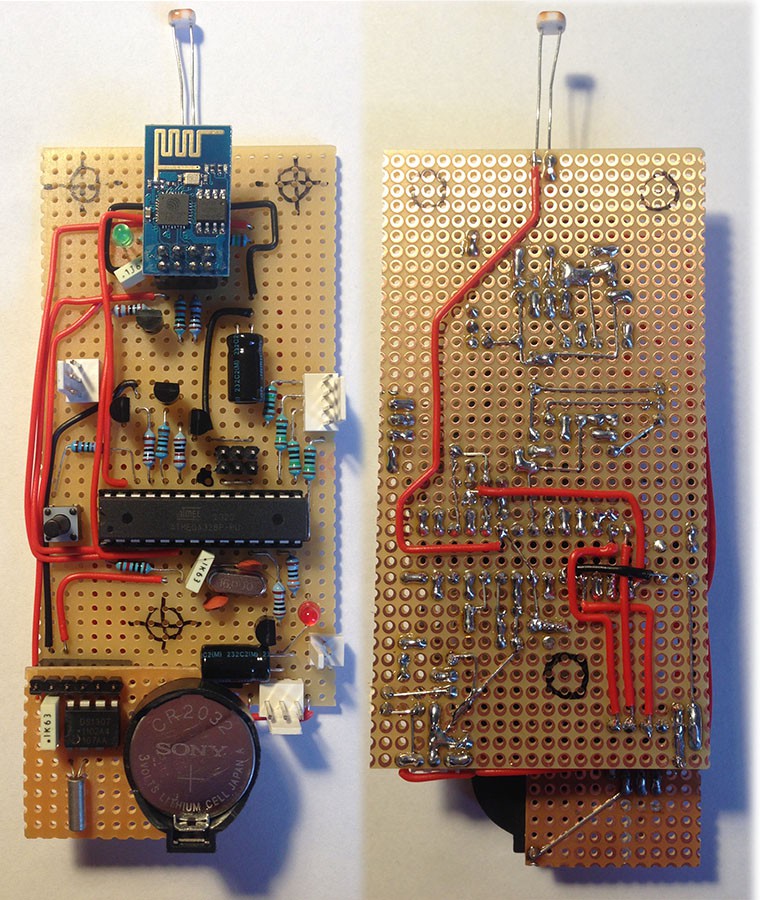
The ESP8266 and the ATmega are connected via Serial. The ESP8266 can be turned off by the ATmega, therefore it only runs when needed for getting the time or running the webserver. The webserver is started by pressing the button on the backside of the clock. When the webserver is started the ESP8266 tries to connect to a WiFi network, if it fails connecting, it starts in AP mode. The webserver displays some info stuff and lets you change different settings (e.g. SSID, password, brightness-settings ...).

Adobe Portable Document Format - 62.04 kB - 02/21/2016 at 19:49

Preview
Download

  • 1 × ATmega328P 8bit AVR microcontroller
  • 1 × ESP8266-01 awesome WiFi module
  • 1 × DS1307 Real Time Clock
  • 11 × LED, red 5mm
  • 3 × LED, white 5mm

View all 13 components

  • updated Code

    Jeremias02/25/2016 at 15:34 0 comments

    The red and white LED's now change their brightness every second. On odd seconds the red LED's are brighter than on even seconds, for the blue LED's vise versa. The change of the brightness is animated

    The brightness scales linear now, because I added a lookup-table for the brightness levels. I have changed the PWM of the red LED's from 8bit to 9bit PWM, now the animations at low brightness settings should look a bit smoother.

    That's the function which fades the brightness:

    void animateBrightness()
    { 
      if((millis() - millis_animate) >= DELAY_BRIGHTNESS)
      {
        if(second % 2)
        {
          if(brightness_red_now < (brightness_red + (DELTA_BRIGHTNESS << 1)))
            brightness_red_now += 2;
    
          if(brightness_white_now > brightness_white)
            brightness_white_now--;
        }
        else
        {
          if(brightness_red_now > brightness_red)
            brightness_red_now -= 2;
          
          if(brightness_white_now < (brightness_white + DELTA_BRIGHTNESS))
            brightness_white_now++;
        }
    
        brightness_red_log = log_brightness_9bit[brightness_red_now];
        brightness_white_log = log_brightness[brightness_white_now];
        analogWrite(WHITE_LED, brightness_white_log);
    
        millis_animate = millis();
      }
    }

    the rest of the code is on Github

  • Code

    Jeremias02/23/2016 at 20:04 0 comments

    My source code can be found on this Github page. The daylight saving time setting is for europe only, but it shouldn't be that hard to adapt it for your country.

    The webserver works/looks best on mobile devices, but is also available on desktop devices.


    ToDo:

    • logarithmic brightness
    • animate brightness to seconds

View all 2 project logs

  • 1
    Step 1

    I started on a breadboard, pretty messy but it kinda worked.

  • 2
    Step 2

    When I received the LED's, I glued them into the laser cut parts, now it looks a lot cleaner than on the breadboard.

    The schematic of the electronic circuit can be found in the files section. This is how the circuit looks like on a prototyping board.

    After screwing and connecting the parts together, the only thing left to do was to finish my code.


View all instructions

Enjoy this project?

Share

Discussions

Similar Projects

Does this project spark your interest?

Become a member to follow this project and never miss any updates