Close
0%
0%

Laser cutter fume filter

Lasercutters fumes smells like hell and are toxic. This project describes a DIY fume extractor and filters.

Similar projects worth following
My 12V Lasercutter works now, but cutting smells like hell and is unhealthy. Now I need a fume extractor, which will do the job of filtering, too. Fortunately I still have an old vacuum cleaner which will be modified for this purpose. A chemist helps me finding the right filters and processes to neutralize all the toxic in the fumes.

!DANGER!

A Lasercutter is a very dangerous device. Not only the laser can destroy your eyes if you handle it the wrong way. The fumes, especially while cutting or engraving wood, contain carbon monoxide. Carbon monoxide is known as "silent killer". The colorless gas doesn't smell. It's not aching in your throat while inhaling. It can diffuse though walls and is more or less the same weight as air which means it can go everywhere.

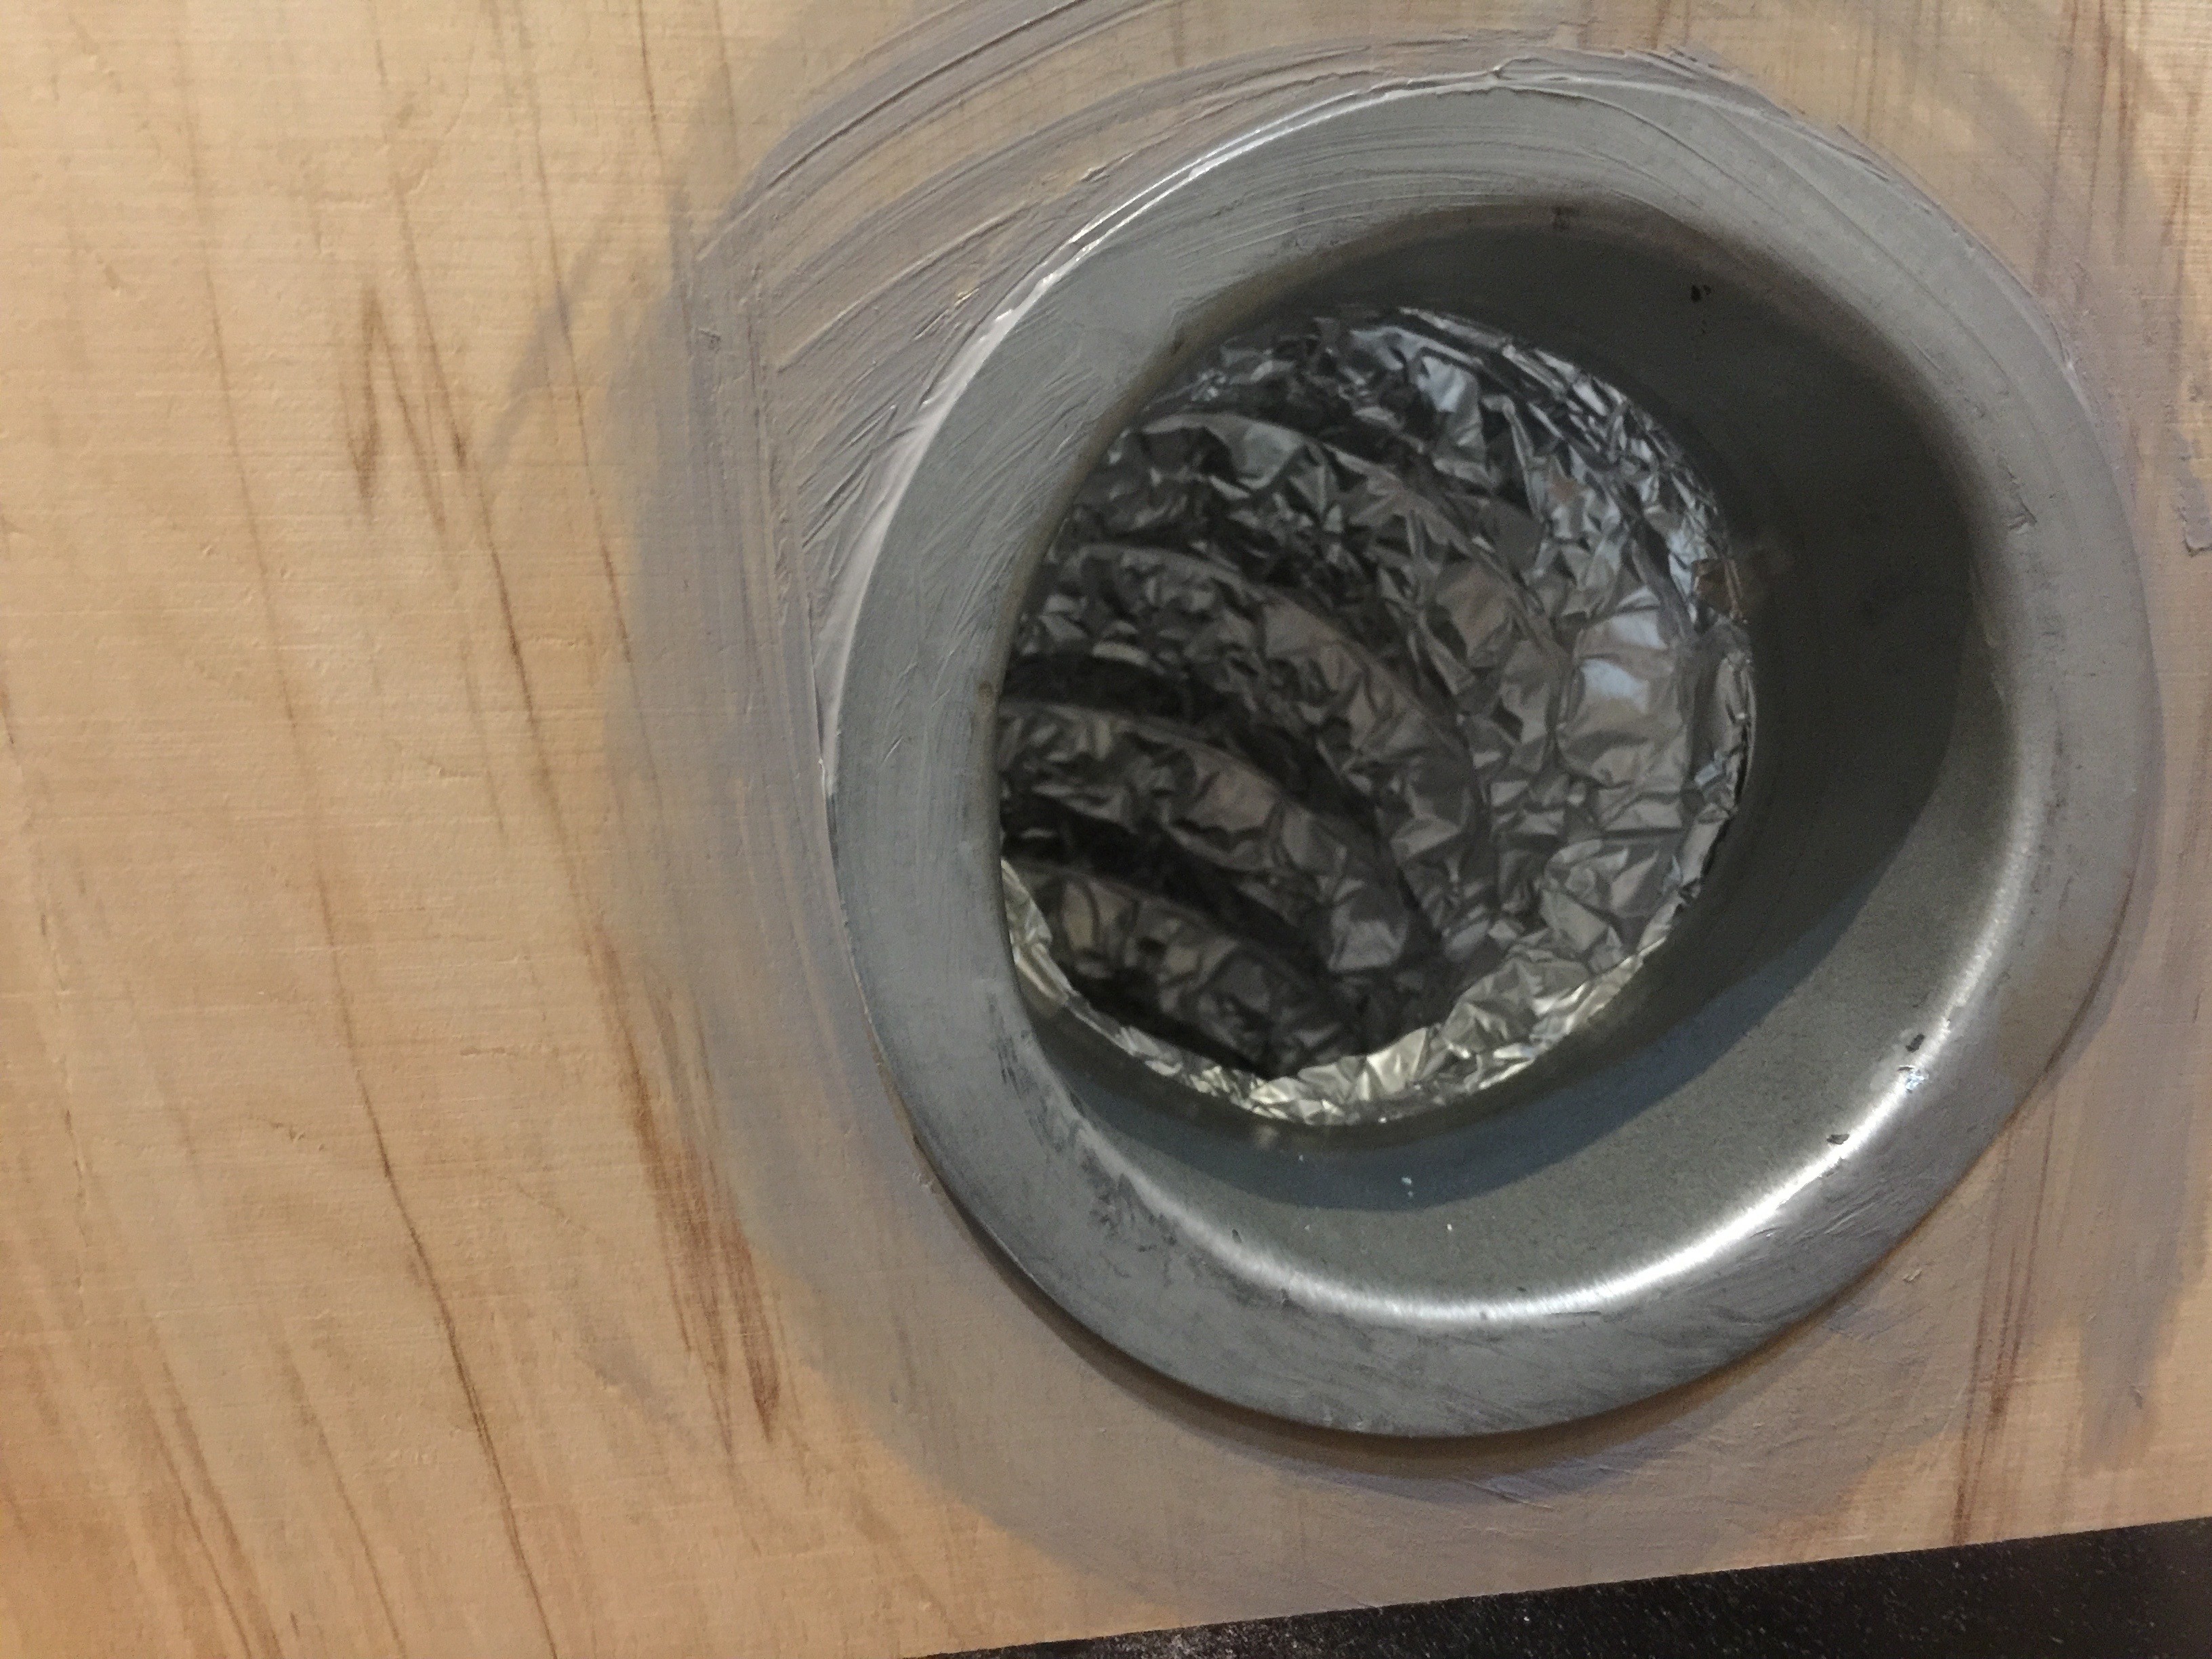
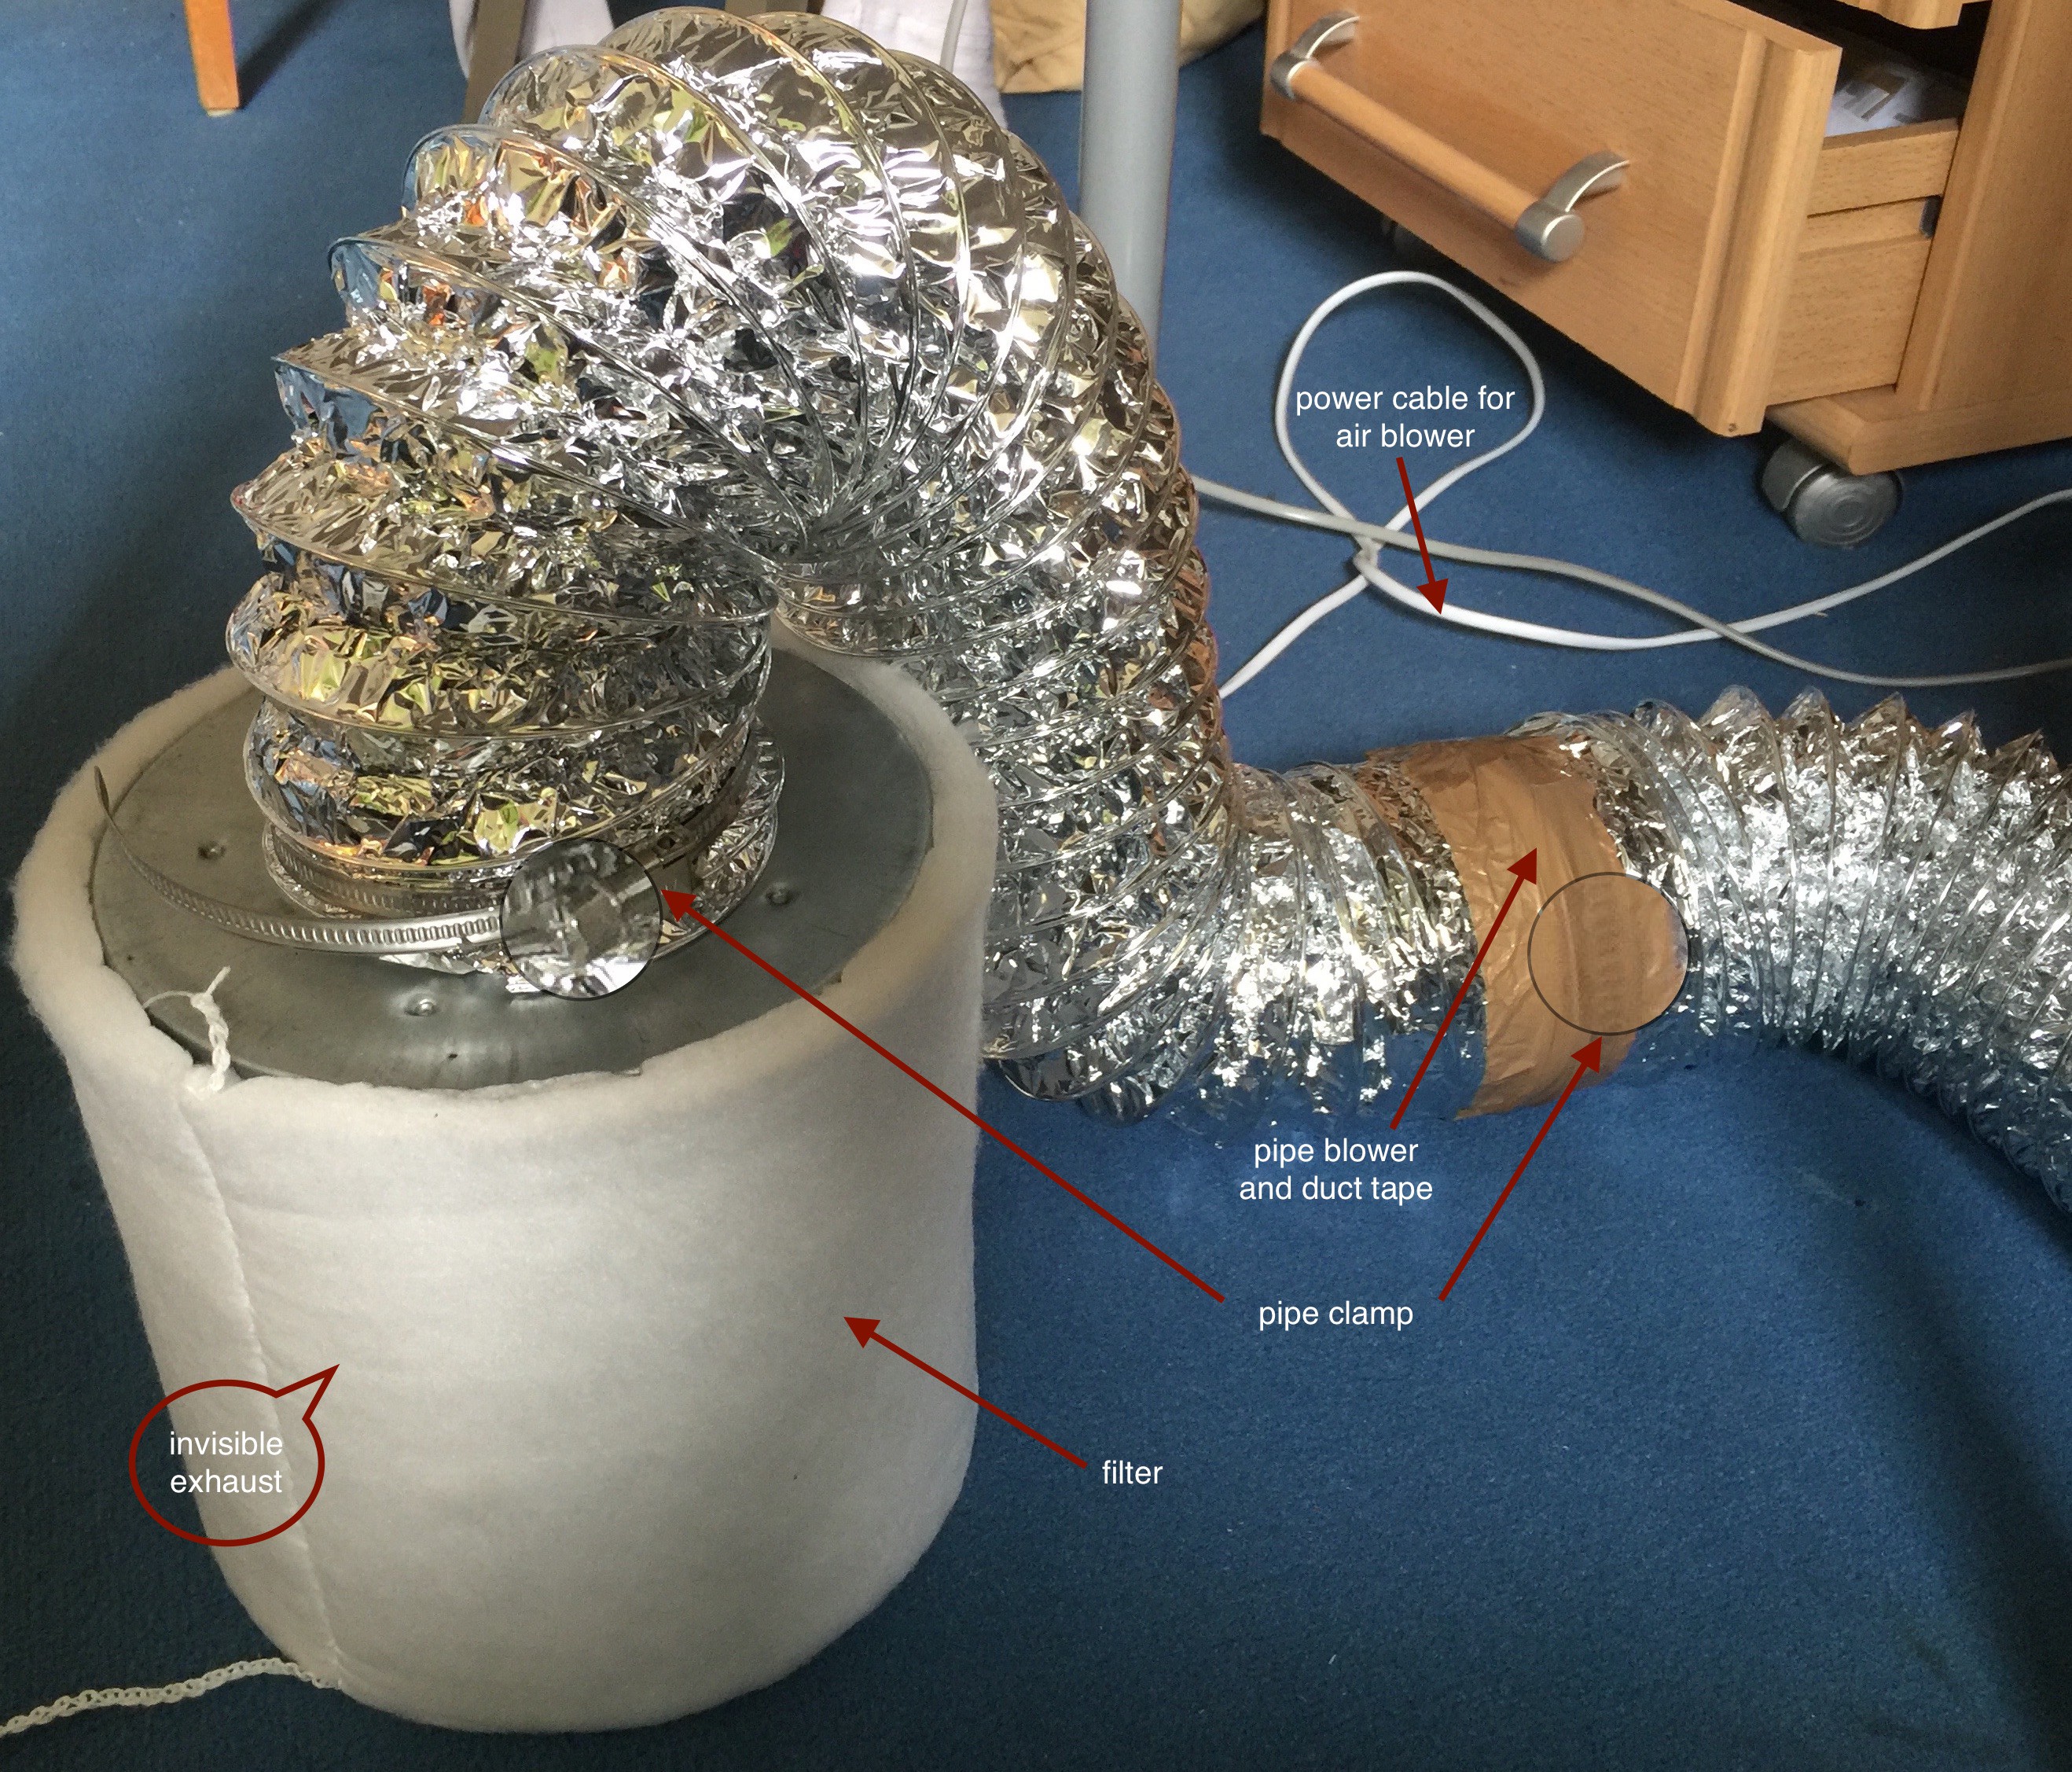
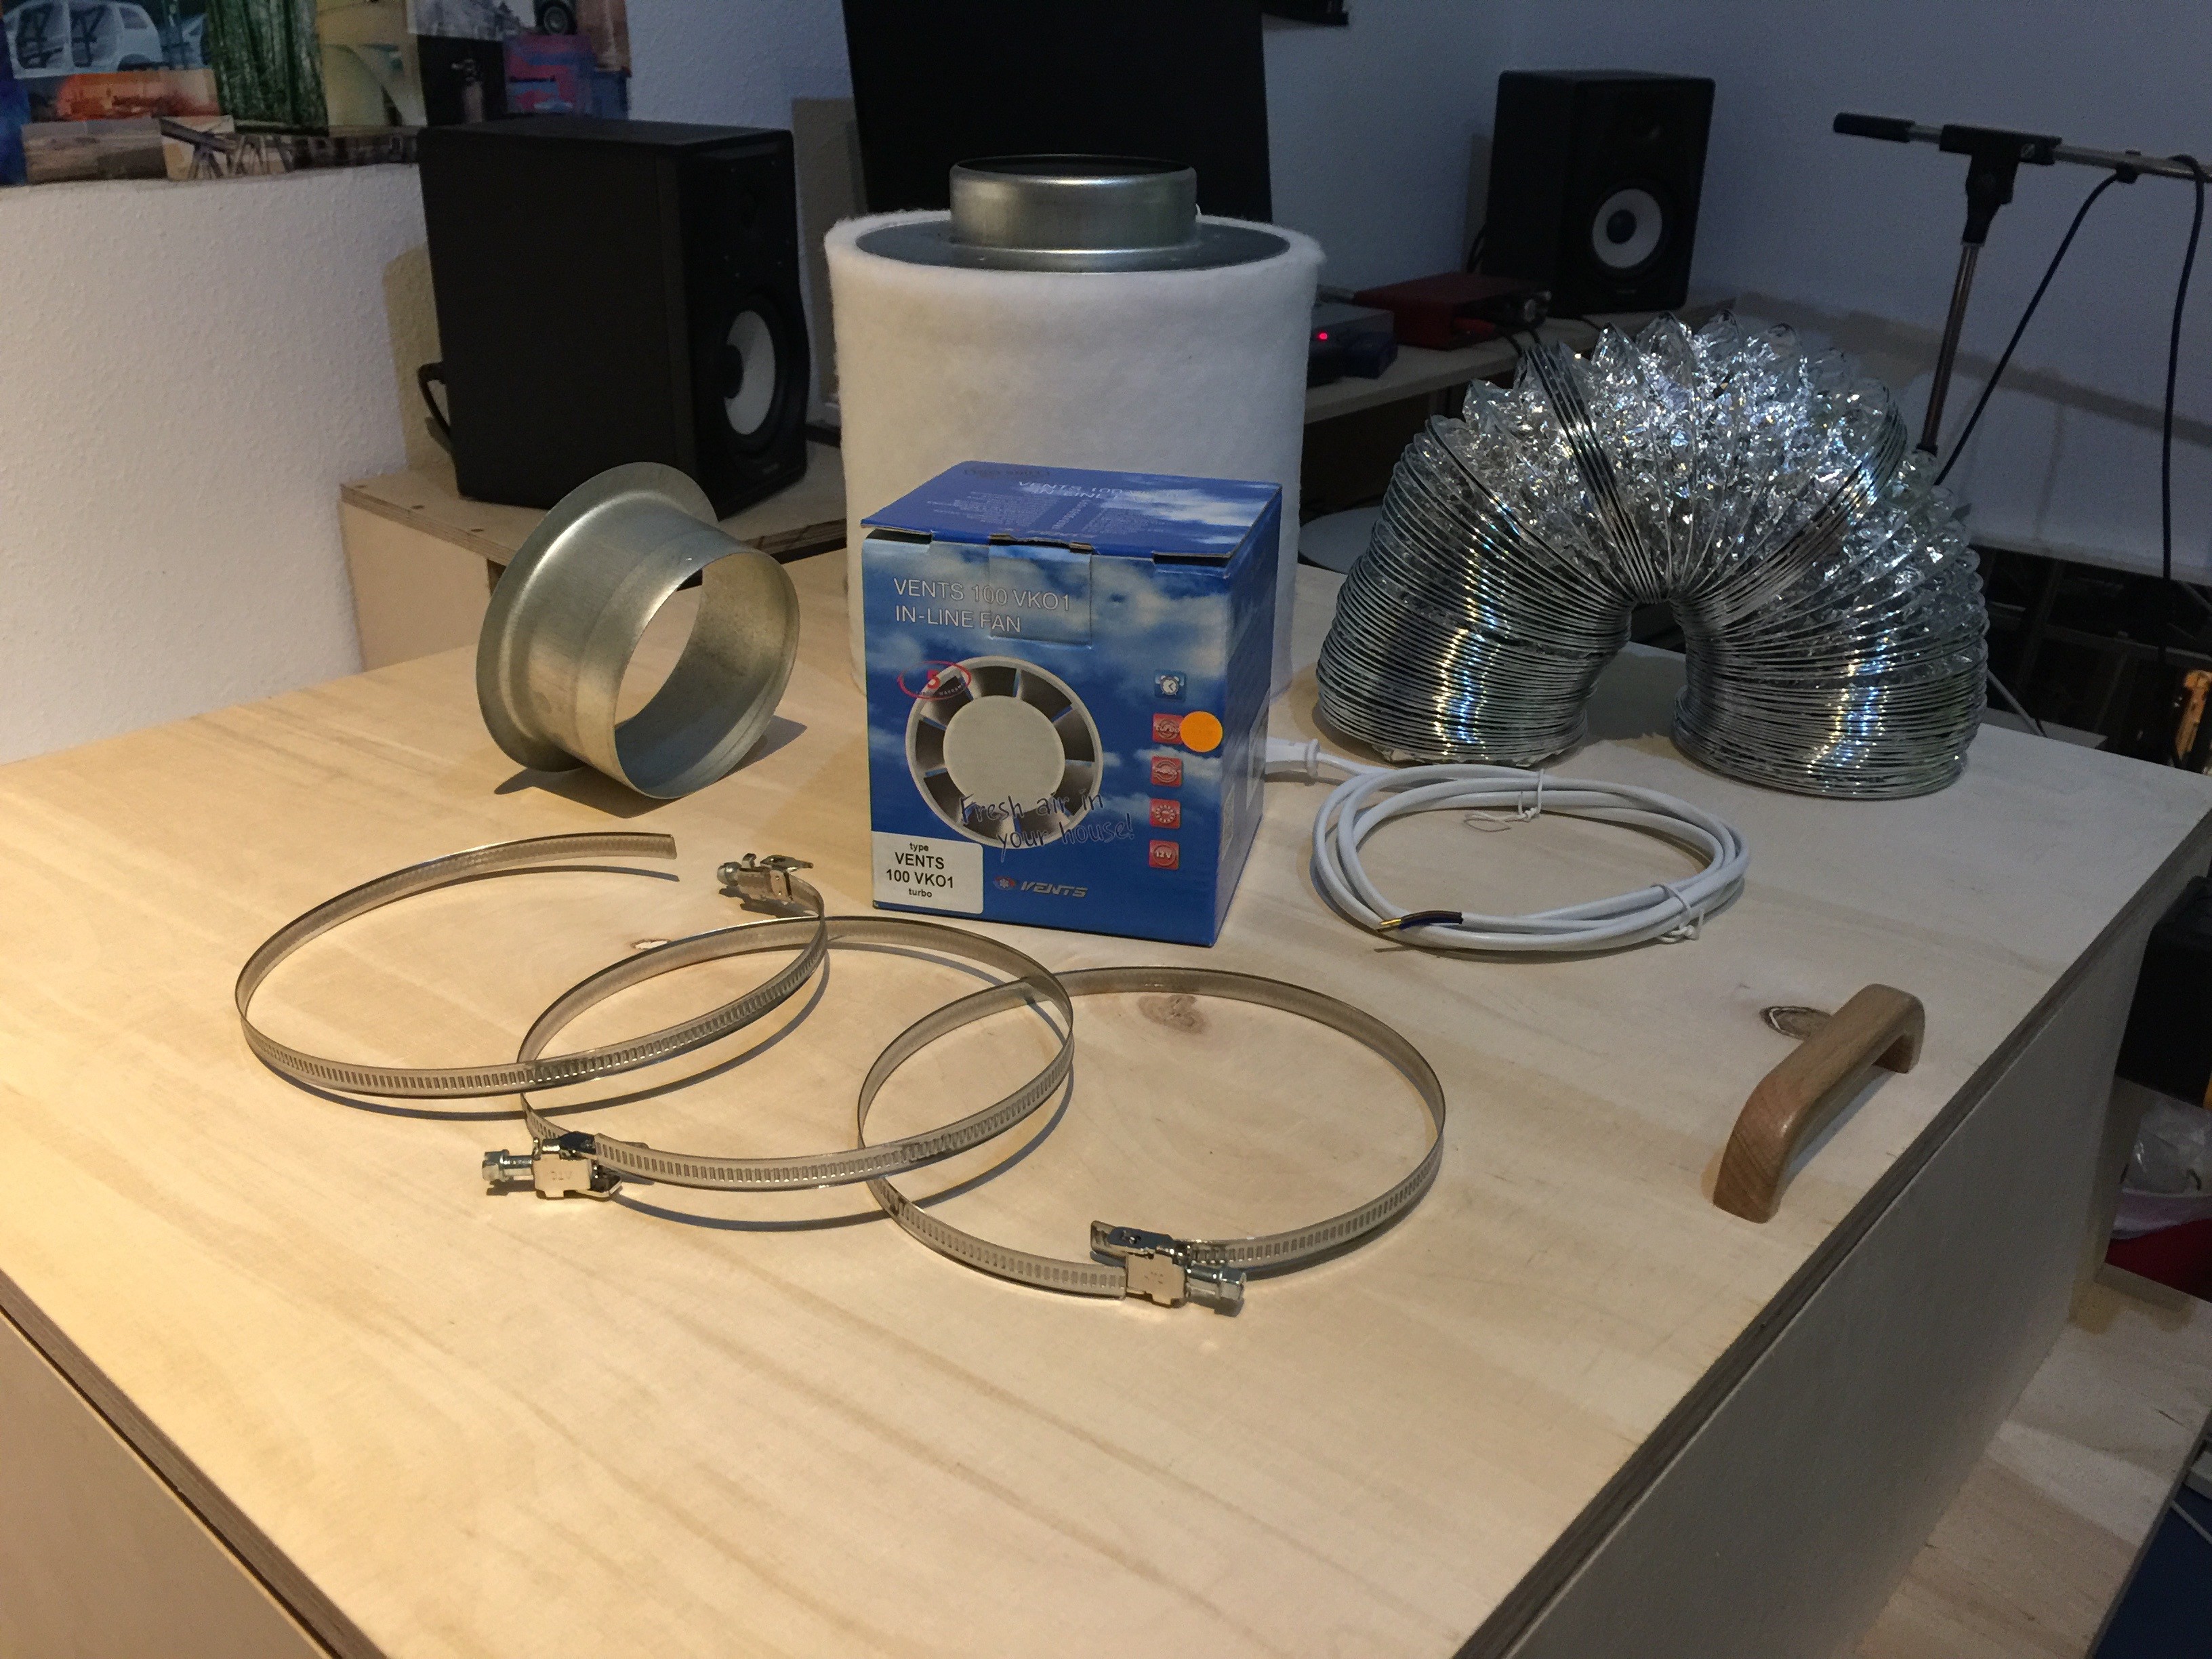
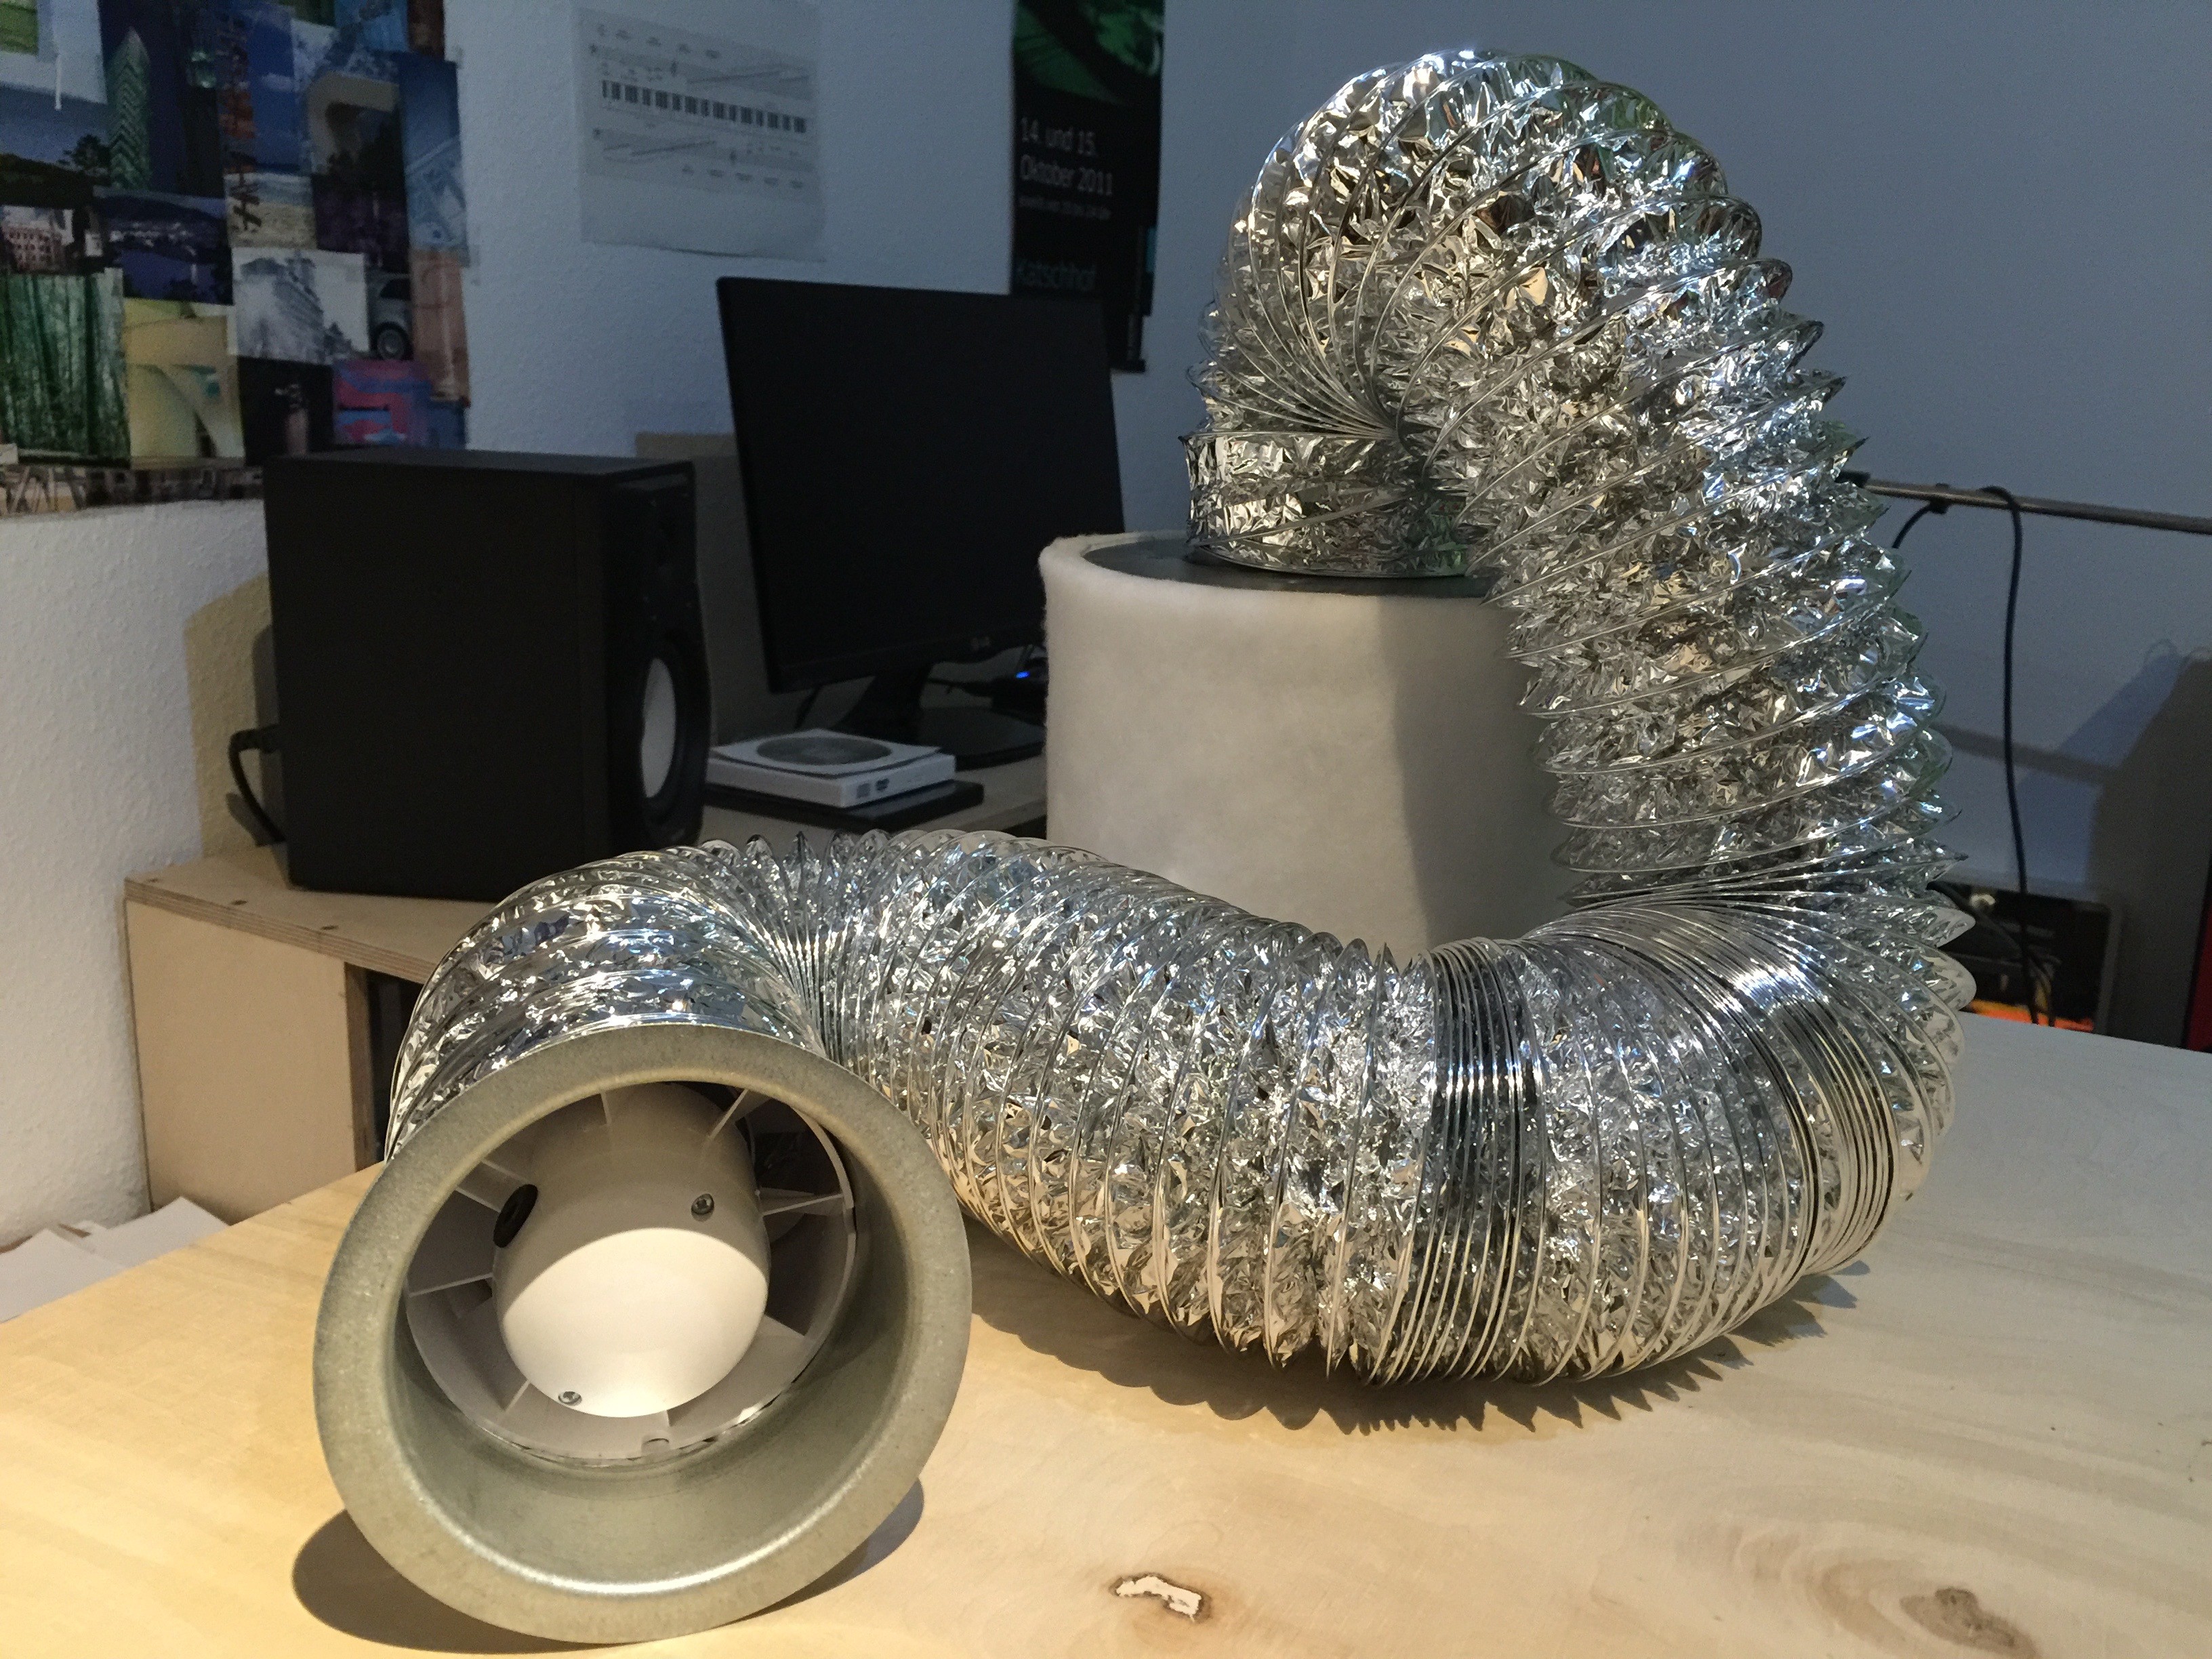
I now attached a filter and a blower to my laser cutter. The char coal filter is doing a great job. Most fumes are adsorbing to the char coal there is no smell anymore at the exhaust. Especially this makes the fume extractor dangerous if it's not completely air tight and being operated indoors. Unfortunately I was a little bit careless at saturday and inhaled a little bit of the carbon monoxide gas. I became dizzy immediatelyand felt awkward. I immediately turned off the cutter by pushing the emergency stop button and ran away from that machine. That was a really unpleasant feeling - and dangerous!

So please be advised, that a laser cutter provides visible and invisible danger and can harm you really bad! If you want to filter the gas using char coal filters, please use a CO - Detector or any monitoring of CO gas (carbon monoxide) while working. Never ever use a laser cutter at home. After a cutting or engraving process was done give the fume extractor some time to remove all fumes. Never open the lid while cutting else you could be exposed to poisonous gas.

Only work outside and use a blower to get the fumes out of the device as quickly as possible. Stay away from the exhaust pipe. This is nothing for children to play with.

  • Attach the exhaust hub

    Jack Pearse03/03/2016 at 12:36 1 comment

    I sew a 100mm hole to the back of the laser cutter box. Then I attached a tin hub at the back side and used silicone do fix it and make it air tight.

    Then I attached the flex pipe using a pipe clamp. I cut 1/3 of the pipe off. The one end was attached to the blower and was fixed to the blower using a pipe clamp. The other end of the bower was attached to the second pipe, the second pipe was attached to the filter.

    After turning on the blower, you can hear a really nice industrial sound. I used a lighter to see if its sucking in the flame. It's working!

    !WARNING!: The filter works pretty well. Any fumes adsorb to the char coal and therefore there is no smell at all. Unfortunately carbon monoxide cannot be filtered and is simply bypassing the filter. CO is completely colorless and does not smell like anything. You should always have the window opened while working. The filter and the pipe should be placed outside, i.e. by hanging it out of the window. Use always a CO detector near by the laser cutter. Never ever do it without a detector. You cannot see, feel or smell that gas. You rely completely to technology here. If you become dizzy, turn off the machine immediately and leave the room. If your CO detector starts an alarm, keep out of the room until the alarm stops, then it's "maybe" safe to enter the room again. If you do everything without any mistakes (no holes in the pipe, an airtight lid and pipe hub) then all fumes should be blown out of the window. Please keep this always in mind. In addition you should be advised that you should always wear laser protection glasses. A laser cutter is a dangerous device.

  • Char coal filter arrived

    Jack Pearse02/25/2016 at 11:56 0 comments

    Nice!

    My Filter setup arrived. Now I can start assembling it.

    To make the assembly more easy I additionally ordered a 100mm tin hub (left side of the image). These components will be the main filter section. At the aspiration port a fleece filter will be used to catch dust, small objects and particles. Then the pipe blower will transport the fumes to the char coal filter. At the end of the filter chain I will use the HEPA filter from an old vacuum cleaner to filter fine particulates.


    This sounds easy. I hope it is. Let's see if the results will be as expected.

  • The box for the cutter

    Jack Pearse02/23/2016 at 13:17 0 comments

    To be able to extract the fumes, the whole cutter needs a casing. Right now I built a box, where I put the cutter in. Later I can refurbish the cutter and mount it directly into the new box. I was not sure if the box belongs to the fume extractor or the laser cutter project page. I decided that the box is part of the fume extractor, which makes ist easier to explain the mounting of the hub and the pipes.

    The new box has 4 table legs so that one can operate the machine while standing. I like it working with machines while standing instead of sitting. I used plywood again (I like plywood) to build the casing. I used the same technique like in the studio furniture project. I used 15mm plywood and joined the plates together using torx screws. It's a quick and simple construction which is very stable and airtight (Use a little bit of silicone where the wooden parts are joined with each other). I used foam sealing strips to provide damping to the lid if the box. Another nice property of these sealing strips is that ist keeps the laser light in the box but keeps a litte airflow between the lid an the foam. The wood is not perfectly flat so the foam compensates small changes in geometry.

    A Webcam inside the box makes it possible to observe the process while cutting.

    At the back side of the box I milled a small pocket where the power and USB connectors will be put in place. Ot the left side I will cut a hole with 100mm diameter. To this hole a 100mm hub will be attached for holding a pipe blower and the exhaust pipe.

    I found a grow shop (thank's to all potheads for making these filter systems cheap!) who sold me a pipe blower, a pipe and a char coal filter for only 45€ (=49,54$) . That's the nicest price I have seen on the market so far.

    For followers of the 12V solar battery philosophy I found this engine compartment blower for cars. Again the car and boat industry provides nice tools for makers: engine compartment blower

    You can use any pipe blower for this project. Just make sure that the diameter fits your pipe and char coal filter. An old broken vacuum cleaner from Dyson (the engine is wrecked) will be used as casing. Fortunately this vacuum cleaner has a built in HEPA filter, which will act as a secondary filter for filtering the fine particulates.

    Normally an industry grade filter is using three filters. For this project I will just use a charcoal filter and the HEPA filter from the vacuum cleaner.. I will test the setup as soon the parts arrive. Maybe a gas washing bottle will be a part of the setup, too. Let's see how this thing grows.

View all 3 project logs

Enjoy this project?

Share

Discussions

vytas wrote 02/06/2017 at 10:13 point

HI, what are the dimensions and airflow specs of the filter you bought?

  Are you sure? yes | no

Similar Projects

Does this project spark your interest?

Become a member to follow this project and never miss any updates