 Asad Zia
I don't have a RaspberryPi Zero. In the meanwhile I am prototyping with Arduino Nano.
In most parts of Pakistan, winter is short. The intense cold, that requires the use of space heating only lasts for about 6 weeks. Most households do not have central heating installed. Inexpensive heaters like the one pictured here are used by the middle-class for general space heating during the coldest part of winter. These heaters are simple and robust but have no safety and automation features. To make situation worse, gas pressure fluctuates throughout the day in the hours of peak demand. Every year there are many lives lost with unattended heaters causing:
1) Carbon Monoxide poisoning http://goo.gl/JvEHK7
2) Gas leak when a momentary decrease in pressure causes the flame to go out,http://goo.gl/Y4JxfJ
I live in Lahore Pakistan. First part of the project, is to address the safety issue and assist locals to equip their old gas heaters with modern safety features.
The second part of the project is the ‘fun’ part. I will add climate control and Integrate with the cloud. Notification will be pushed to smart phone. User will be able to turn their heater ON/OFF and change desired room temperature from smart phone.
The third part is the ‘awesome’ part where I will analyze the data collected on the cloud. Based on usage pattern, daily gas pressure fluctuations, predicted time to reach desired temperature (room profile) and user location, suggest to turn the heater ON automatically so that when user gets home, they find their room perfectly warm.
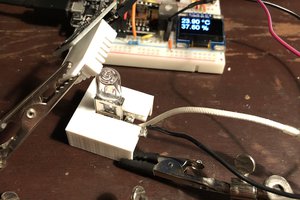
The attached picture is the room heater that I have own for many years and will be retrofitting for this project. I don't have a RaspberryPi Zero. In the meanwhile I am prototyping with Arduino Nano. The other picture are the sensors and actuators that I have already interfaced with an Arduino.
There are several components involved. Below I will detail how I am bringing up each sub system.
For detecting if heater is ON and has not flamed out due to low pressure, this is a video of testing the functionality of flame sensor.
github: https://github.com/asadziach/arduino_misc/blob/master/flame_sensor_keys/flame_sensor_keys.ino
The flame sensor in the video is hooked by a tape because I was experimenting with the proper placement and the value of onboard potentiometer. I will 3D print a mount that will hold both flame sensor and LCD/keypad at front.
In order to programmatically turn ON the heater, I need two things, a solenoid valve and a source of spark. I know there is a specific unit in stove and instant gas geysers but I could not find a spare in my city. As I mentioned, I live in Lahore, Pakistan and Amazon don't deliver here. There are however auto-shops and I sourced an inexpensive ignition coil and spark plug from a 70cc Honda motorbike. I wired it as below:
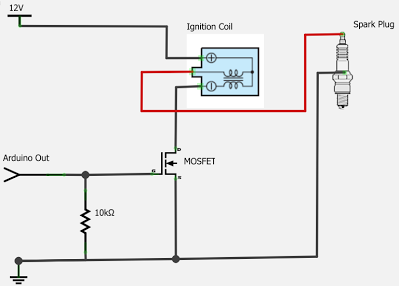 When working with a Raspberry Pi, the drive pulse will come from a 555 timer circuit which will be activated by the PiZero. STP75NF75 Power MOSFET is used to drive the current in ignition coil. See it in action in below video:
github: https://github.com/asadziach/arduino_misc/blob/master/lighter/lighter.ino
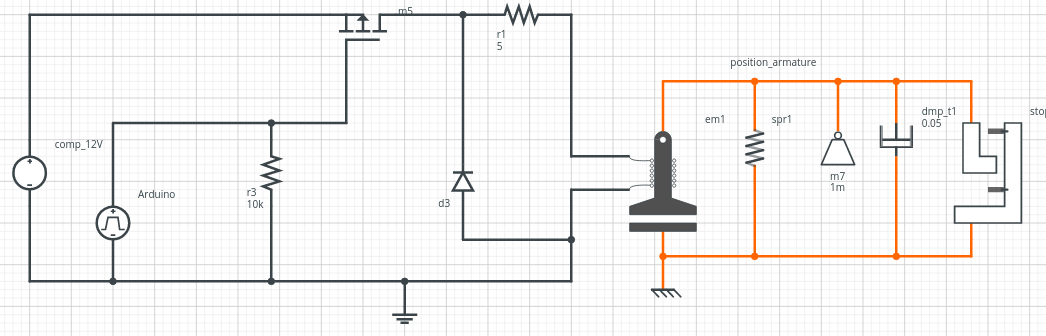
First I wired up the Solenoid directly to a STP75NF75 Power MOSFET connected to Arduino. As shown below, it was getting heat up a lot.
I did some research and learned that in order to properly drive a solenoid valve, I have to provide it with high current in start, when it triggers, then I need to reduce the current so that It stays engaged and does not dissipate excess power and damage itself.
I changed the circuit as follows and the solenoid was happy.
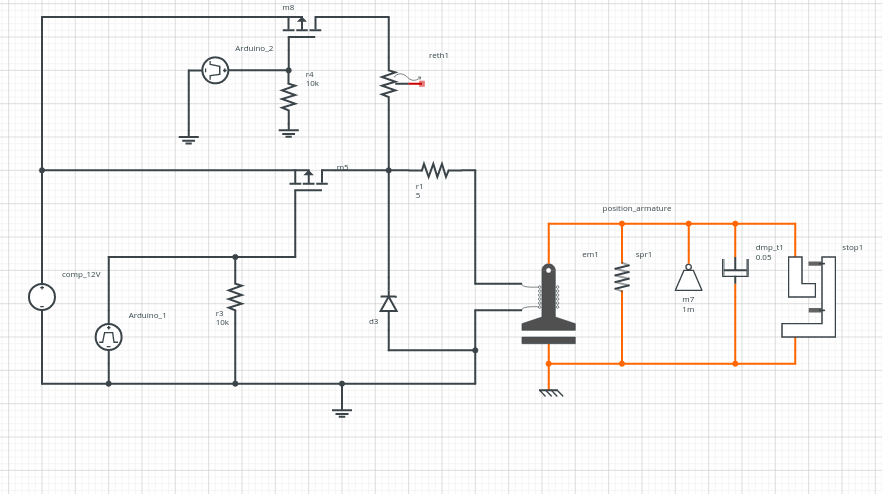 When bottom MOSFET is turned ON, it supplies peak current needed to trigger the solenoid. After 100ms the top MOSFET is turned ON and bottom one turned OFF. The second MOSFET has a power resistor in serial to limit the current to the minimum required holding value.
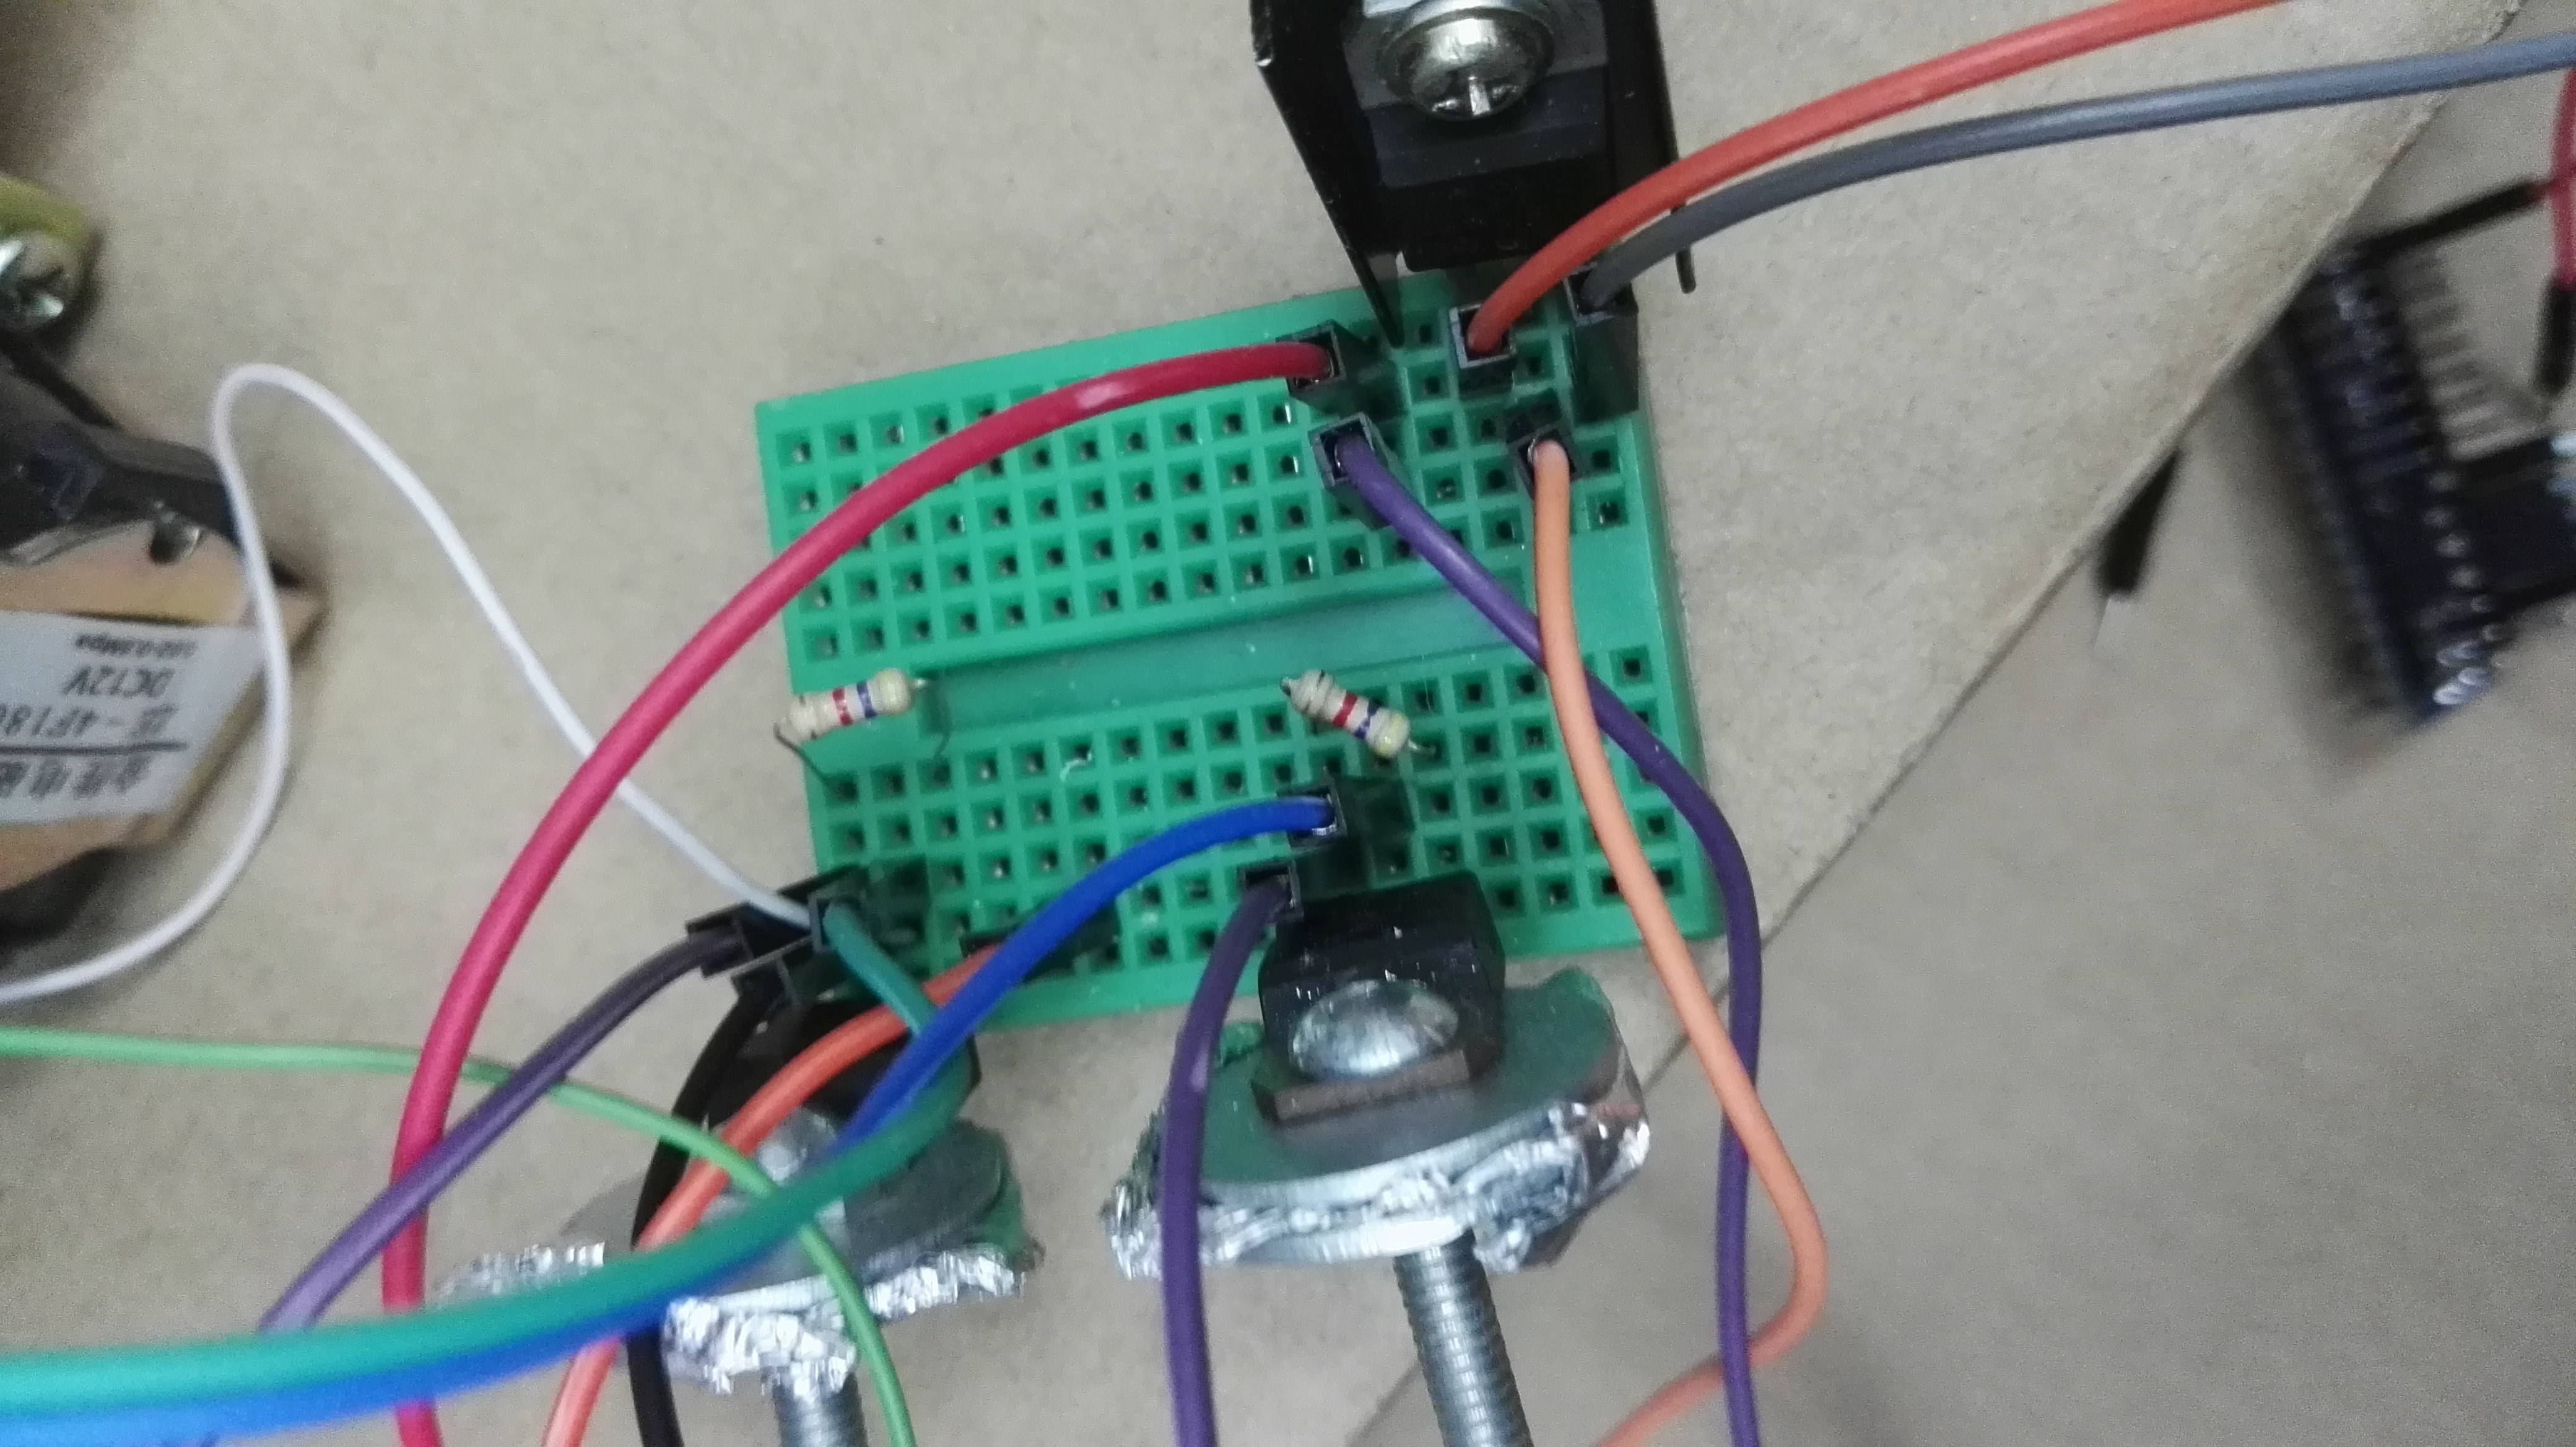
In order to properly limit the current, I needed a 33 ohm 10 watt resistor. I could not find it in my stash. So I improvised and cut an heating element...
Read more »

 albert

 Leo
Leo
 Saabman
One more note, and I am done for now. If you go to PWM control to drop the current on the gas control solenoid, you should add a low pass filter to the circuit to smooth the voltage and current through the solenoid. You can use the inductance of the coil as part of the low pass, but it will benefit from parallel capacitor with a low value inline resistance. You can find designs for PWM solenoid control on the web. The values for the parallel capacitor will not be critical, it just needs to be in an appropriate range for the inductance of the solenoid coil. Some designs do not use a series resistance on the capacitor. It depends on the transistor you are using as a driver. Peak current into the capacitor on initial startup can damage the transistor, and a low value series power transistor will limit that peak current. Your transistor choice will determine the design of the filter. The smaller the capacitor, the less the peak current and duration.