This project will allow my family to check the status of our garage door via cellphone and remotely control it as needed: 1) Close - if forgotten, 2) Open - if need to let someone in while away.
This is potentially a 3-Phase project, with Phase 1 serving as the minimum baseline for completion. Phases 2 and 3 offer additional capabilities, but given my current work, school, church, and family schedules, I am unsure when I can complete those.
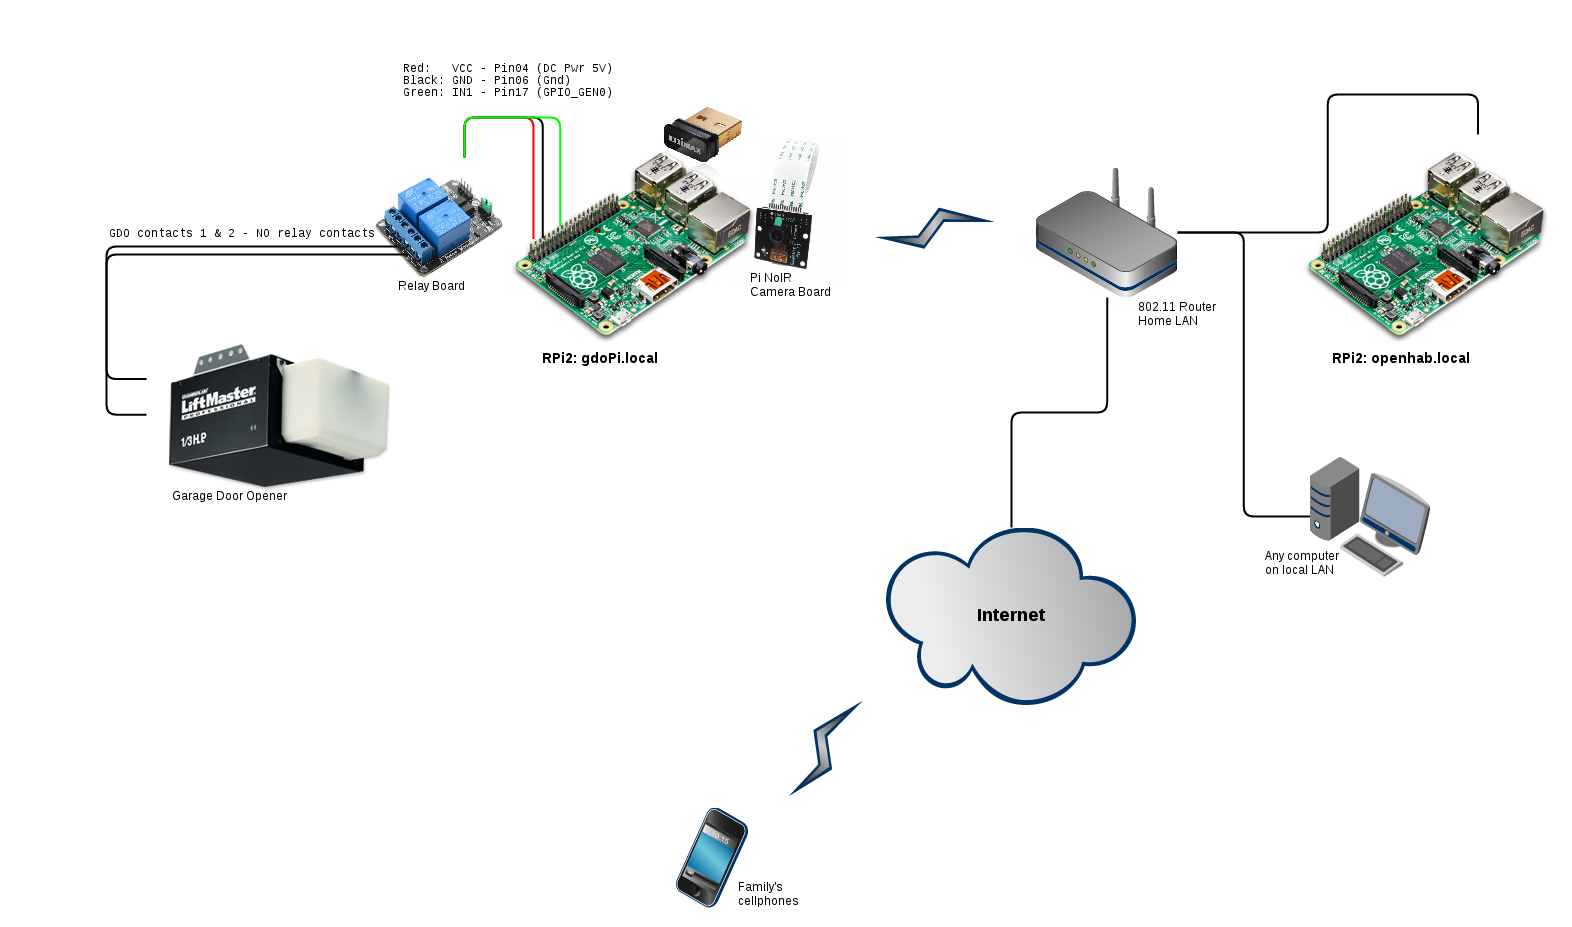
Phase 1: Network-Controlled Garage Door Opener. [Baseline]
A) Garage door opener remotely controlled via smartphone.
A.i ) Door status (via camera visual and/or sensor)
A.ii) Open/Close
B) Safety & Security mechanisms
Phase 2: Self Detection/Automation.
A) Detect if both cars gone; if so, automatically shut garage after delay.
B) Send SMS notification of new door status.
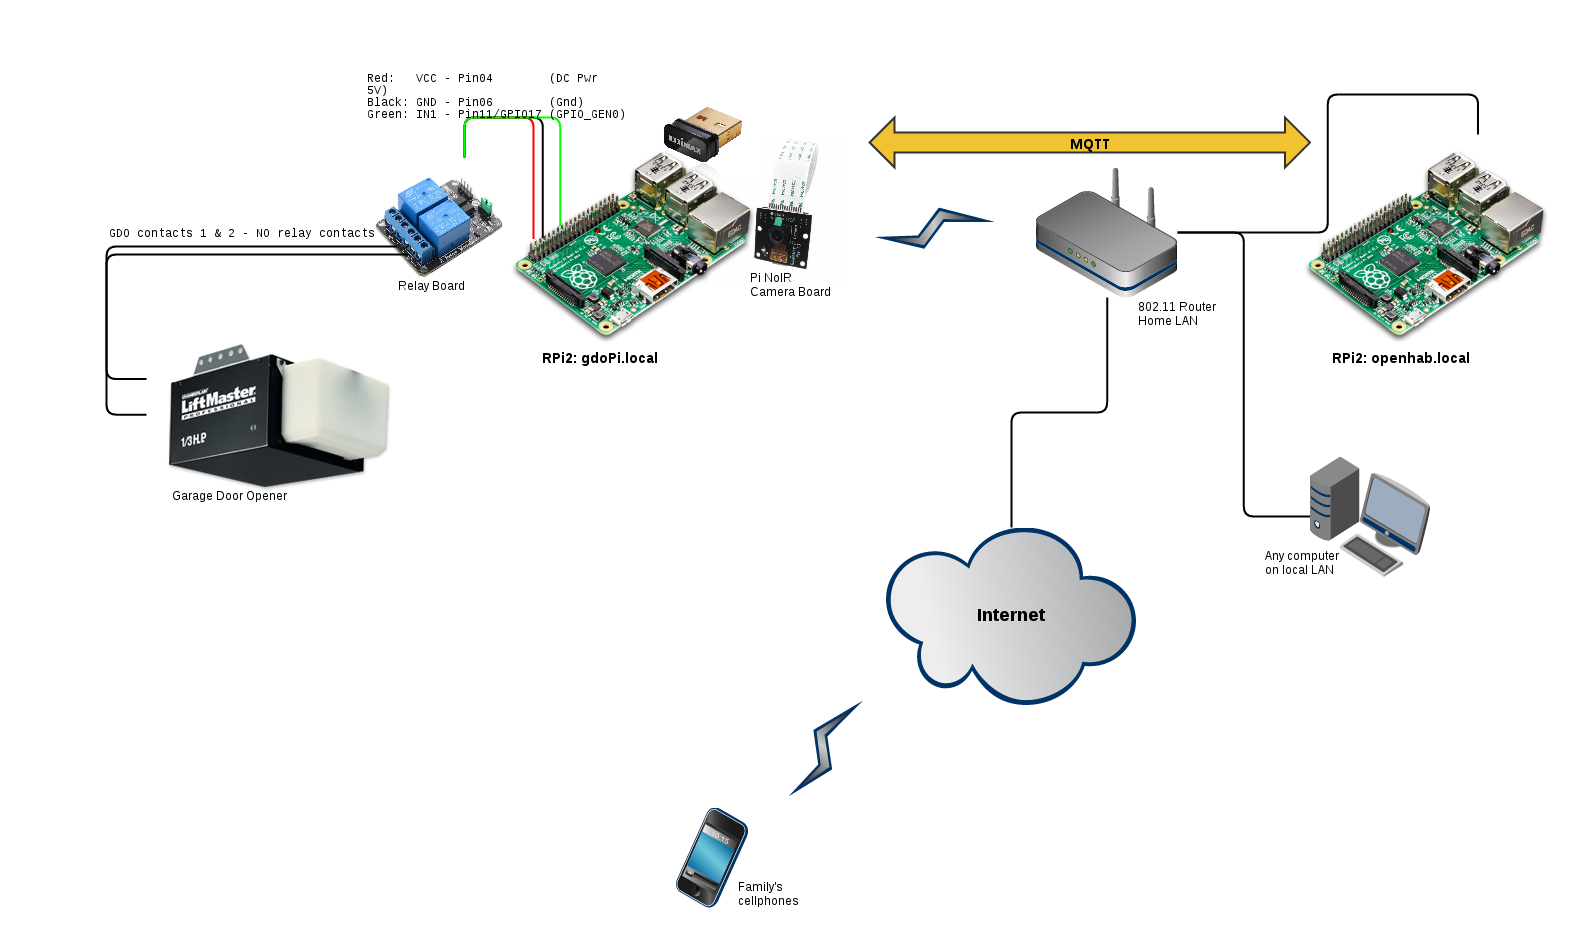
Phase 3: Integrate Automation Backend System of Systems.
A) Integrate Phases 1/2 into an automation-control system of systems.
B) Integrate w/ nest thermostat.
C) Integrate w/ nestCam.
0%
0%
Home Automation - Garage Door Opener
Extract best practices from existing garage door projects. Build version that suites my needs; eventually integrate into other HA efforts.
Become a Hackaday.io member
Already have an account? Log in.
Just one more thing
To make the experience fit your profile, pick a username and tell us what interests you.
Pick an awesome username
hackaday.io/
Your profile's URL: hackaday.io/username. Max 25 alphanumeric characters.
Pick a few interests
Projects that share your interests
People that share your interests
 Ben Brooks
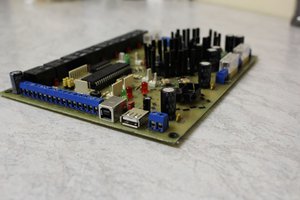
 Dewet
Dewet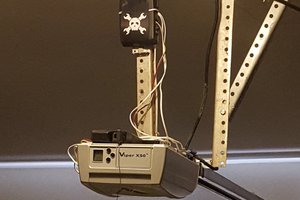
 krich
krich
 Jose Ricardo