 Joshua Vasquez
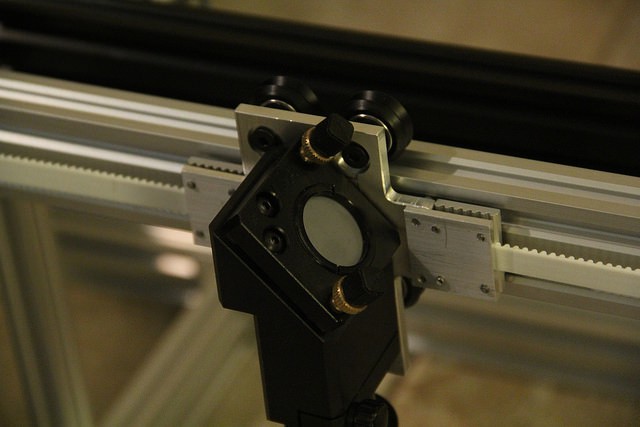
The head plates for the laser head were probably the most complicated pieces I've done yet on the manual mill. Luckily, that complexity bubbles down to a finite number of measurable, repeatable operations. In this case, I'm fitting four delrin v-slot pulleys into a plate while using an eccentric spacer to apply compression and deliver that "wiggle-free" glide that we'll need for a laser head. Those eccentric spacers needed to slip into a 7.1[mm] hole such that they could hold their screws without losing their position. Since reamers were just a bit too tall to be easily mounted into the mill, I crossed my fingers and drilled the hole out with a 7.1 [mm] drill bit. Success! I got the slip-fit that I needed to insert the eccentric spacers! No Loctite-409 needed this time!
Since the Taig Mill is so tiny, I'll usually rough out as much material as I can with the band saw first, getting the general shape of what I want. I'll then finish it off to its final dimensions on the mill.
On my first pass, I didn't take into consideration any mounting points for the cable track that routes the air assist down to the nozzle.
I gave it some thought, and figured that an angled extrusion would be far easier to mount onto. 30 minutes of milling later, I had an upgraded clamping plate cut down from an extruded U-Tube.
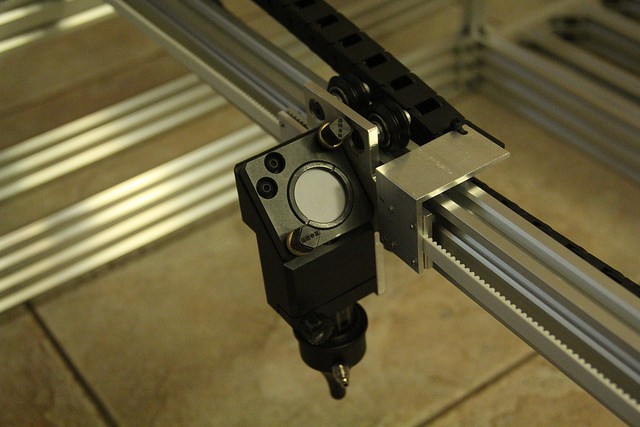
This plate provides a nice mount point for the cable track while also holding the clamping plate in place.
Discussions
Become a Hackaday.io Member
Create an account to leave a comment. Already have an account? Log In.