-
Explore 8 Best Cricut Bundles for Your Crafting Needs in 2024
05/13/2024 at 12:26 • 0 commentsWant to take your crafting skills to the next level? If yes, then you need to have Cricut bundles as your companion. It's been more than 3 years since I have been using Cricut machines for making customized projects, and I have used various tools & supplies while creating DIY projects. The company keeps launching bundles frequently to meet their customer's needs and give them wings to touch the sky.
Inside the package, you get various crafting supplies that allow you to make new projects for business and personal purposes. Besides, these items are budget-friendly and can be purchased by beginners and professional crafters. If you're confused and unable to decide which item would be best, then check out this blog.
This blog contains not only the bundle names but also their features, which you can use to draw your favorite project.
1. Everything Materials Bundle
This Cricut bundle contains everything that a beginner should have before starting their crafting journey. It will help you start a variety of customized projects to explore your actual capabilities while making any DIY project. Also, the possibilities of making customized crafts are endless, and the bundle will be delivered directly to your doorstep.
![]()
2. Essentials Materials Bundle
Among the Cricut bundles, this is the most demandable Cricut product among DIYers. In this bundle, you will find selected machine tools, mats, and others that can help you create your ideal customized projects. All the products that are part of this product comfort the newbie while drawing new designs from the cutting machine.
3. Glue Gun Essentials Bundle
In addition to the bundles for Cricut, you will surely fall in love with one of these crafting supplies. With this Cricut glue gun, you are almost ready for any easy-to-create project. Its smooth trigger and small diameter tip will make your work easy while laying the glue on the material. Also, this impressive Cricut tool has an auto-on & off feature along with an LED indicator.
4. Removable Vinyl Everything Bundle
Nevertheless, you can now relax with this Cricut supply, which comes with a removable vinyl. You can easily place the cutting material on the compatible mat without any bubbling or tunneling during the crafting process. With these Cricut bundles, you can cut, weed out the material, and apply it easily on the surface.
5. Essential Tool and Pen Bundle
Equally important, give color to your white DIY dream by using pigment-rich hues and shimmering metallic hues. This Cricut product allows you to add a special touch by writing and drawing on your project, and you can easily create a perfectly color-coordinated project.
6. Cutting Essentials Bundle
You are most welcome to include the cutting essentials bundle in the Cricut bundles list. Inside this bundle, you will find all the tools that you will need to cut the material into the correct position while making any project. It permits the crafter to make straight and precise cuts with an easy glide system. In addition, this crafting supply is compatible with all the Cricut models.
7. QuickSwap Tools Tips Bundle
Meanwhile, expand your possibilities of creating a do-it-yourself project with these fabulous Cricut supplies. This bundle includes four different kinds of tips for engraving, debossing, perforating, and cutting the materials. You just need to insert any one of these tips into the housing and let your cutting machine do the rest of the work.
8. Sportflex Iron-on Bundle
Last but not least, this Cricut supply ensures long-lasting iron-on results that stick to the material. After the perfect placement on the surface, you can run, climb, walk, or pose without any worries that the design might be ruined. This Cricut stool is easy to learn and can be used anytime and anywhere to create DIY projects.
As a result of this blog, you must have gotten clarity on which Cricut bundles will be perfect for your...
Read more » -
How to Make Labels With Cricut Explore for Office?
05/01/2024 at 11:51 • 0 comments![How to Make Labels With Cricut Explore for Office?]()
Hi! Lovely crafters. I have been waiting to write this blog for many days after designing a custom label for my daughter’s school assignment. It was fun making it. And most importantly, my daughter loved it. So, I thought, why not share my way of creating labels with a Cricut Explore machine?
Well, you all are here to learn how to make labels with Cricut. I am ready to share all the important points with you all. Let’s dive into this beautiful project that you can make any time.
Supplies and Tools Needed for Creating Cricut Labels
This is the important part. You should get ready with all the things I am mentioning in the list below.
- Your Cricut machine (I am using a Cricut Explore)
- Cutting mat
- Premium vinyl
- Transfer tape
- Weeding tool
- Scraper
Finally, you are set with your supplies. Now, let’s check out the final steps for creating a label.
How to Make Labels With Cricut Explore Machine?
Now, it’s time to learn the process for creating a label with your Cricut machine. Here are the step-by-step instructions on making the best labels.
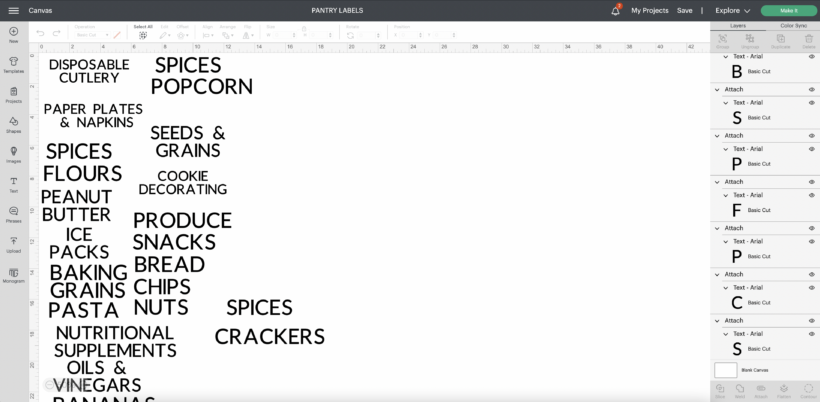
Step 1: Make a Design in the Cricut Software
To get started, you’ll need to create a design in the Cricut Design Space. You must be already familiar with Design Space, and while making labels you have plenty of options to select your font, size of font, and everything else that is needed to make a proper label. And, you can also make labels in multiple sizes that fit your place.
![how to make labels with Cricut Machine]()
You first need to be clear about the purpose of your label, where you are going to put it on. For instance, I created the labels for a basket for my daughter. What’s your use? Select the size accordingly.
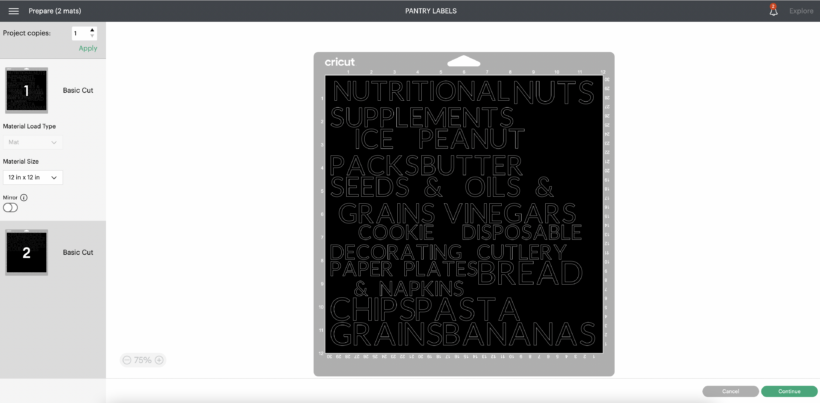
Step 2: Allow Your Cricut Machine to Cut Labels
When you are done with the labels, don’t wait to cut them down with your Cricut cutting machine. After that, hit the Make It button to let the machine cut your design effectively. As you are using premium vinyl, you’ll get the best cut with the machine.
![how to make labels with Cricut]()
Step 3: Remove the Excess Vinyl
When you are ready with your final cut, it’s time to weed off the excess vinyl from the design. This step is really important to keep the design precise and avoid overlapping of letters. Here, Cricut’s weeding tool can save you.
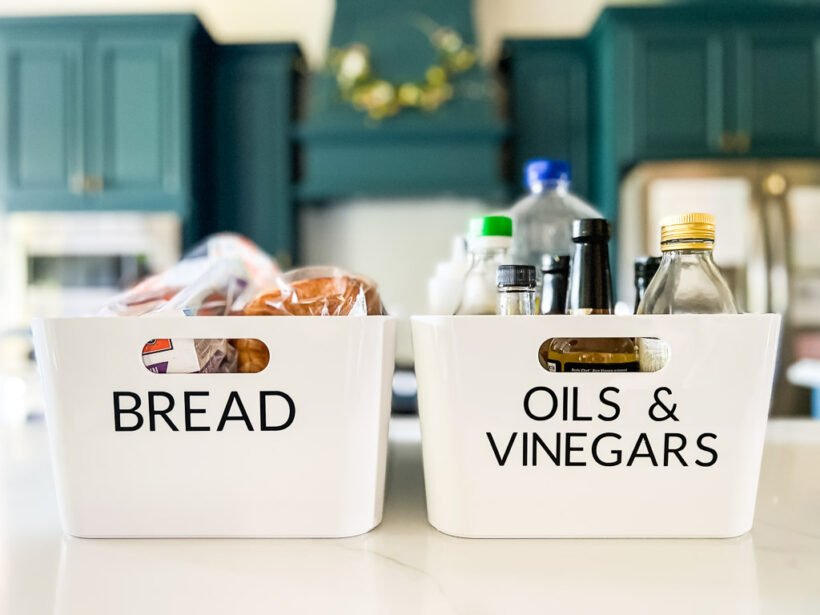
Step 4: Apply Labels to the Surface
Finally, you know how to make labels with Cricut Explore. And now, it’s time to learn how to transfer it on the surface. Basically, you need to apply tape on your label’s sheet. Next, smooth down the surface with a scraper tool. This step will stick your vinyl designs well to the tape.
Now, cut down the label pieces. Then, you have all the label pieces with transfer tape on them. These tapes have a significant role in transferring the design.
![how to make labels with Cricut]()
So, how do you transfer the final design? To start, select a label and place it on the area you want it to stick. Also, remove the backing paper from the label. Your label will transfer to the surface. Use the scraper tool again to smooth out the final design. Finally, peel off your transfer tape to leave only the vinyl design.
Conclusion
Wasn’t it fun learning how to make labels with Cricut? I hope you all enjoyed the process. Moreover, the supplies are minimal to get started. With no complex procedure, you can make any label with your Cricut cutting machine. I like making such small things for my office. If you’re also a working person and want to create a label for your name to put it on your desk, go for it.
FAQs
How to Make Name Labels With Cricut?
To make a name label with Cricut, all you need to do is use your Cricut Design Space to create any text you want. Use your name or the name of anyone you want to create a label for. Then, cut it with your Cricut machine and stick transfer paper on it. Now, transfer the design to your surface, remove the backing of the transfer tape, and peel off the transfer tape to leave the final design.
What Do You Need to Make a Label...
Read more » -
How to Connect Cricut to iPad: Two Methods Explained!
04/06/2024 at 11:48 • 0 commentsAs you know, Cricut machines are amazing. You can use them to create thousands of creative stuff like tote bags, keychains, cards, stickers, decals, etc. If I tell you about my crafting journey, it's too long. I started when I was a teenager just for a hobby, but I didn't realize when it would become my business. Well, if I share my story, this blog isn't enough. So, let's discuss the matter we are here for. I know you want a little clarity on how to connect Cricut to iPad. Don't worry; I'll share everything with you to make your work easier.
My blog is dedicated to iPad users who are struggling with their Cricut machines and want to learn how to connect them to an iPad. Let me walk you through this guide and teach you the process.
Introduction to Cricut Design Space
Before we move forward to learn how to connect Cricut to iPad, let's learn about its special software and its excellent features. This application or software is designed for Cricut users to create creative designs. Also, you get multiple features in this software, including different fonts, texts, templates, and designs; you'll be able to design anything you want. To get this software or application, you need to install it from Cricut's official website.
How to Download Cricut Design Space on iPad?
If you want to download and install the Cricut Design app on your iPad device, follow the steps below.
- In the first step, go to your App Store on your iPad on the home screen.
![]()
- Now, look for the Cricut app that looks like a green C letter inside a white square.
- After that, click on the Get button to get the application and verify your download with iTunes password.
![]()
- When you download the app, launch it and choose either the Sign In or Machine Setup option.
![]()
- Now, you are ready to connect your machine.
That's it for the Cricut Design Space download on an iPad. Now, let's check its connection process.
How to Connect Cricut to iPad via Bluetooth and USB?
Here comes the final step, which is to connect your Cricut to an iPad. To do this, you'll need to use the Bluetooth pairing option. Go through the steps below to learn the connection process.
Method 1: Using a USB Cable
If you want to connect your Cricut to a wired connection like USB, you need to follow the steps below. A wired connection is helpful in many ways and can be set up hassle-free.
- When you buy a Cricut machine, you receive a USB cable inside its box.
- Take that USB cable to start a connection.
- Now, connect one side of your USB cable to the iPad's port and the other side to your Cricut machine.
- After that, verify whether your machine is ON or not. If not, power it on.
- Next, head to the Cricut Design Space software and tap on the Cricut New Product setup option.
That's how to connect Cricut to iPad with USB. After this, you can utilize your Cricut to create anything.
Method 2: With Bluetooth
Check the steps below to learn Cricut setup on iPad via Bluetooth. This wireless connection is amazing and will work best for you.
- In the first step, ensure that the distance between your devices doesn't exceed 10-15 feet.
- Now, check whether your Cricut machine has Bluetooth connectivity or not. If not, purchase a Bluetooth adapter.
- But if your machine has built-in Bluetooth, that's good, too.
- Next, turn on the Bluetooth on your iPad too.
- Now, your iPad will scan for the nearby Bluetooth device.
- Then, you can select your Cricut model from the list.
- Once you choose your Cricut, you'll get a request to enter a PIN code.
- Type "0000" into the PIN box and choose the Pair option.
- Finally, your Cricut is paired with the iPad smartphone using Bluetooth.
That's how to connect Cricut to iPad via Bluetooth. If you want, you can go for a wired connection such as USB.
FAQs
Why Does My iPad Need to Download the Cricut App?
There are certain minimum system requirements you need to check before you download the Cricut app on your iPad. For instance, your...
Read more »


 Lutetium
 John Oliva
 alongruss
 Ivan Lazarevic
 PixelCircuits