Stephen Chasey
-
Pigeons have a long memory, jackdaws are quick learners
6 days ago • 0 commentsI cleaned up the software a bit and added a "calibration mode" that lets you dial in sensor sensitivity without dispensing peanuts and ran it outside for a few days. You can get the latest version (1.2 at the moment) of the software and PCB here: https://github.com/src1138/VMFB-MC/releases/tag/VMFB-MC_V1.2
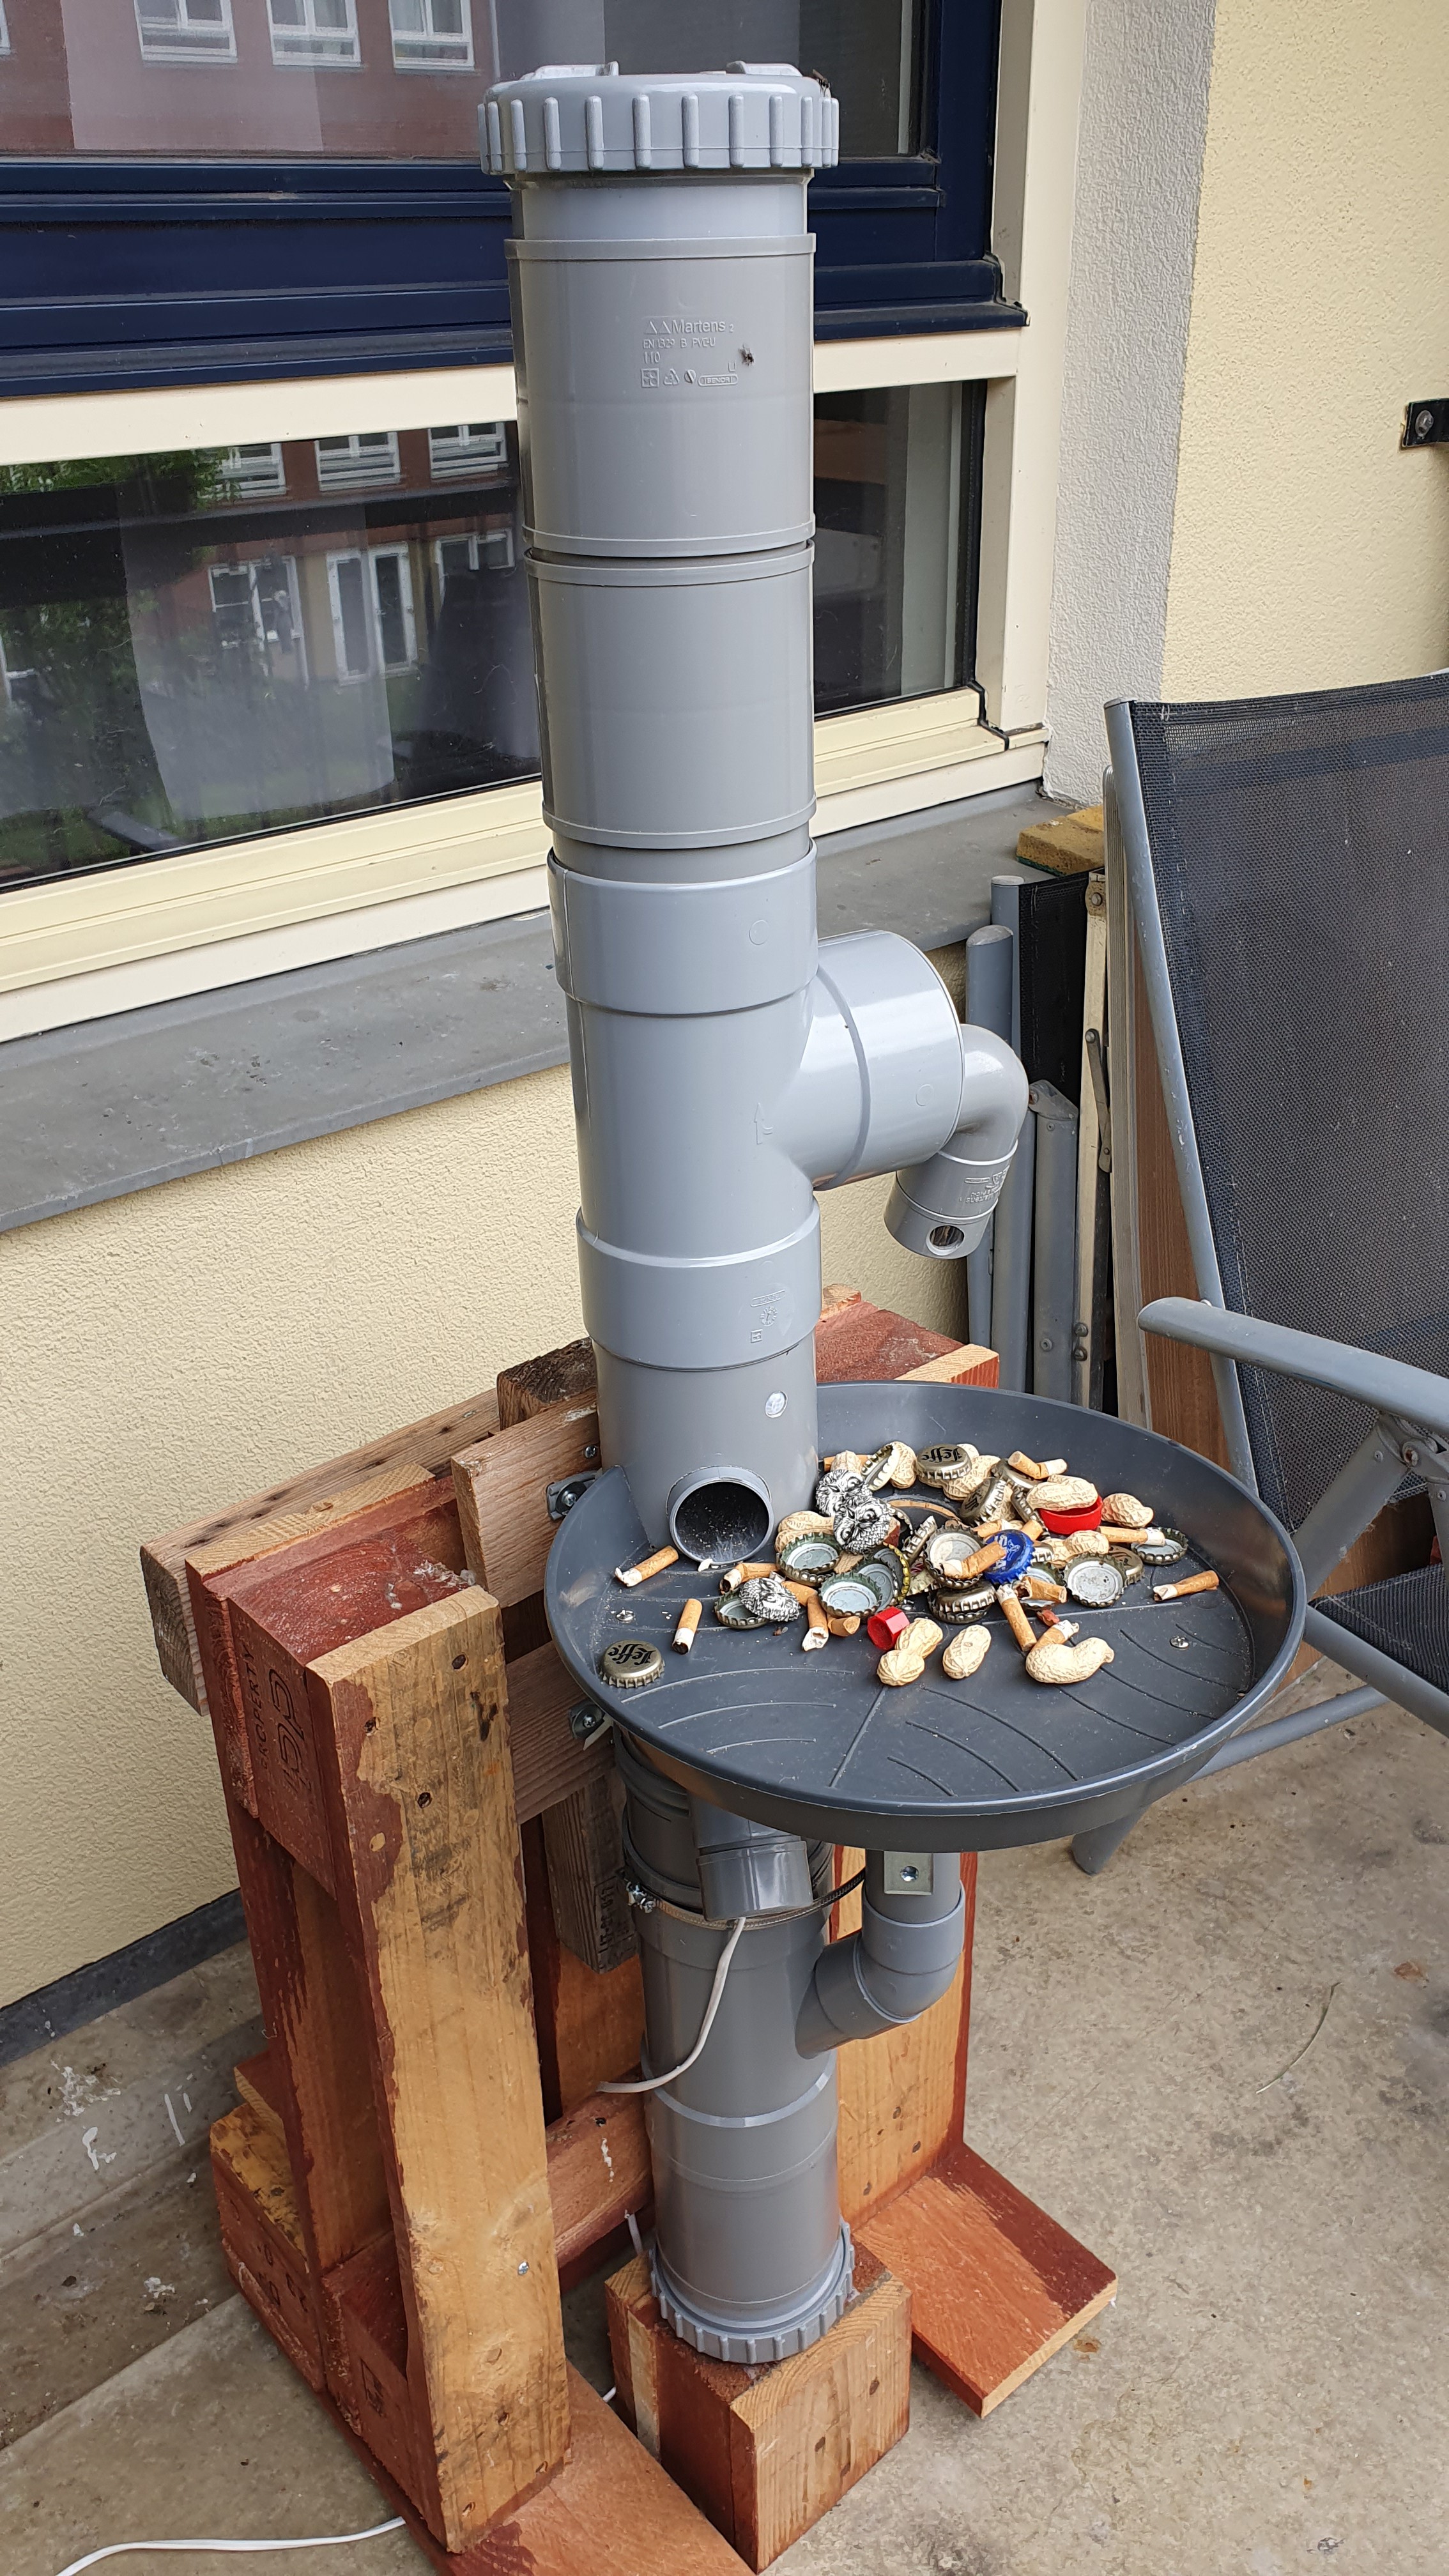
After a couple further tweaks it seems to be working as intended. Here's what it looks like now.
![]()
The first day was to work out the kinks - and there were sensor adjustments, platform levelling and a loose jumper to correct before turning it on and walking away.
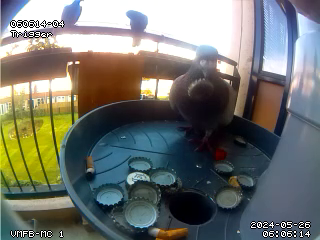
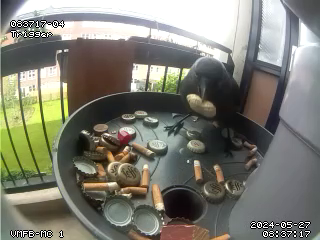
On the second day I set timed dispense to dispense a peanut every hour between 06:00 to 18:00 and put some caps and butts on the platform near the deposit chute with some peanuts mixed in.
The pigons still remember getting shelled peanuts from this and occasionally land and start shuffling things around until they sink a few things. The jackdaws were watching, and swooped in to grab the peanuts that were dispensed.![]()
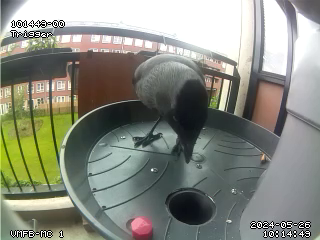
Then the jackdaws started studying the machine, giving it a good look-over and really inspecting it.
![]()
![]()
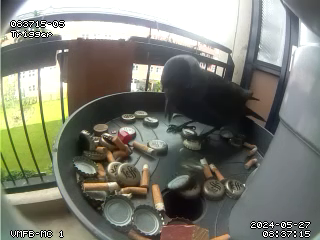
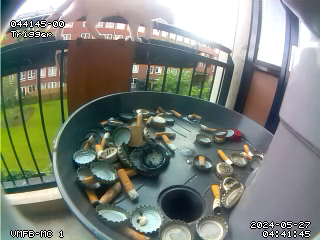
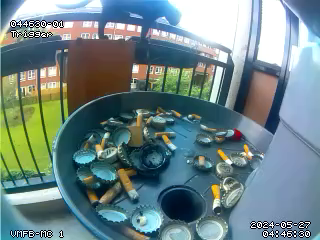
Then they started tossing caps and butts around like they saw the pigons do. They seemed to understand a connection between tossing caps and butts around and getting peanuts. By the third day I saw this behavior from the jackdaws pretty consistently.
![]()
![]()
Except for when the neighbor's cats come around.
![]()
![]()
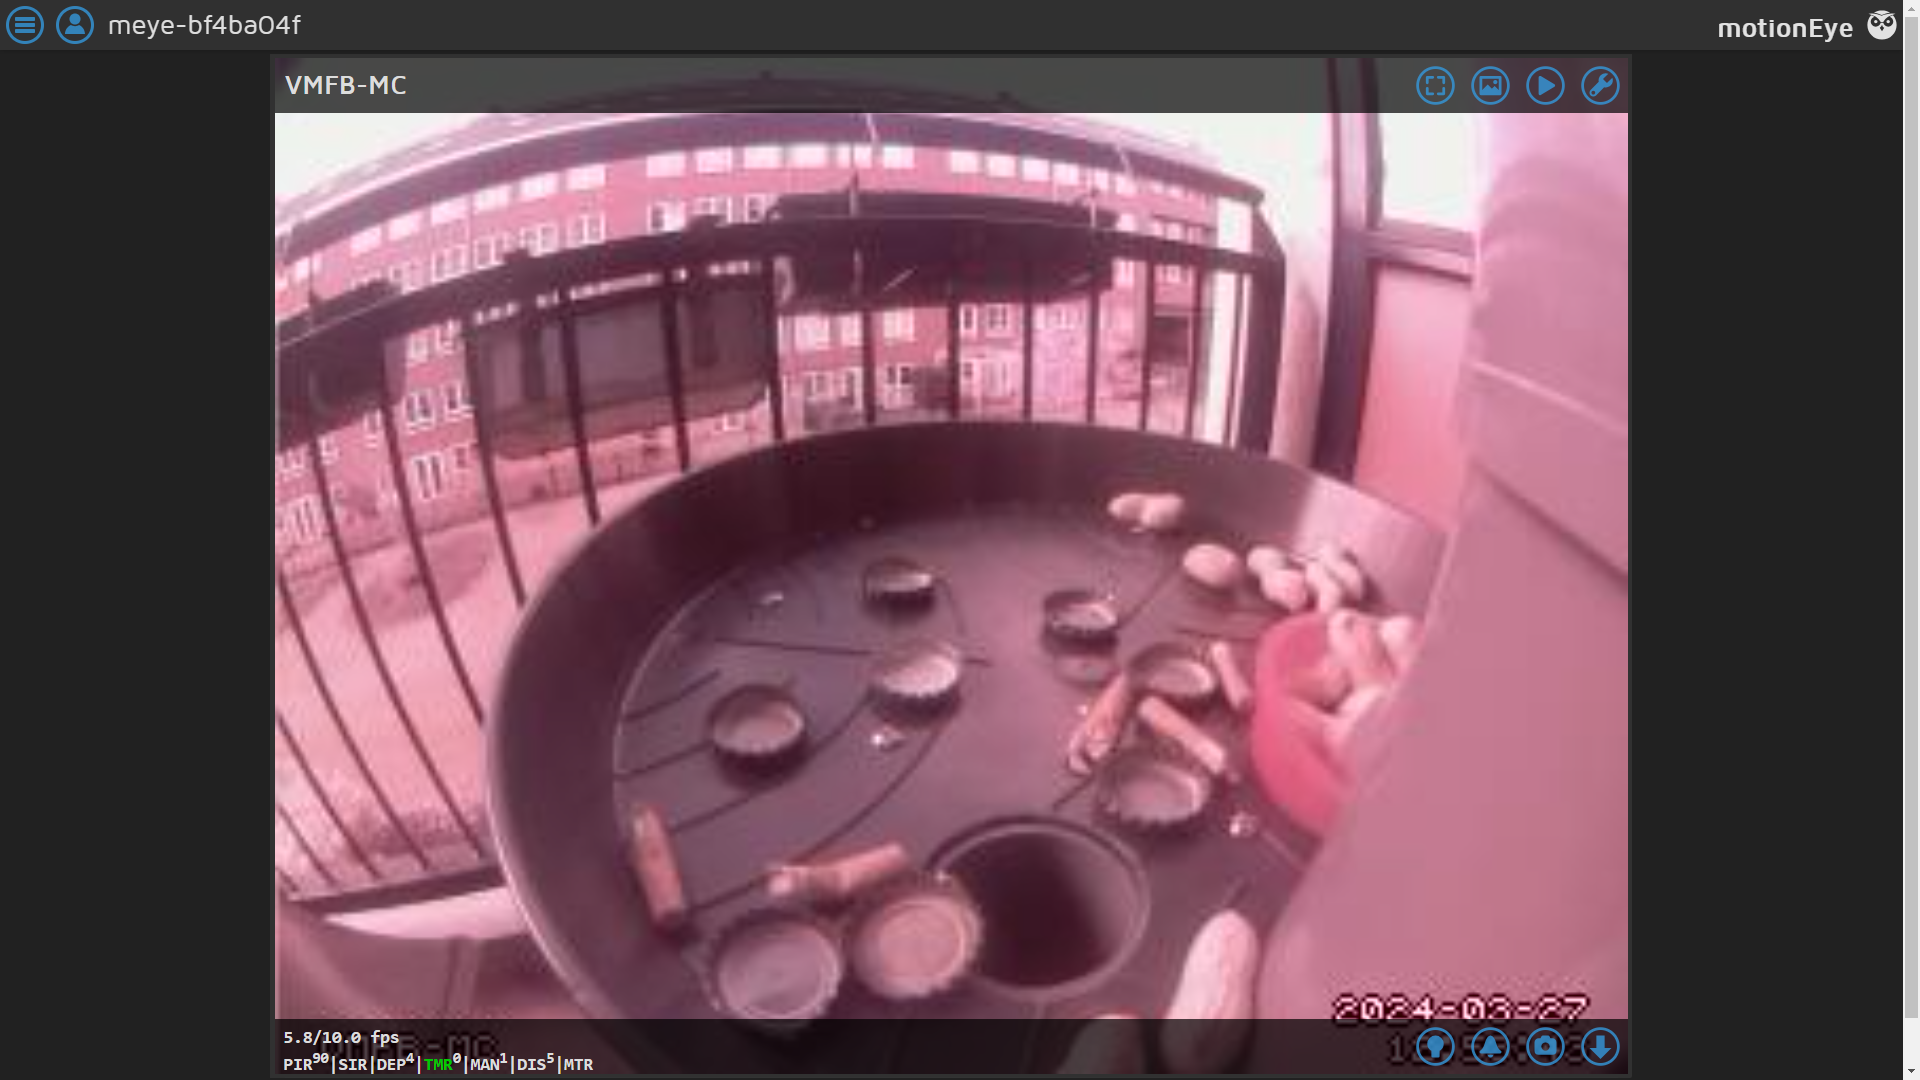
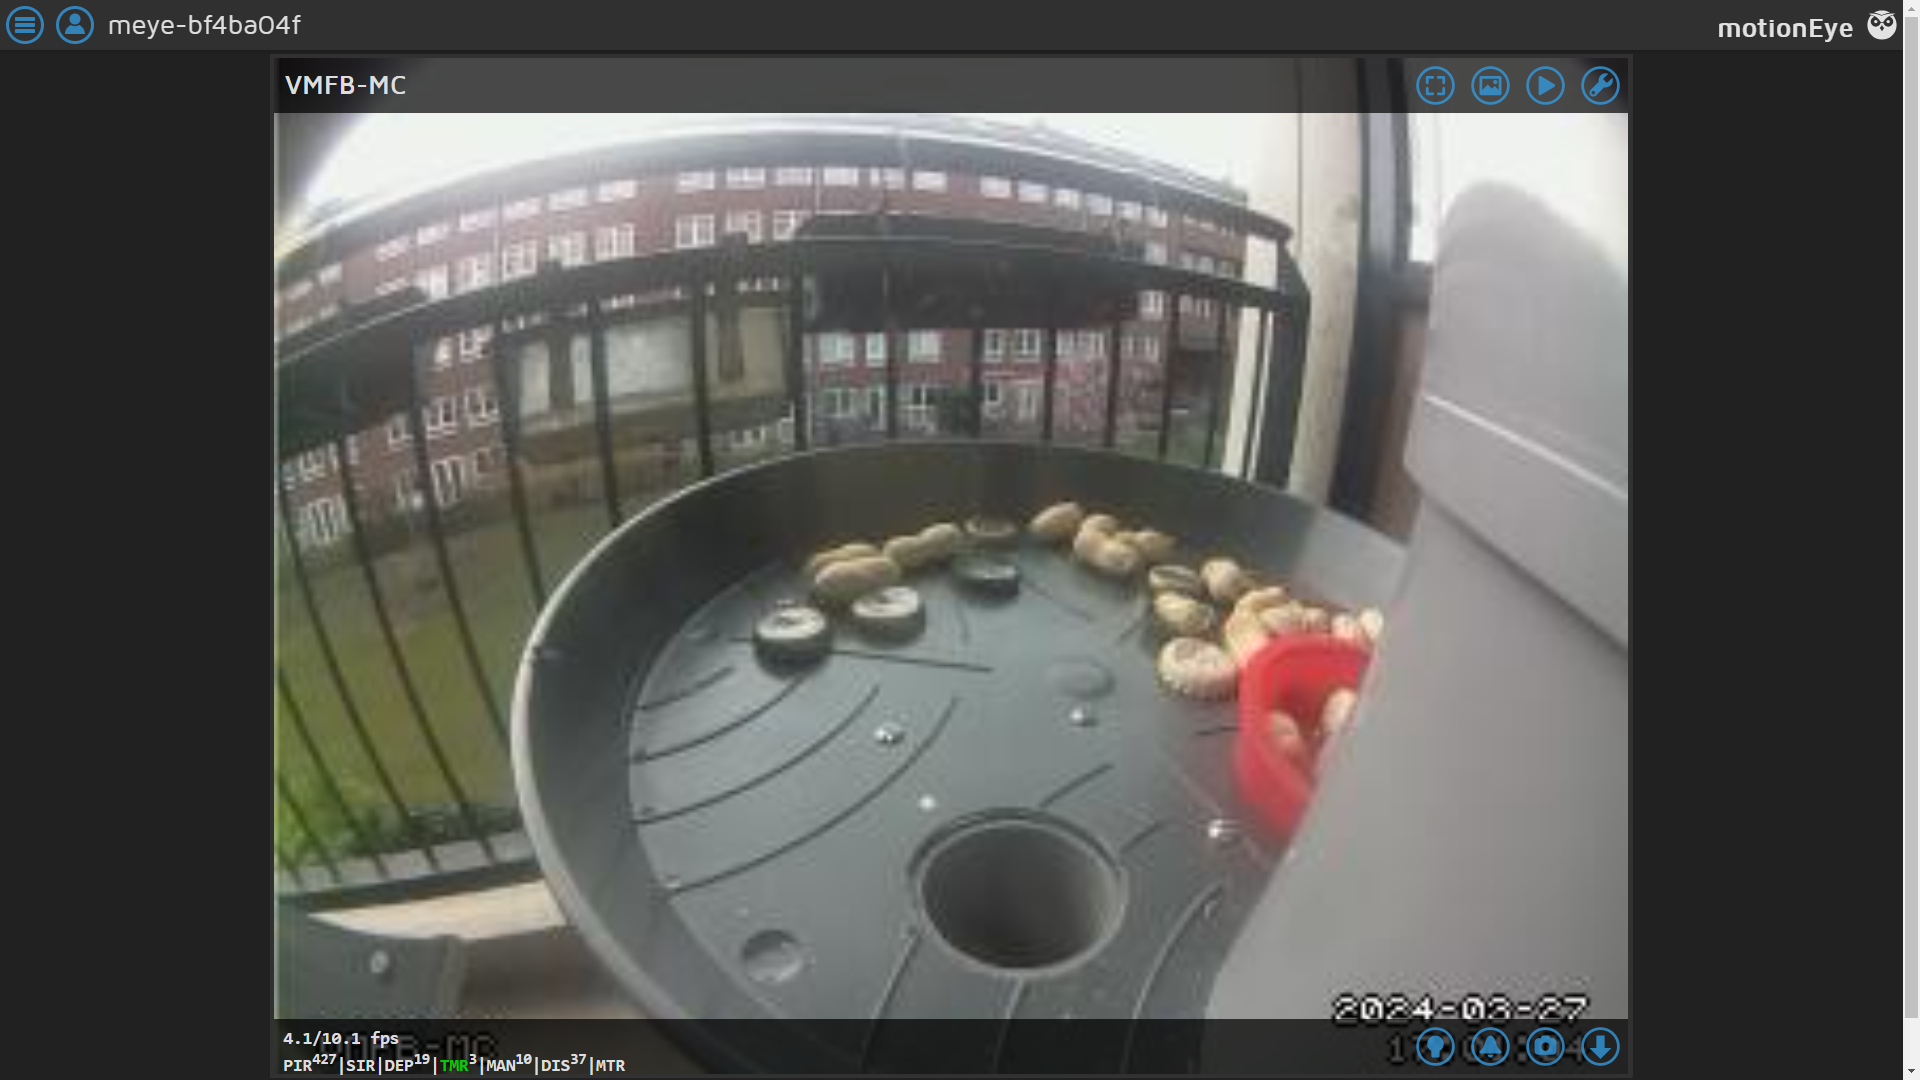
Here's what the monitoring and control interface looks like. When I took this there had been 25 deposit events, the timed dispense (enabled/green) had triggered 5 times, and I had manually dispensed 4 times. 34 dispense events in all. The buttons on the lower right toggle PBKA (lightbulb), timed dispense (alarm), manual snapshot (camera), manual dispense (down arrow) and calibration mode (magnifying glass).![]()
I will have to pause this again in a couple of weeks to visit the US for a month - a bit too long to leave this running unattended at this point. Will try to make some progress in the meantime.
-
Some revisions after testing
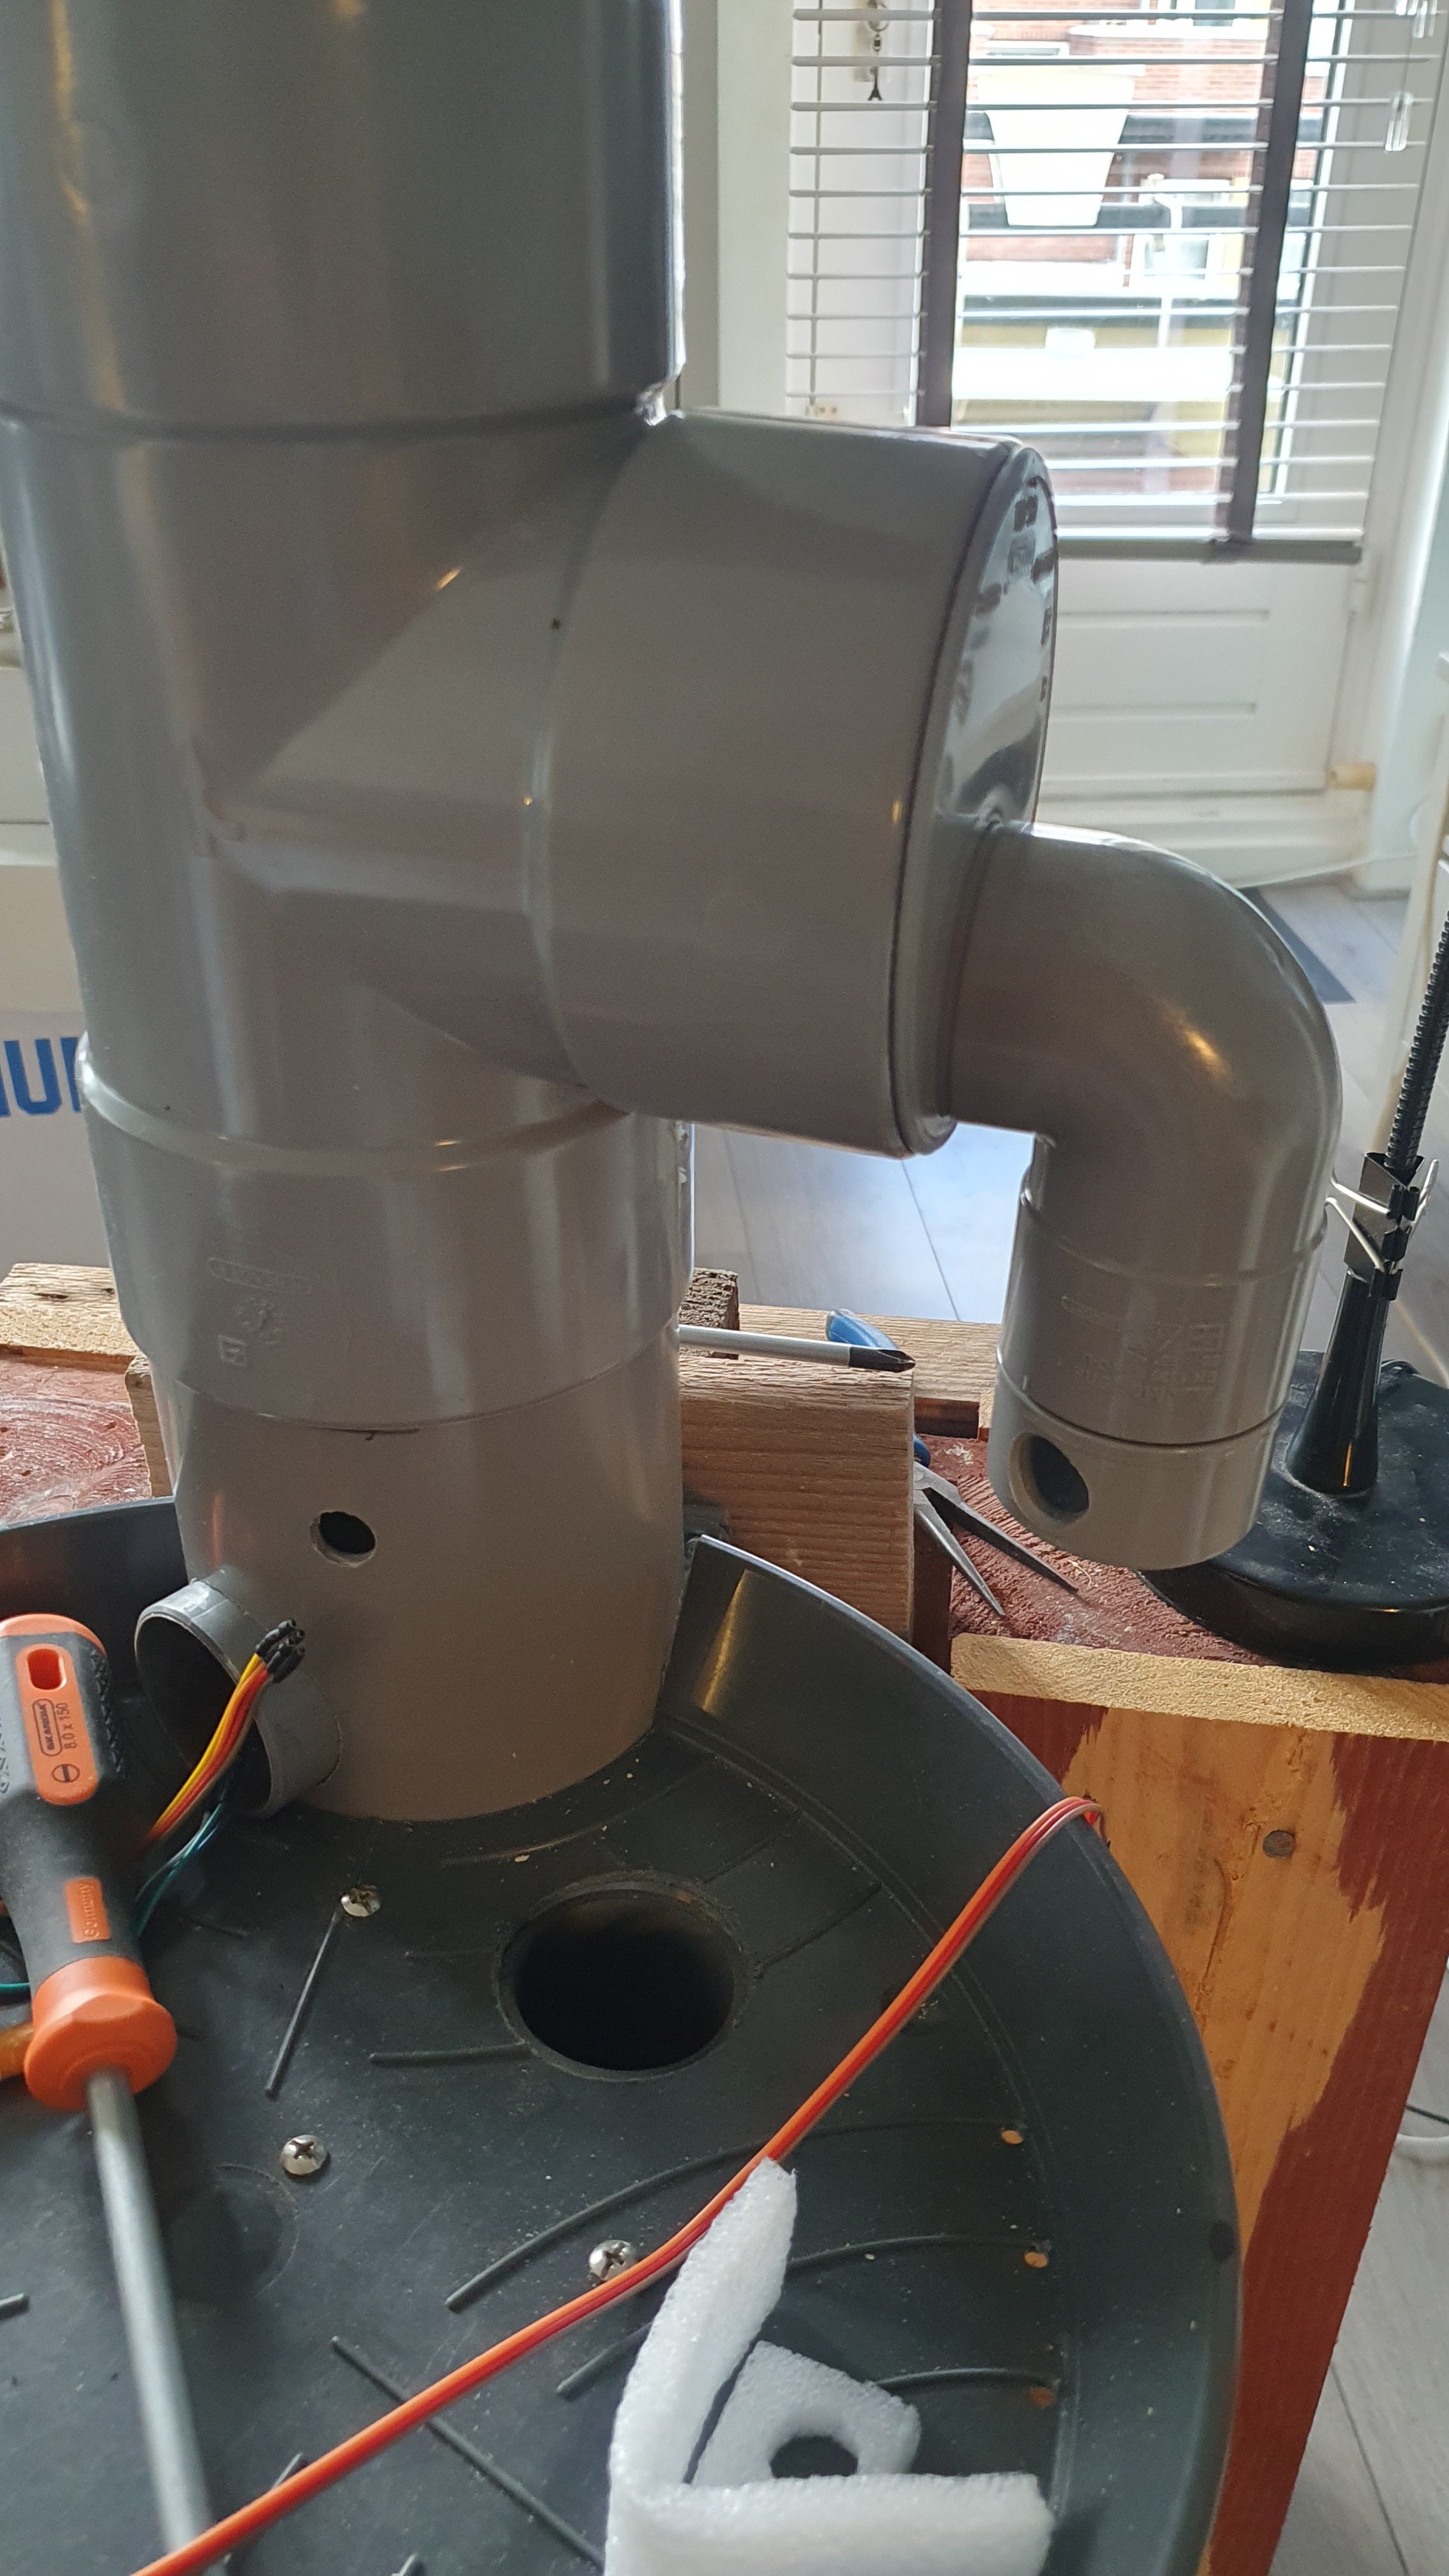
05/07/2024 at 14:10 • 0 commentsI ran into some problems with the vending machine a few weeks ago. This led to a bit of code cleanup, but the real problem was too little space in the enclosure where I was putting the main PCB, RPi ZeroW and the camera. This led to some wires getting stress-damaged and led to some weird behavior.
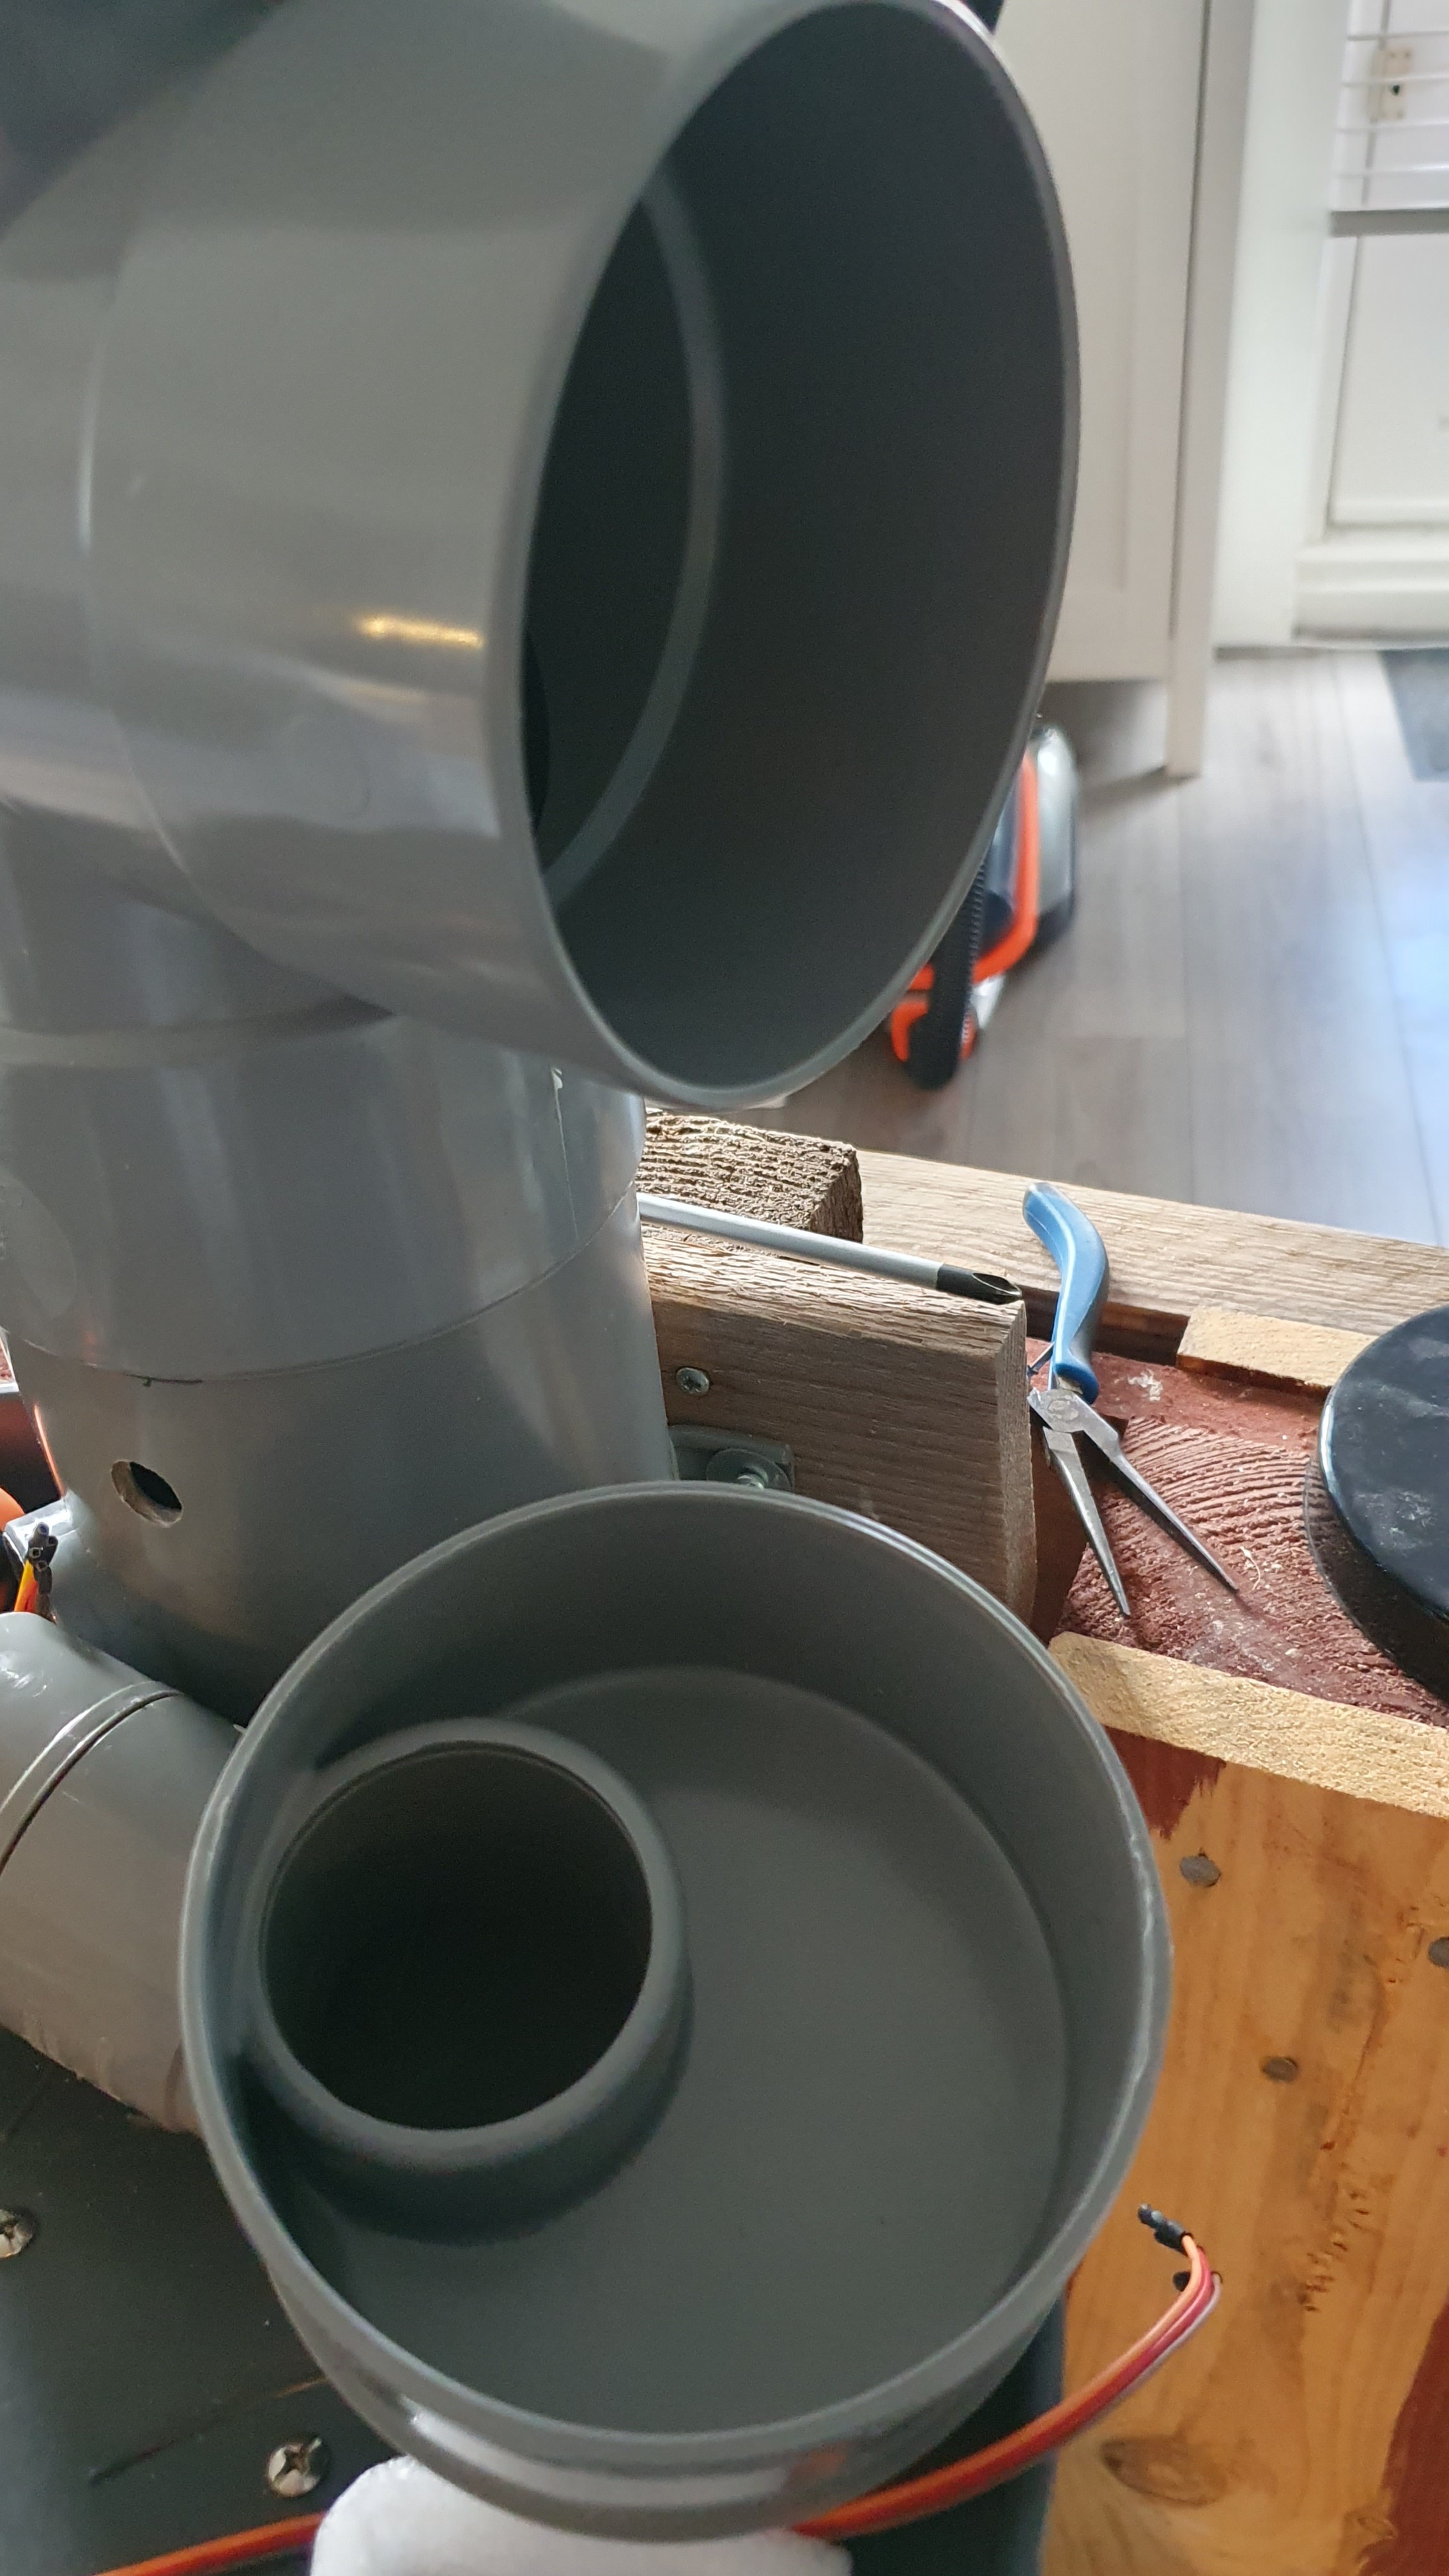
Once I found the cause I revised the enclosure to provide more space and better accesibility to the electronics. I replaced the 110mm/50mm T-joint hilding the camera with a 110mm T-joint and an eccentric 110mm-50mm adapter. Now there is more space and the electronics are easier to mount and get to.
![]()
![]()
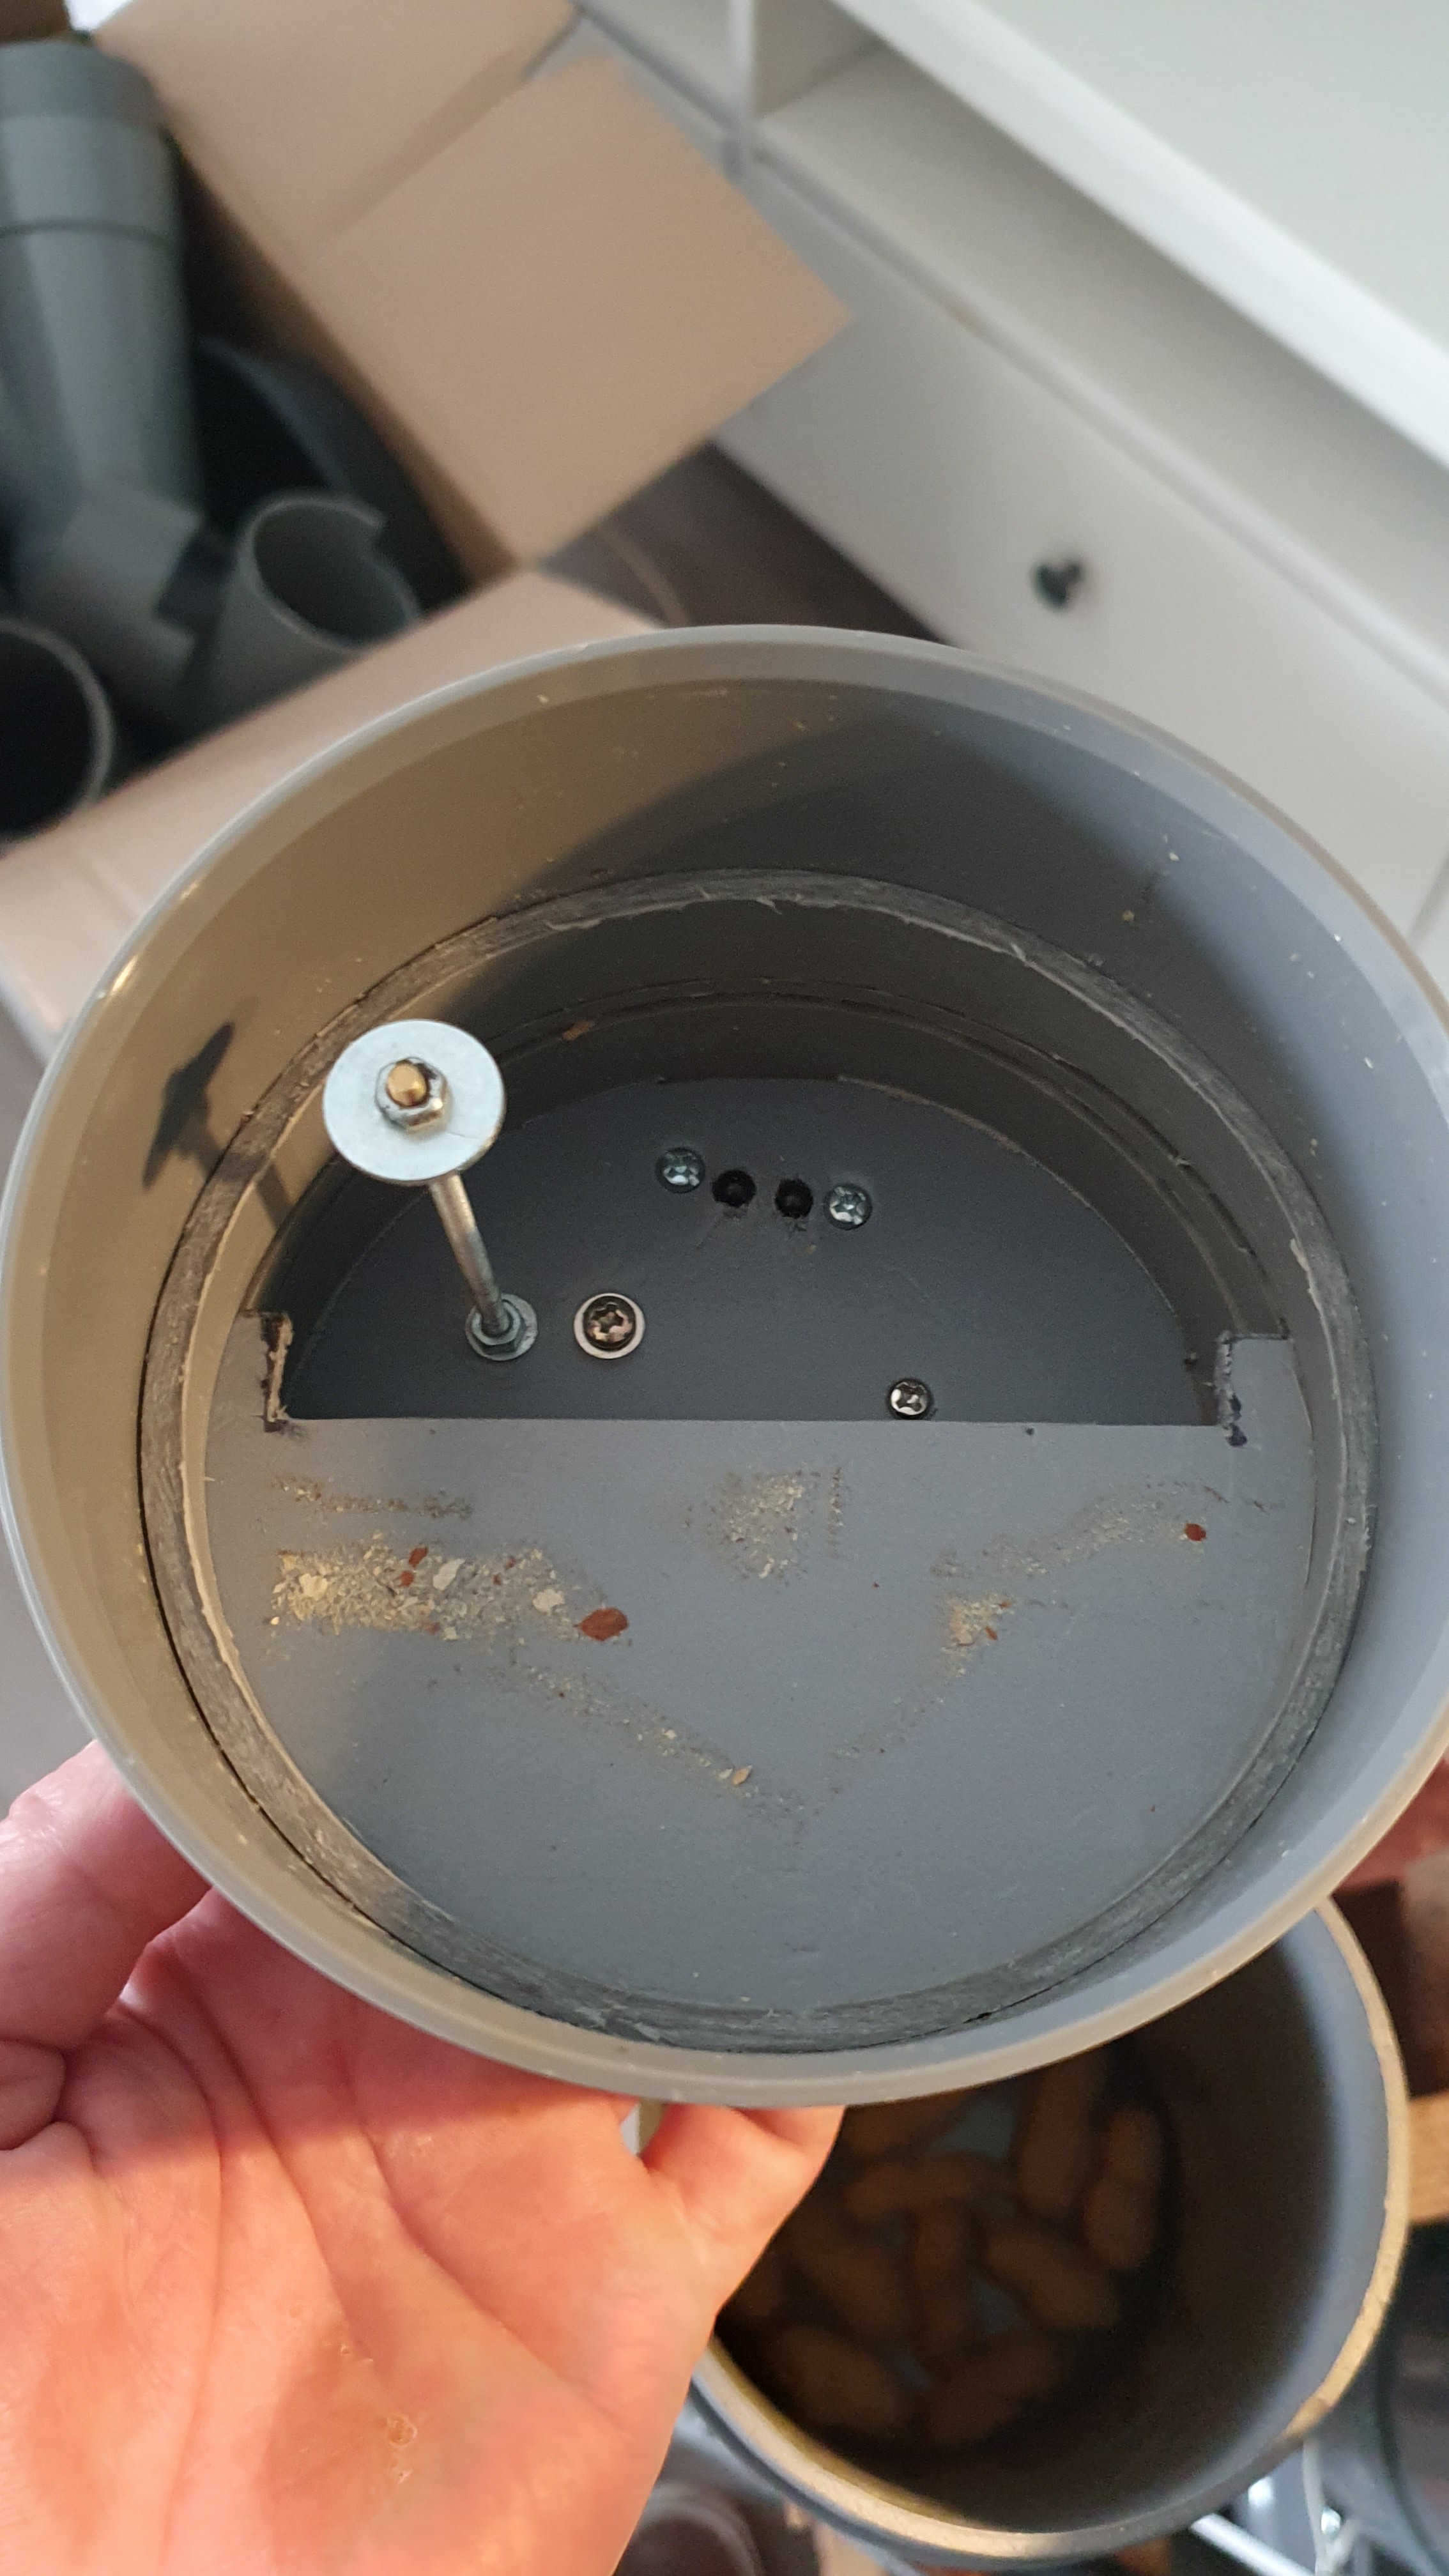
To better regulate the number of peanuts that are dispensed I added a small lip to the dispenser opening. Hopefully this will lead to 1-2 peanuts dispesnsed instead of 1-4.
![]()
I'm also adding a "calibration mode" you can activate from the web interface so you can calibrate the deposit and dispense sensors without triggering events and optimizing the pin usage on the RPi to work better with the wire arrangement coming from the VMFB-MC PCB.
I'm taking a break from this for a couple weeks, but should have the latest hardware and software deployed on the balcony again before the end of May.
-
Dispensing Unshelled Peanuts
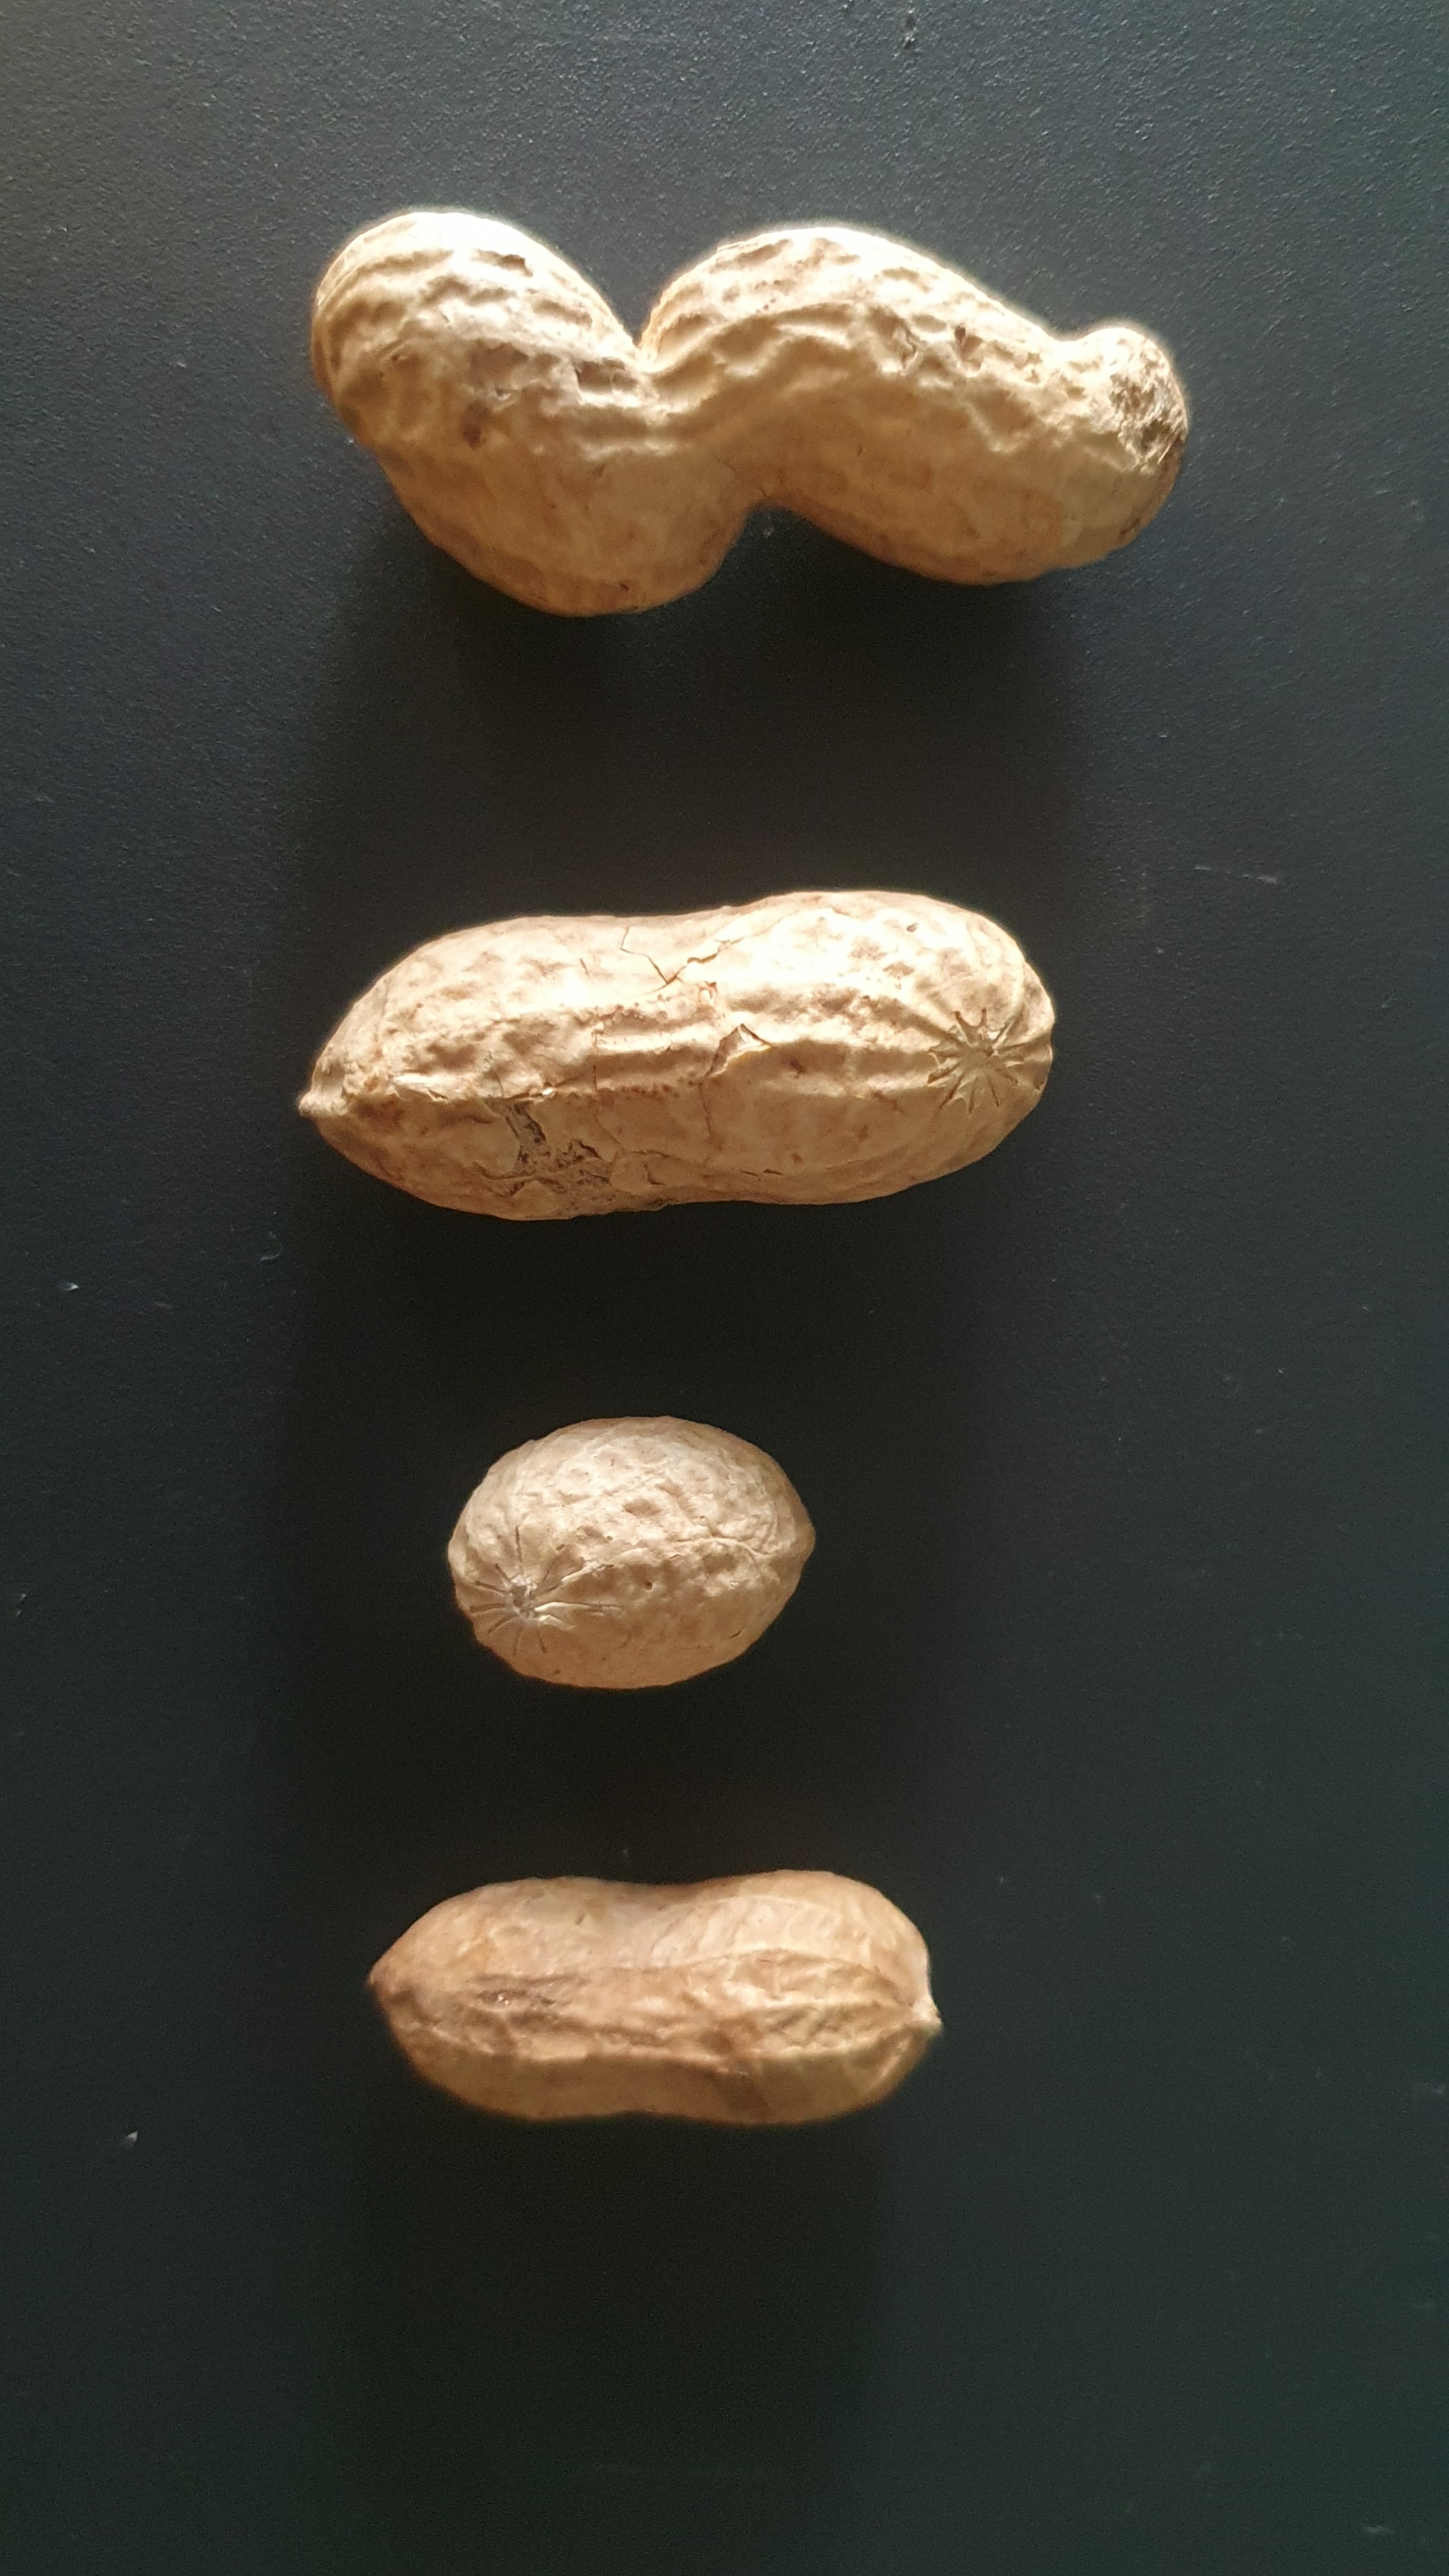
04/17/2024 at 13:22 • 0 commentsI've made many adjustments to the dispenser assembly in the past two weeks of testing. Unshelled peanuts are more dificult to reliably dispense than shelled peanuts - they vary more in size and shape, they are less dense with a rougher surface. They jam very easily, and the size/shape variance makes it difficult to dispense just one. I usually get 2 or 3 peanuts at a time with this dispenser.
![]()
First I had occasional jams in the hopper itself, leading me to
- increase the size of the pathway from the hopper to the dispense chute
- add a debridging arm
![]()
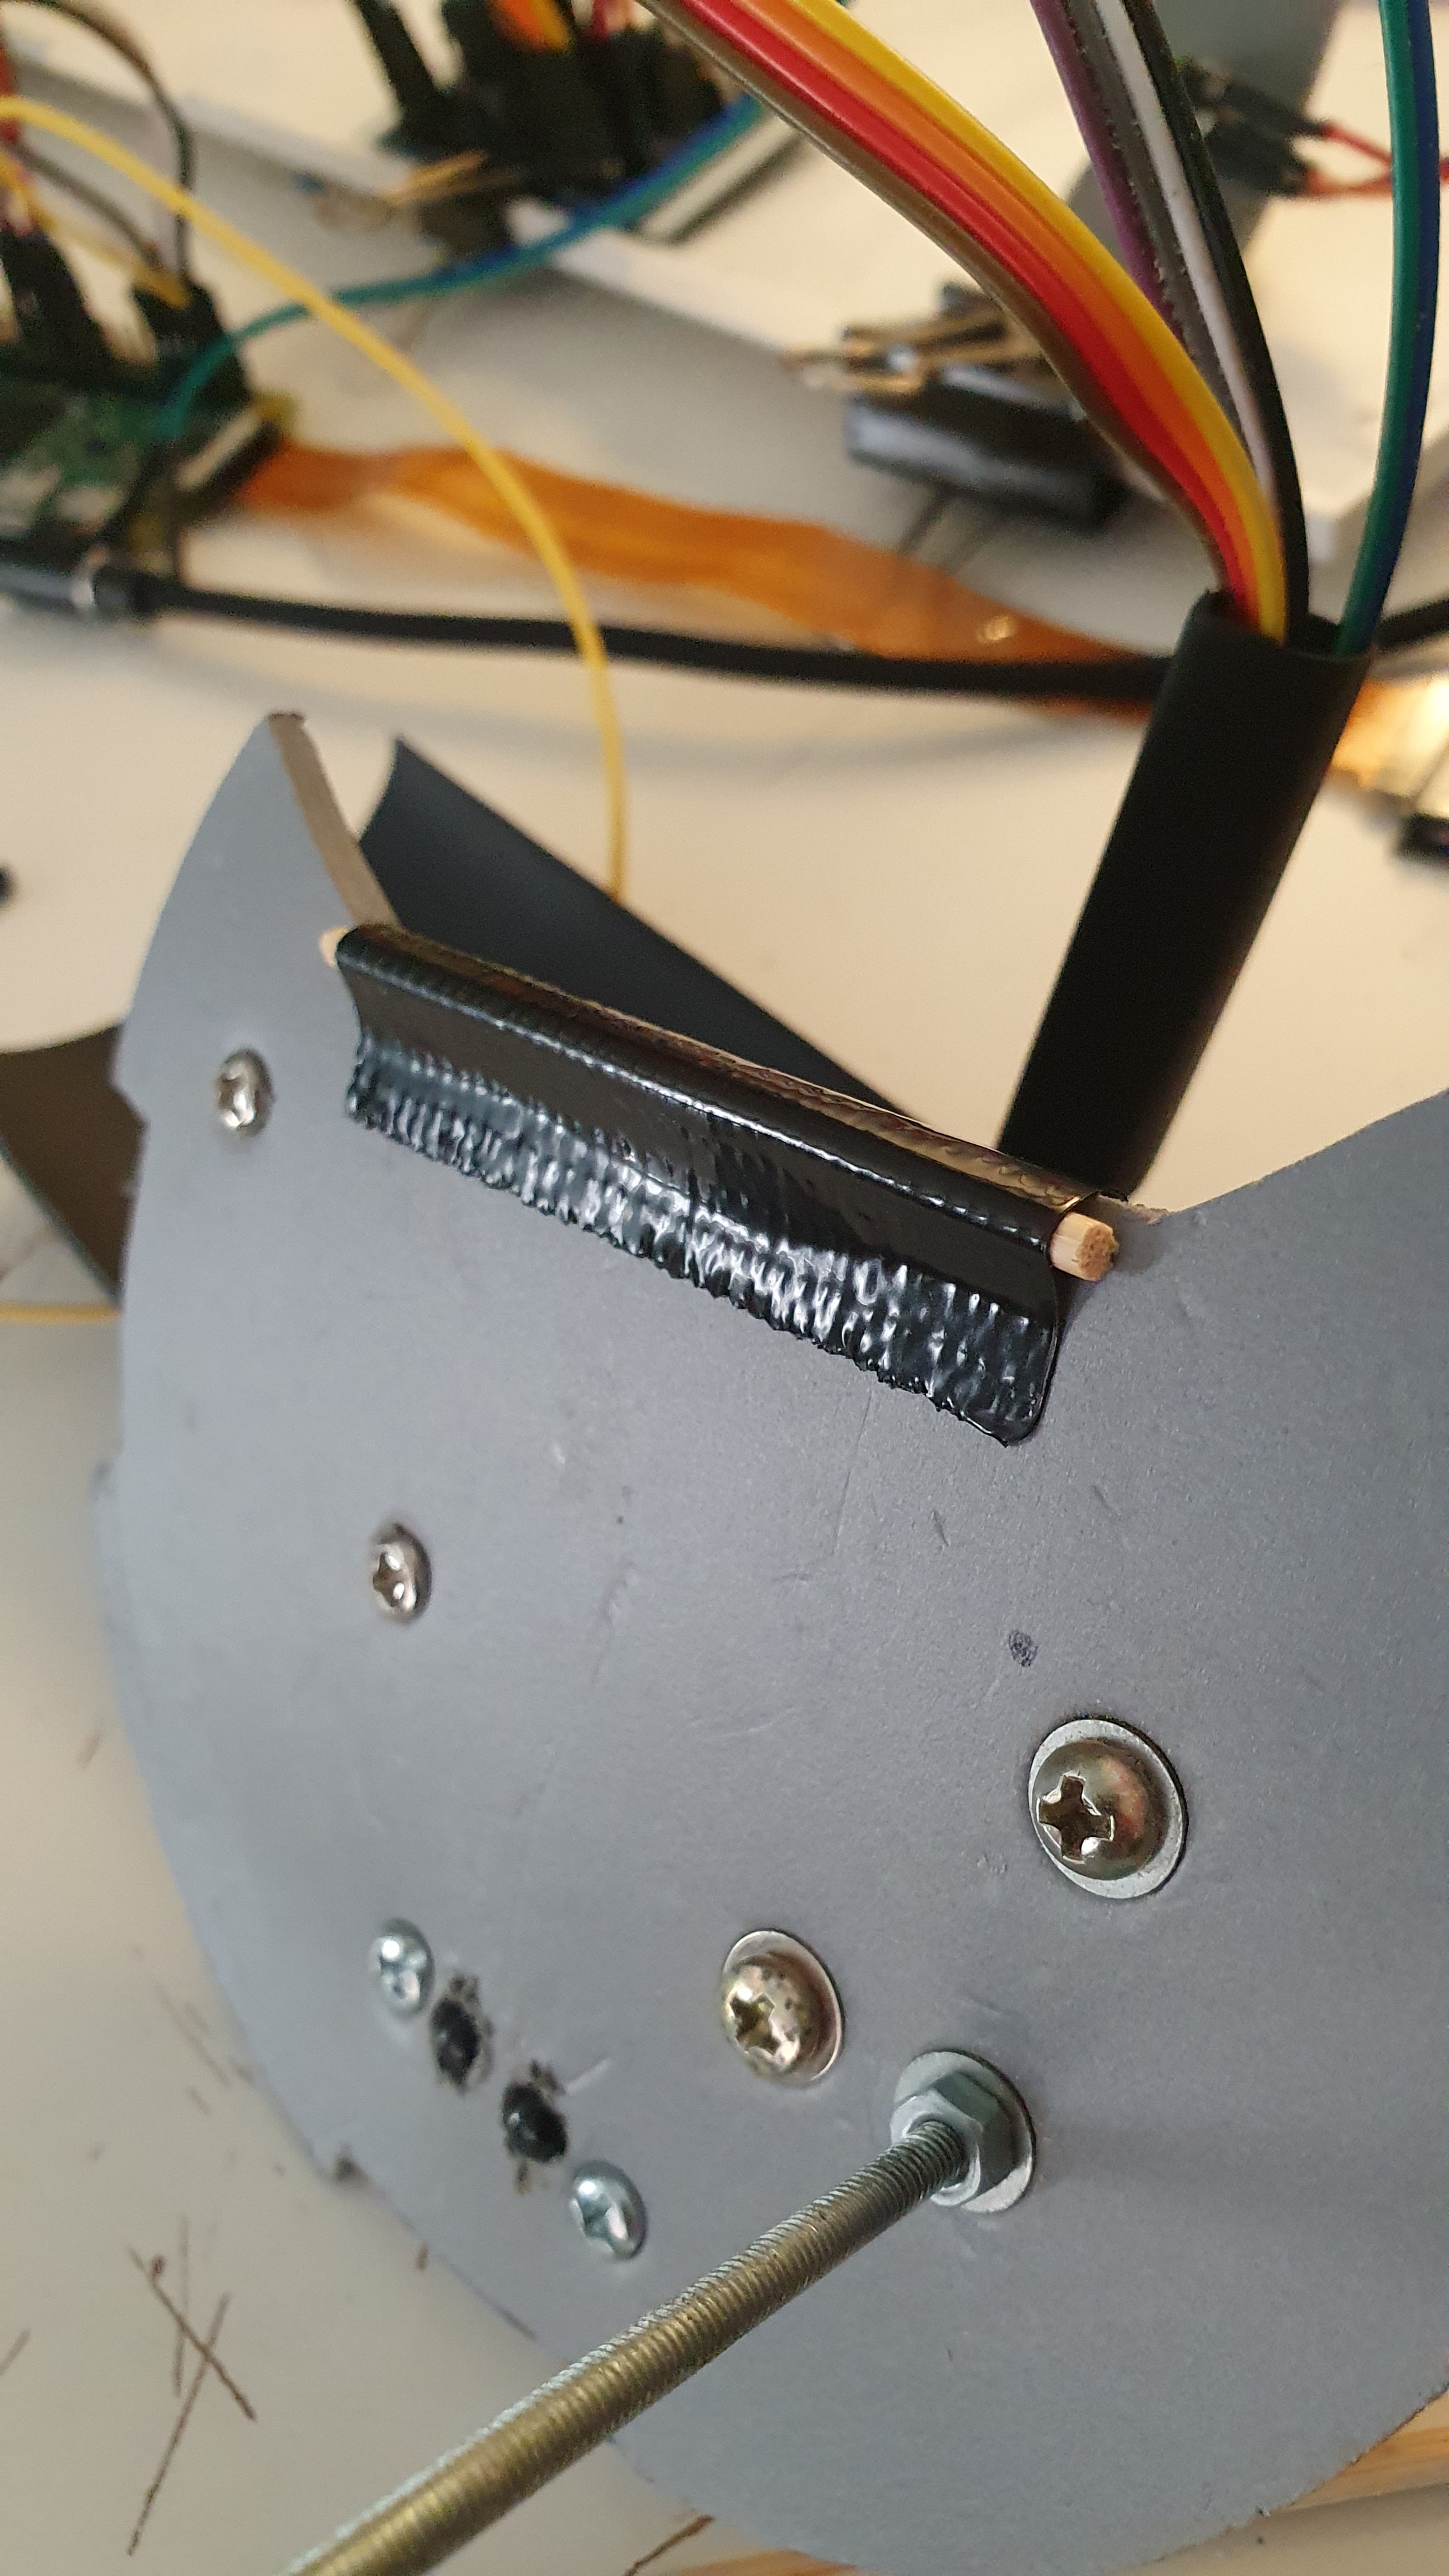
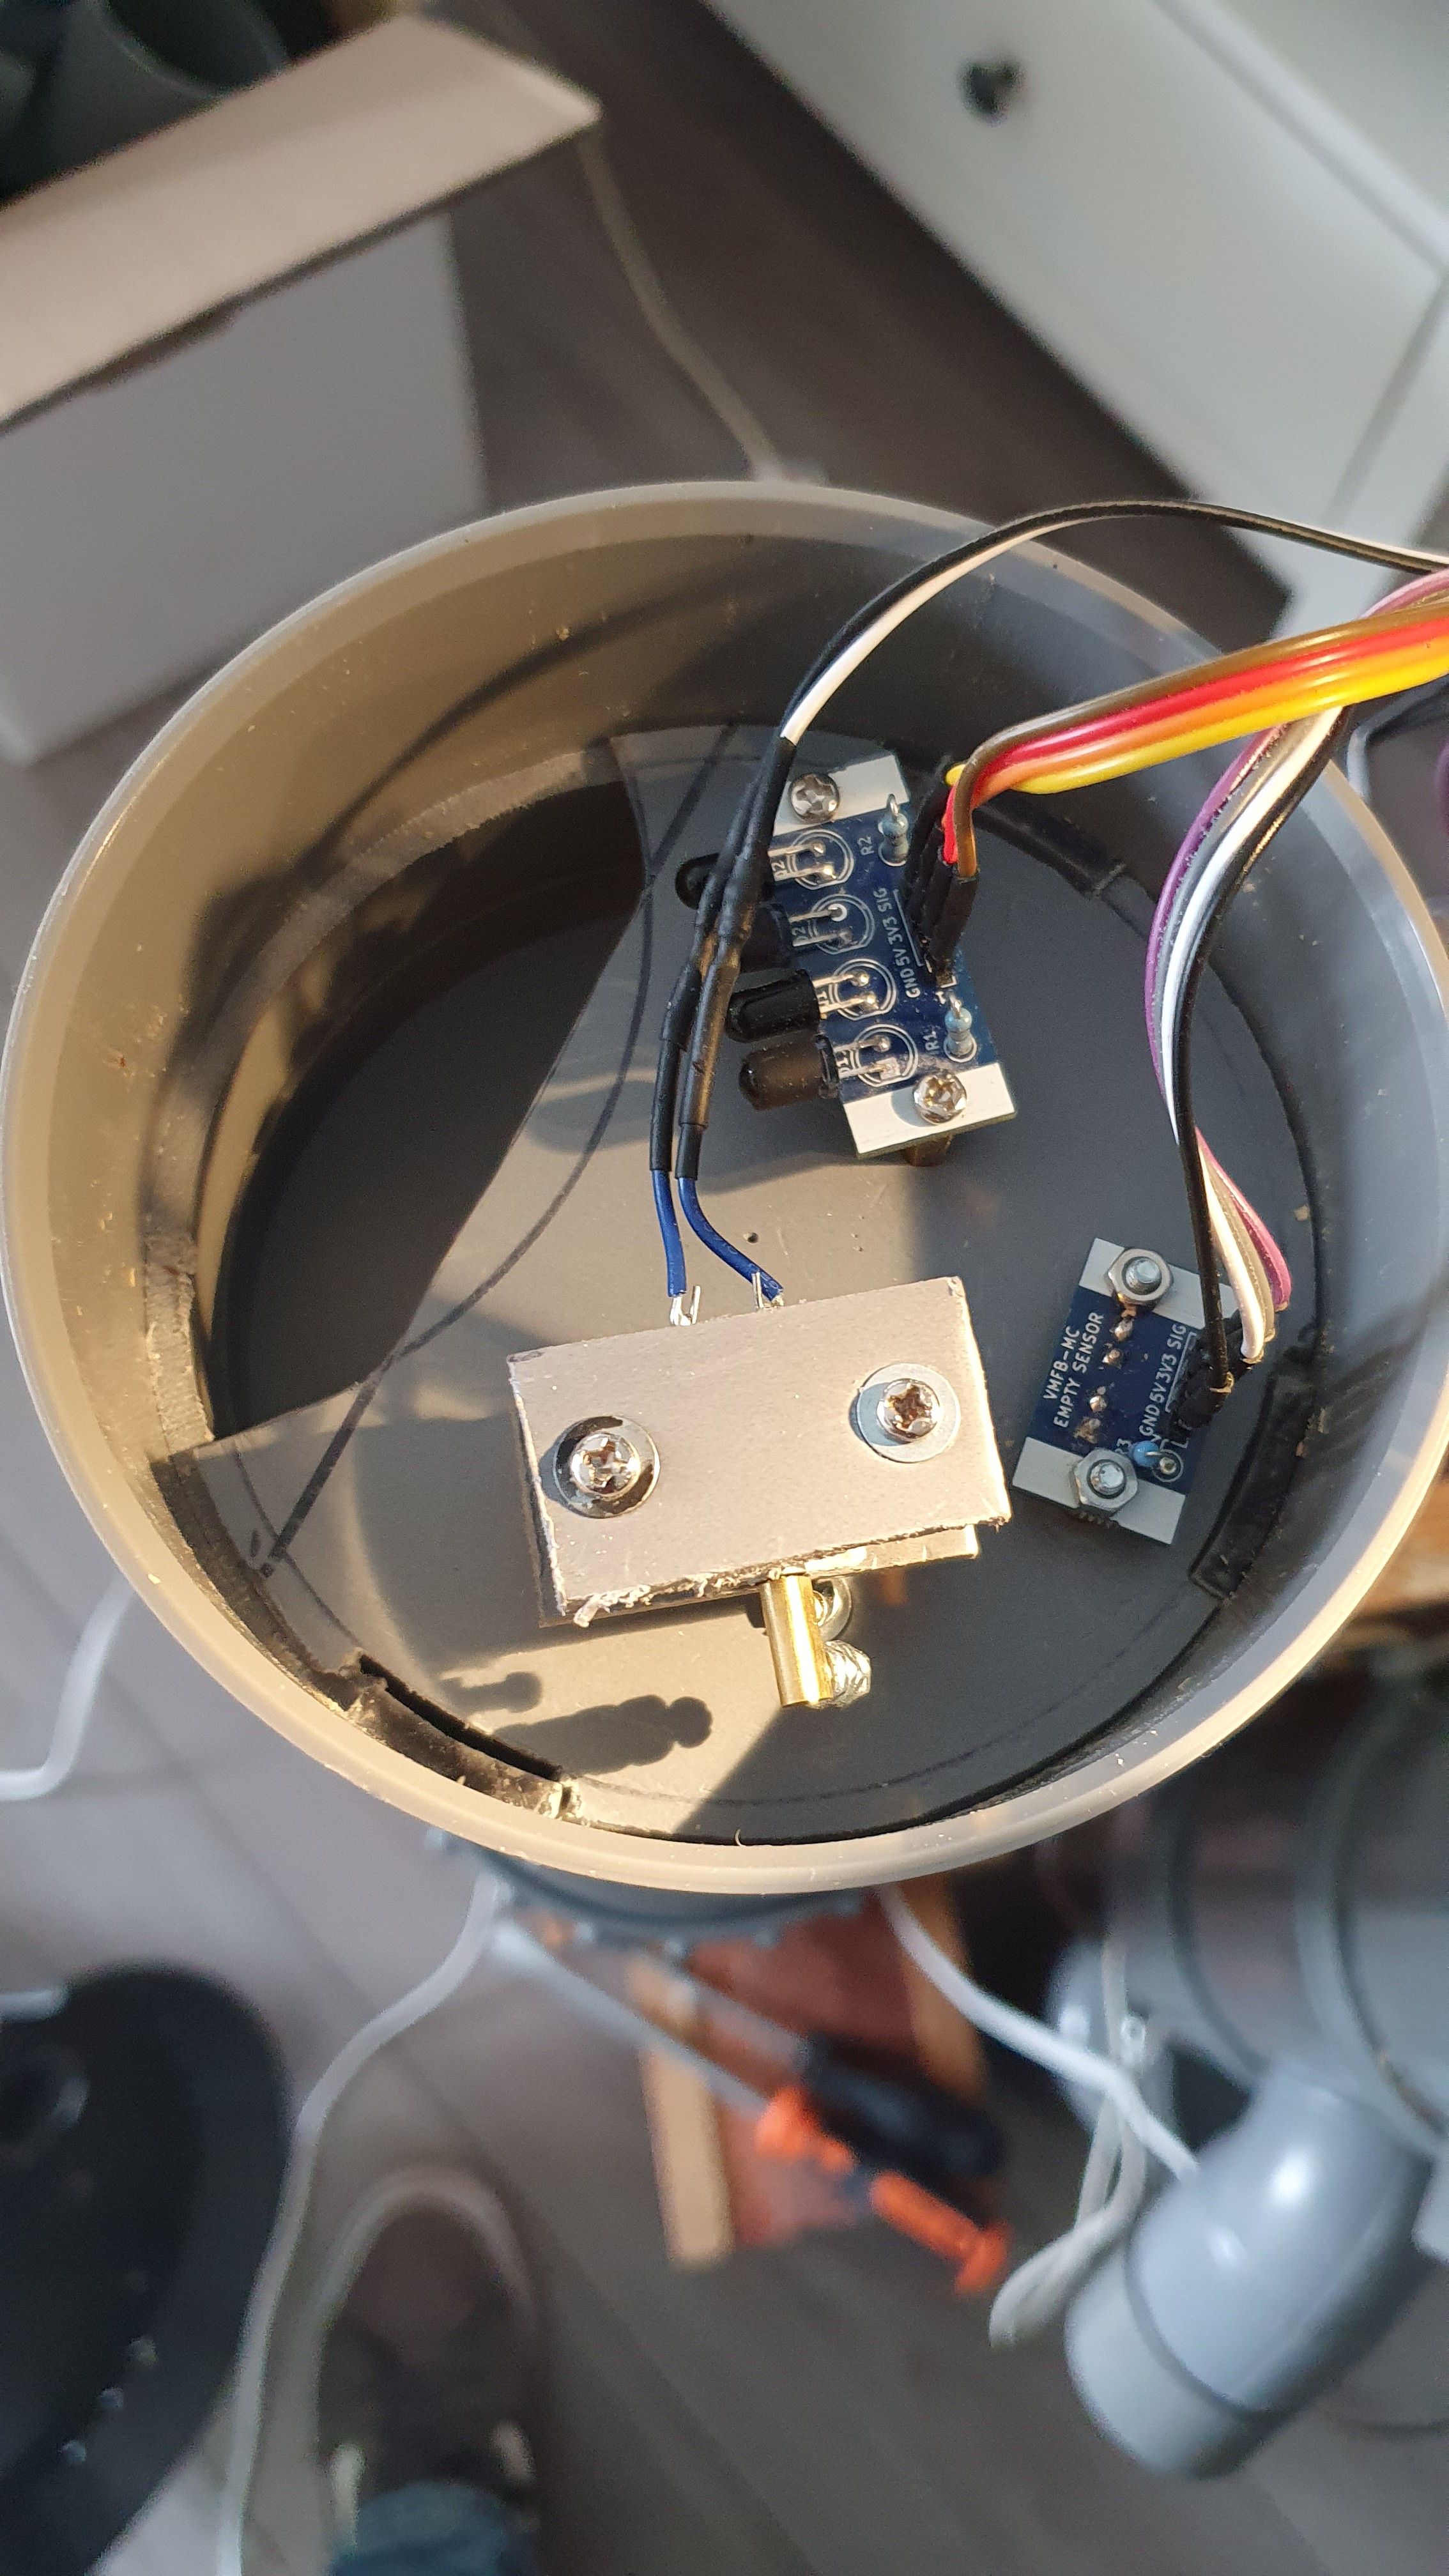
Here is the underside of the vibration plate showing where the motor and sensors are mounted.
![]()
These changes solved the hopper jams. Then I had jamming in the dispense chute. To solve this I removed the red cup that caught peanuts on their way out. This helped reduce the frequency of jams, but the real issue was using several segments of pipe in the chute. Each joint was an opportunity for a jam. Replacing this with a single piece of pipe seems to have solved this for now. If there is a jam, it is at the opening at the bottom and the birds can pick it out and remove the jam themselves.
I'm getting a pretty steady stream of magpies and jackdaws now. Along with some pigeons that remember when this dispensed shelled peanuts :)
https://cdn.hackaday.io/files/1847547904515136/VMFB-MC_05-49-22.mp4
-
VMFB-MC for unshelled peanuts deployed
03/27/2024 at 12:50 • 0 commentsIt passed some basic tests and is on my back balcony now.
I think I may have put too much strain on the camera cable as blue and green are faded. I will fix that later.
UPDATE - I was using an IR camera... I replaced it with a normal one.
Now hoping to get some jackdaws and magpies interested. I got my first visitors already.
https://cdn.hackaday.io/files/1847547904515136/VMFB-MC_16-56-28.mp4
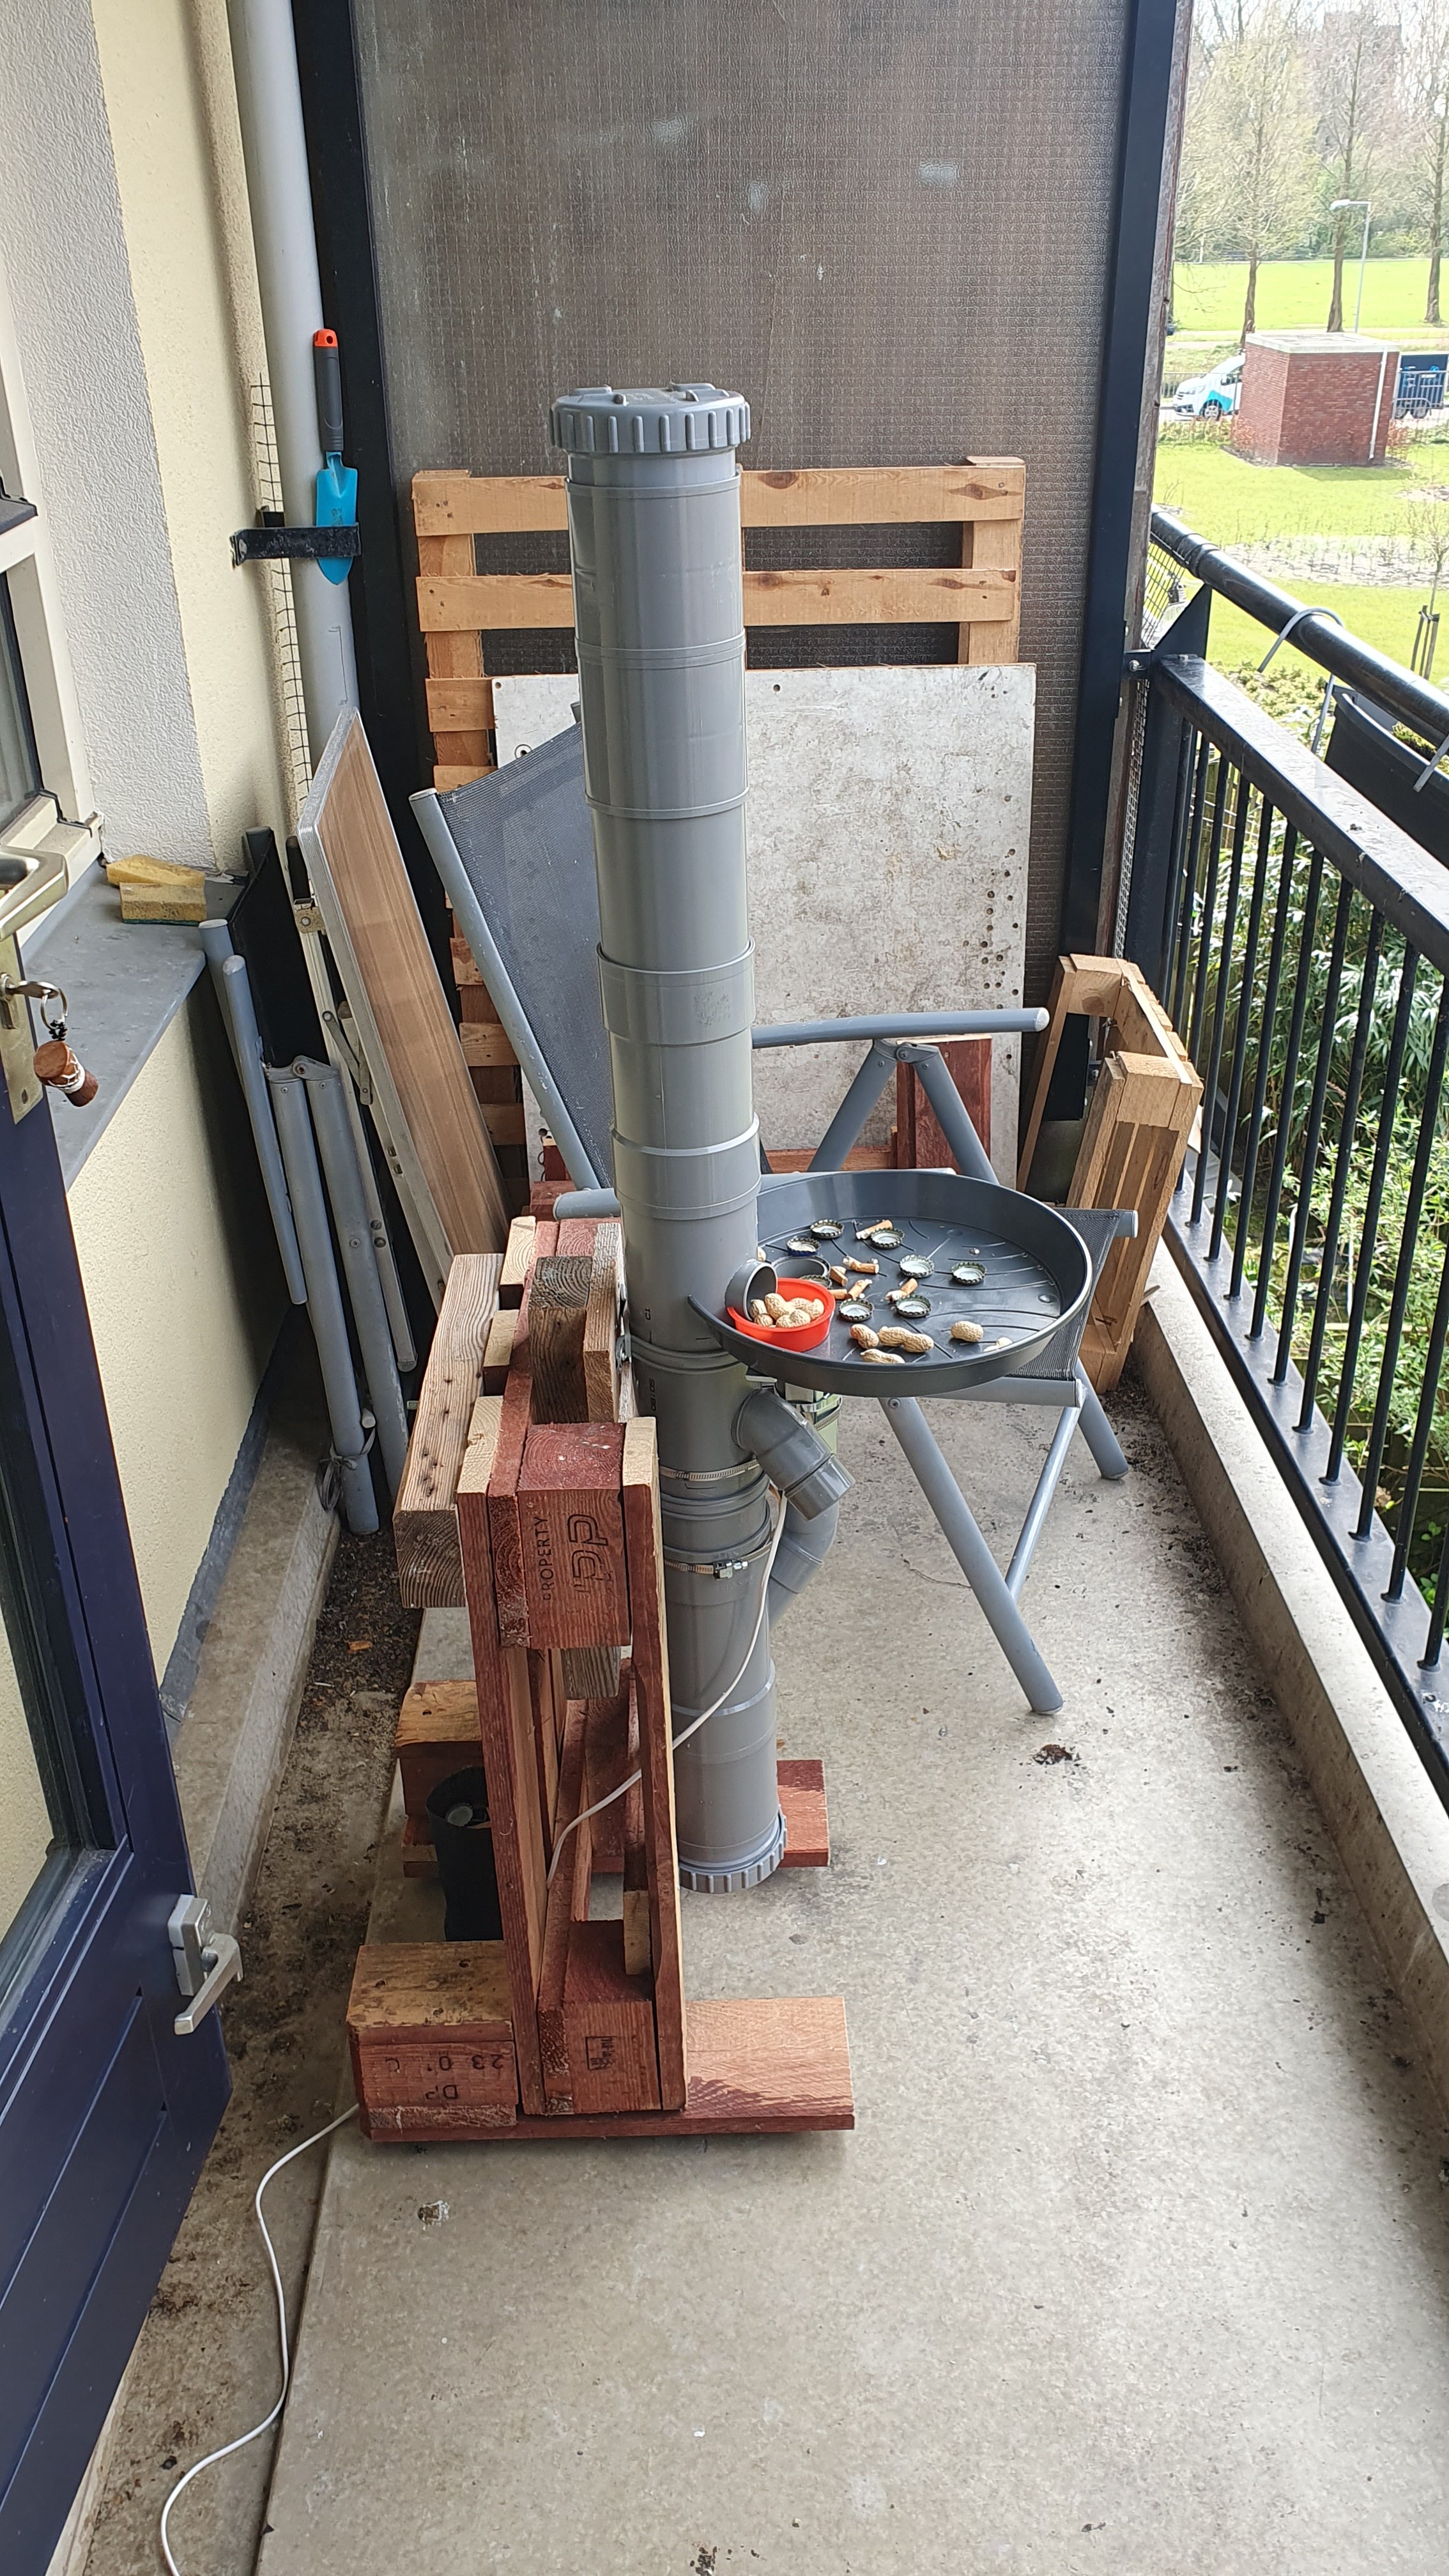
Here's what it looks liike on the balcony.
![]()
![]()
-
New enclosure ready for testing
03/25/2024 at 15:31 • 0 commentsTo avoid problems associated with feeding pigeons in my neighborhood I revised the design to accomodate peanuts in the shell, which corvids love. After some trial and error (and some poor designs) I finally have my test candidate assembled. It's not as small or pretty as I want it to be, but I think it will work. This is my 7th enclosure design and the 5th one based on 110mm PVC. I also made a base out of a discarded wooden pallet so I can move it around easier.
It does have enough room for batteries and an opening below the platform to get a mains line or solar charging cable in. The bottom comes off by loosening a hose clamp to replace batteries. The electronics are accessible by removing the top (everything above the camera arm).
A wide-angle camera is mounted on a rotatable mount so you can position it as you like. The deposit hole and dispense chute are on either side of the platform to reduce the chance that a bird drops food into the deposit hole and the dispense chute is 50mm instead of 32mm to accomodate the larger unshelled peanuts.
![]()
Now to put the electronics inside and do some more tests before setting it outside. It should be out back by this weekend.
-
PCBWay 6th Project Design Contest
03/14/2024 at 13:57 • 0 commentsA while back I submitted the analog version of this project to the PCBWay 6th Project Design Contest, and I actually got a prize!
PCBWay has been very supportive of this project since the beginning and I am excited that the first PCB I made with Kicad got some recognition.
Now to finish assembling and testing the peanuts-in-the-shell enclosure for the microcontroller version.
![]()
-
Code is ready (functional anyways)
02/23/2024 at 15:13 • 0 commentsAfter a month of occasionally working on moving all the main logic to one python script and debugging I think it's ready. It's all interrupt- and timer-driven, just like the analog version. It took a little work to make sure it worked well with both op amps and comparators, especially since I did not really design the circuit to work with comparators (no feedback to reduce hysteresis) and did not include capacitors to absorb the initial blip you sometimes get with phototransistors.
In the analog version, I had the camera recording while the sensor IR LEDs were on instead of using motion detection. For this version I'm still just enabling and disabling motion detection to trigger recording.
I also optimized the status overlay for motioneye so it's more informative.
https://github.com/src1138/VMFB-MC
The code works, but is as a friend of mine described it, "janky". There is still room for improvement, but for now it's usable and appears to work consistently.
- You can enable and disable the powerbank keep-alive and timed dispense from the web interface.
- You can trigger a manual dispense event from the web interface.
- The video overlay indicates the state of PIR, deposit, dispense, feed level, sensor IR LEDs and the dispense motor.
- The video overlay also shows the count of how many times PIR, deposit, dispense, timed dispense and manual dispense were triggered that day.
- You can easily use other types of sensors or switches in place of the PIR and phototransistors if your situation calls for it.
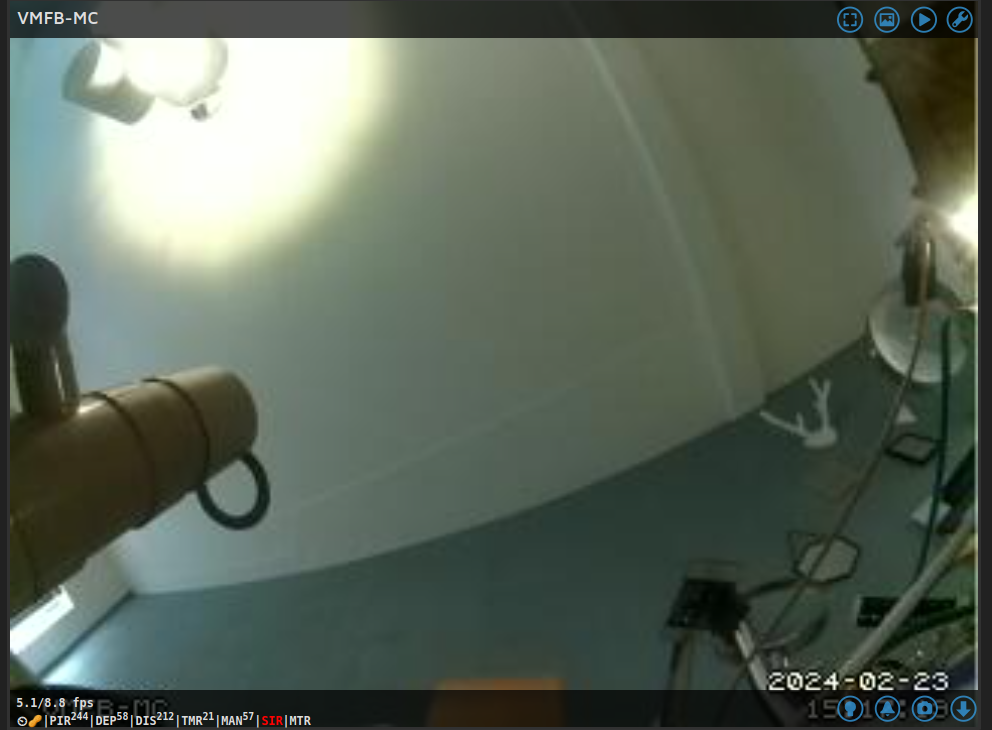
Here is a screenshot. The numbers are the result of testing and debugging. The sensor IR LEDs are on (SIR is red). The peanut level is low and the timer is enabled.
![]()
I will share some better screenshots and a short video soon.
I found a better way to mount a camera in the enclosure so it gets a good shot of the platform without being in the way or using a side-mounted arm.
Finally I found a better solution for rodent-proofing that should allow me to make the enclosure a little smaller without making it easy for rodents to get in there and have a feast. I have not had any rodent issues since I started this project, but this is a pervasive problem with bird feeders and I want to mitigate it as much as possible.
I expect to have another complete prototype based on the VMFB-MC with the above improvements and dispensing peanuts in the shell ready in the next 3 weeks. Since the peanuts will be in the shell, pigeons will not be able to eat them, but the jackdaws, magpies and crows that come by my balcony love them. Hopefully this will keep me from running afoul of the HOA for feeding pigeons.
I think these changes, along with the event logging and dashboard, will make this a more practical solution for students and researchers wanting to experiment with behavioral conditioning and collect data automatically. The VMFB can be adapted to use with other animals like rats or mice and apply to different use cases.
-
VMFB-MC PCB Populated
01/07/2024 at 02:59 • 0 commentsI found time to populate the board and am working on the code to make it work with an RPi Zero W and motioneyeos. Hope to be able to demonstrate it soon.
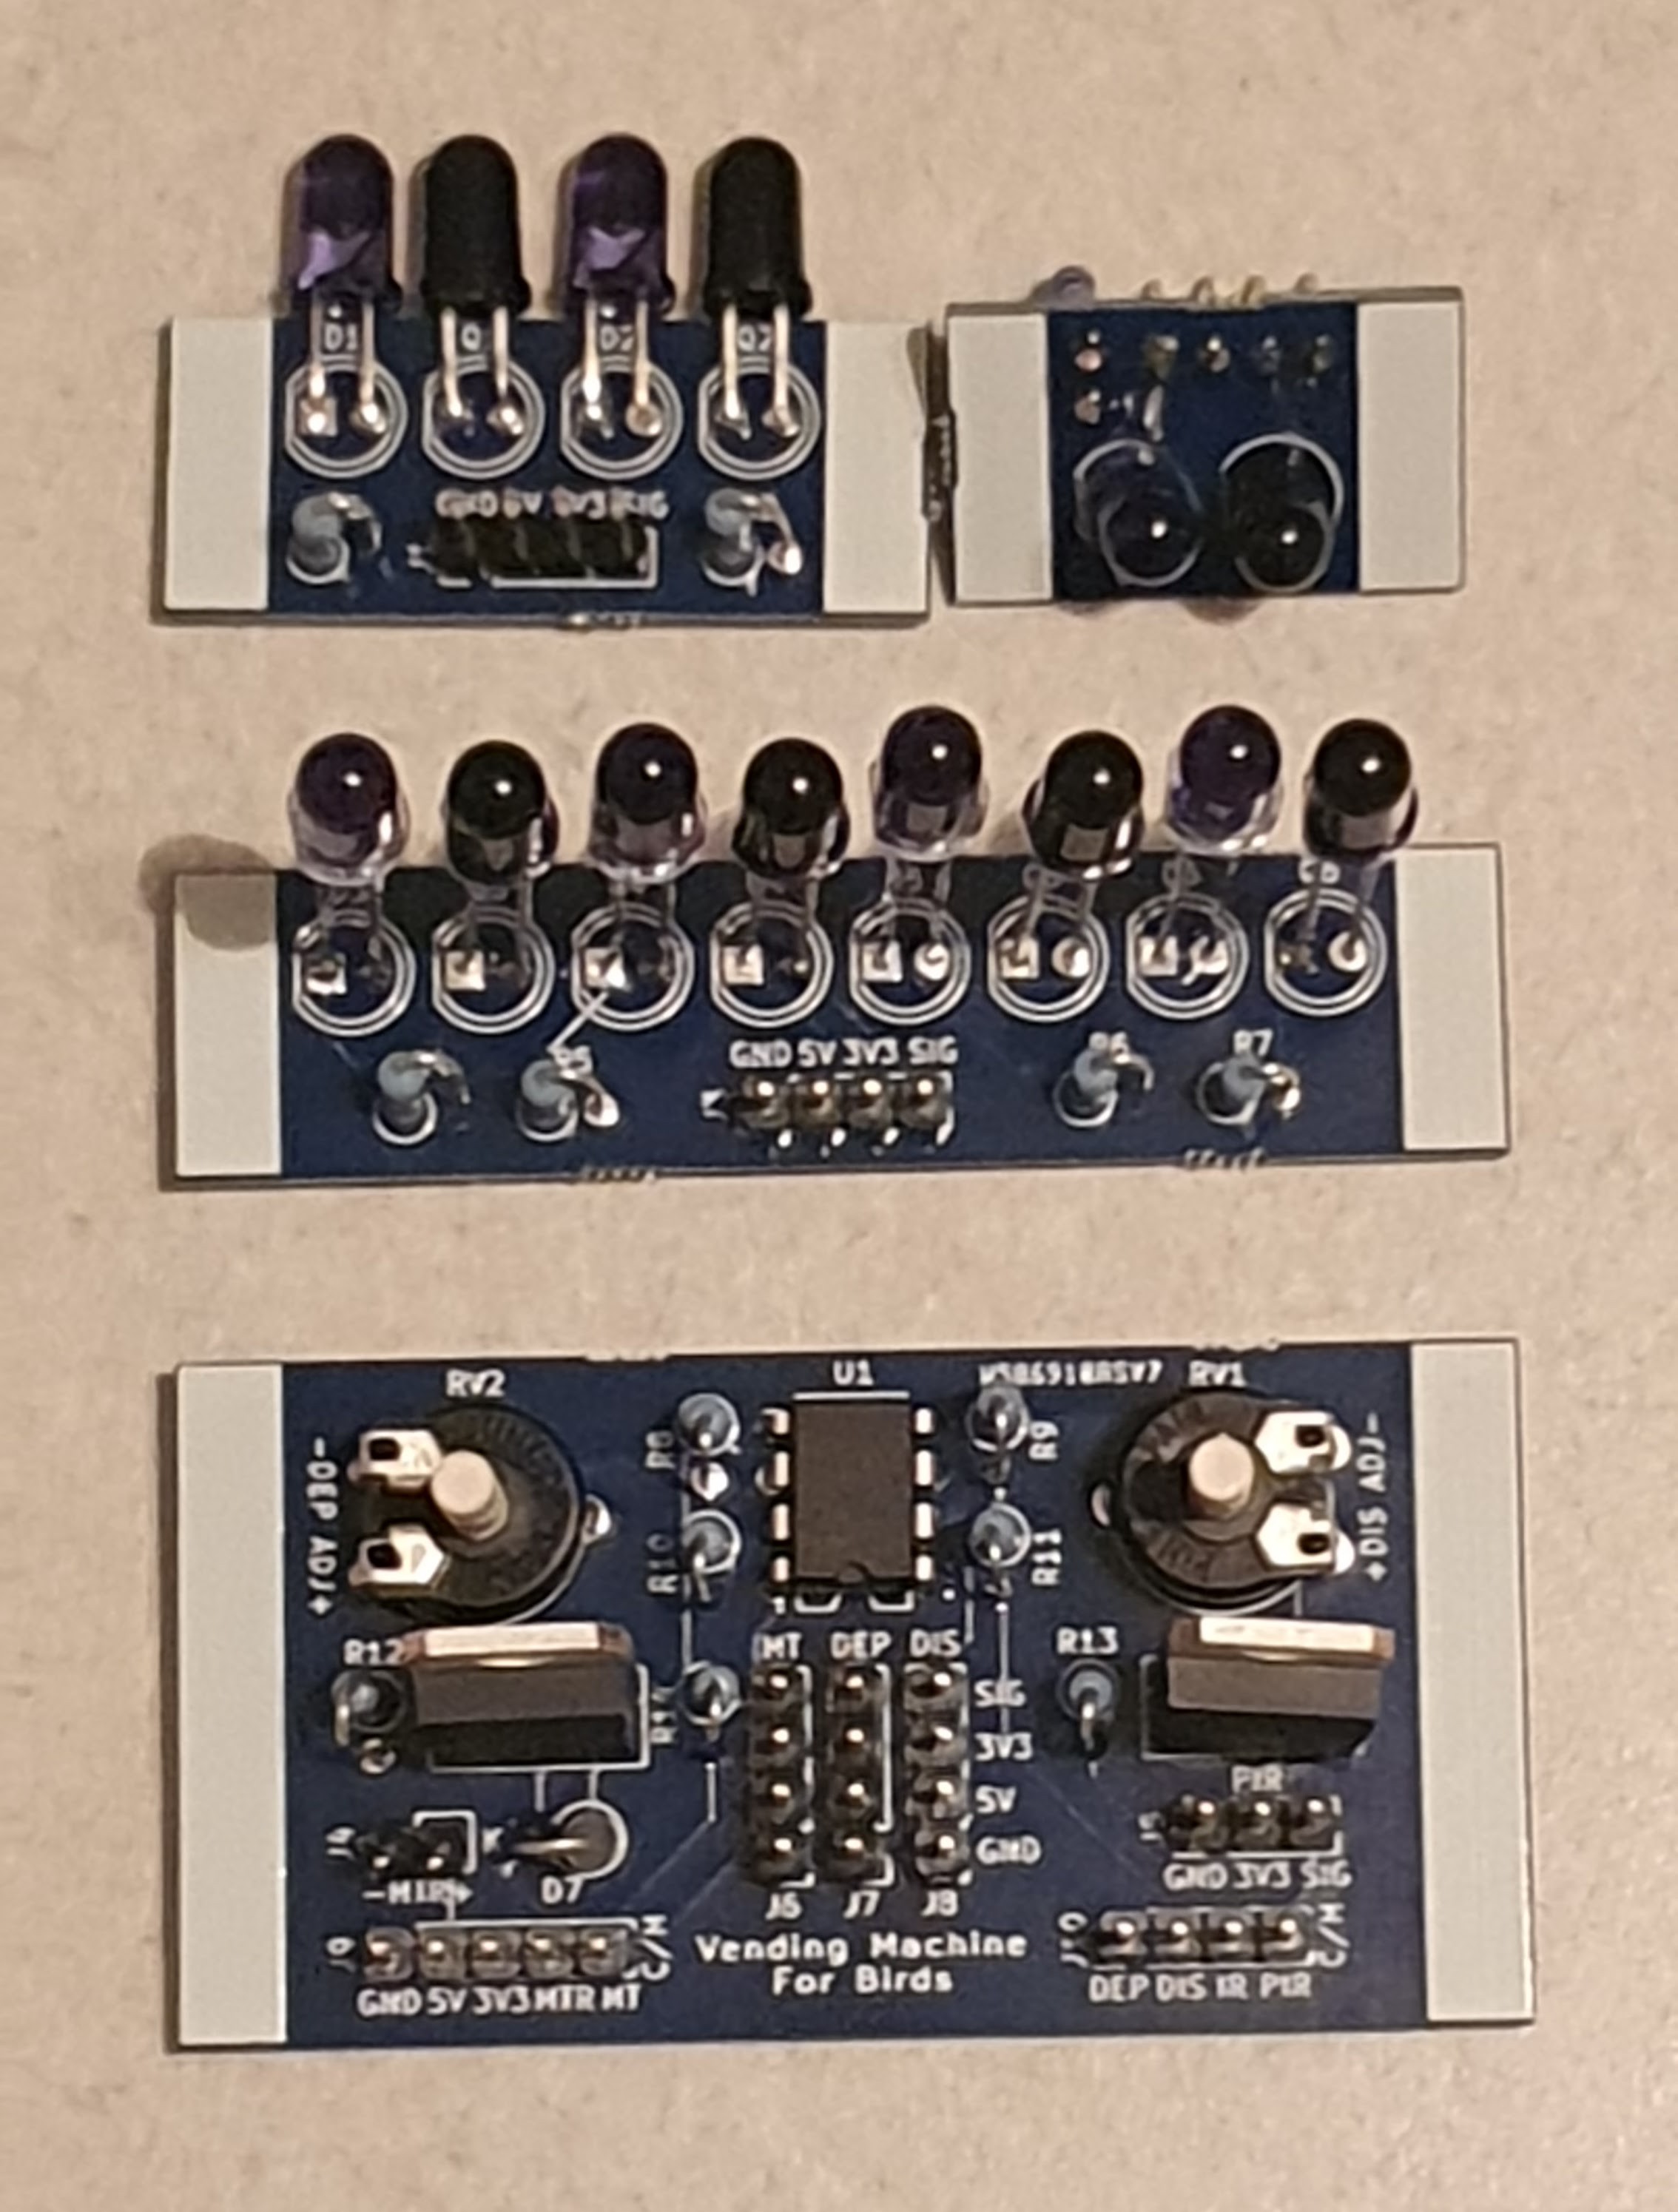
From top left to bottom:
Dispense Sensor, Empty Sensor (for peanut level)
Deposit Sensor
Main Board
![]()
-
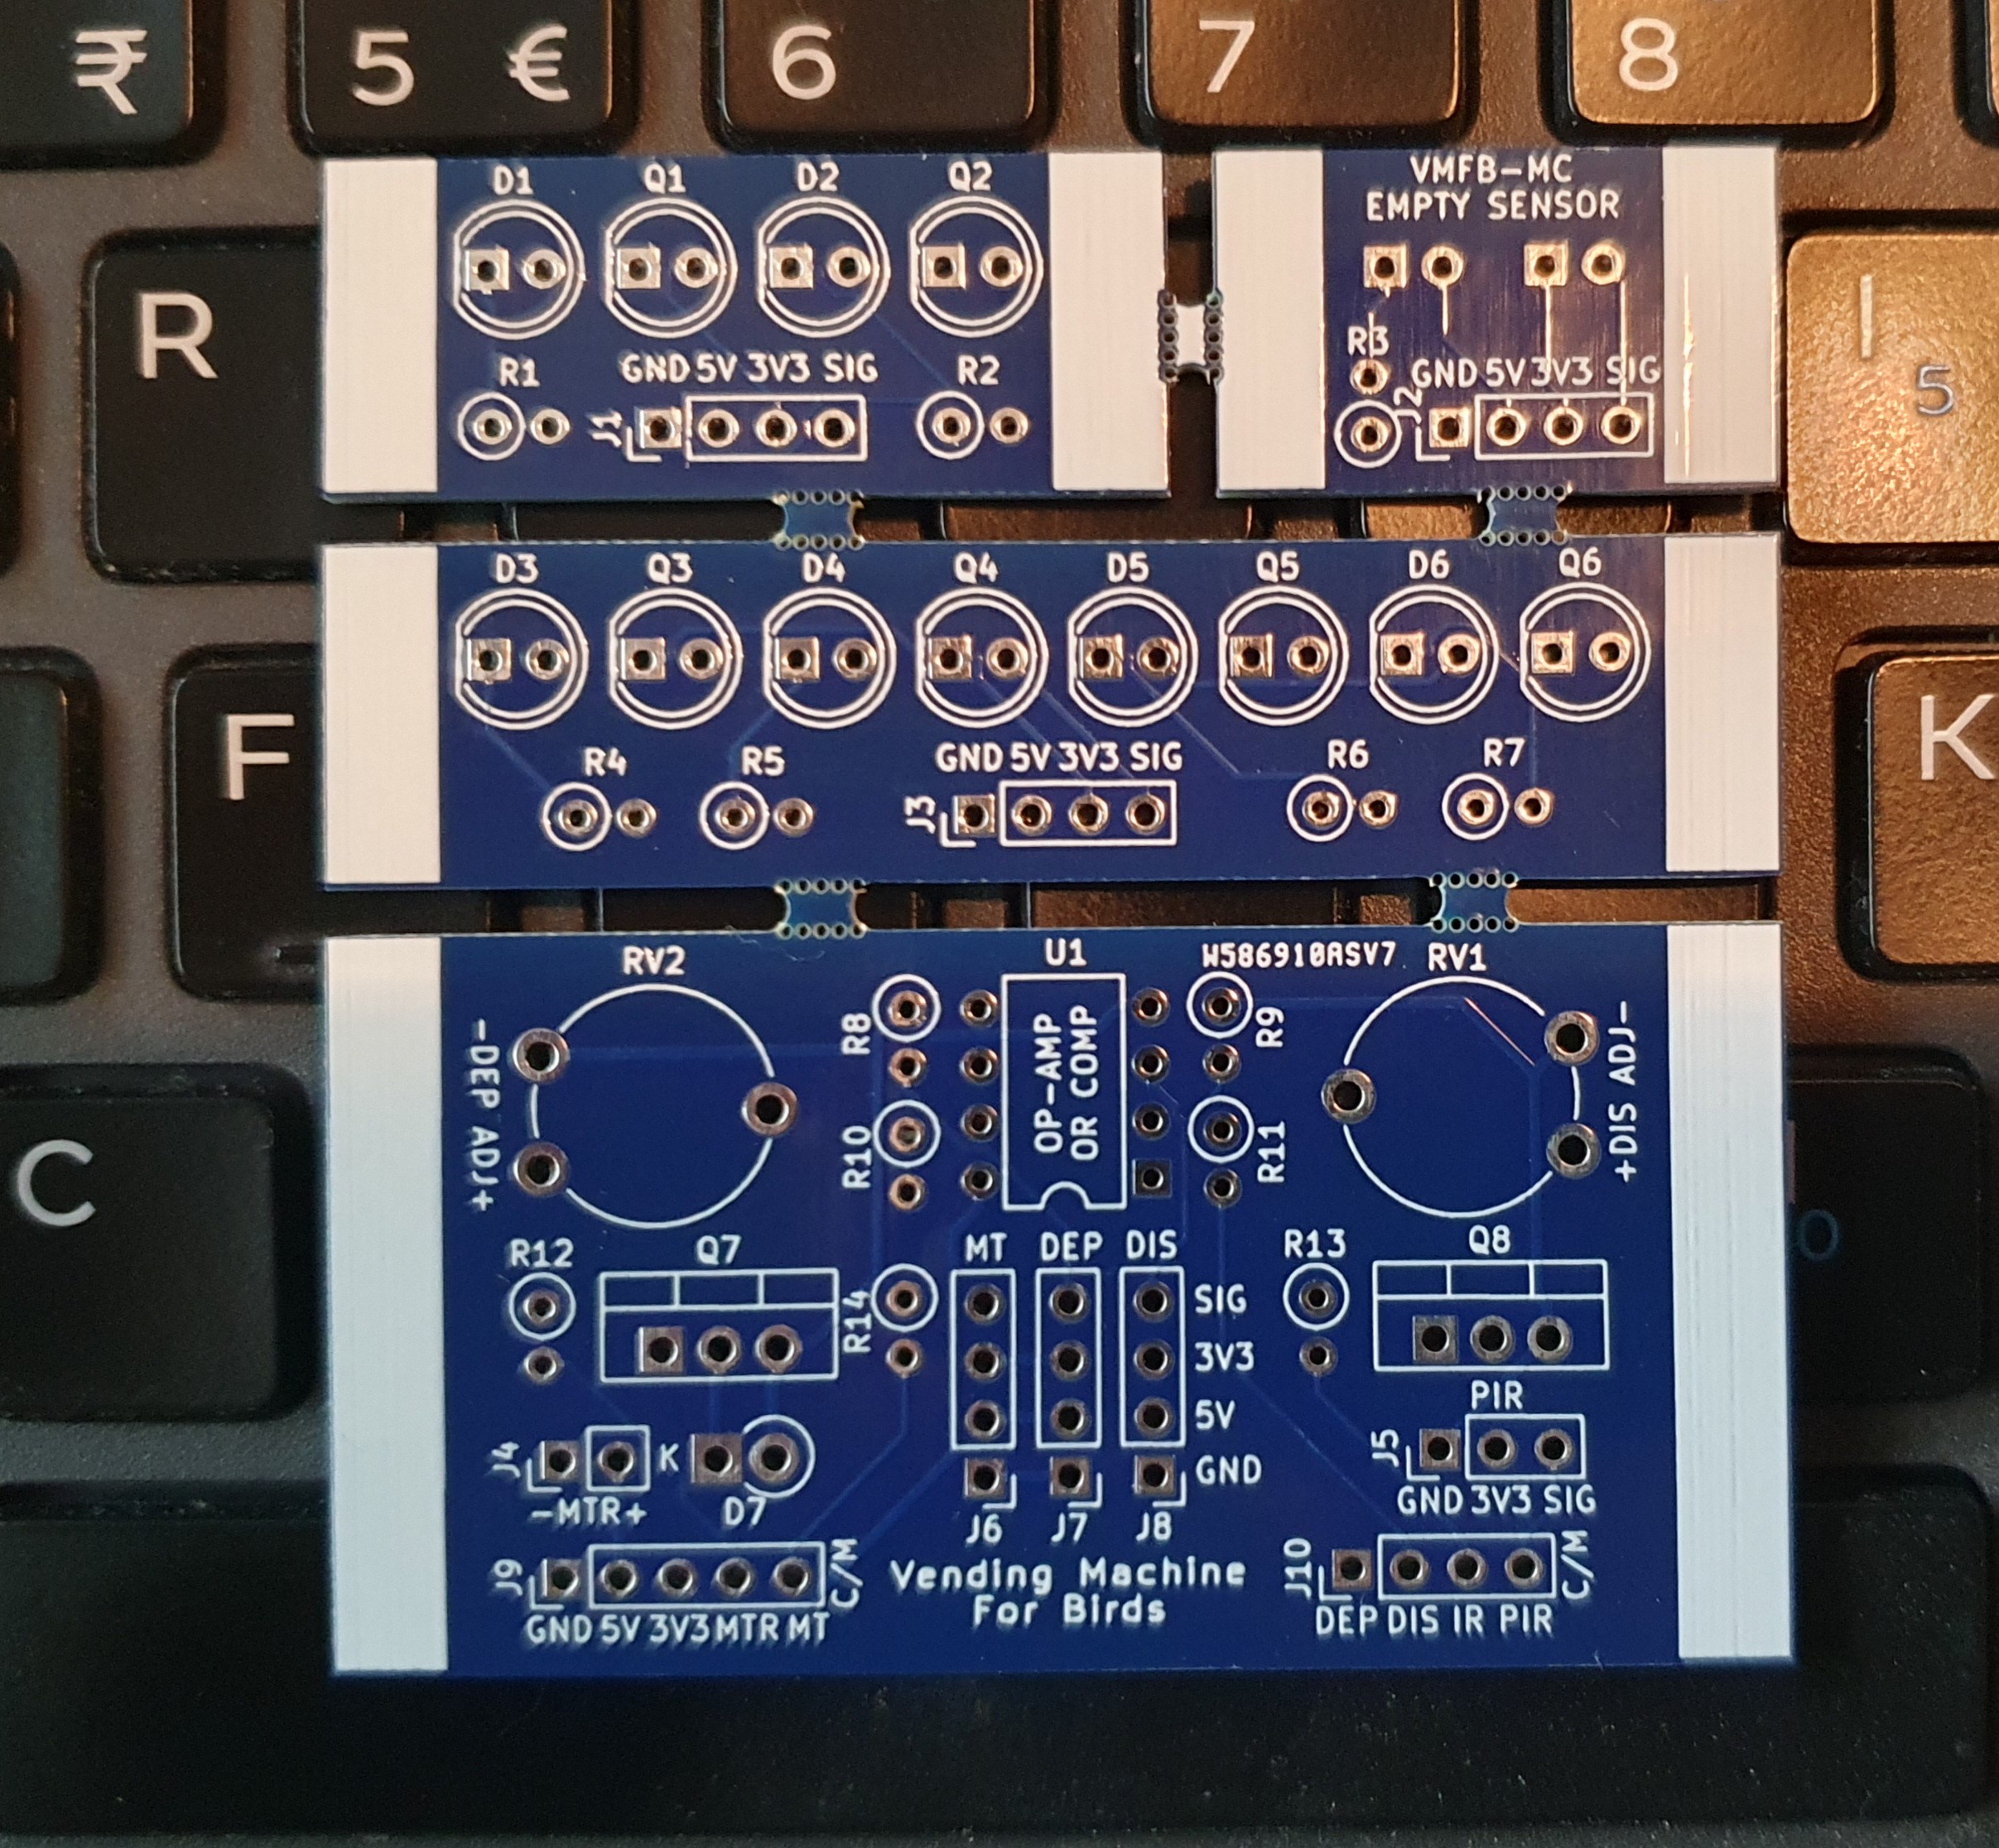
VMFB-MC PCB Received
01/03/2024 at 18:56 • 0 commentsFabricated, shipped and received in less than a week - and over the New Year holiday!
Quality looks great as usual (PCBWay) - looking forward to populating and testing it.
![]()
For anyone insterested, here's the PCBWay share project link: https://www.pcbway.com/project/shareproject/W586910ASV7_VMFB_MC_RA_V1_0_20231227_ecb23676.html
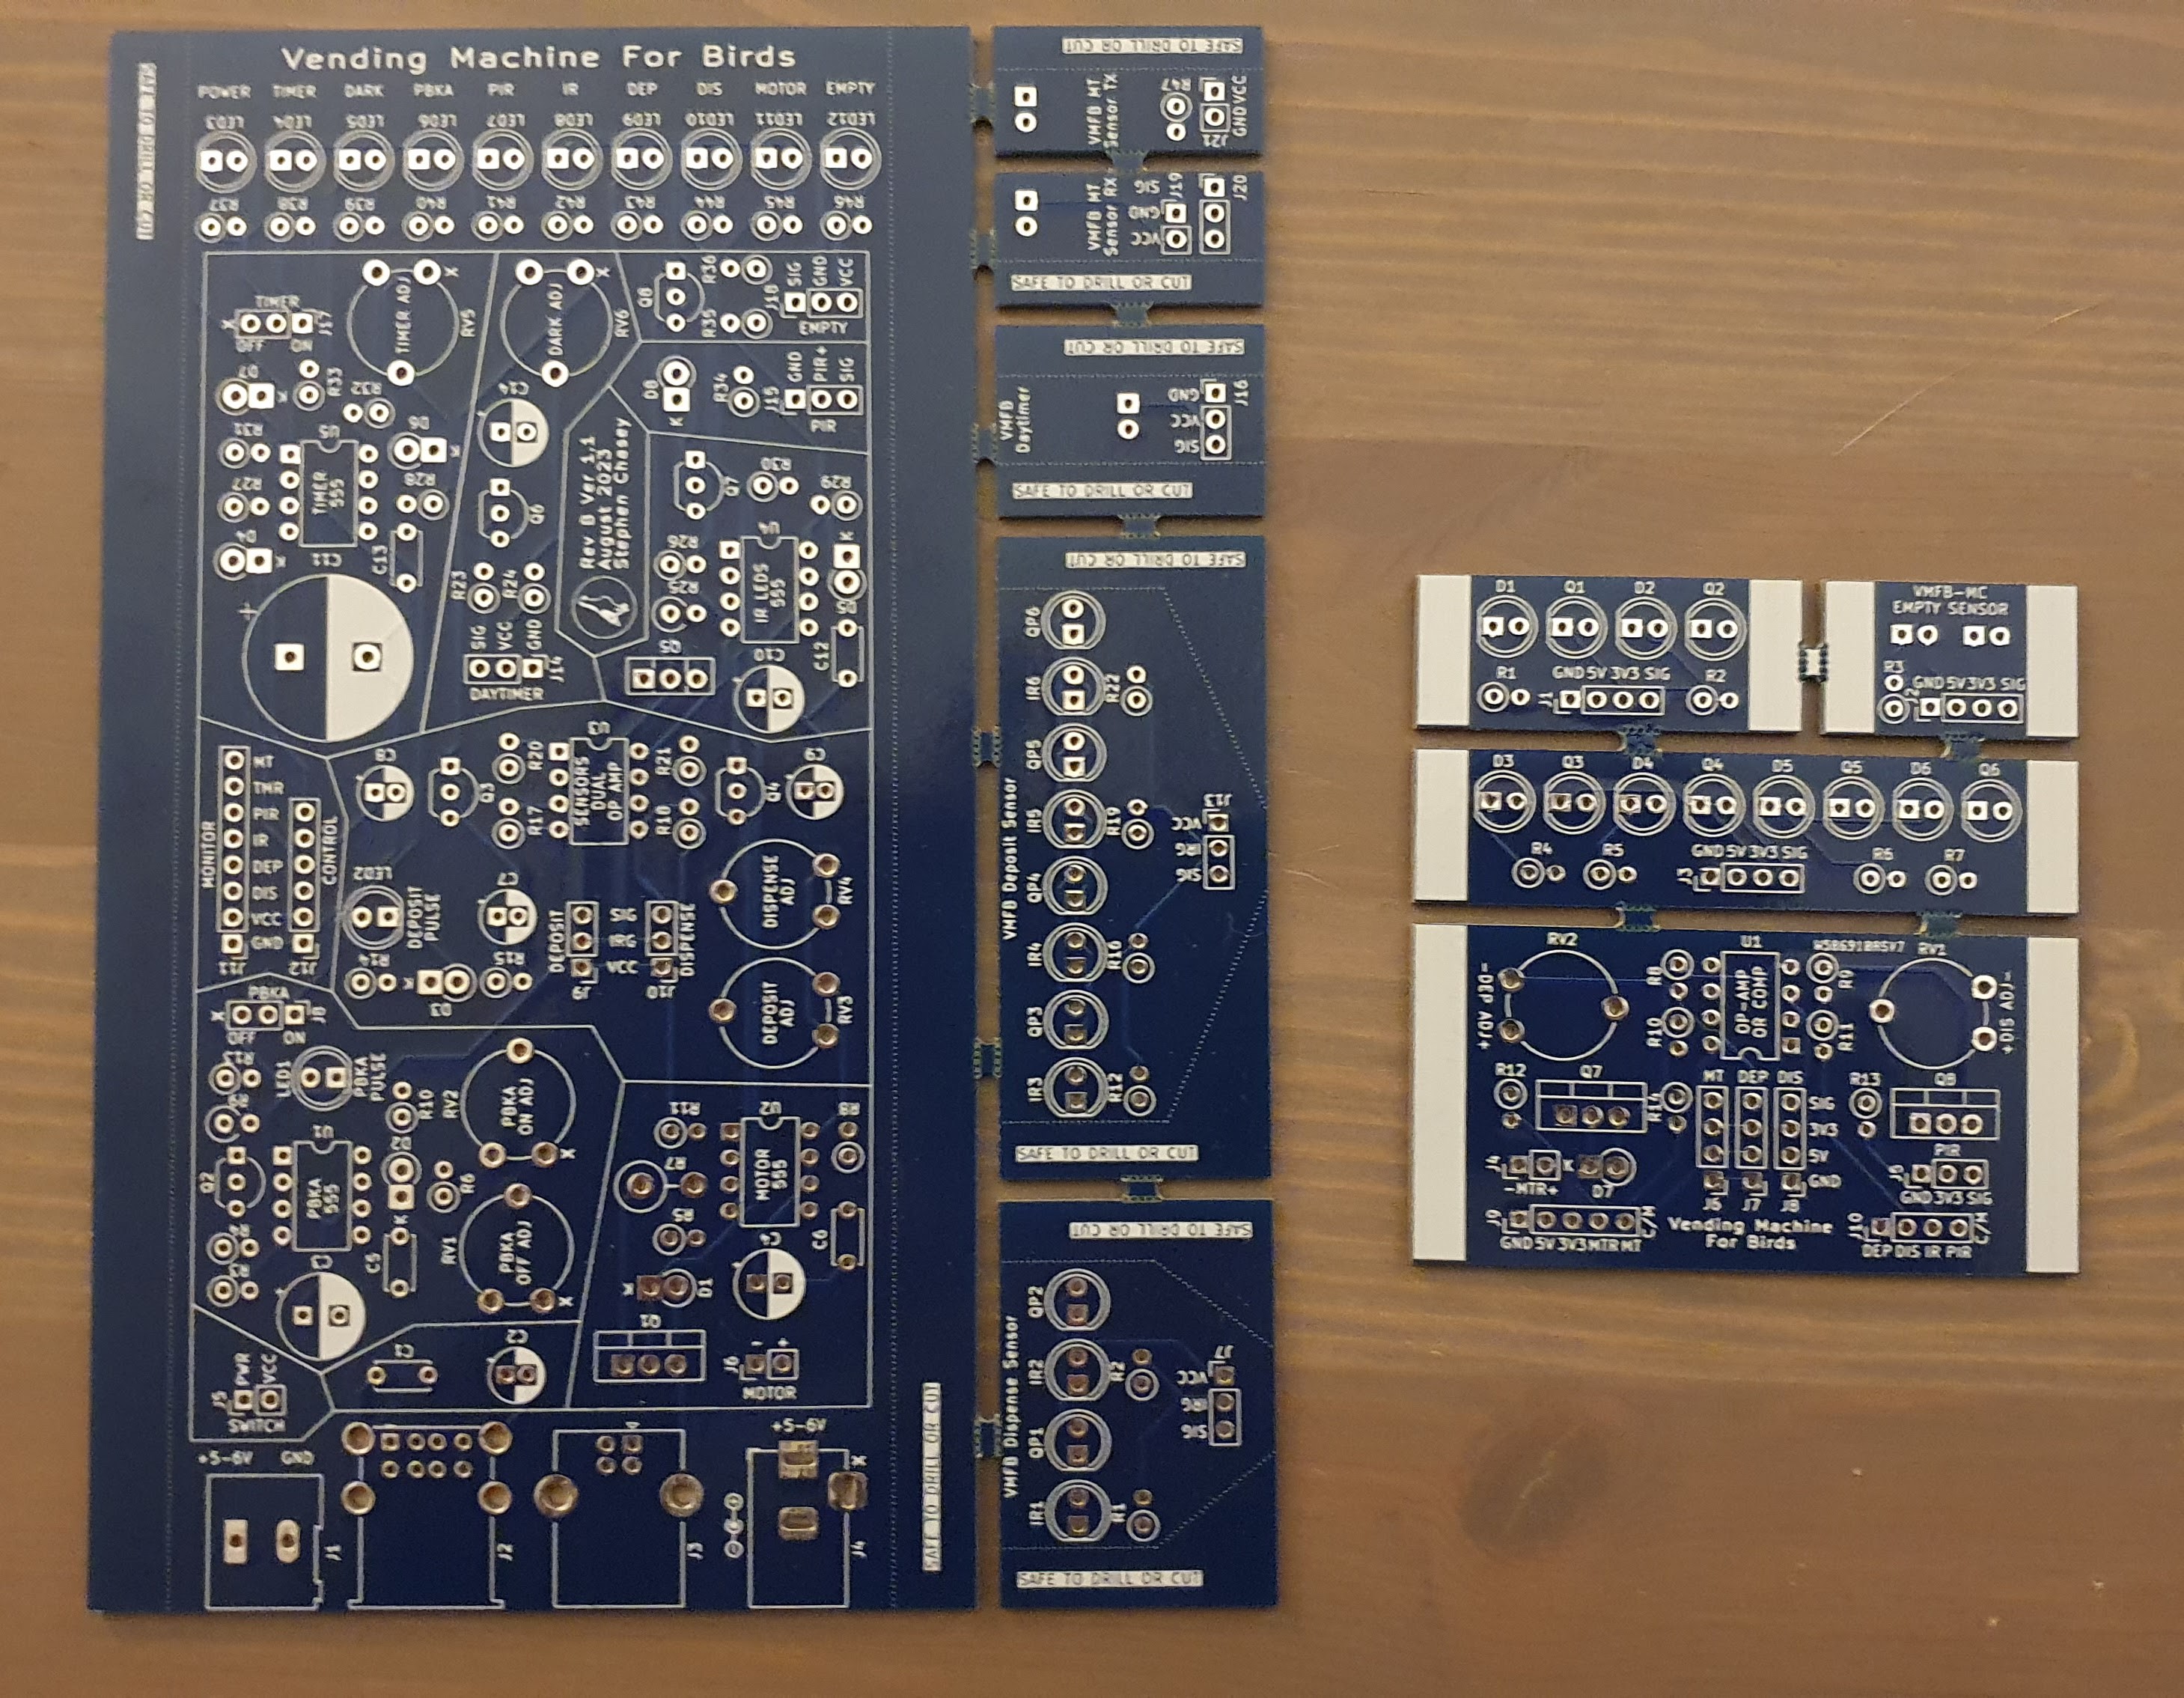
The all-analog VMFB and the VMFB-MC PCBs side-by-side to show how much smaller it is without all the 555's :) The main board is now about the same size as a Raspberry Pi Zero.
![]()
-
Update and smaller PCB footprint/BOM
12/15/2023 at 18:08 • 0 commentsIt's been a little over a month since the student in Warsaw deployed one of these and despite freezing temps and lots of snow the thing has been working fine. It does get clogged with snow build-up though, so a small resistive heater on the plarform is a good idea if you are doing this when there is a lot of snow.
I experimented with dispenser designs that could reliably dispense unshelled peanuts. The one I landed on is just a simplified version of the shelled peanut dispenser. One baffle at a 10-15 degree angle, one vibrating plate with an opening on one side. It works pretty well, and would allow me to deploy it where feeding pigeons is prohibited since pigeons can't eat unshelled peanuts and can't figure put how to open them. The larger openings makes keeping it rodent-proof a challenge. The dispense tube went from 32mm to 50mm. A rat or small squirrel could get in there and cause problems. I'll have to think of a solution for that.
In an effort to make this a more useful research tool I designed a new PCB that relies on external GPIO to work. Sadly, no 555's in this one, but the BOM is smaller (44 components including headers) and so is the footprint (6.5x6.8cm including sensors). This should make it easier to build and install, and you can use prety much any microcontroller, development board, ot SBC to control and monitor it.
It's not fully baked yet - I will create a version tag after I get one made and teseted.
https://github.com/src1138/VMFB-MC
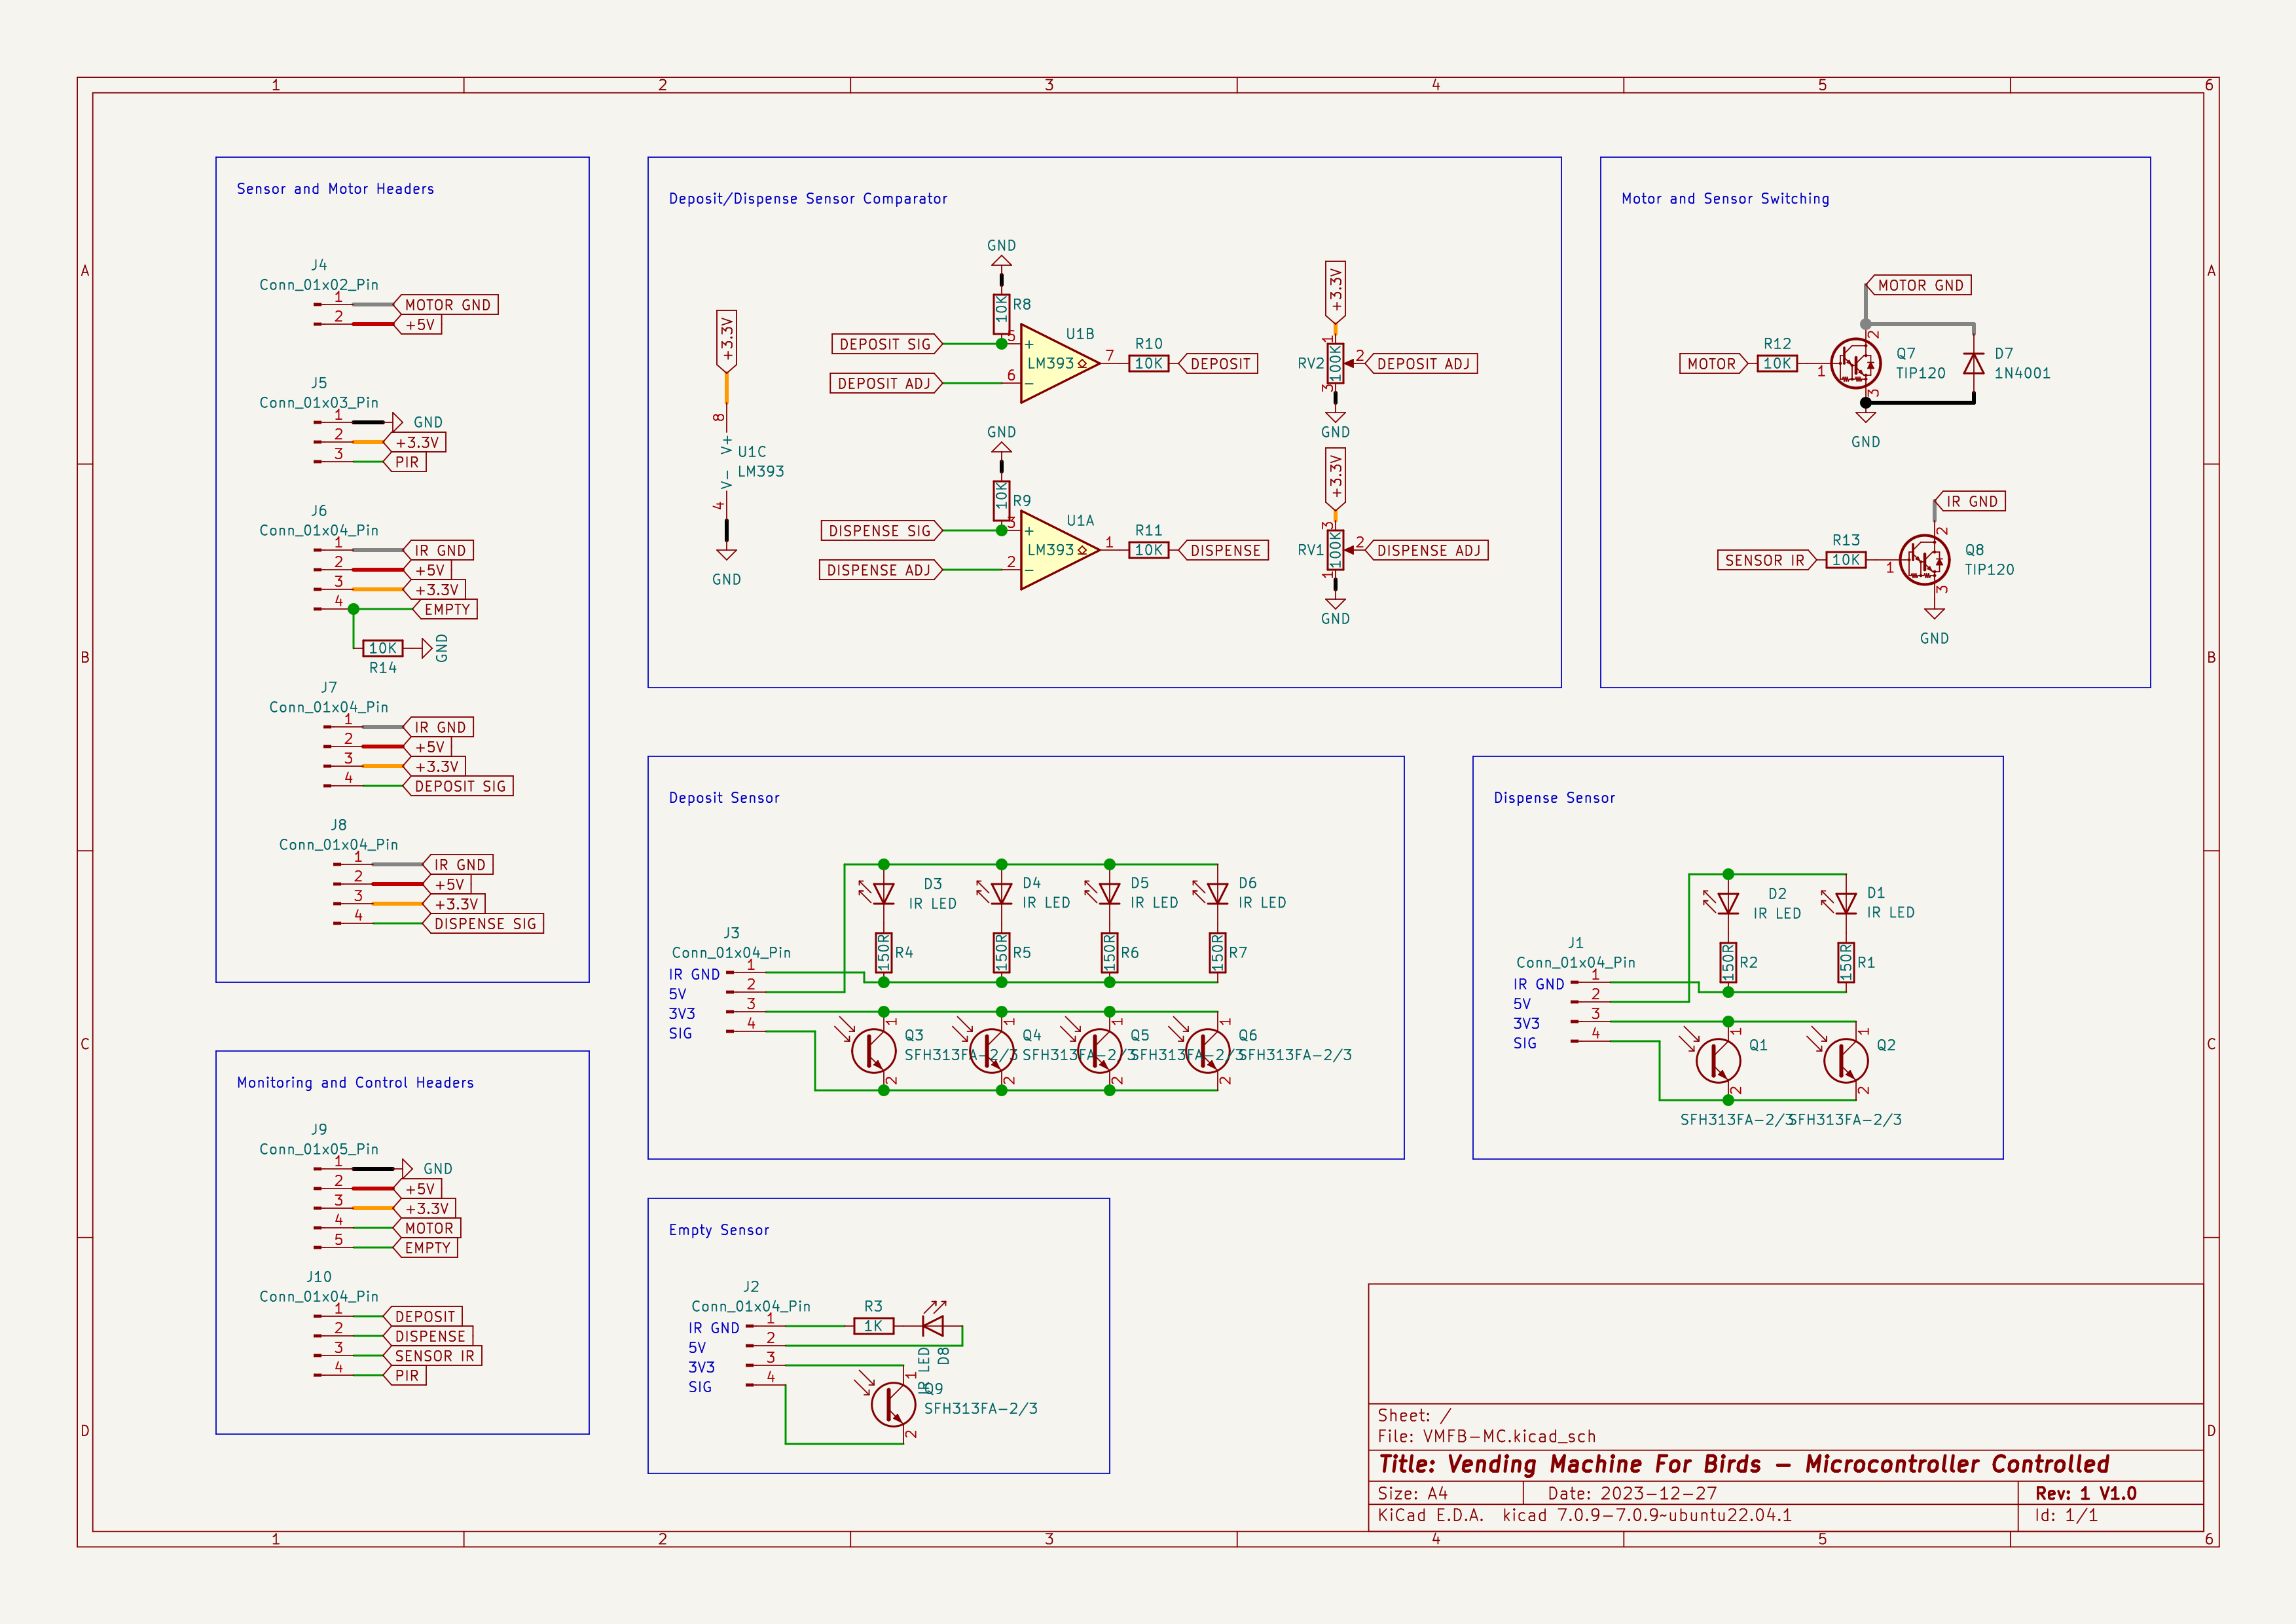
Current Schematic
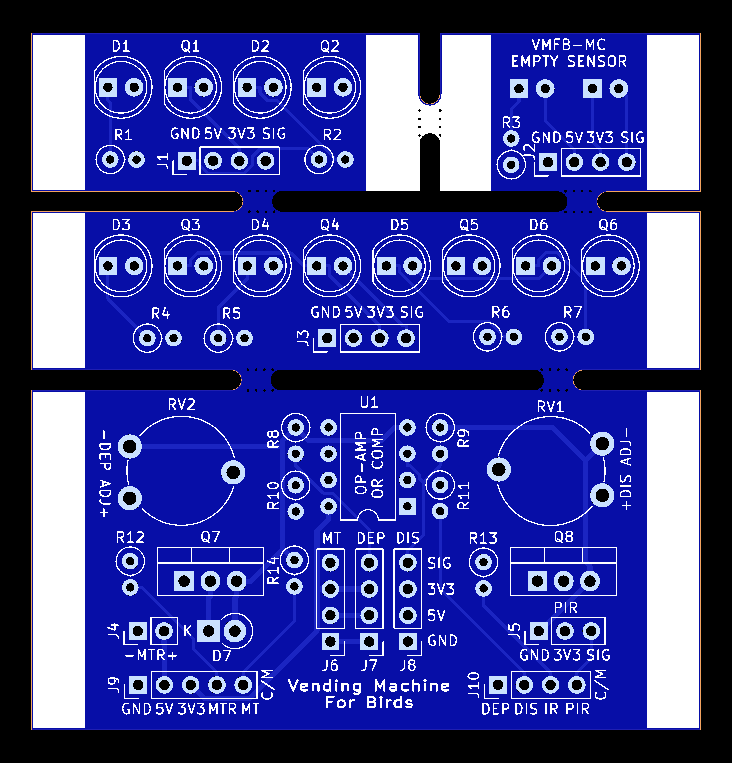
Current PCB
Board Dimensions: 65x68mm
Front
![]()
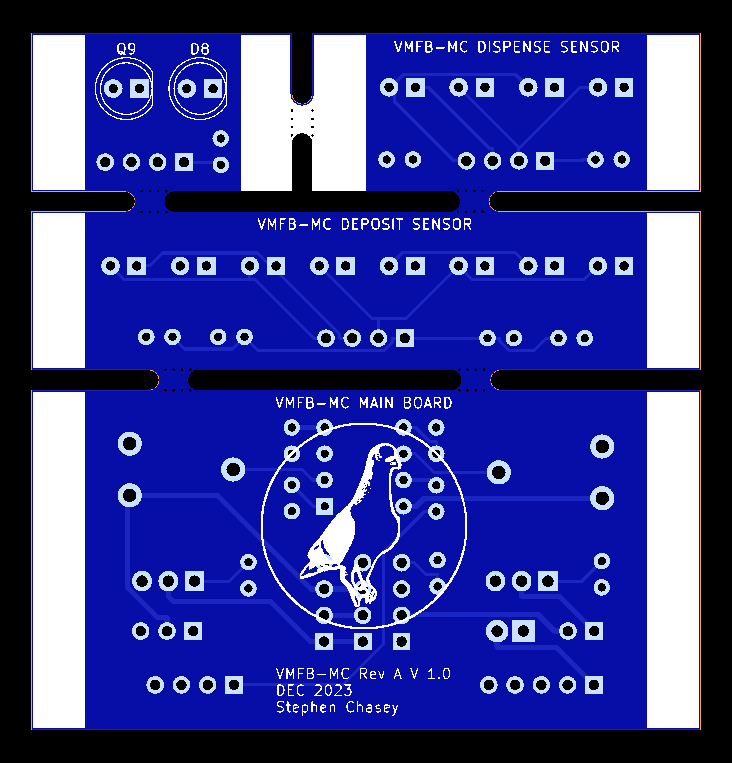
Back
![]()
BOM
Component Count: 44
Ref Qnty Value D1, D2, D3, D4, D5, D6, D8 7 IR LED D7 1 1N4001 J1, J2, J3, J6, J7, J8, J10 7 Conn_01x04_Pin J4 1 Conn_01x02_Pin J5 1 Conn_01x03_Pin J9 1 Conn_01x05_Pin Q1, Q2, Q3, Q4, Q5, Q6, Q9 7 SFH313FA-2/3 Q7, Q8 2 TIP120 R1, R2, R4, R5, R6, R7 6 150R R3 1 1K R8, R9, R10, R11, R12, R13, R14 7 10K RV1, RV2 2 100K U1 1 LM393 Total BOM cost for all electronic components including a Raspberry Pi Zero W, 8GB micro-SD card, a wide-angle camera module, PIR sensor, a motor and a terminal strip (to make the vibration motor) cost €59.62 at Mouser (not the cheapest place, but while I'm in the Dallas area for the holidays delivery is next day). Jumper wires (36x F/F) are not included in this BOM, but cost around €6 in most cases. The PCB will cost about €7 per board at PCBWay.
Here is the Mouser cart (minus some non-informative columns).
Mfr. No Manufacturer Description Order Qty. Price (EUR) Ext.: (EUR) TIP120 STMicroelectronics Darlington Transistors NPN Power Darlington 2 0.744 1.49 SFH 313 FA-2/3 ams OSRAM Phototransistors PHOTOTRANSISTOR 7 0.642 4.49 LM393P Texas Instruments Analog Comparators Dual Differential 1 0.428 0.43 1N4001 Diotec Semiconductor Rectifiers Diode, DO-41, 50V, 1A 1 0.214 0.21 15400594F3590 Wurth Elektronik Infrared Emitters WL-TIRC IR THT Blue 5mm 940nm 7 0.4 2.8 61304011121 Wurth Elektronik Headers & Wire Housings WR-PHD 2.54mm Hdr 40 P Single Str Gold 1 1.42 1.42 MF1/4LCT52R151J KOA Speer Metal Film Resistors - Through Hole 1/4 WATT 150 OHM 5>#/td### 6 0.101 0.61 MF1/4LCT52R102J KOA Speer Metal Film Resistors - Through Hole 1/4 WATT 1K OHM 5>#/td### 1 0.101 0.1 MF1/4LCT52R103J KOA Speer Metal Film Resistors - Through Hole 1/4 WATT 10K OHM 5>#/td### 7 0.101 0.71 PT10WV10-104A2020-1CRPM Amphenol Trimmer Resistors - Through Hole 100K 20% 10mm POT CREAM COLOR SHAFT 2 0.886 1.77 114992065 Seeed Studio Camera Accessories Camera Cable for Raspberry Pi Zero 1 2.3 2.3 SC0065 Raspberry Pi Single Board Computers Raspberry Pi Zero WH (With Pre-soldered GPIO Header) 1 14.88 14.88 U054 M5Stack Infrared Detectors An M5StickC compatible human body induction sensor 1 3.26 3.26 PPN7PA12C1 MinebeaMitsumi AC, DC & Servo Motors DC Brush Motor, Flat, 11605RPM, 5VDC 1 2.7 2.7 39100-1802 Molex Barrier Terminal Blocks TERM STRIP 8MM HIGH PROF 2 CIR WHT 1 0.735 0.74 114110130 Seeed Studio Cameras & Camera Modules OV5647-160 FOV IR Camera module for Raspberry Pi 3B+4B, suitable for large or night landscape surveillance 1 12 12 SDSDQAB-008G SanDisk Memory Cards 8GB UHS Class 4 MicroSD Card WD/SD 1 9.71 9.71 I hope to have one of these built and tested in January. I will prototype it with a Rasperry Pi Zero W and add the code for this to the repo, too.
Vending Machine for Birds
Simple, inexpensive bird feeder that dispenses peanuts in exchange for dropping stuff in a hole. A vending machine for clever birds.