Close
0%
0%

Internet of Things Microscope

We are updating the microscope using open source materials to make microscopy accessible globally

Similar projects worth following
Using a modular design based on a Raspberry PI 3, our challenge will be to update the microscope using low cost and open-source materials. We are going to build a microscope that can go anywhere! This microscope is capable of transmitting images to a screen, e-mail or internet location around the world. It will scan an entire plate to create a single high resolution image for visualization of microscopic objects. Citizen scientists can now bring a microscope anywhere and use it. Our project will increase the accessibility of students who are home-bound, unable to attend a class, or lecture to still be able to see the demonstration video and pictures of real-time microscopy. Our project will also allow developing countries to have access to previously very expensive technology. This microscope will not only be easy to build, but will cost a fraction of the price of current technology.

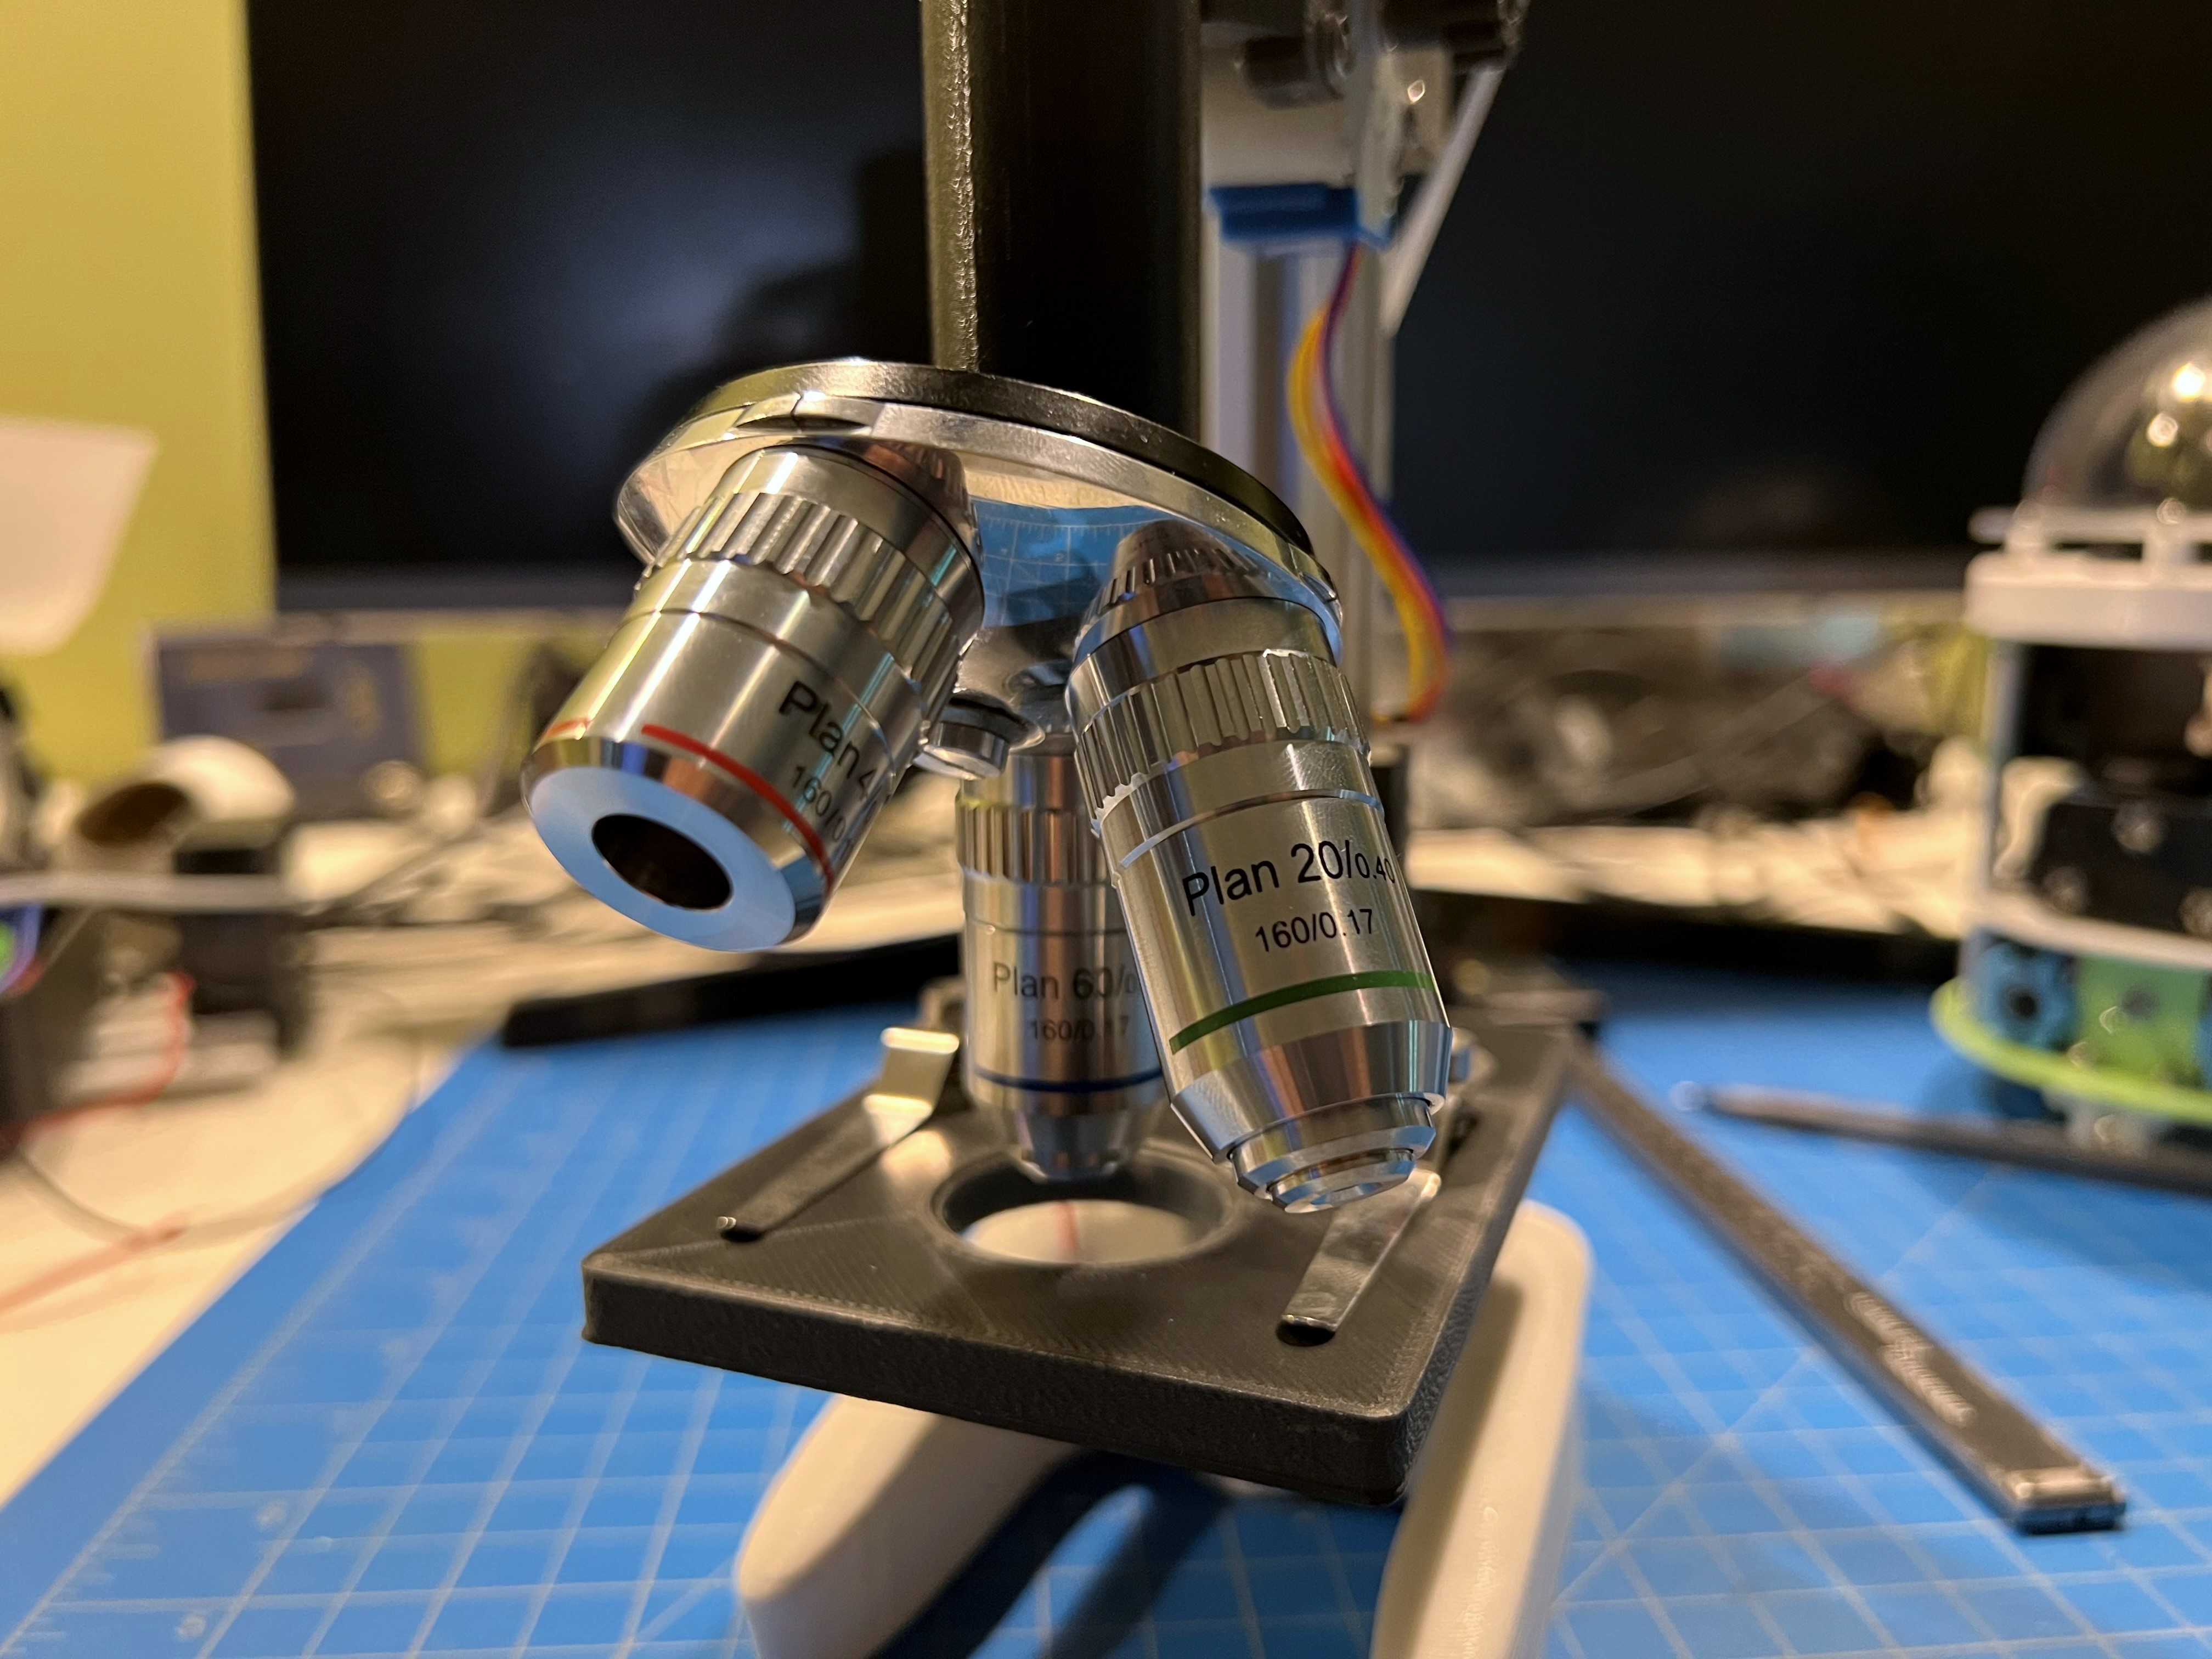
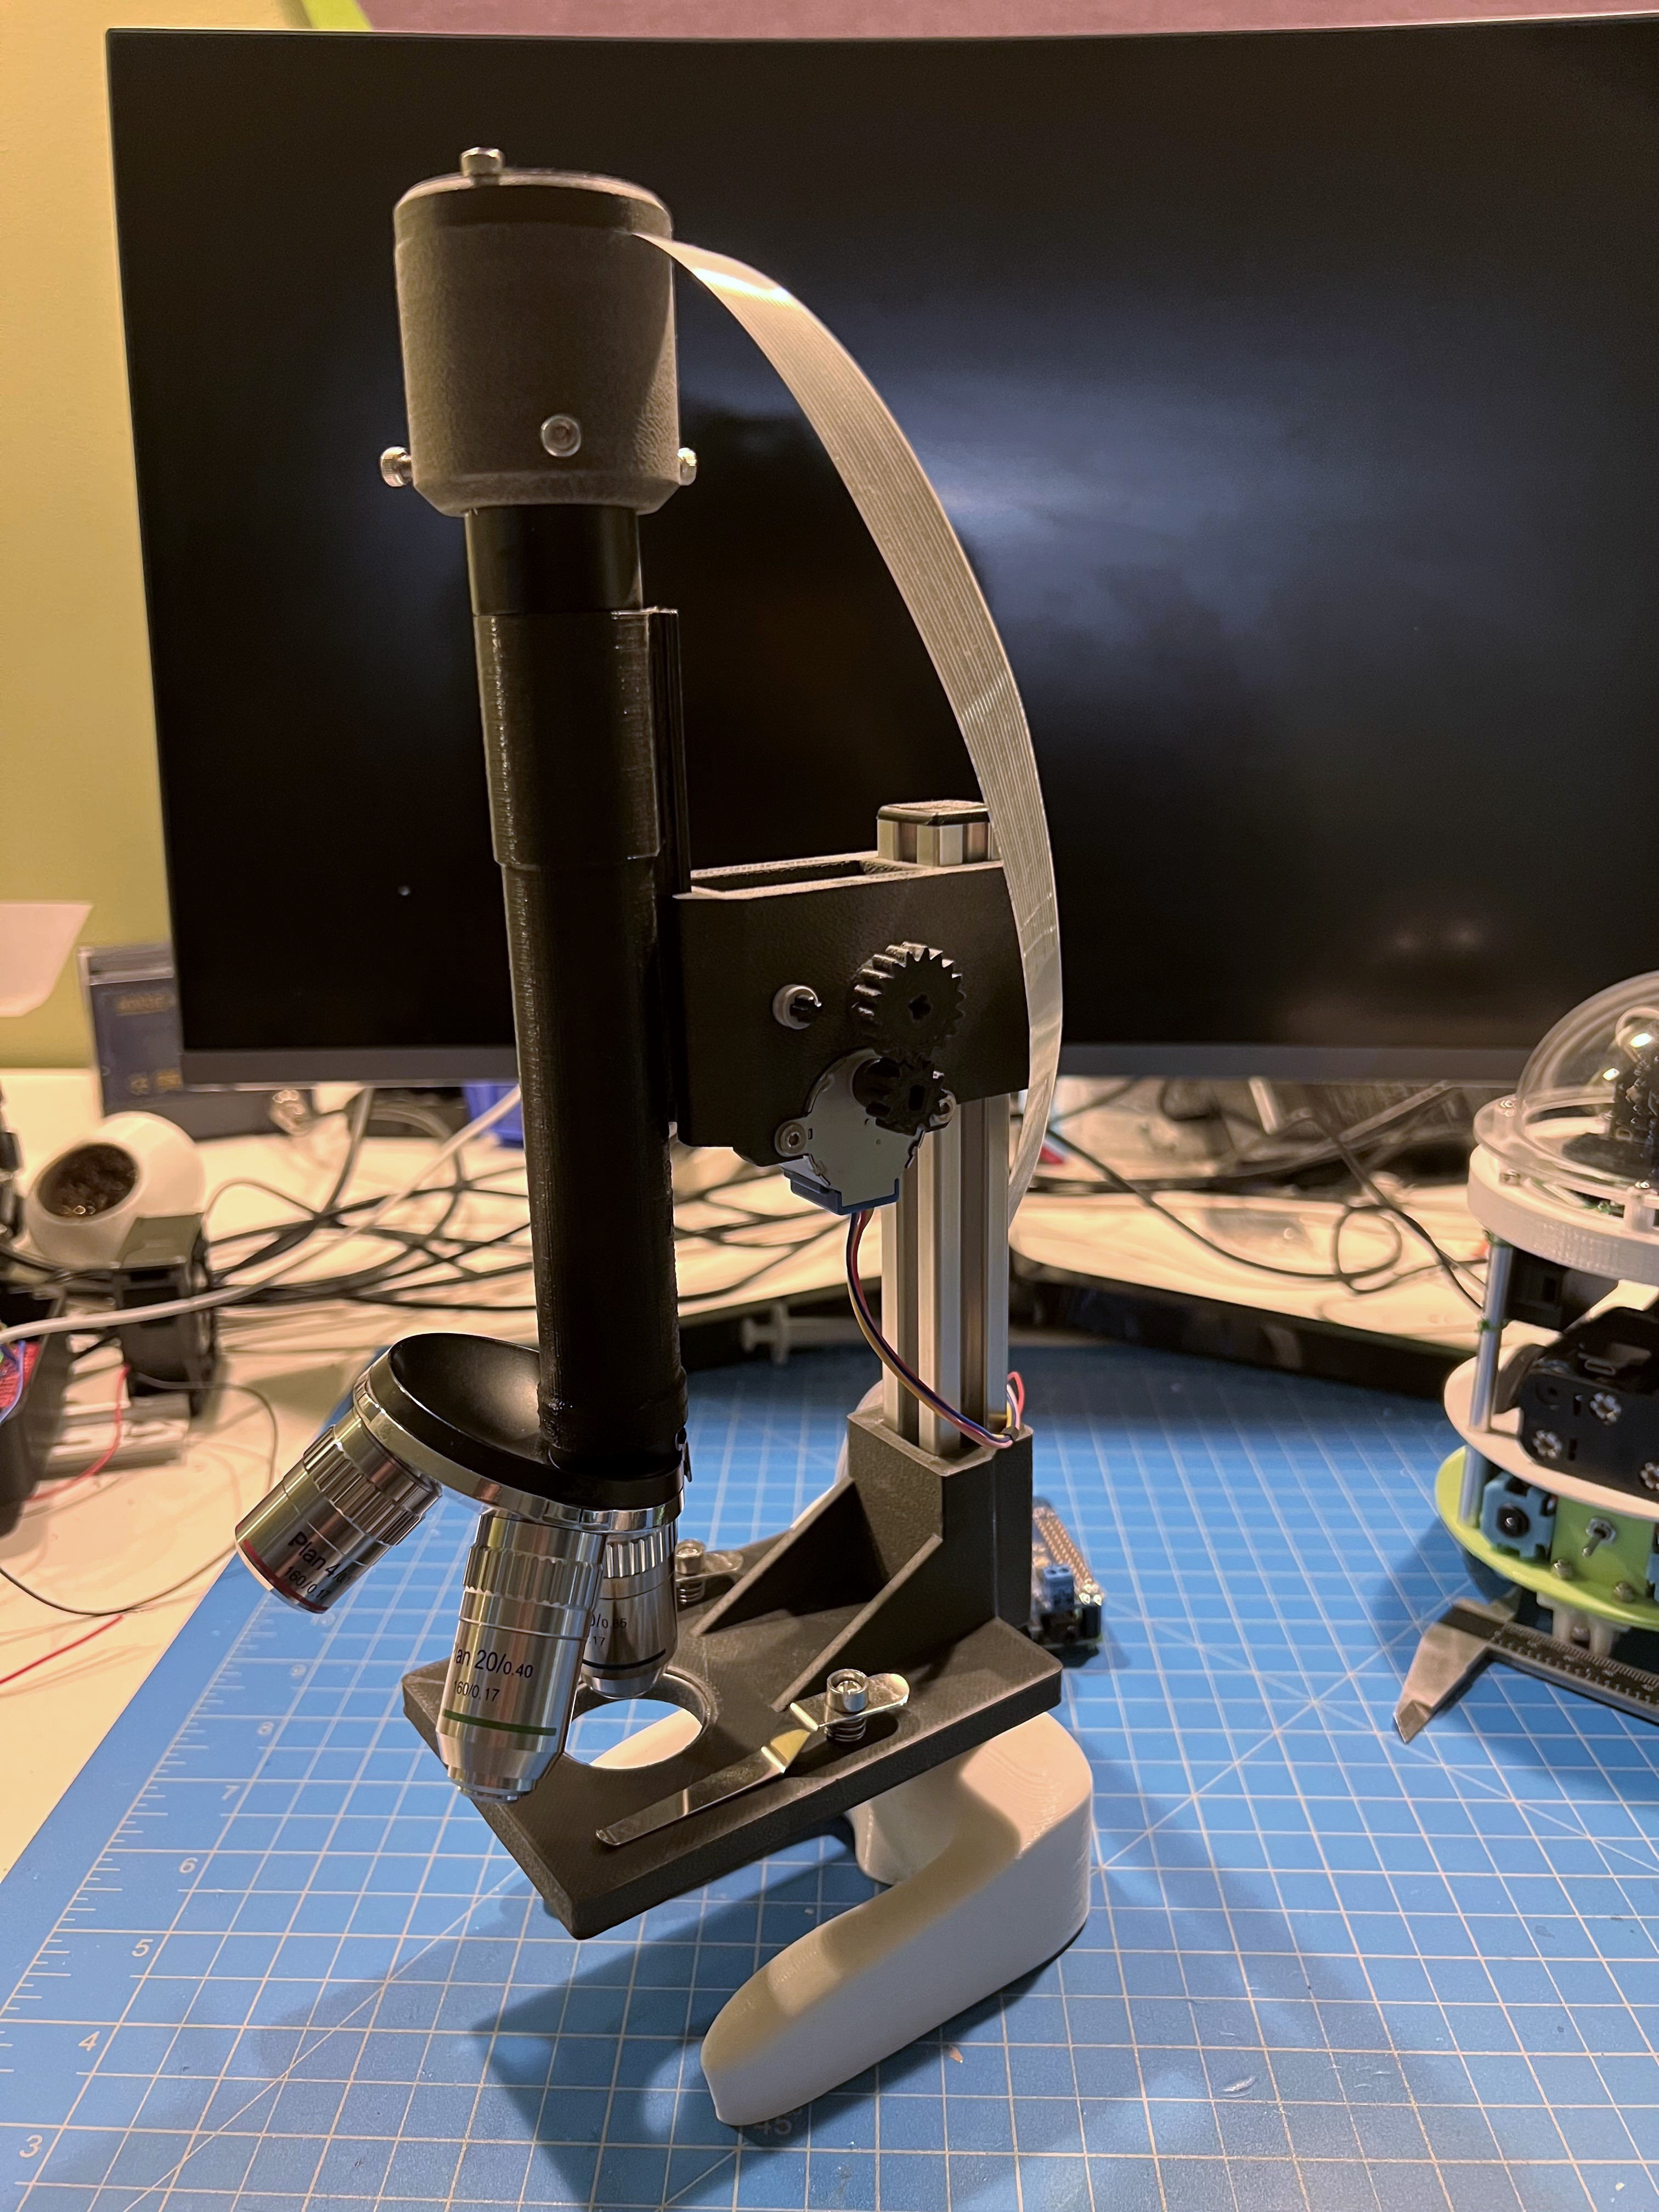
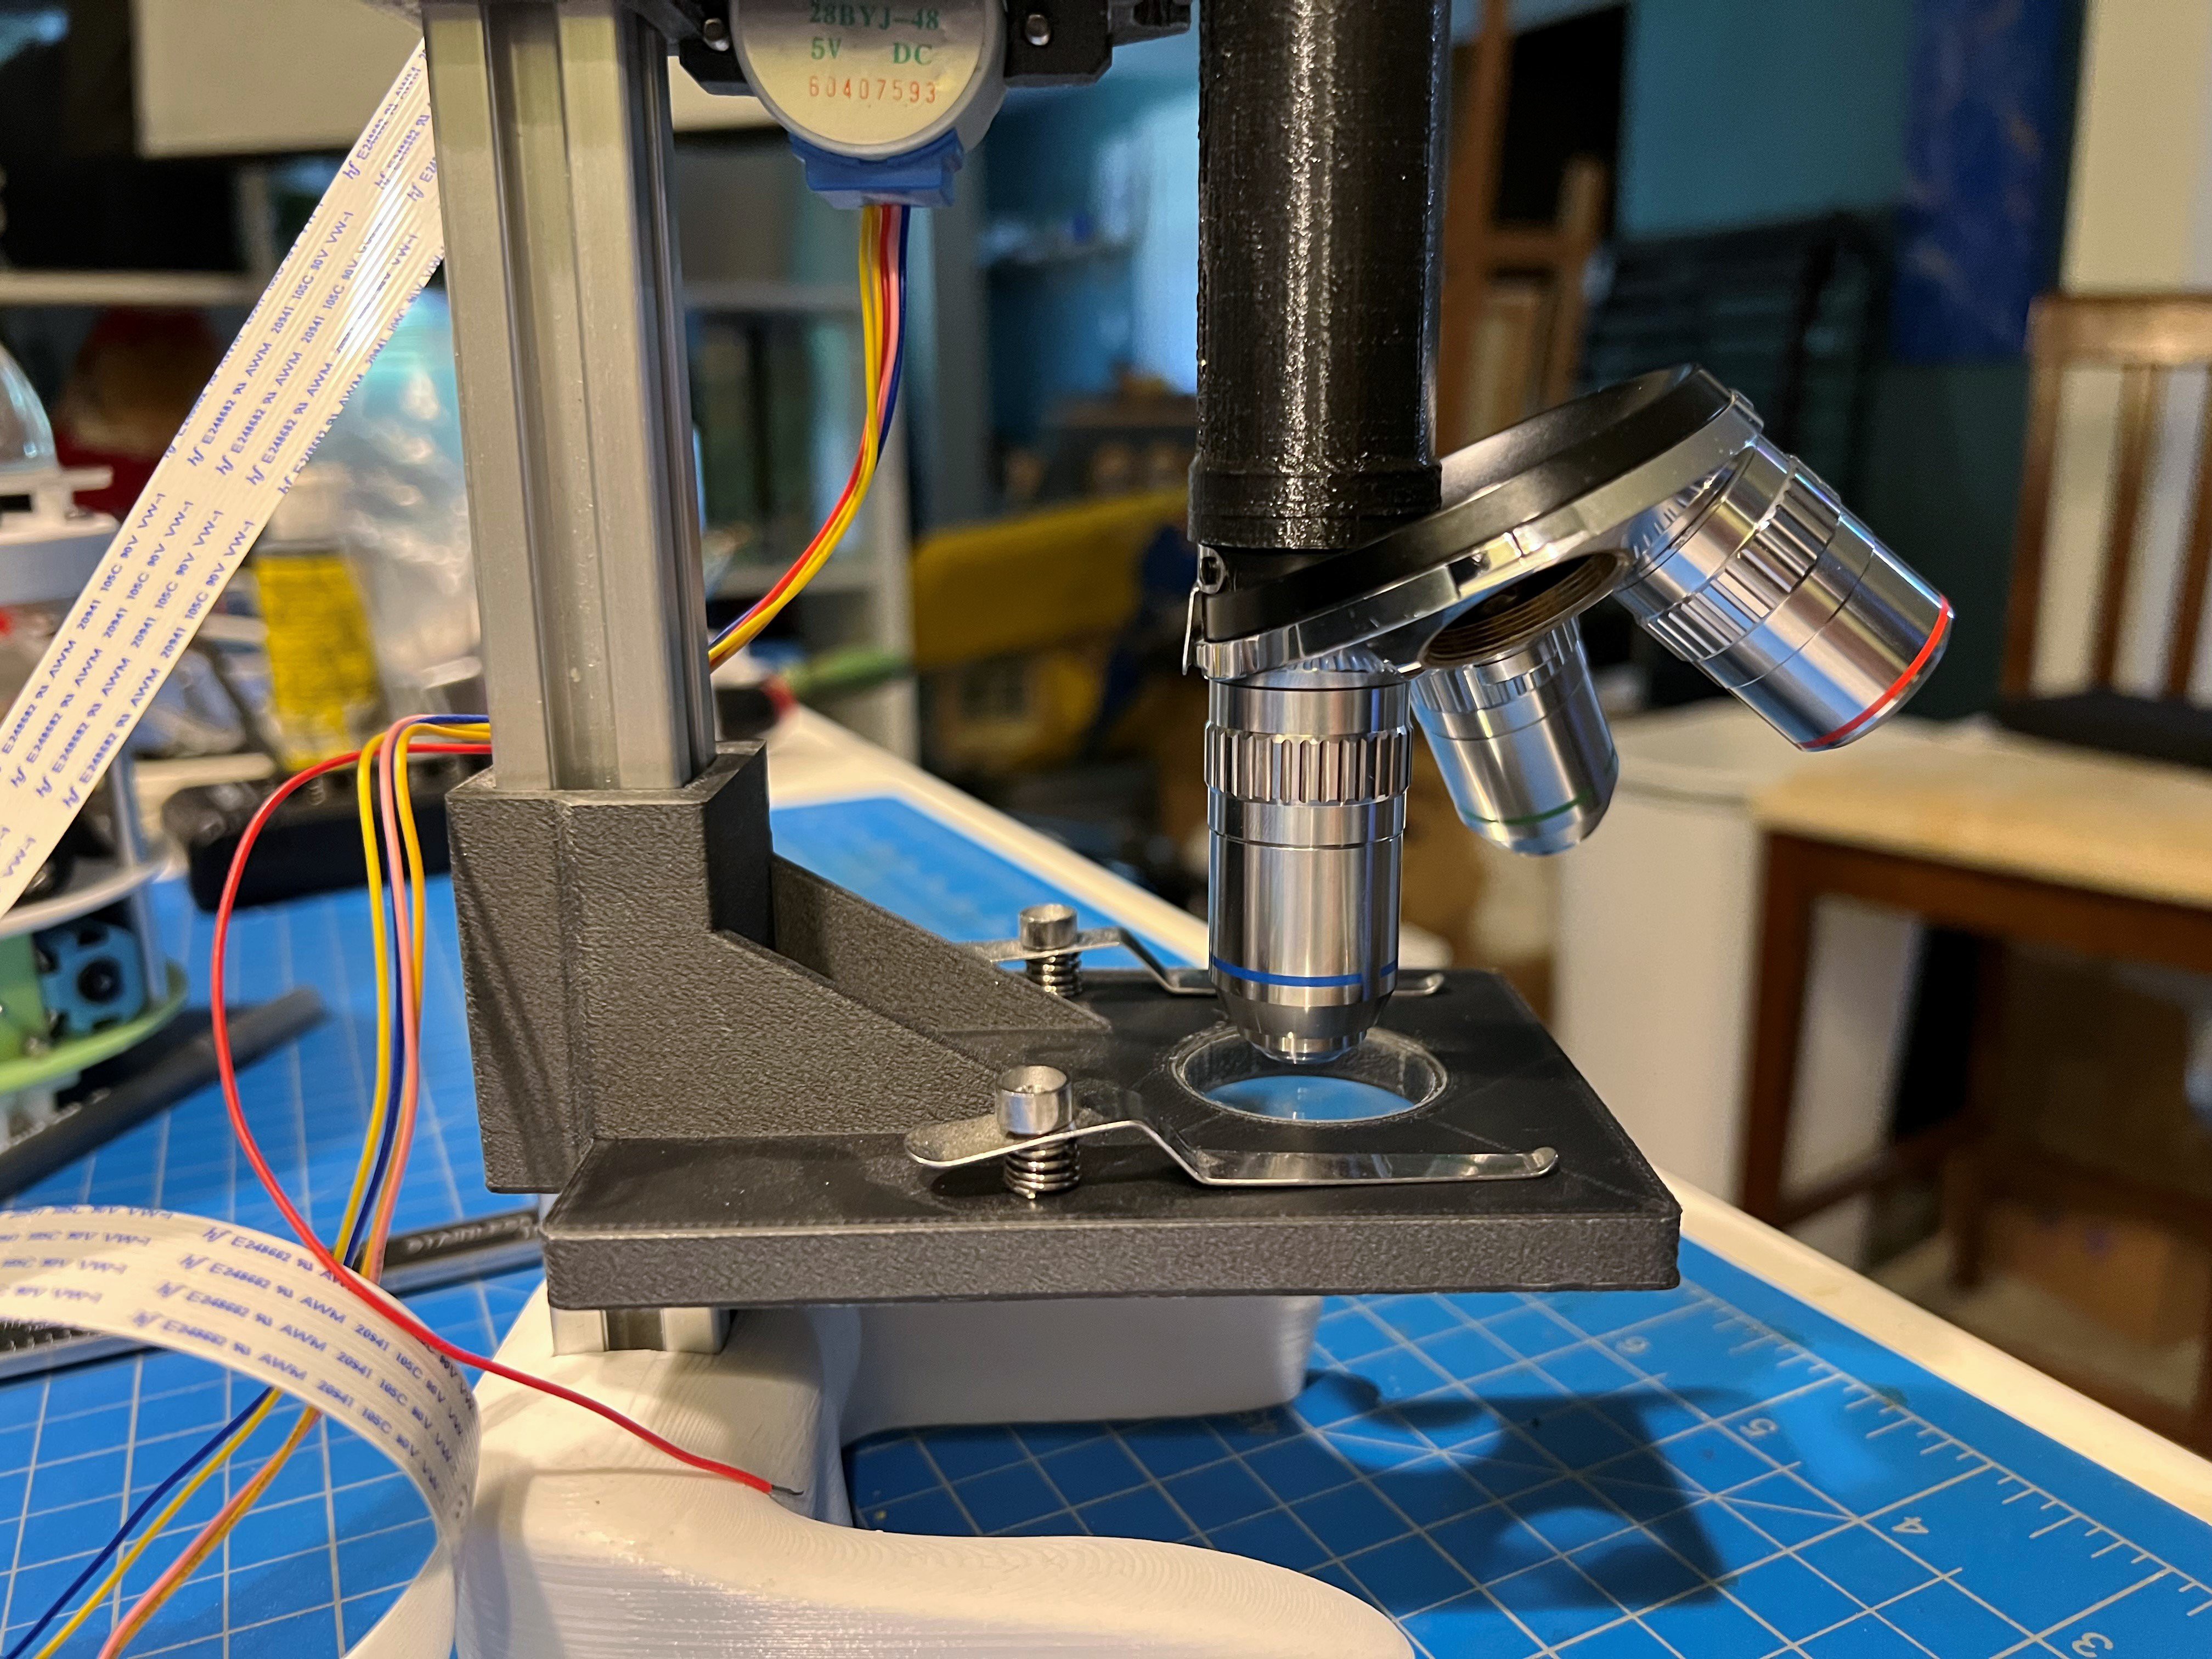
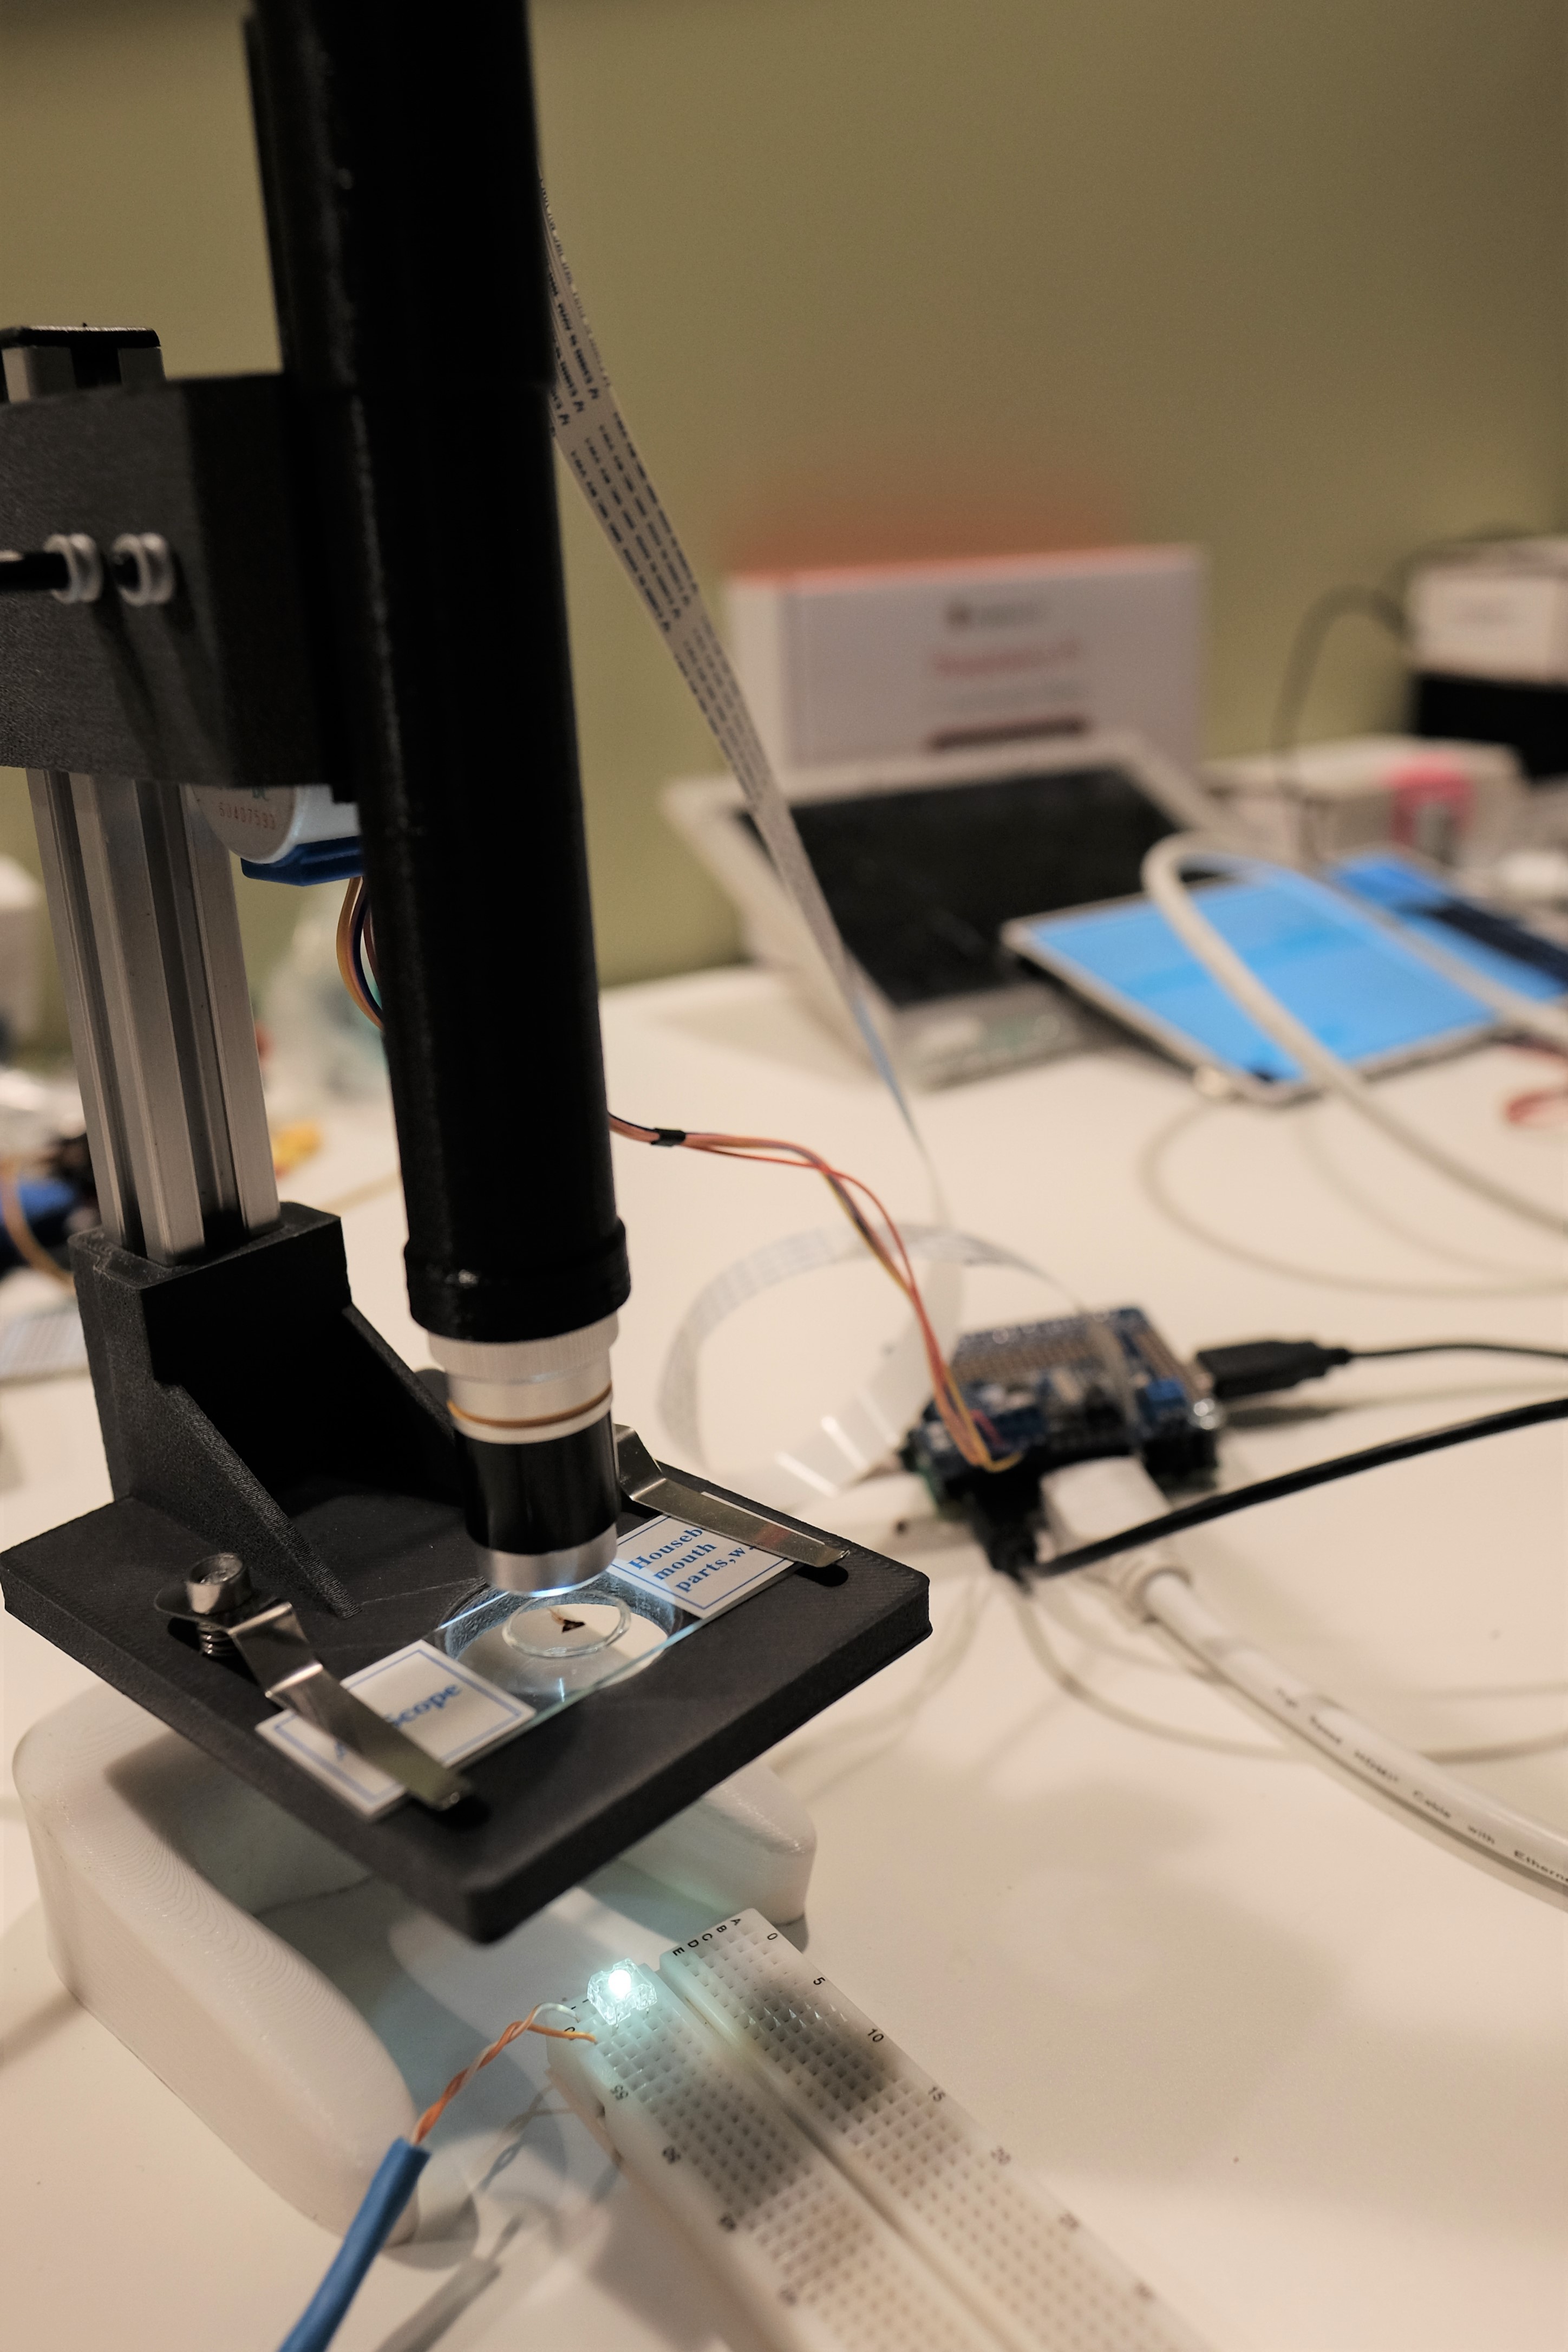
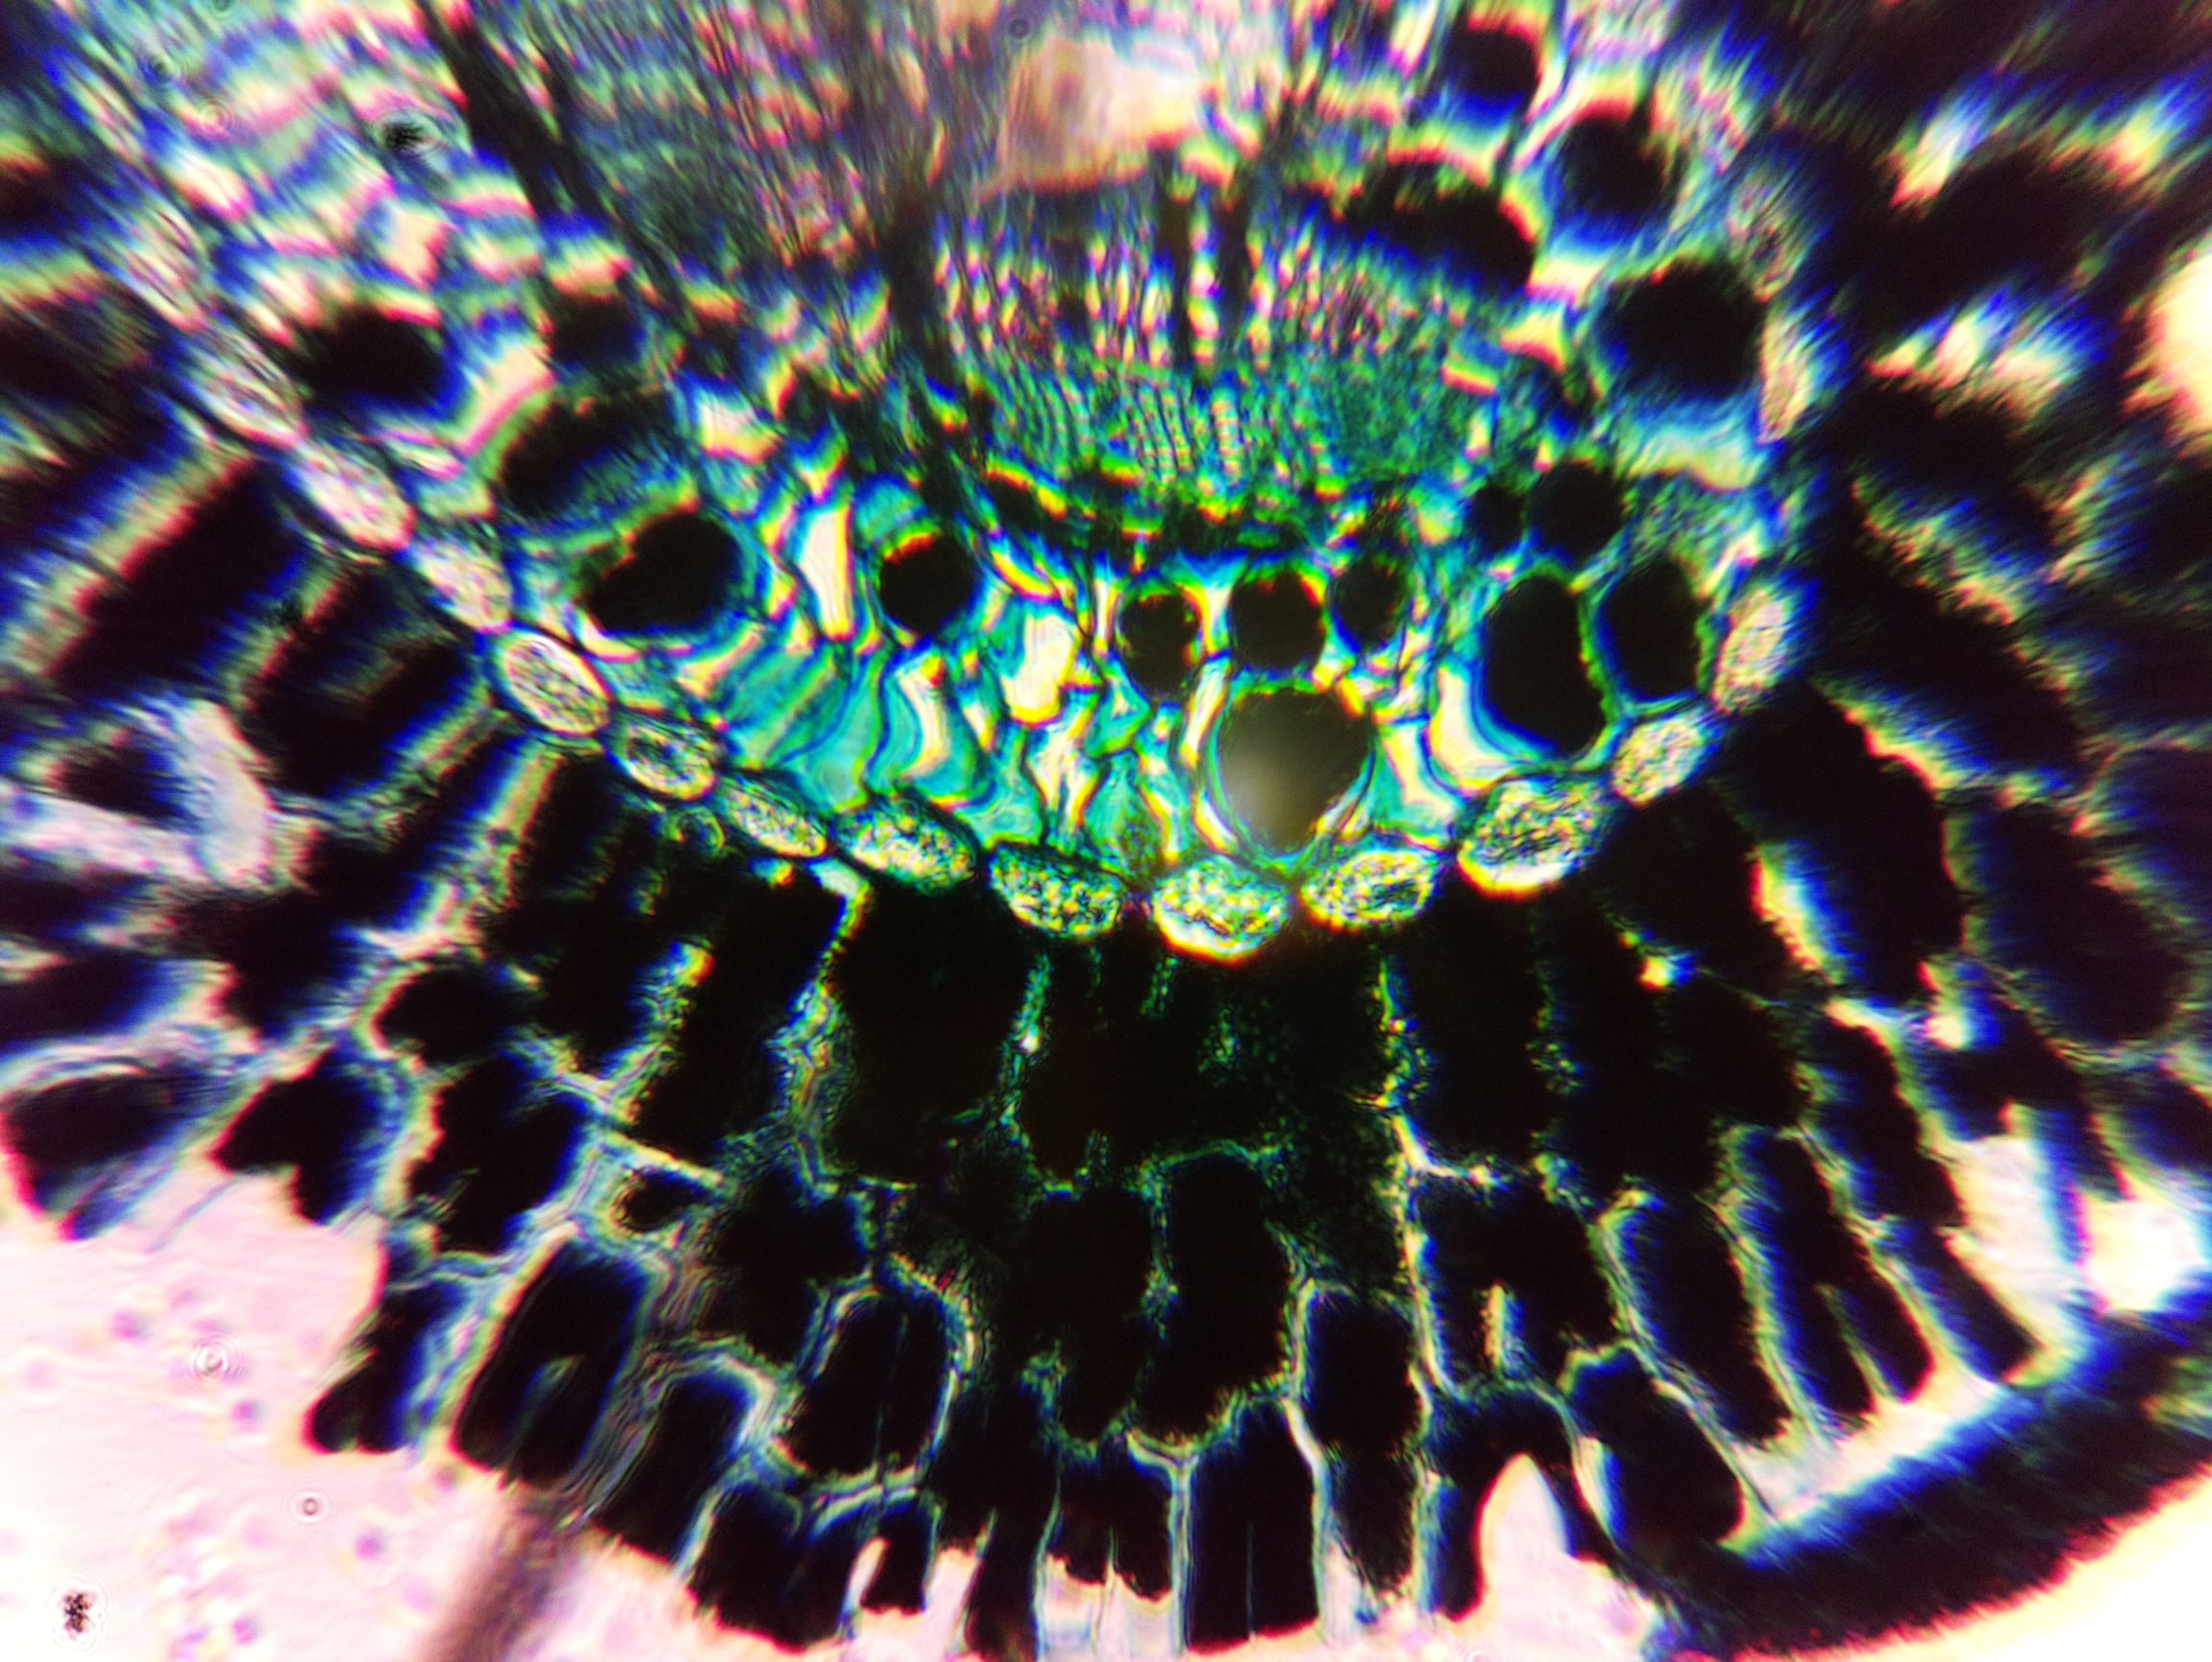
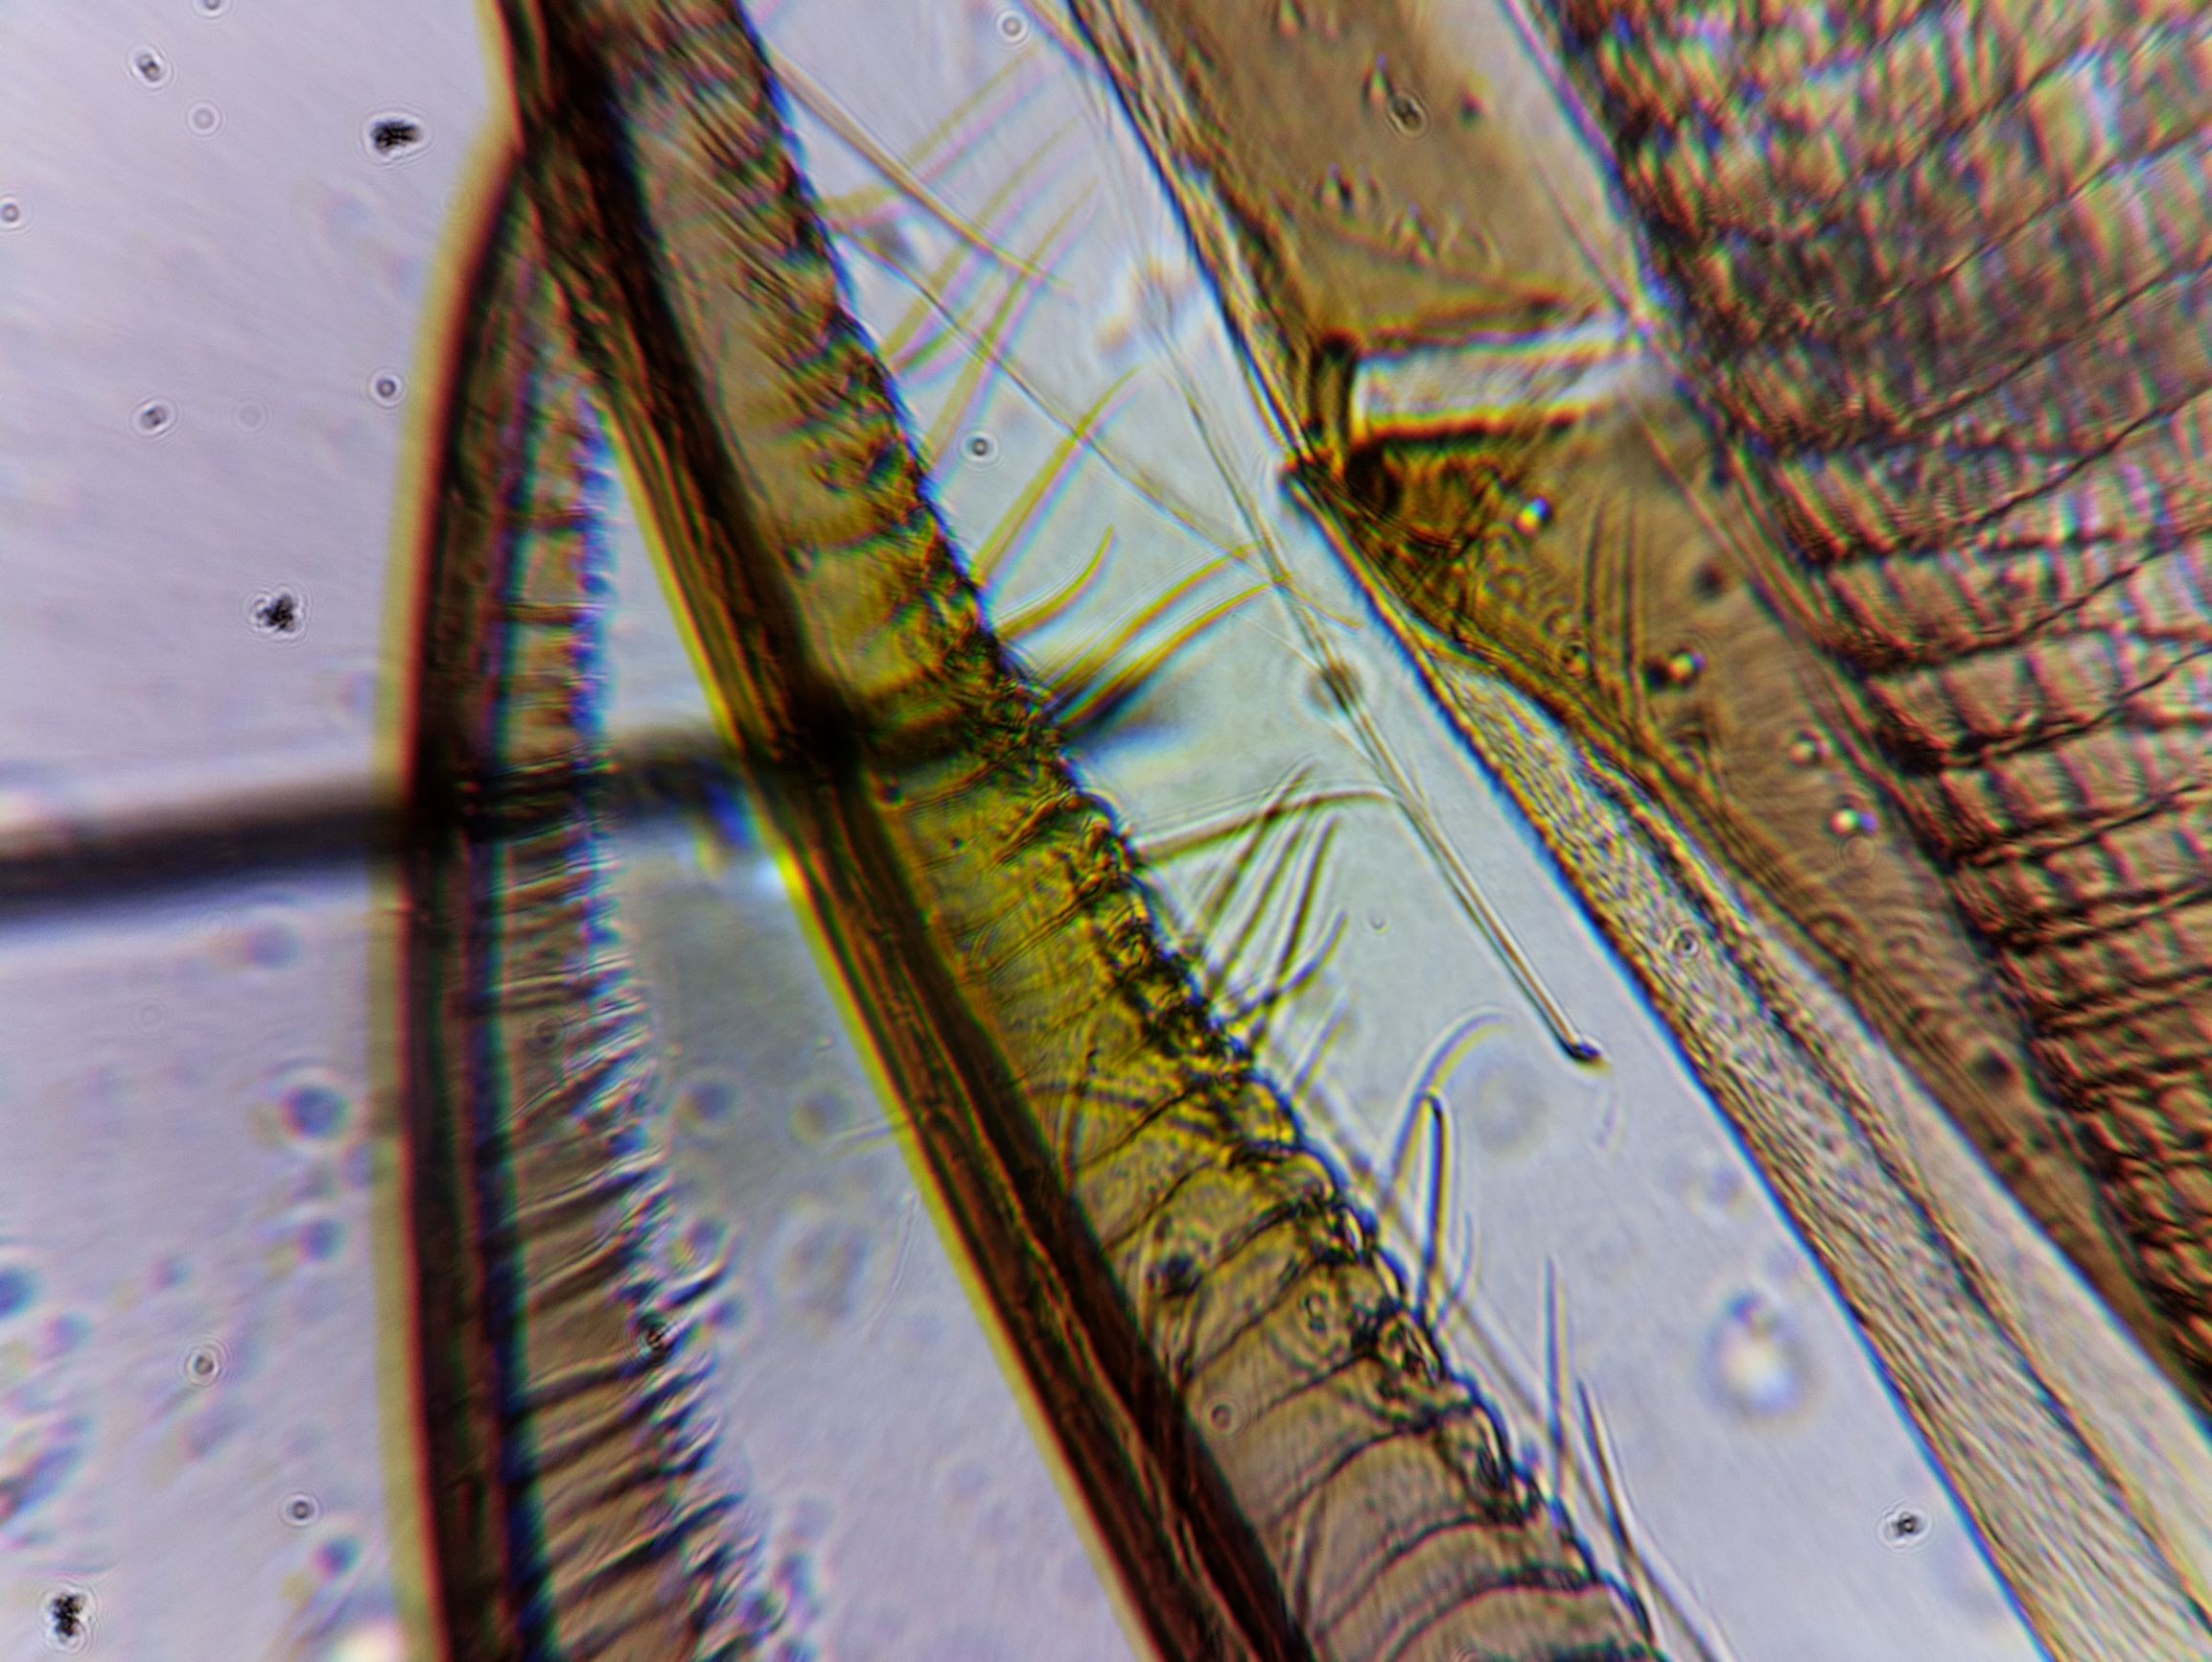
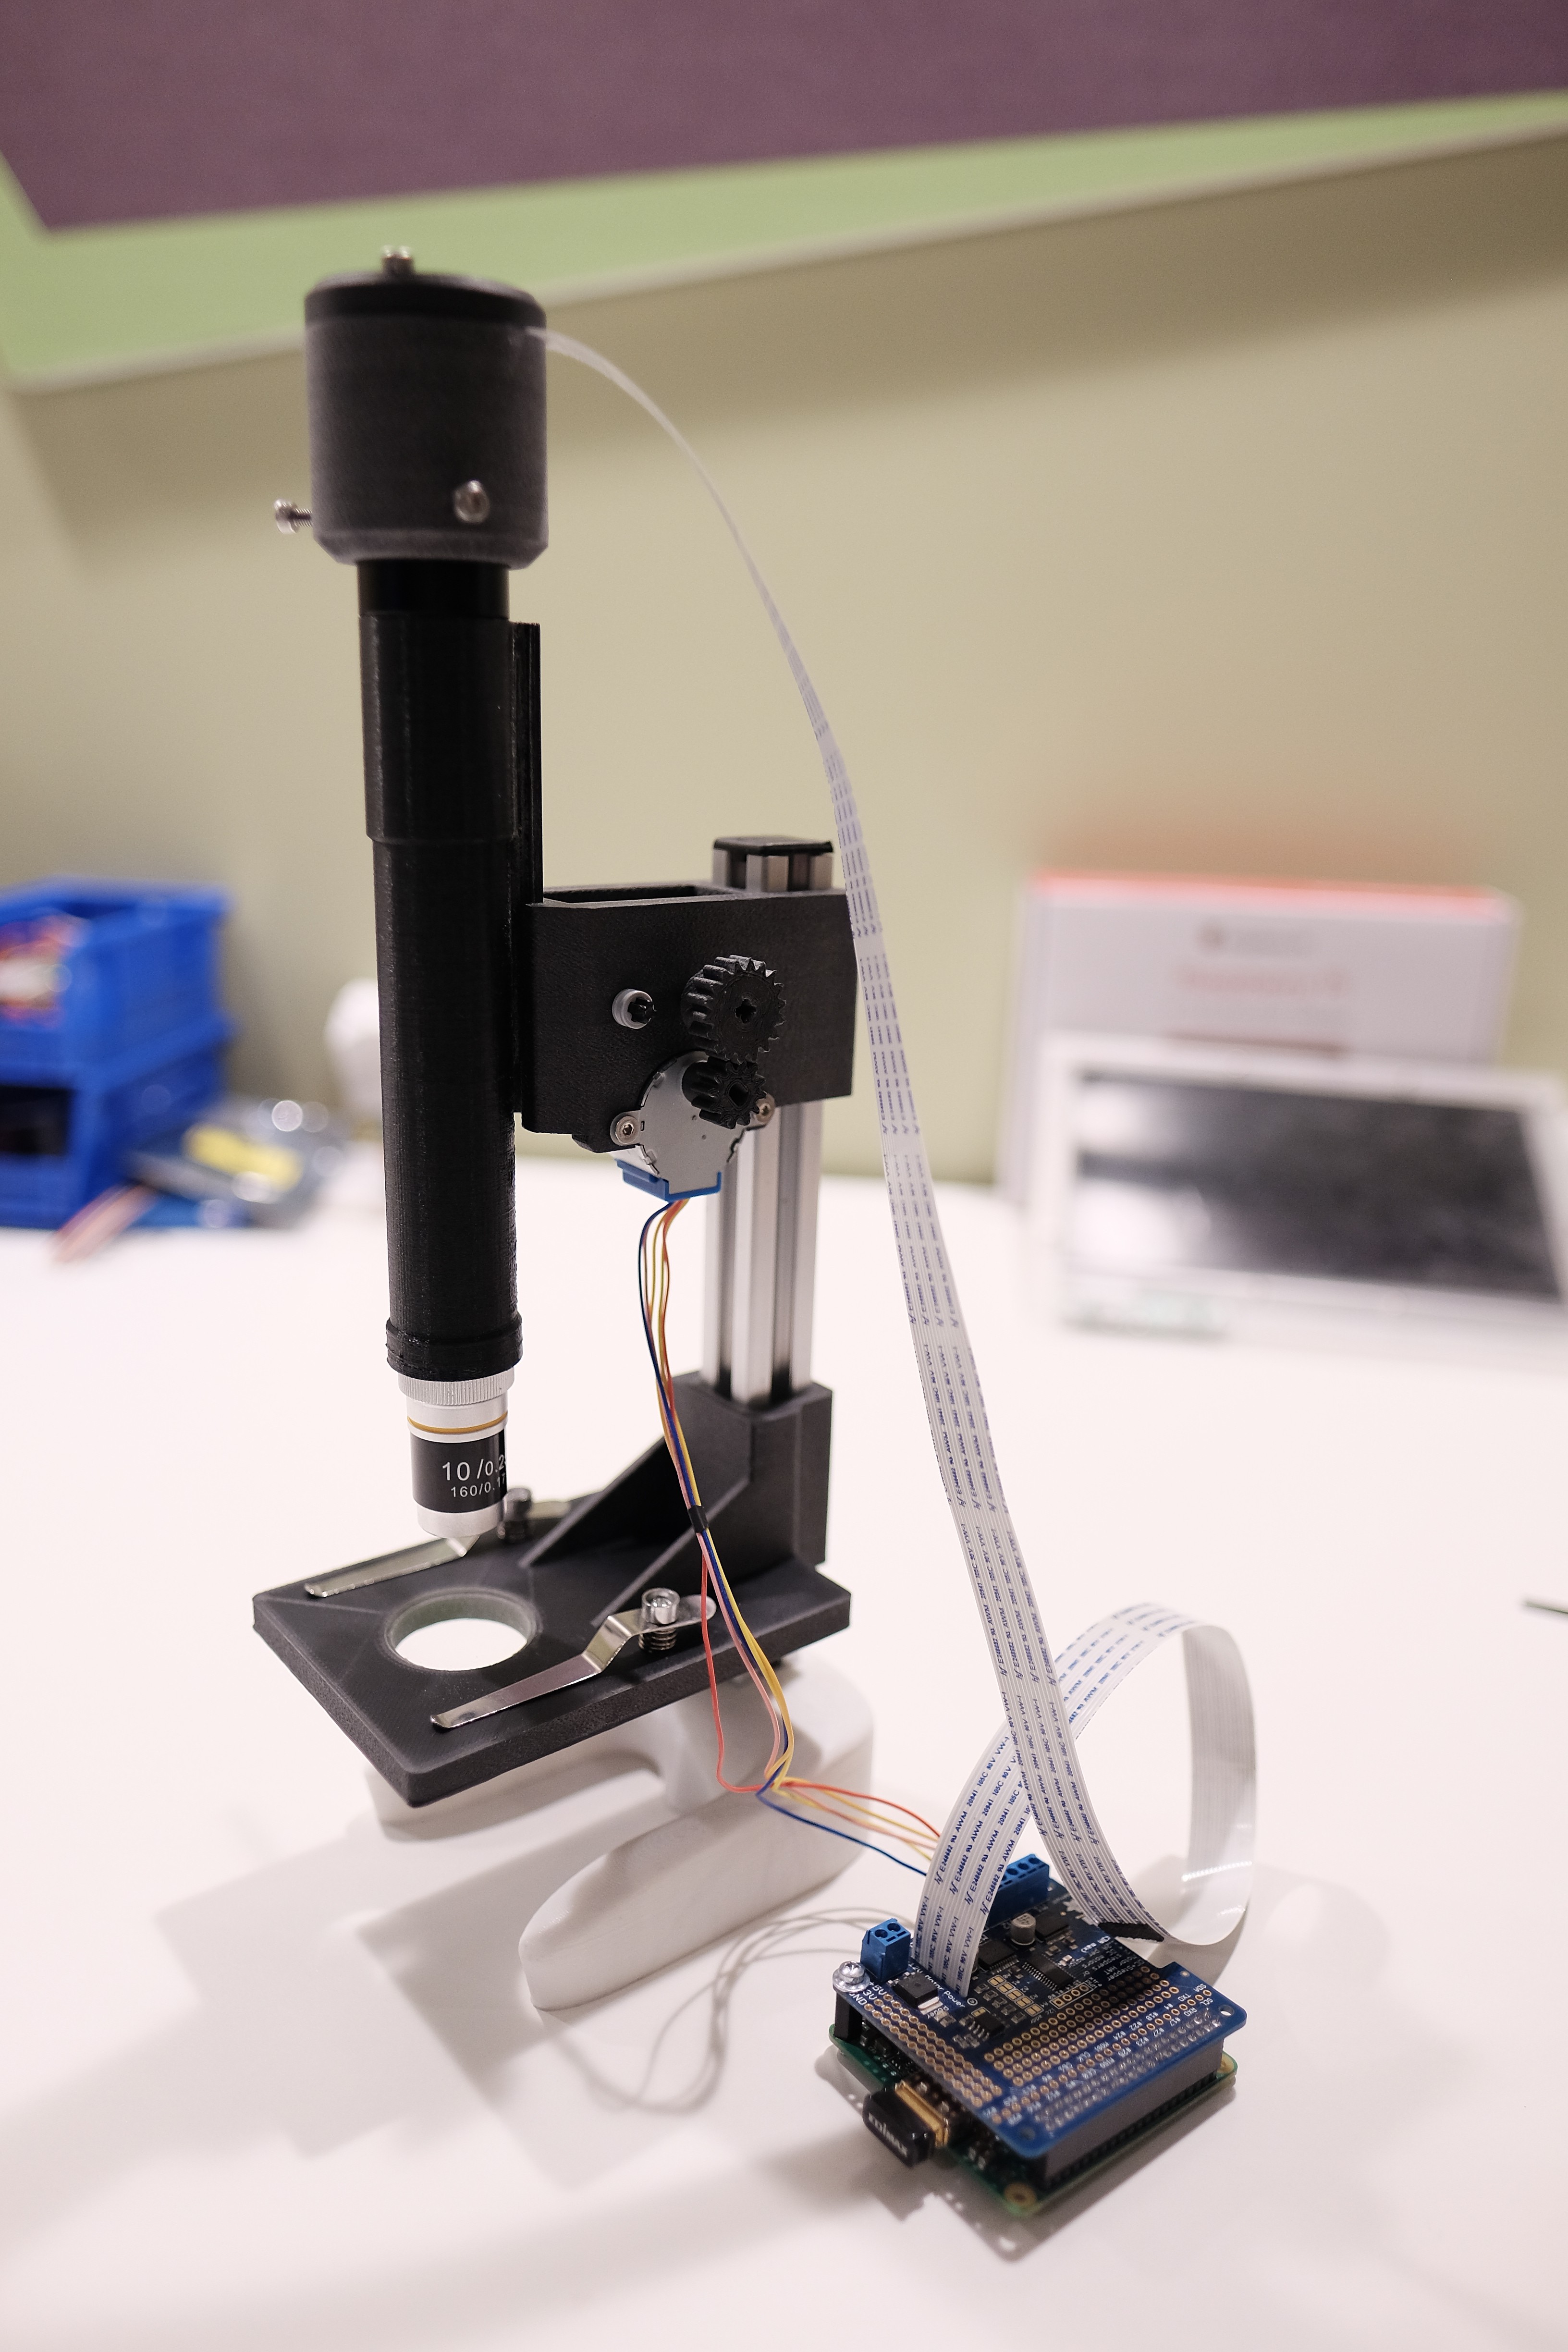
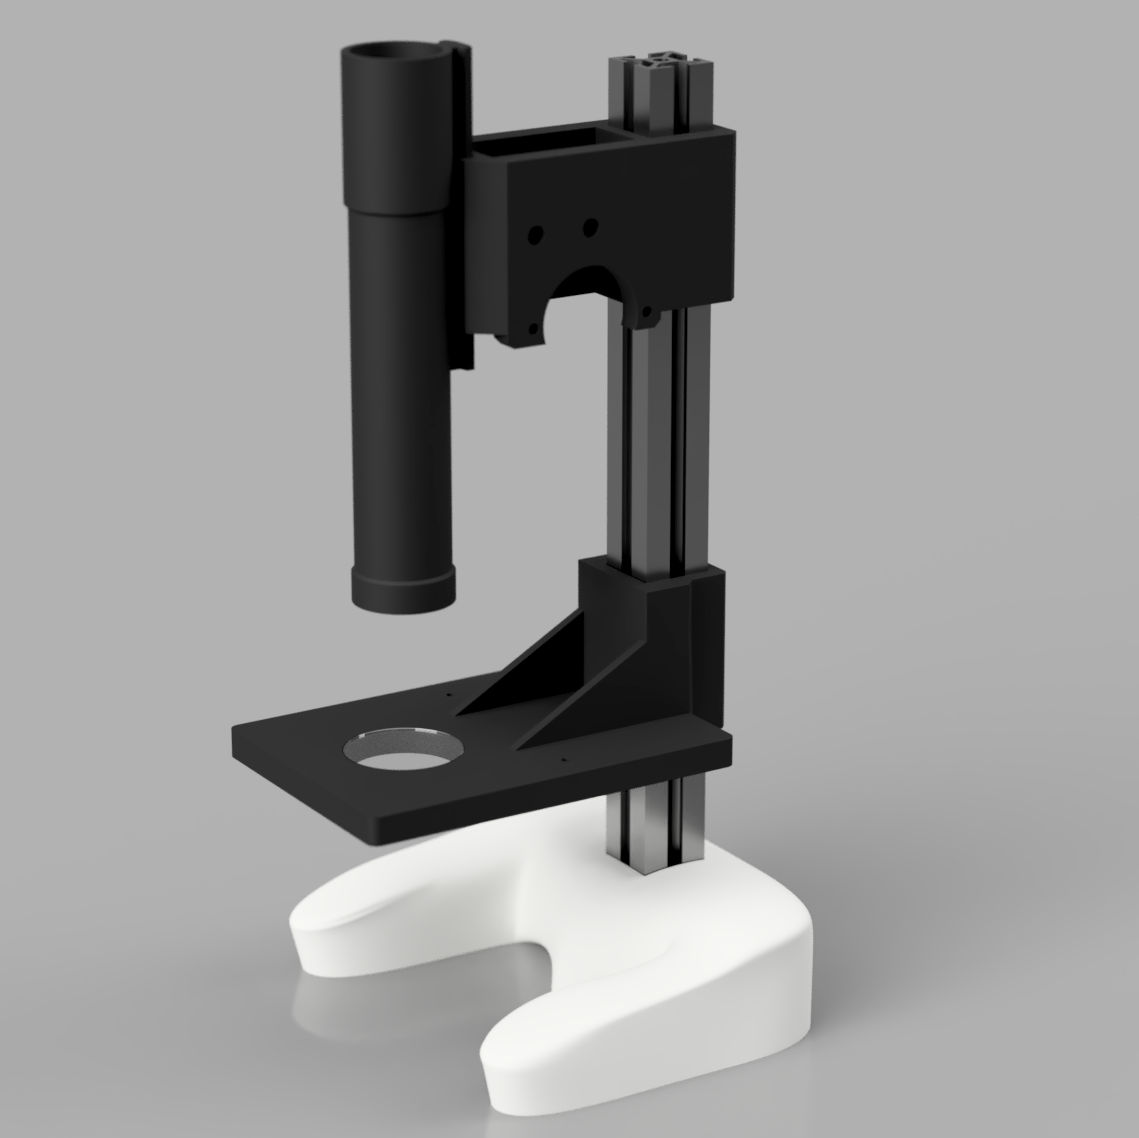
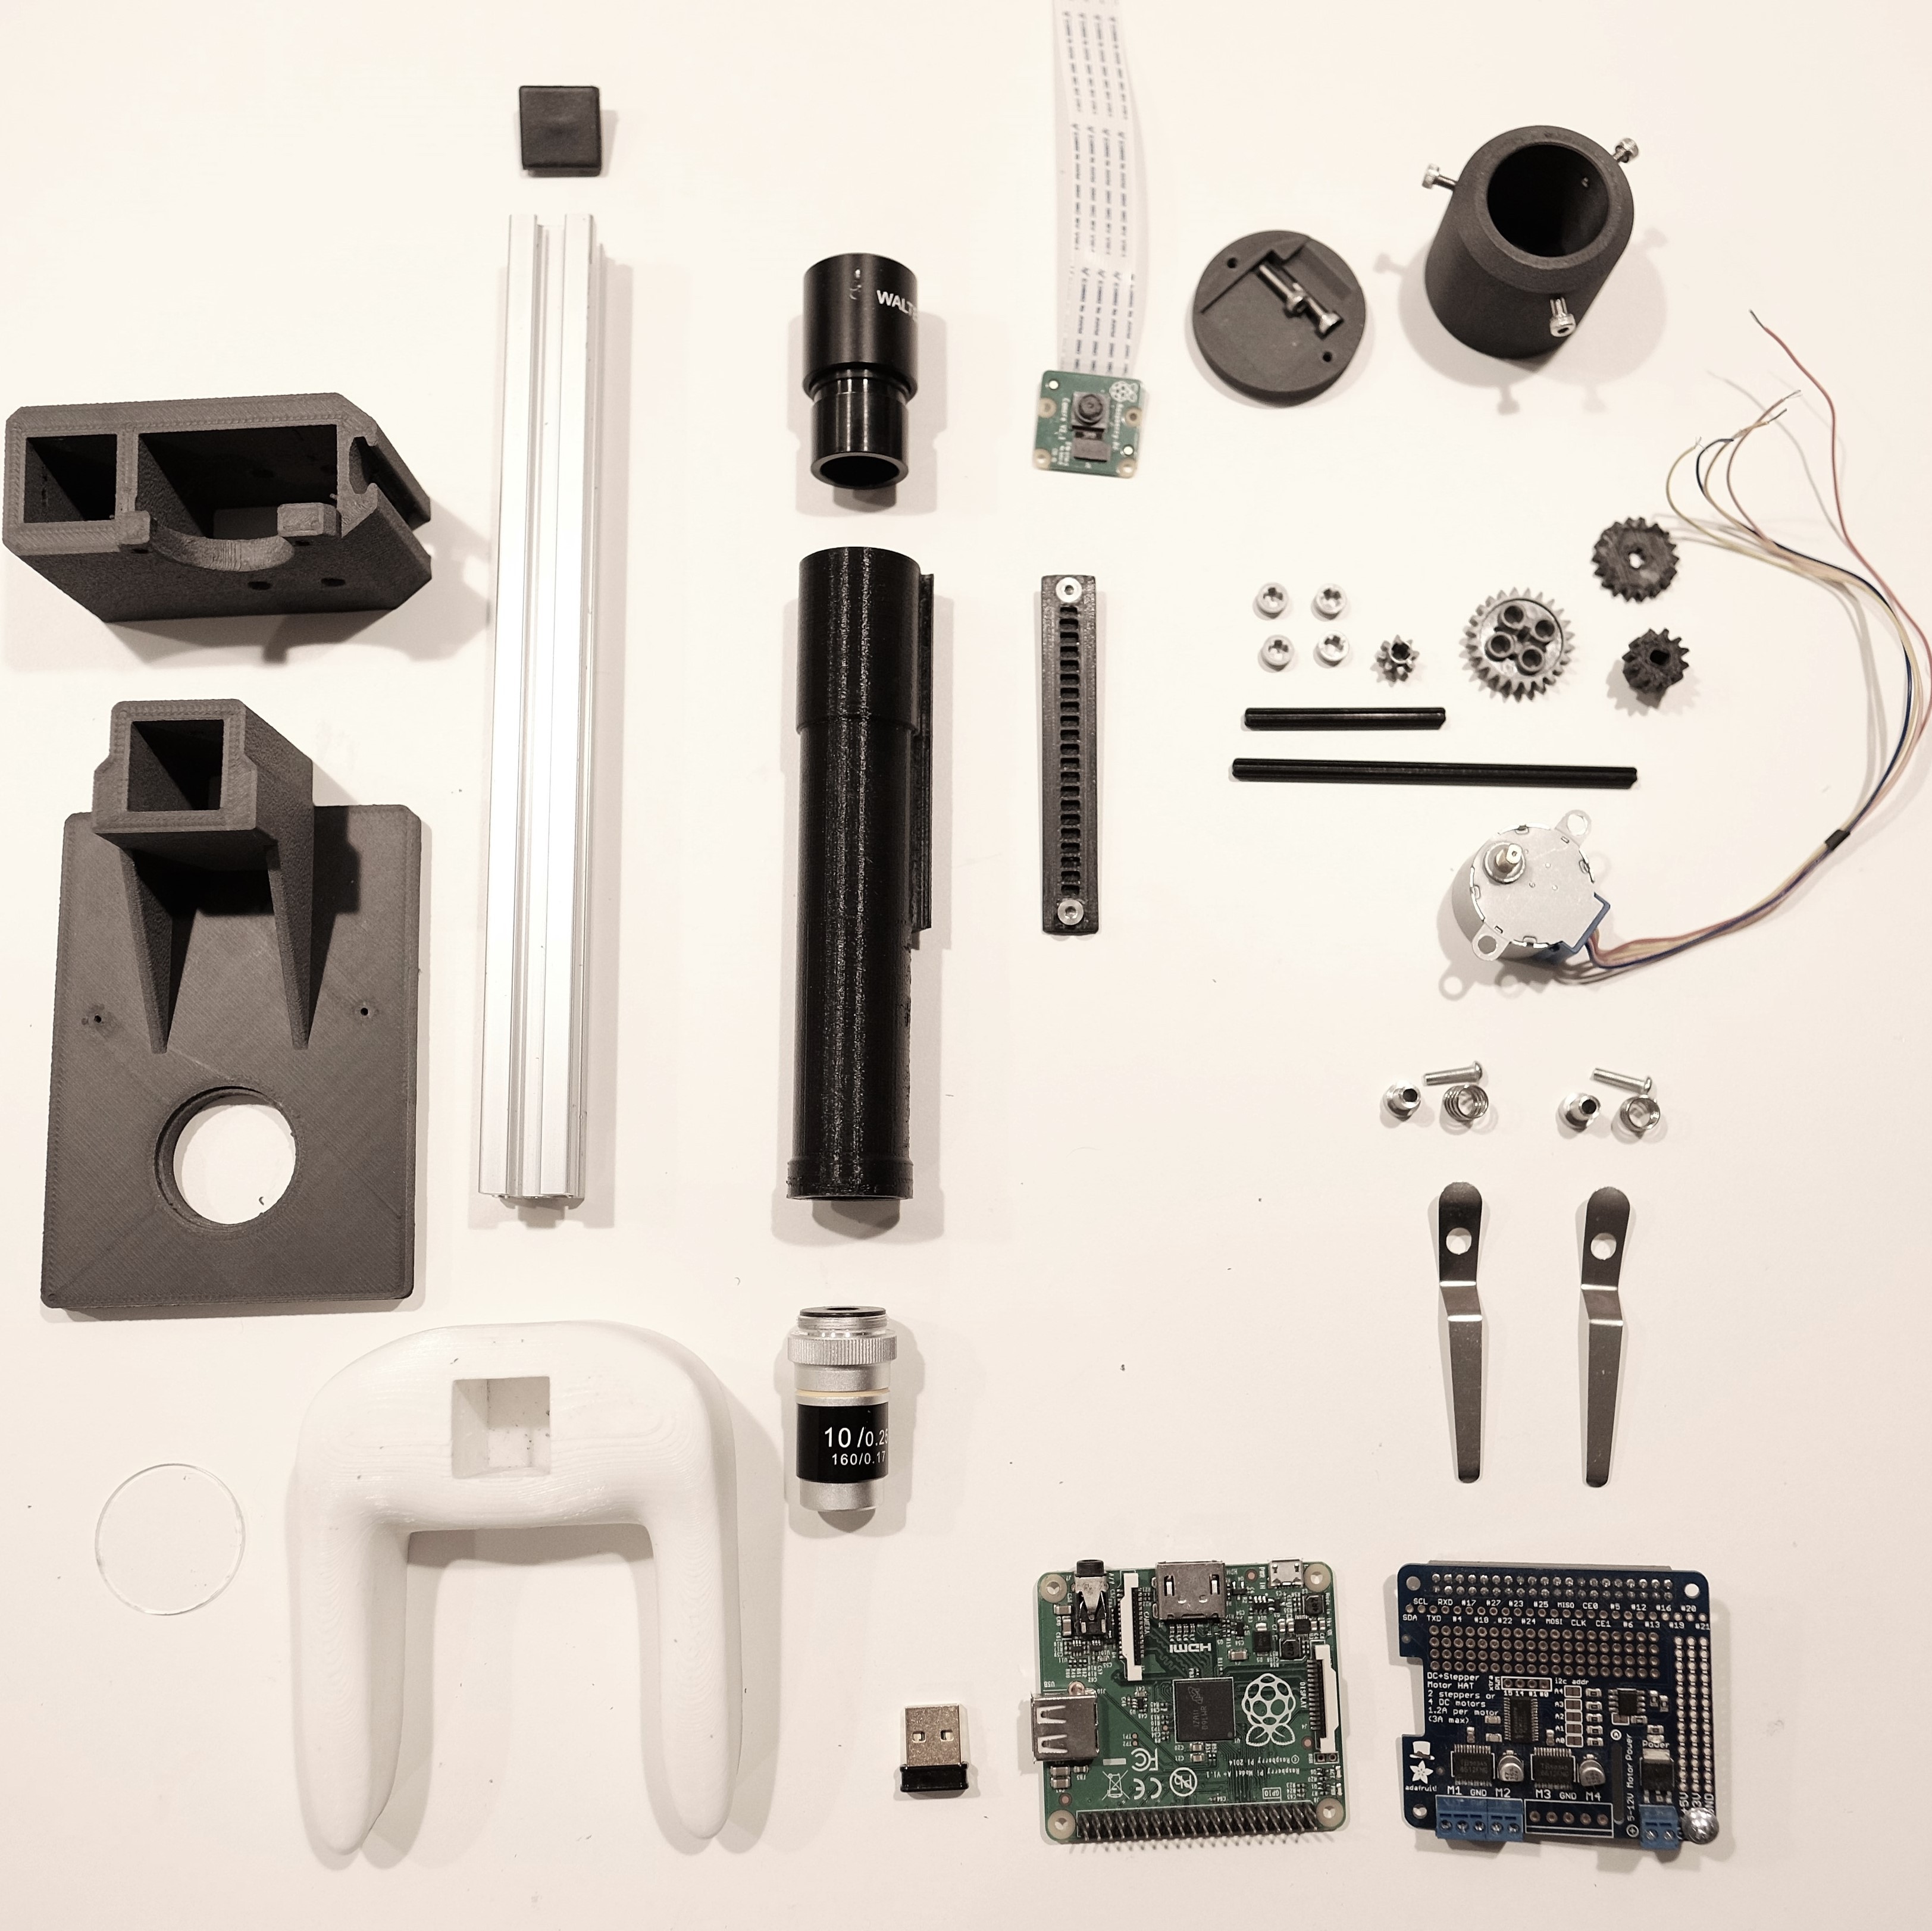
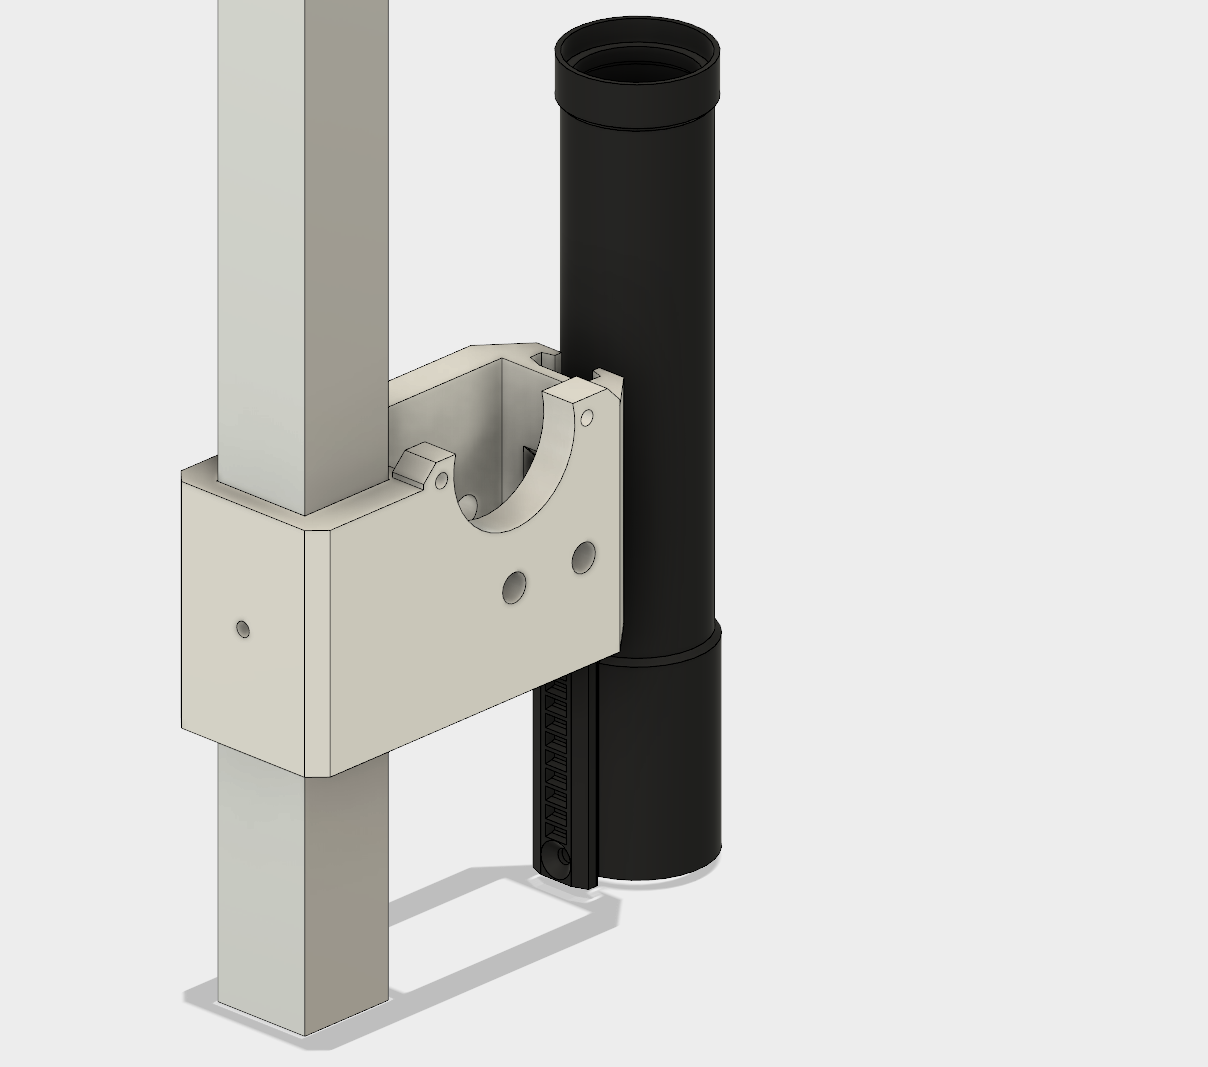
We are building a low cost IoT microscope based on the Raspberry Pi 3. Using easily changeable glass objectives. This microscope will provides various magnification. (40x, 100x, 400x). The microscope will scan the specimen on the x and y axis and stitch the images together to create a large and very detailed image that can be reviewed on a internet connected phone, tablet or computer. We will be making the design as low cost as possible so that anyone in the world has access to a very powerful digital microscope. Citizen scientists from around the world will soon have a new powerful tool to aid in future discoveries.

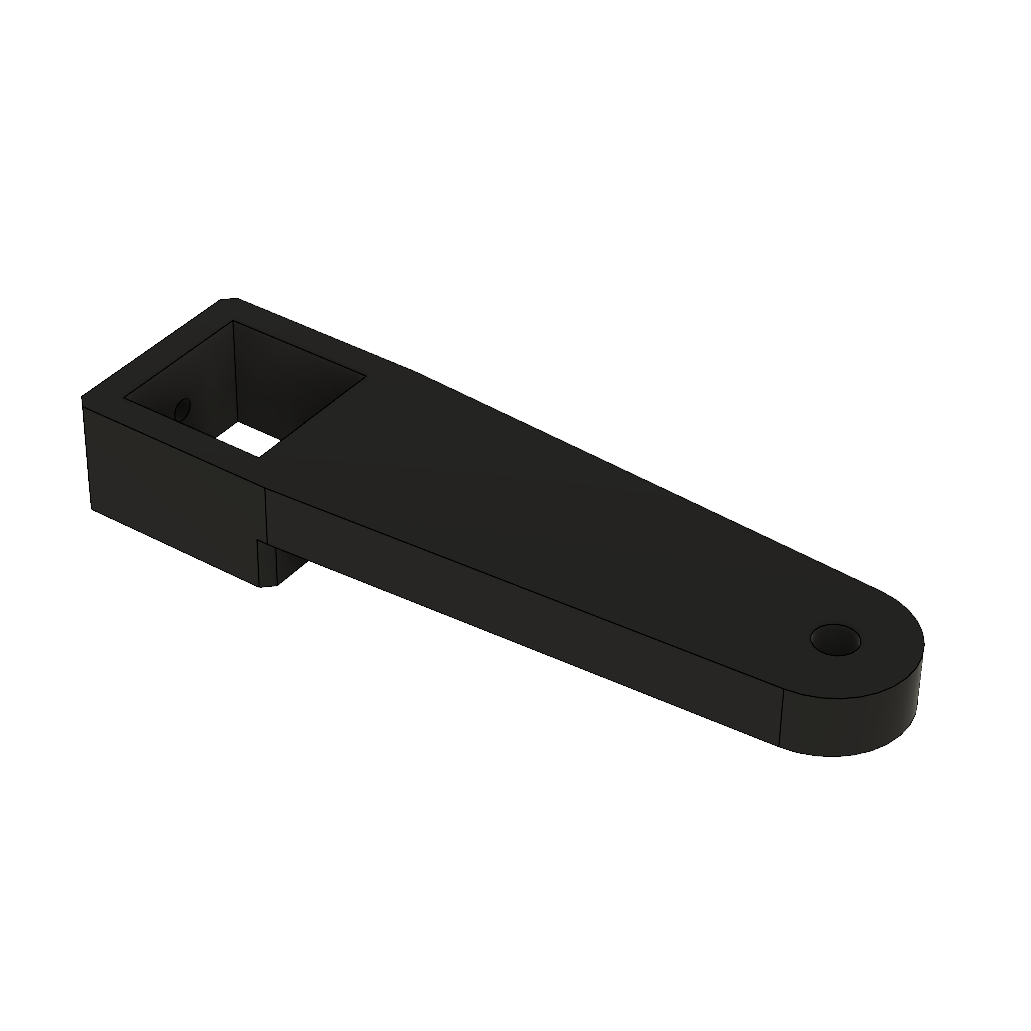
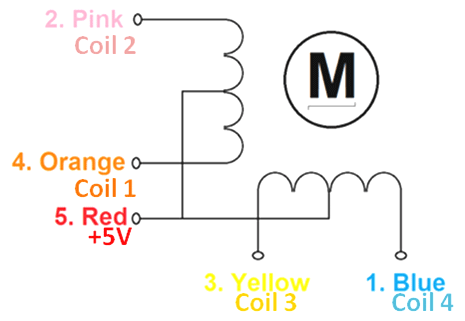
The Raspberry Pi 3 will provide the necessary I/O pins for control of the stepper drivers and Pi camera, and will also facilitate the connection to multiple devices via a WiFi connection. We are looking into software algorithms that will stitch the images together on the Pi as it scans the target. Since it also has a built -in full size HDMI port, you can also simply hook the microscope to a TV or computer screen to view the camera.

JPEG Image - 2.09 MB - 07/31/2022 at 18:18

Preview
Download

JPEG Image - 1.90 MB - 07/31/2022 at 18:18

Preview
Download

JPEG Image - 2.16 MB - 07/31/2022 at 18:18

Preview
Download

JPEG Image - 1.66 MB - 07/31/2022 at 18:18

Preview
Download

Standard Tesselated Geometry - 29.57 kB - 12/13/2018 at 21:38

Download

View all 39 files

  • 1 × Raspberry pi 3 Main controller and has built in WIFI and Bluetooth
  • 1 × Raspberry pi camera 5mp - 8mp A very common accessory for the Raspberry pi
  • 1 × 10x microscope eyepiece
  • 1 × 10x microscope objective
  • 1 × 3D printed structure parts White and black PLA or ABS

View all 17 components

  • Added a 4x turrent

    Apollo Timbers07/31/2022 at 18:22 0 comments

    Added updated optics and a 4 bay turret to the scope. This modification was down long ago, but I never really got around to posting. 

  • I took a picture or two...

    Apollo Timbers12/16/2018 at 02:40 0 comments

    Here is the scope all hooked up with a quick bright white LED I found. 

    And a few images of a pine leaf and Housebee mouth parts. Images were downsized for loader. About 7.7 MP each normally 

    Looks like next will be some upgraded optics. Don't forget to check out https://hackaday.io/project/162831-pcb-inspection-microscope where I will be building a base to turn this biological scope into a PCB inspection scope.

    Enjoy!

    Apollo 

  • 5mm LED holder

    Apollo Timbers12/13/2018 at 21:38 0 comments

    I whipped up a design for a simple LED holder. Use a bright white 5mm LED. You can power it with two wires from the 5 volt rail. Make sure to use a appropriate size resistor for your LED. For a fancy version you can use the PWM I/O on the Pi or add a pot to adjust the brightness manually. 

    File is under 5mm_LED_holder v3

    Enjoy!

    Apollo 

  • Added .STL files

    Apollo Timbers12/12/2018 at 14:57 0 comments

    I added all the .STL flies to the page. This microscope design uses a commonly available 28BYJ-48 Stepper Motors.

    Here is a pin out of the coils

    Below are some tips if you are looking to make your own.

    • It's best to grease the optical tube and gear rack, you will want to ensure there is a good fit and that it moves freely as possible.
    • The Pi Camera will need to have it's lens removed to get the best pictures. 
    • I found the slide holders on EBAY, on the slow boat from China. (the 67mm version named "Slides Clip Stage Presser Pressure Holder Stainless Steel"
    • The 32mm watch glass was found locally for under 3 dollars.
    • The 20mm x 20mm extruded aluminum T-slot is 230mm long
    • You will also need a 20mm to 25mm adapter that will glue into the bottom of the optical tube. (Also from EBAY "Adapter RMS Thread to 25mm M25 for Nikon Leica Microscope")

    I still need to design a simple 5mm bright white LED light holder. But in the meantime you can use any source of stable light. The sun, a flashlight, or your cell phones camera light. 

    That's all I got for now, need to get my car to the shop.

    Apollo 

  • Introducing Pi Microscope v3

    Apollo Timbers12/12/2018 at 04:21 0 comments

    Stardate 96546.25

    I'm here to resurrect this project from the depths of time...

    There I was stuck at the origin of Autodesk Fusion wondering though the vast array of design files, only to find that the Pi microscope needed a bit of TLC. I then went on a spree of design and redesign. Though all of this, I'm proud to present the microscope v3. 

    Well it looks the same you say? Wrong...

    Updated features include:

    1. A new camera mount compatible with the Raspberry Pi 8MP camera
    2. Lego gears (I'm unabashedly an adult AFOL ( Adult Fan Of Lego ))
    3. Objectives are now easily screwed in to the bottom of the optical tube with metal internal threads
    4. A 32mm mineral glass for the platform
    5. Integrated stepper motor mounting
    6. A 3D printed rack attached to the optical tube
    7. Stronger over all
    8. Less parts to print
    9. Cheap as ever


    How many design iterations did it take?

    Well over 20 for some and only minor adjustments for others. Here is a look at the CAD render. 


    Below is a look at all the parts used:

    Note: I should be getting to uploading the design files tomorrow. But know that the ones that say v3 on them are the correct parts to print for the newest design. You will also need "microscope base" and "base plate" .STL files.

    How do I build it?

    Well first stop procrastinating and start printing the parts. Then buy some objectives and a Pi. 

    As for printing:

    I have three different print layer sizes to choose from. 

    0.1 mm - you want a show piece microscope that does work!

    0.15 mm - you want a functional microscope to show to friends and family \o/

    0.2 mm - you want to have a really nice looking paper weight that does not function...

    All the holes are slightly under sized so you can carve them out a bit for a better fit. 

    Enjoy!

    Apollo 

  • New Github Link

    Arch Reactor09/30/2016 at 20:45 0 comments

    For those looking for our newest files. We have connected them to the Arch Reactor Github here:

    Arch Reactor Github

  • Design Revision V3

    Arch Reactor09/30/2016 at 20:30 0 comments

    Hello all o//

    I have put a lot of thought in making the microscope more usable and on the same level as other microscopes. To that end we have been designing a newer optical tube element and gearing. At the moment it is using Lego gears however we are switching to pre-made injection molded gears for reduced backlash. This newer version also adds a rotatable objective element that houses 4 objective lenses. It will also have a very nicely spun molded casing with a build it Pi foundation 7 Inch display.

    We are also incorporation the motor into the frame to reduce part count and mesh with the gear reduction. The optical tube now features a 3D printable gear rack that not only gives the design a refined look it does away with the older fishing line method that was know to slip or become non operational after a long period.

    It also has been exiting to see many individuals approaching us on the project wanting to make it there self's and has been a very rewarding project.

    Below are some sneak peaks of the design and I hope you enjoy the refinements.

    The current shell design.

    Thanks for looking and make sure to comment below!

    Apollo

  • Improvements being made

    Arch Reactor08/22/2016 at 14:49 0 comments

    We are moving on to a version 2 our of microscope. We have the basics working. We are now going to see if we can improve the quality of the images. They are adequate, but we want better. In addition, we are creating a custom body that will incorporate some new display features. This should help increase our refresh rate, and give better visualization of the slides.

  • Software Updates

    Arch Reactor08/03/2016 at 16:42 0 comments

    Now that we have a working prototype, we are turning to upgrades. We have recruited some new help to upgrade our software. We will be improve our web interface and begin working on the X/Y stitching application.

  • Overview of Microscope

    Arch Reactor07/10/2016 at 01:31 0 comments

    Just a quick video explaning the differnt elements of the microscope.

View all 25 project logs

Enjoy this project?

Share

Discussions

morgan.miransky wrote 03/10/2023 at 14:22 point

While following up on this project. I found this article that relates to the subject. https://www.nature.com/articles/s41598-023-29182-y

  Are you sure? yes | no

Panagiotis wrote 01/31/2023 at 14:57 point

Hello again.I print all the parts for version 3 but im missing something.Cant find the inside gears to fit.Can you help me please?

Thank you.

  Are you sure? yes | no

Apollo Timbers wrote 12/27/2023 at 12:14 point

The inside gears are standard Lego gears, https://www.thingiverse.com/thing:1666077 has a part layout pic

  Are you sure? yes | no

Panagiotis wrote 01/25/2023 at 17:40 point

Hello and thanks for sharing.My name is Peter and im from Greece.Im mineral collector and i would like to know if i can use your project for minerals photography.

Thank you.

  Are you sure? yes | no

Apollo Timbers wrote 12/27/2023 at 12:16 point

It is open source, you are free to use it for mineral photography.

  Are you sure? yes | no

maker wrote 08/25/2022 at 18:01 point

How to assemble base_plate with microscope_base? I saw there have some screw pole inside microscope_base, but none of base_plate. if I drill the hole and screw base_plate to it, it maybe destroy the bottom plane for stand stability. if I glue the base_plate to it, what's those pole designed for?

  Are you sure? yes | no

maker wrote 07/30/2022 at 10:29 point

I just want to build this great project, while purchase object lens, I have notice they are designed to work with 160mm tube, but the printed tube_v3 is only 145mm, is it the correct size?

  Are you sure? yes | no

Apollo Timbers wrote 07/30/2022 at 13:51 point

Yes, all standard objectives should work fine. You may not get “max” magnification, though when you adjust the 8MP pi camera holder distance you can get a good clear picture still. Have fun with the build and I still have it together so I can take extra pictures of it or help with any other questions you have. 

  Are you sure? yes | no

maker wrote 07/31/2022 at 17:17 point

I am not understand why we do not obey the tube length while we even print those parts in 0.1mm (very slowly) layer height.  we can get the magnification, but the resolution (i.e. image quality) will be lower.

  Are you sure? yes | no

Apollo Timbers wrote 07/31/2022 at 18:12 point

This newer design v3 was meant to have a "Revolving Nosepiece or Turret" installed so that you can have rotating optics. With this addition the "tube" or total light path is ~160mm. 3 or 4 of them mounted like a normal biological scope. I have a version with this installed and will post pictures. 

  Are you sure? yes | no

maker wrote 08/01/2022 at 17:33 point

It's a wonderful design, but I cannot found "Revolving Nosepiece or Turret" or similar STL file.

  Are you sure? yes | no

Apollo Timbers wrote 08/01/2022 at 20:28 point

The "microscope turret" or "metal revolving nosepiece" is something you would have to buy wholesale or on eBay. It is a generic microscope part made of metal. I did not design a 3D part for this as they were easily found. Make sure to flip though the gallery as I added images that show it mounted.

  Are you sure? yes | no

maker wrote 08/03/2022 at 11:00 point

I found it. Pardon me, I am just sourcing the parts. How connect plastic tube with that heavy turret? I have purchase a outer 25 to inner 20.3mm adapter ring as the build log says, but they are both female threads.

  Are you sure? yes | no

thekarlmiller wrote 02/10/2019 at 23:15 point

Wow!  Very nice.  Here's a couple of suggestions for features :

1.  Autofocus like a phone or camera does (using servo adjustment) 

1.5 Illumination adjustment including color filters, brightness,... 

2. democratization of access and (separately) contribution to a  public share of 

     a. slided pictures & 

     b. AI engine trained data

   This would allow either a public OR private AI agent to assist with identifying objects, cell types, disease patterns, all the way up to spectrographic results.  It would continuously improve the agents ability to assist the micrscope's operator with identification efforts.  You might have to point it in the right direction first (this is a sample of blood, serum, plant leaf...), but then it could offer intelligent help. 

Think about it! 

  Are you sure? yes | no

Semenov Dmytro wrote 10/01/2016 at 17:55 point

Hi.

Do you guys need any support? I'm interested in the project and want to contribute!

  Are you sure? yes | no

bhanu423 wrote 08/16/2016 at 21:43 point

Excellent project. 

Do you have any tips for using 40x and 100x objective lenses instead of the 10x ones ? Thanks

  Are you sure? yes | no

Arch Reactor wrote 09/30/2016 at 20:38 point

We have been able to get good images at 400x but it becomes a mater of focusing the image at any higher magnification. We are on the third version of the scope that will have higher gear reduction that should help us achieve higher magnifications. 

Arch Reactor 

  Are you sure? yes | no

Arch Reactor wrote 06/24/2016 at 15:39 point

We have had surprising success with the ability of the camera to focus. We had long discussions, especially about fine focus. So far, it is exceeding expectations. I suspect it is partly software related, but yes it is focusing. We are still having some problems at higher maginfications.

  Are you sure? yes | no

avishorp wrote 05/26/2016 at 06:43 point

Very nice done!

Do you have any additional optics on the RPi camera? Is it able to focus to such a short distance?

  Are you sure? yes | no

Arch Reactor wrote 05/29/2016 at 19:30 point

We have used a few different methods of adding optics including using the default lens that comes with the scope and also a plastic lens from a laser pointer. We attempted to use glass beads as well though we could not get a clear picture. We are looking into higher quality glass lenses however we are still attempting to keep the cost low.  

Thanks for the comment!

Arch Reactor

  Are you sure? yes | no

Similar Projects

Does this project spark your interest?

Become a member to follow this project and never miss any updates