Close
0%
0%

Arduino Advent Wreath

An Advent Wreath built using electronics and craft materials

Similar projects worth following
Many people who observe Christmas also observe a time called Advent (from Latin, "adventum," meaning "coming" - because Christmas is coming) which is a time to get ready for Christmas. Part of the tradition of Advent is to mark how far we are in to Advent using an Advent wreath - for each Sunday leading up to Christmas, we light a new candle. In this project, I built an advent wreath using some spare electronic components, an Arduino nano, and some craft materials (for the actual wreath part of the wreath).

For the purposes of our project, here are a few requirements:
1. We have 4 candles: 3 purple, 1 pink (technically the color is rose, but for our purpose pink is close enough).
2. Otherwise, it should look like a wreath, and have lots of green and maybe somethings that look like berries and flowers.
3. We need a way for not all candles to be lit at the same time. There is a particular order to the lighting - the pink candle gets lit on the 3rd week, in the other weeks we light one of the purple candles.

4. I have 2 young daughters who think it's funny to destroy things I build, so the final build has to be sturdy.

From those requirements, we made the following design decisions:

To satisfy 1 + 2, we decided to build most of the wreath out of pipecleaners. Pipecleaners have the advantage that they stay in place, and can be twisted into different shapes. It also meant that my daughters could help me make different parts.

For requirement #3, even though it was overkill, I used an Arduino Nano. We probably could have just used switches, but I didn't have enough switches lying around. The original design (which I didn't end up doing) included a button that we could press for each new week. There was an interesting exercise in getting the right button de-bounce code in place to track the week number, but in the final build I didn't hook that up.

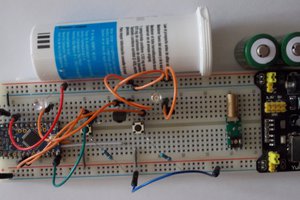
For requirement #4, I put together a prototype on a breadboard, but soldered together the final product.

JPEG Image - 6.27 MB - 12/21/2018 at 18:47

Preview
Download

JPEG Image - 3.18 MB - 12/21/2018 at 18:47

Preview
Download

JPEG Image - 4.33 MB - 12/21/2018 at 18:47

Preview
Download

JPEG Image - 3.90 MB - 12/21/2018 at 18:47

Preview
Download

JPEG Image - 3.65 MB - 12/21/2018 at 18:47

Preview
Download

View all 6 files

  • 1
    Wreath Design

    First, I wanted to make sure that we could do something that looks like a wreath - if we got the electronics working, it wouldn't matter if we couldn't actually make it look like an Advent Wreath. 

    First, we need a green base. The first set of pipe cleaners we got only had one shade of green, and it was a bright neon green shade, so didn't look great. We later went to get a different packet of pipe cleaners that included more of a pine green.

    Next, we needed something that looked like candles. We ended up going with a simple design of twisting a white and colored (either purple or pink) pipe cleaner around a wire, which did a pretty good job of standing up straight.

    Finally, to look like a wreath, my daughters were in charge of coming up with some decorations. They used pipe cleaners to make flowers and leaves that would go on the final product (and would cover up some of the electronics.

  • 2
    Electronics Prototype

    While the girls were working on decorations, I got out a breadboard, an Arduino Nano and some electronics components and started figuring out the electronics. 

    One non-obvious snag with dealing with the Arduino Nano was that it required using Linux - Mac didn't have support for the right drivers to hook it up. So I got out my old Linux laptop.

    Obviously, we needed 4 LEDs and resistors. That was an easy part, and mostly followed standard "Hello World" Arduino tutorials.

    I also experimented with adding a button for changing the week. Of course, it's not enough to detect when the input pin goes high and hook that up to a counter, for a few reasons. First of all, when the input pin goes high, it may stay high for several cycles, meaning the counter will end up on a random number. Also, some stray current could make the pin high even without the button pressed. These issues can be solved by adding logic to detect that the button was low, stayed high for a certain amount of time, and then the pin went back down to low again. In the end though, since this was a button that we'd press once a week, it didn't seem worth it to add to the final build.

  • 3
    Power

    Before building the full, final product, we needed a way to provide power. I didn't want to rely on it being plugged in, so I decided to hook up a 9V battery. You can get a pack of 10 9V clips pretty cheaply off Amazon. I clipped off the plug head (since I wasn't going to plug it in), used a wire stripper to expose a bit of wire, and did a quick sanity check that I could power the wreath circuit prototype with the Arduino hooked up to the 9V battery instead of my laptop power.

View all 5 instructions

Enjoy this project?

Share

Discussions

Similar Projects

Does this project spark your interest?

Become a member to follow this project and never miss any updates