Today I'd like to take a moment to discuss the design of the boxes in my project. Like any good building block, there needs to be a certain level of uniformity so that creativity has space to grow. Sometimes we are more inspired to be creative when certain limits are imposed on our actions. If you can do anything at all, what would you do? That's a hard thing to decide if your decision matters. If you have 3 hours on a Saturday afternoon, what would you do? That's a bit easier.
Similarly, a box that can do too many things leaves us wondering what's the point in doing anything? A box that has limits challenges you to push those limits. So I decided to start off with a simple cube with 2, 3, or 4 inputs/outputs. This keeps things simple and makes us think about how to get more out of our boxes than we might otherwise believe is possible.
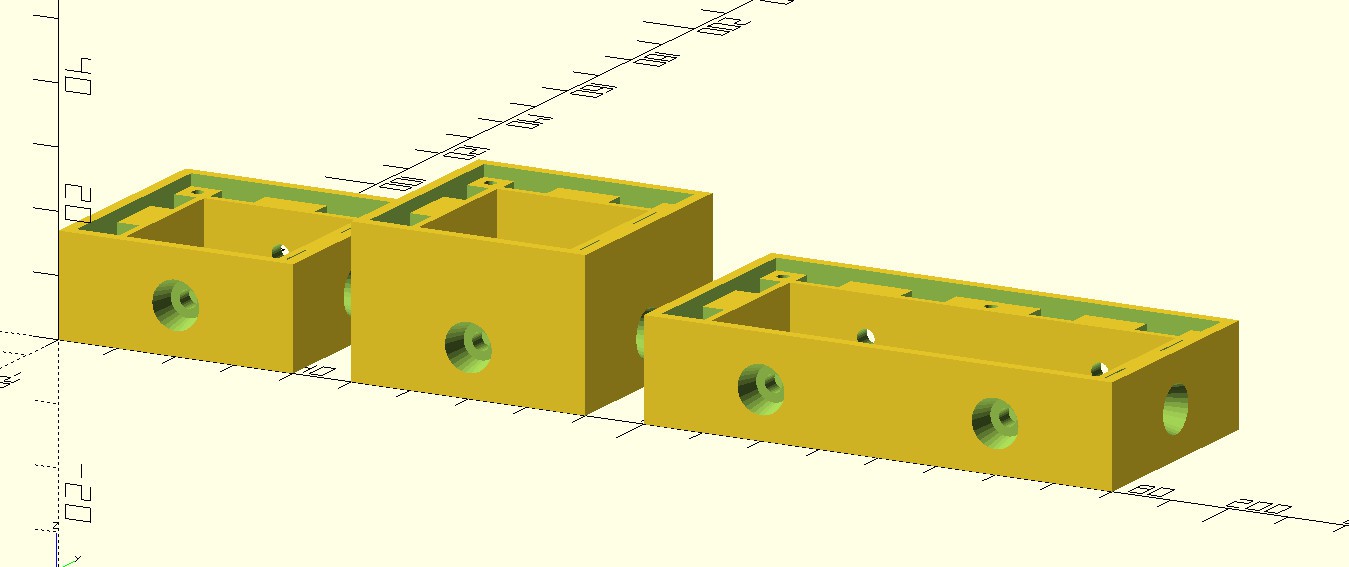
I chose the size of the boxes (40x40x17mm) based on estimates of how much space I would need inside the box for screws to jut out into the middle of it, for small components to fit inside of it, and for ease of holding and placing the boxes exactly where you want them regardless of the state of your finer motor skills. 40x40mm seemed just right. The 17mm came from estimating 15mm of space as a minimum, and adding 2mm for the height of the lid. The lid was originally 1mm until a test print convinced me to double that thickness to 2mm. I still use that lid (it's the one with the black marker on the arrow), but it's definitely flimsier than the other lids. Luckily it's not supporting any components. It just sits there. Along with the details I've already discussed in previous logs, that fills in my considerations for the boxes. They're simple, sturdy, don't need print support, and just a few different designs make up most of the boxes you'll ever need to print.
However, I did run into a problem with one particular lid/box combo. The potentiometer box was too small at 17mm tall. The screws would touch the potentiometer no matter how I tried to turn, shift, or hack my way around the size constraint. So I went a route I was hoping to avoid: I made a taller box. Why didn't I want to make a taller box? Well I didn't want to complicate the box system. I only designed 5 boxes that will fill 99% of my use cases. Having random unicorn boxes is annoying and upsets the uniformity of the puzzle. So I tried my best to simply make it a tiny bit taller. Just enough to give me that extra space without turning the whole thing into a cosmopolitan skyline. In retrospect, I like the slight pronounced look of the potentiometer box. It seems to draw attention to it, which is good since it's the only piece that requires user interaction after being placed. The best part is, the only thing that has changed is the height of the box. The lid and everything else are all the same.
Since I was mucking about with my boxes and the sizes of them, I decided I'd go ahead and throw in one other possible box variation I was thinking about: the double wide box. This is a box that is 80x40x17mm. It's exactly as if you had placed two boxes side by side. In fact since you can place two boxes side by side, there are probably not many things you can do with it that you can't do with two boxes, but there is one thing that I was hoping to achieve: 6 IO in one box. While I haven't used or even printed it out yet, I can see it getting used in the future. I decided against making this box taller as well, because the number of changes would quickly cascade out of control, and losing the 4mm of walls that would normally be present in between two boxes provides us with more space anyway.
Here's a screen capture of the 3 different styles of boxes in OpenSCAD. You can see the taller box printed in the photo gallery. I haven't printed the double wide yet. I just haven't needed one. I'll probably end up using one for a rechargeable battery pack.
I was planning on writing about the lids as well, but this is already long enough. I'll discuss the lids in the next log post.
Discussions
Become a Hackaday.io Member
Create an account to leave a comment. Already have an account? Log In.
Little boxes that snap together and make circuits are an ingenious way to introduce children to the world of electronics. These kits not only encourage creativity but also foster an understanding of how electronic components work together. You can Check This Out here https://coub.com/njmcdirect.com Kids can experiment with different configurations, learning through hands-on experience. The satisfaction of seeing their circuits come to life teaches valuable lessons in problem-solving and encourages a love for STEM subjects. These kits provide a fun and engaging way to explore technology, making learning an exciting adventure for young minds.
Are you sure? yes | no