 Chance Reimer
This update centers around setting up the board support package correctly to get UART working with Xilinx Vitis designs. I was troubled with debugging multiple boards that would not display UART correctly, even though the circuit and FTDI chip were correctly passing all tests.
UART has plagued me for many years, since my senior design when trying to communicate between an Arduino and a Jetson Nano (pro tip always check your GPIO voltage levels before your nostrils are blessed with the sweet crispy smell of burning ICs), to now with this Kria SOM. Much like back then, some thorough reading of documentation could have saved me a few hours of troubleshooting, but apparently I prefer life in constant pain and stress and pressed forward blindly into the unknown with multi-meter probes and a few ILAs. My guess was that I could see some variability on the multi meter on the UART lines to clue me in if the IC was damaged and not appropriately converting the signals the the FTDI 3.3V domain.
After staring at steady voltage level probes for longer than I would like to admit, I eventually broke down and googled. I found a thread created back in 2015, cluing me in that default BSPs must have some peripheral interfaces selected before it will actually use them. Apparently I had been living my life in sweet bliss, coddled by Xilinx's nicely packaged BSPs for their development boards when creating previous designs, and now I find myself thrust into the cold of custom PCB design, a place where there is no love, and hope is a distant memory.
If you or a loved one is in a situation where your UART interface doesn't work with a Xilinx FPGA on a board you created, you should take a deep breath and follow the below steps:
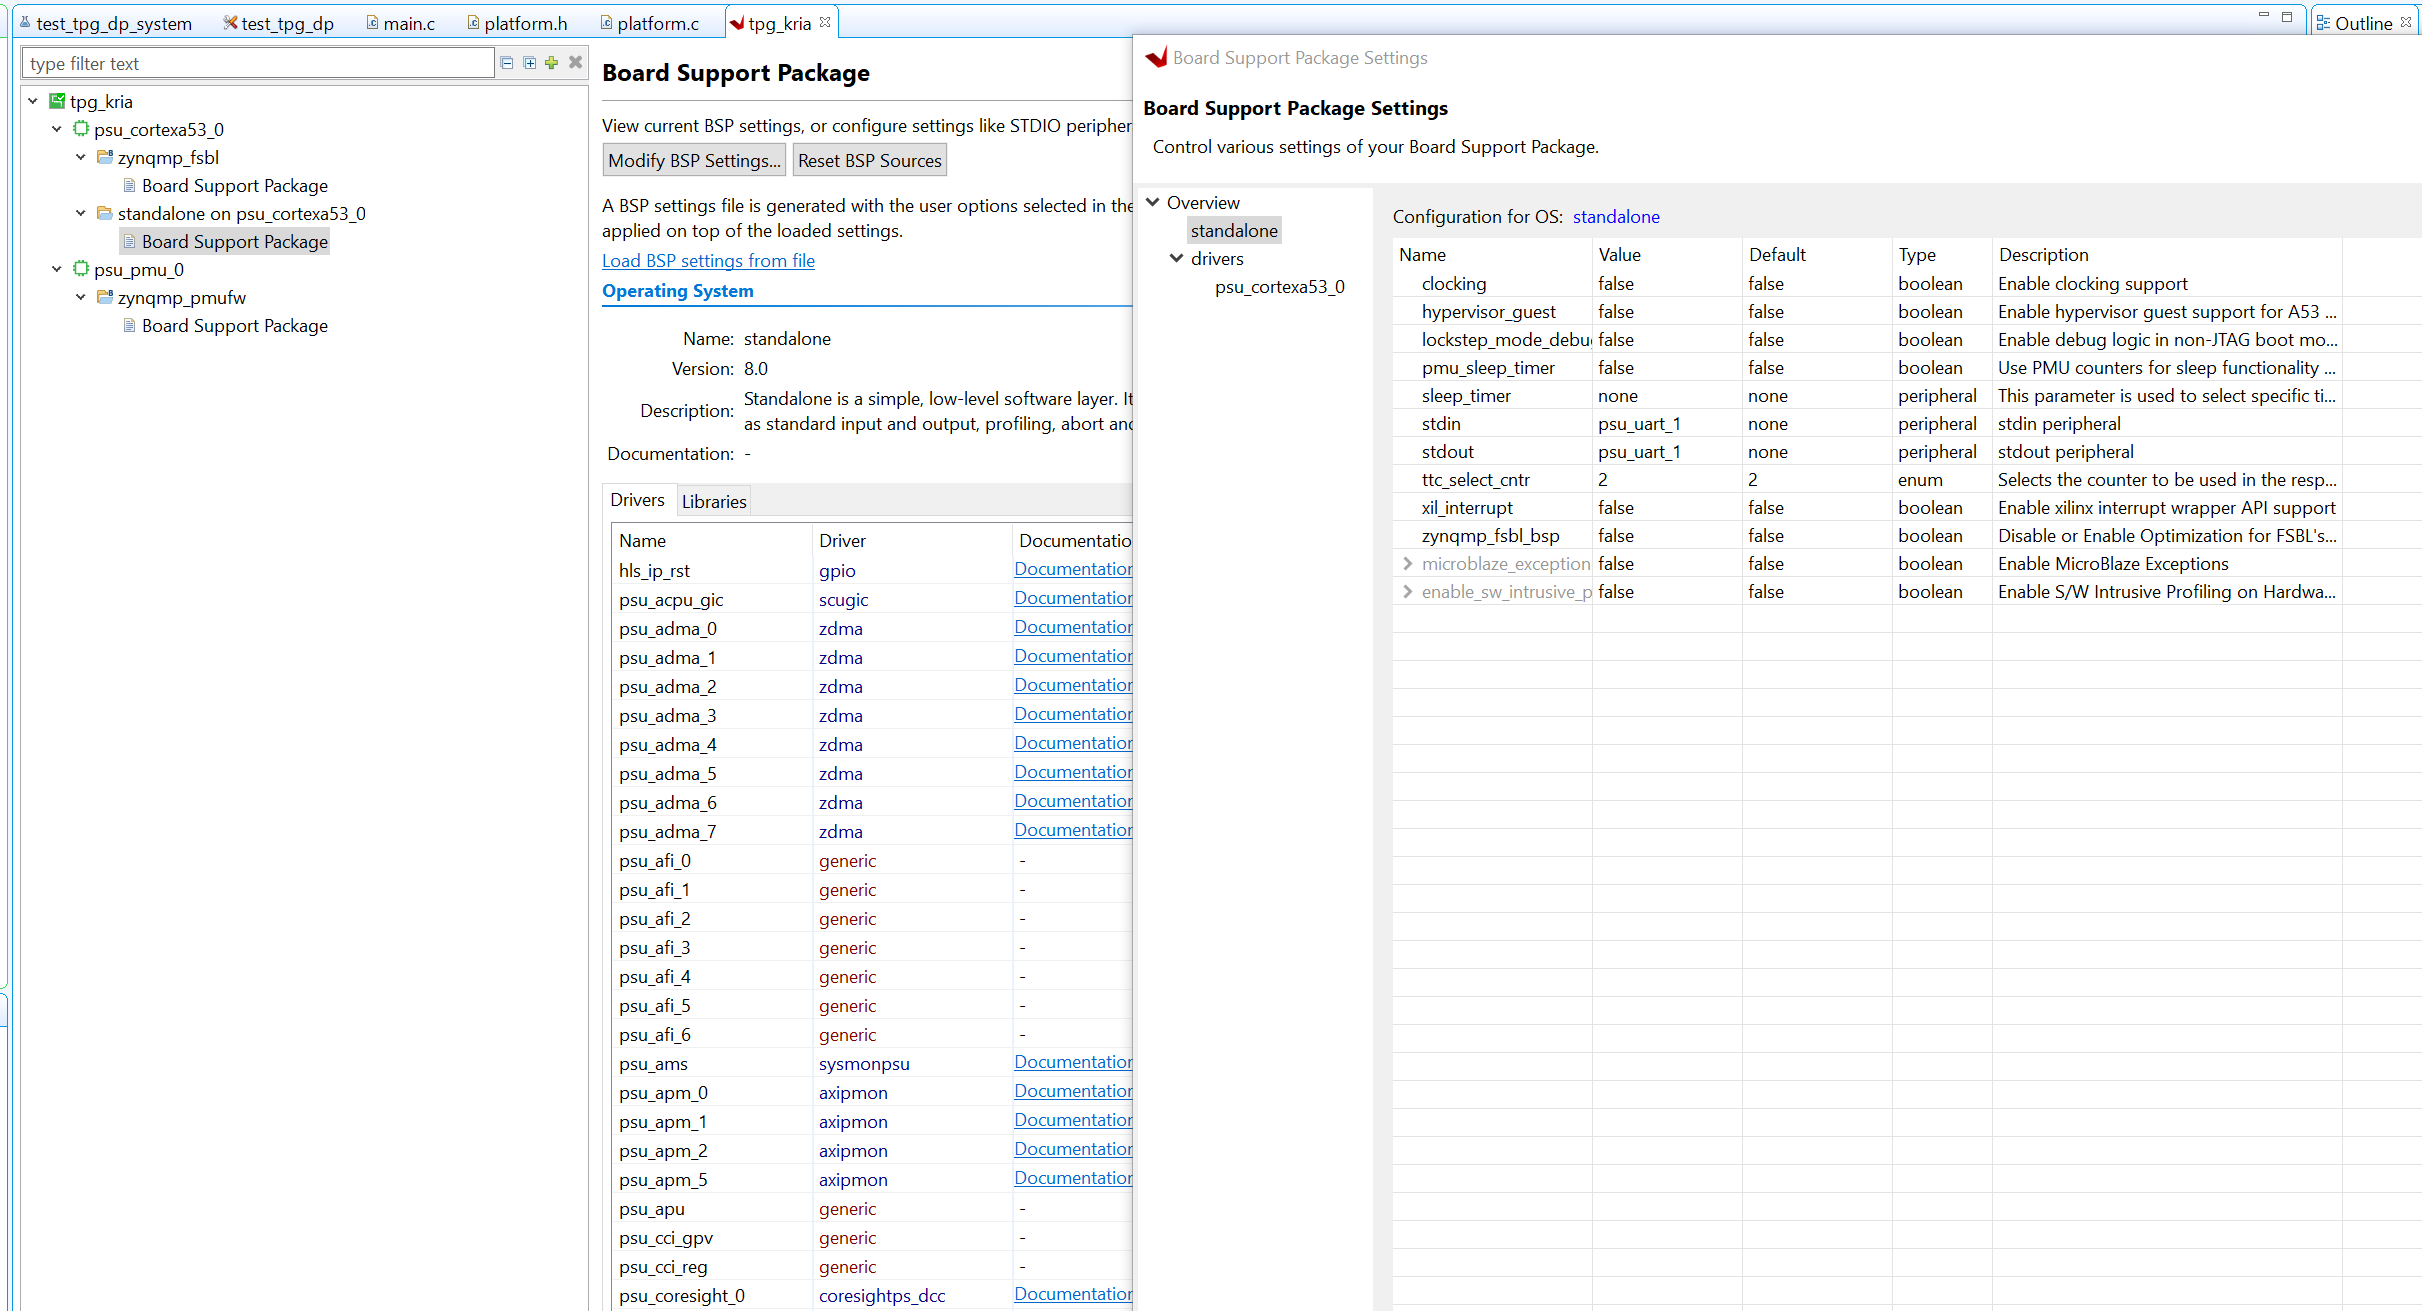
- Open up your Vitis Application Project, and navigate to BSP settings
- Select the platform, and navigate to the appropriate BSP (I'm using the standalone_psu_cortexa53_0 for example).
- Select modify BSP settings
- Go to stdin, stdout, and select the peripheral that you want to use.
Edit: After messing around some more, I've found out that if you specify UART in the Zynq MPSoC block diagram element before generating your Vitis Application, the BSP will normally choose for you. The above checklist is still useful if you ever forgot to initialize the UART in the BD and added it later, after generating the Vitis platform project.
CoaXPress is now working on the Aper-Oculus. This might be one of the first Kria SOM's that's interfaced with a Basler Boost! Coming soon.
Discussions
Become a Hackaday.io Member
Create an account to leave a comment. Already have an account? Log In.