There are no changes to the hardware since the last log. I have received new boards but I'm waiting with some frustration on an order of one particular logic chip.
So I've been completing the sprite functionality. In the last log I demonstrated that sprites were working but I'd only implemented 16x16 unmagnified sprites.
The TMS chip has flags for sprite magnification and sprite size. 'size' determines whether the sprite definitions are 8x8 or 16x16. 'magnification' determines whether sprites are shown with pixels doubled in width and height, giving an effective size of up to 32x32 pixels on screen (but blocky).
I see no point to the 8x8 size. Obviously only 8 bytes of VRAM are used rather than 32, but it doesn't save VRAM because the definition for the second sprite still begins 32 bytes after the first. it's just the same as using the first 8 bytes of the sprite definition and setting the rest to 0 (transparent). Nevertheless, I'm trying to make sure that I've implemented everything on the TMS chip as documented so that existing software will run.
To test the magnification, I built this little demo / screensaver, which runs on an RC2014 with TMS video card. (photo below, you can see it running in the video which is further below.) I've built this demo with sprites magnified and without.
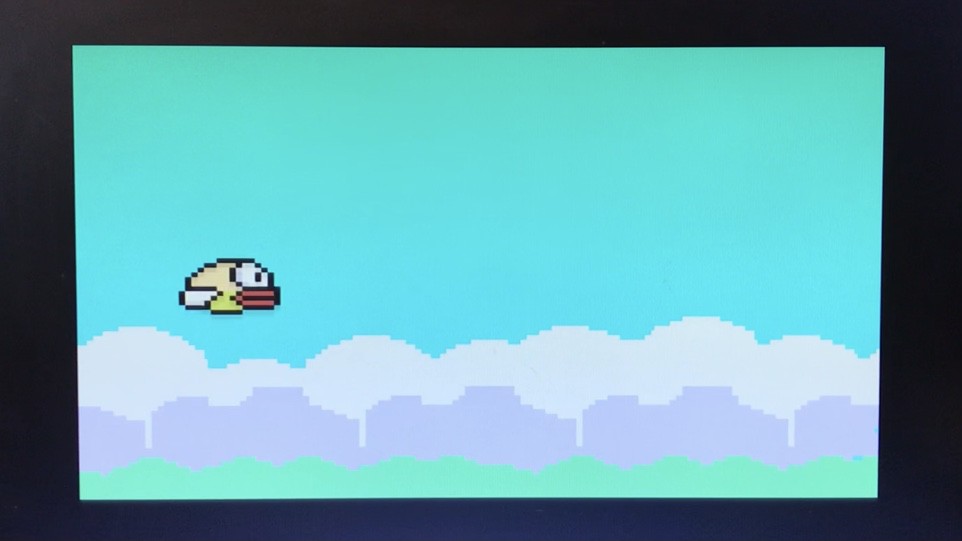
It's difficult to tell but there are six colours in the sprite, which is actually 8 overlaid sprites. We can only have four per scanline, so there's a dividing line about halfway down the bird (there's a change from light yellow to dark yellow). Four stacked sprites make the top half and four make the bottom half.
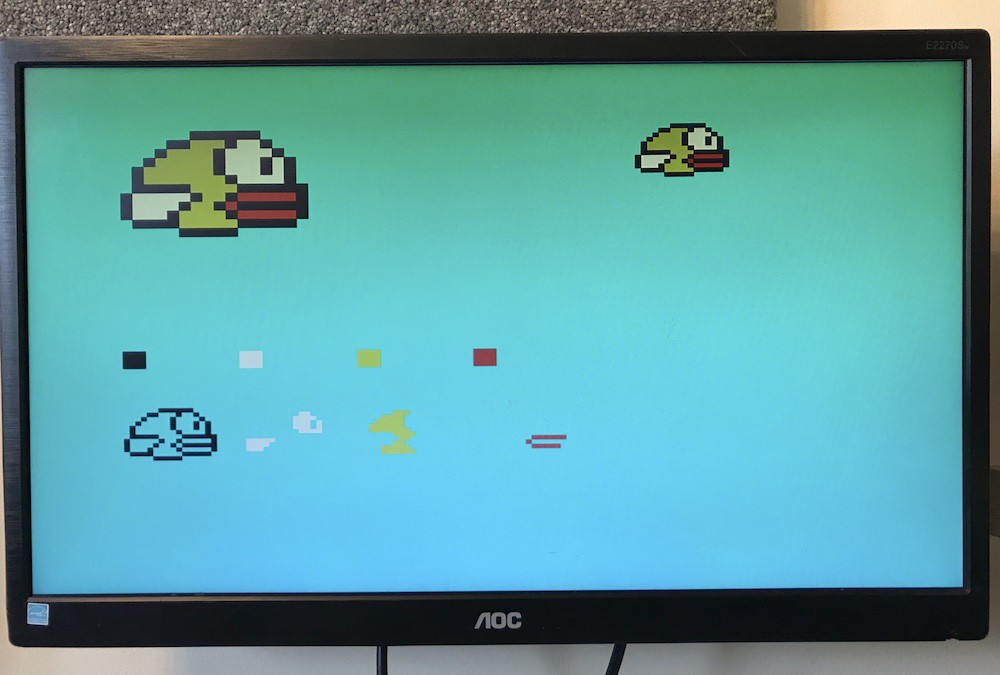
Making the sprite data was very laborious. I didn't quite go oldschool with graph paper but it was still a very manual process (with the data in the form %00001100 to help me see what I was doing).
So for future sprite-based work I decided to write a sprite designer tool. (Started but not finished yet). It will allow you to 'draw' the sprites on screen and then spit out the sprite definition data. It allows you to stack up to four sprites (and set the colour of each to one of the TMS's 15 colours) and see the sprites separately and stacked. It also allows you to hit keys to change the magnification and size flags on the TMS chip. This makes the Sprite designer a more useful tool for testing my TMS emulator than the original flappy demo!
In this video you can see the flappy demo working (I'll put that into my repository of programs to run on RC2014+TMS) and the work-in-progress sprite designer. I've shot short video clips of that running with my emulator and a real TMS chip, to show that the emulator matches the real chip in these respects.
It also shows the difference between the pin-sharp DVI output of the emulator vs the composite output of the real TMS chip. I like both for different reasons.
This project isn't just about getting a better picture. I need to say again (because of comments I've had) that it isn't going to be a drop-in TMS9918A replacement, but a RC2014 module. The additional terminal functionality will make it a very useful alternative to the TMS video card.
Discussions
Become a Hackaday.io Member
Create an account to leave a comment. Already have an account? Log In.