Features
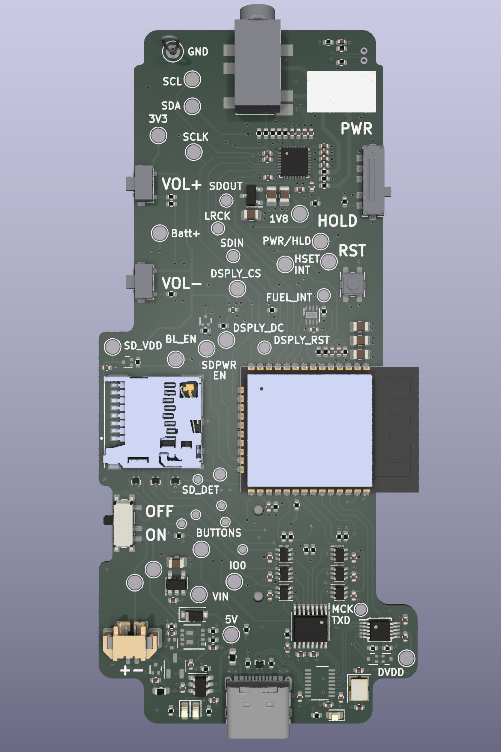
- Stereo analog audio out (3.5mm)
- ES8327 CODEC 24-bit, 96khz max
- Internal microphone
- Headphone present detect, can pause music when headphones removed
- Replaceable 2500mah lipo battery, capacity can be changed by user
- Charge and power indicator lights
- Data and power over USB-C
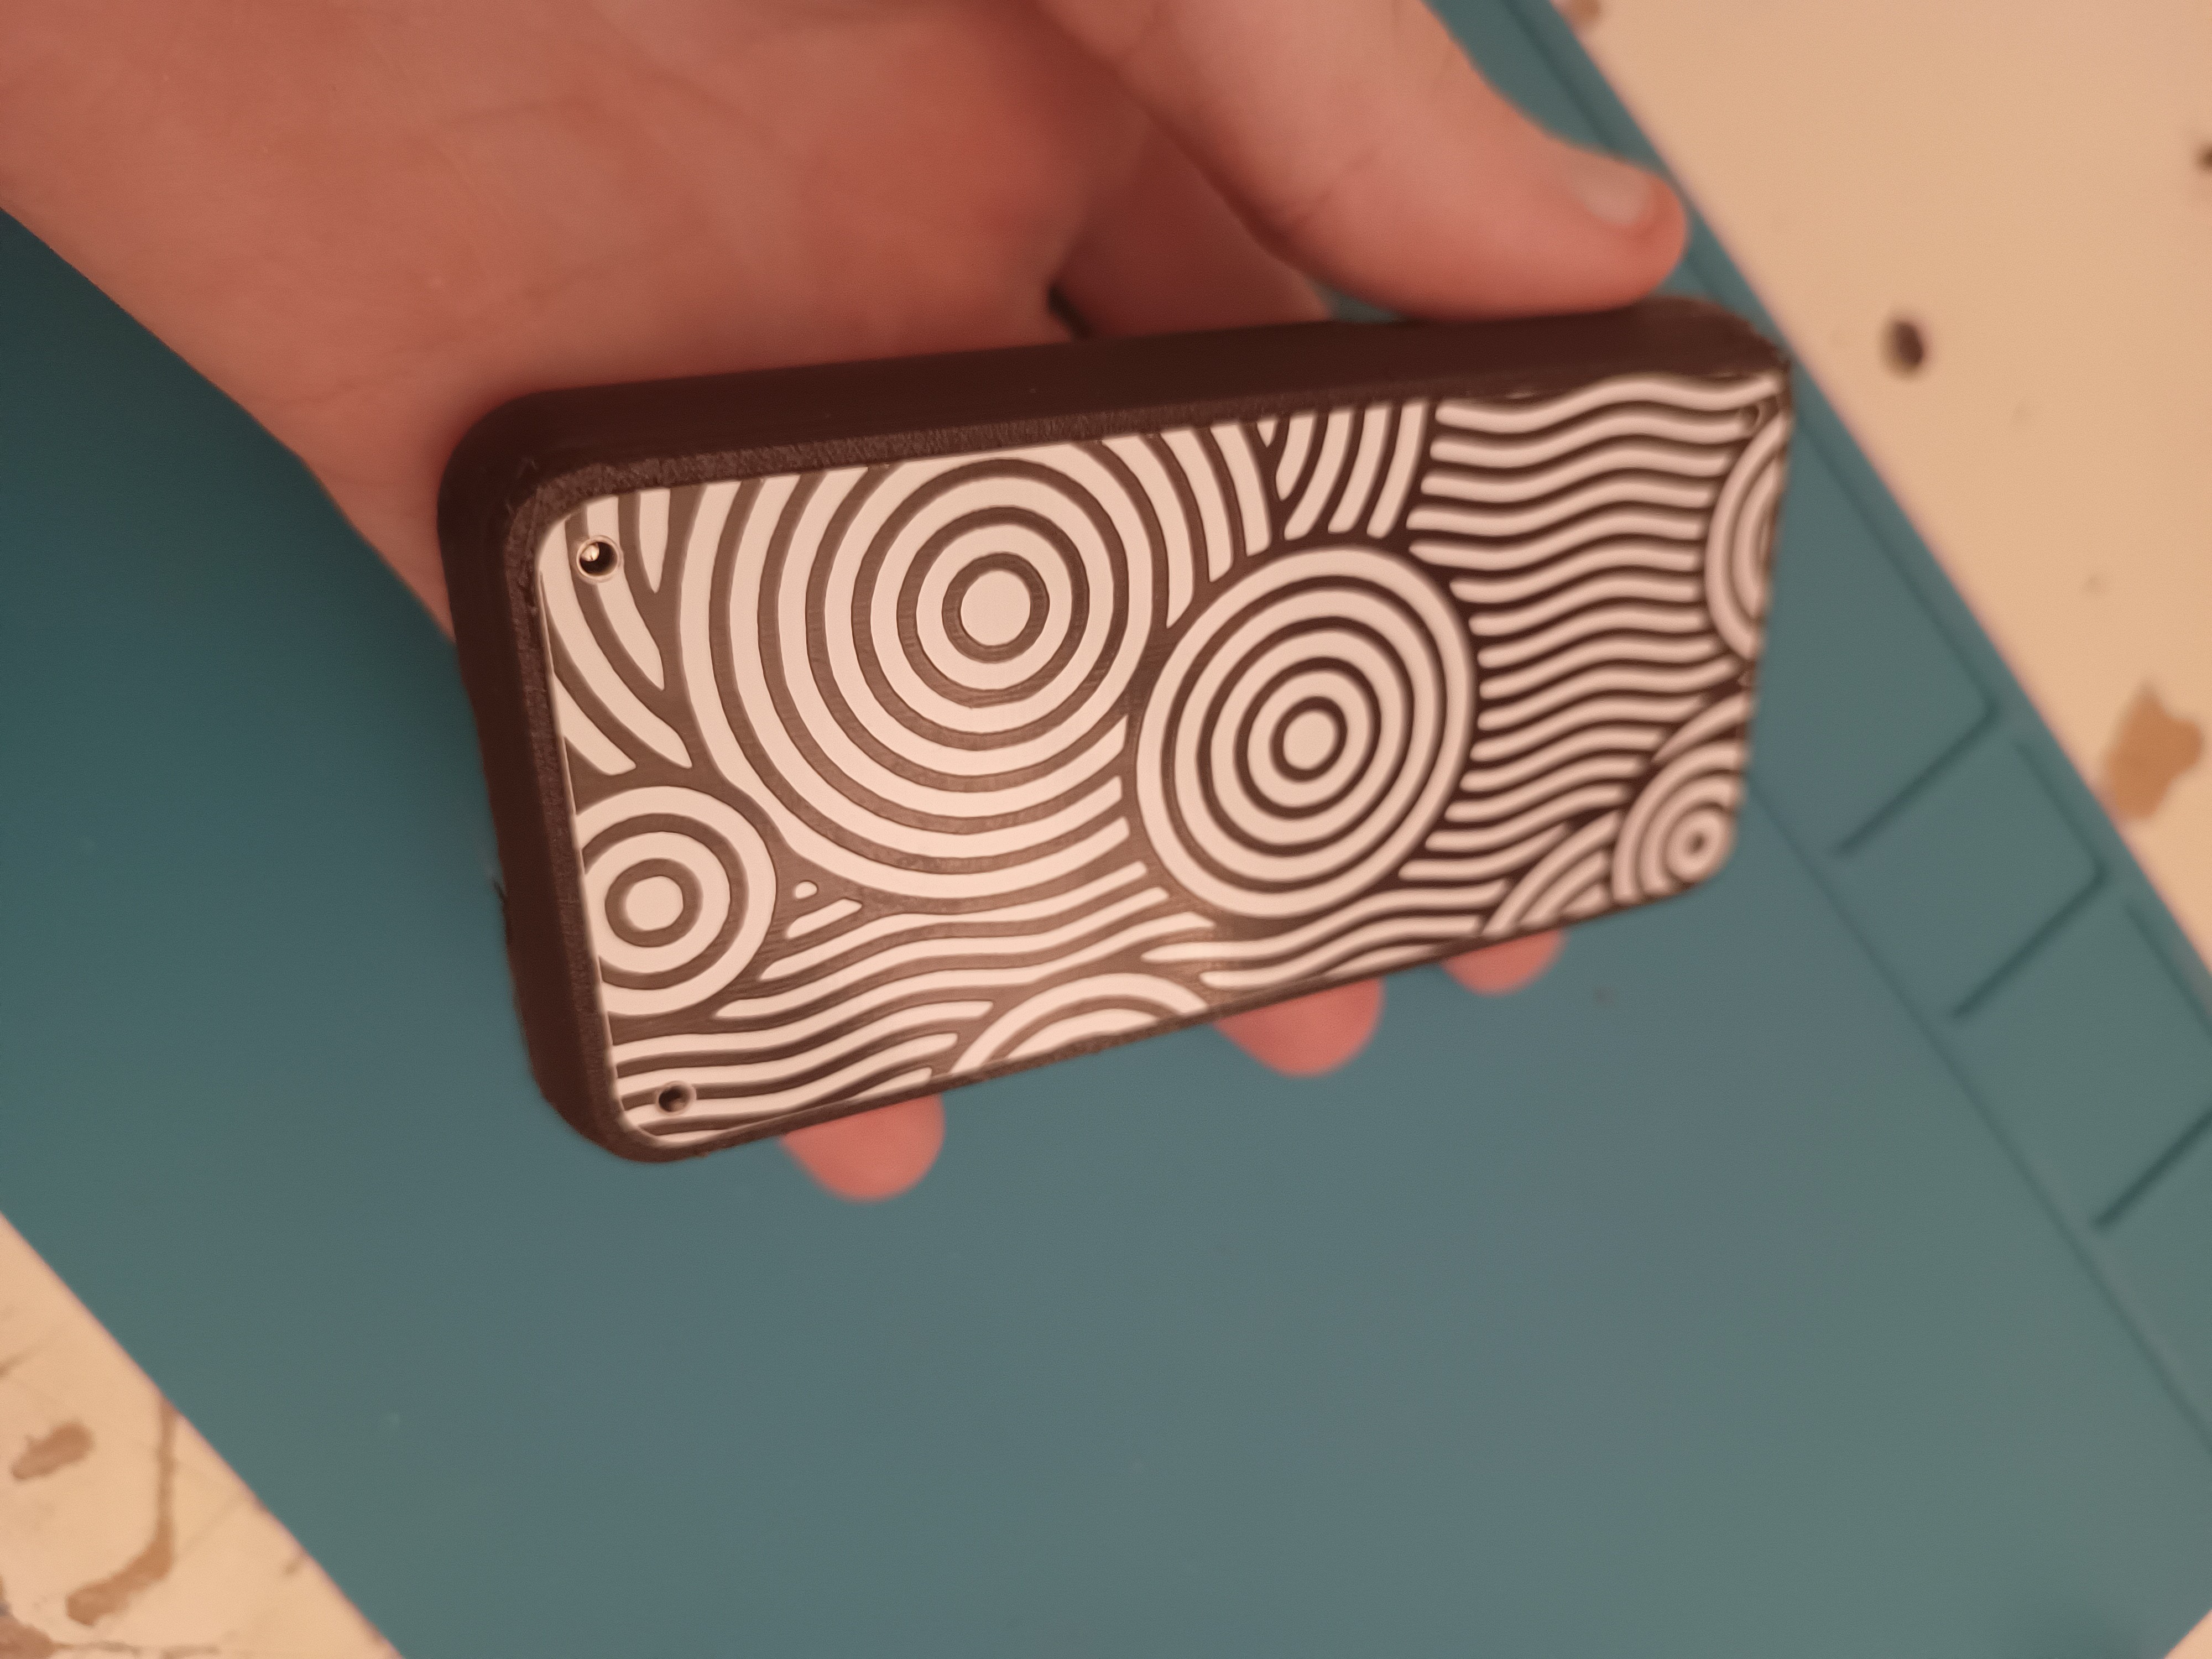
- FR4 front and back plate, stylish and structural
- Hold/Power slide switch
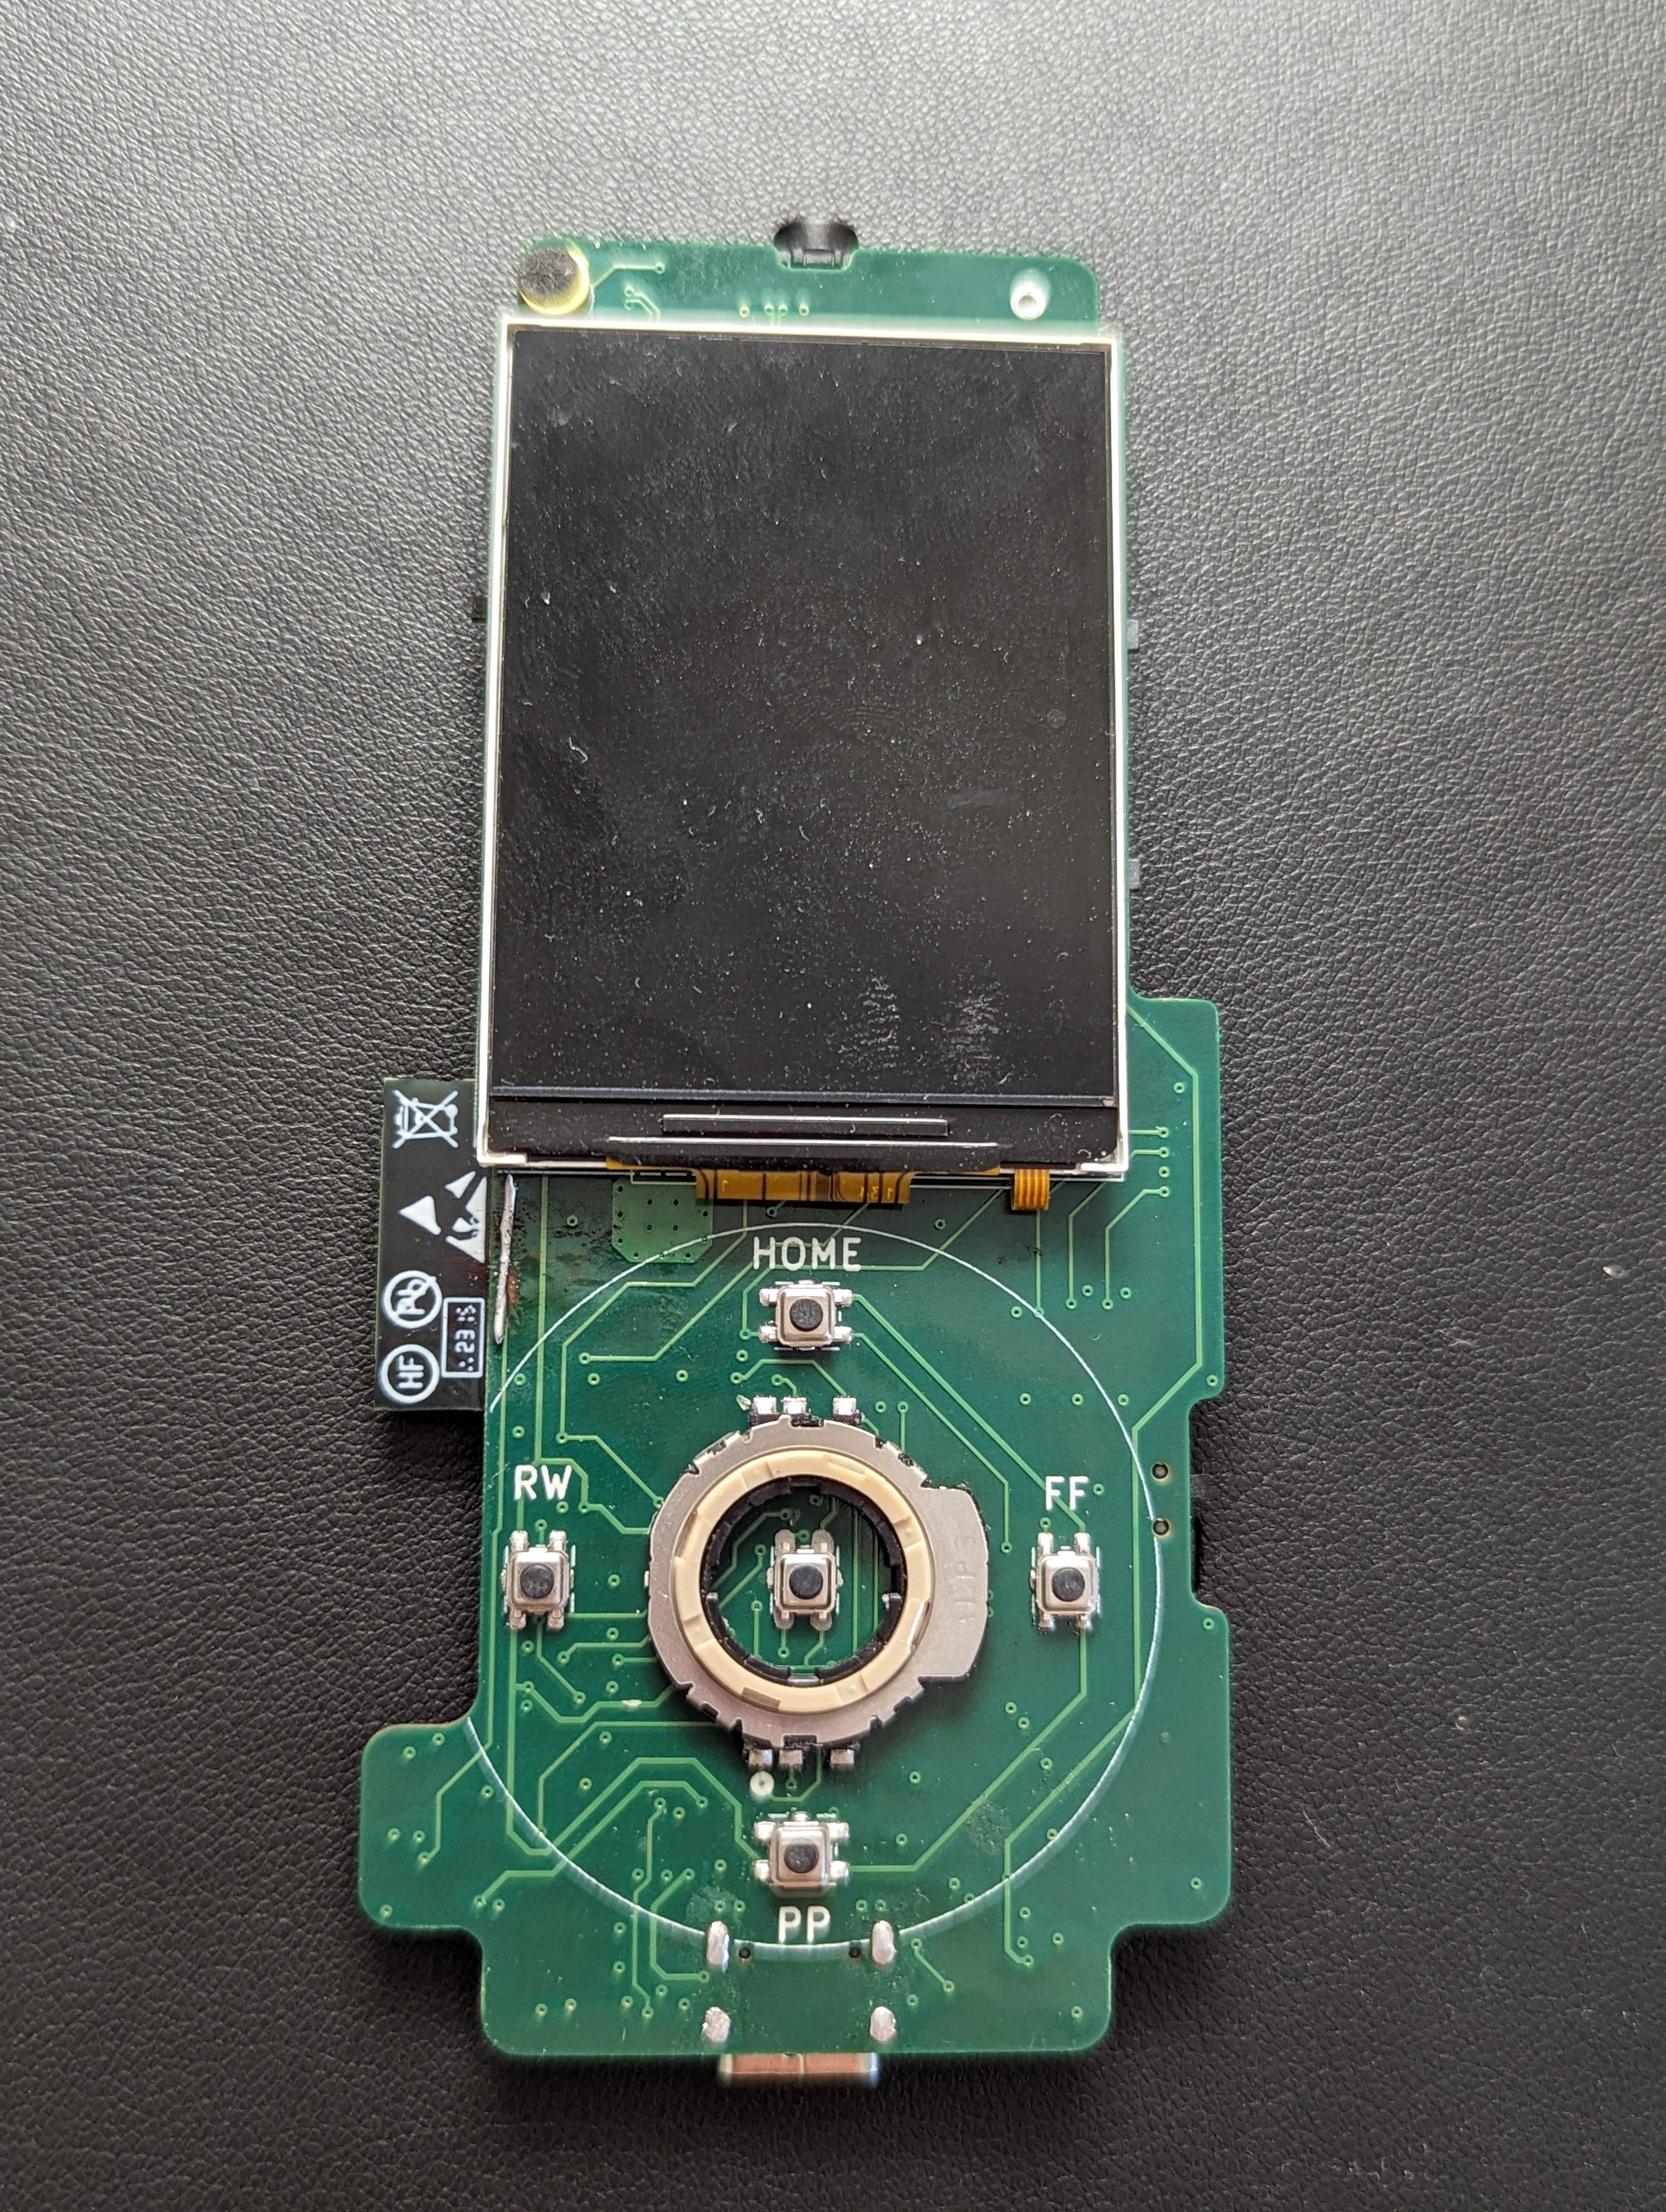
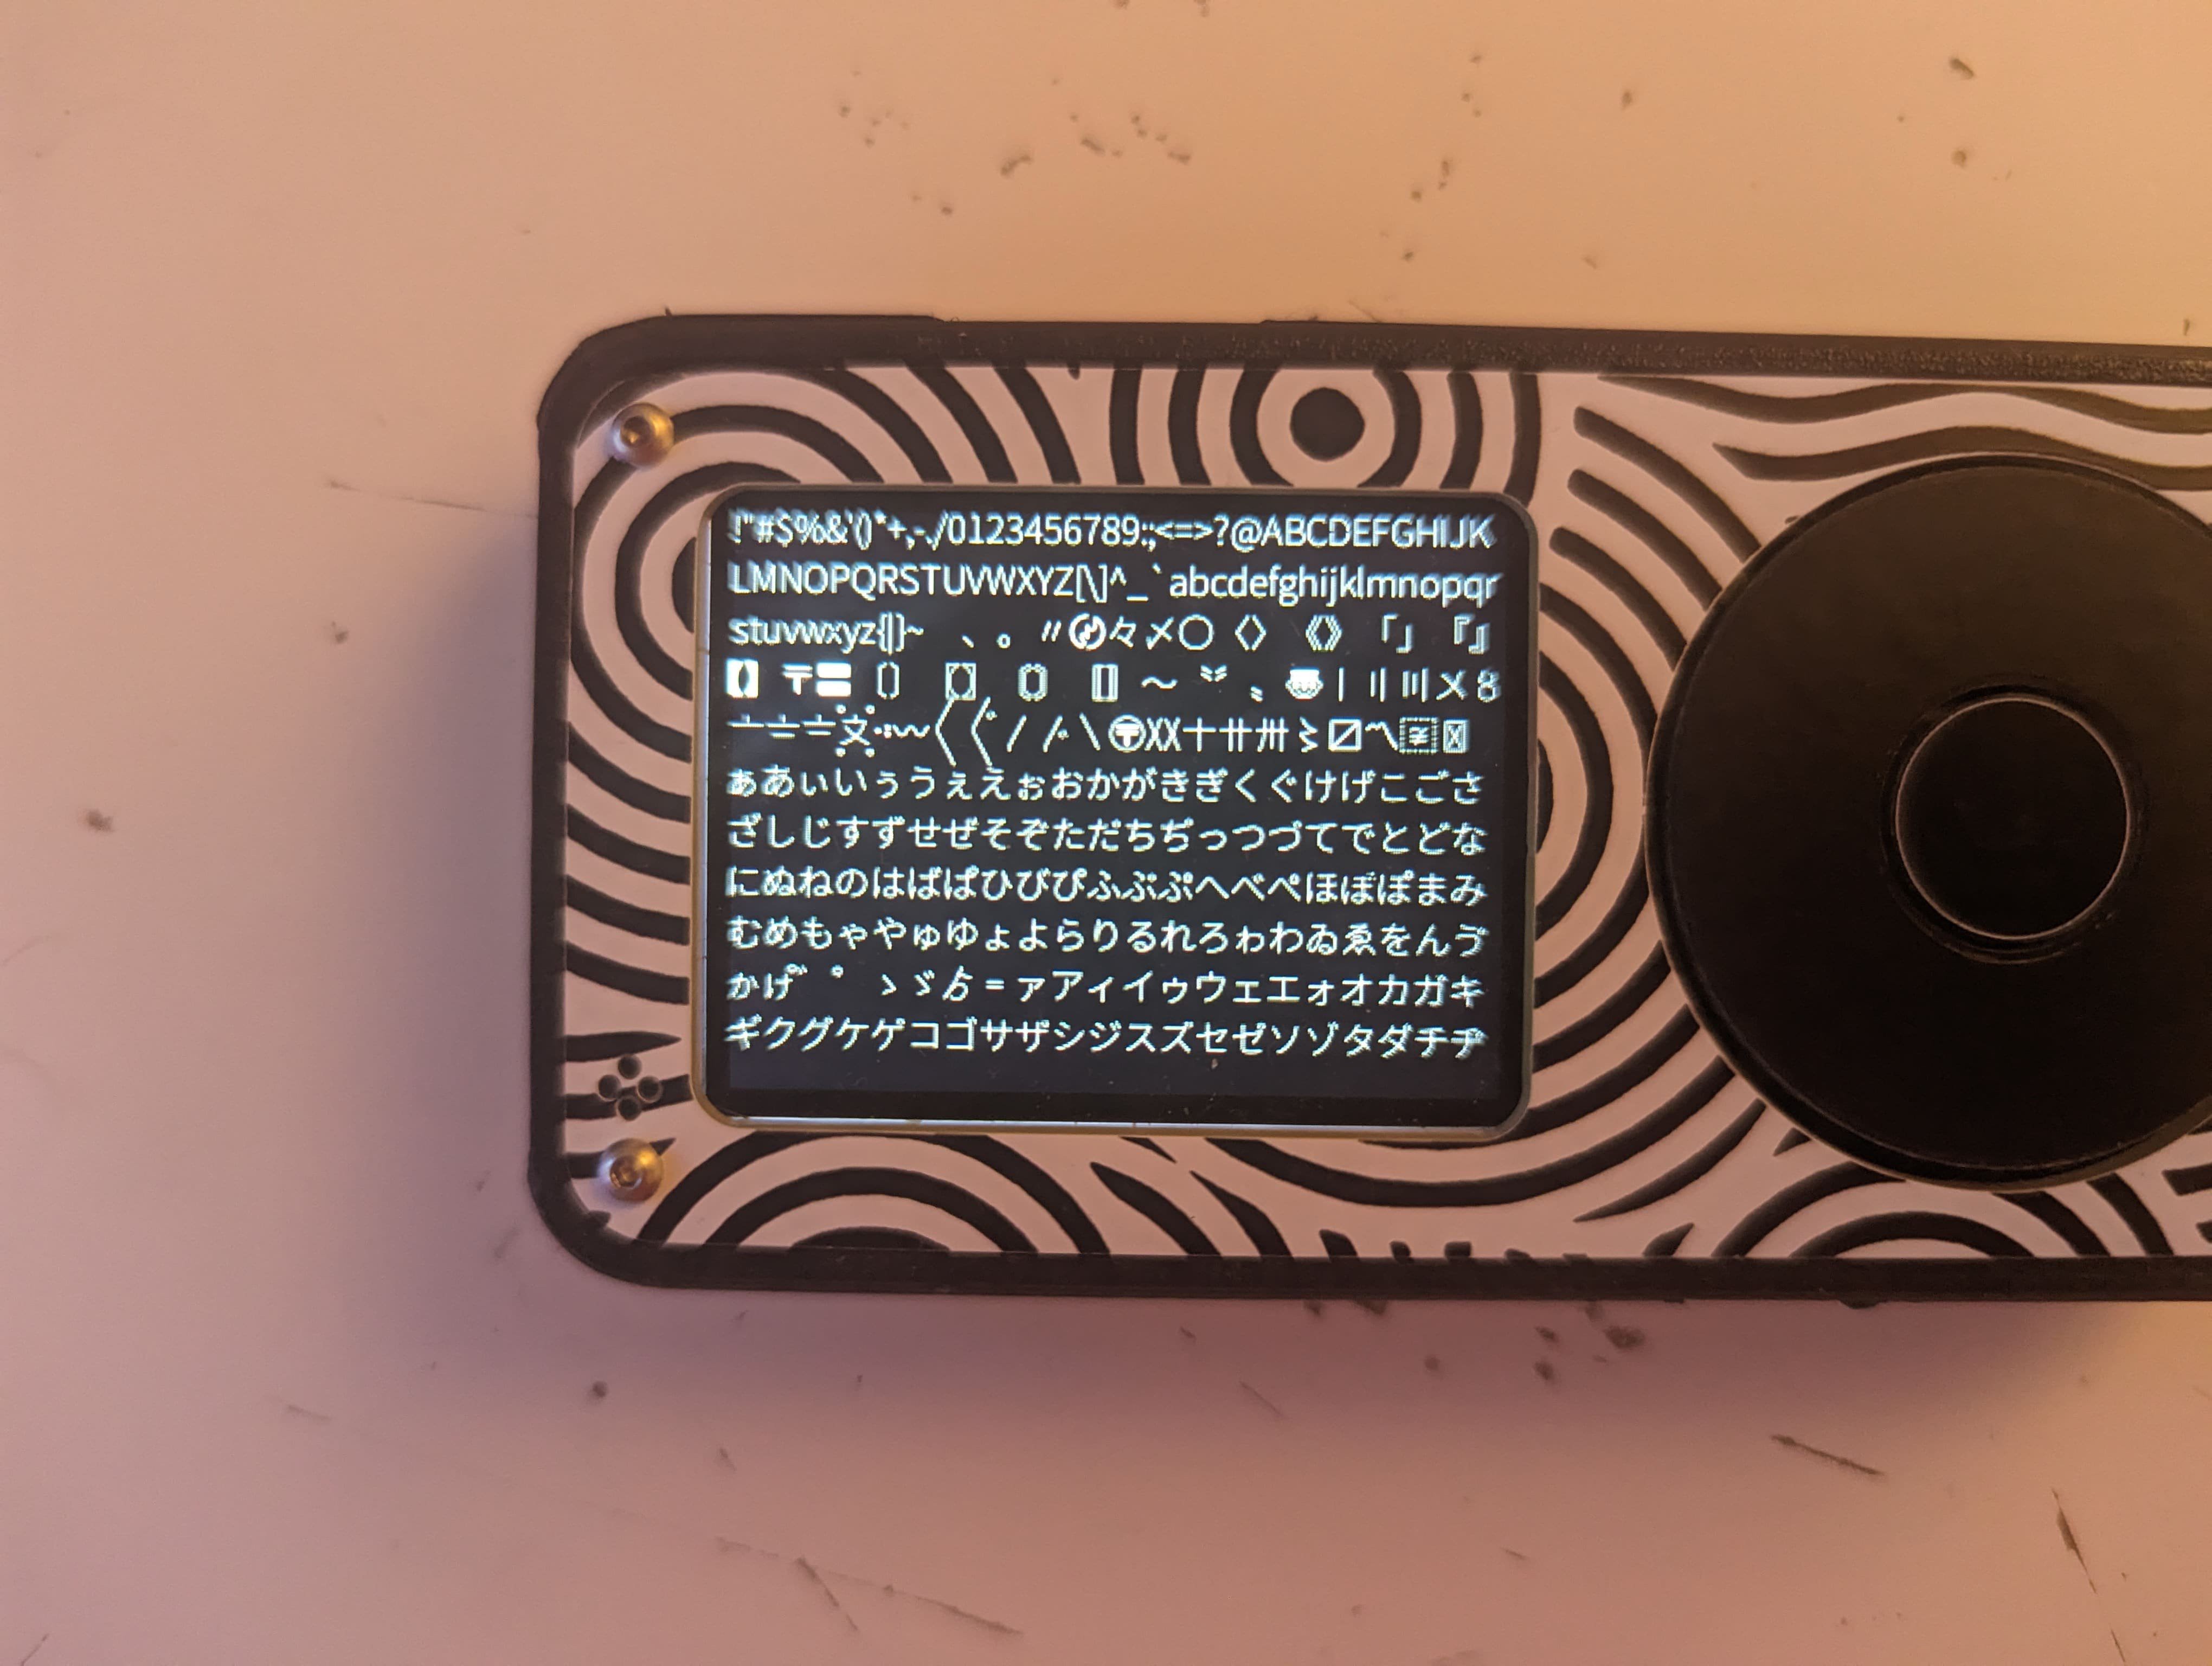
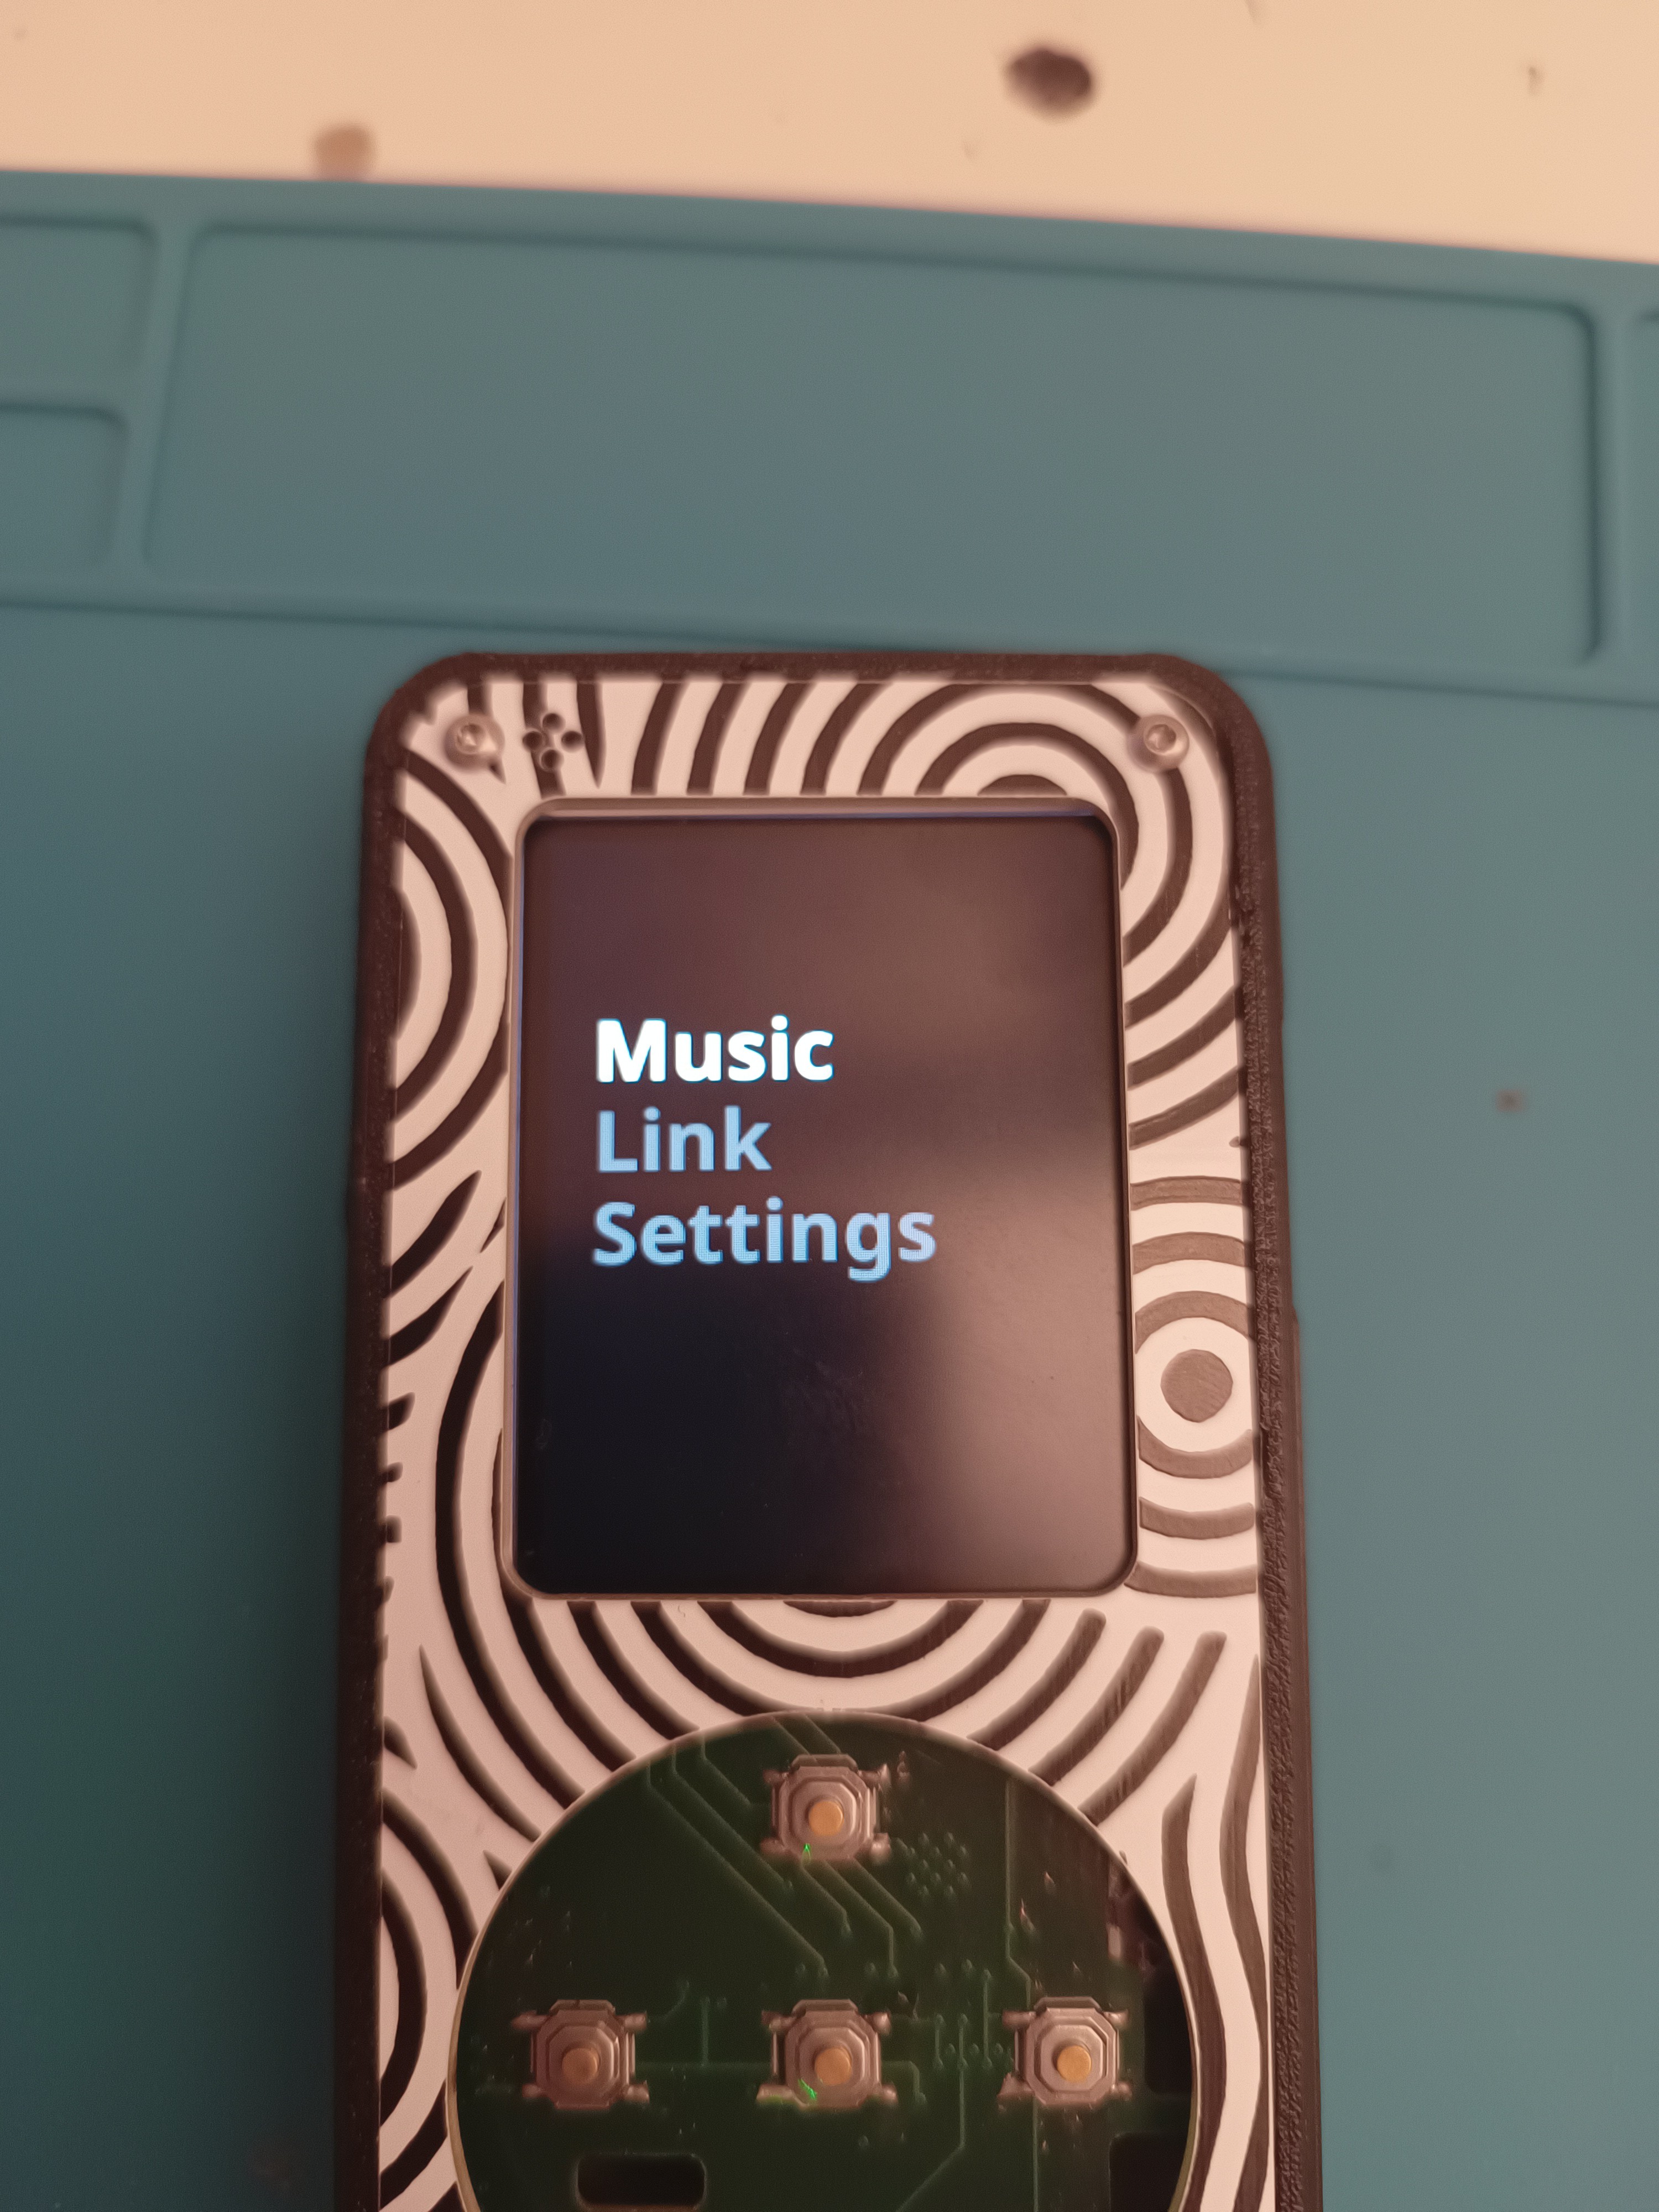
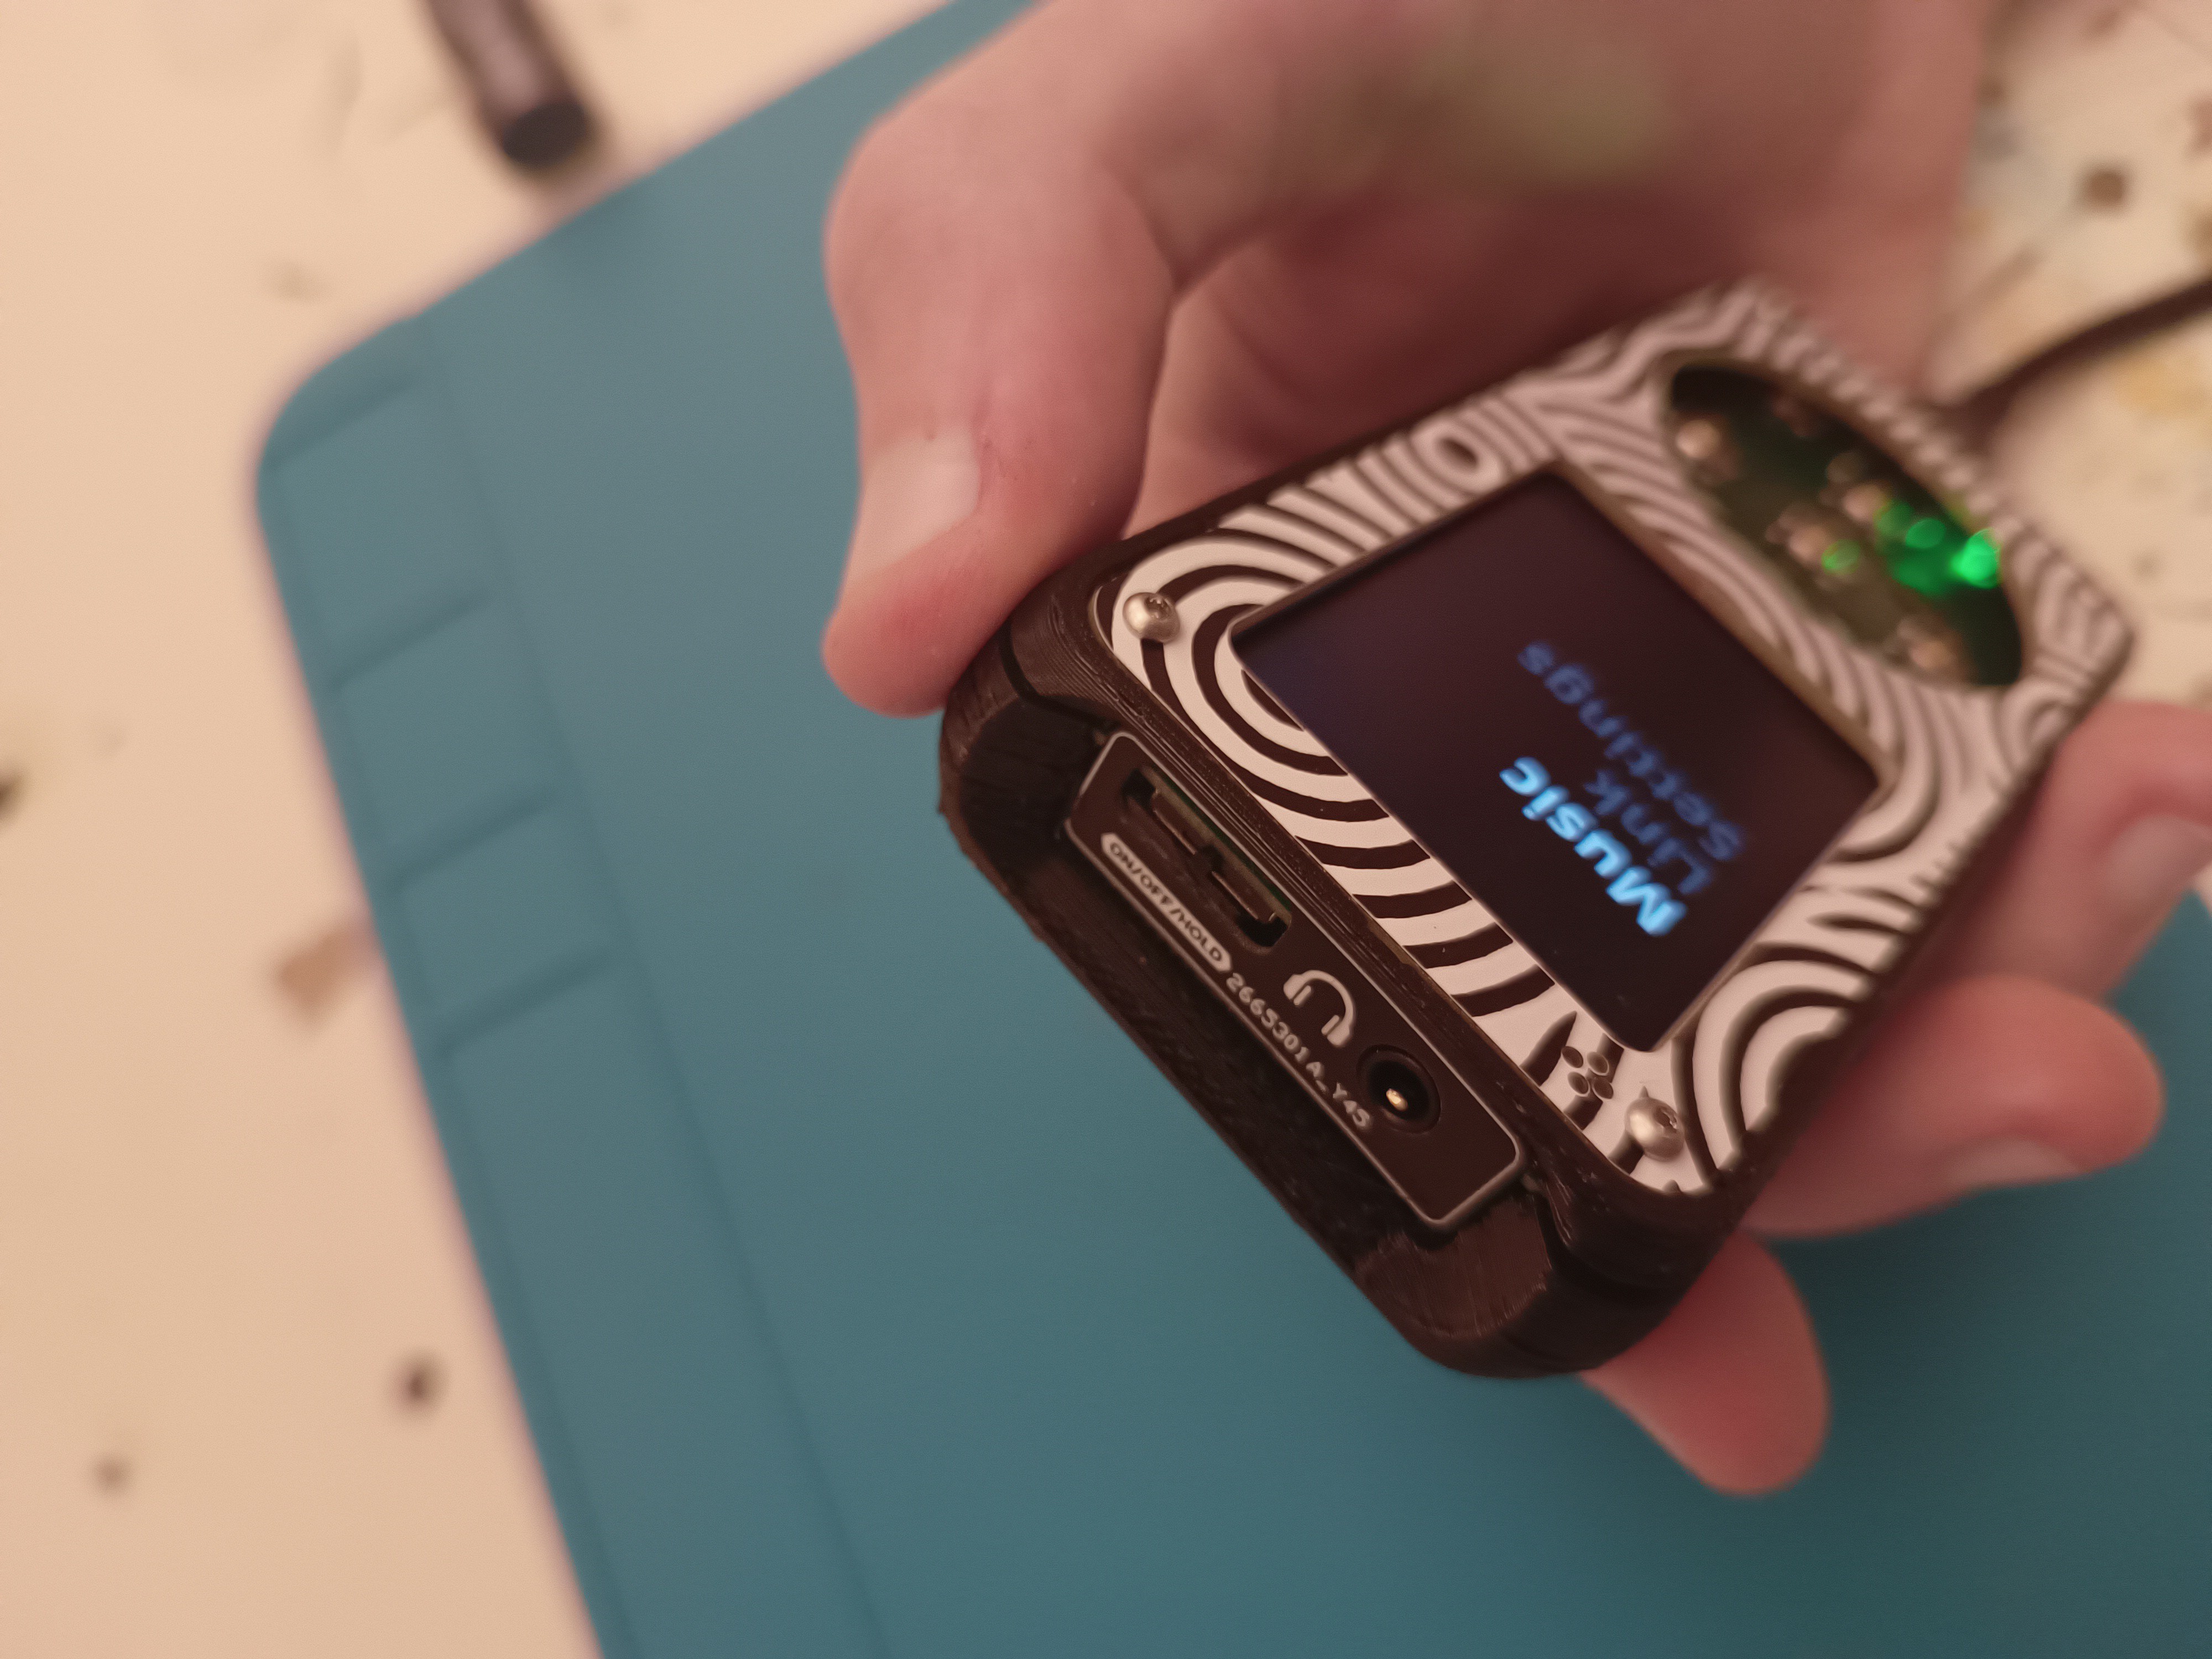
- 2" Colour IPS LCD, 240*320 pixels
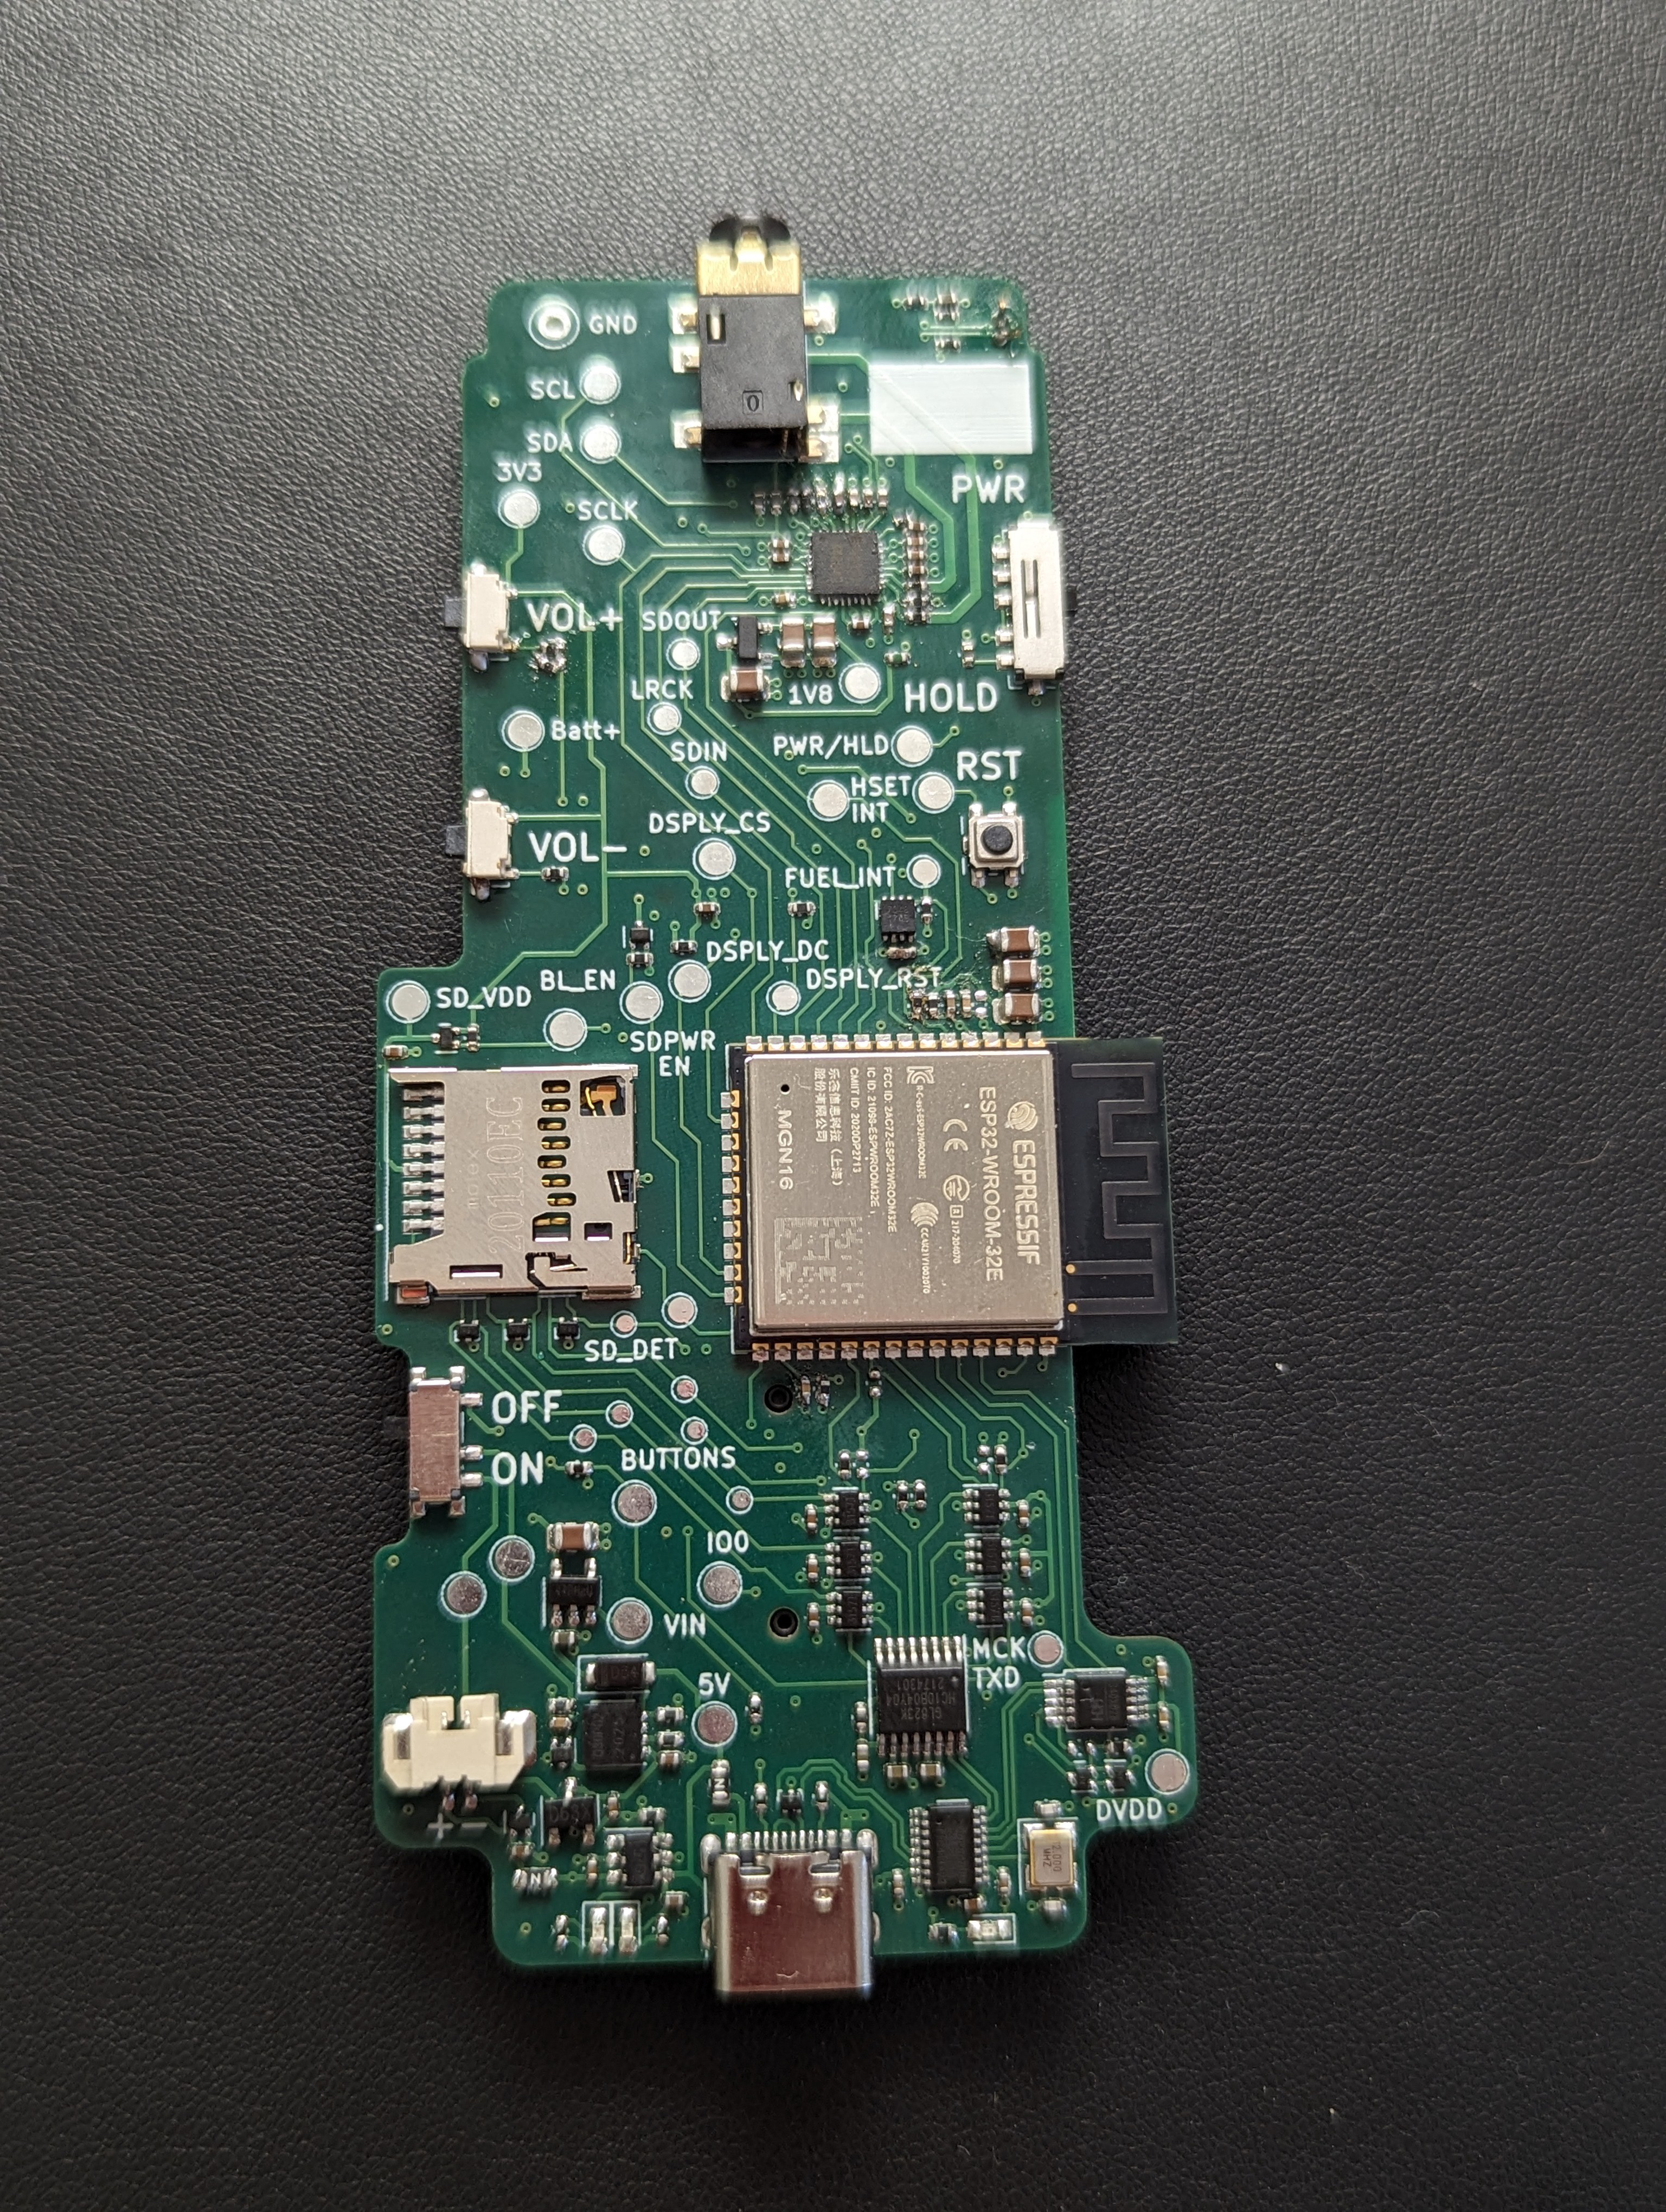
- ESP32-S3 with 16MB flash 8MB PSRAM
- Real time clock with configurable interrupt
- Clickwheel with 5 tactile buttons and 6 capacitive sensing electrodes
- Micro SD card slot (push-push spring loaded)
- Fuel gauge with configurable interrupt
- USB MSC drag and drop onto SD card (WIP)
- Easy to repair construction, 4 hex bolts
- Fully open source
What is not on the V2
- Bluetooth classic - theres going to be a mcu change for V3 to allow this
- Haptic feedback for clickwheel
Analog audio is managed by a ES8327 CODEC chip. The audio is sent out over a standard 3.5mm headphone jack in stereo. I have so far tested with 16 ohm and 60 ohm headphones. The 16 ohms can have a slight static in the backround but this goes away completely on the 60 ohm headphones. Hoping to get that sorted out though since I use 16 ohm earphones usually. Apart from playback it also supports recording, with both an internal mic and the ability to use the headphone mic of wired headphones. By using a codec not only do you gain recording but also we should be able to detect buttons on headphones.
Power comes from a 2500mah battery, connected through a 2mm JST connector. The battery is recharged when plugged into the USB-C port, with charge indicator lights near the port.
The display is a 2" IPS LCD, backlit of course with full colour at a resolution of 240*320 pixels. Being used with the tft-espi library at 80MHz.
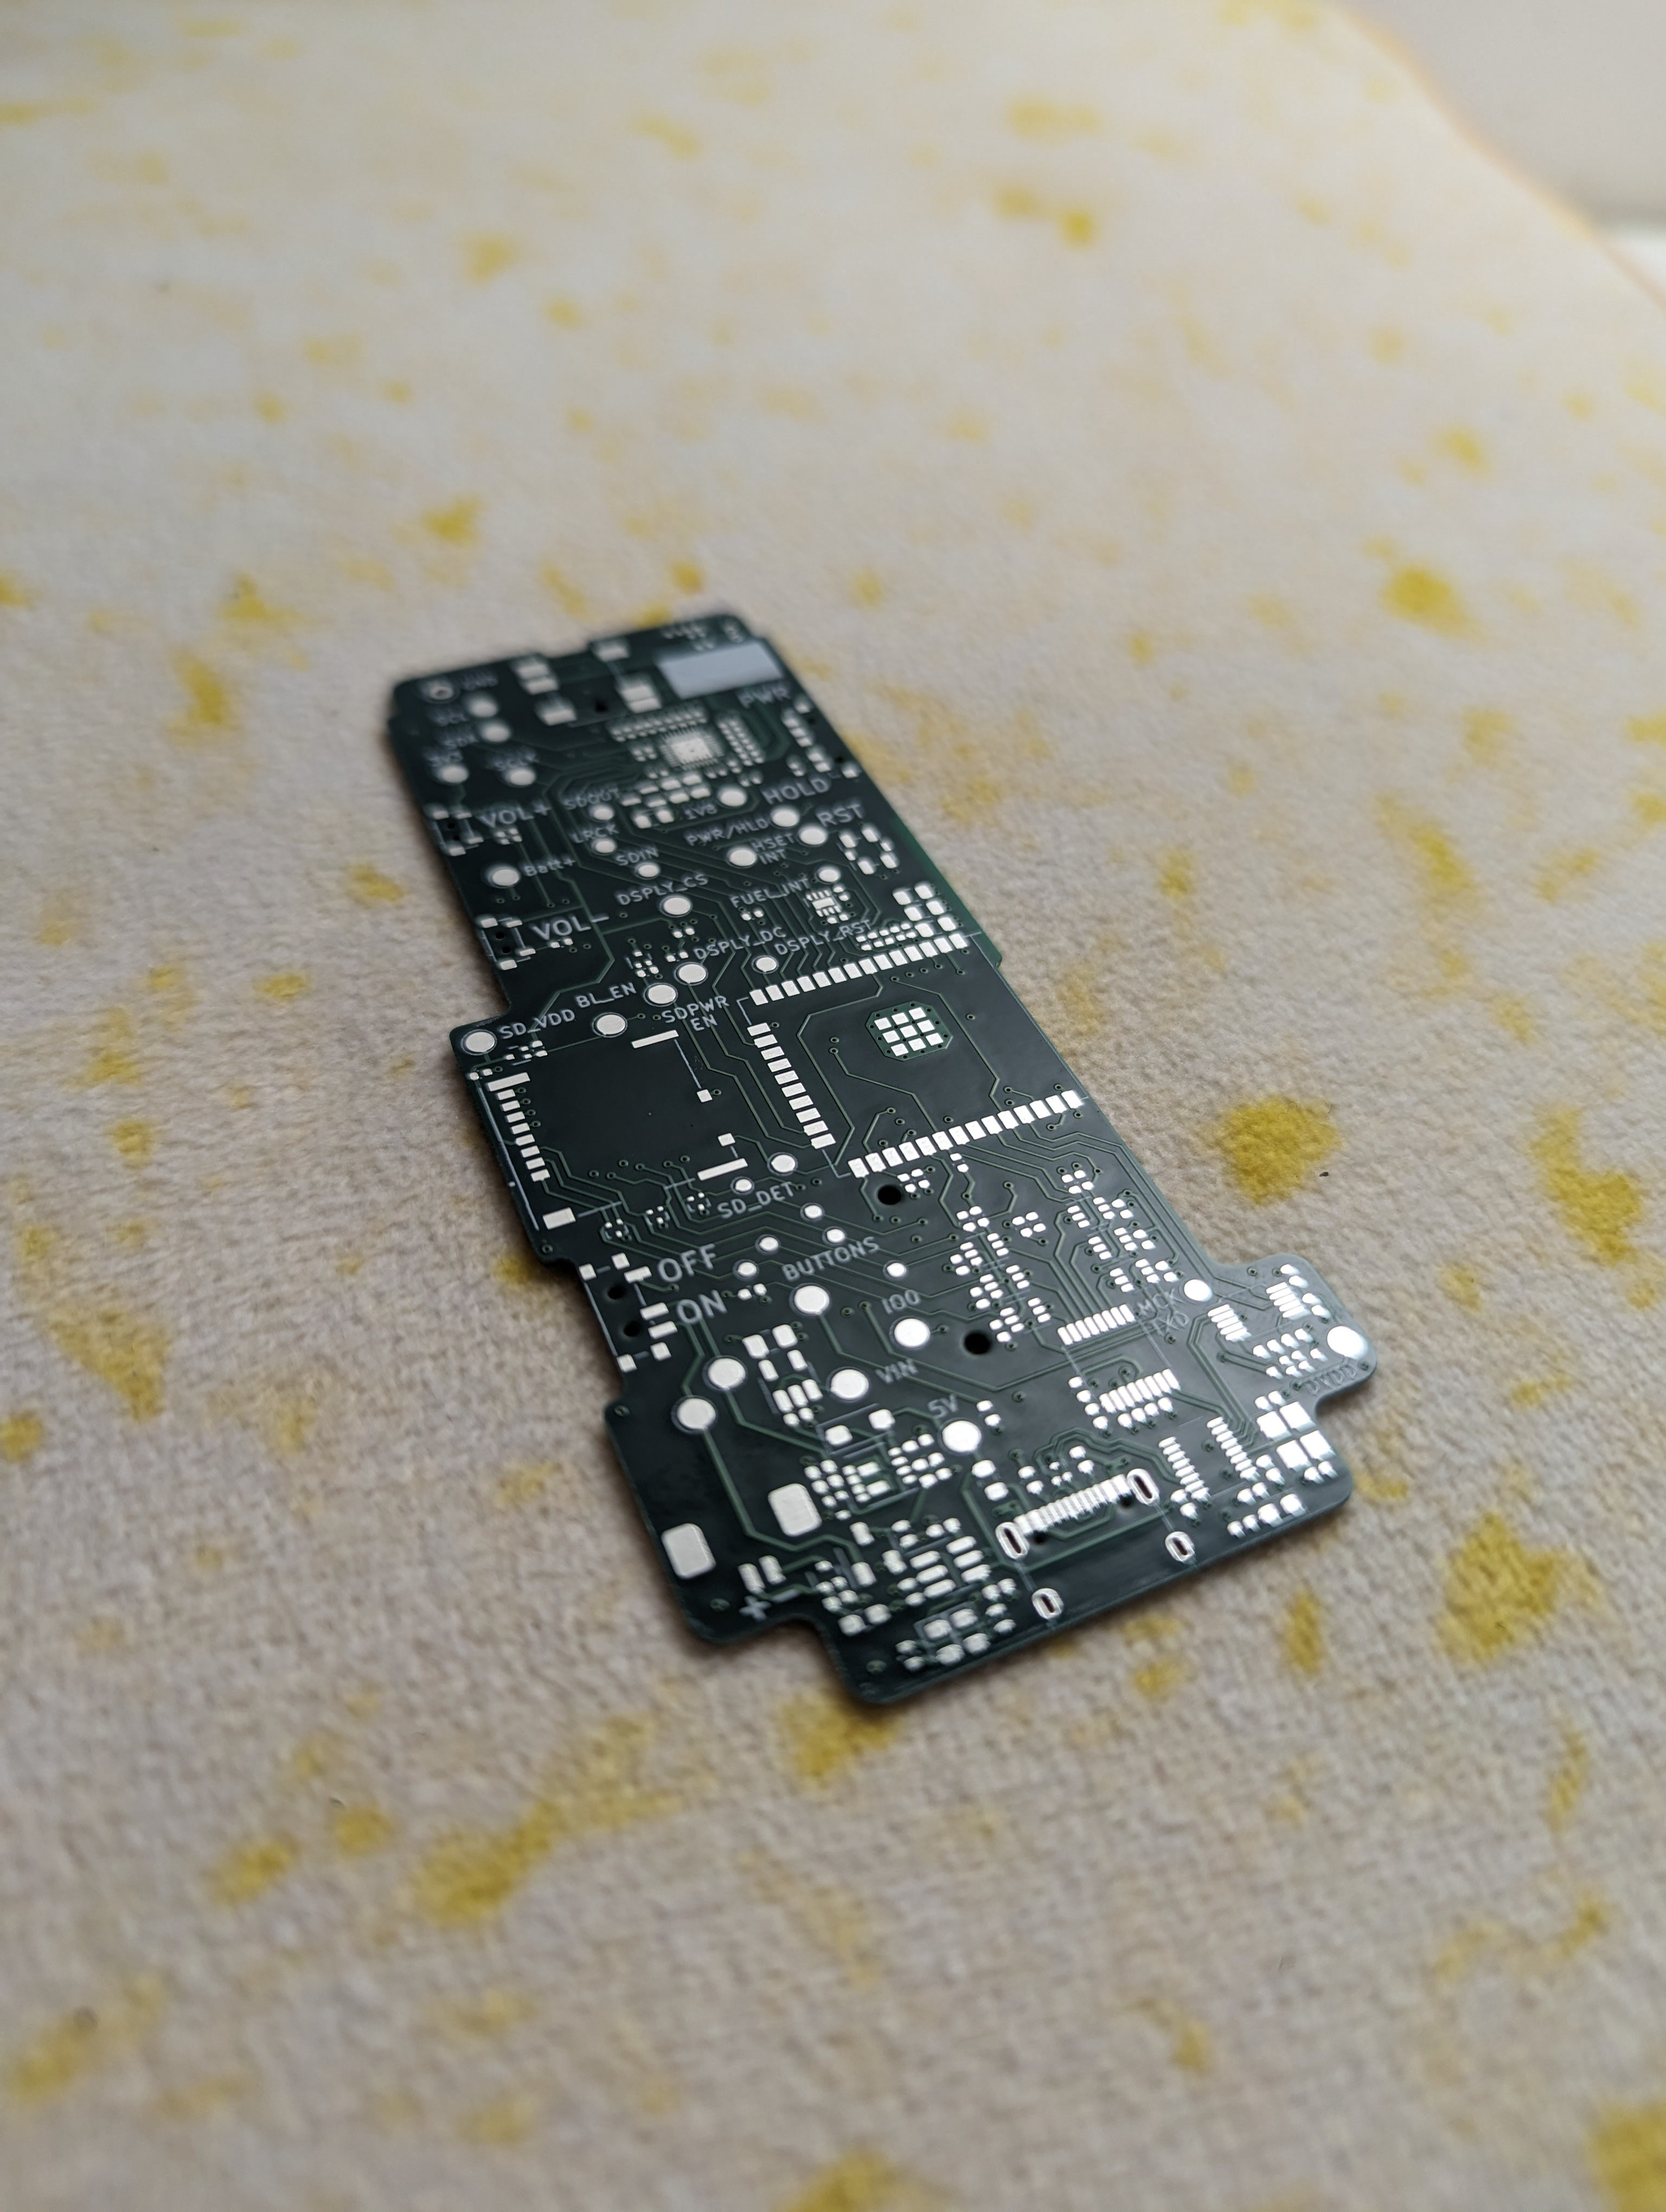
Main processor is a ESP32-S3 WROOM module. Chose a wroom module because its so much easier to design for and assemble. Especially since its all pre certified wireless so no worries there. Also using one of the chips directly does not provide any space, assembly or cost benefits. Code is uploaded over the internal usb peripheral. To upload code you just press and hold the top button on the clickwheel (io0) and press the reset button through the small hole in the lower right corner of the top plate. That puts the ESP32 into download mode and you can upload over the com port that will show up on the computer.
There is PCF85063 real time clock onboard which should allow the device to keep time accurately, I could have used the "internal RTC" of the ESP32 but I needed every GPIO pin.
The clickwheel is connected by a ribbon cable to the main board, with a connector on the main board for easy replacement. Same goes for the battery with its JST connector, should be very easily replaceable or interchangeable with other battery capacities. Just need to change the value of the resistor as per the LGS4056 datasheet to set the correct charge current for the battery you choose to use, i've marked this resistor with a star on the silkscreen. Though it is 0402 like every other resistor on the board, I definitely could have made it easier in that regard but if you are going to be making this board id think you can solder and desolder 0402 components. If this turns out to be a problem i'll make the changes for a next revision.
I want to talk a bit more about the clickwheel, because its something that needs to be changed for the next version.

Now to start off, it works really well. Im quite happy with its performance and i'm blow away by the interpolation. Check out the logs if you want to see that demo. Currently i'm using it as a software defined 12 segment wheel and loving its performance. But to get to what I don't like, it's gotta be the assembly of the wheel. The ribbon cable is soldered directly onto the clickwheel which is a fairly difficult job, not impossible though and i've got two functional wheels. Just really tedious to solder as its 8 little metal strips...
Read more »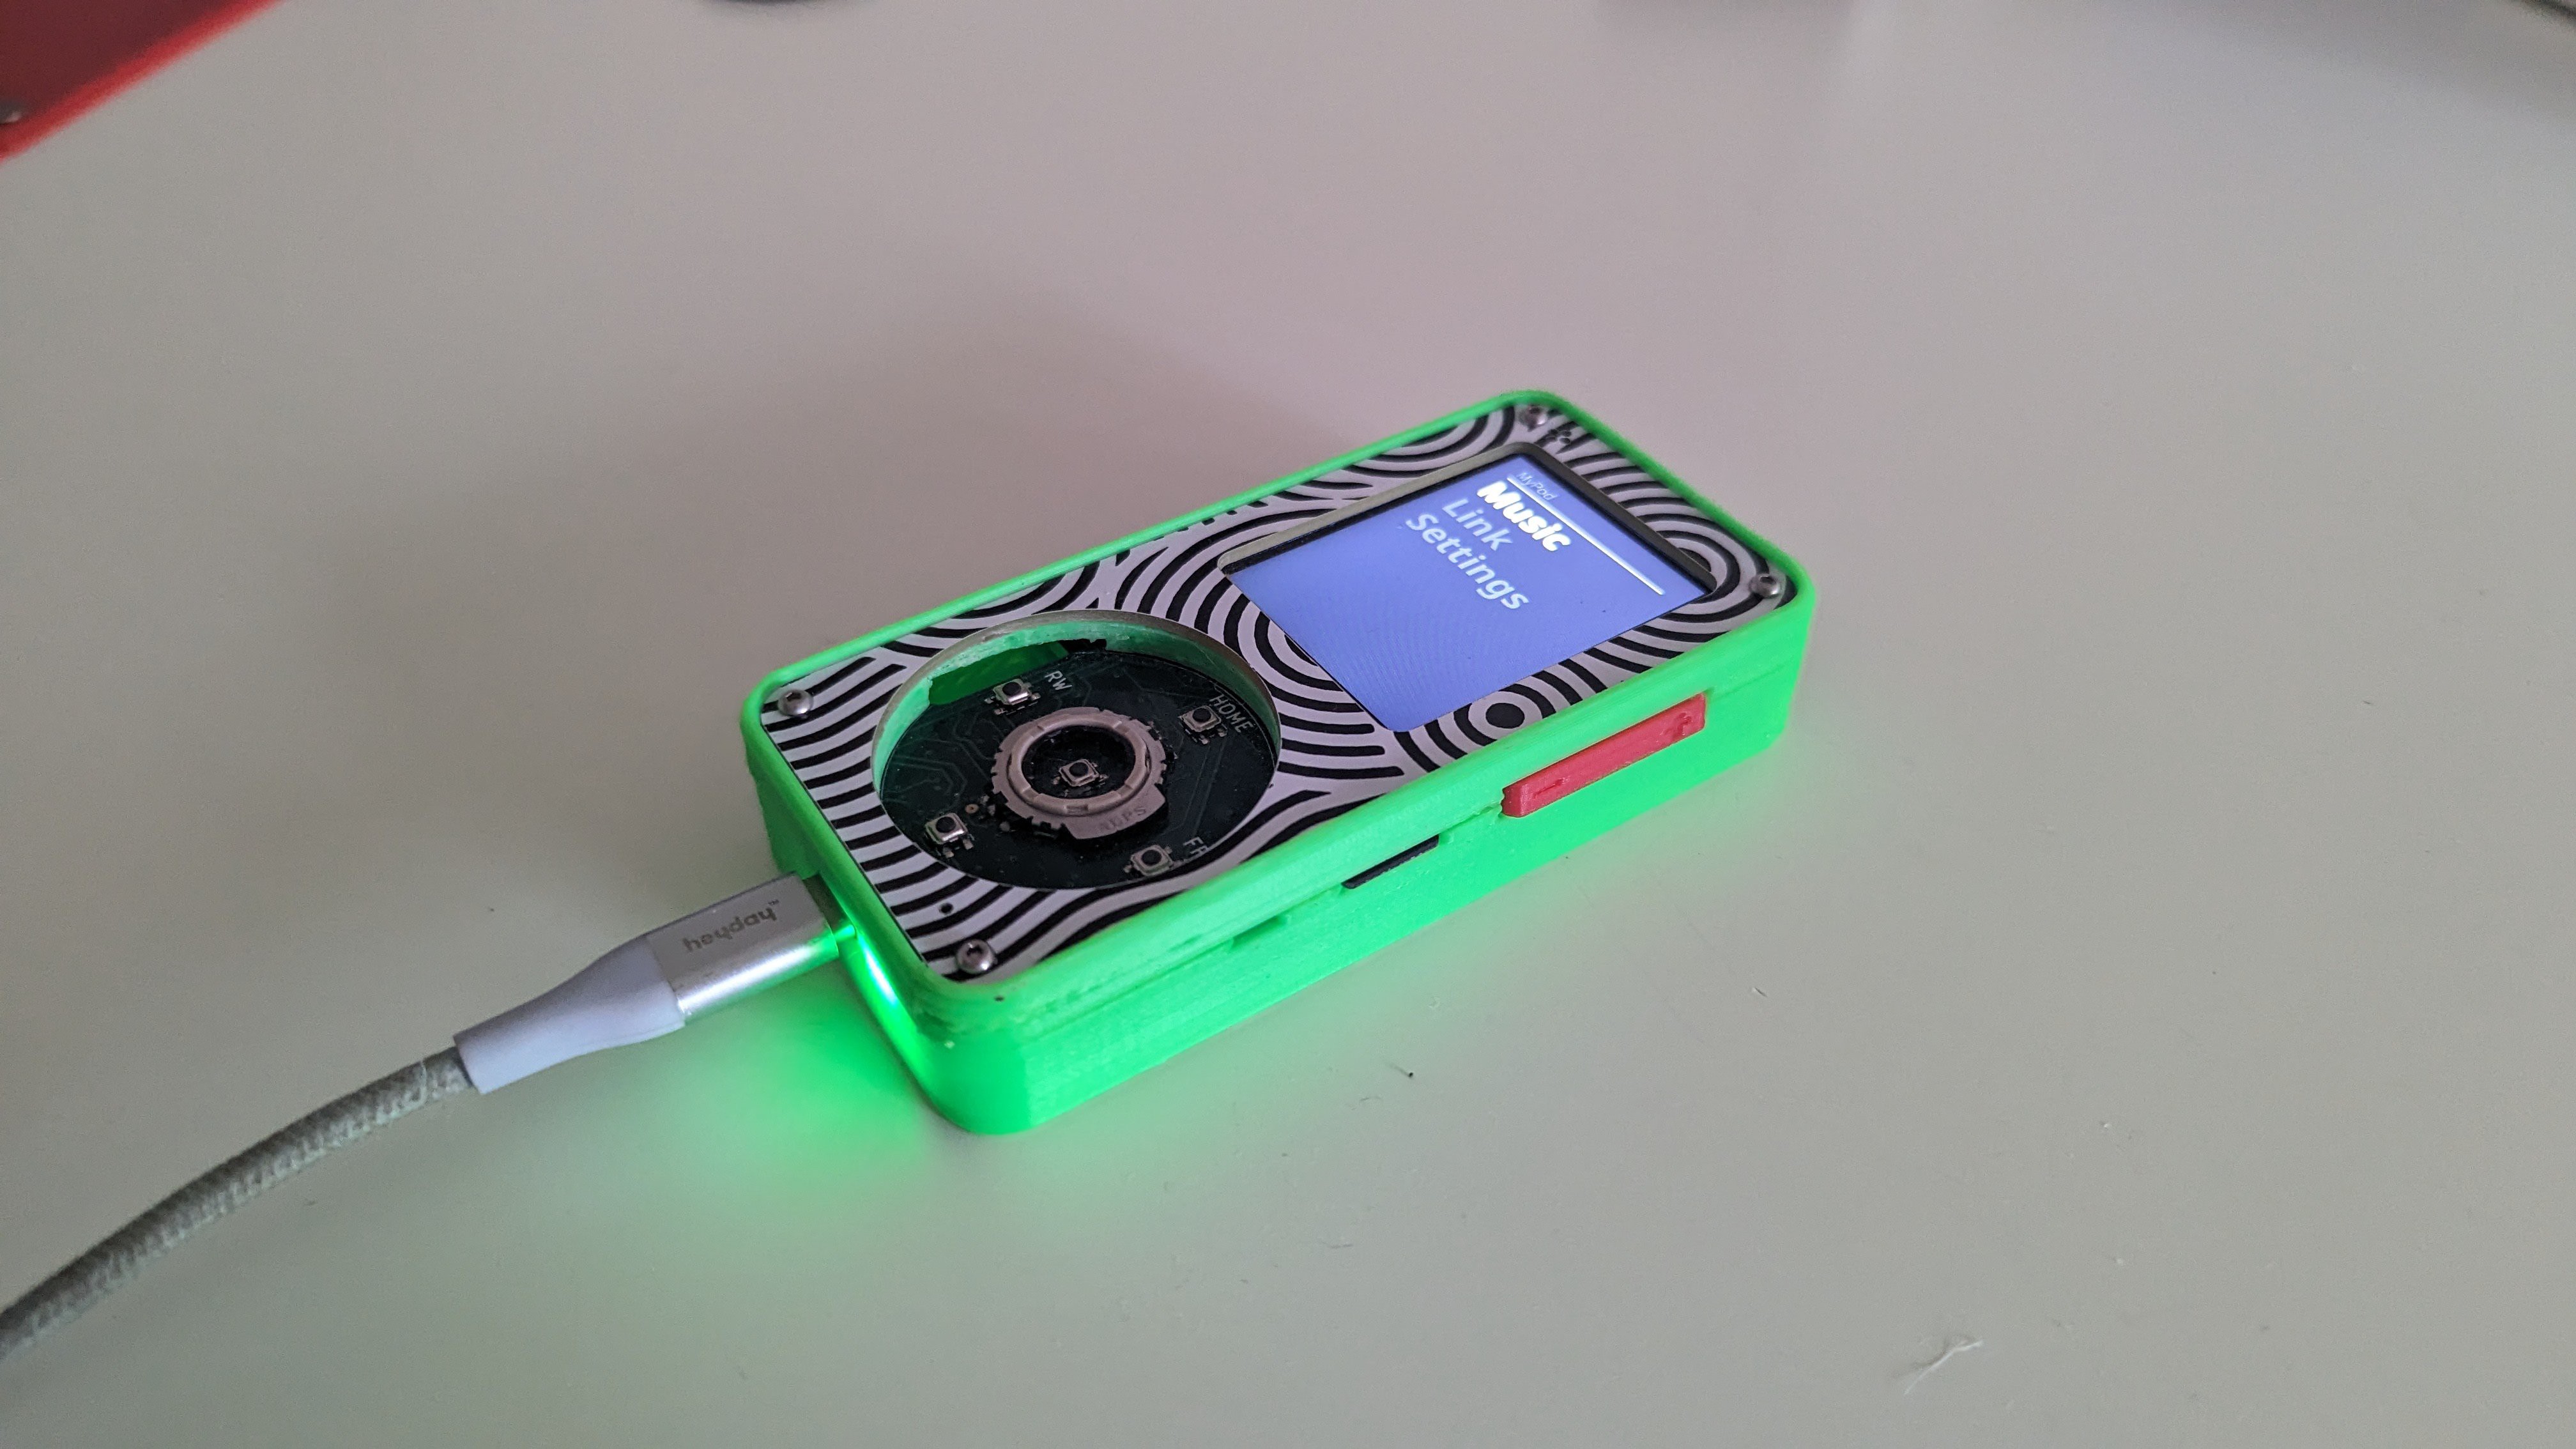


 hexum064
 Jonathan 'theJPster' Pallant
 Maksym
Very interesting.
"Add external capacitive touch sensing chip that can communicate over i2c and has an interrupt."
Have you ever had an idea to use clickwheel from ipod classic? :)
Will schematic and code be open source?