 Guillermo Perez Guillen
In this chapter I will show you the main features of Raspberry Pi 3B+, Qwiic pHAT module and AS7262 sensor. Also we learn how to setup the Raspberry Pi and how to detect the peripheral of the sensor.
Raspberry Pi 3B+
The Raspberry Pi 3 B+ provides you with the same Pi as before, but now with gigabit and PoE capable Ethernet, as well as better overheating protection for the 64-bit processor. This computer small has a Broadcom BCM2837, an ARM Cortex-A53 64-bit Quad Core Processor System-on-Chip operating at 1.4GHz. The GPU provides OpenGL ES 2.0, hardware-accelerated OpenVG and 1080p30 H.264 high-profile decode. It is capable of 1Gpixel/s, 1.5Gtexel/s or 24 GFLOPs of general-purpose compute.
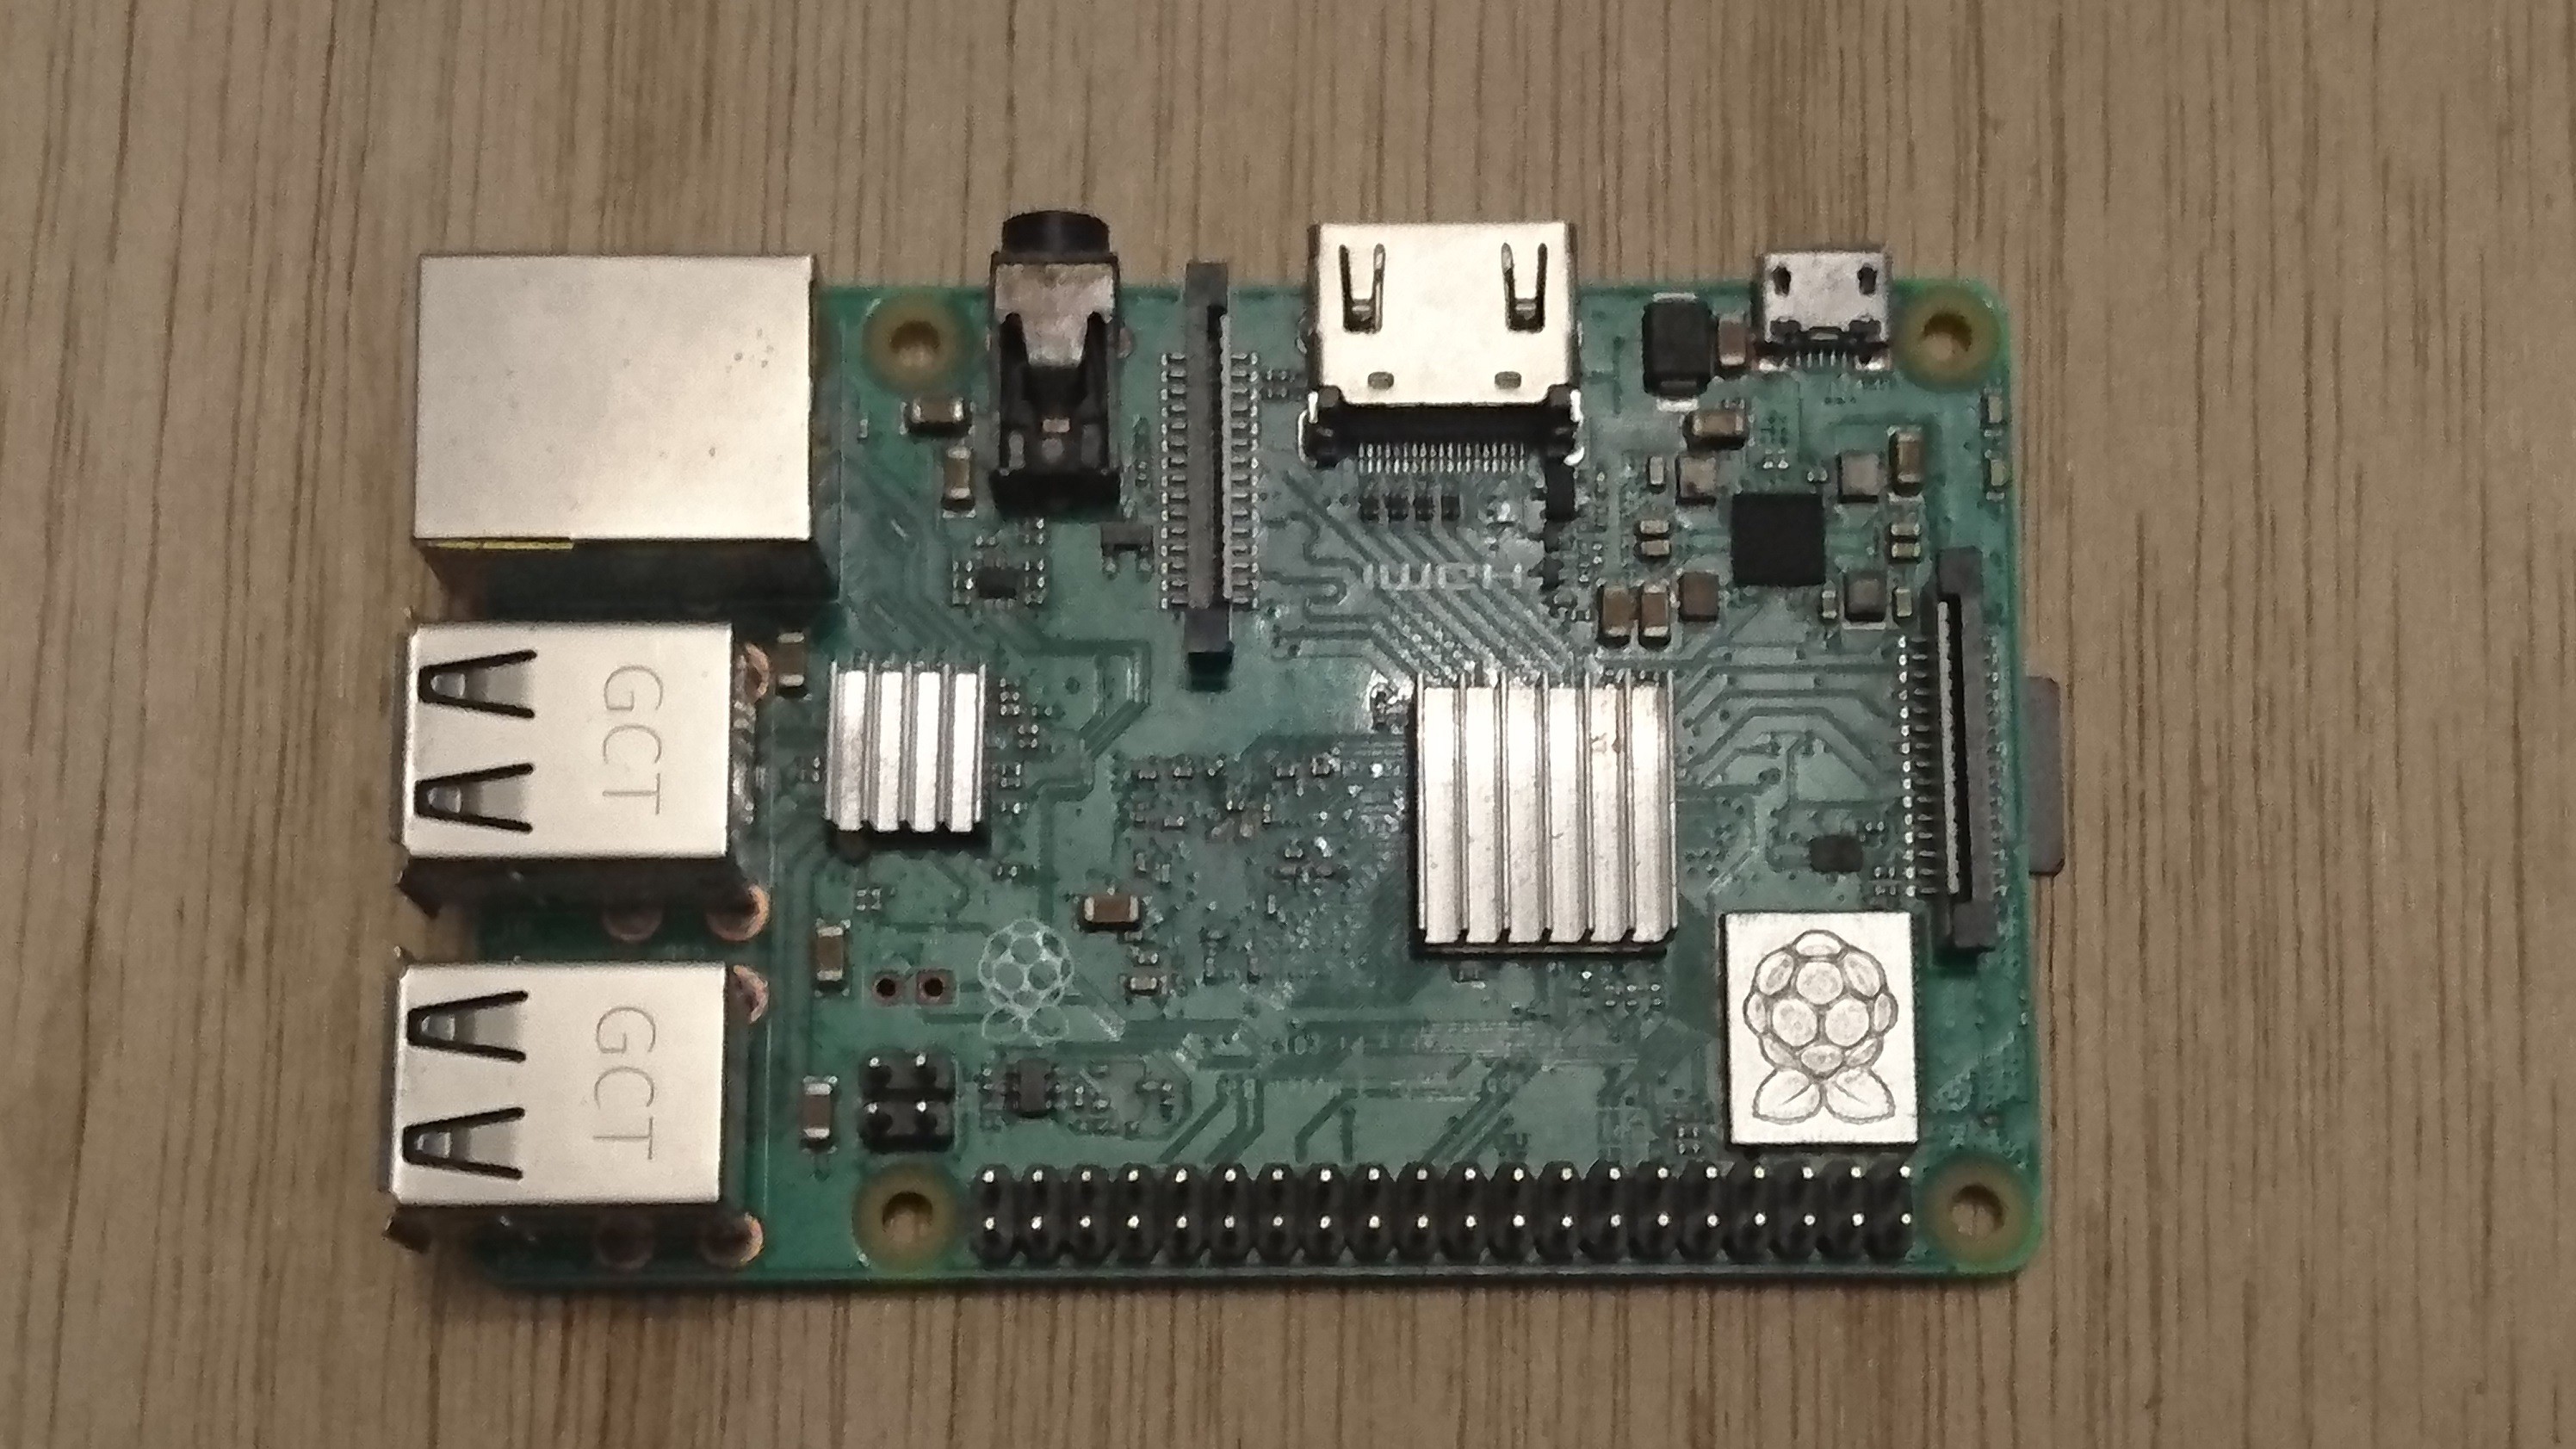
- Broadcom BCM2837B0, Cortex-A53 (ARMv8) 64-bit SoC @ 1.4GHz
- 1GB LPDDR2 SDRAM
- 2.4GHz and 5GHz IEEE 802.11.b/g/n/ac wireless LAN, Bluetooth 4.2, BLE
- Gigabit Ethernet over USB 2.0 (maximum throughput 300 Mbps)
- Extended 40-pin GPIO header
- Full-size HDMI
- 4 USB 2.0 ports
- CSI camera port for connecting a Raspberry Pi camera
- DSI display port for connecting a Raspberry Pi touchscreen display
- 4-pole stereo output and composite video port
- Micro SD port for loading your operating system and storing data
- 5V/2.5A DC power input
- Power-over-Ethernet (PoE) support (requires separate PoE HAT)
SparkFun Qwiic pHAT v2.0
The SparkFun Qwiic pHAT connects the I2C bus (GND, 3.3V, SDA, and SCL) on your Raspberry Pi to an array of Qwiic connectors on the HAT. Since the Qwiic system allows for daisy-chaining boards with different addresses, you can stack as many sensors as you’d like. The Qwiic pHAT V2.0 has four Qwiic connect ports (two on its side and two vertical), all on the same I2C bus. It also add a simple 5V screw terminal to power boards that may need more than 3.3V and a general-purpose button. This pHAT is compatible with any Raspberry Pi that utilizes the standard 2x20 GPIO header.
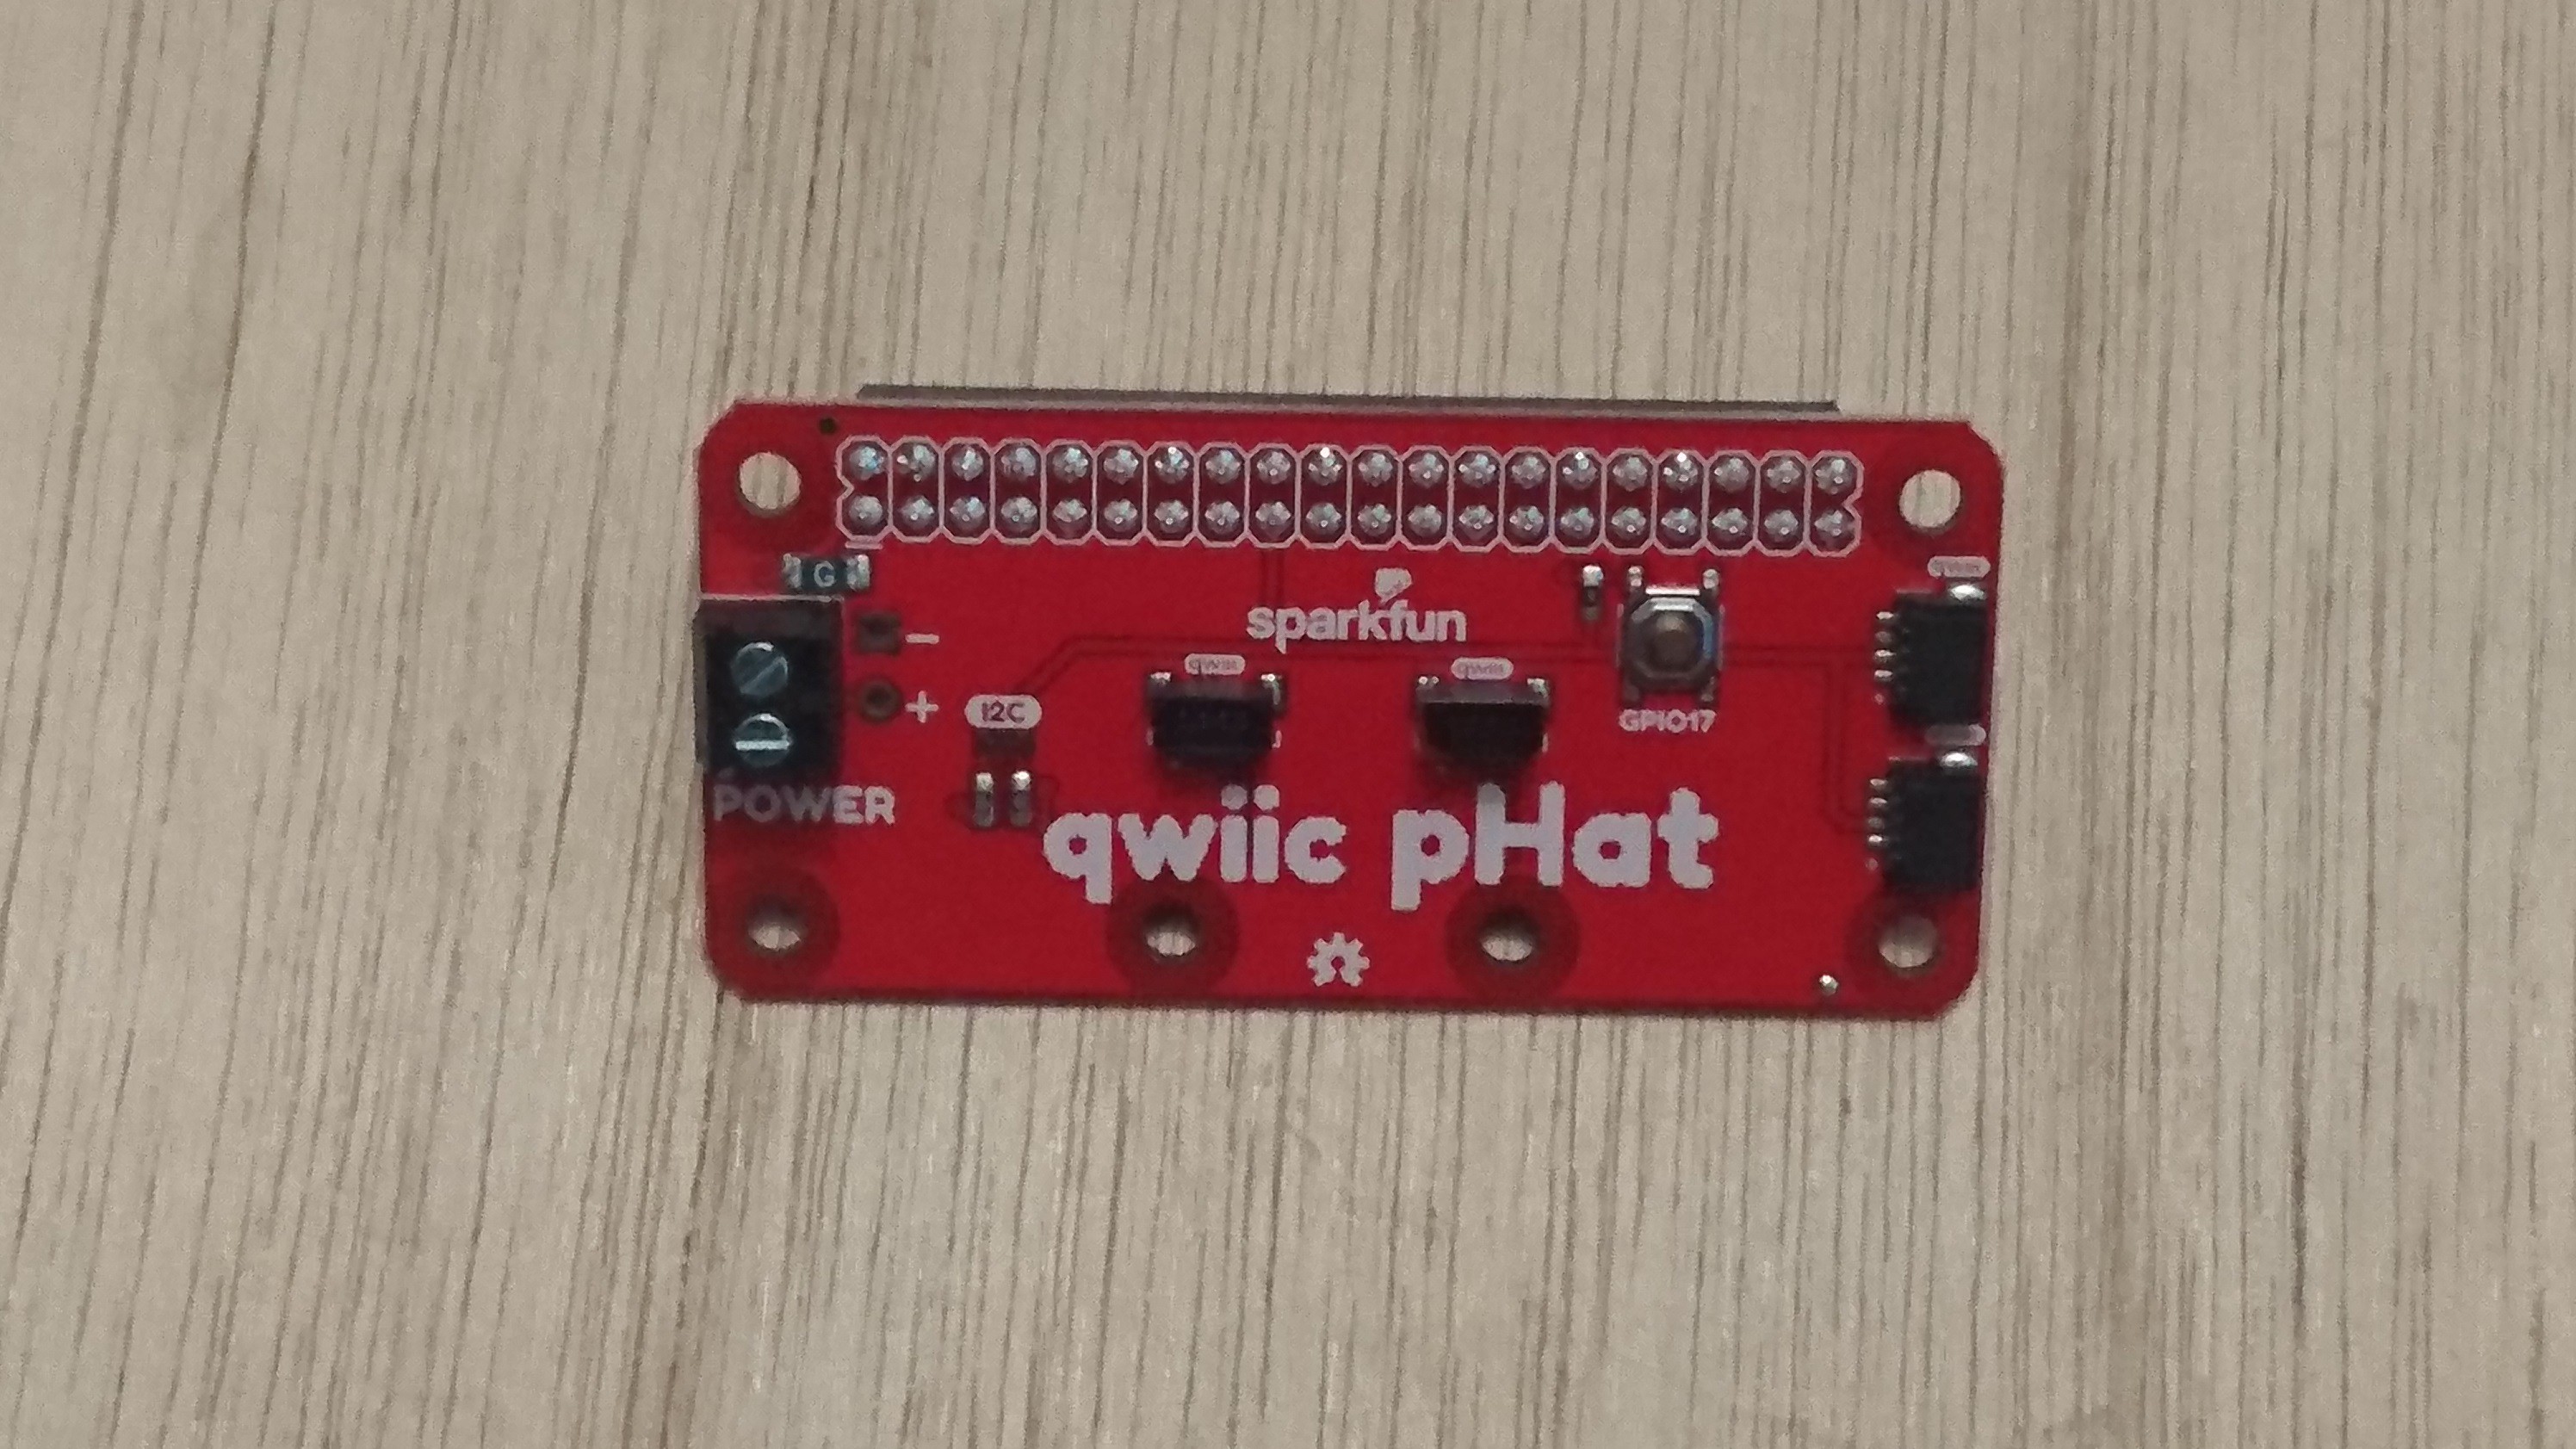
- 4x Qwiic Connection Ports
- 1x 5V Tolerant Screw Terminal
- 1x General Purpose Button
- HAT-compatible 40-pin Female Header
AS7262 6-channel Visible Light Sensor
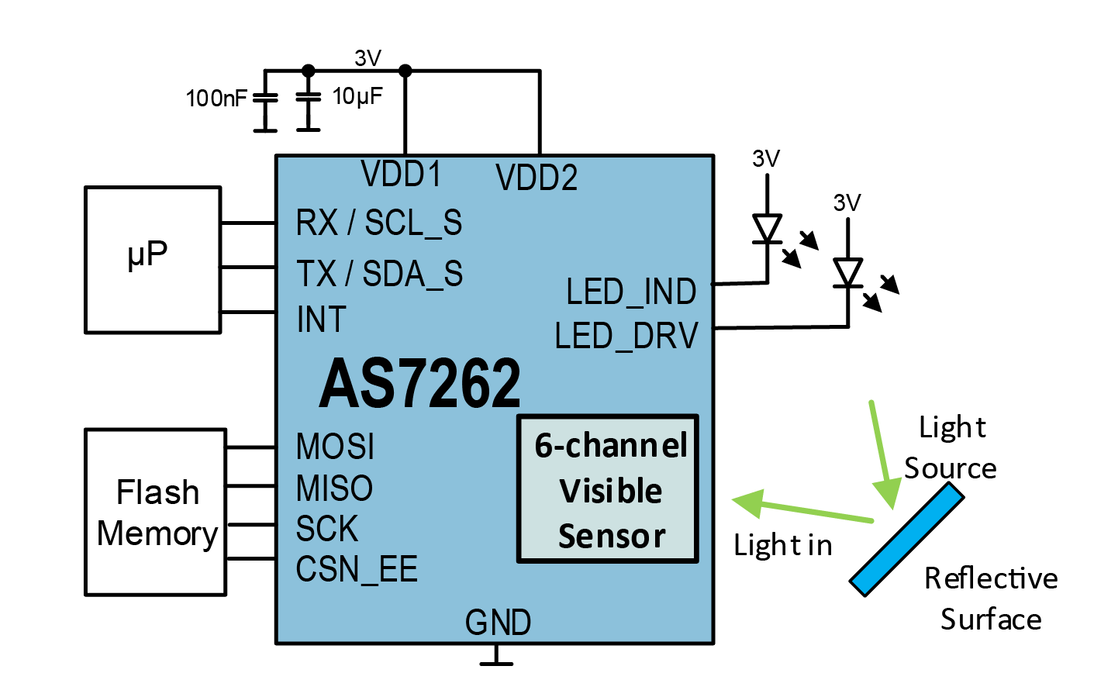
The SparkFun AS7262 spectrometer detects wavelengths in the visible range at 450, 500, 550, 570, 600 and 650nm of light each with 40nm of full-width half-max detection. The board also has multiple ways for you to illuminate objects that you will try to measure for a more accurate spectroscopy reading. There is an onboard LED that has been picked out specifically for this task, as well as two pins to solder your own LED into. The AS7262 Breakout is unique in its ability to communicate by both an I2C interface and serial interface using AT commands.

- 6 visible channels: 450nm, 500nm, 550nm, 570nm, 600nm and 650nm, each with 40nm FWHM
- Visible filter set realized by silicon interference filters
- 16-bit ADC with digital access
- Programmable LED drivers
- 2.7V to 3.6V with I2C interface
- 2x Qwiic connectors
Applications:
- Visible spectrometry.
- Spectral Color Matching and monitoring
- Authentication and counterfeit detection
- Detection of color mixture effects (e.g. textiles, paints, etc.)
- Fluid monitoring and analysis (using reagents)
- ID marker detection
Below you can see the spectral responsivity of this sensor.

Configuring the Pi
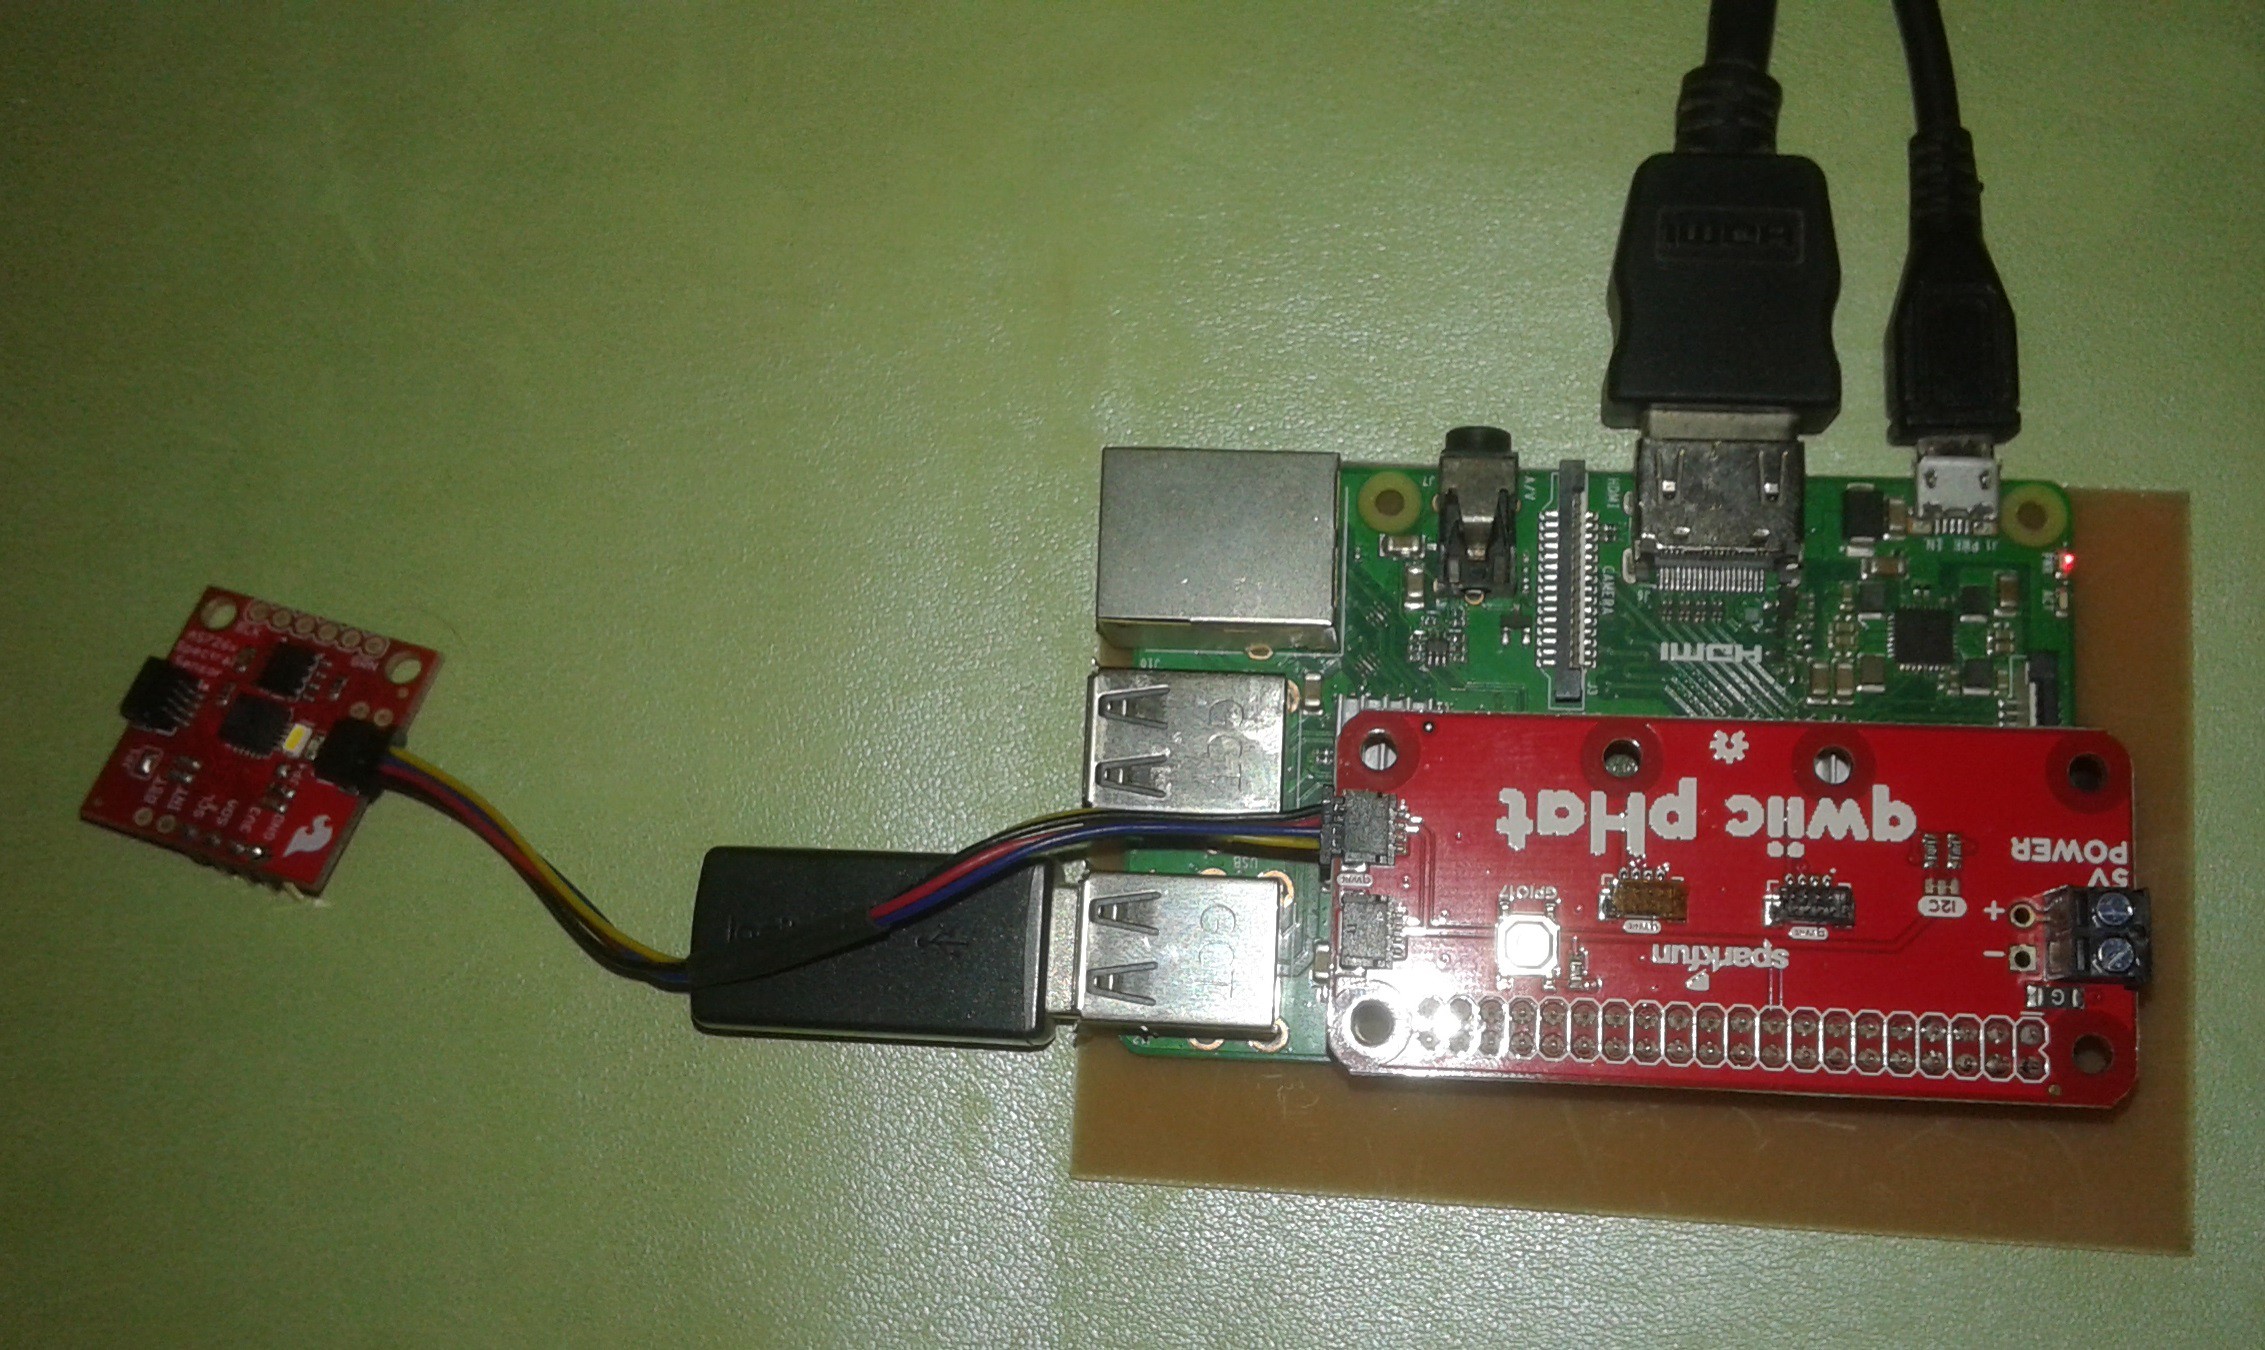
To get started with your Qwiic pHAT, simply plug it into the headers on the Raspberry Pi with the letters facing you. We'll use the Qwiic pHAT v2.0 in the following image to connect a Qwiic device.
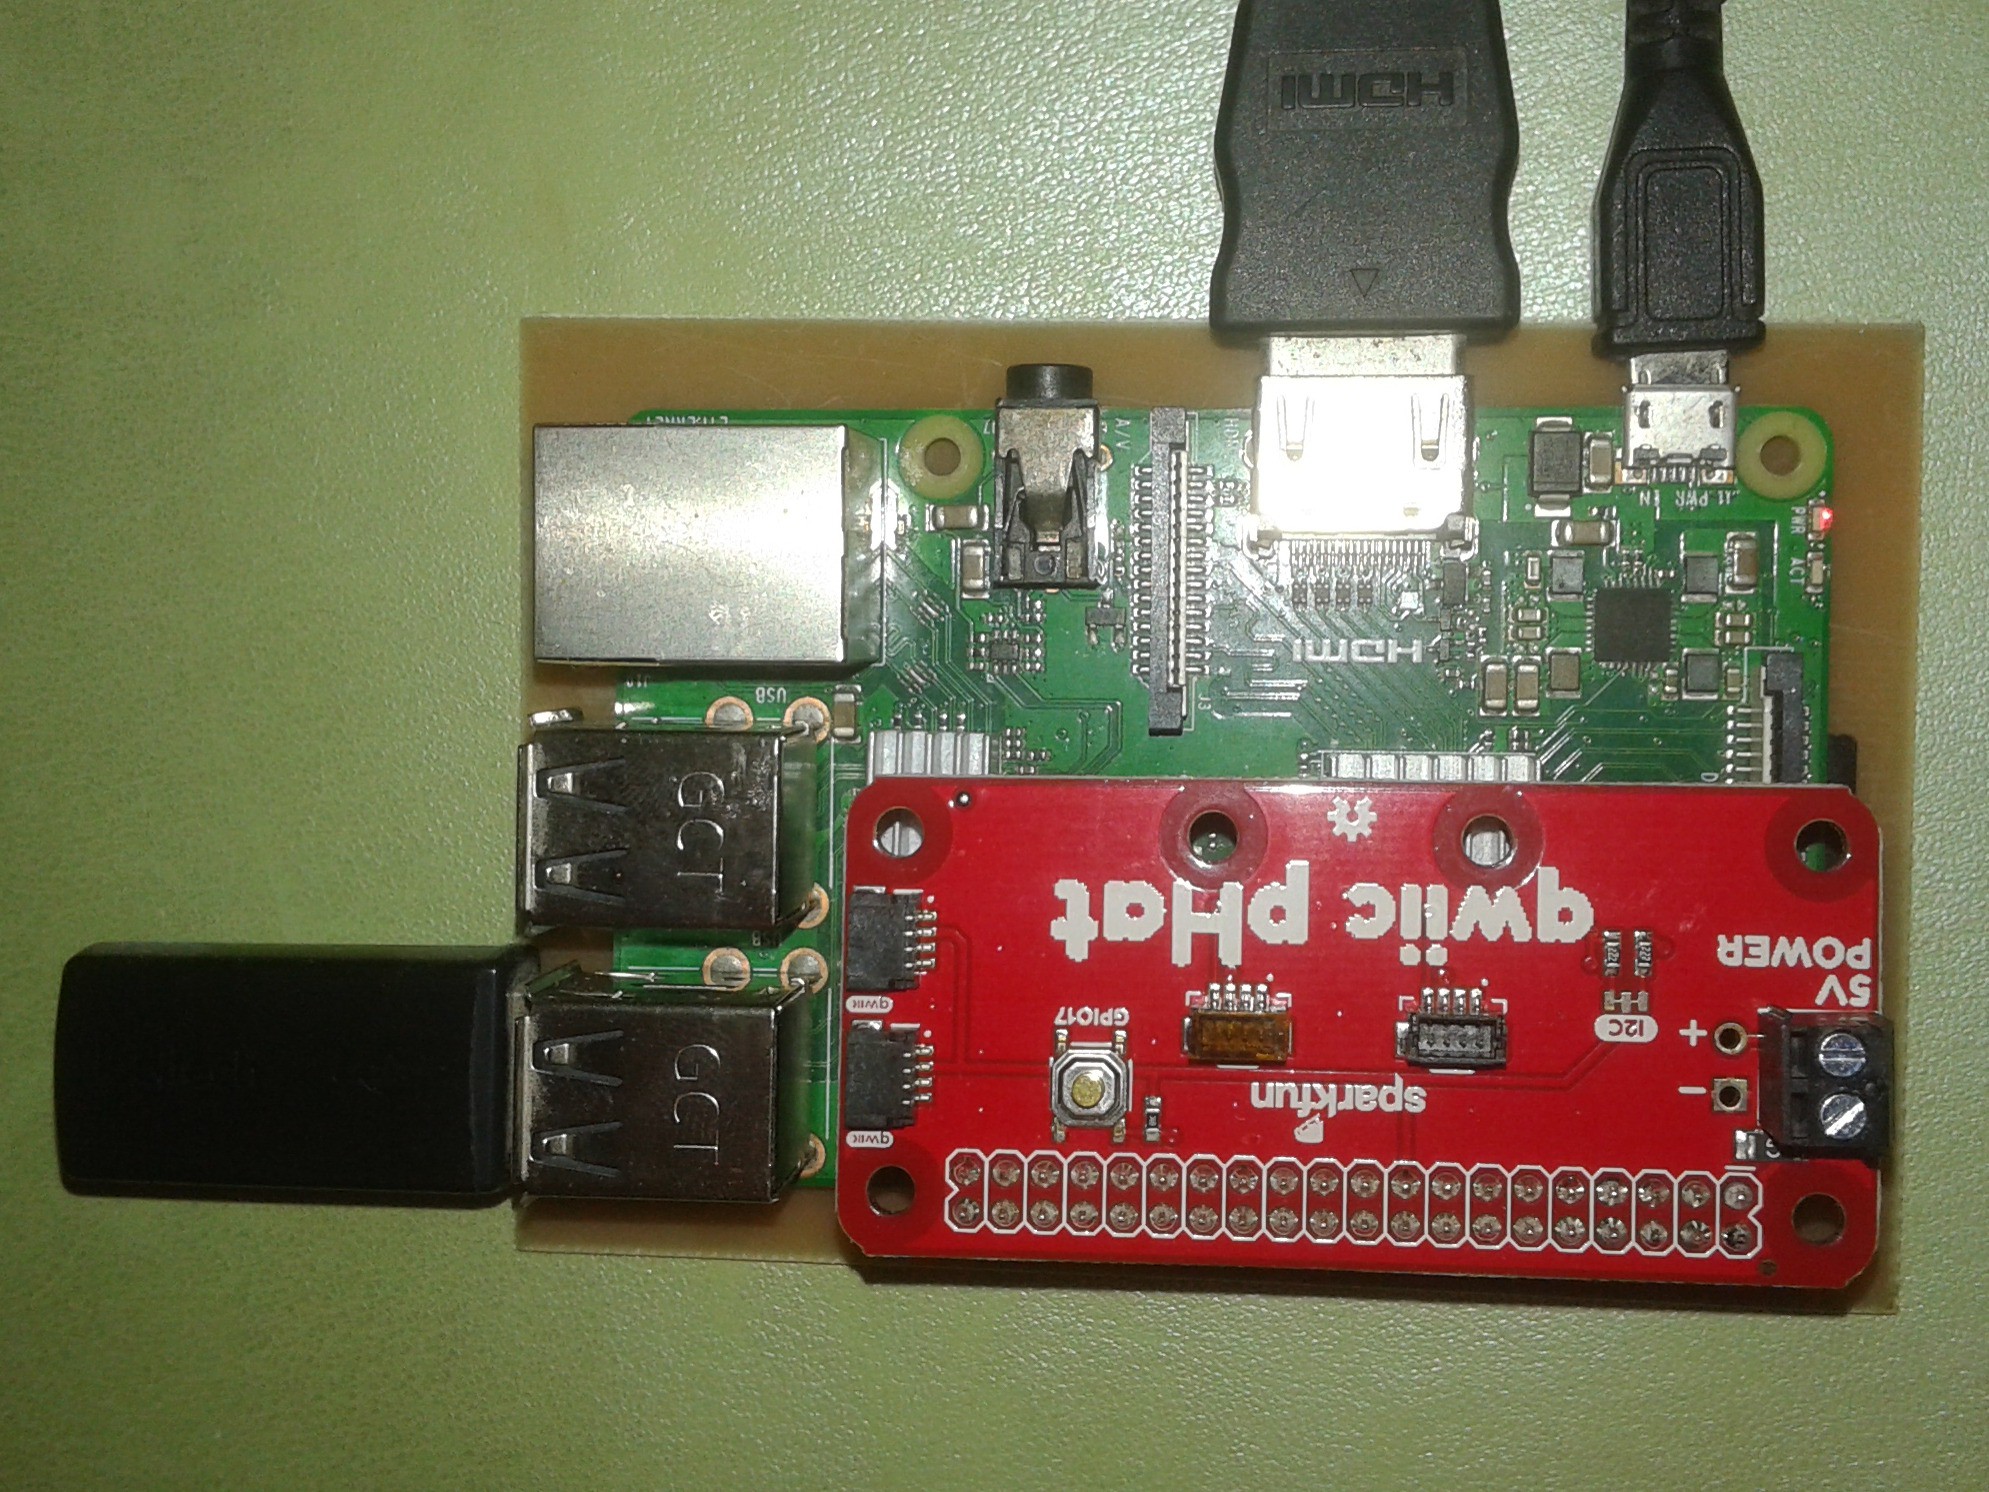
Once the pHAT is plugged in, you can start plugging in AS7262 6-channel Visible Light Sensor.
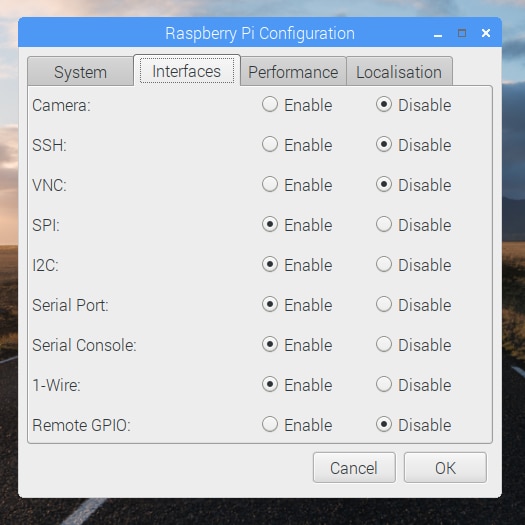
The Raspberry Pi Configuration via Desktop GUI
You can use the Desktop GUI by heading to the Pi Start Menu > Preferences > Raspberry Pi Configuration. A window will pop up with different tabs to adjust settings. What we are interested is the Interfaces tab. Click on the tab and select Enable for I2C. Click on the OK button.
 It's recommend restarting your Pi to ensure that the changes to take effect. Click on the Pi Start Menu > Preferences > Shutdown. Since we just need to restart, click on the Restart button. The system will reboot. When it comes back up, log in and enter the following command
ls /dev/*i2c*
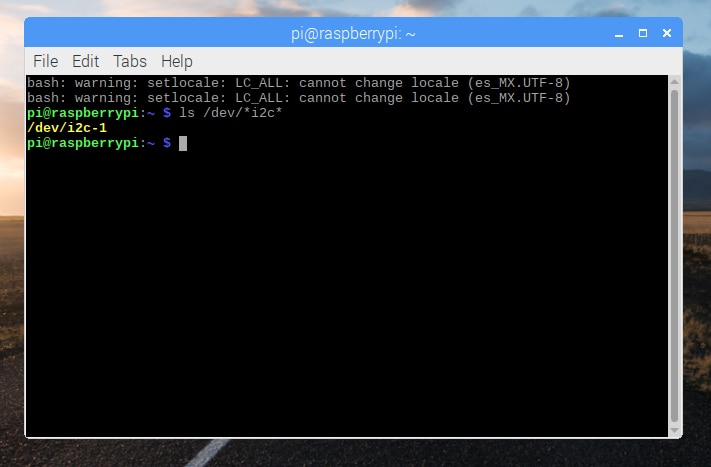 The Pi should respond with
/dev/i2c-1
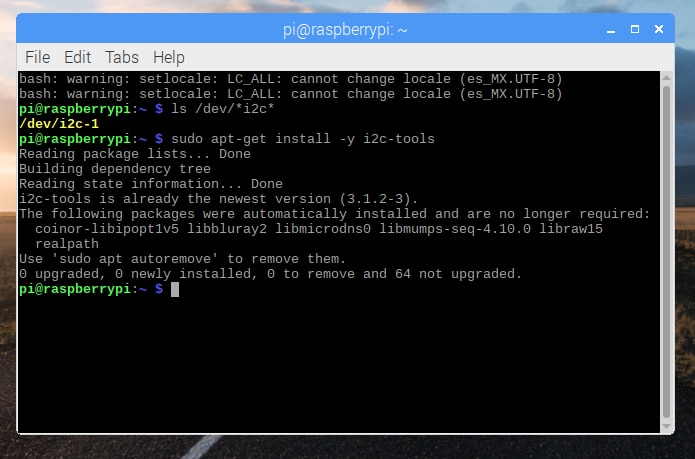
Which represents the user-mode I2C interface. There is a set of command-line utility programs that can help get an I2C interface working. You can get them with the apt package manager. Enter the following command.
sudo apt-get install -y i2c-tools
 In particular, the i2cdetect program will probe all the addresses on a bus, and report whether any devices are present. Enter the following command in the command line. The -y flag will disable interactive mode so that you do not have to wait for confirmation. The 1 indicates that we are scanning for I2C devices on I2C bus 1.
i2cdetect -y 1
You will get an output from your Raspberry Pi similar to the output below.
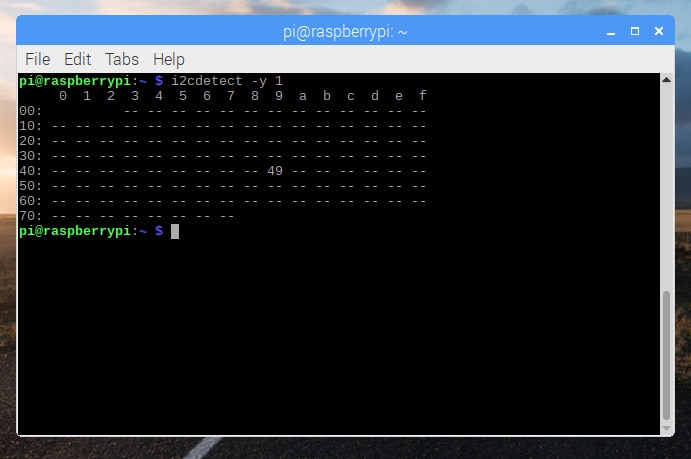 This map indicates that there is a peripheral at address 0x49, and according to the AS7262 datasheet, device address is 49 hex.

Conclusion
- We have learned the features of the Raspberry Pi 3B+, and Sparkfun's PHAT device that is useful for interfacing sensors with Qwiik connectors easily like the AS7262 6-channel Visible Light Sensor.
- Finally we have configured the Raspberry Pi as well as the pHAT module and we have done a simple test to detect a peripheral.
- In the next chapter I will install the libraries of the AS7262 sensor, and I will assemble the first module or device to do tests with color filters.
Discussions
Become a Hackaday.io Member
Create an account to leave a comment. Already have an account? Log In.