 J
JBuild and Demonstration Video:
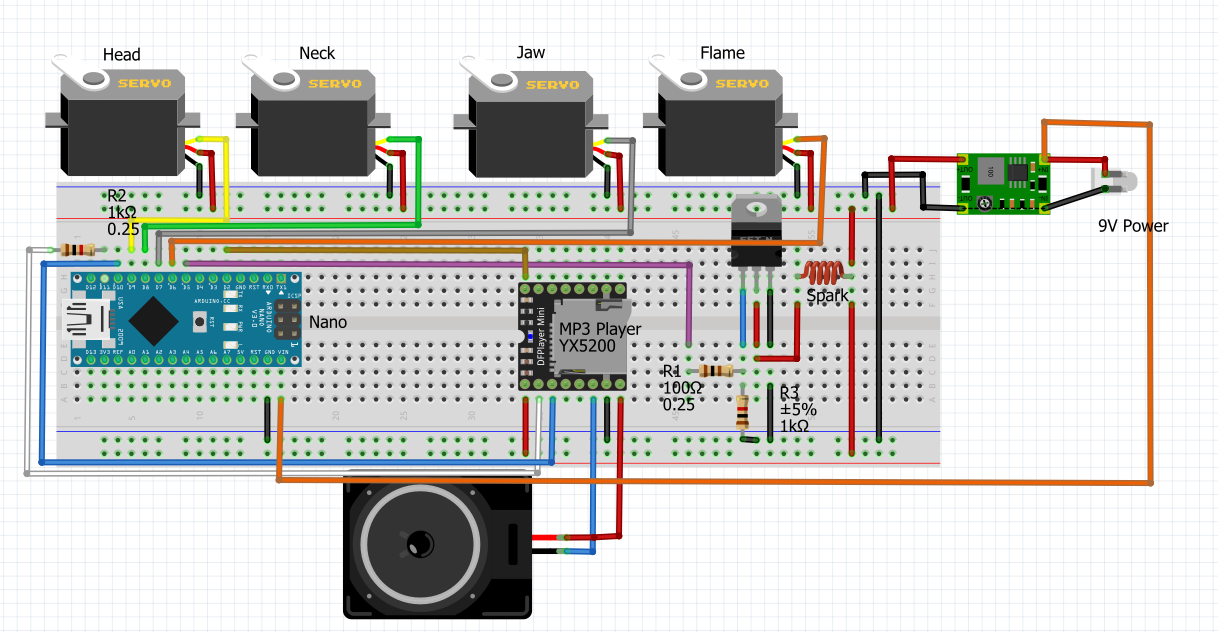
Skeleton
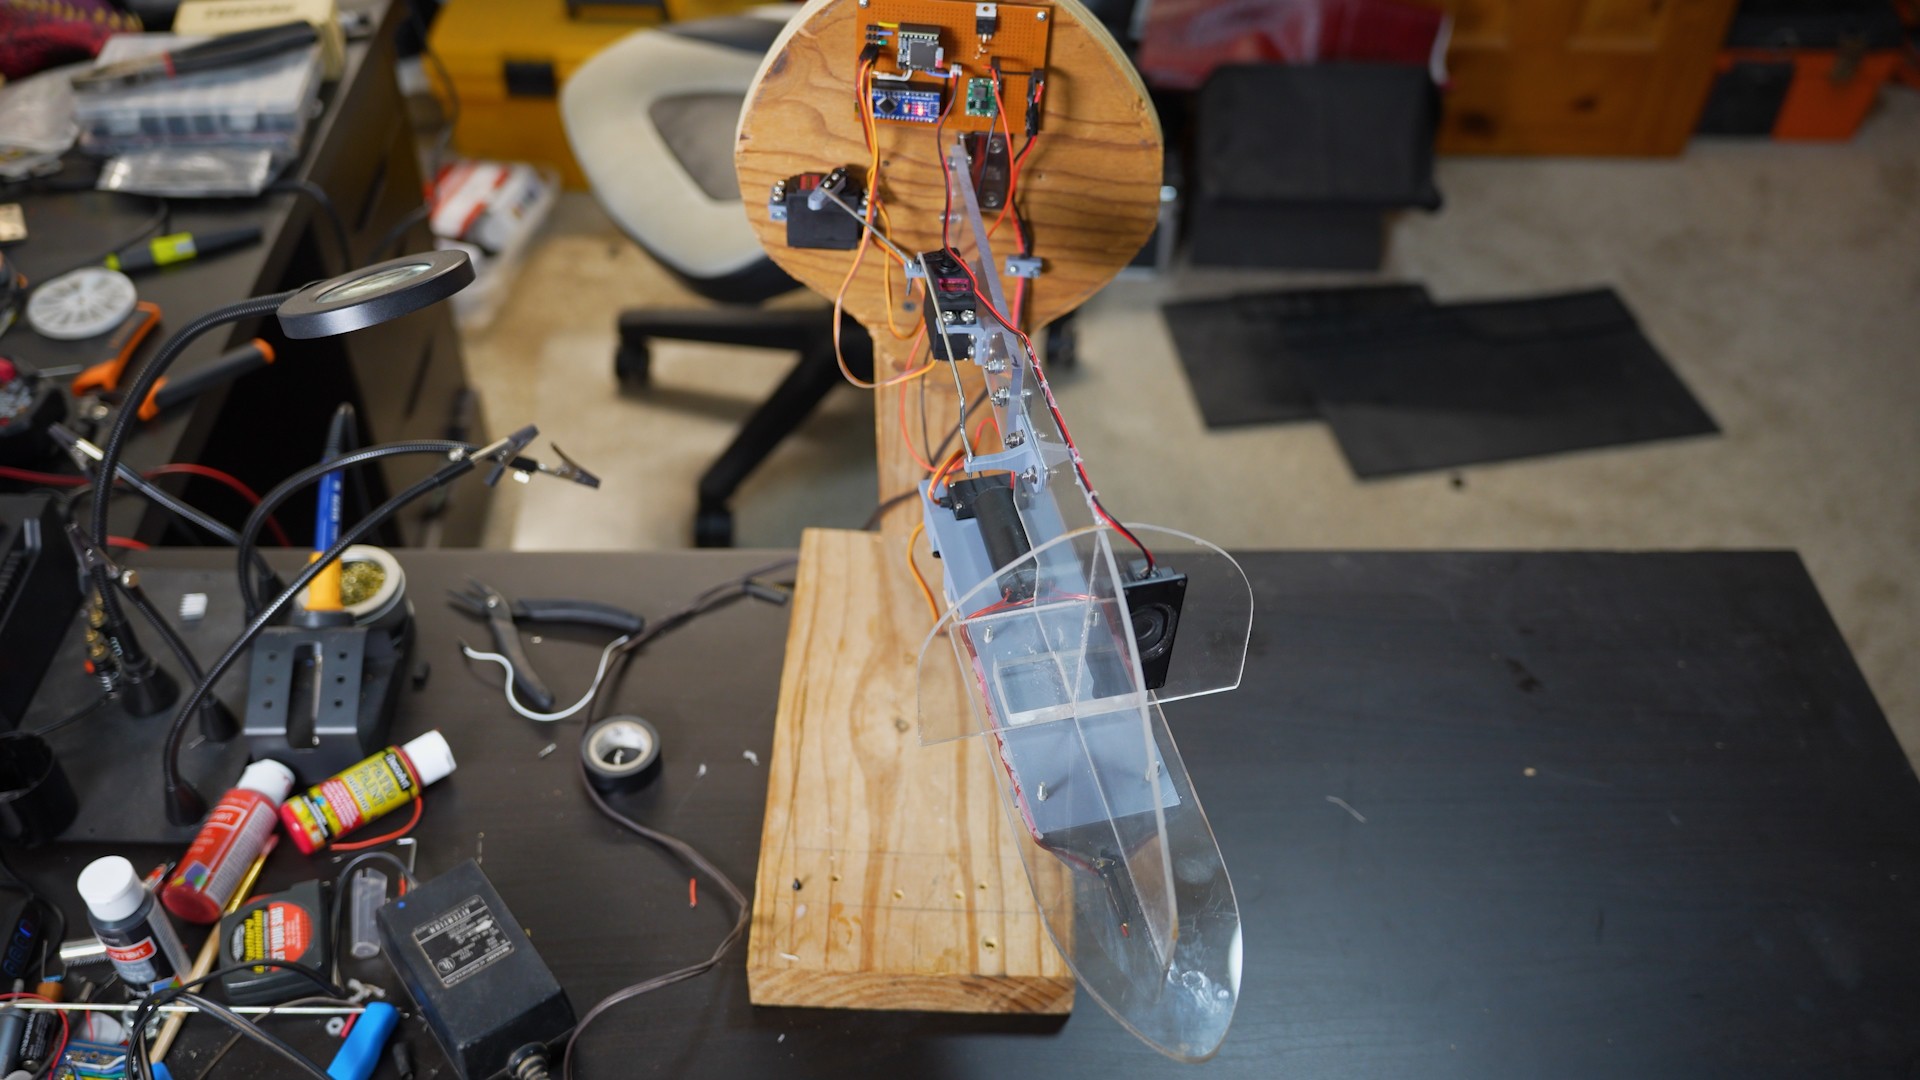
We decided to keep the mechanical movement as simple as possible. After prototyping a solution by utilizing scrap wood we made a more stable and lighter weight skeleton from acrylic. The head and neck had to be mounted to something so a nice sturdy block of wood shaped to the profile of a neck also allowed the whole head structure to be attached to a wall. A temporary frame of scrap wood was perfect to secure everything while constructing the head.
The skull was structured to fit into the mask and act as a base for the rest of the components. Adding some vertical pieces shaped to the mask, helped keep the mask from collapsing and give it some structure. The front piece was shaped to insert into the nose of the mask. The rear was squared off to attach to the neck. For the neck itself we used acrylic again
The rear of the neck attaches to the base board. The neck attaches to the head and base board with heavy duty hinges. There are two pivot points making the movement a little simpler than a full vertebra but still behaving realistically.
There are 3 servos to control the dragon. The first is to turn the head left and right positioned at the base of the head.
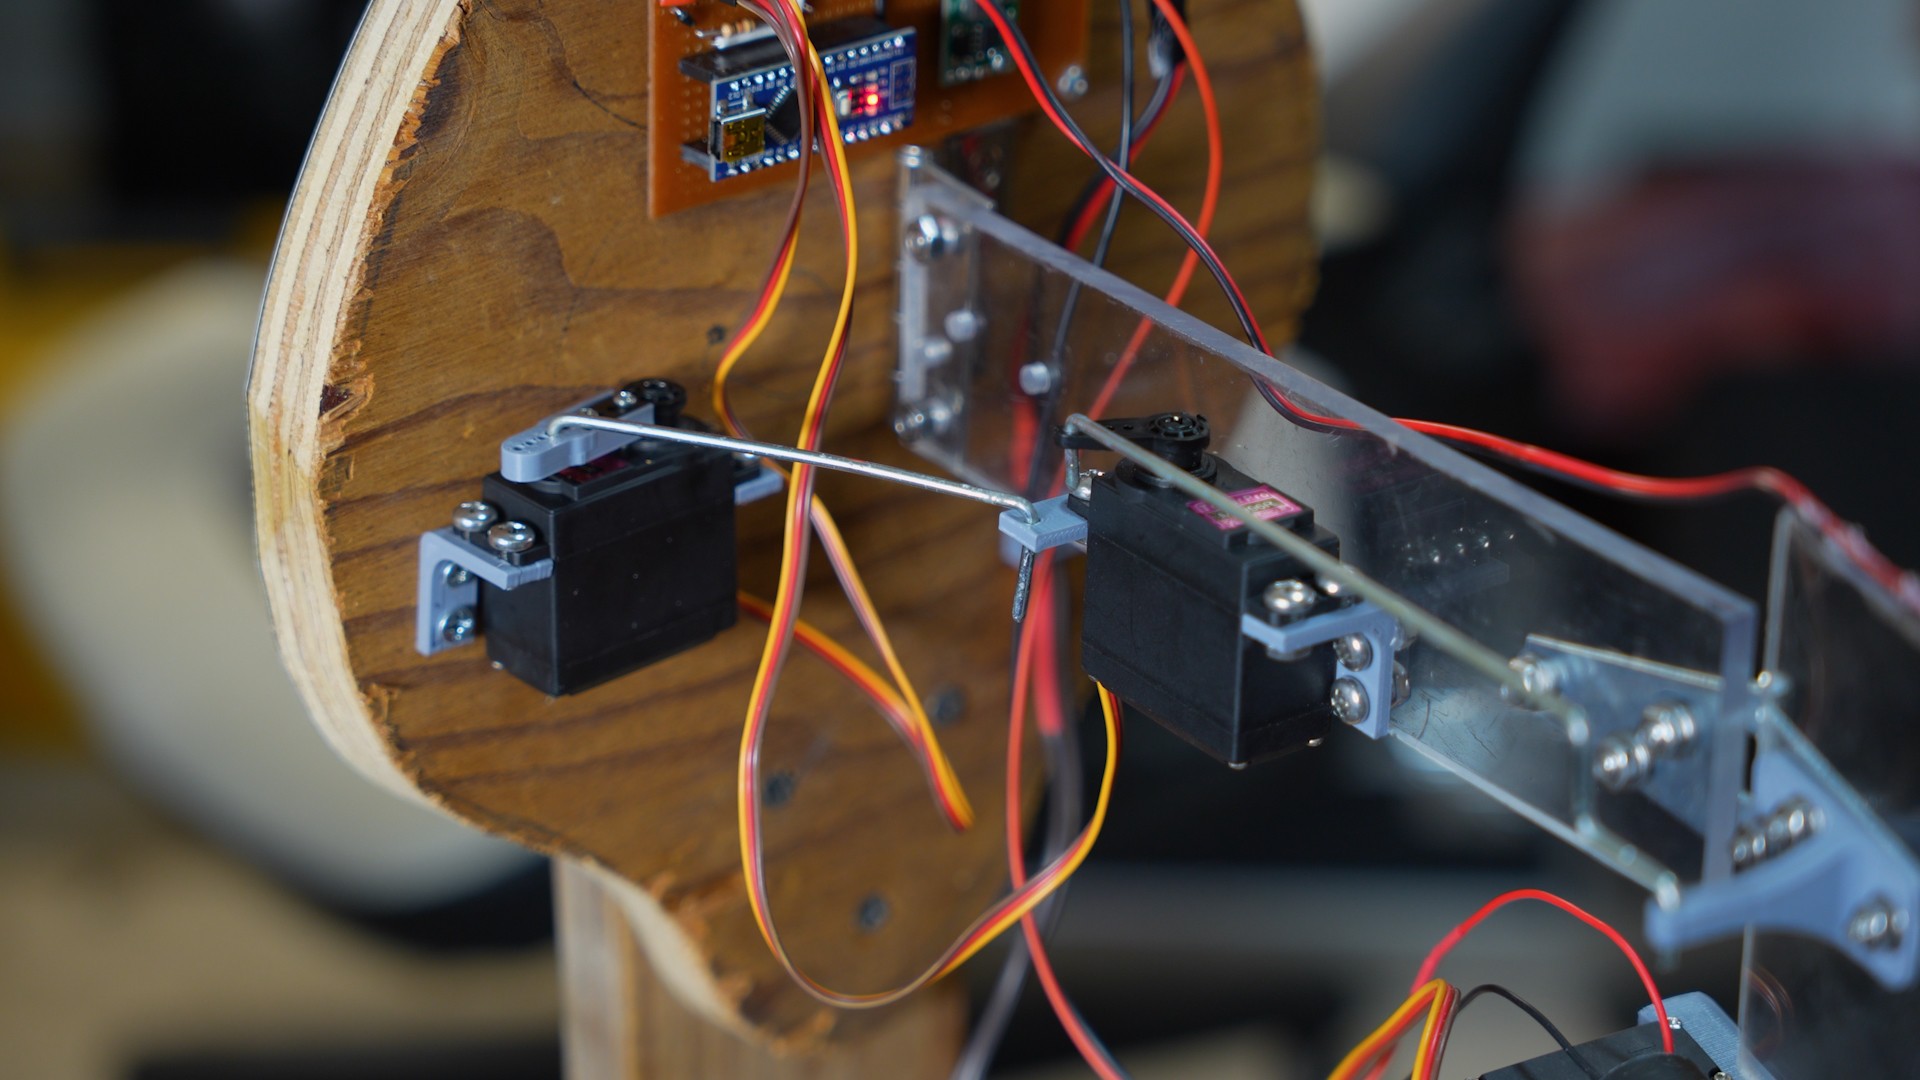
The second will adjust the neck orientation left and right and is situated at the base board-neck junction.
For the head to move like a real serpent the neck should follow the head and not vice versa. So after the head turns left the neck should move left as well. More about that when we get to the code. The third servo is for the fire breathing.
A note on the servos - the weight of the head and neck is substantial and so we could not use the normal cheap SG90 servos for RC projects. Something more substantial with extra torque is needed. We settled on 13kg-cm, MG996R servos “featuring metal gear construction”. After destroying 2 of them we discovered one of the gears is metal, the others are all plastic. With a little care they do the job.
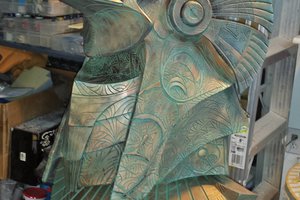
Fire Breathing
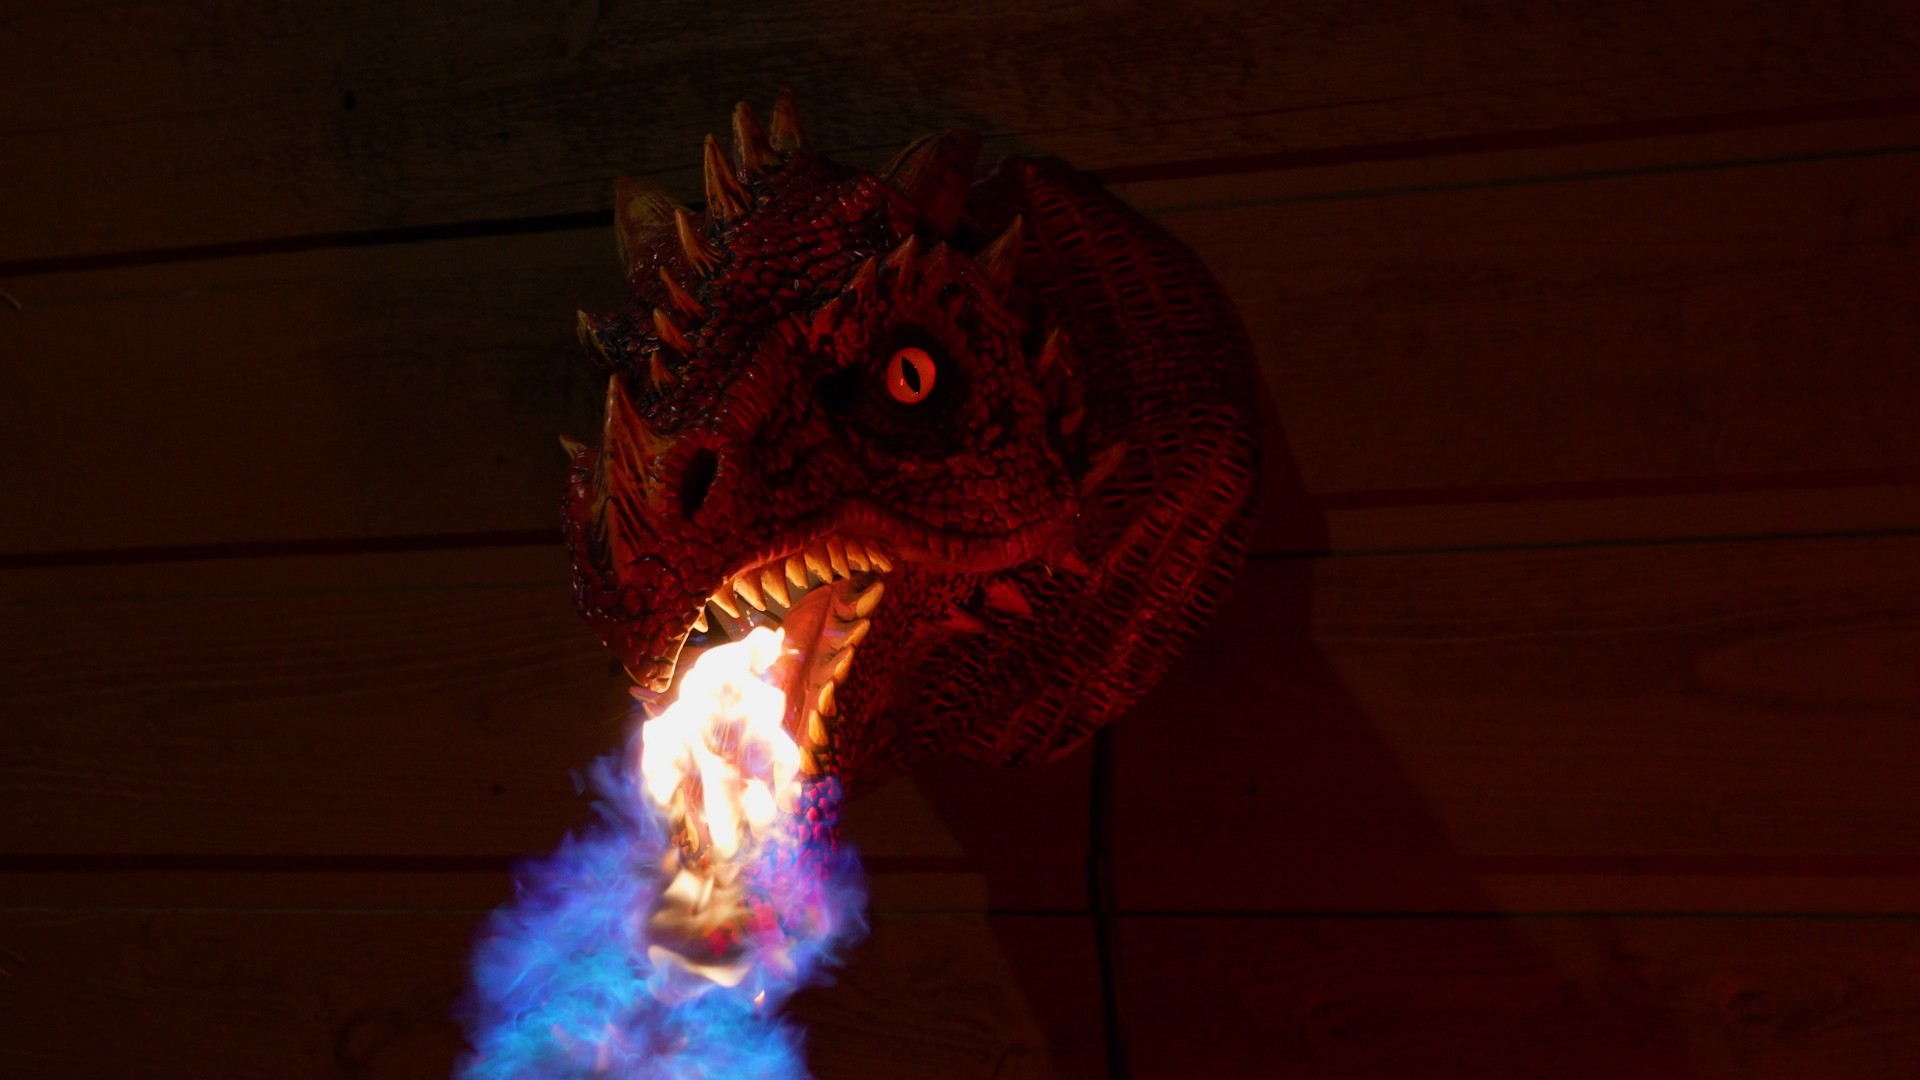
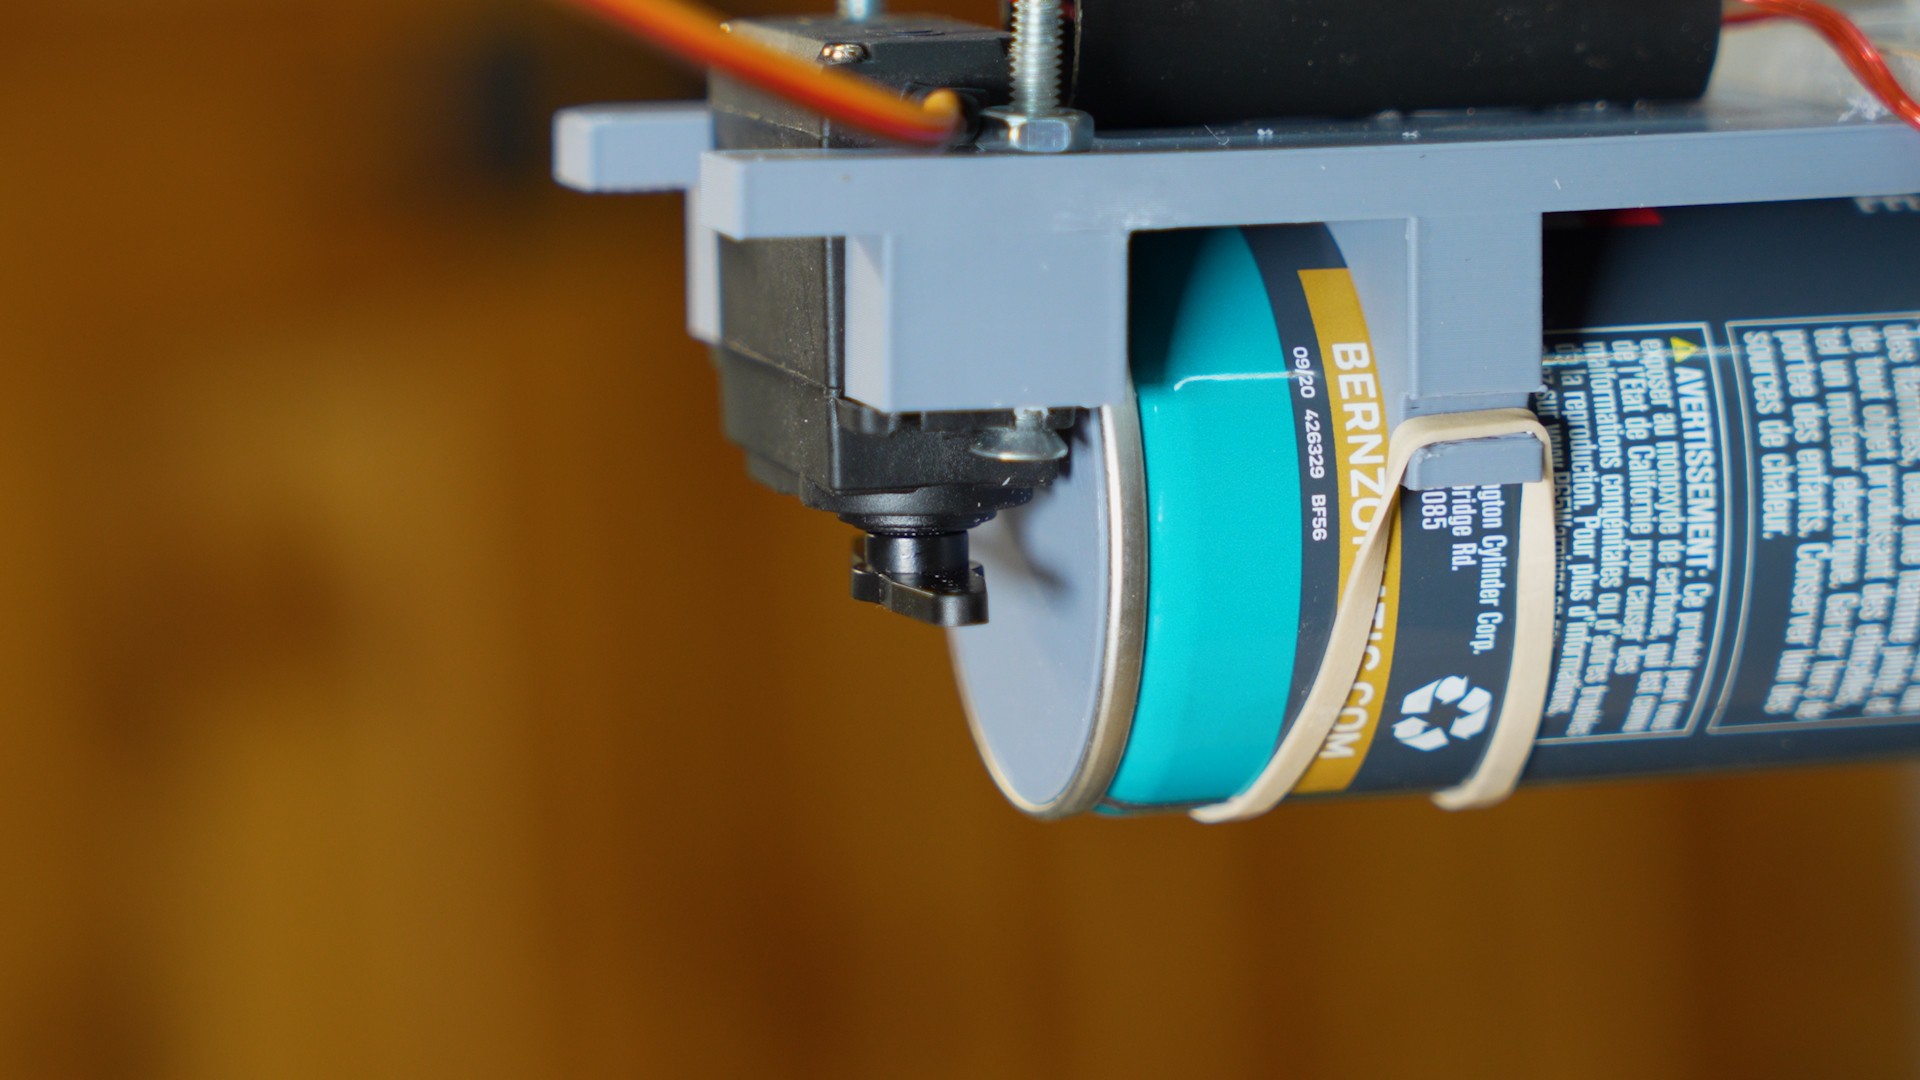
For real fire to be breathed out of the dragon mouth we needed to build something that is basically a mini flame thrower. No off-the-shelf mini flame throwers are readily available so we opted for a simple but custom solution. A small butane canister used for lighter refueling, ejects a spray of butane gas when the nozzle is depressed. So with a small actuator that pushes the can forward against a stop, it will eject a quick spray. Having a high voltage spark in front of the nozzle will ignite the spray instantly.
This required a platform to be 3D printed that would house the butane canister and servo to move it. By adding a small brass tube onto the nozzle, we extended the nozzle further out of the mouth of the beast. The entire mechanism was mounted onto the wooden skull such that the nozzle is extending out of the back of the throat. Now with the use of a servo, we can activate the spray of butane on demand - short or long blasts .
Another advantage of using a latex mask is that it is very heat resistant. With all that flame it was good to have something protecting the internal electronics, wiring and acrylic.
Electronics
The electronic control system is run with an arduino nano. This is where we control all the servos and other electronics. The servos control the various moving parts and a small mp3 player provides dragon sound effects via a small speaker. The main power supply is a 9v, 2.5A power brick which feeds the Vin of the arduino and a buck converter to give us a high current 5v supply for the servos. It is much safer having this split power source rather than trying to run 5v into the Arduino 5V pin to power it as it is unregulated.
The Fritzing circuit layout is shown below.
In the end we abandoned the jaw movement as it wasn’t really necessary, but left it in the design anyway. The flame servo activates the butane canister by pushing it against the front of the carriage we built...
Read more »
 jeromekelty
 Ossum
Ossum

 Mike Rigsby
Impressive, and a great way to keep people off your porch the other 364 days of the year ;-)