Close
0%
0%

Beagle Entertainment System

Turning the BeagleBone Black into a retro gaming appliance

Similar projects worth following
The Beagle Entertainment System (BES) is an embedded Linux appliance that turns your BeagleBone Black hardware (and originally the BeagleBoard-xM, as well) into a combination of a Super Nintendo Entertainment System, Nintendo Entertainment System, Game Boy Advance, and Game Boy Color. It combines the SNES9X, VBA-M, and Nestopia emulators, a custom GUI front-end for selecting games, and patched bootloader with Linux kernel to create a stand-alone console capable of playing thousands of classic gaming titles. BES boots a 3.14 Linux kernel and OS from a microSD card, allowing you to update your BES system by mounting the microSD card on your desktop PC and then directly modifying its contents. ROM images, as well as saved games and save states, are also stored onto the microSD card.

BES is now in its third year of development!

Welcome to the Beagle Entertainment System! BES originally started as BeagleSNES, a class project for a graduate course in embedded system design that I took a few years ago. My goal was to turn the BeagleBoard-xM ARM-based SBC into a stand-alone Linux appliance that mimicked an SNES. I began by building the SNES9X emulator on that platform, but I quickly found out that the kernel was missing some things that I needed and the emulator's performance wasn't very good by default. I ended up hacking on the bootloader and kernel a lot, as well as spending dozens of hours profiling the emulator code and making various tweaks.

After a lot of research, many late nights, and a lot of swearing, BeagleSNES v0.1 escaped into the wild. Little did I know that I was just starting on my quest to make the best retro-gaming platform that I could. Whenever I could spare a few hours (and even when I couldn't spare them), I would chip away at adding new features, squashing bugs, making the boot time shorter, and making the emulation better and faster.

These days, BeagleSNES is primarily used on the BeagleBone Black platform. It has grown into a far more polished stand-alone appliance that can either use your HDMI television or an LCD cape board for its display. Several students and makers (and corporate interns!) have used BeagleSNES as a basis for their own handheld gaming consoles, class coursework, and other retro-gaming projects.

BeagleSNES is actually only one portion of BES. BES is an emulator suite consisting of two large binaries. The first binary, the main part of BES, is the front-end game selection GUI and the NES/GBC/GBA emulators. The second binary is BeagleSNES, the SNES emulator without a front-end GUI. While BES is licensed under the GPL, BeagleSNES is restricted by the SNES9X license and must remain as a separate binary. Not to worry though... all of the technical details have been worked out and the final result is a seamless experience for the end user.

While I didn't expect much when I started developing this project, it has grown and grown as users have requested features such as save state support, other game console emulators, support for multiple gamepads, GPIO input, easier game menu configuration (now XML-based), and various other features. Last I checked, there were over 5000 downloads of the full BeagleSNES microSD card image. That is roughly one download of BeagleSNES for every 45 BeagleBone Black boards that have been made by CircuitCo!

With BES, I'm currently in the process of making the transition from the 3.8 kernel to the 4.1 mainline kernel for the BeagleBone Black. This change brings with it OpenGL ES support, which has opened up a lot of opportunities for hardware-accelerated scaling and various other speed-ups. With NES, Game Boy Color, and Game Boy Advance support slated for the next release, we're well on our way to having the BeagleBone Black be the flexible, hackable retro-gaming console appliance that I always hoped it would become!

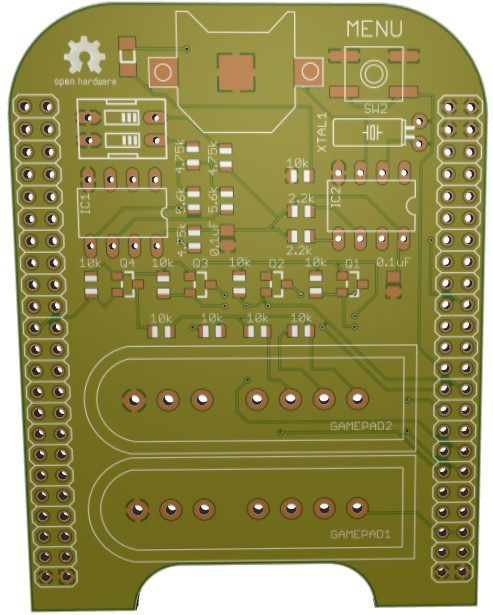
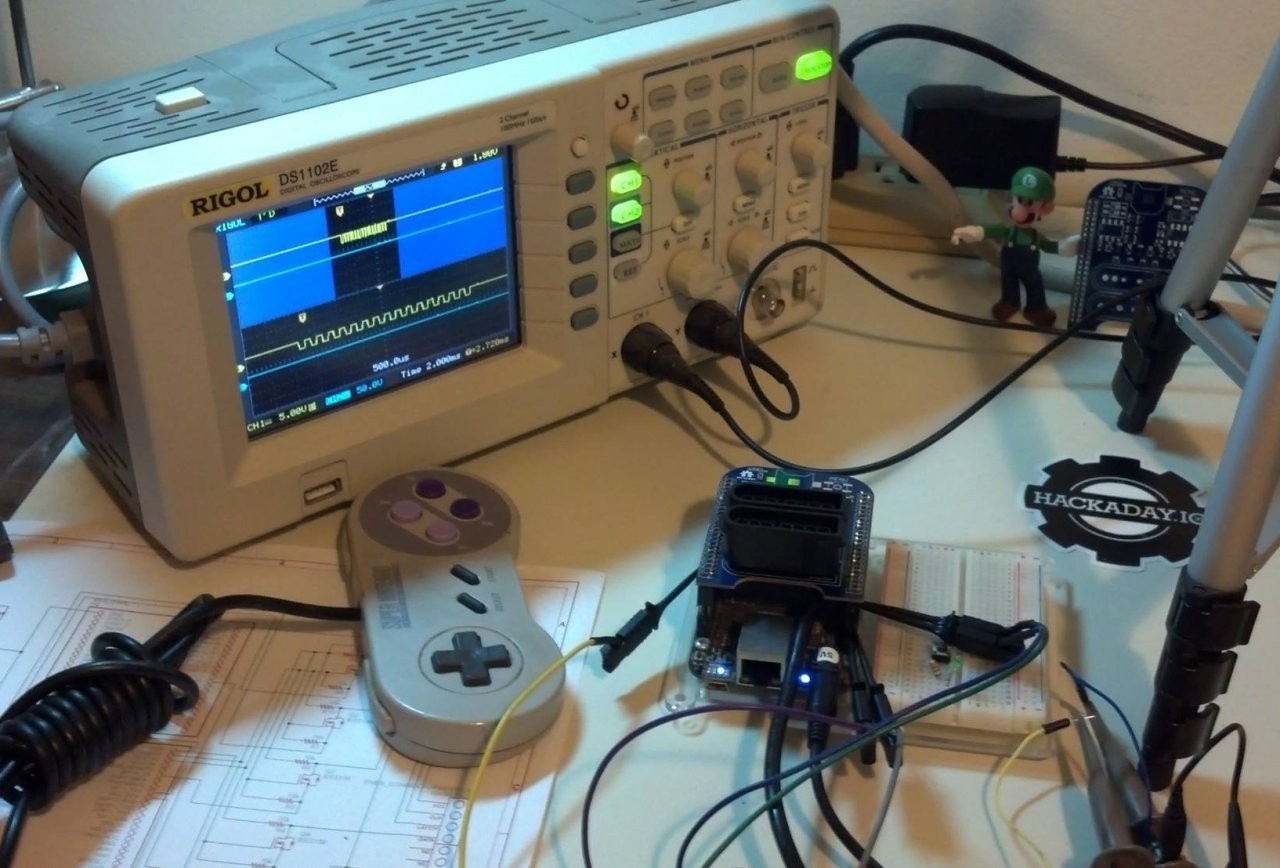
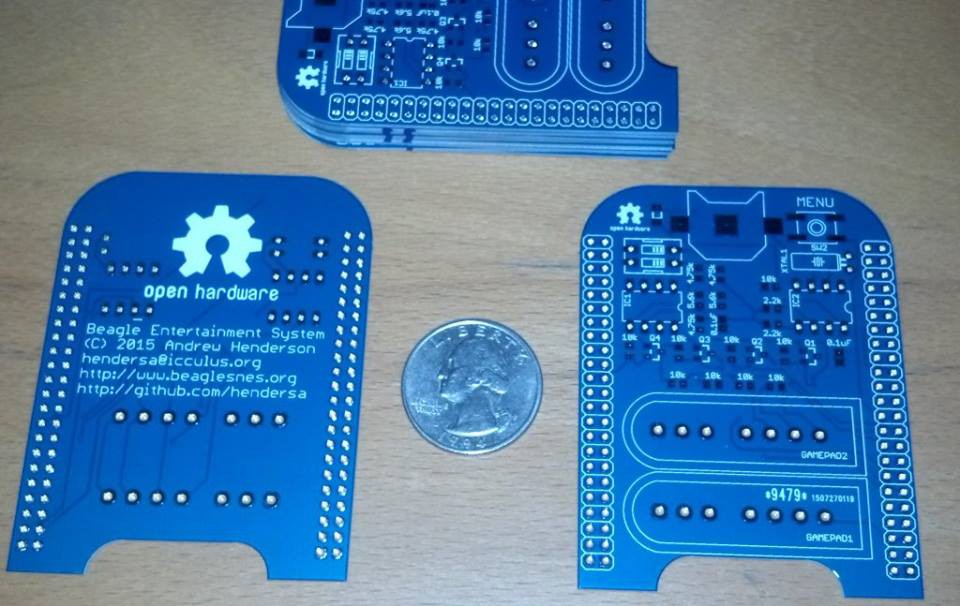
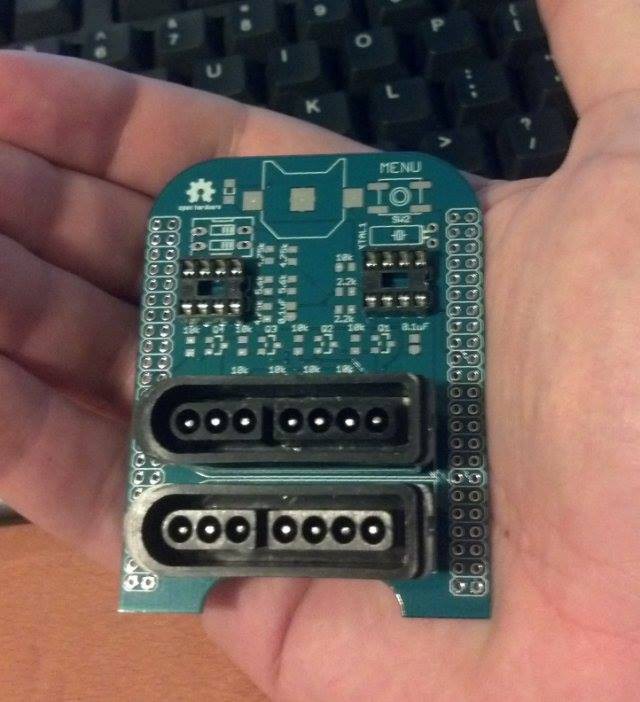
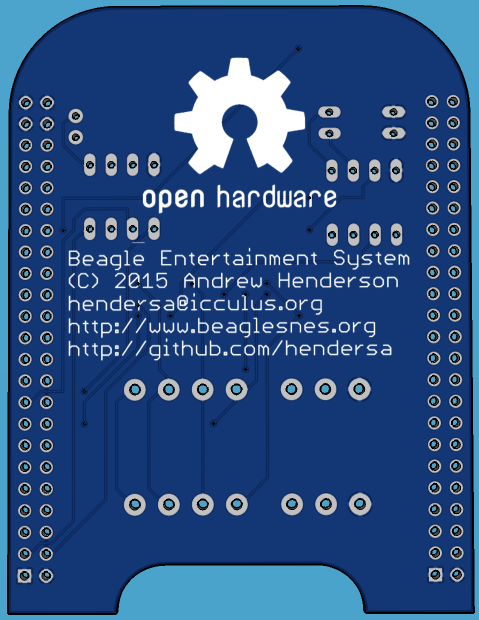
In addition to the software that drives the BES system, I have been working on developing a custom BES cape for interfacing with the original SNES controllers. The cape also includes a battery-backed RTC for cartridges that have internal RTCs to track the time (for example, Pokemon Yellow on the Gameboy). Hopefully, the project will be moving towards creating a complete console with low-latency access to inputs generated by the original console controllers. Using the BeagleBone Black's PRUs, I can bitbang the gamepad interface with negligible performance impact to the rest of the system.

BeagleSNES has a very detailed manual that is written to help users both use the system and understand how it all works. You should take a look at it, since it gives many development details that are of interest to anyone that wishes to turn the BB-xM and BBB into stand-alone appliances. The manual is due for an update for the new features of BES, which will happen upon BES's initial release.

  • 1 × BeagleBone Black (no particular revision) If you are going to use the software, you'll need something to run it on! BeagleSNES doesn't use the eMMC storage of the BBB, so both the older models with the 2 GB eMMC and the newer Rev C with the 4 GB eMMC will work.
  • 1 × BeagleBone Black power supply Running the BBB at 1 GHz with a USB gamepad takes more power than the USB cable can provide.
  • 1 × USB SNES gamepad (Tomee) (second USB gamepad is optional) Other gamepads will work, but the default button configuration in the config XML file is set up for the Tomee.
  • 1 × 8 GB microSD card The pre-made BeagleSNES image is ready to be written to a microSD card to get you up and running ASAP.
  • 1 × Micro-HDMI to Standard HDMI cable If you are connecting your BeagleSNES system to your HDMI television, you'll need this.

View all 7 components

  • Beagle Entertainment System Cartridge Console

    Andrew Henderson12/21/2016 at 21:28 0 comments

    For months, I have been so tied up with finishing my PhD that I haven't spent much time at all on my BeagleBone Black work. But, now that I've defended my thesis and submitted my final dissertation, I figured it was time to dust off the code and designs that I've had sitting around and do something interesting. What better way than to turn my Beagle Entertainment System (BES) work into a retrogaming console? A really tiny SNES cartridge console.

    I started with a design using some Adafruit component boards I had sitting around: the ILI9340 320x240 TFT LCD, a four-channel BSS138 FET line-level converter, and a DS1307 RTC breakout board. I spent some time breadboarding the setup, using Fritzing for planning. The plan was to provide a status screen for the console using the LCD, native SNES gamepad interfacing with GPIOs running through the BSS138 board, and a battery-backed RTC for games that had one in their original carts.

    I ended up dropping the RTC from the design, as the RTC wasn't really needed and it was really tight for space inside of the cartridge. Once everything was wired up, I planned out my pin muxing and got to work making the device tree for the kernel (a 3.14 TI BSP without device tree overlay support).

    My prototyping went on for a few days as I continued to refine and test software, create wiring harnesses, and carve up on the SNES cart that would serve as the shell for the system. The victim cart was a Super Scope 6, which I purchased for $2.50 from a local used game store. I was able to cut through the cart using a drill and an X-ACTO knife. Once I got the cuts about where I wanted them, I smoothed out the edges of the cuts a little by carving them down with the knife. I wasn't pretty, but good enough for a rough prototype. I tried mounting the various pieces inside of the shell, keeping the BeagleBone Black outside of the shell during testing.

    Once the software and wiring looked good, I did the final assembly. It turns out that the BBB and a micro-to-full HDMI converter fits almost perfectly across the width of the cartridge, making the final console have a (far more convenient) full HDMI port available. I did have to shave off the rubber coating on the outside of the converter, as it was too thick for the space inside of the cart. There was also zero clearance over the P8/P9 headers, so I had to run all wires directly into the P9 header. I did this my tinning each wire with solder and then inserting it into the appropriate header hole.

    The logic-level converters were necessary because SNES controllers use 5 volt signals and the BBB uses 3.3 volts. The SNES controller protocol is well documented, and I used the BBB's PRUSS to bitbang the protocol using GPIOs. This has the added advantage of the controls not getting sluggish when the CPU load is high on the system. USB gamepads using the kernel joystick interface tend to get less responsive when CPU load gets really high, but the PRU keeps chugging along without any concern about CPU load. My PRU firmware placed the state of the two controllers into a 32-bit memory location shared between main system RAM and PRU RAM, so checking the controller states was as simple as doing a 32-bit memory read in my application.

    The surprising thing is, after all of the engineering effort... it actually all works great!

  • PRU SNES Gamepad Interfacing Works!

    Andrew Henderson04/26/2016 at 20:13 0 comments

    I'm currently using a 3.14 TI BSP kernel with a set of UIO PRUSS patches to access the PRUs. I verified the waveforms on my scope, and I'm able to retrieve the state of two gamepads via a read of 32-bits of PRU shared memory.

  • Unit Testing of Gamepad Interface

    Andrew Henderson04/15/2016 at 22:15 0 comments

    I finally took some time to sit down and unit test the line-level converter subsystem of the BESCape. I was very wary of the fact this design mixes 5V and 3.3V signals using FETs to convert between line levels, and I've blown BeagleBones in the past by applying 5V to a 3.3V GPIO by accident. So, I was triple-checking everything with meters and scopes prior to plugging it into an actual BBB. Beyond the physical interfacing and line level conversion for the SNES gamepads, I have the RTC and EEPROM subsystems left to test. Those are both I2C and should be a piece of cake, though.

    It actually works! And no smoke came out of the BeagleBone Black, either!

    I am currently bitbanging the GPIO interface to the controllers from Linux userspace, but I'll be moving to using the PRU to do that for me.

  • Lots of updates...

    Andrew Henderson03/27/2016 at 21:55 0 comments

    I have been largely focused on finishing up my PhD as of late, so I haven't been doing releases of BeagleSNES. But, BeagleSNES is part of the larger Beagle Entertainment System (BES) project that I've been working on for a while. Progress on that is plodding along, and I'm hoping to pull all of its pieces together to do a full release of BES v0.1 within the next few months. This includes:

    • A web interface (jQuery and node.js) for uploading and configuring ROMs. Just plug the BBB into your PC via a USB cable, go to 192.168.whatever, and boom... there it is. The current version of this is at Github here: https://github.com/hendersa/bes-config-node
    • A cape board for native SNES gamepad interfacing. The next rev of prototype PCB prints are back from China, and I have some PRU assembly code to debug to drive the cape. The current version of this (Eagle PCB files) is available at Github here: https://github.com/hendersa/bescape
    • Cleaning up my whole BES codebase. I chopped out a few hundred lines of code, added a new dialog, replaced all of my char buffers with std::string, ditched my linked lists for the std::vector template, const'd everything I could, merged code duplicated across BES and the BeagleSNES codebases, and basically made code that isn't embarrassing. The current version of this is at Github here: https://github.com/hendersa/bes

    Since I was going to do some eval on the new PCBs that came in, I figured that I'd set up a camera and record it. I got out my GoPro Hero, set it up on my tripod, and got to work:

    Here is a 7x speed video of my assembly and test of the SNES gamepad line-level converter circuit that interfaces the 5V SNES gamepads to the 3.3v GPIOs on the BeagleBone Black:

    Luckily, I stick to SMT components that use a package size of 0805 or larger so that I can assemble my designs by hand with only a soldering iron and tweezers.

  • Cape PCBs have arrived!

    Andrew Henderson08/04/2015 at 14:21 0 comments

    The cape board PCBs have arrived from China:

    I placed a few components to ensure that the physical fit was correct. Since I created the Eagle PCB parts for the SNES controller sockets, I wanted to ensure that all of my calculations for the layout were right:

    I put in an order at DigiKey and Raphnet Technologies for the necessary parts, and I'll begin assembly of the first few prototypes once I get the parts in. In the meantime, I'll keep working on the software for the BBB's PRU that bitbangs the gamepad interface signals.

  • SNES controller cape update

    Andrew Henderson07/27/2015 at 01:19 0 comments

    The first revision of the BES SNES controller cape PCB has been submitted for manufacture. I'm only doing a small run of the boards to validate the design and get my feet wet with the PCB manufacturing process. Even though the PCBs will be created in Hong Kong, I expect them back within about two to three weeks. Take a look:

  • The Beagle Entertainment System

    Andrew Henderson07/02/2015 at 16:11 0 comments

    With the introduction of multiple emulators, OpenGL ES 1.1 texture rendering for hardware scaling, and a variety of updates and improvements, BeagleSNES has outgrown its original title. The next generation of BeagleSNES will actually be a superset of the original project. This new project will be called the Beagle Entertainment System (or BES, for short).

    I've had the source for BES sitting around for a while, and I've recently been cleaning up the codebase and creating some kernel patches for the 3.14-ti kernel to better support BES. Among other things, I've black-listed the 1920x1080 video mode that refreshes at 24 Hz because it causes problems with the PowerVR GLES. I've also created a set of custom static device tree binaries that resolve the long-standing pinmux conflict between the Audio Rev B cape and all of the CircuitCo and 4DSystems LCD capes.

    This means that you can create a (pretty thick) hand-held console by plugging the LCD3 cape into the audio cape into the BBB. I still need to reconstruct my GPIO input circuit to verify that my custom GPIO input pinmux settings have the proper pullup/down resistor settings. Of course, you can still use an HDMI TV for audio and video and USB SNES gamepads for input. Still, I want to make it as easy as possible for people to extend this work for their own multimedia appliance projects!

    I'll be working on BES here and there as time permits, and I hope to get a release out (with a new manual) soon. It can easily take me 50 to 60 hours to do a full release test, packaging, and upload/staging for a release, so I'll just continue to chip away at my development and release when I can spare the time.

  • Version 0.7 Released!

    Andrew Henderson03/02/2015 at 23:14 0 comments

    After almost six months of on-and-off development, I finally got v0.7 of BeagleSNES out the door. It includes all of the new emulators and is the first version to support OpenGL ES on the BeagleBone Black for hardware scaling to all sorts of HDMI and DVI display resolutions. You can download the pre-built microSD card image and source code at beaglesnes.org, so go get it and give it a try!

  • Ongoing BeagleSNES Development

    Andrew Henderson02/17/2015 at 16:03 0 comments

    Native Gamepad Support:

    One of the items that has been on my to-do list for a while now is native support for the original SNES gamepads. Routing events through the USB subsystem is convenient, but the original SNES gamepads are often cheaper than their USB equivalents and input latency goes down to practically nothing if you're talking directly to the original hardware. This is why a BeagleSNES cape board has been in my plans for a while. While I have been quite busy as of late, I did spend a little time with the scope and coded up some tests for SNES gamepad interfacing via GPIOs:

    My plans are to push this logic into the PRU and have it repeatedly poll the gamepads as the SNES hardware originally did. The bitmask for the depressed buttons can be pushed to a shared memory location where I can mmap() it from userspace and read it as I would read any control register. This frees me from trying to get the timing on the protocol correct in userspace. You don't get the concurrency guarantee this way, but I can treat the memory location as volatile and re-read it until I get a set of duplicate readings. Not elegant, but it works will practically no overhead.

    Currently, the USB gamepad support in BeagleSNES is pretty heavy-weight. This is because I check for not only the presence of USB gamepads, but I also check to see that they are plugged into particular USB ports. This allows me to have player 2 plugged in while player 1 is still unplugged, for example. But, this also requires a stat() or two to make sure that the /dev/input/js? is linked to the proper location on the USB bus. I found that the GPIO support for player 1 that I added in v0.6 was pretty snappy (less latency) when compared to the USB gamepad input, so it is my hope that pushing native gamepad support via GPIOs into the PRU will be even more responsive.

View all 9 project logs

  • 1
    Step 1

    The BeagleSNES user manual will tell you everything that you need to know to get your BeagleSNES system up and running quickly and easily. Download it and read it. It's awesome.

View all instructions

Enjoy this project?

Share

Discussions

Tachyon wrote 03/03/2015 at 15:06 point

This is very cool and clearly a lot of hard work has gone into it. Nice job. It's especially interesting that you took advantage of a PRU as that would be the main reason for using a BeagleBone for such a project. I'll be curious to see what other uses you can put the PRUs to in this project in the future.

Oh, BTW, in my head I am going to call this the BeagleBoy (or possibly BeagleBoy Advanced) because it sounds right to me.  ;')

  Are you sure? yes | no

Similar Projects

Does this project spark your interest?

Become a member to follow this project and never miss any updates