Johan Berglund
-
Get it on Tindie
12/01/2017 at 07:22 • 0 commentsIn case you've missed it, the T.WI is now available on Tindie as a finished product. If you are interested in getting just the case from me for a build of your own, let me know! I might put those too on Tindie if there are people interested in such a thing.
![]()
-
T.WI Examples
10/31/2017 at 15:37 • 0 commentsGarageBand (Mac)
GarageBand is pretty limited in how much can be configured, but many of its synth patches respond to aftertouch (channel pressure), so setting up the T.WI to send aftertouch makes it useful here. You can even keep the standard CC#2 active when activating aftertouch by holding the second RH key in combination with the pinkie key held for aftertouch.Examples of useful synth sounds in GarageBand 10 are Saturn Lead and Soft Saw Lead.
Thor (iPad)
Now, Thor is a synth I can highly recommend. It is very flexible in its controller configuration, great sounding and not too pricey. Also there are lots of ready-made patches for it intended for use with wind controllers. Patchman Music has pro grade patches for it with a bit higher price, but there are other options, like the set by Bernie Kenerson or even free patches for download. The free patches are actually really good, but they lack mod wheel response. The Akai EWI is using MIDI pitch bend to create vibrato, so some patches made for EWI just has no mod wheel action programmed. This can be helped with some alterations to the patches of your own, or by setting the T.WI to send pitch bend vibrato by toggling the MOD setting.To use the T.WI with these Thor patches, have it set up in its default mode, using CC#2 for the breath data.
Seaboard 5D (iPad and iPhone)
This is a free app from Roli, the makers of the expressive Seaboard controller. The Seaboard 5D app responds very well to aftertouch data, as this represents the ”press” dimension of the 5D concept.To use it with the T.WI, we need to set up both the app and the T.WI for it. In the app, use the top right menu circle, select MIDI setup and choose Teensy MIDI as MIDI input. Select Single channel and Bend Range 12. (See their support page for more info.) Set the T.WI to send breath data as aftertouch (AT), pitch bend (PB) to 1/12 and modulation (MOD) to send vibrato as pitch bend.
Arturia Minibrute (via USB host adapter)
The Minibrute has a connection in history with the T.WI, as the filter in the Minibrute is designed by Nyle Steiner, the same genius that invented the original EVI and EWI. For that reason, I reckon the Minibrute should be included here. Another reason for it is that the T.WI needs to be set up in a rather special way for this combination to work. First of all, the MB is a bit limited in receiving midi control data. It does receive aftertouch that can be routed to control the filter cutoff, but with no smoothing function in the digital to analog conversion for it, there is quite a bit of audible stepping in the sound as a result. The solution is to use the mod wheel control instead, as it is capable of receiving high resolution MIDI CC. That means that in addition to the seven bits of data sent on CC#1, another group of seven bits are sent on CC#33. That’s 14 bits of resolution. In reality, the resolution we get from the Teensy ADC when reading the breath sensor is 12 bits, and 12 bits is what the MB modulation wheel is sending/receiving, but that it still a whole lot more than the standard 7 bits of midi. We get 4096 steps instead of just 128.
The breath setting to use on the T.WI is CC1+33, keys LH1 and LH3 held with PB UP at USB plug-in.
Another limitation in the MB is that pitch bend range when received on MIDI is always 12 semitones up or down. That’s way too much for practical use with an EWI, so we need to compensate for that. The T.WI has two modes for pitch bend. The default one sets pitch bend to half range. Sounds great with synths set to two semitones PB range. The other one is 1/12 of the total range. This is what we will use with the MB.
Hold joystick right and RH2 key at USB plug-in to toggle this setting.
To get the breath response you want when controlling the MB, you can also try different curves for it. I’d recommend something in the -4 to -2 range.
The way to set up the MB is to route mod wheel to filter cutoff, open up the envelopes, dial down the cutoff a bit and then just muck about to find the sounds you like.
-
New firmware
10/21/2017 at 14:06 • 0 commentsI've brought over some features from the NuEVI midi trumpet project, so now there is a selection of response curves to choose from, the possibility to send breath value as other CC numbers than 2 (breath) or as aftertouch (channel pressure), and also the possibility to change the midi channel. Even a limited set of transpositions are available.
To change settings, hold a combination of joystick direction and RH fingering from the settings chart while plugging in the USB. The Teensy onboard LED will flash the setting (in a cryptic way) and then it's ready.
Crypto key for the LED flashing: fast flashing is zero, longer flashes counts to a number. First the joystick position is shown. One is up/breath setting. Two is down/midi setting. Three is right, for various toggling settings and for factory setting restore. Four is left/breath response curve selection. Then there is the result of binary combination of the three main RH keys. This counts from zero to seven. If there is another bit, like for midi setting or breath curve, this is controlled by the first pinkie key. This key also controls aftertouch breath on in combination with the breath cc selection. The pinkie keys have their own separate flashes, either zero (four fast flashes) or one (one longer flash).
Example 1: Setting midi channel to number 11, we hold pitch bend down on the joystick and finger the combination from the chart – RH2+RHp1 – while connecting the USB to power. The LED will flash 2 - 2 - 1 - 0. (Midi channel 1 is fingering zero, so two flashes equals the value three. Plus eight from the extra bit equals eleven. Then there's the zero for the RHp2 that is not pressed. After that it's ready to play.
Example 2: Selecting the linear breath response curve. That's joystick left and RH3 at USB plug-in. LED will flash 4 - 4 - 0 - 0.
Example 3: Transpose from C to G. Joystick right and both pinkie keys at plug-in (transpose -7 to F and +2 to G). LED will flash 3 - 0 - 1 - 1. To toggle the setting back to C, do the same procedure again.
Example 4: Send breath cc (#2) and aftertouch in combination. Joystick up and RH2+RHp1 at plug-in. LED will flash 1 - 2 - 1 - 0.
Example 5: "Factory" reset. When you are completely lost in all of this, and your instrument is acting so weird you have no idea what's going on, you can reset to default values by holding joystick right and all the RH keys. LED will flash 3 - 7 - 1 - 1 and then you feel safe and comfy again.
If this sounds too complicated, it's because it is. You can just use it without changing anything and live your life as you did before all of this.
To get an idea what the controller is doing at any given time and have a better chance of having it do what you want it to do, a midi analyzer app for your computer or iPad is very helpful. I'm talking about stuff like MIDI Monitor on Mac or MIDI-OX on Windows.
-
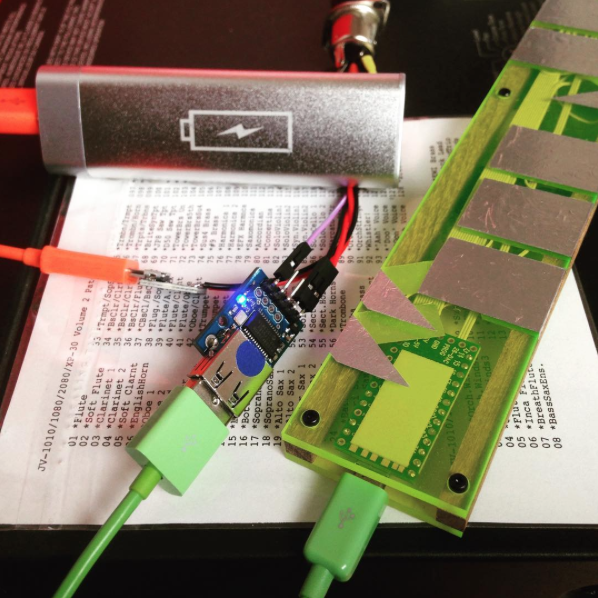
Connecting to DIN MIDI hardware synths
09/19/2016 at 10:03 • 0 commentsSure there are a lot of nice softsynths to use with the TeensieWI, but if you also wish to use it with hardware synths with DIN-5 MIDI input, you can't do that directly of course. The options are to either go via a computer and reroute the MIDI data, or to get a MIDI USB host converter. The first one is not very practical in many situations, and the latter can be expensive and still a bit bulky. For pro use, I'd probably go with the Kenton converter, but if you just built yourself a €40 wind controller, you probably don't want to spend €100 just to make it work with your hardware synths. Sure, you could just use a serial TX port on the Teensy to get the signal out, but that would require another cable going from the controller. Also, with a USB host converter, you can do this with any class compliant MIDI controller, so that's a plus. After some internet searches I found the USB host mini from Hobbytronics.co.uk. It converts USB data directly to serial data, so all you need to get a working MIDI converter is a 5V DC regulated power source and a MIDI jack with a couple of resistors. You can easily fit it in a small enclosure and make yourself a cheap (< €20) converter dongle. So that's my little tip of the day :)
![]()
![]()
-
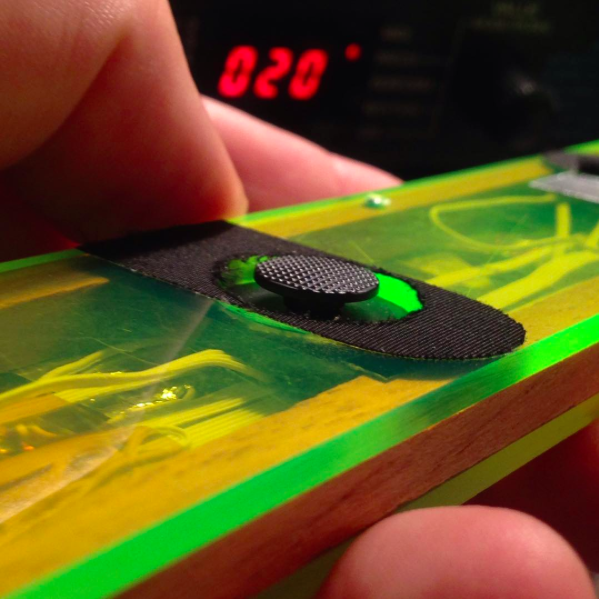
Joystick for pitch bend and modulation
09/16/2016 at 19:59 • 0 commentsTo increase the playability and nuance in the controller, I've installed an analog thumb slide joystick normally found in PSP 1000. The size was just perfect, and with some changes to compensate for the shortcomings in this joystick, I could use the pitch bend and modulation functions from my MiniWI code. I've updated my Github with the new firmware and schematics.
![]()
A quick demo:
-
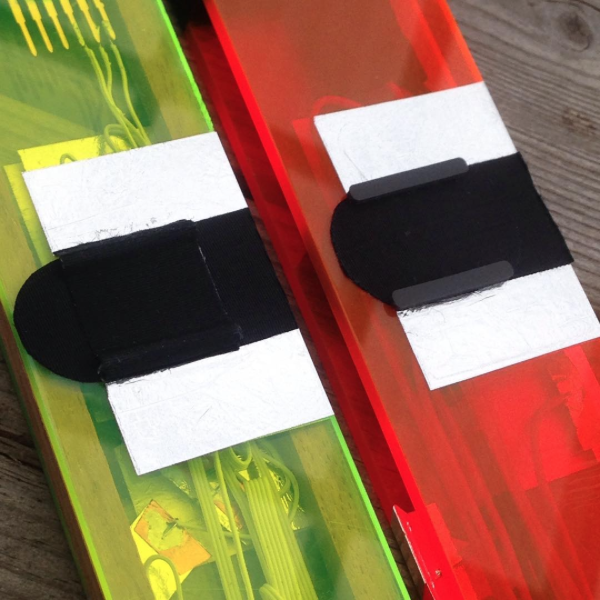
Anti-slip thumb rest wall
08/12/2016 at 07:45 • 0 commentsHere's a little detail I forgot to mention earlier. To prevent LH thumb accidentally slipping onto the octave pads creating glitches, a small wall can be put at the sides of the thumb rests. Helps a lot.
![]()
-
Building another one
08/03/2016 at 07:50 • 2 commentsI made another one of these, with some alterations. This time I used some smaller gauge wires (some old LVD-SCSI ribbon cable I had lying around) to make it less cramped. I also put wood strips (5x5 or 6x6 mm) between the edges of the perspex sheets and used M2x10mm self tapping screws to hold it together (with some pre drilling and countersinking).
![]()
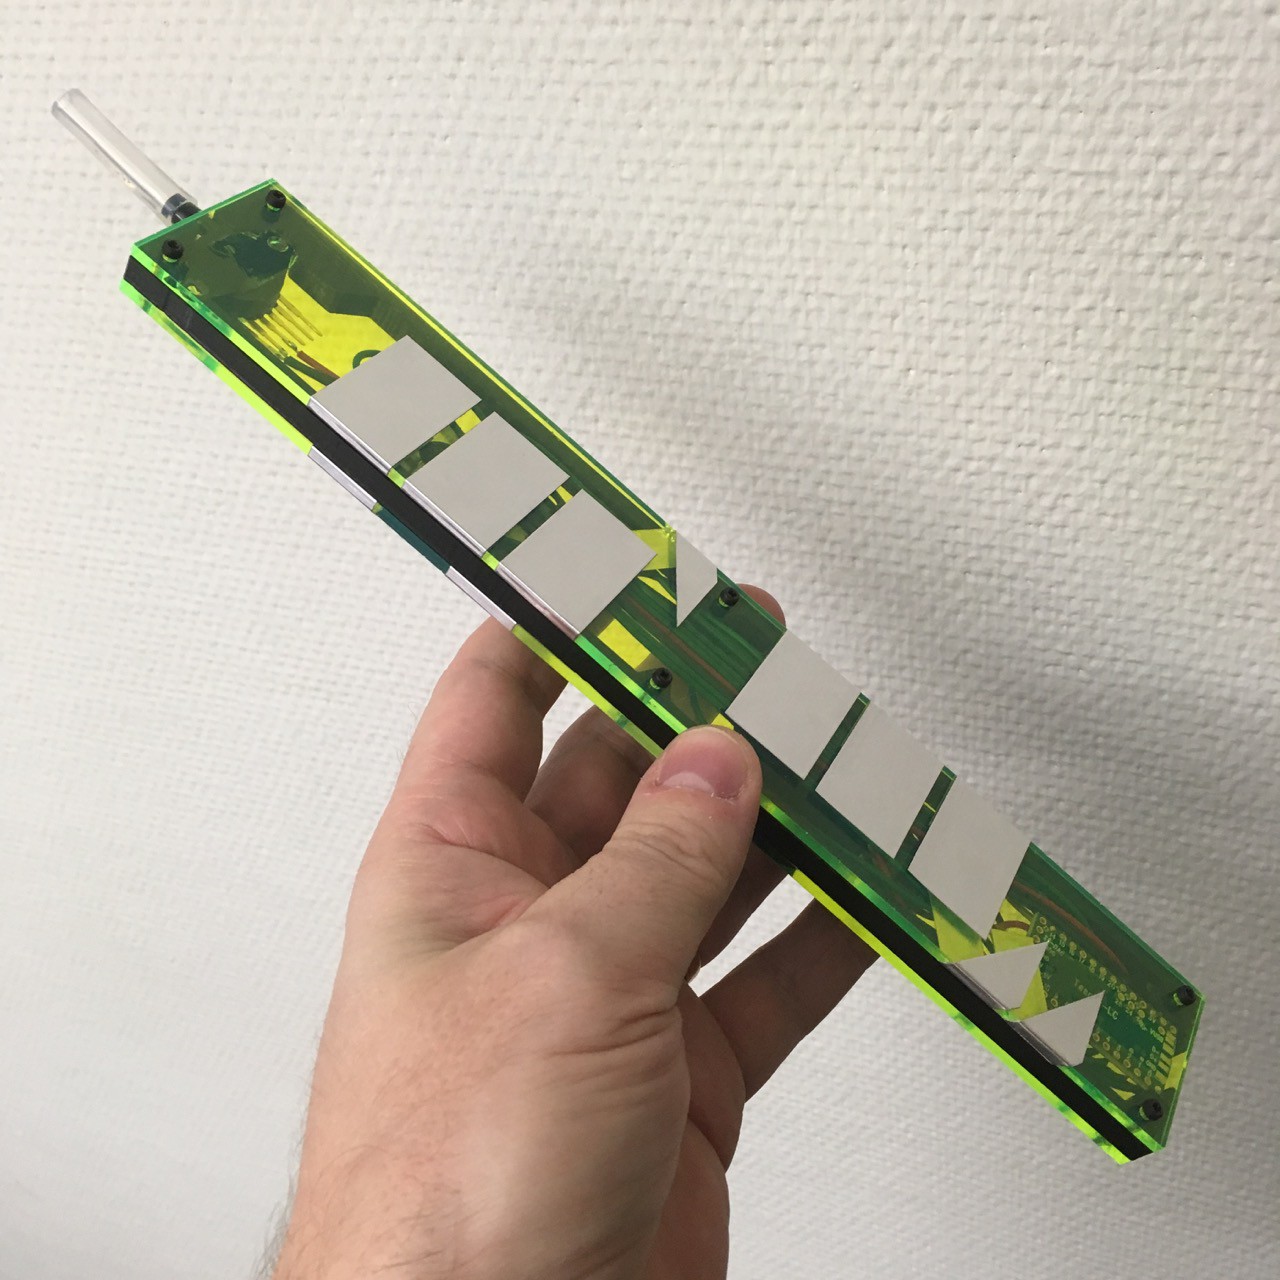
TeensieWI woodwind USB MIDI controller
Minimalistic and easy to build USB MIDI controller, inspired by the AKAI EWI, the CASIO DH-200 and my own MiniWI.