 WJCarpenter
Tiles get applied to some kind of surface, generically called backerboard. For a wet area like a shower, the traditional backerboard material is cementboard. It's a bit like drywall, but it's impregnated with cement (tile people call them "cementitious"; yup). The advantage over drywall is that cementboard will not degrade if it gets wet. However, cementboard is not waterproof (a common misunderstanding). In recent years, an alternative technology of closed-cell foam boards has been developed. There are several different manufacturers. The foam backerboards are completely waterproof except for places where you put a hole in it for screws or where two pieces meet in a seam. That's very appealing to me. The other advantage is that the foam boards are very light (5-10 pounds) compared to cementboard (30-40 pounds for a 3x5 foot piece). The disadvantage of foam backerboards is the price. In my area, cementboard in DIY quantities is about US$15 each, whereas the inexpensive foam boards are about twice that. There are more expensive brands that the pros use, and those are a lot more expensive.
For my little job, I will be using 5 or 6 pieces of backerboard, so the price difference was not a big deal. I chose to use GoBoard, It's readily available locally.
A little while ago today, I put up the first piece. I admit that I did the easiest piece first to give myself a little victory. In a standard tub alcove, one piece of backerboard mounted horizontally exactly fits the back wall. I only made the cut-out for the bottom part of my larger niche. I haven't yet done the cut-out for the smaller niche. Everything I read about this was true: I just used a plain old utility knife to trim out that piece. Easy as pie.
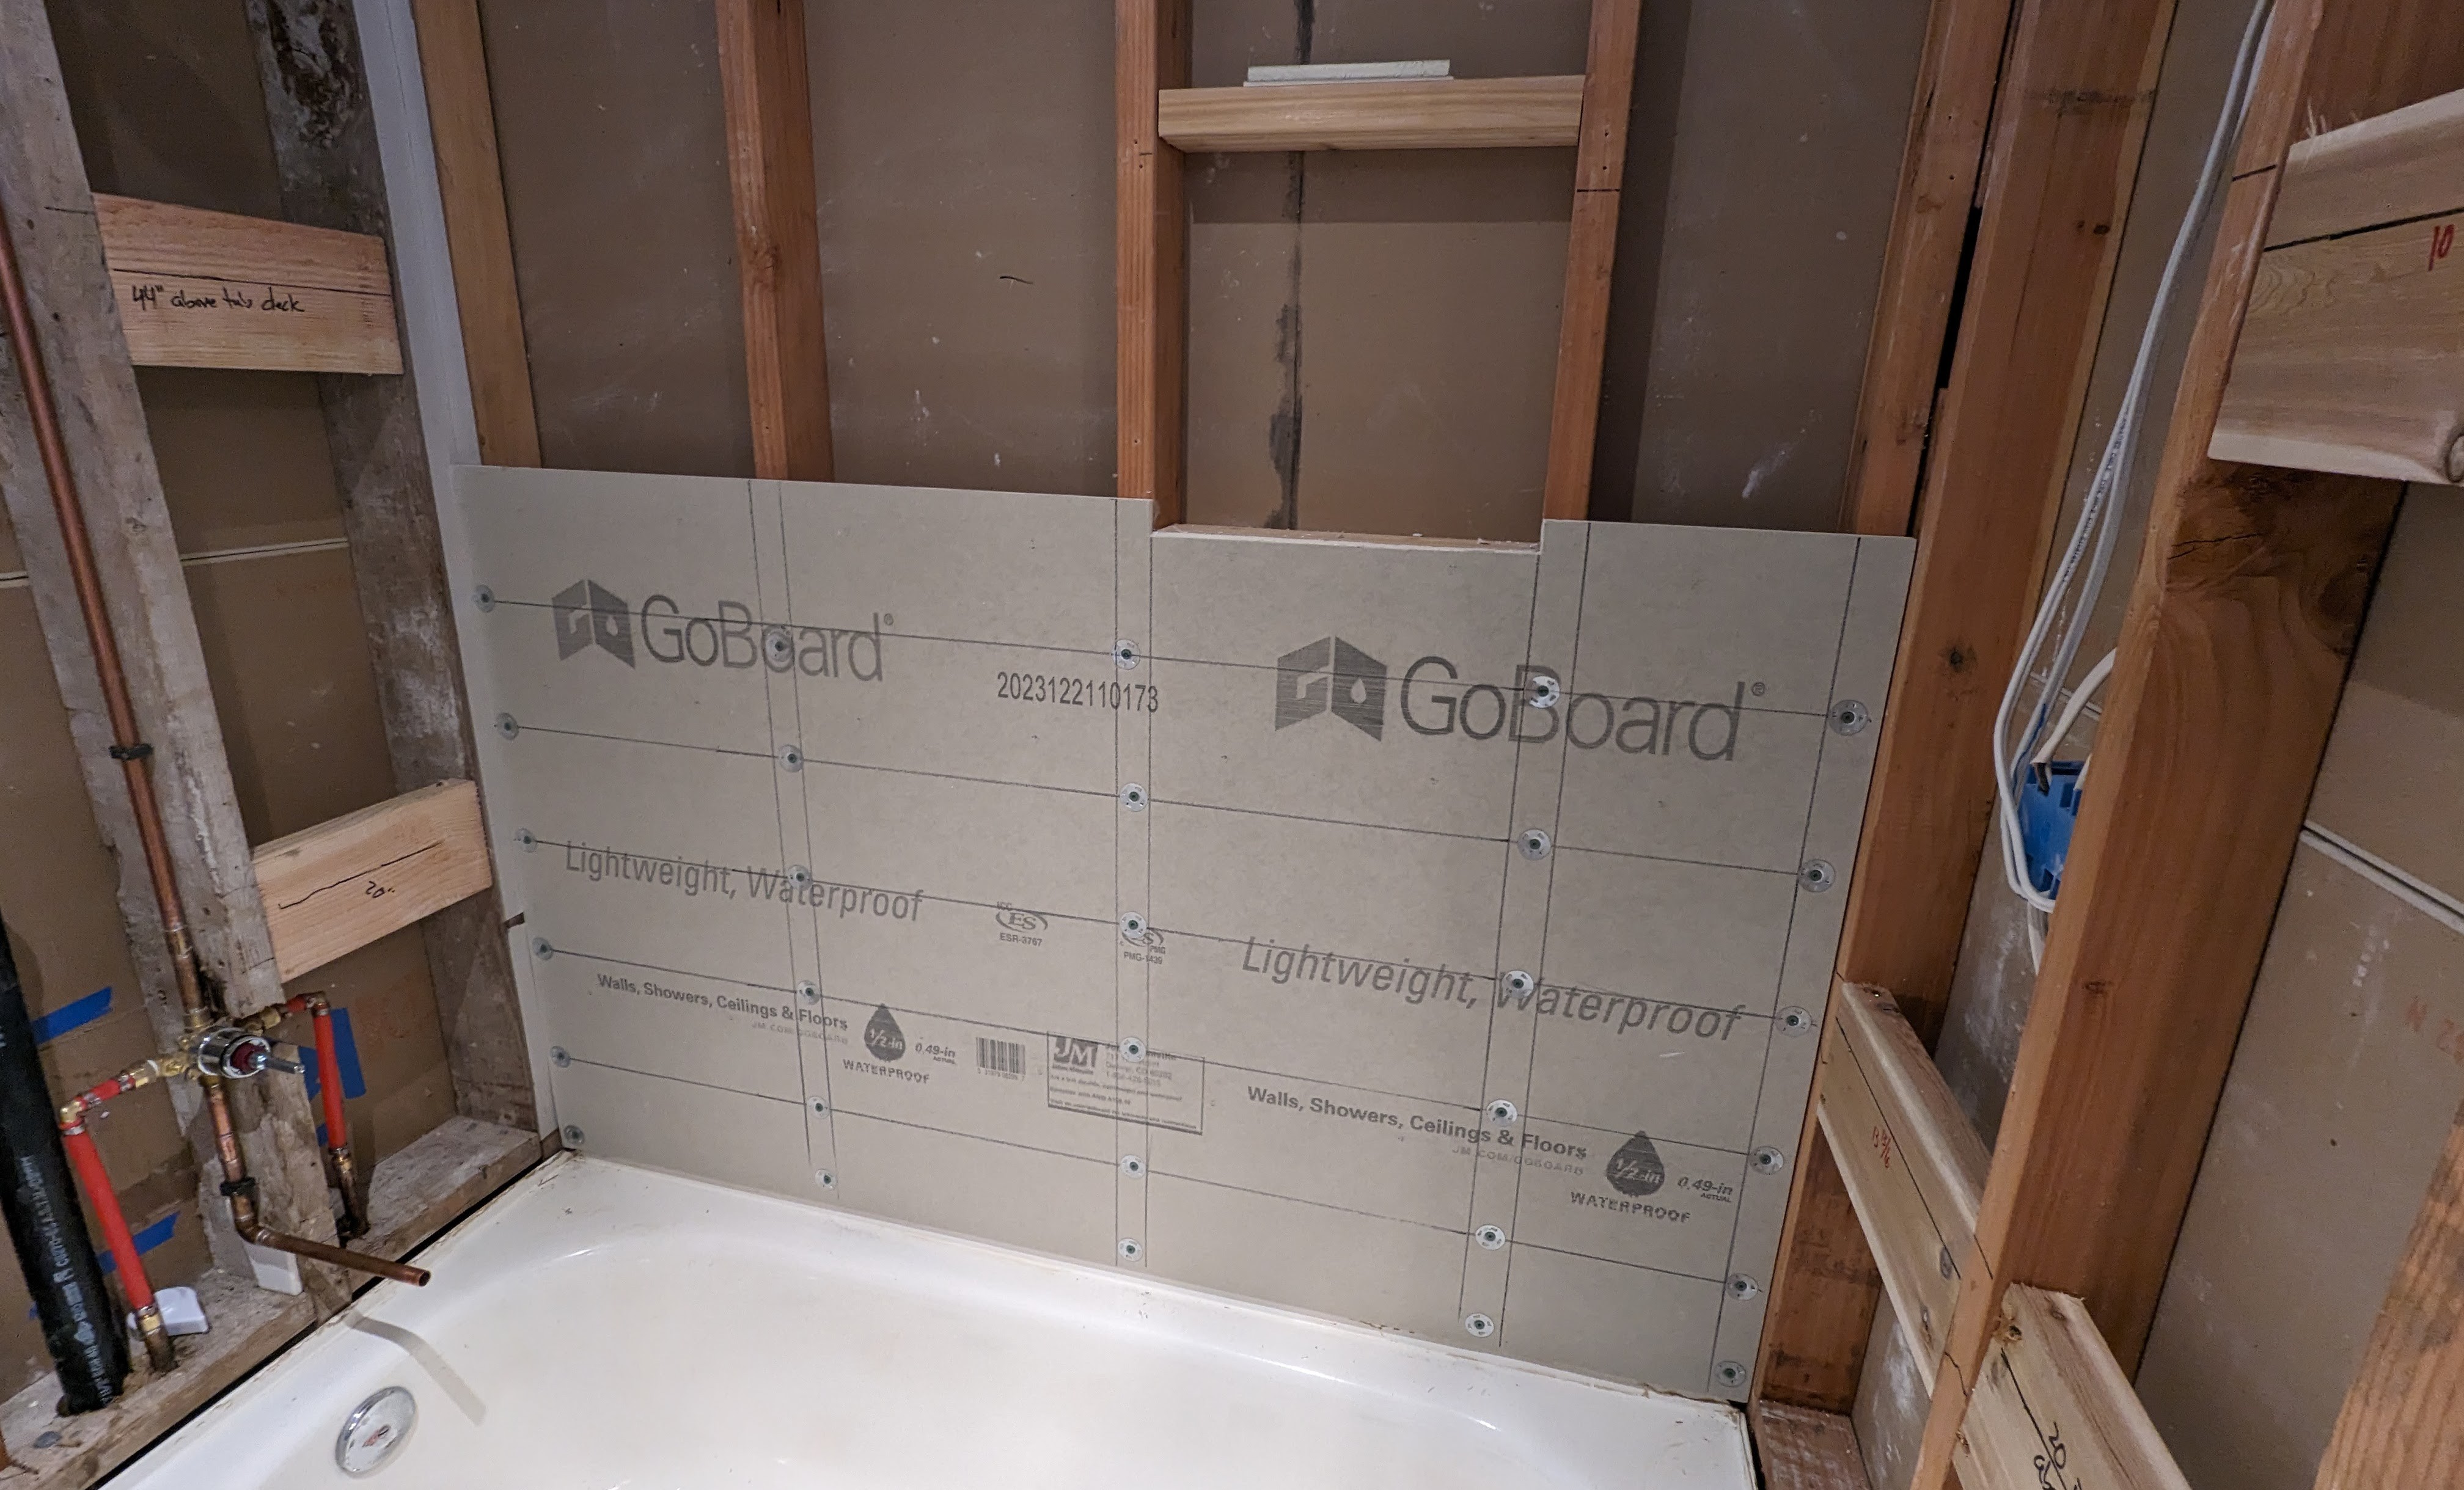
If you look closely, you can see that I'm using washers with the screws. The washers are also from Johns Manville. They say that if you use the washers and the matching screws, you can change the minimum vertical spacing from 6 inches to 12 inches. I wasn't able to find their matching screws locally, so I'm using backerboard screws intended to be used with cementboard, which are a little different. Their guidance doesn't address that combination, so I decided to stick with the 6 inch spacing. The grid of lines were done by me to keep track of the stud locations and the 6 inch vertical spacing. I didn't yet put screws along the top edge because a single screw can go in each stud where sheets meet if you are using washers. At the left end, you can see where I built up the two studs in that corner with cardboard strips to get them flush with their peers.
With this first backerboard in place, I finally feel like I've turned the corner and might even someday soon place some actual tiles. Woot.
Update: More progress.
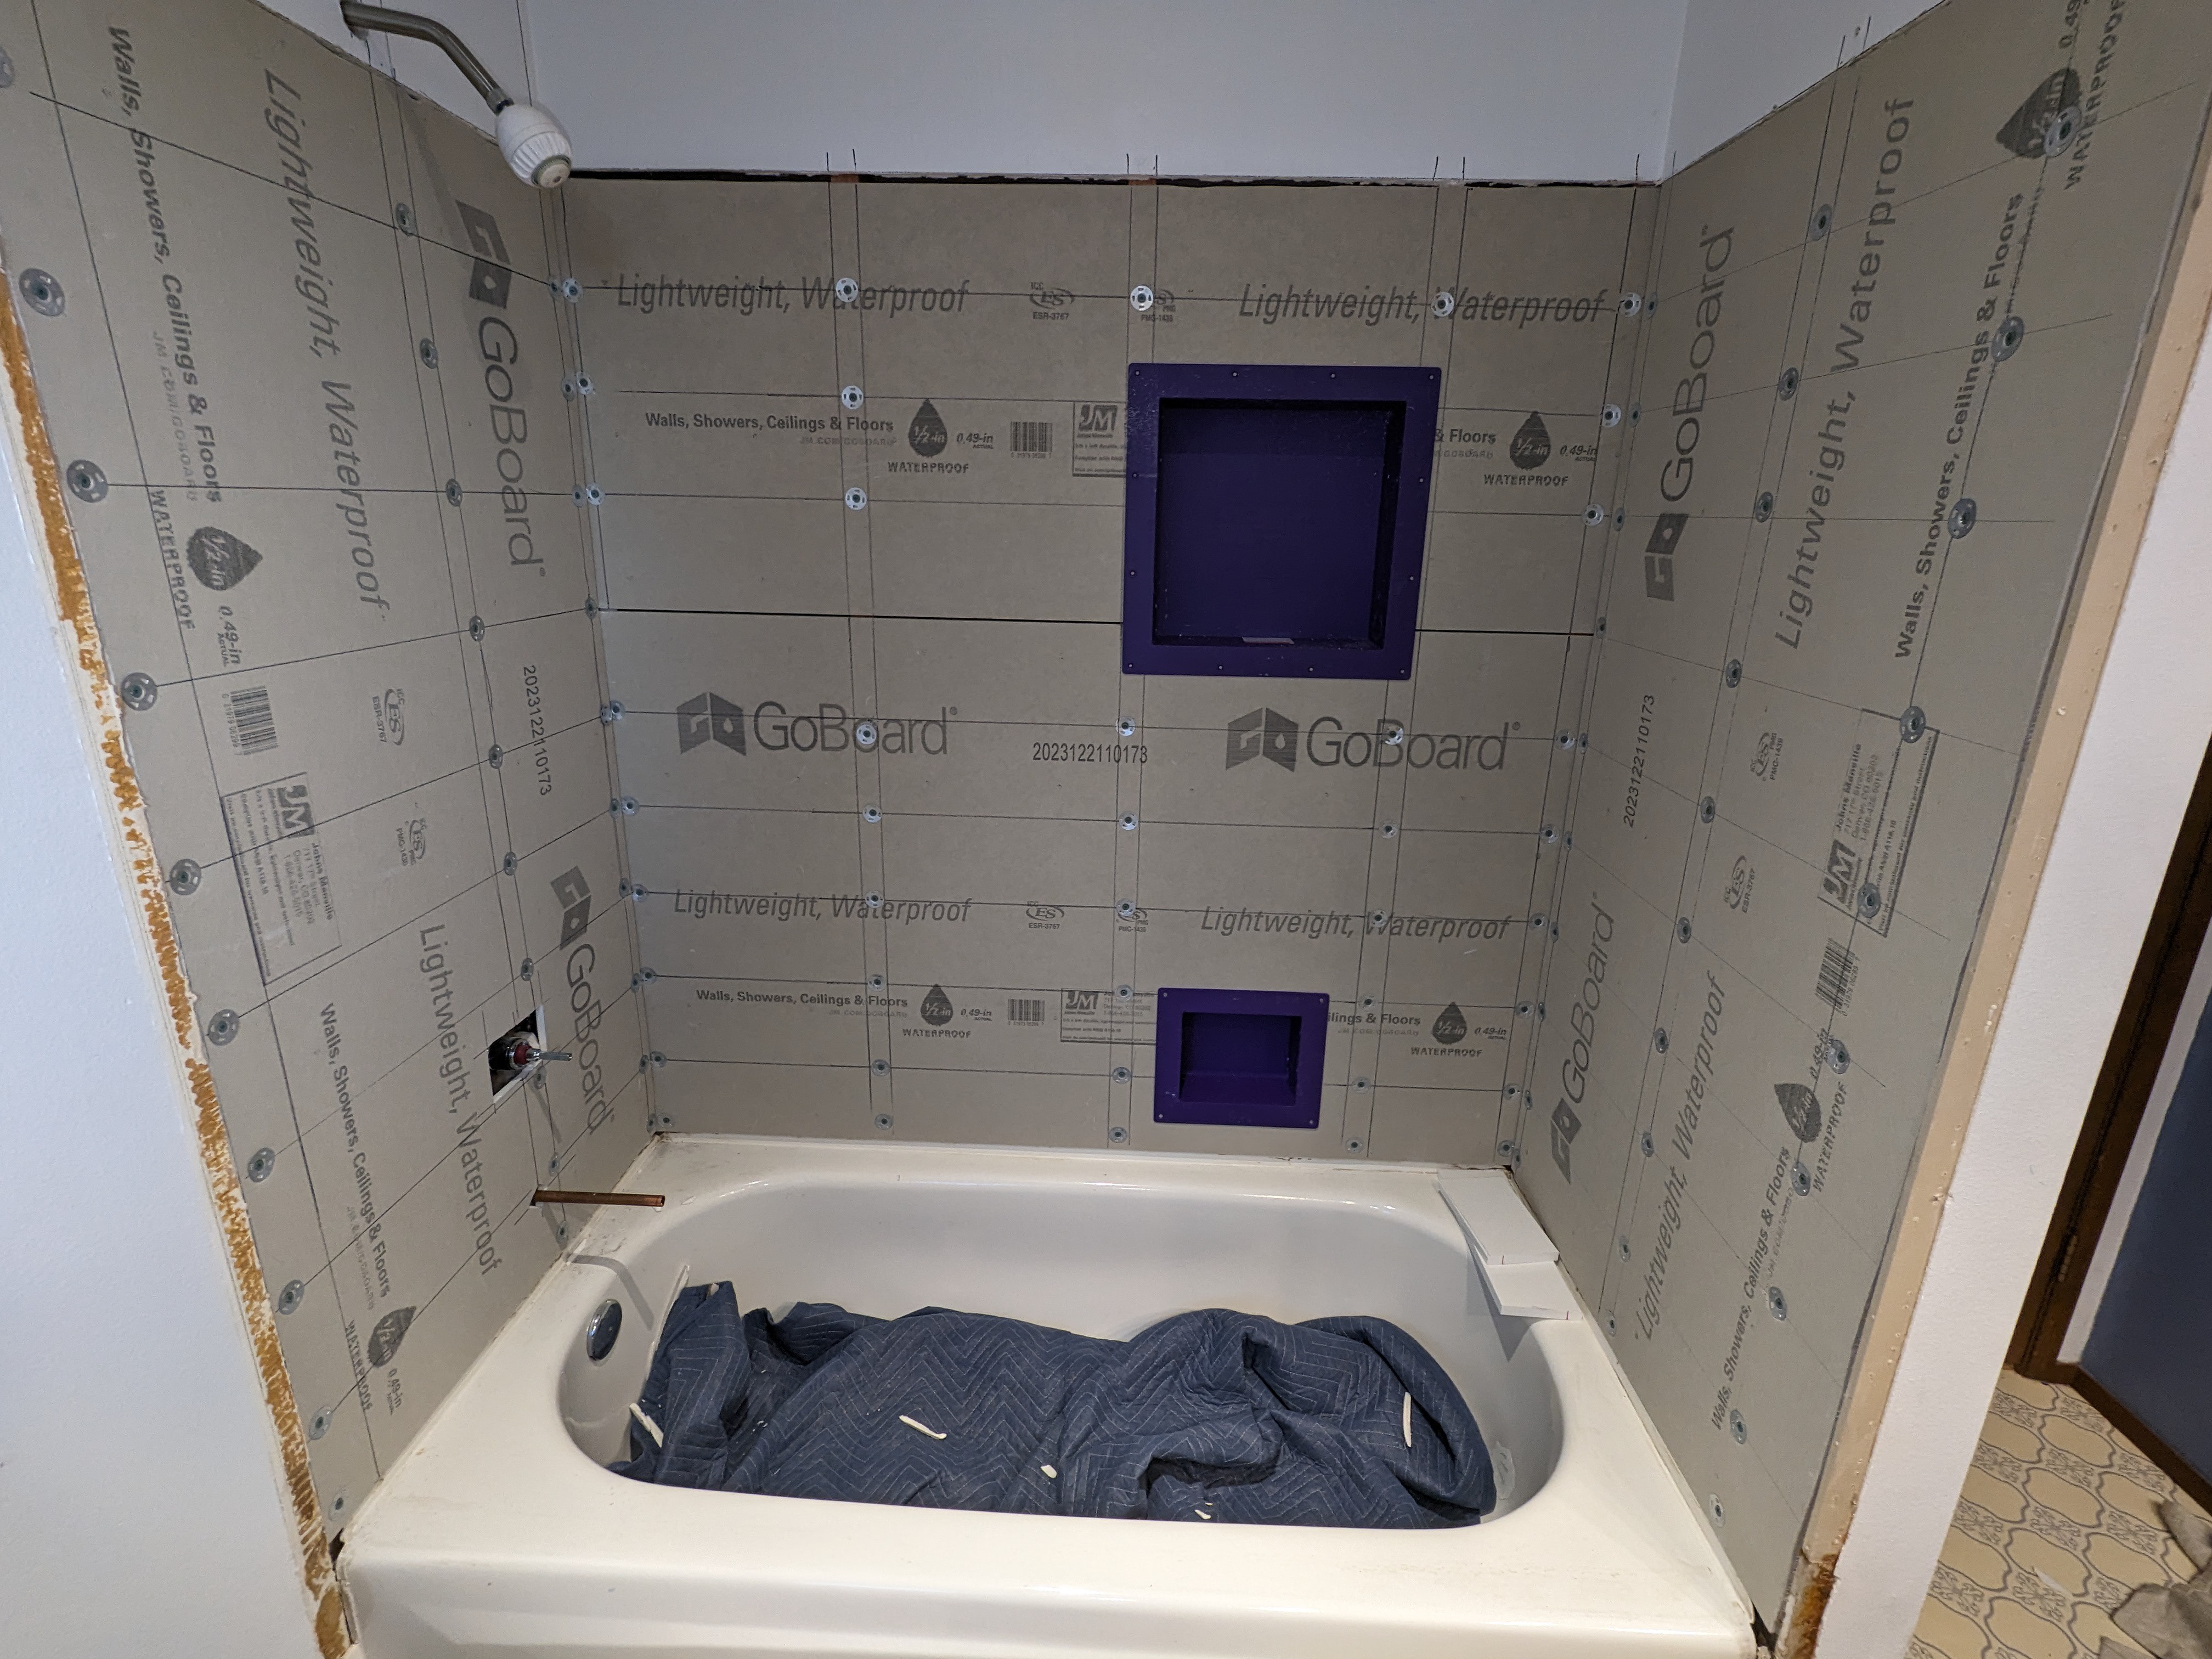
The right end-wall was also fairly easy since I just had to make two straight-line cuts to make it the right size. If I had been more careful about removing some drywall with the old tiles, that interface would have been exactly 5 feet up and eliminated the need for one of those cuts. It's easier to trim GoBoard compared to drywall, so that's what I did.
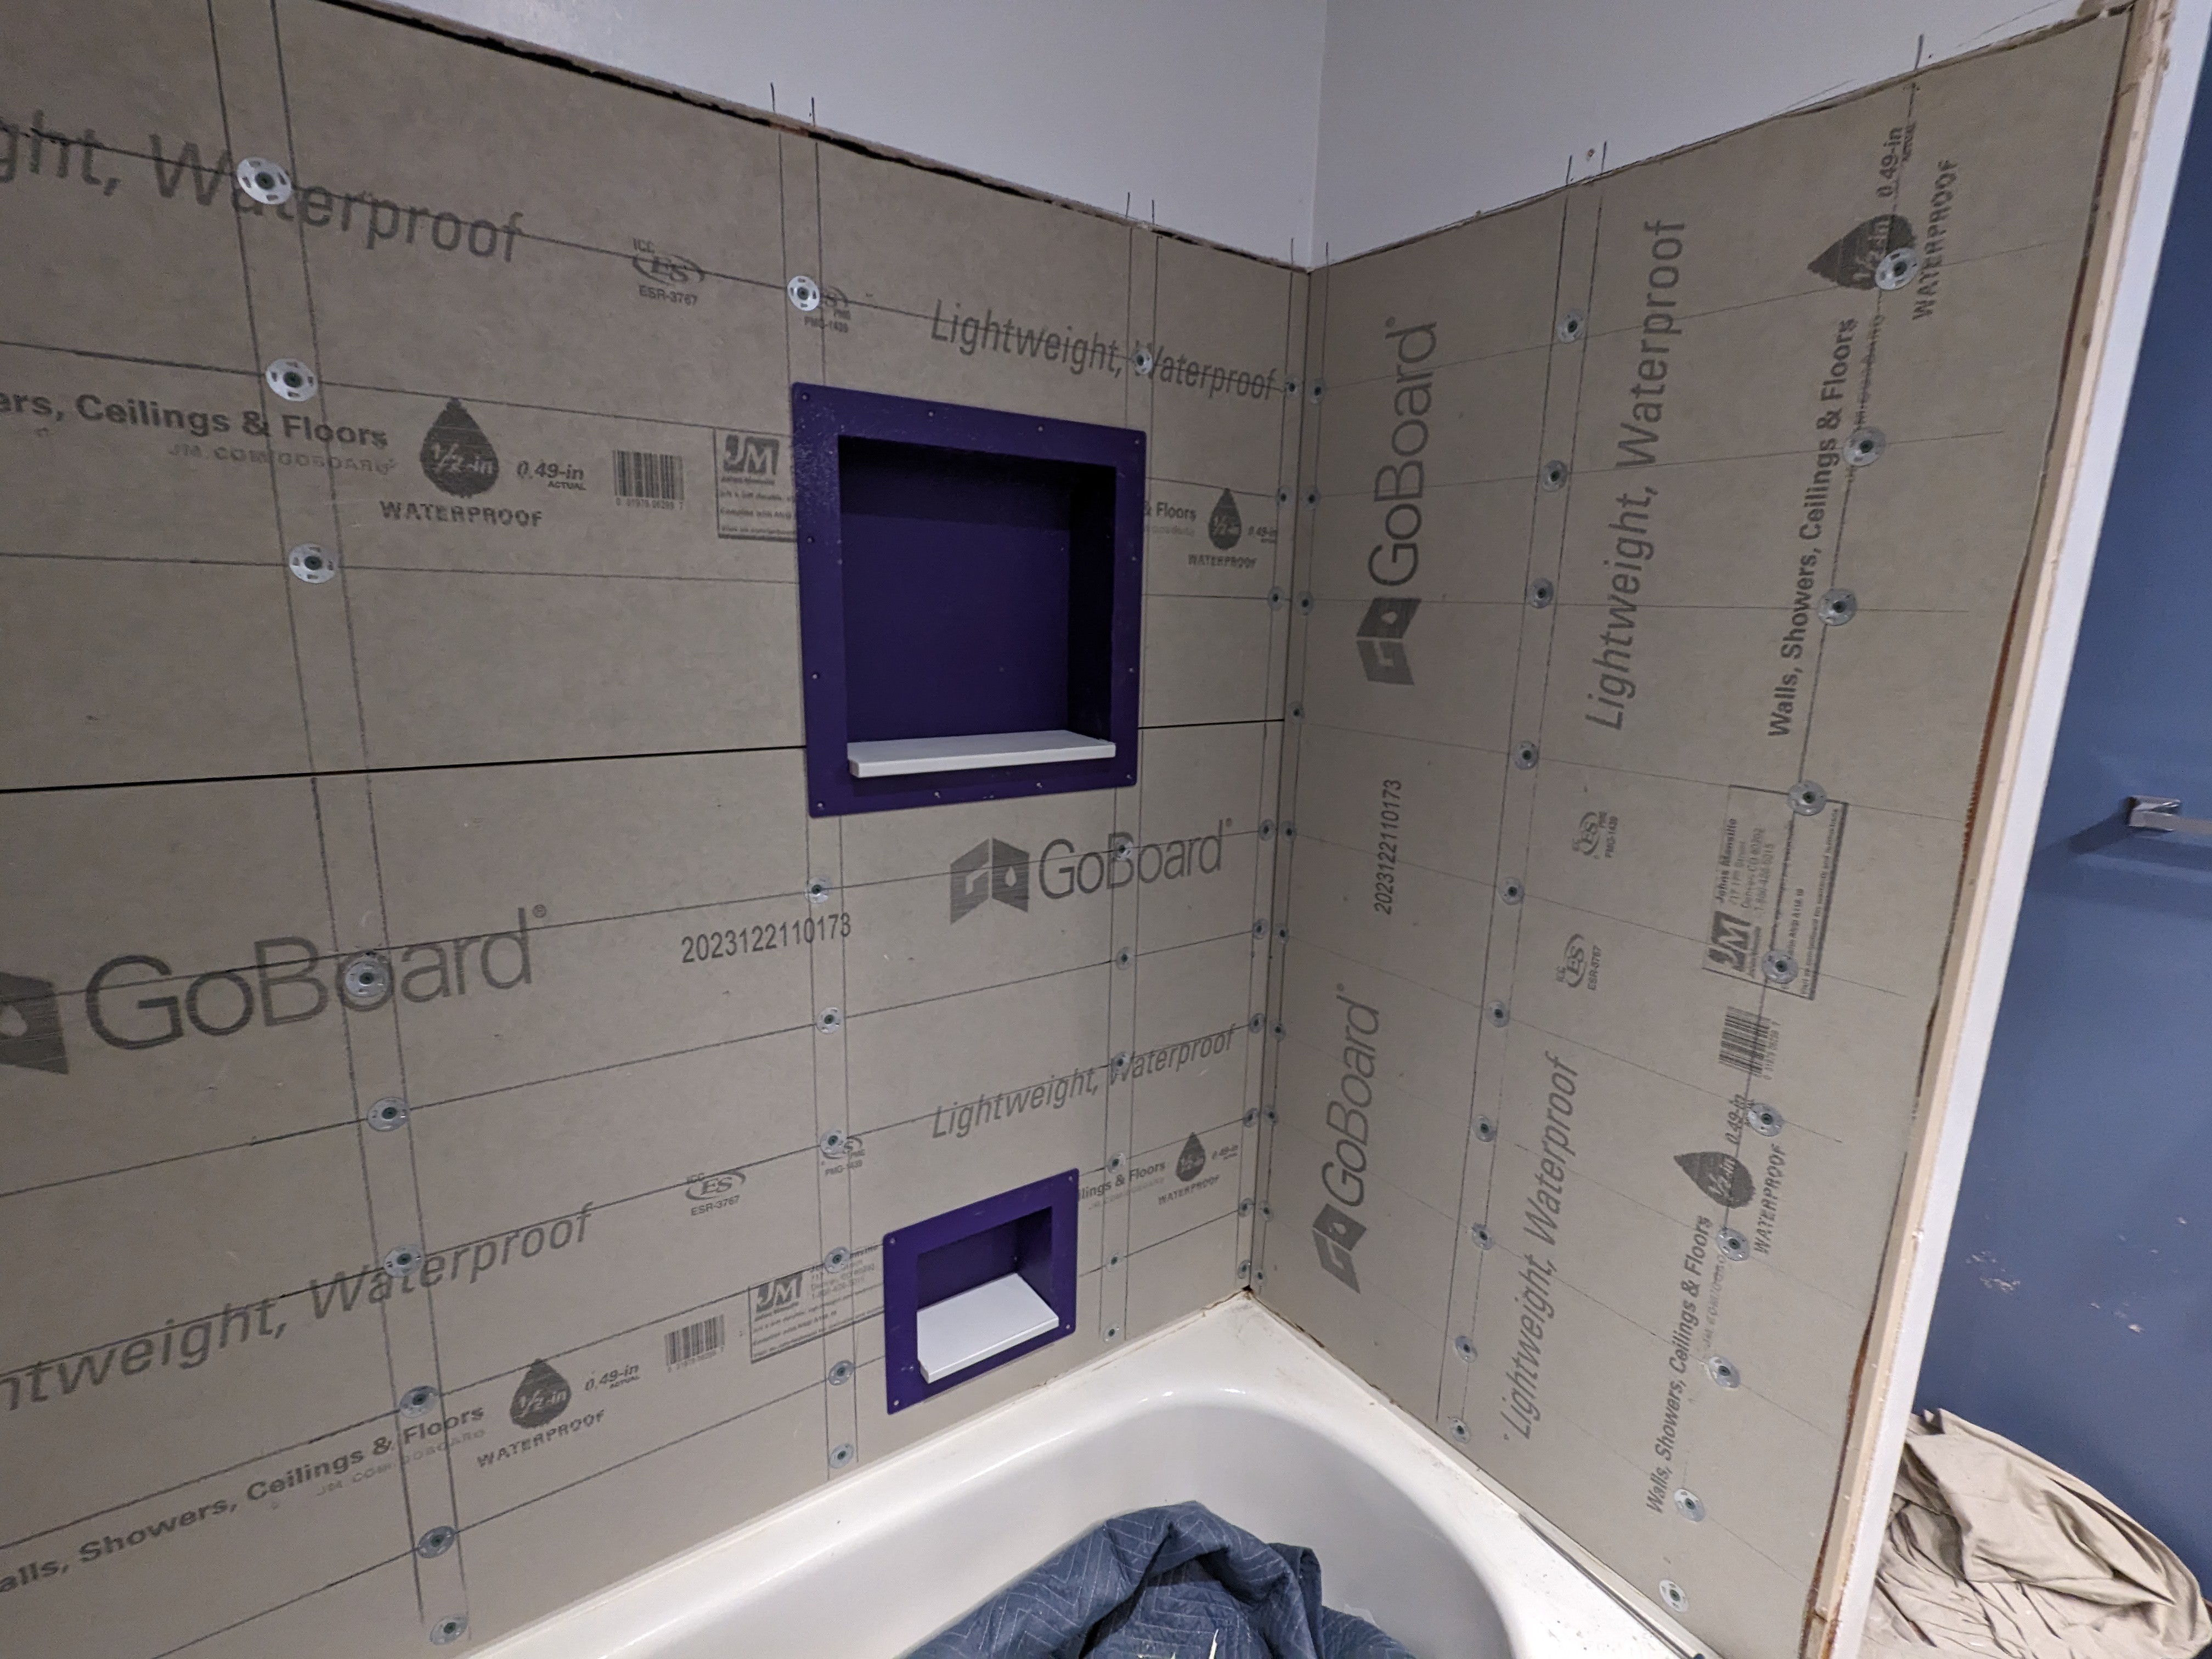
On the back wall, the two niches have been set in place but not fastened. The white sills on the bottoms are some pieces of manufactured stone that is also just set in place but not yet attached. The gap at the top of the back wall, where the GoBoard meets the drywall, is more than the intended 1/8 inch (due to poor craftsmanship by me). It's well above the wet area, but I still want to seal it with the GoBoard sealant. I'll fill that gap with some backer rod to make a good foundation for the sealant.
The remaining wall is the complicated left end-wall. Besides the trimming that was done on the right end-wall, I've got to measure and cut two openings for the plumbing. One opening will be a drilled hole for the tub spout, and the other will be some kind of cut-out shape for the faucet control. The installation instructions call for a fairly large circle (large enough to expose the integrated shut-off valves), but that amount of opening is not really needed above and below. I'll do some kind of smaller rectangle or some approximation. Before I do that, I've decided to make an adjustment to my earlier plumbing work that I've described in an update to an earlier project log.

And, finally, after the plumbing revision, all of the main GoBoard pieces are up. I just need to do some tiny pieces on the outside of the tub.
Update: I estimated that I might need 5 pieces of GoBoard, and I bought 6 pieces to be on the safe side so I wouldn't have to run back and get another one in a hurry. It turned out I only needed 4 pieces and have some substantial chunks left over from cutting those. It was two pieces for the back wall and one piece for each end wall. The reason my estimate was a little higher was because I wasn't sure if I would take out the drywall above the old tile (I didn't) and I thought I might fabricate the niches from GoBoard (I didn't). I returned the two extra pieces to the store.
Discussions
Become a Hackaday.io Member
Create an account to leave a comment. Already have an account? Log In.