 WJCarpenter
Now it's finally time to replace the tub and shower combination faucet. My motivation for the replacement is (a) to move from separate hot and cold controls to a single handle, and (b) move from ancient rubber washer technology to modern washerless goodness. I was initially planning to do the replacement myself, then I saw the cramped and crowded conditions of the current piping after I opened the wall up, then I got a quote from a licensed plumber, and then I went back to deciding to do it myself.
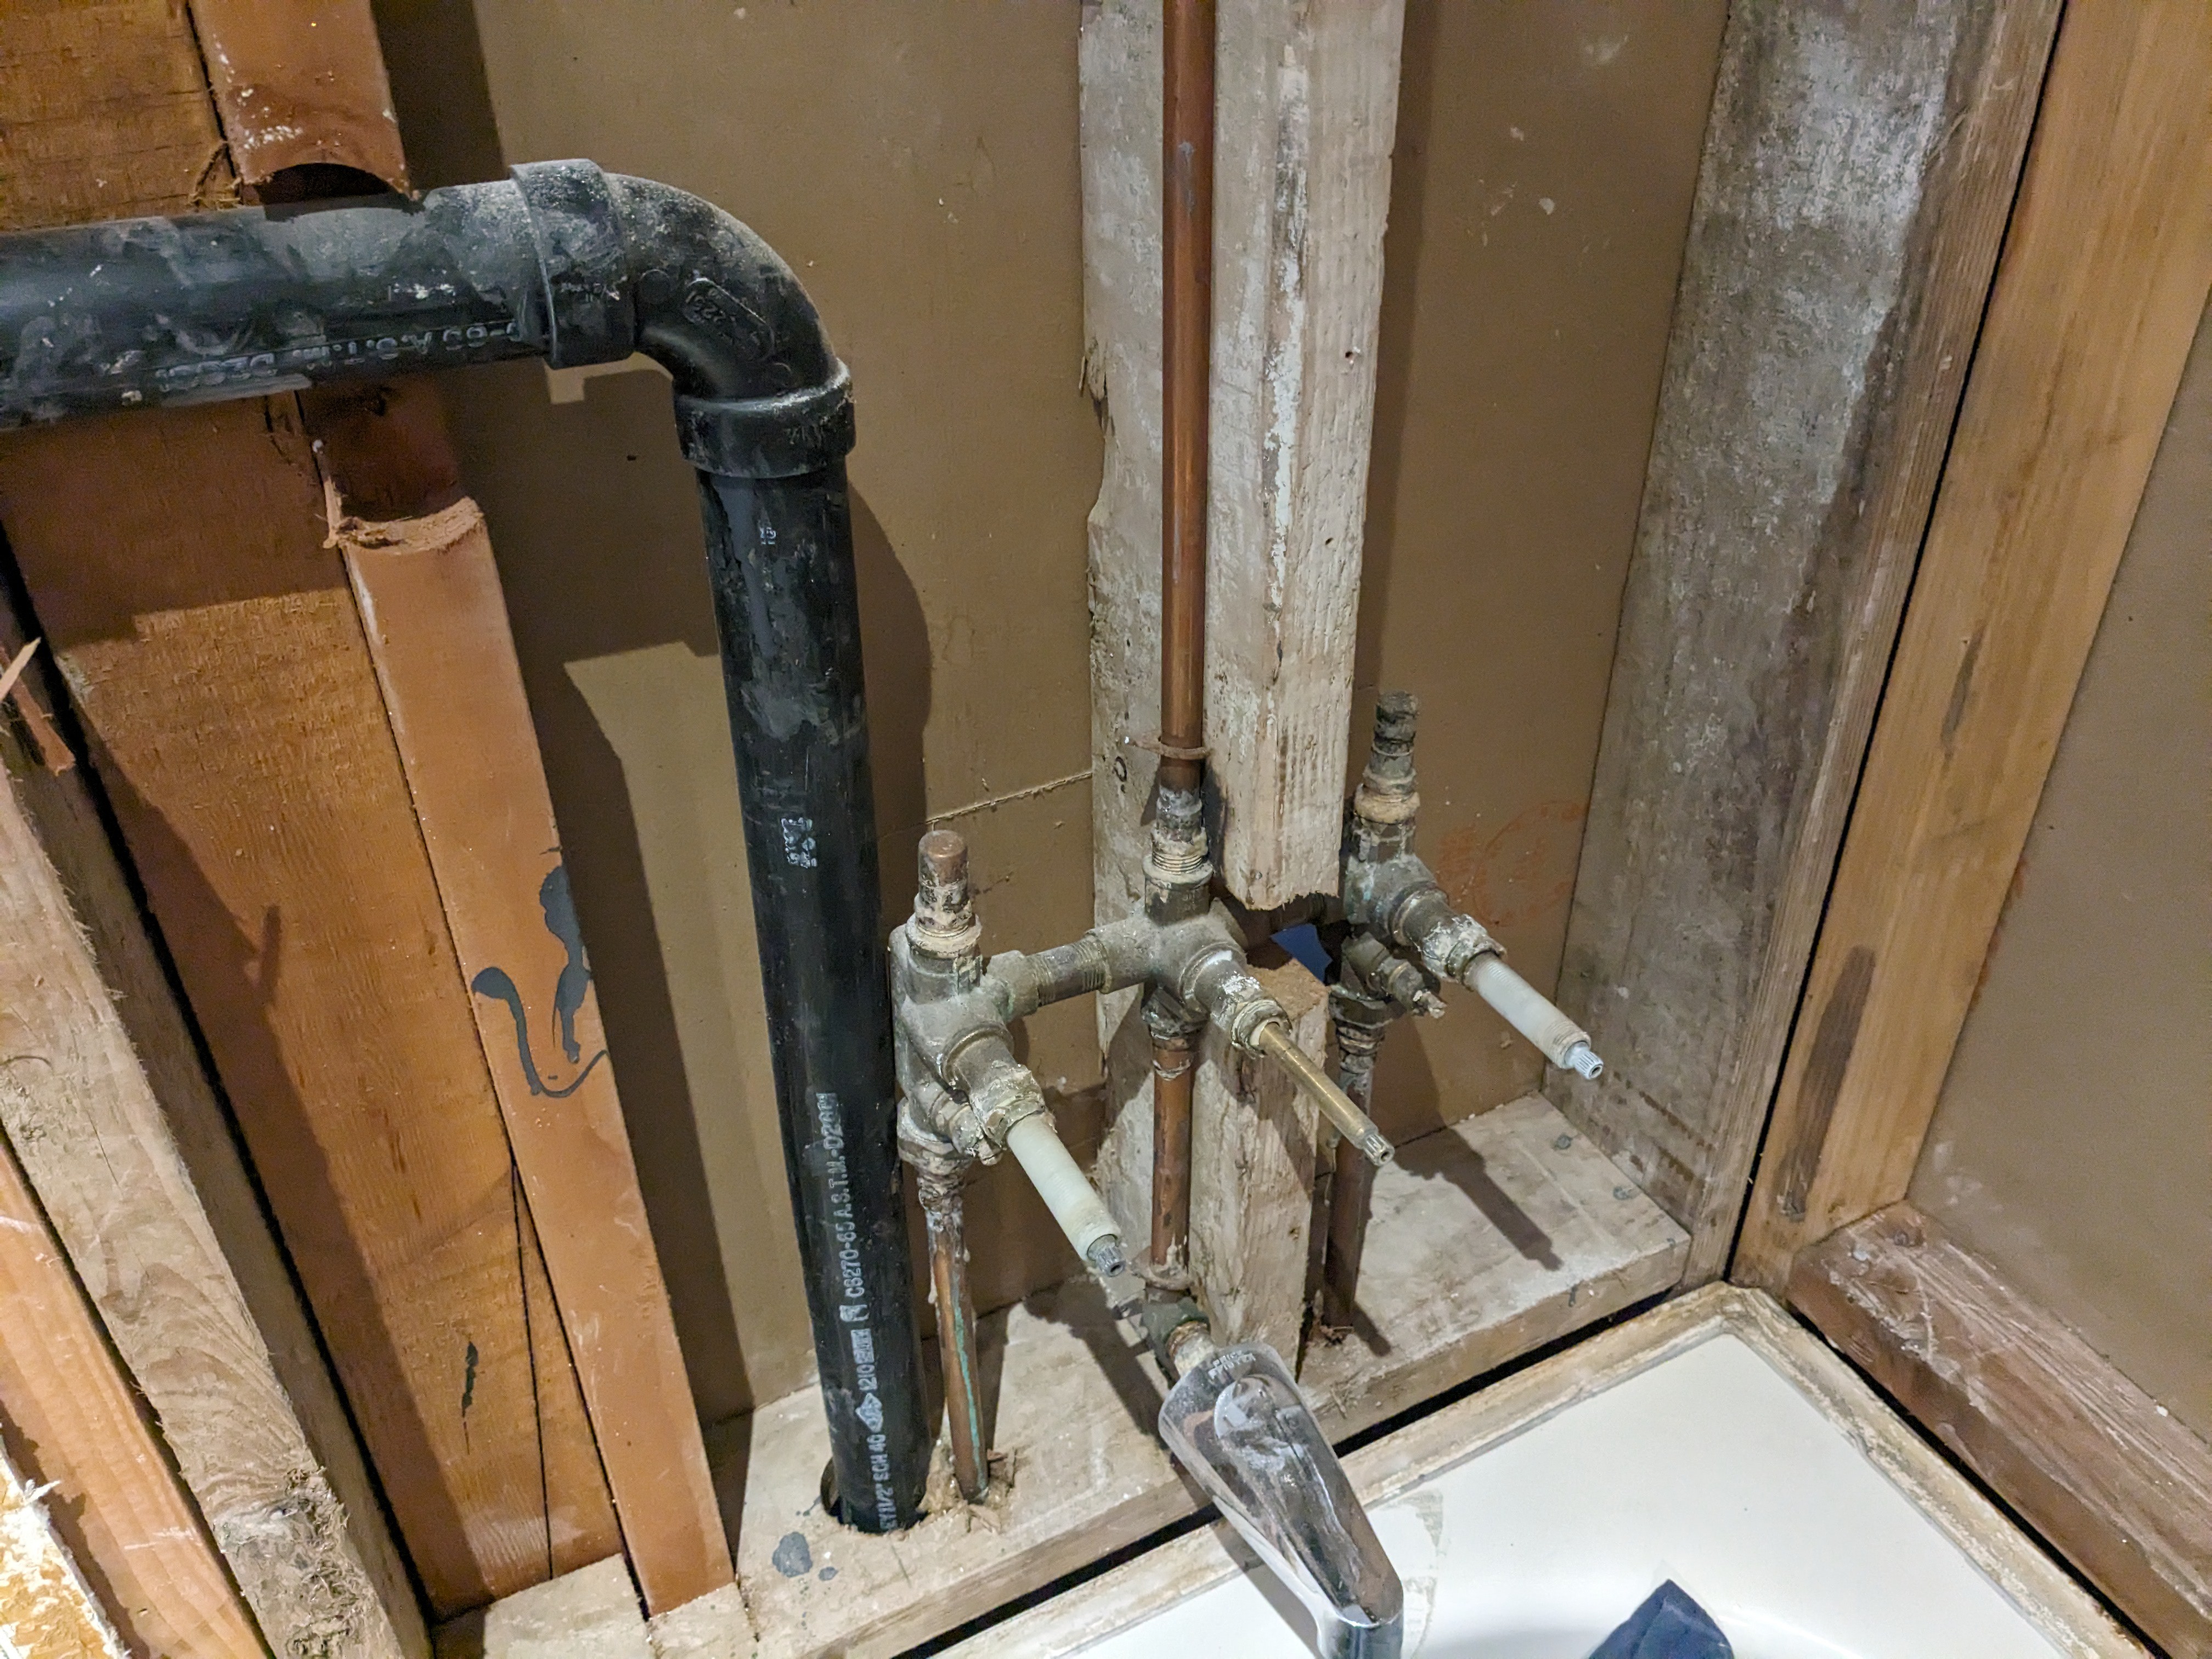
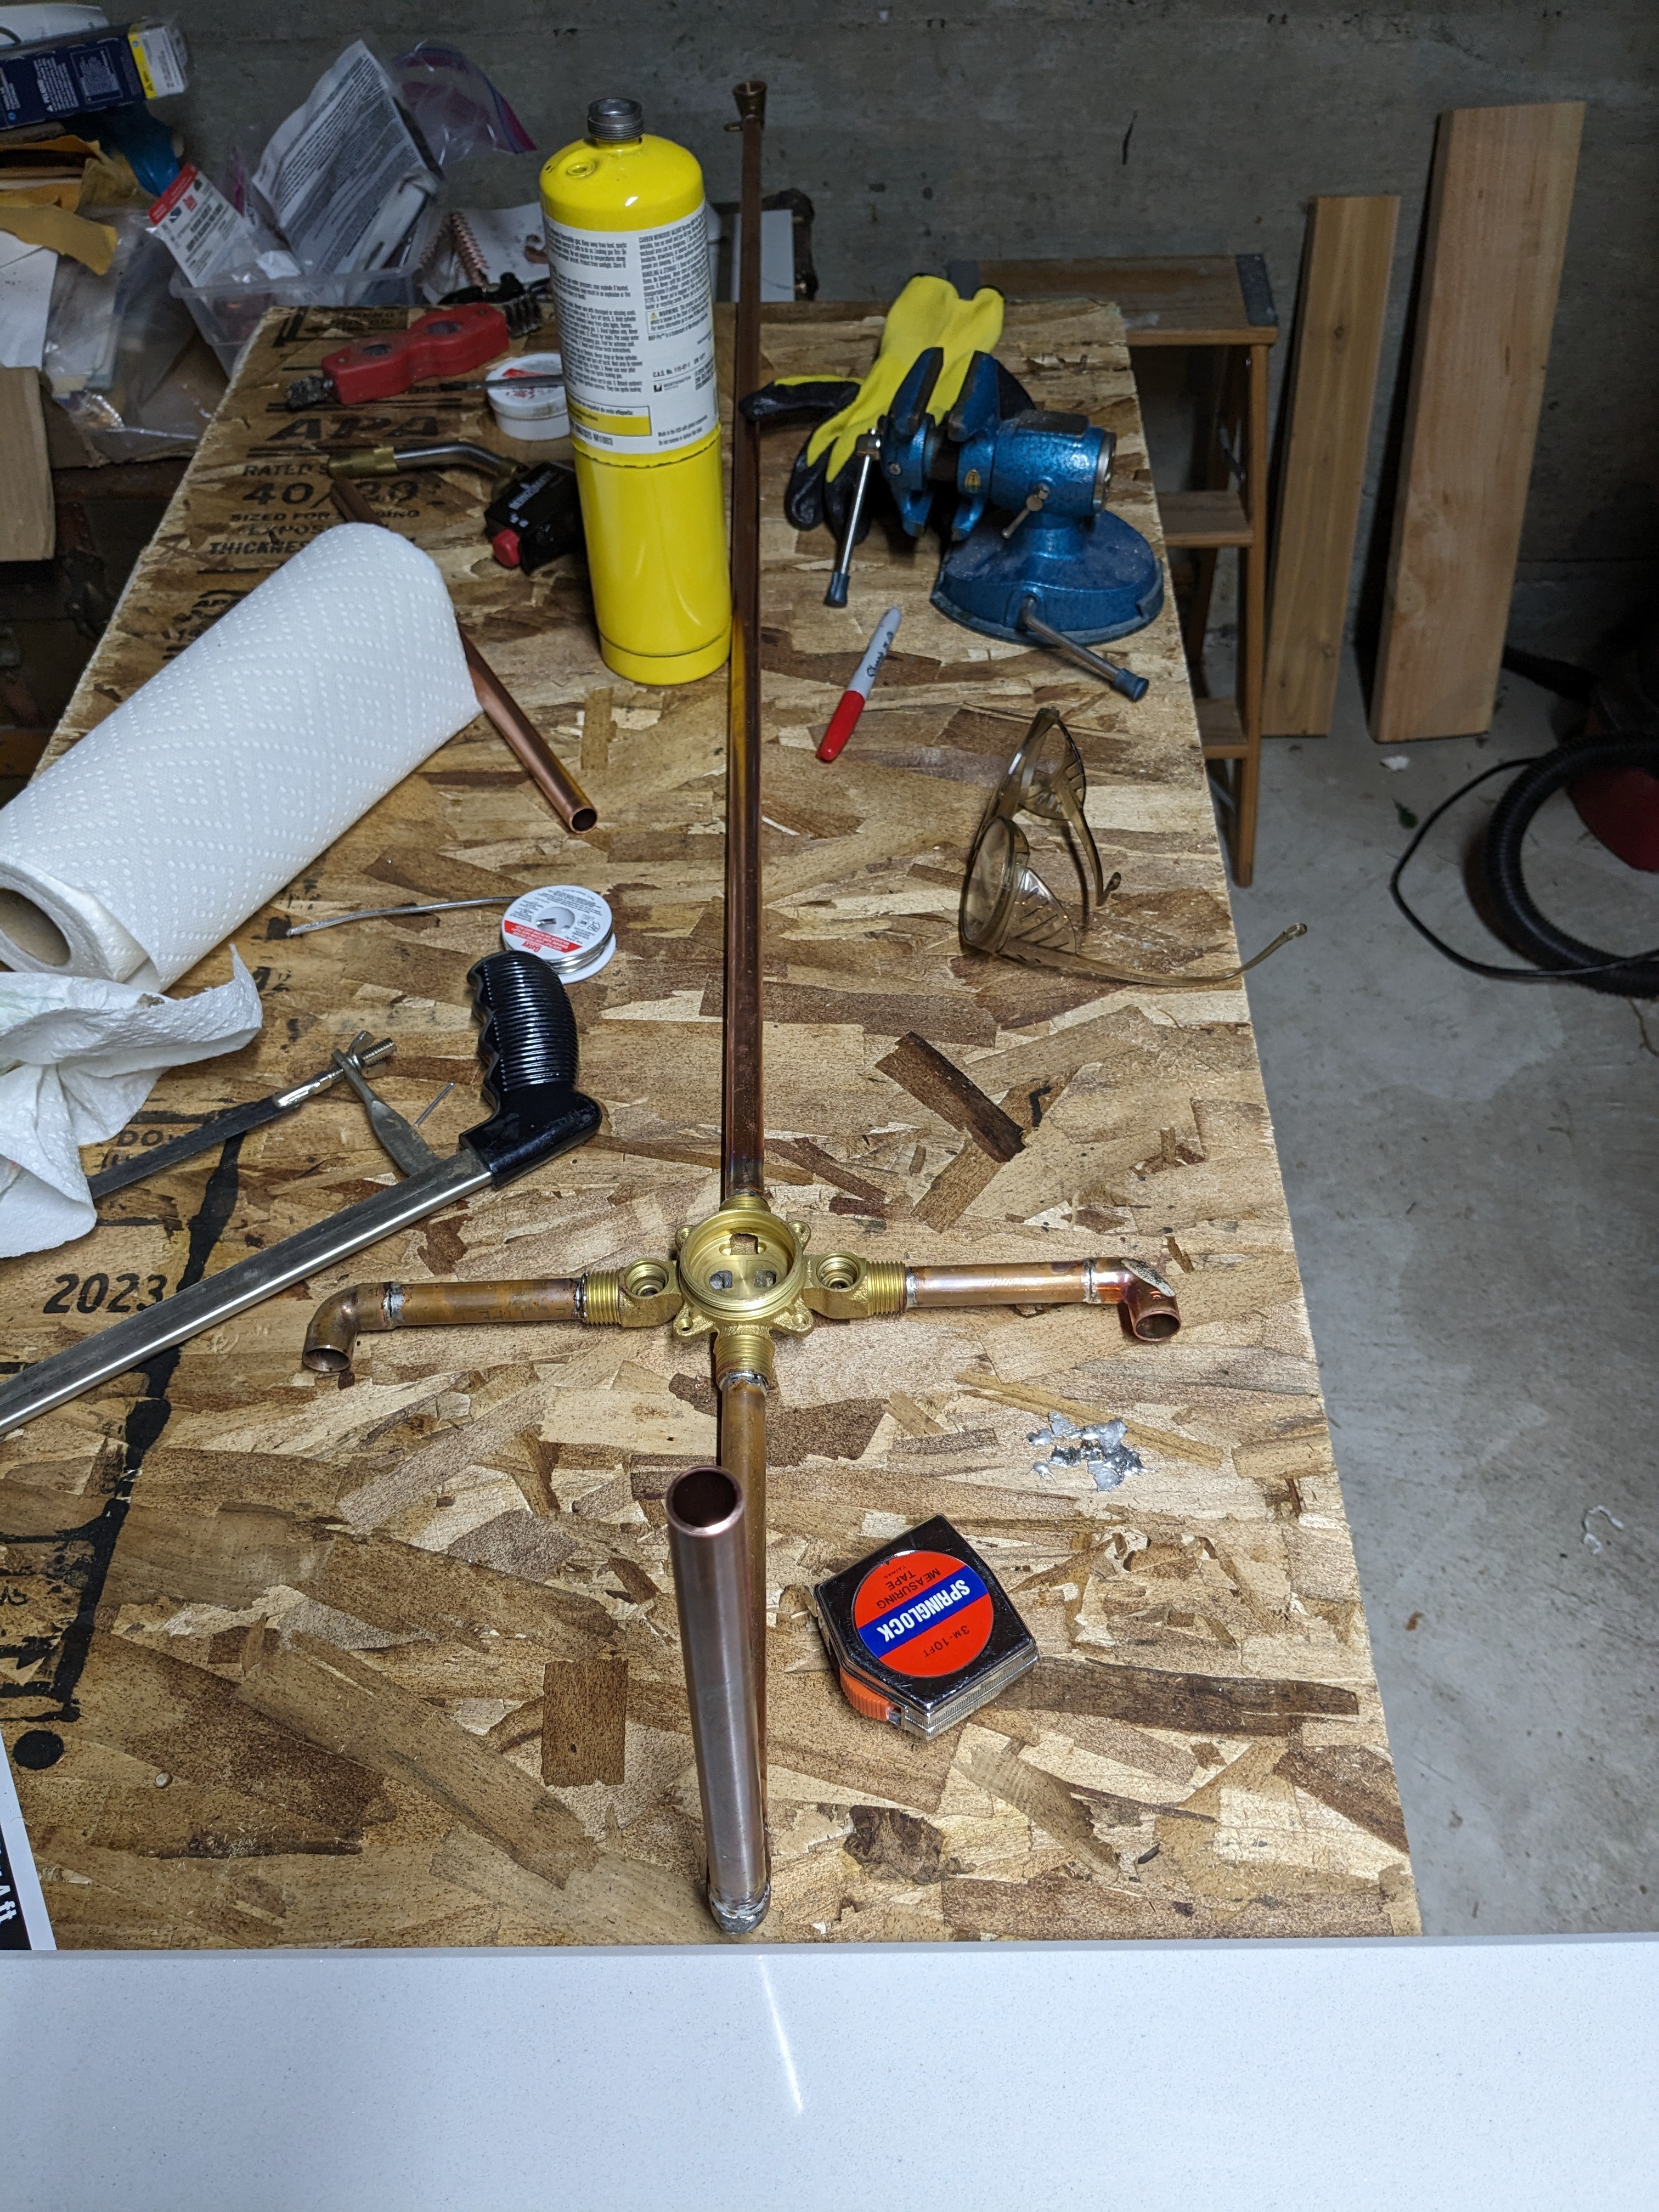
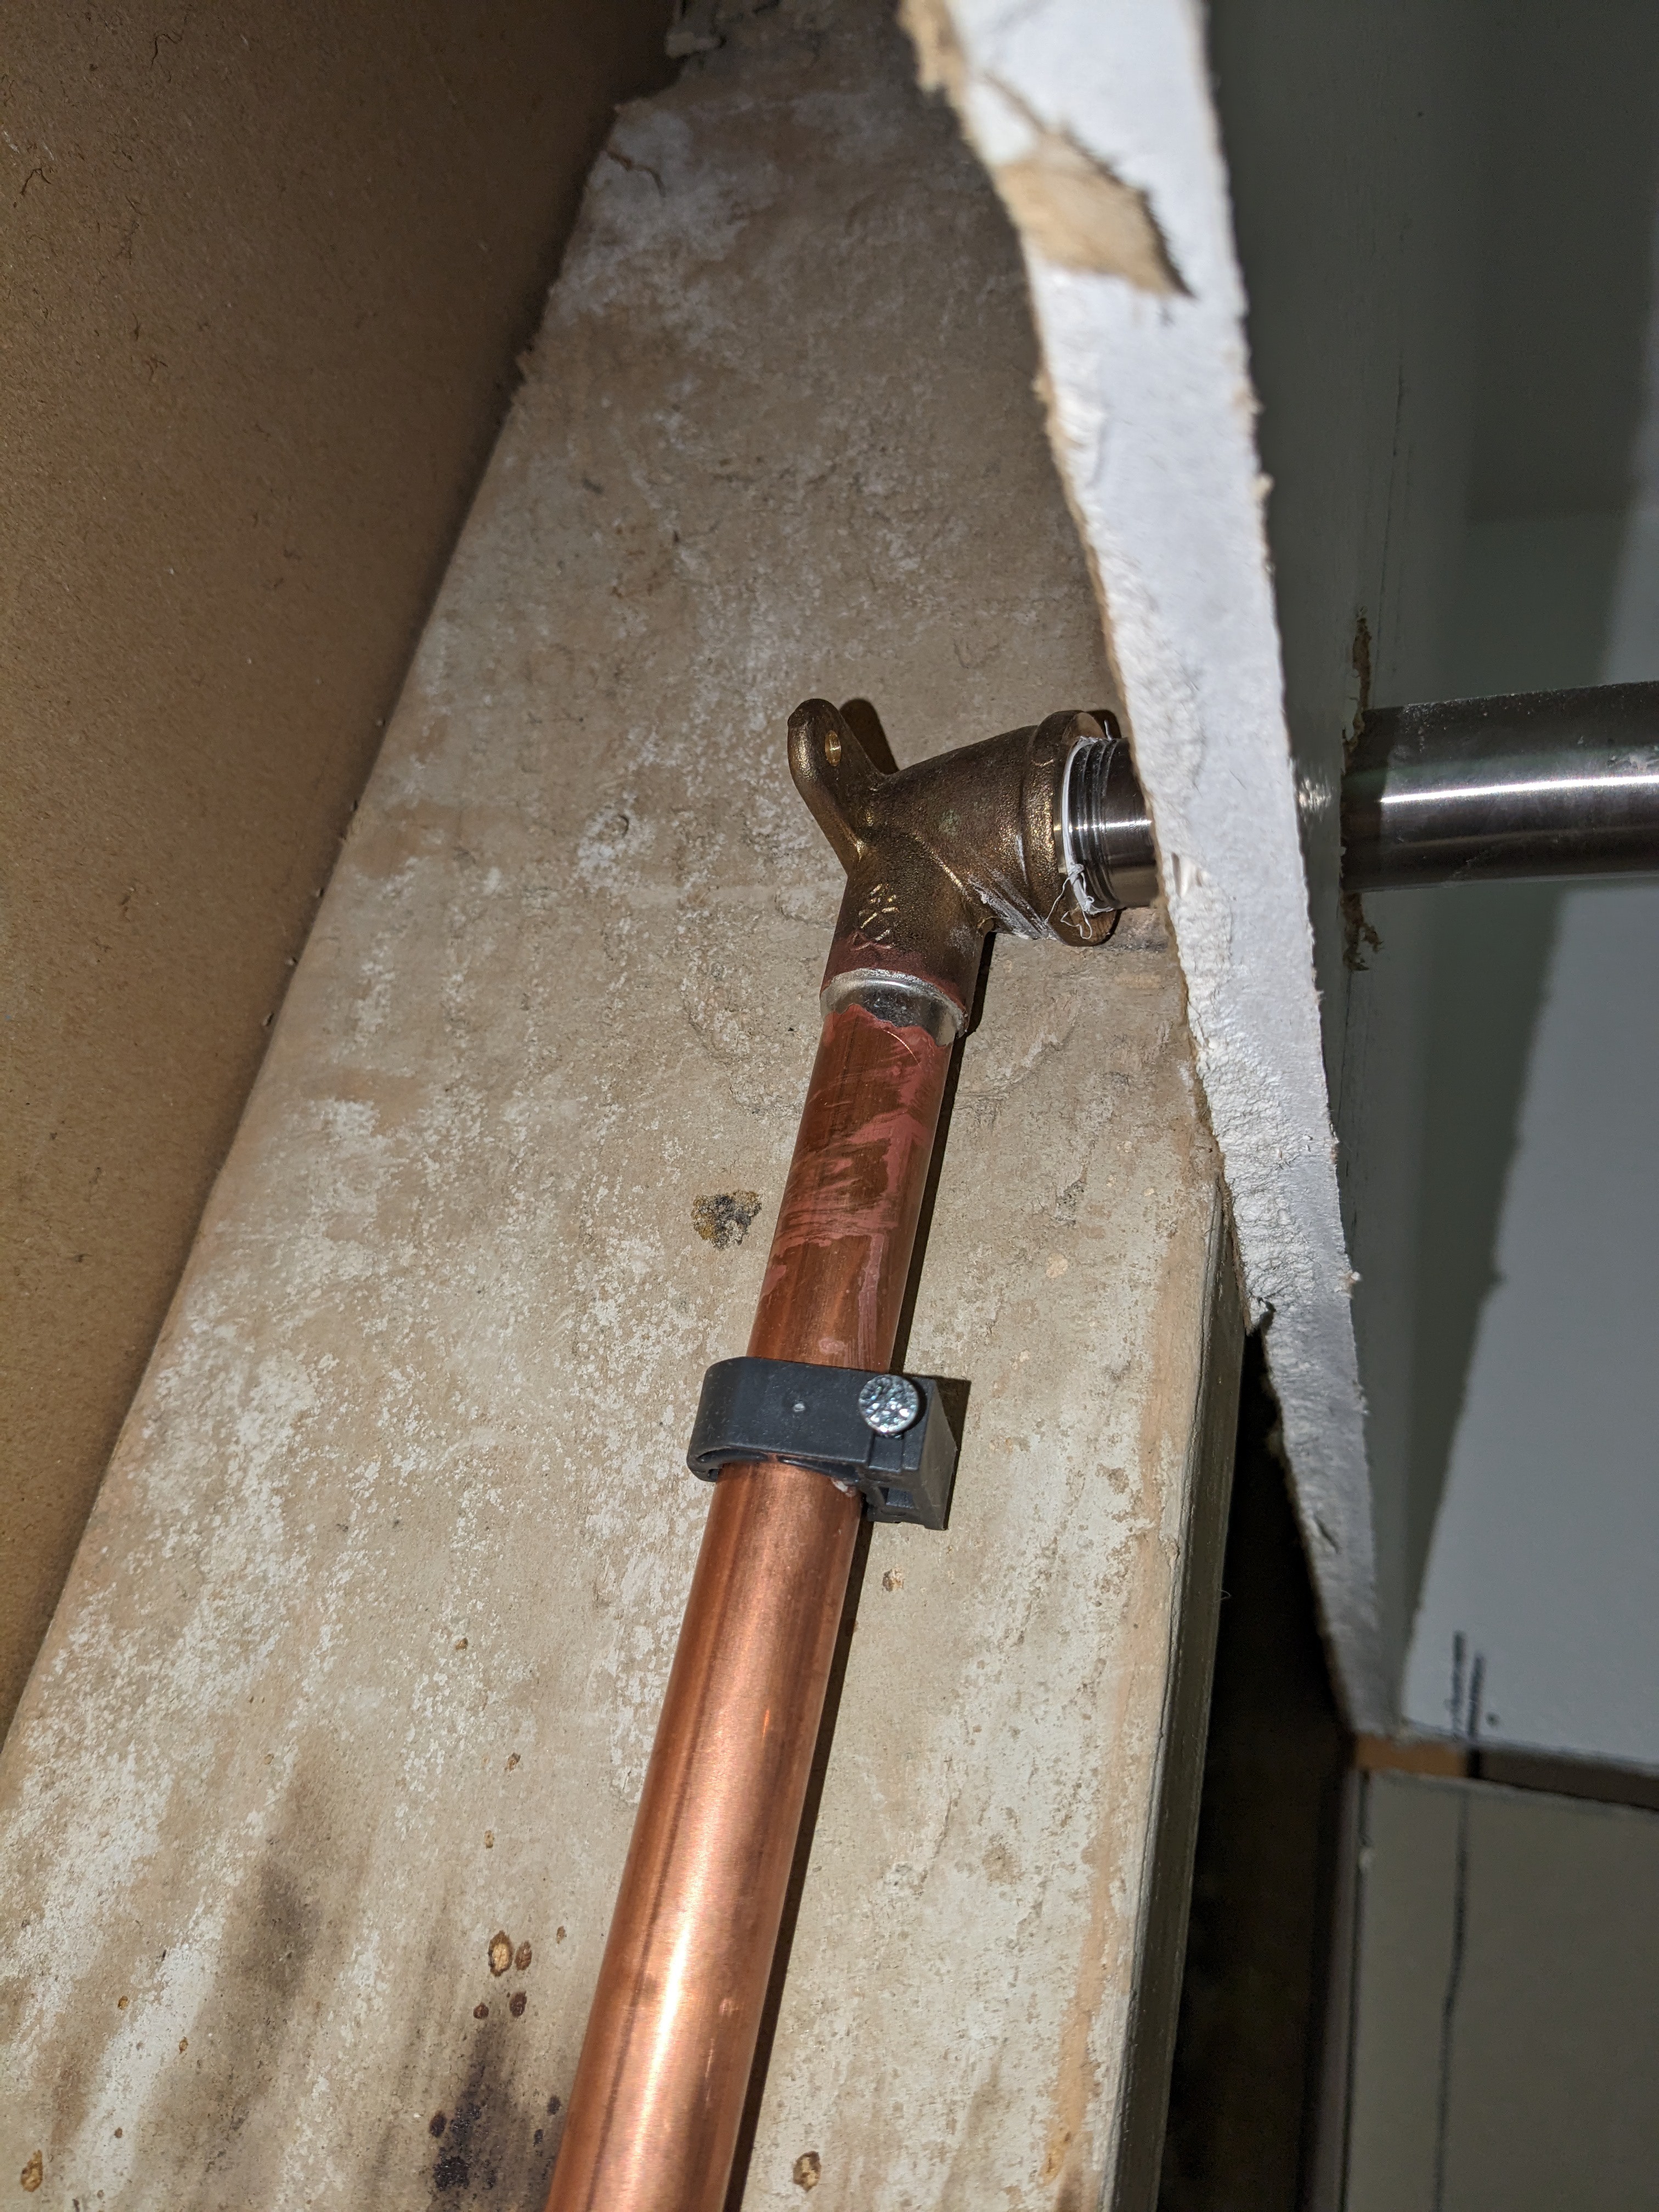
I originally planned to splice the new valve controls into the existing pipes. Both the shower tube and the tub spout proved to be especially steadfast in wanting to stay put. Replacing them both, to go from chrome to brushed nickel, was part of the plan. I eventually decided to replace everything. That means I can solder up almost everything on a convenient workbench, and I just need to splice into the supply lines as a last step.
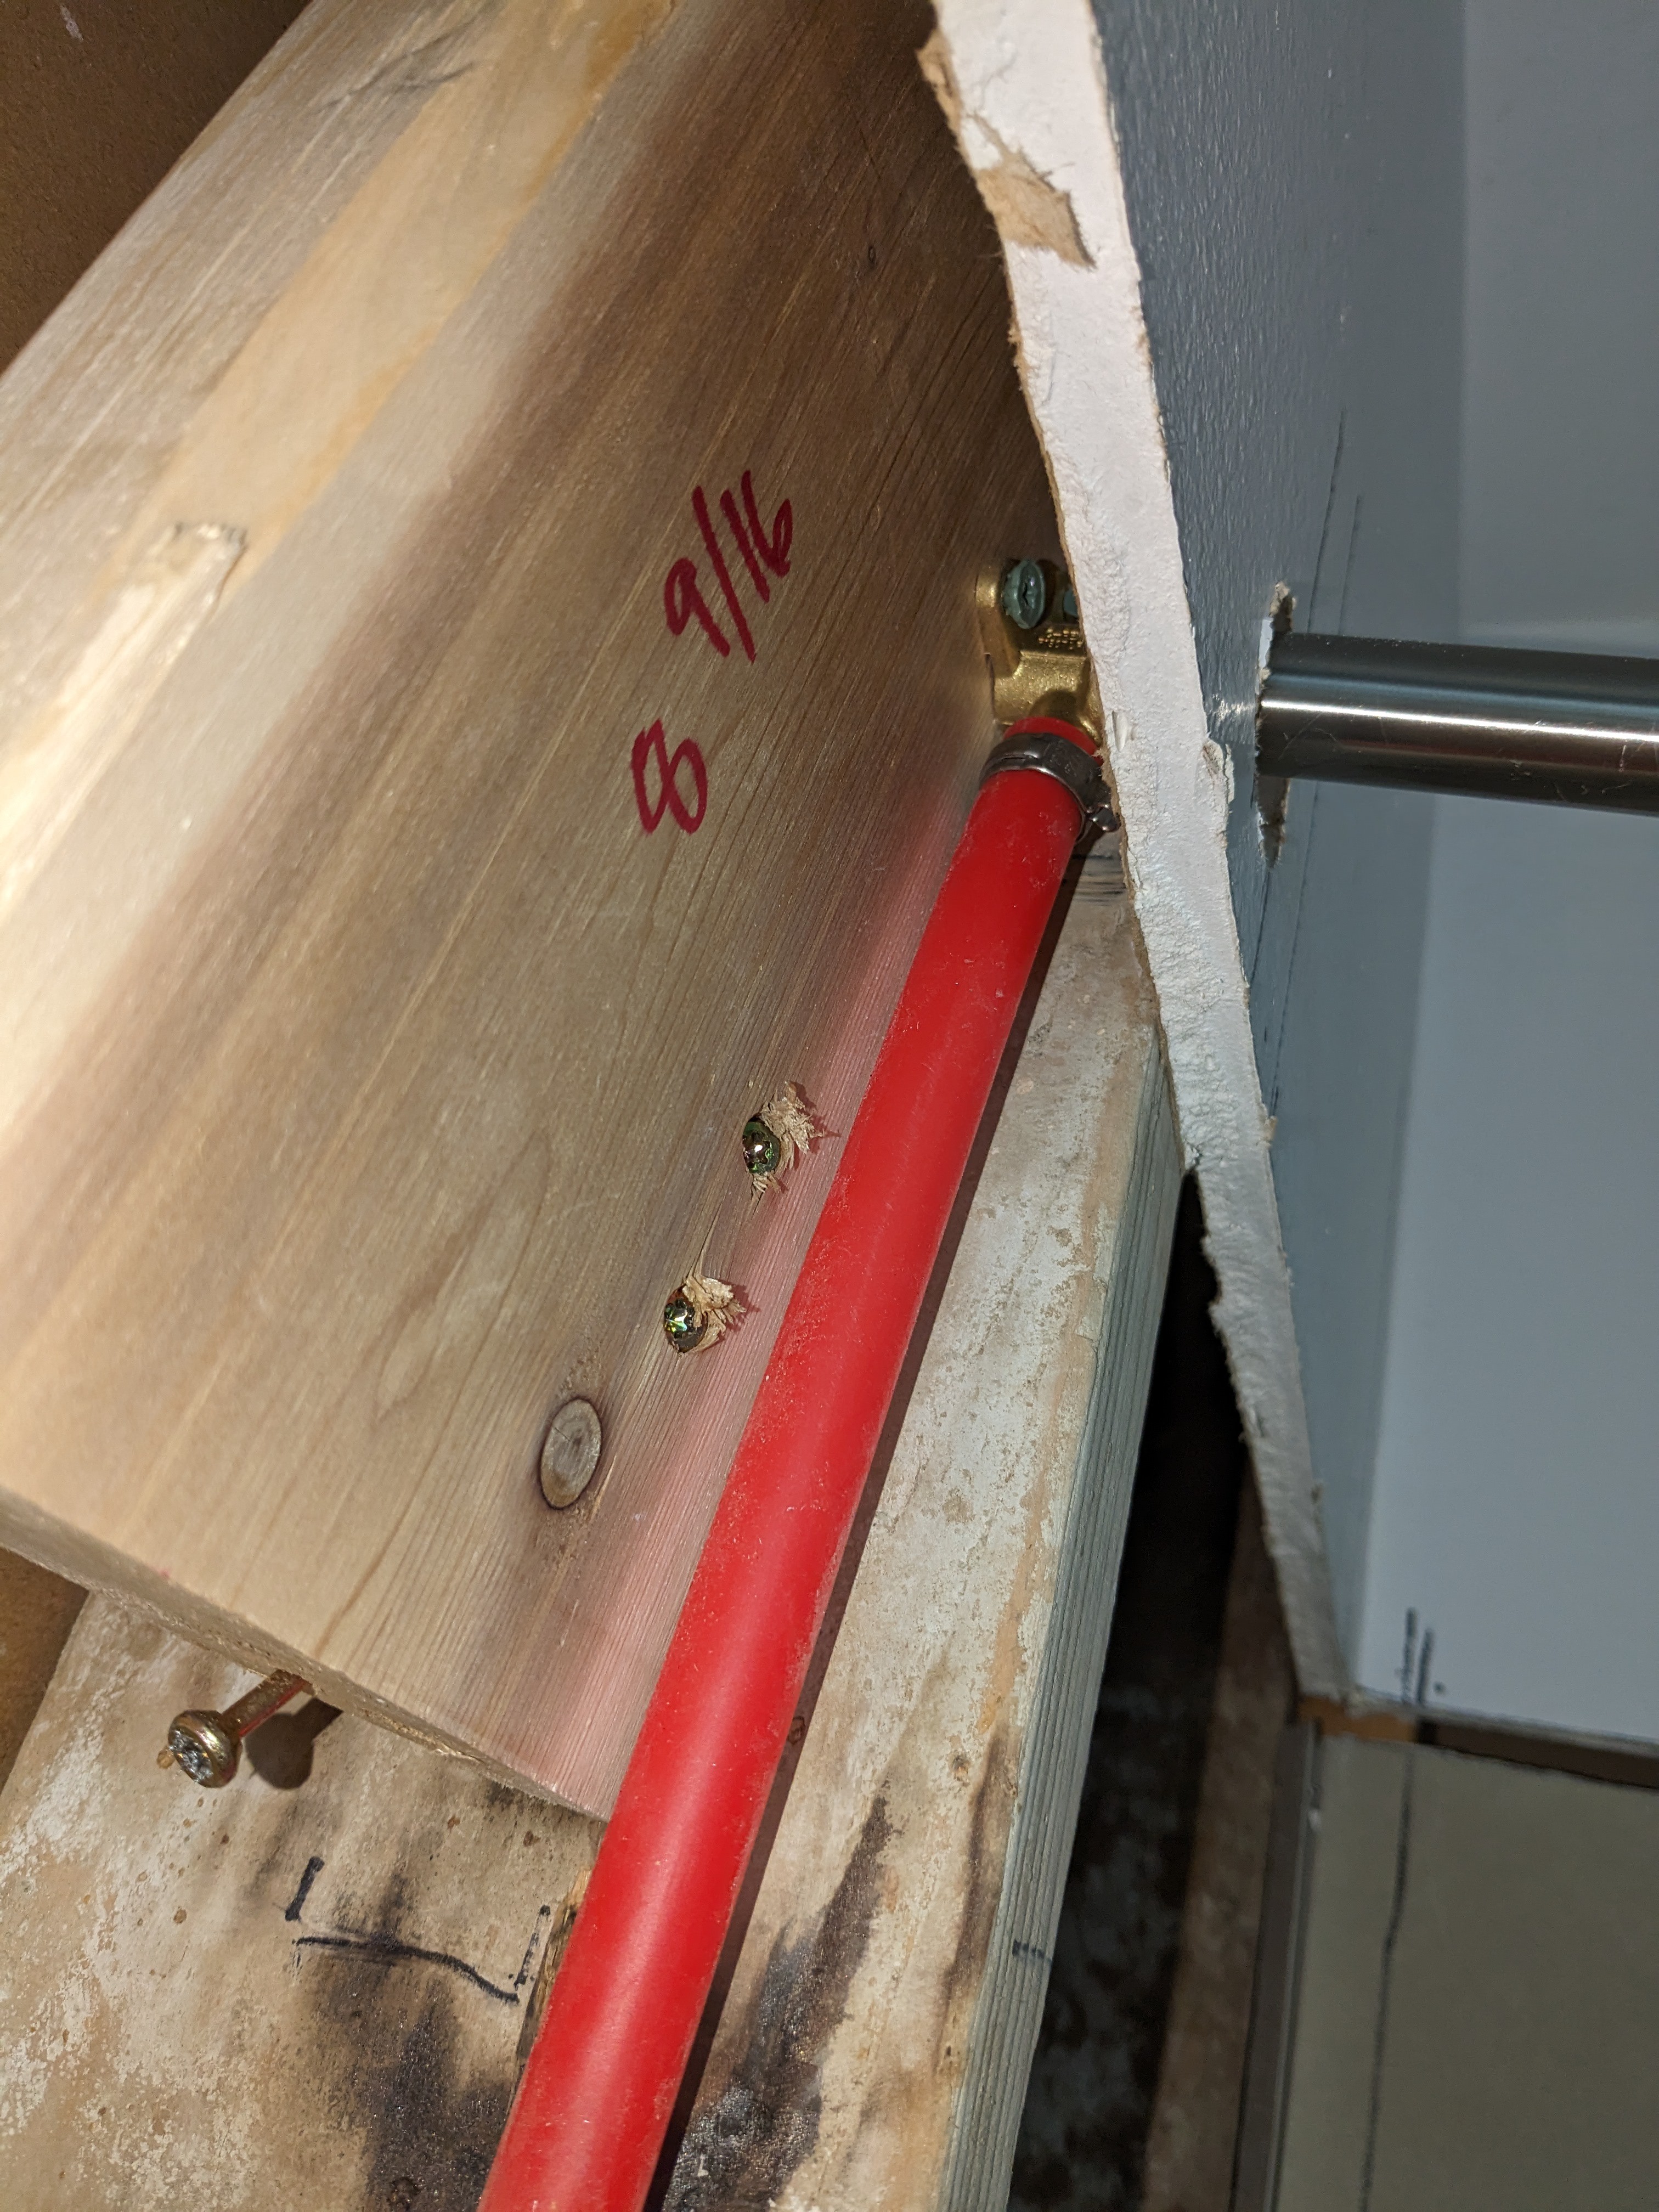
Except for the old supply line connections, I'll be able to remove the entire old contraption by just removing a few pipe clips on the stud. I think I can use my small tube cutter on the right-hand supply pipe, but the left-hand supply line is too close to that black vent pipe. I'll have to cut that one with a hacksaw or my grinder's cut-off wheel. (Update: I used my hacksaw, and it was a pain in the neck.)
I have two "efficiency" goals in doing the swap. First, I want to minimize the amount of time that I have the main water supply to the house turned off. Second, I want to make it convenient to myself to do the soldering work. As seen in the photo above, I've already soldered up most of it, but I need to test it for leaks. If I put the whole new assembly in place and find a leak, it could be a pain in the neck to remedy the leak. That's because of the cramped space and because any soldering near the valve itself requires the removal of heat-sensitive components (already removed in the photo). How can I run water through this contraption to test it in a simple way? I'll use some push-to-connect fittings to run a short length of PEX-B tubing from each supply line to the intake lines of the valve. With the push-to-connect fittings, it's easy to undo the temporary connections. I can lay the new assembly down in the tub so I don't have to worry about water spraying into inappropriate places. If I find I need to do some leak remedies, I can use push-to-connect caps on the supply lines while I do the work. I'll still have to deal with adding and removing the heat-sensitive parts of the valve, but I can do that at the convenience of the workbench.
The instructions for the new faucet assembly warn that there is an "up" orientation. One of the connection fittings is marked "up". It's the connection point that goes to the shower head. I got tired of reading that repeated warning. What kind of dummy do they take me for? First class, apparently. You can guess the punch line here. In the photo above, the valve is upside down. I repaired the tub and shower lines by cutting them both, swapping the pipes, and using a straight copper connector to solder things back together (you can see those in the next photo below)). The two arms for the supply lines were more problematic since they already had elbows pointing in the wrong direction. I would either have to remove the elbows and re-solder them, or I would have to remove the entire arms and re-solder them. I opted for the latter. It's fairly easy to undo a soldered copper connection. Well, it's easy if you have three or more hands, but it's do-able with two hands if you're willing and able to act quickly. After taking it apart, there's a fair amount of solder layer on both the male and female parts of the coupling. With sandpaper and elbow grease, I got most of it off the pipe itself. The female connector on the valve was tougher. I could not get enough solder out so that the pipes would fit all the way into the connector. I was able to get things re-soldered, but I didn't really trust those connections.
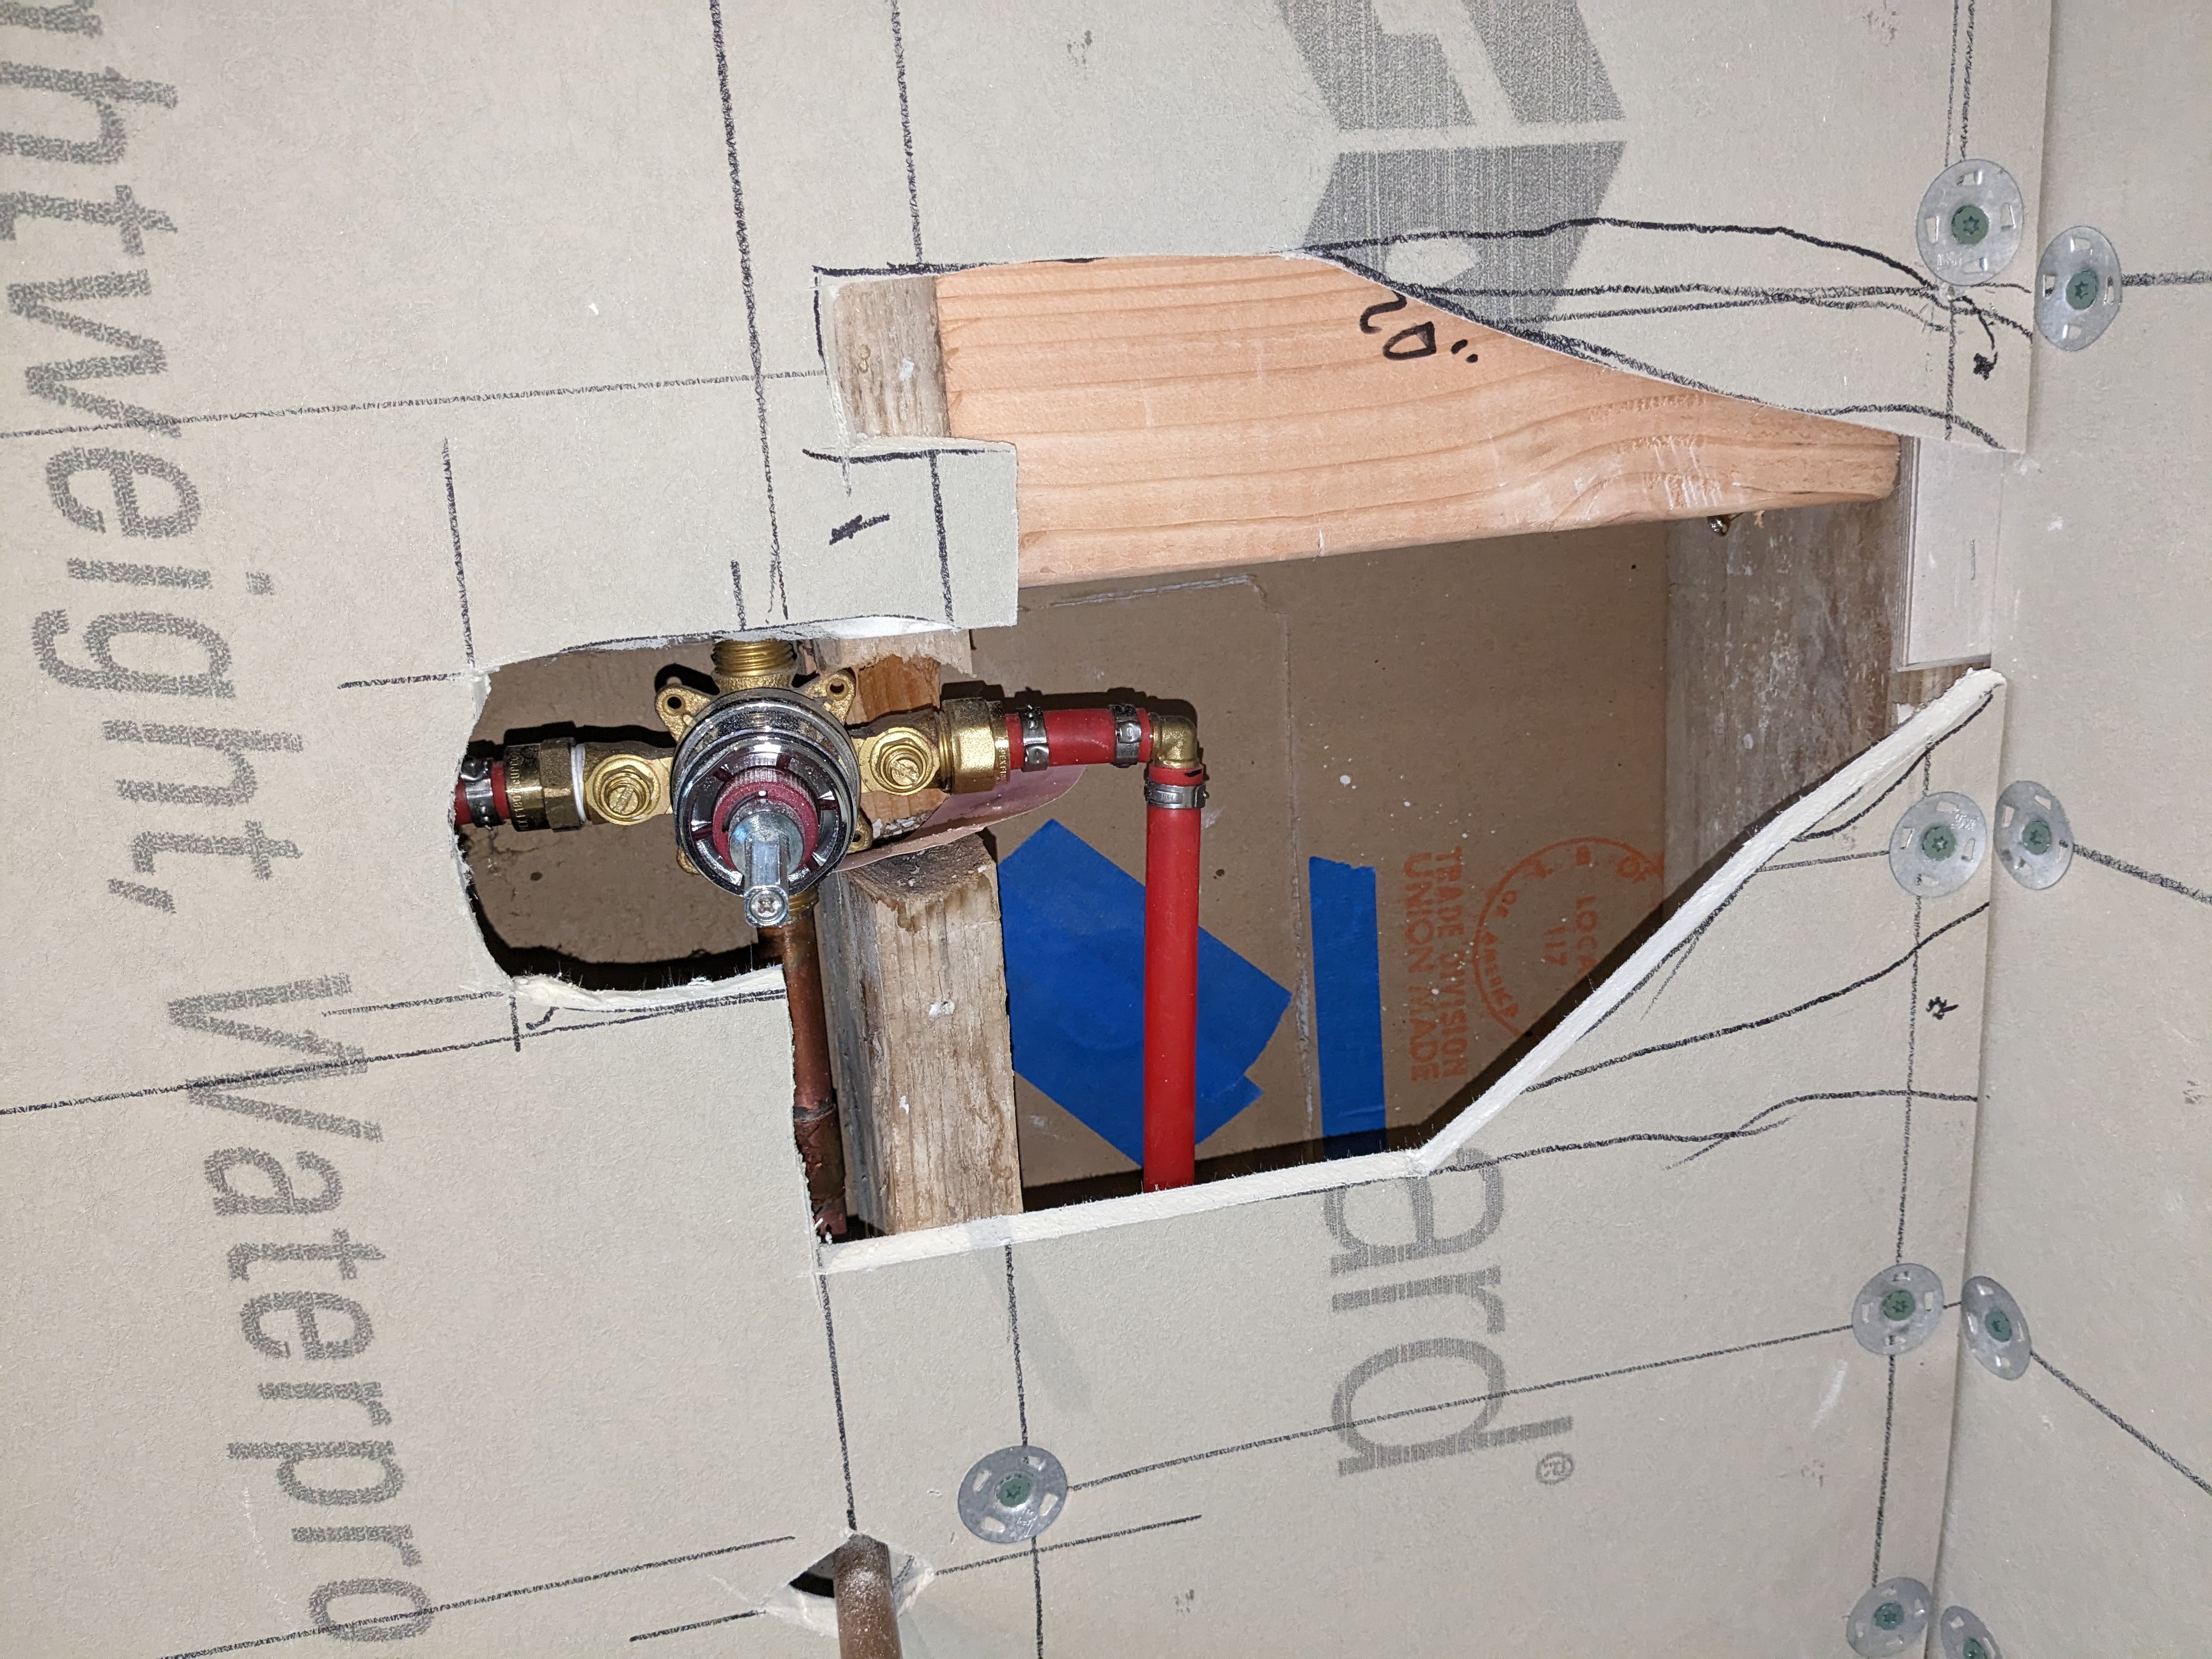
The valve accepts either soldered copper connections or threaded brass connections. I had chosen solder as the more reliable connection method (based on many DIY plumbing projects where getting the last drips to stop consumes 90% of the time). After putting on the threaded adapter, I'd still have to solder the copper pipe into it. While I was pondering all of that, I was also studying up on PEX, which I had never really looked into before. PEX, specifically the PEX-B variant, is impressively easy to work with. You can cut it easily with a sharp knife. The brass fittings for elbows and so on are about the same price as the brass fittings for copper tubing. You do need one specific sort of tool, a crimper, for making connections. Those are readily available in different price ranges. My new plan was PEX to threaded coupling adapters at the valve end, PEX to sweated copper adapters where I cut the supply lines, and then a PEX elbow connector for making the right angle turns. The PEX-B minimum turning radius would not let me use just a single piece of PEX between the two brass ends.
It ended up looking like this:
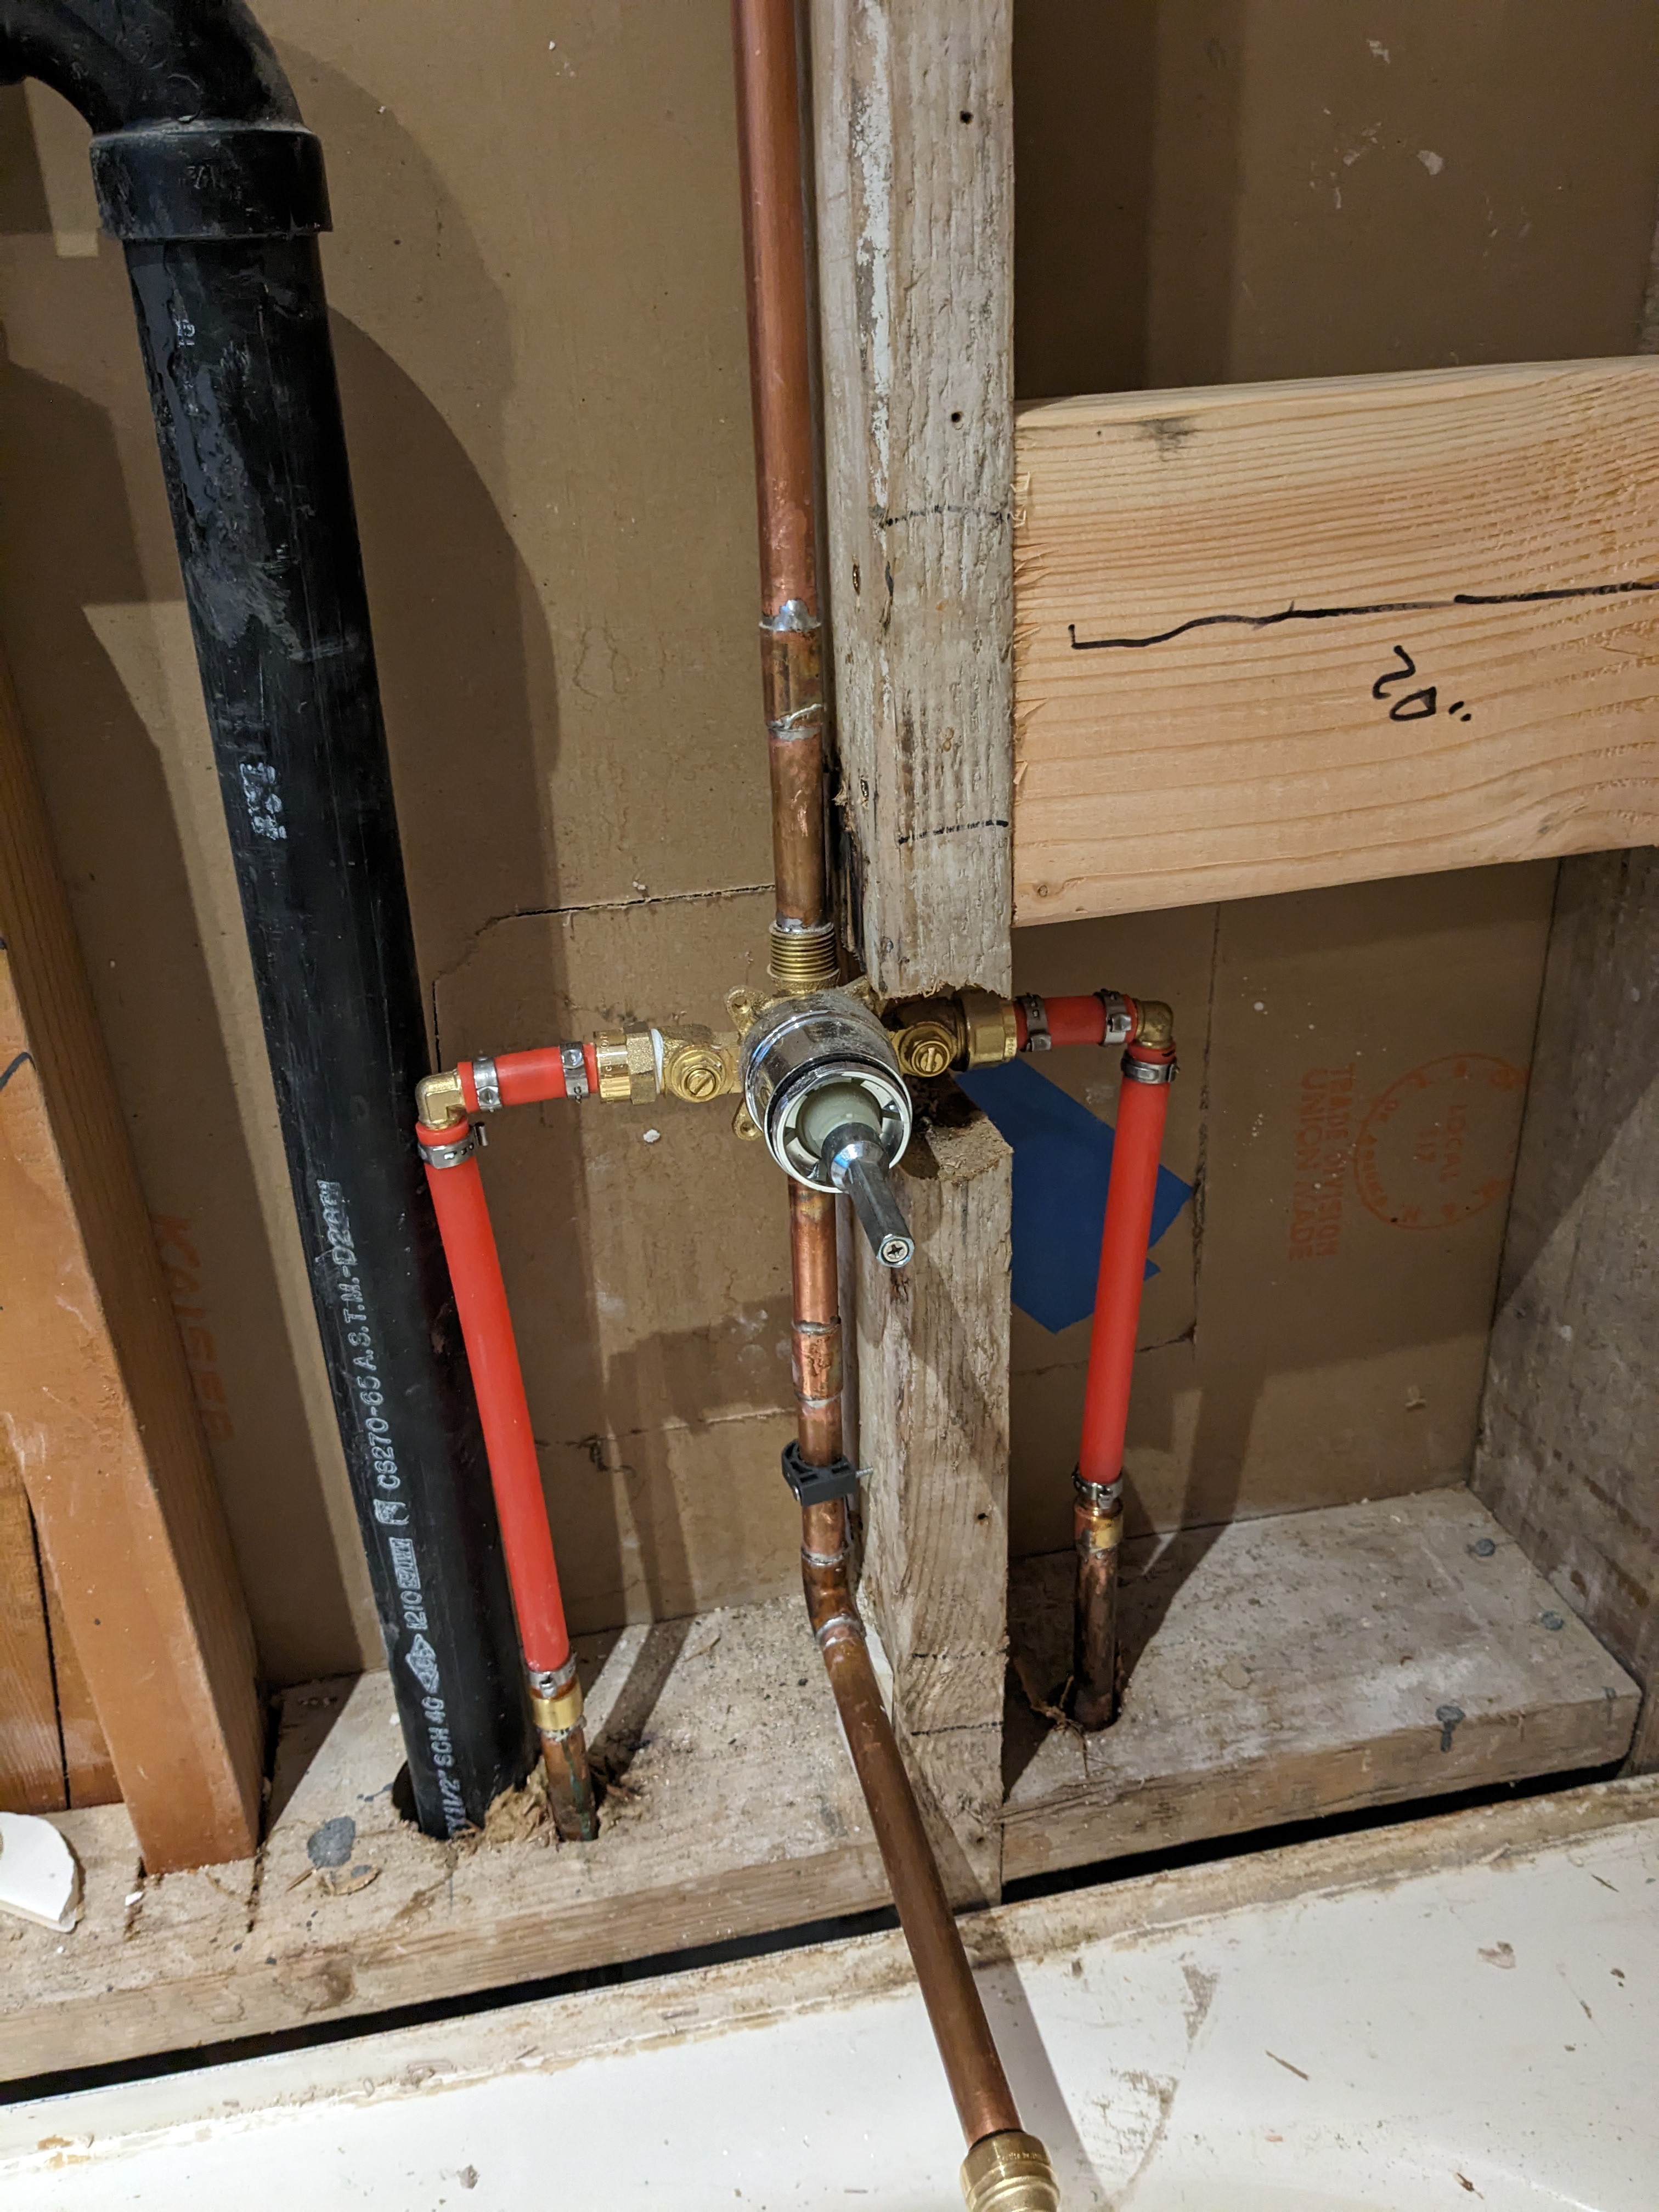
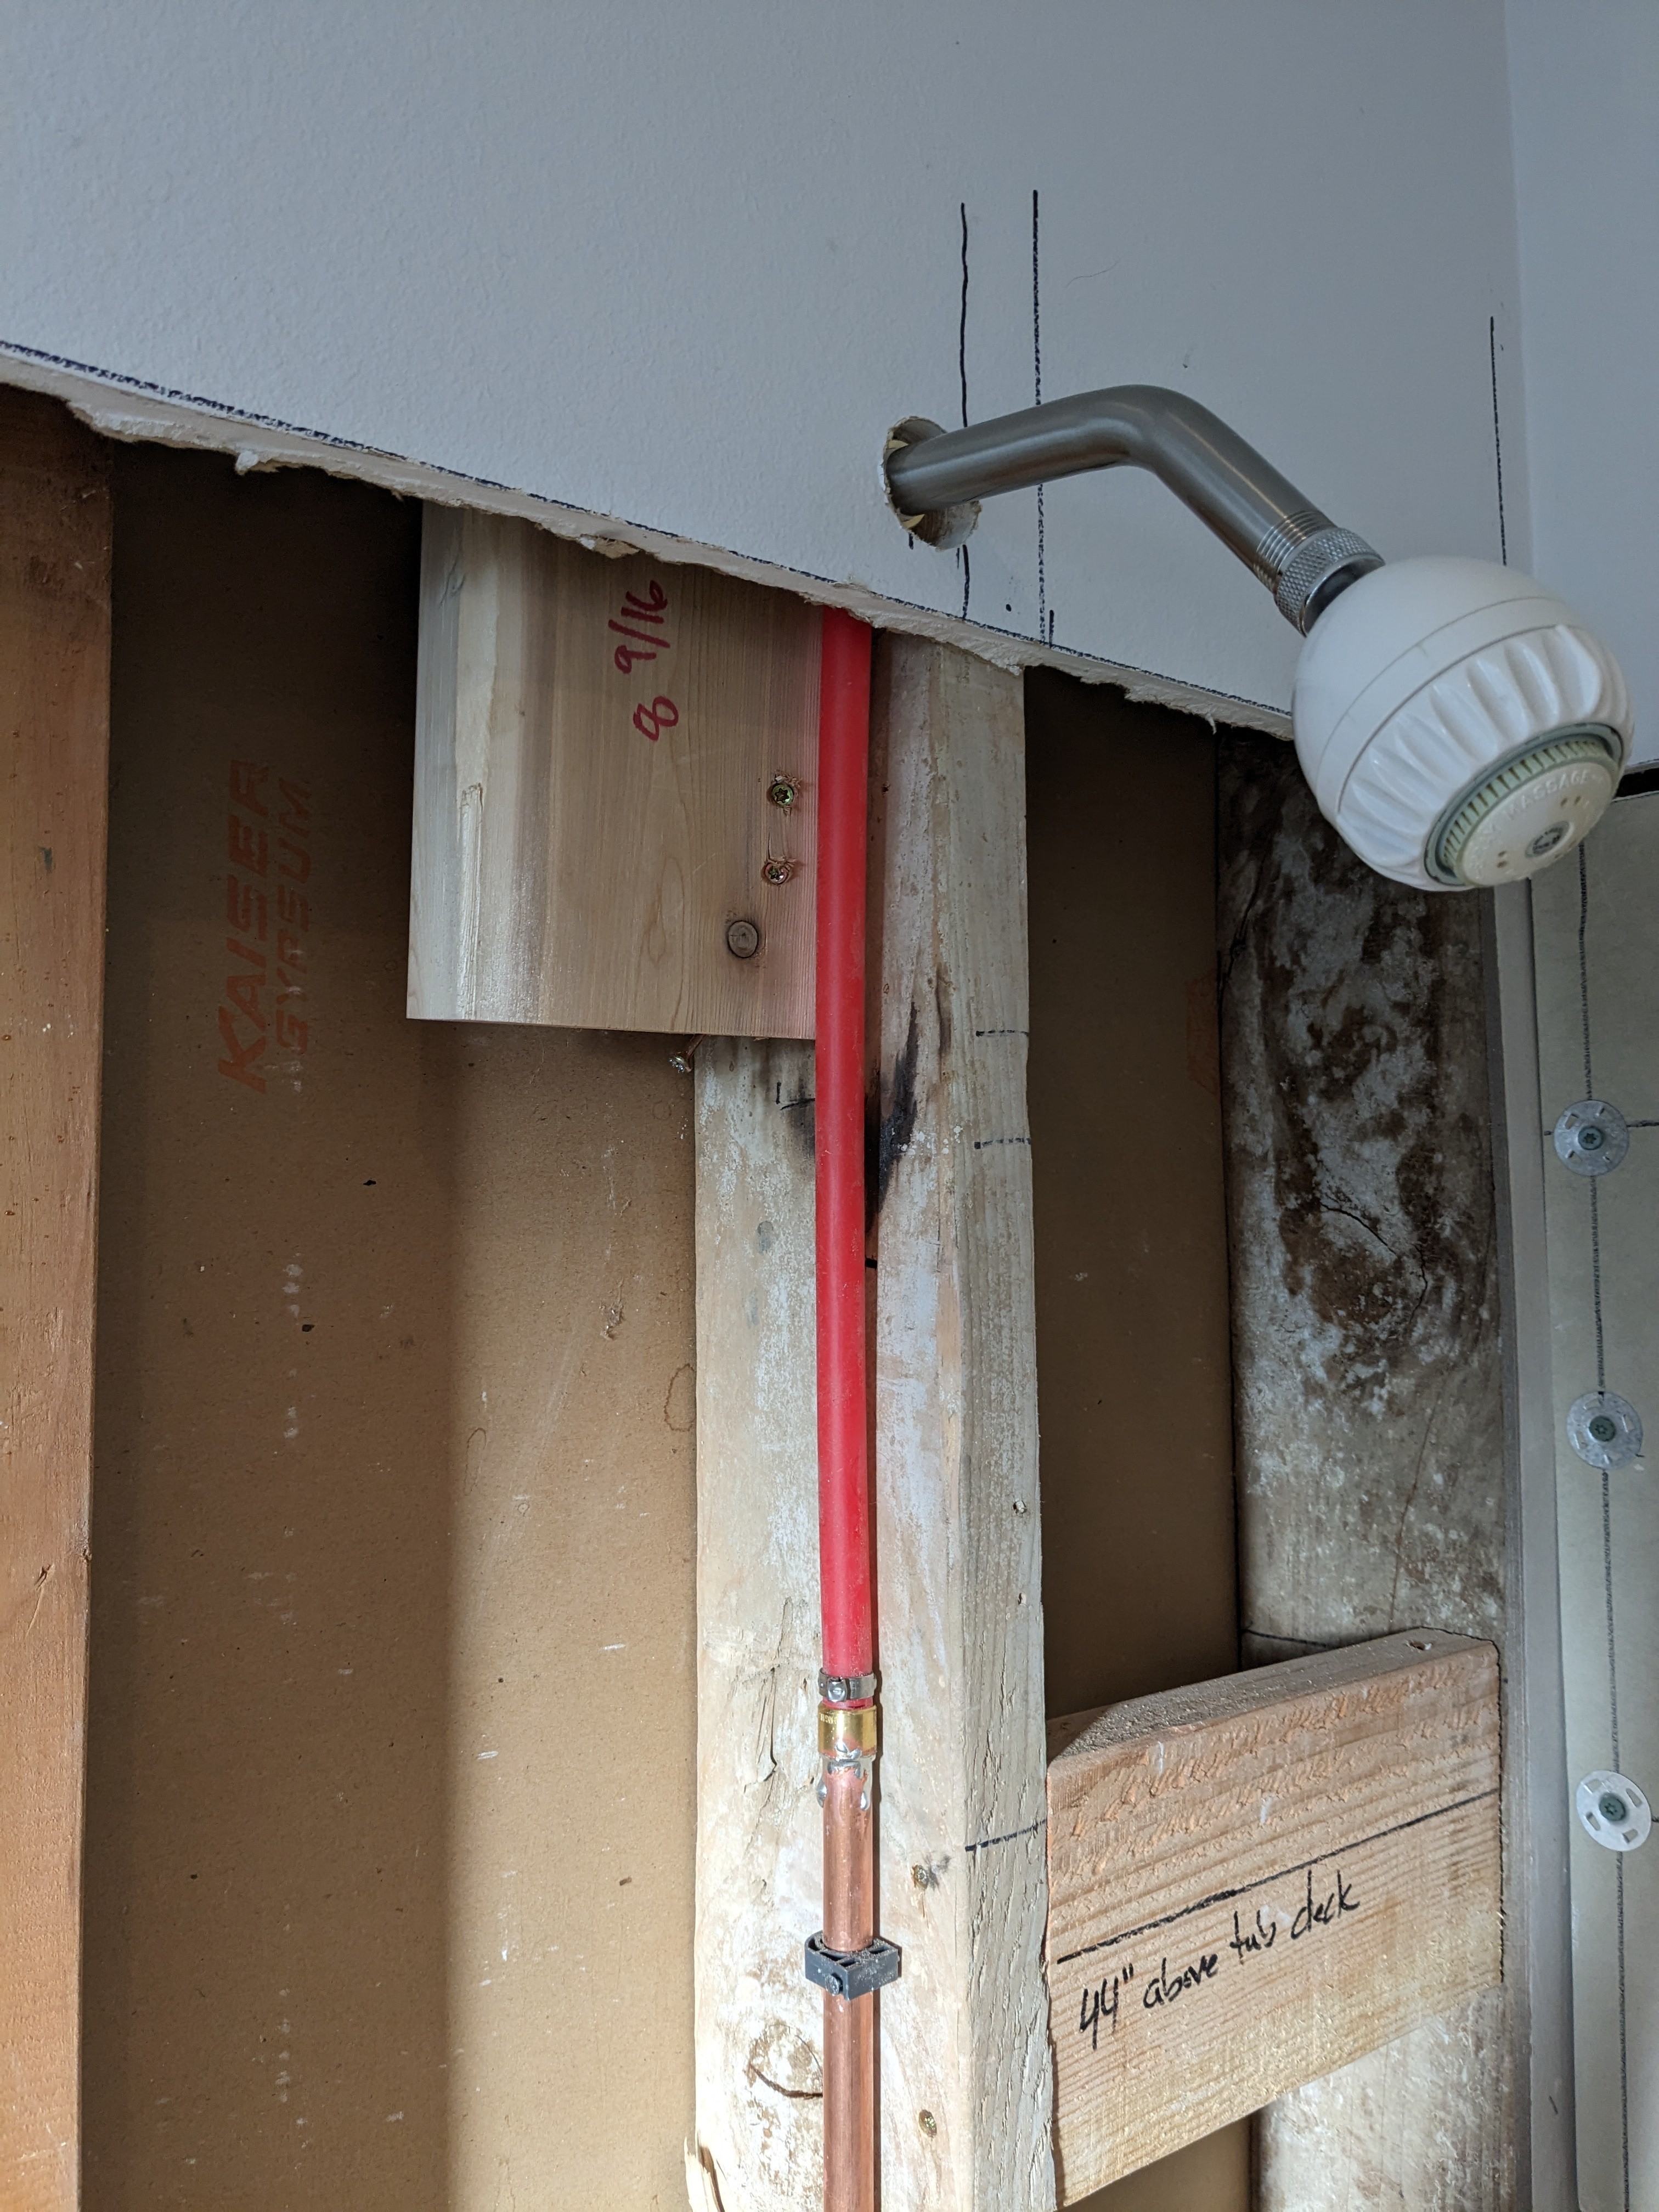
I had to make an educated guess about the mounting depth for the valve so that it will be right once the tile is on the wall. The tub spout is intentionally much too long. I'll trim that to the right size after the wall is finished. In the upper right of that picture, you can see that I put in the final piece of grab bar blocking. I waited for that so I wouldn't get in my own way while working on the plumbing..
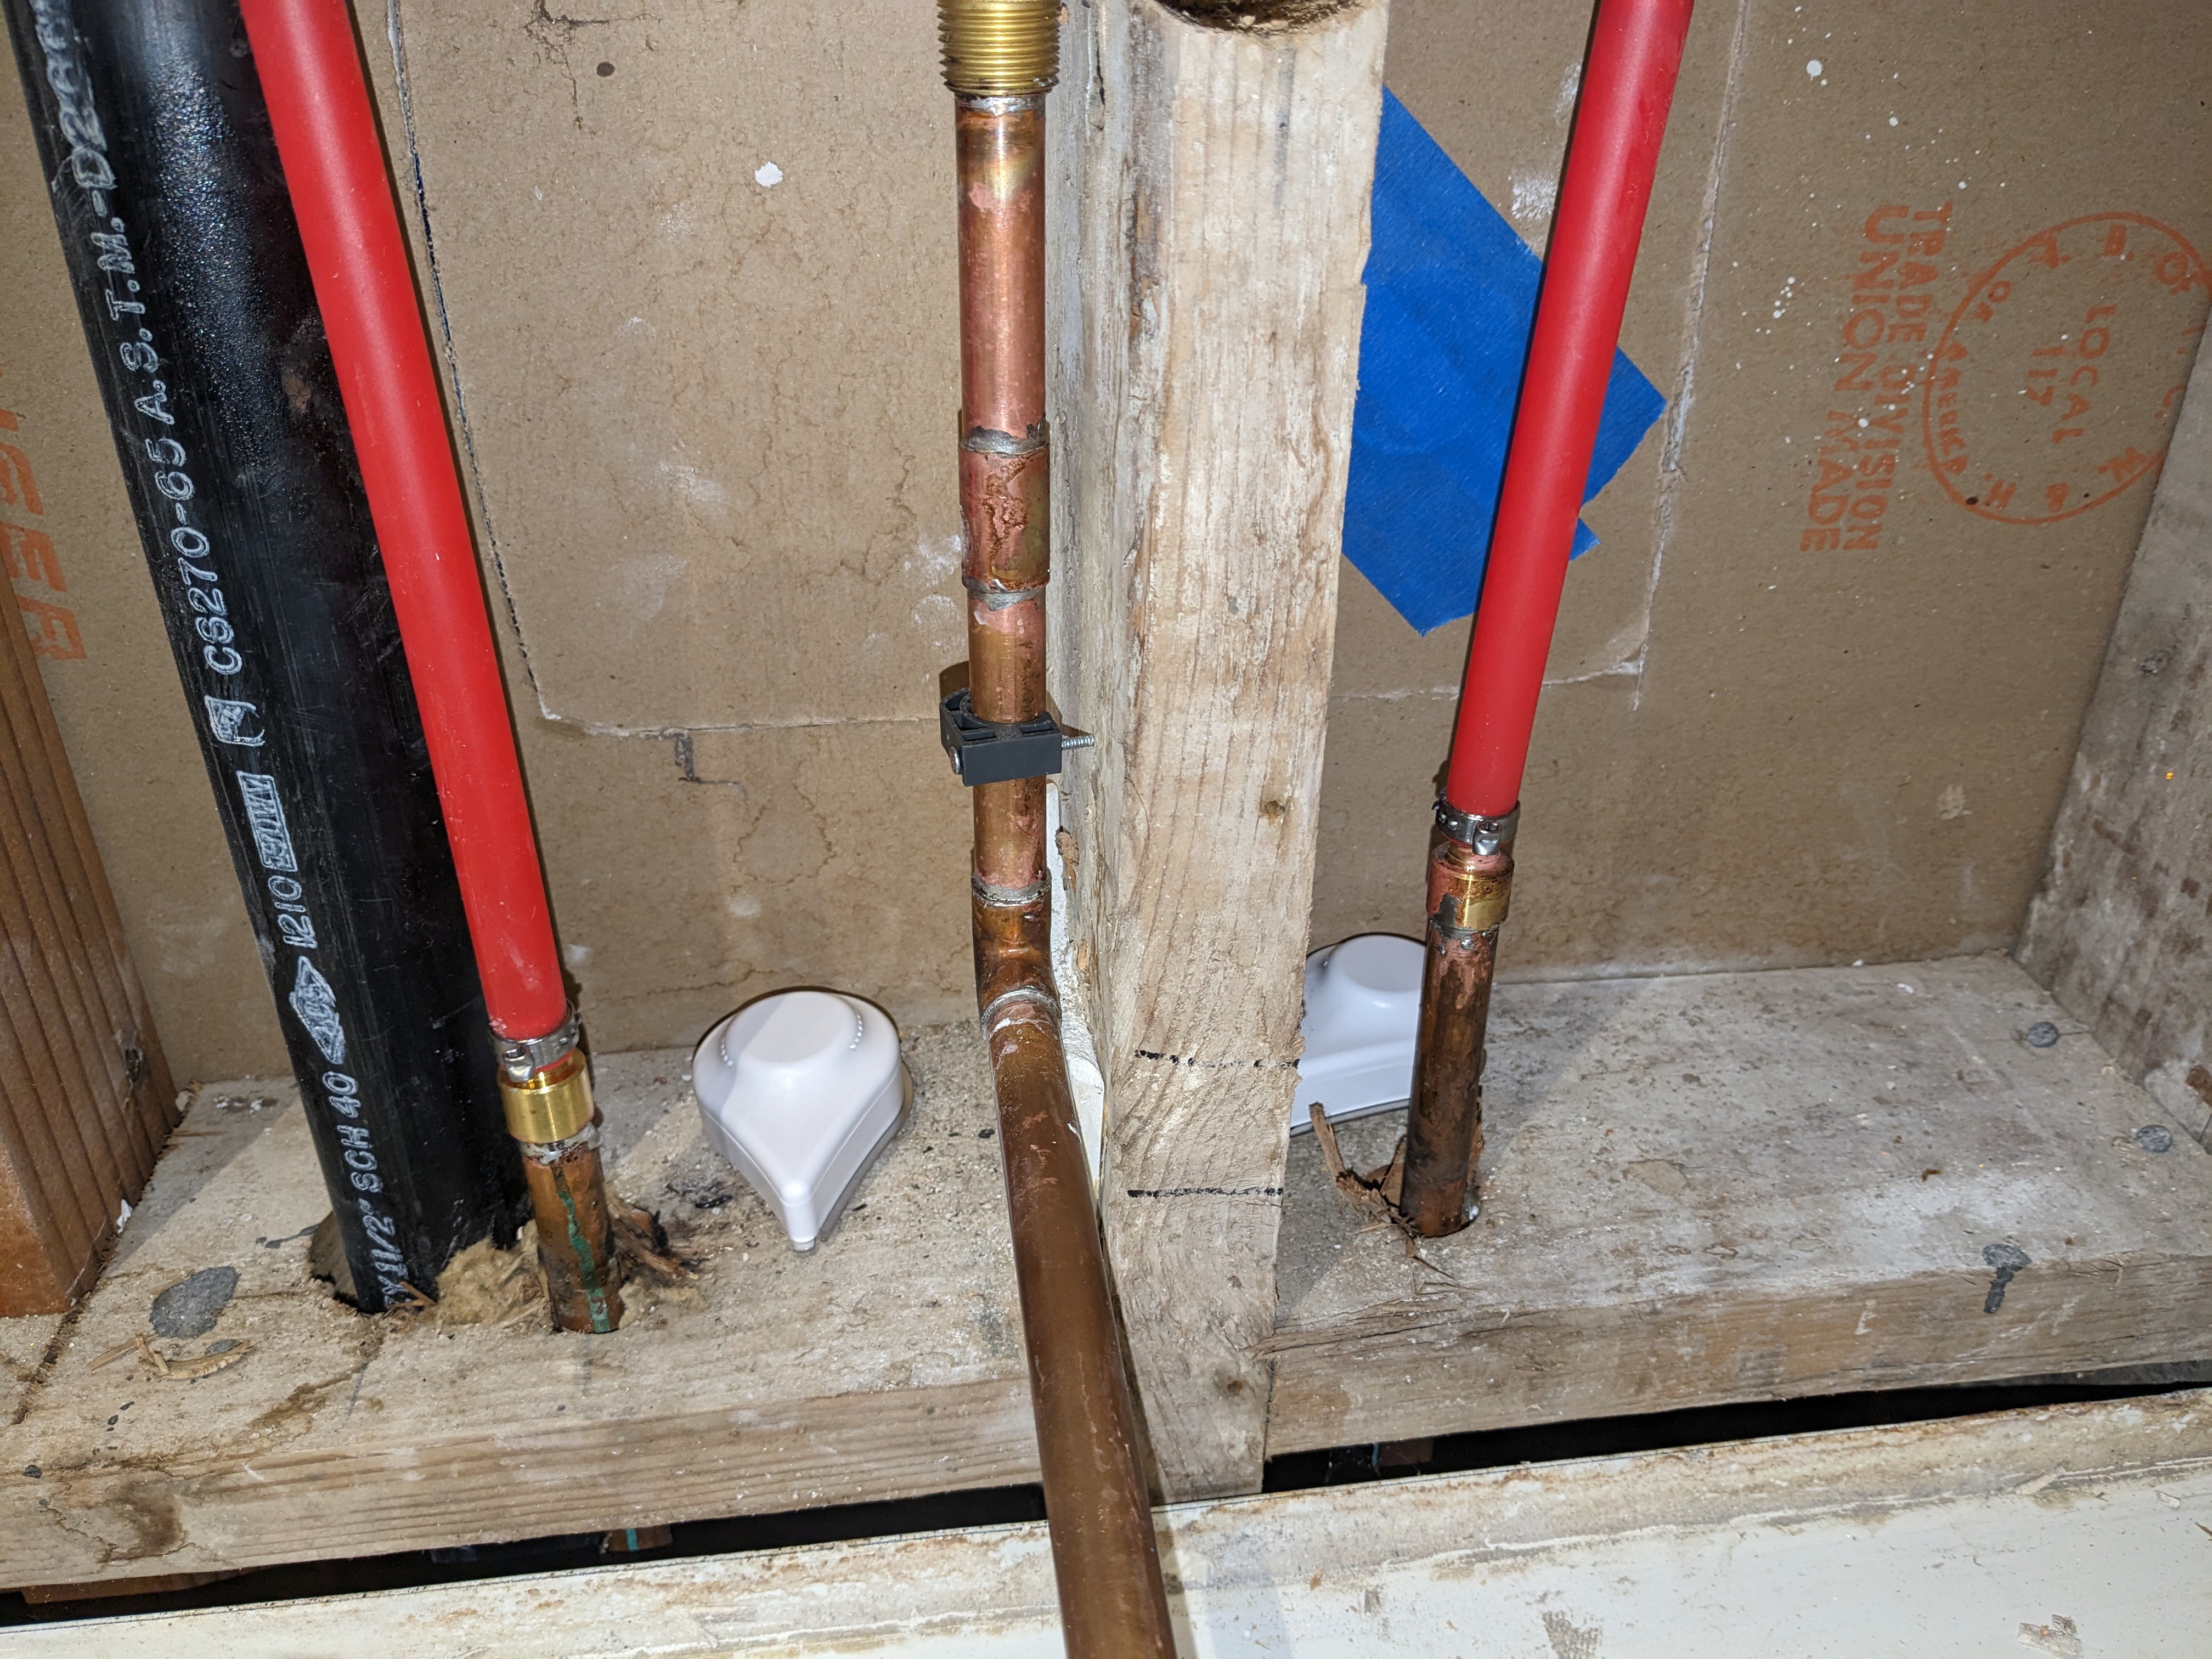
I tested for leaks according to my original plan. During testing, you tend to get little splashes of water here and there. I waited overnight for things to dry out, and then I tested everything again while looking carefully for even the tiniest drips. No drips were seen. I'm still completely paranoid about those solder connections, though. Once the wall is closed up, a failure in a connection can do a lot of damage before the symptoms appear to the humans. I installed water leak sensors on each side of that stud (those white things that look like teardrops in the photo below). The Third Reality sensors I got have both an audible alarm and a Zigbee connection to my home automation server. Belt and suspenders. I'm not sure how long the batteries will last. Unlike many Zigbee sensors, these take two AAA batteries instead of a coin cell battery. I already have a cut-out panel in the drywall in a closet on the other side of that wall (done as part of my original investigation). You can just barely see the outline of the drywall cuts in the photo. When my home automation tells me that the sensors need a battery change, I can get to them through that panel.
Update: I've decided to re-do/adjust part of this plumbing job. You can't see it too well in this photo, but the fitting at the top, where the arm for the shower head goes, is not at the correct angle compared to the valve and tub spout. As a result, the tube is about 20 degrees away from perpendicular to the wall. Shower heads these days have a built-in swivel, so I'm not worried about the water spraying off center. It's just that the looks of the thing will bug me forever if I don't fix it.
It will be easier to line things up with PEX compared to soldered copper, so I will cut that copper pipe at some convenient point and splice in a section of PEX, including a PEX version of the fitting at the top, which the plumbers call a "drop-ear cup". Here's the PEX revision. It doesn't have stiffness to hold the elbow in place, so I mounted it on a scrap of lumber.
Update: After I got all the GoBaord installed, I discovered a very slow leak from one of the threaded connectors on the faucet valve. It was at the rate of about a drop every half hour, which is why I missed it before amongst all the ambient water from the plumbing work. My hypothesis was that it either wasn't tightened enough or that I hadn't used enough teflon tape around the threads. There wasn't enough room to swing a wrench in the small cut-out in the GoBoard for the faucet valve, so I had to remove a bigger chunk. The chunk was bigger than needed for the wrench work because I had to be able to secure everything to studs when I closed it back up. Re-taping the threads with an ungodly amount of tape resolved the problem.
I find it's fairly difficult to detect slow drips in a wood environment or an environment that has gotten wet during repair work. My trick is to use a tissue or stretch of toilet paper under the fixture. Any drips on that soft paper will usually show up pretty clearly. In this specific case, the tissue got damp, but I wasn't sure if it came from the nearby wood, which had gotten wet. My fallback trick is to use a piece of colored paper, the softer the better. Drips will usually cause some obvious bleeding of the color in the paper. In the photo below, you might be able to make out a small slip of pink paper under the right-hand threaded connector.
The mud guard that protects the faucet valve during tiling bumps into that cut-out stud before being fully seated. The mud guard is optional for the completed installation, but I would like to have it in place at least during tiling. My choice is to either cut a little more from the gap in that stud or trim the edge of the mud guard to go over the stud. It might not make any practical difference for a stud that has already been notched, but I'm not too crazy about the idea of cutting into it. I trimmed the edge of the mud guard instead.
Discussions
Become a Hackaday.io Member
Create an account to leave a comment. Already have an account? Log In.