jupdyke
-
Gas Permeability of vinyl tube; and why it sucks.
09/06/2016 at 21:11 • 0 commentsIt has been a little while since I really posted anything other than a brief update. I really have not had anything interesting to publish or share. I moved my setup to my basement, this required first cleaning up the basement, building a workbench, moving everything, running new outlet wires, adding lights and getting a dehumidifier. It was a lot of work, but worth it to have a dedicated space.
I have not been running the resin molding system too much lately. This is mostly because I got parts injection molded and have several thousand black Tank Chain treads. :) Since the vast majority of my orders are black track, I no longer mold those using my resin system. I only make the custom colors now.
This means that the resin system has been sitting for quite a while. One issue with the resin I am using is the shelf life once opened. The Part A resin will harden without being mixed with Part B. And I have noticed that Part B will turn almost black. This completely ruins it for making custom colors because once it is black it is nearly impossible to get any other color.
I have been storing my resin in my custom dispenser using Corny Kegs and they work GREAT! I knew the resin would harden if left open and didn't want it to harden inside the kegs. So I added some R134a to the kegs as a dry gas blanket. This worked great, and even after a month in the keg the resin was still liquid. But I noticed the Part A in the clear vinyl tubes coming from my keg was solid, and the Part B was black. This was never an issue when I was making a lot of parts becuase I was running the resin through the tube every day or two.
Lucky for me I had enough spare tube to cut it off and replace it. This was annoying but only took 1-2 hours to get everything back into working order. But it made me think, why was the resin hardening in the tubes?
Well I am not 100% sure yet, but I have a good guess. After talking with my buddy who brews beer, he mentioned that the vinyl tube has some gas permeability. Meaning that gas leaks through the tube. Normally this is not much of a problem. The amount that leaks out is a small percentage. But if you are storing CO2 kegs under pressure with 20 feet of vinyl tubing, the percentage might be enough to care about.
For my application it is the opposite problem. The air can be getting through the vinyl tube and causing the resin to harden. It doesnt happen fast, but after 2 weeks I now have a clogged up dispenser.
Here is a good link which gives some approximate numbers for how much gas can leak from various types of tubes.
If you look at the bottom you can see that vinyl tube has a value of 360 for C02, 40 for O2, and 80 for N2. The units are a little confusing at first {cc-mmsec-cm2-cm Hg } x 10-10, but basically you need to know the pressure the tube is under and the surface area. I don't need to calculate the value, but I can use these values to select a better type of tubing.
I am not 100% sure that this is the problem, but it definitely makes sense. Being exposed to humid air definitely causes the resin to harden. This is why having the R134A dry gas blanket in the kegs is so important. Another idea I had was UV light exposure could be hardening the resin. Simple solution to both is to order some opaque tube which is not air permeable.
I will report back my results when I get them.
Josh
-
Update after a long break
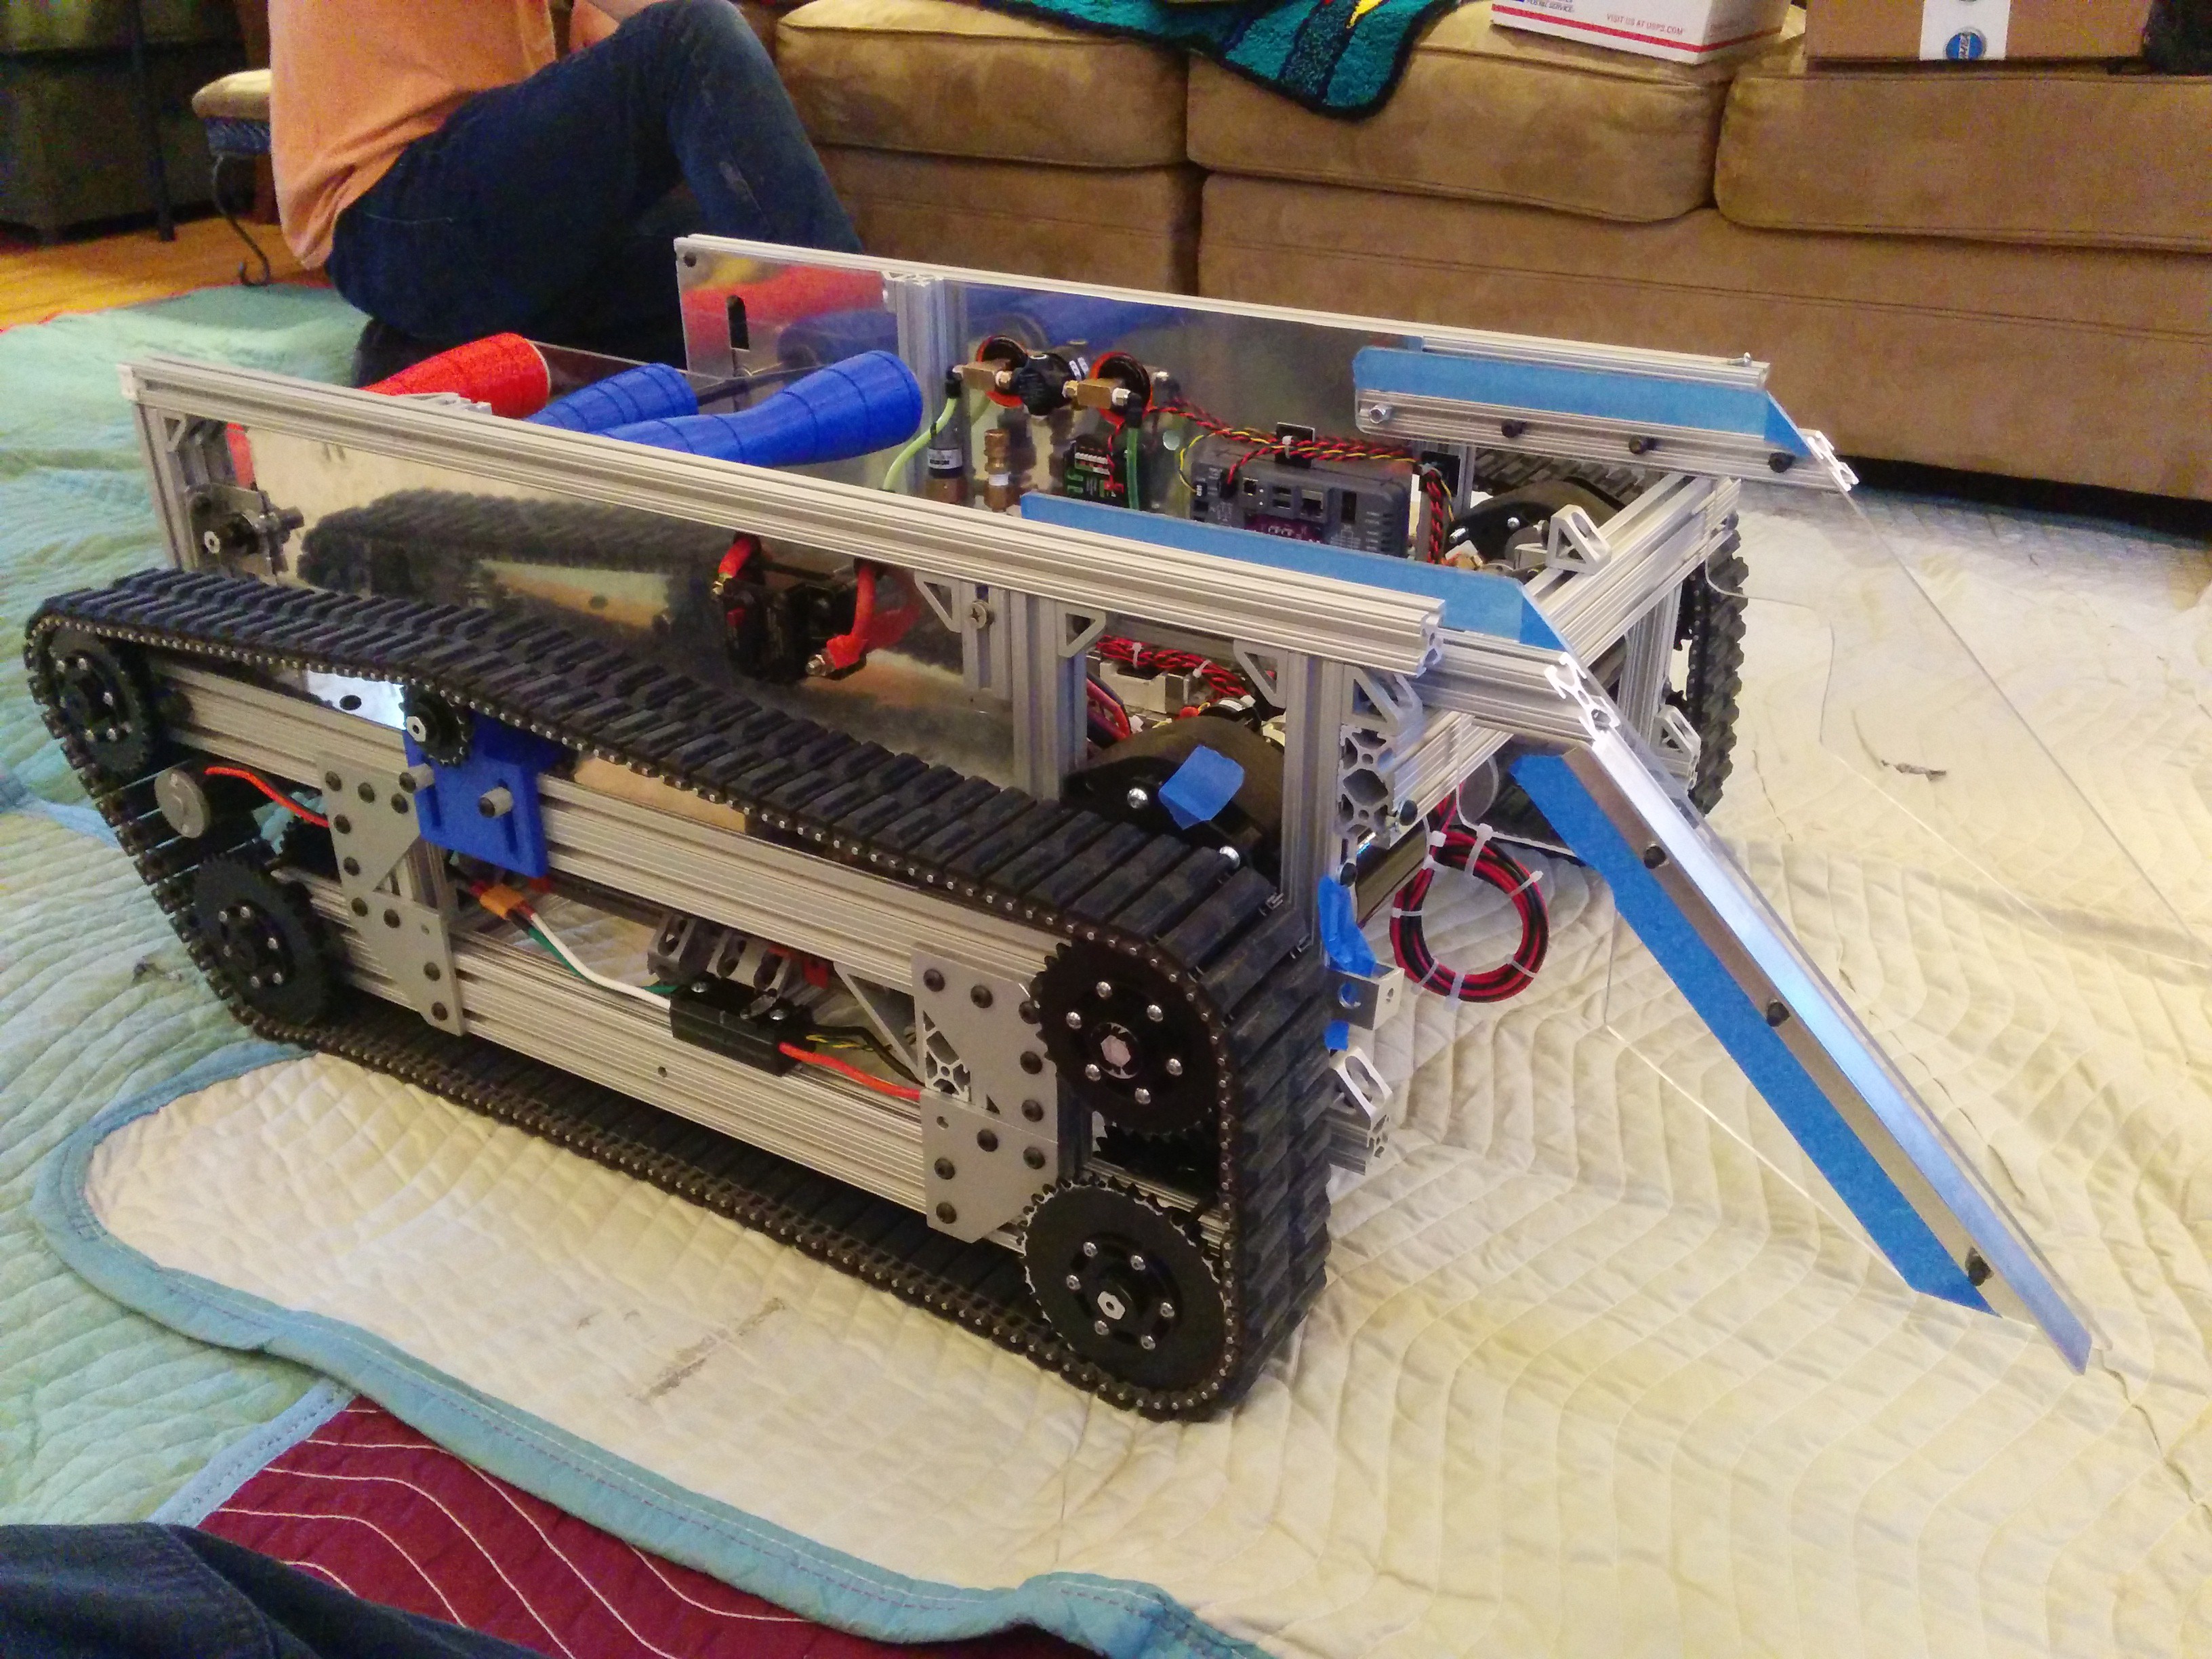
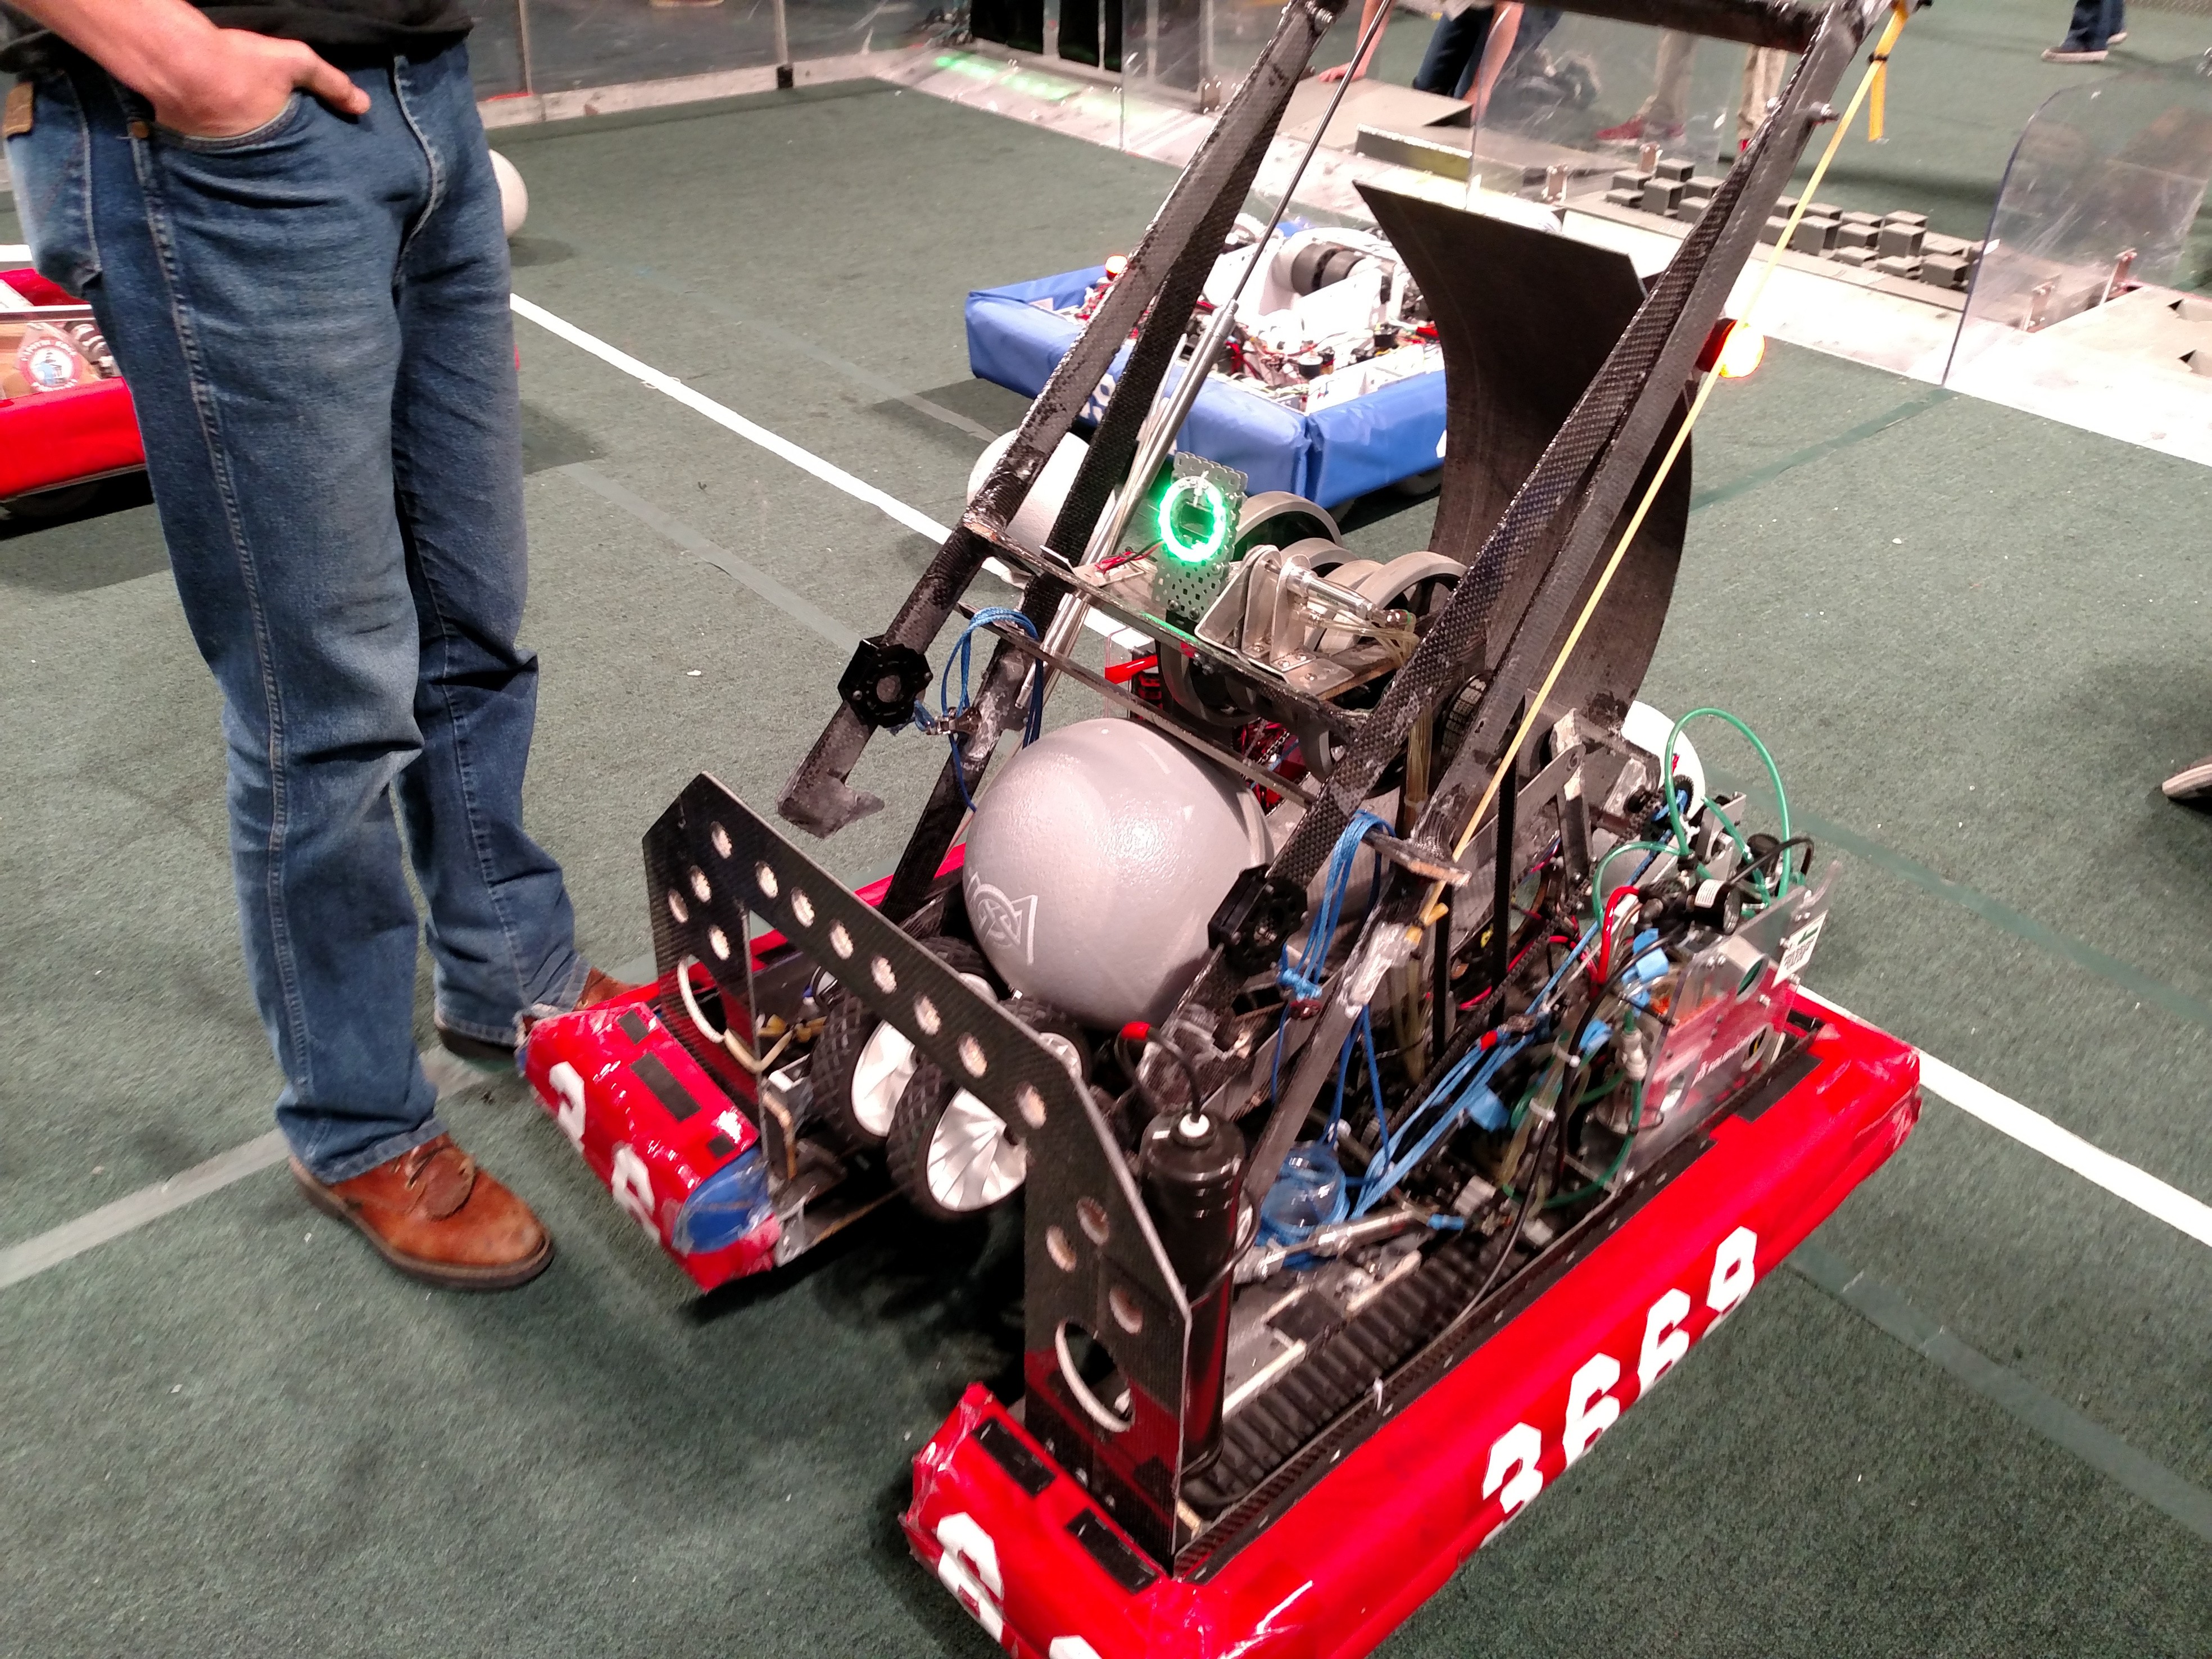
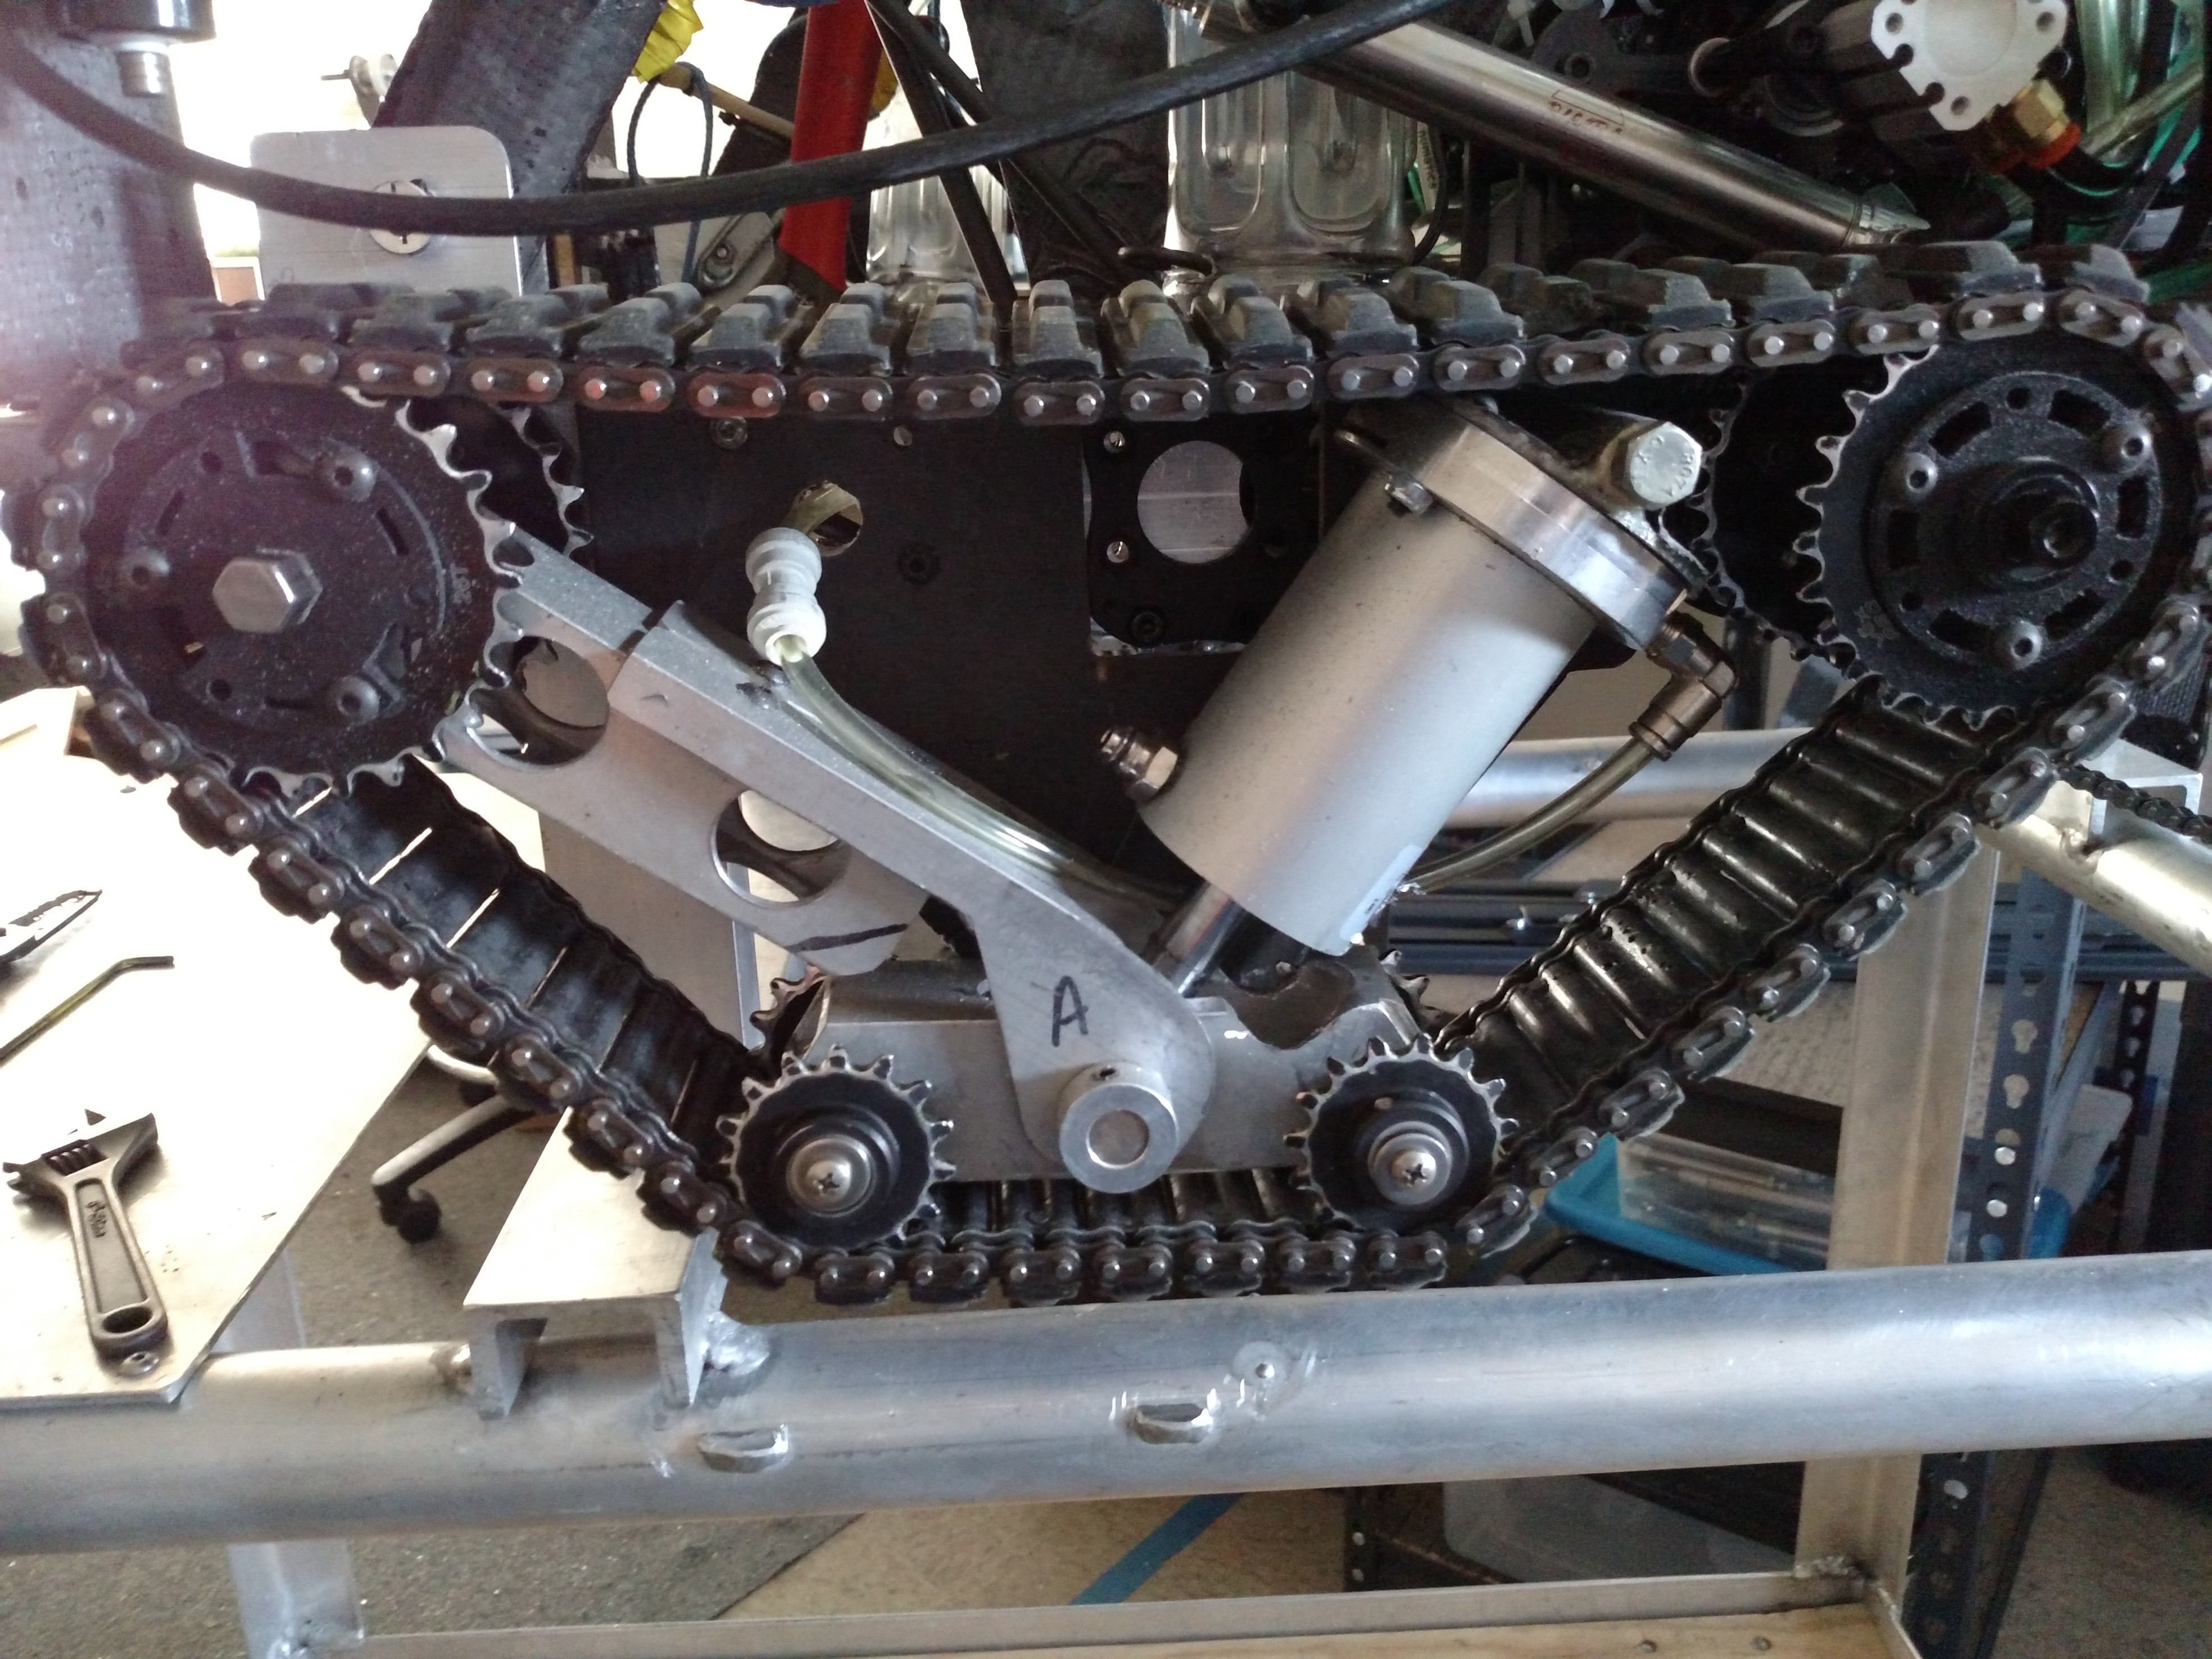
08/30/2016 at 20:23 • 0 commentsI just wanted to give an update. It has been a while since I posted and that is mostly due to nothing particularly hackaday worthy. I have been focusing mostly on fulfilling orders and shipping out parts. That has stalled some of my r&d efforts, but I am very happy to be sending the product out to customers. It has taken a while, but I am now starting to get some pictures back from them of their robots. Hopefully that continues and I can show off more and more tracked robots.
![]()
![]()
![]()
I also moved my workspace to a new area and have been slowly setting that up. The method I am using works pretty well. The aluminum molds and heated plates continue to crank out parts time after time. I am curious what the life of the molds will be, but so far am not seeing any change in part quality. The edges of the mold are getting a little banged up from prying them open. But that was expected. In the future a mold opener might be nice to have. Something that pulls the mold open evenly rather than prying it.
Since the method is working well there has not been much hacker worthy notes. When I was first starting this project I was having to make a lot of tools, develop new methods and stuff like that. But now that the system is running smooth I just sit down and start making parts. I have several thousand black parts injection molded already and I only custom make the colored parts now. So I that has reduced the number of parts I am making by hand too.
One area that is interesting is prolonging the life of the resin. But I will post on that in a seperate log. Thank you to all the support.
-
New Advertising Video
05/12/2016 at 19:48 • 0 comments -
Unboxing Video
02/10/2016 at 05:21 • 2 commentsI have been making steady progress and have shipped out almost all the current orders. I was waiting on the injection molded parts to arrive and then it was a mad rush to repackage and ship parts as soon as possible.
One of the First Robotics teams asked if I could sponsor them. While we are not really big enough to do so in the traditional sense, I did have several prototype parts I had made that I sent them. They were excited and did an unboxing video. it is really cool to see someone do an unboxing video of a product I designed. lol
-
New Smaller Track
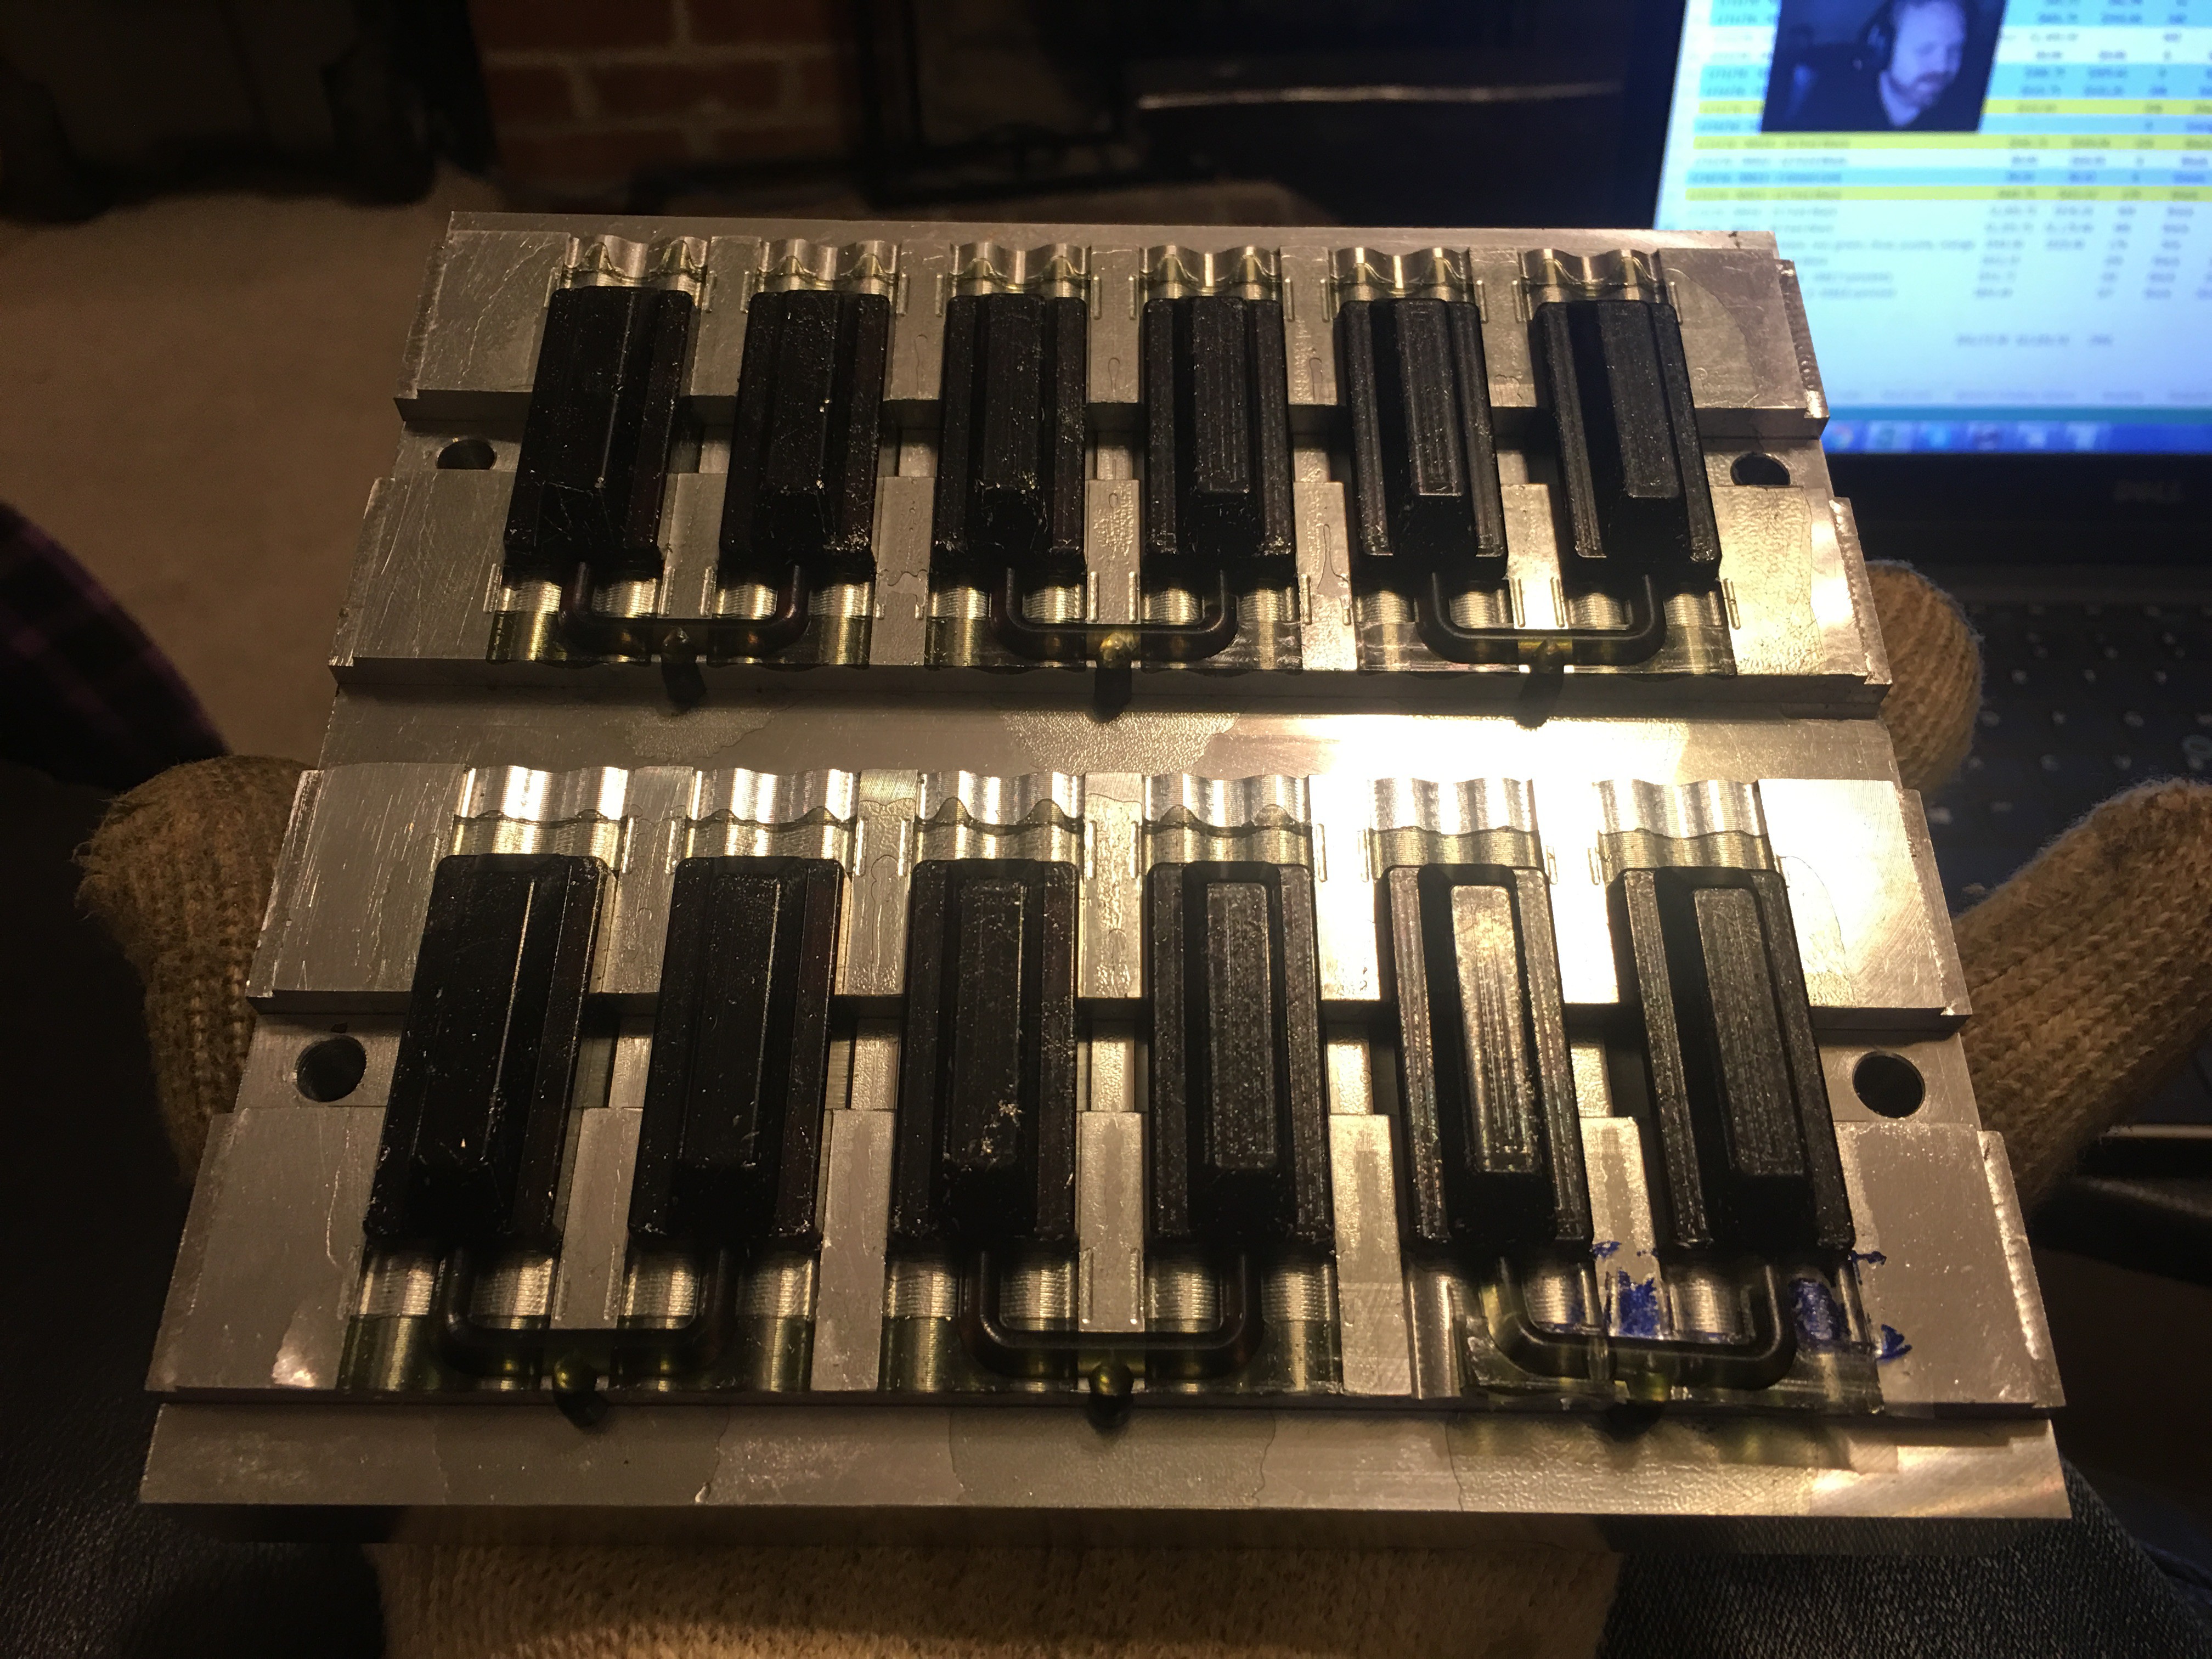
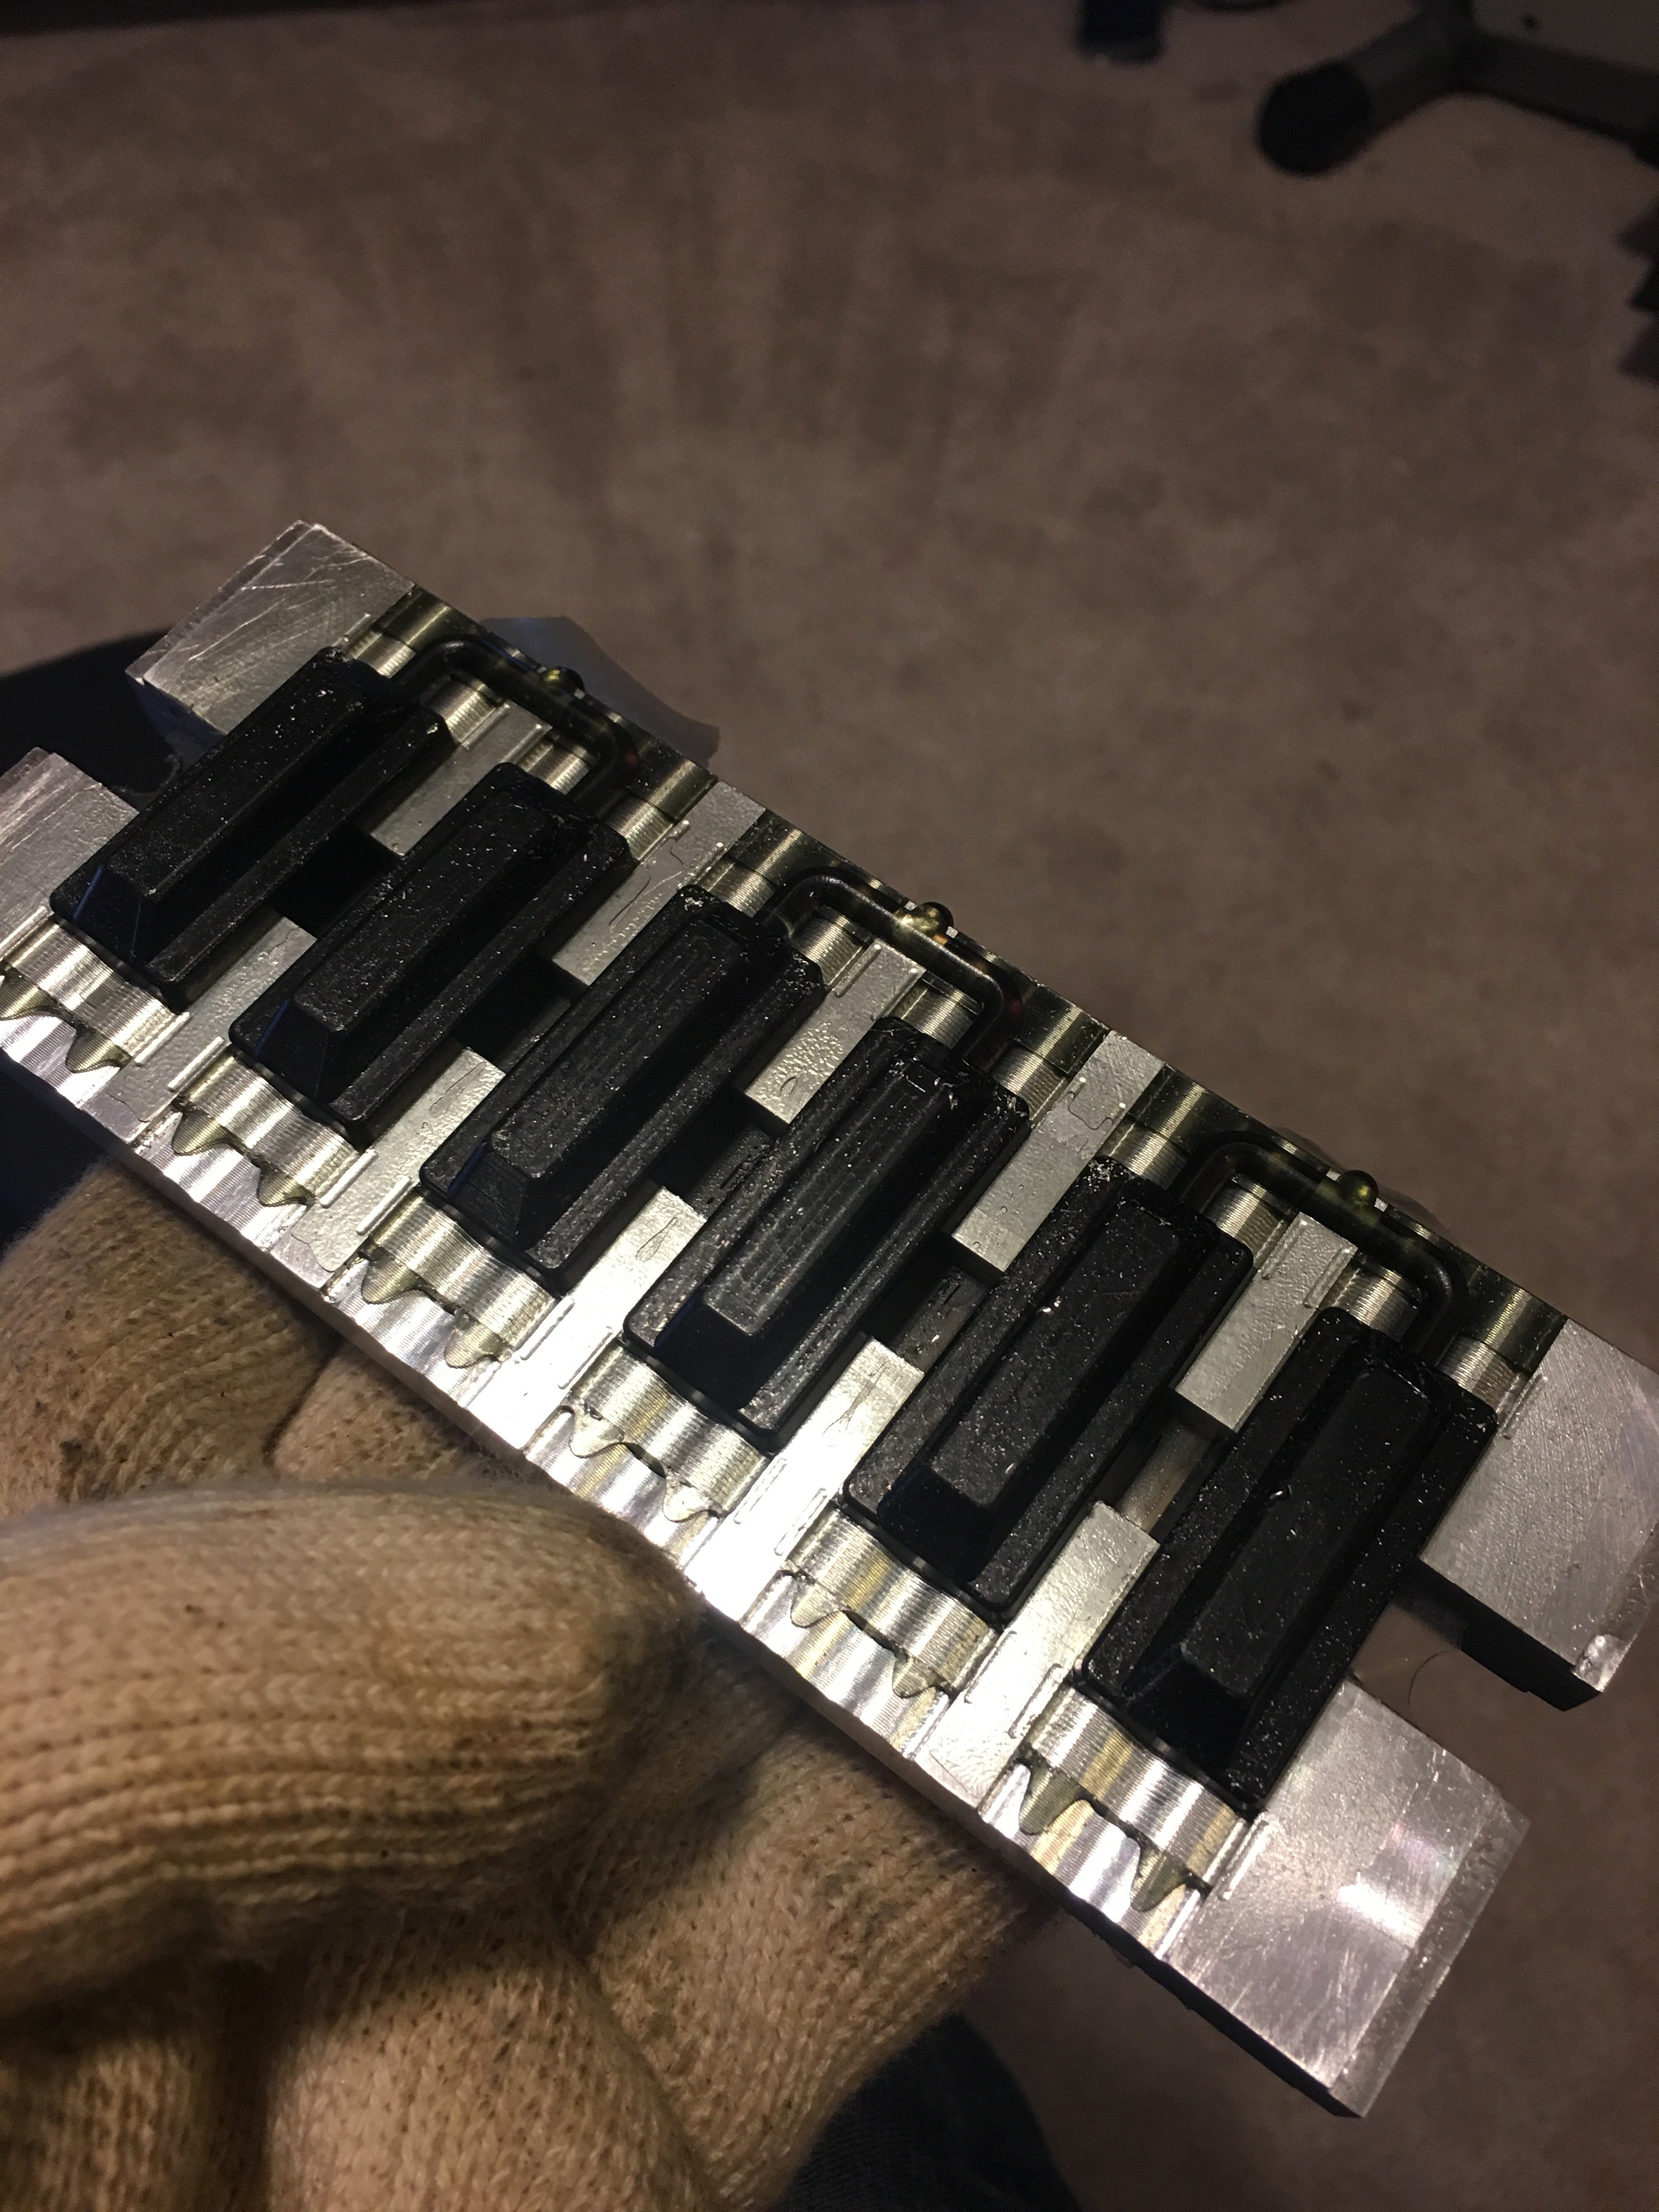
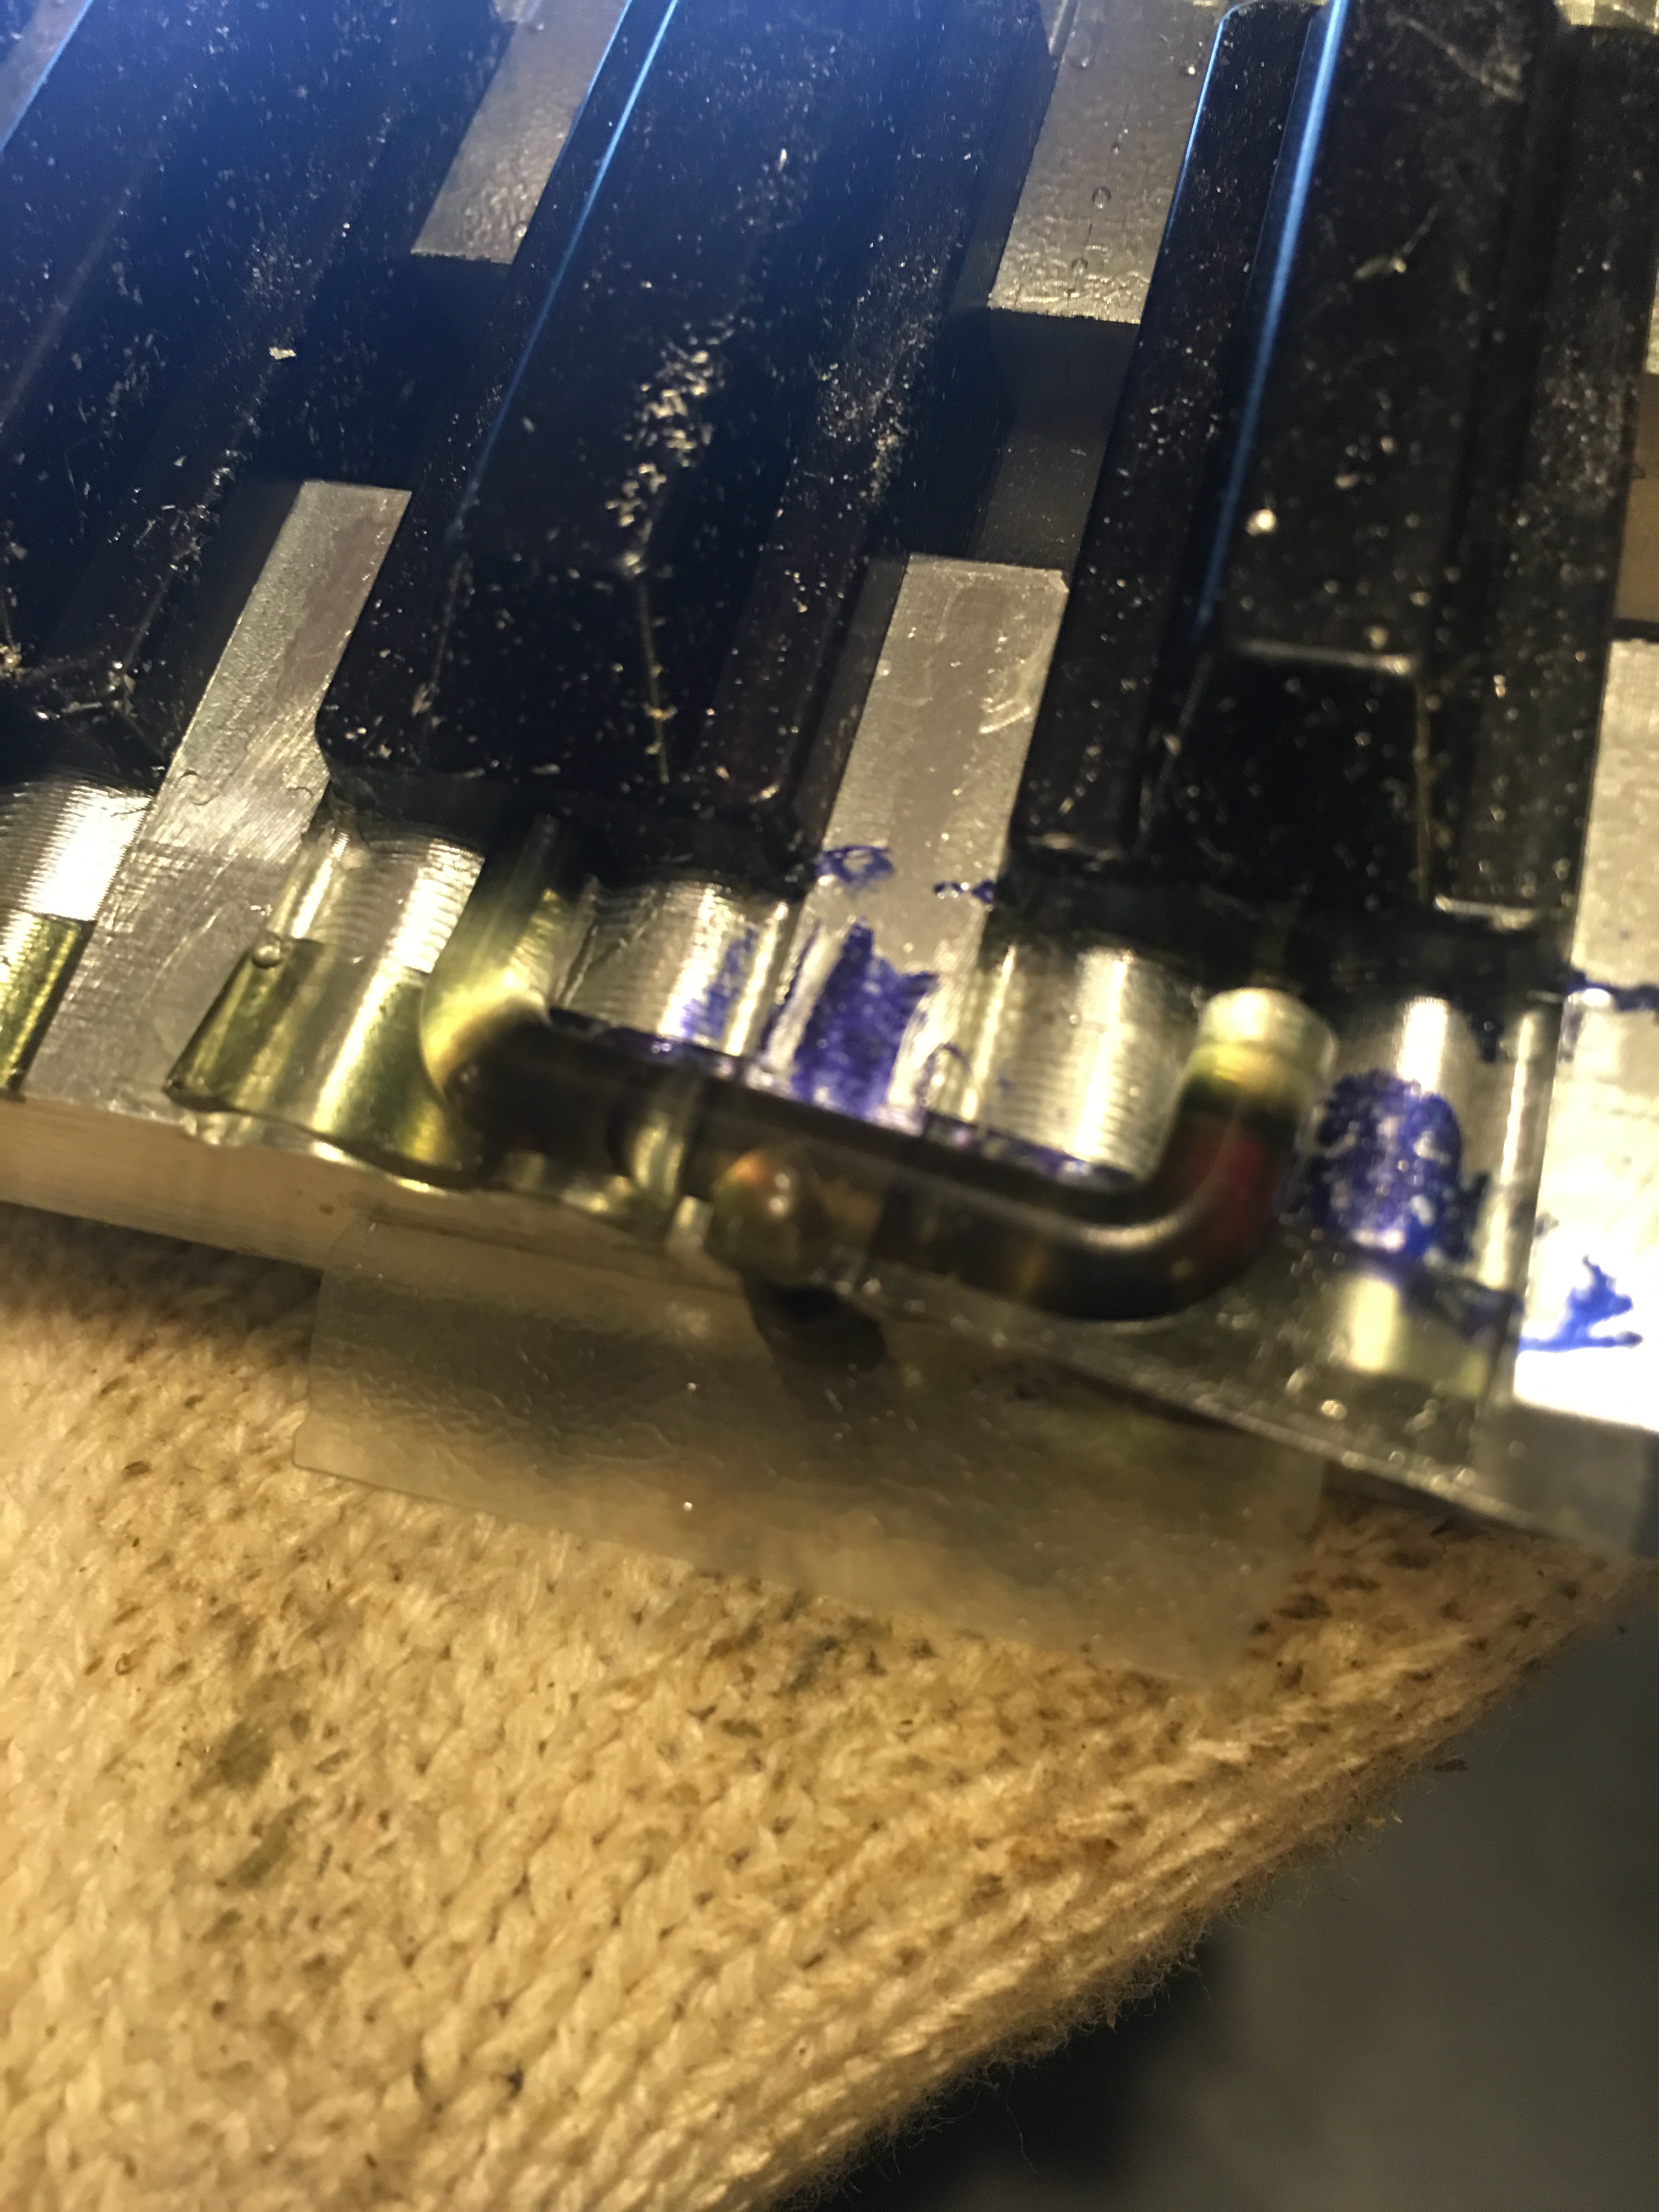
02/04/2016 at 04:54 • 4 commentsThis project has been growing so fast it is hard to post about all the parts. One of my customers asked if I could do a smaller size track and I got another size of pins made and a new mold. I did a few things differently on this mold as I have learned a lot over the past year of working on this project. I am trying to step up my injection mold design to get closer to how a commercial mold would be made.
I now have a runner which allows me to fill two cavities through a single hole. I would like to get to the point where I am filling the whole mold from a single inlet. But I was not sure how that would work. So I compromised and did only two parts per inlet. This way if it failed, I could always drill more inlets. I also reduced the size of the air vent. Now the vents are much smaller than the inlet which should help in the situation where one cavity fills before the other. Air can escape much easier than the resin so if one cavity fills first, the other should fill easier and equal out.
All in all, this experiment worked perfectly and now I can offer a second size product. Below are some photos. You can see some aluminum powder in the parts because this was the first time the mold was shot.
![]()
![]()
![]()
![]()
-
Hundreds of Tank Tracks
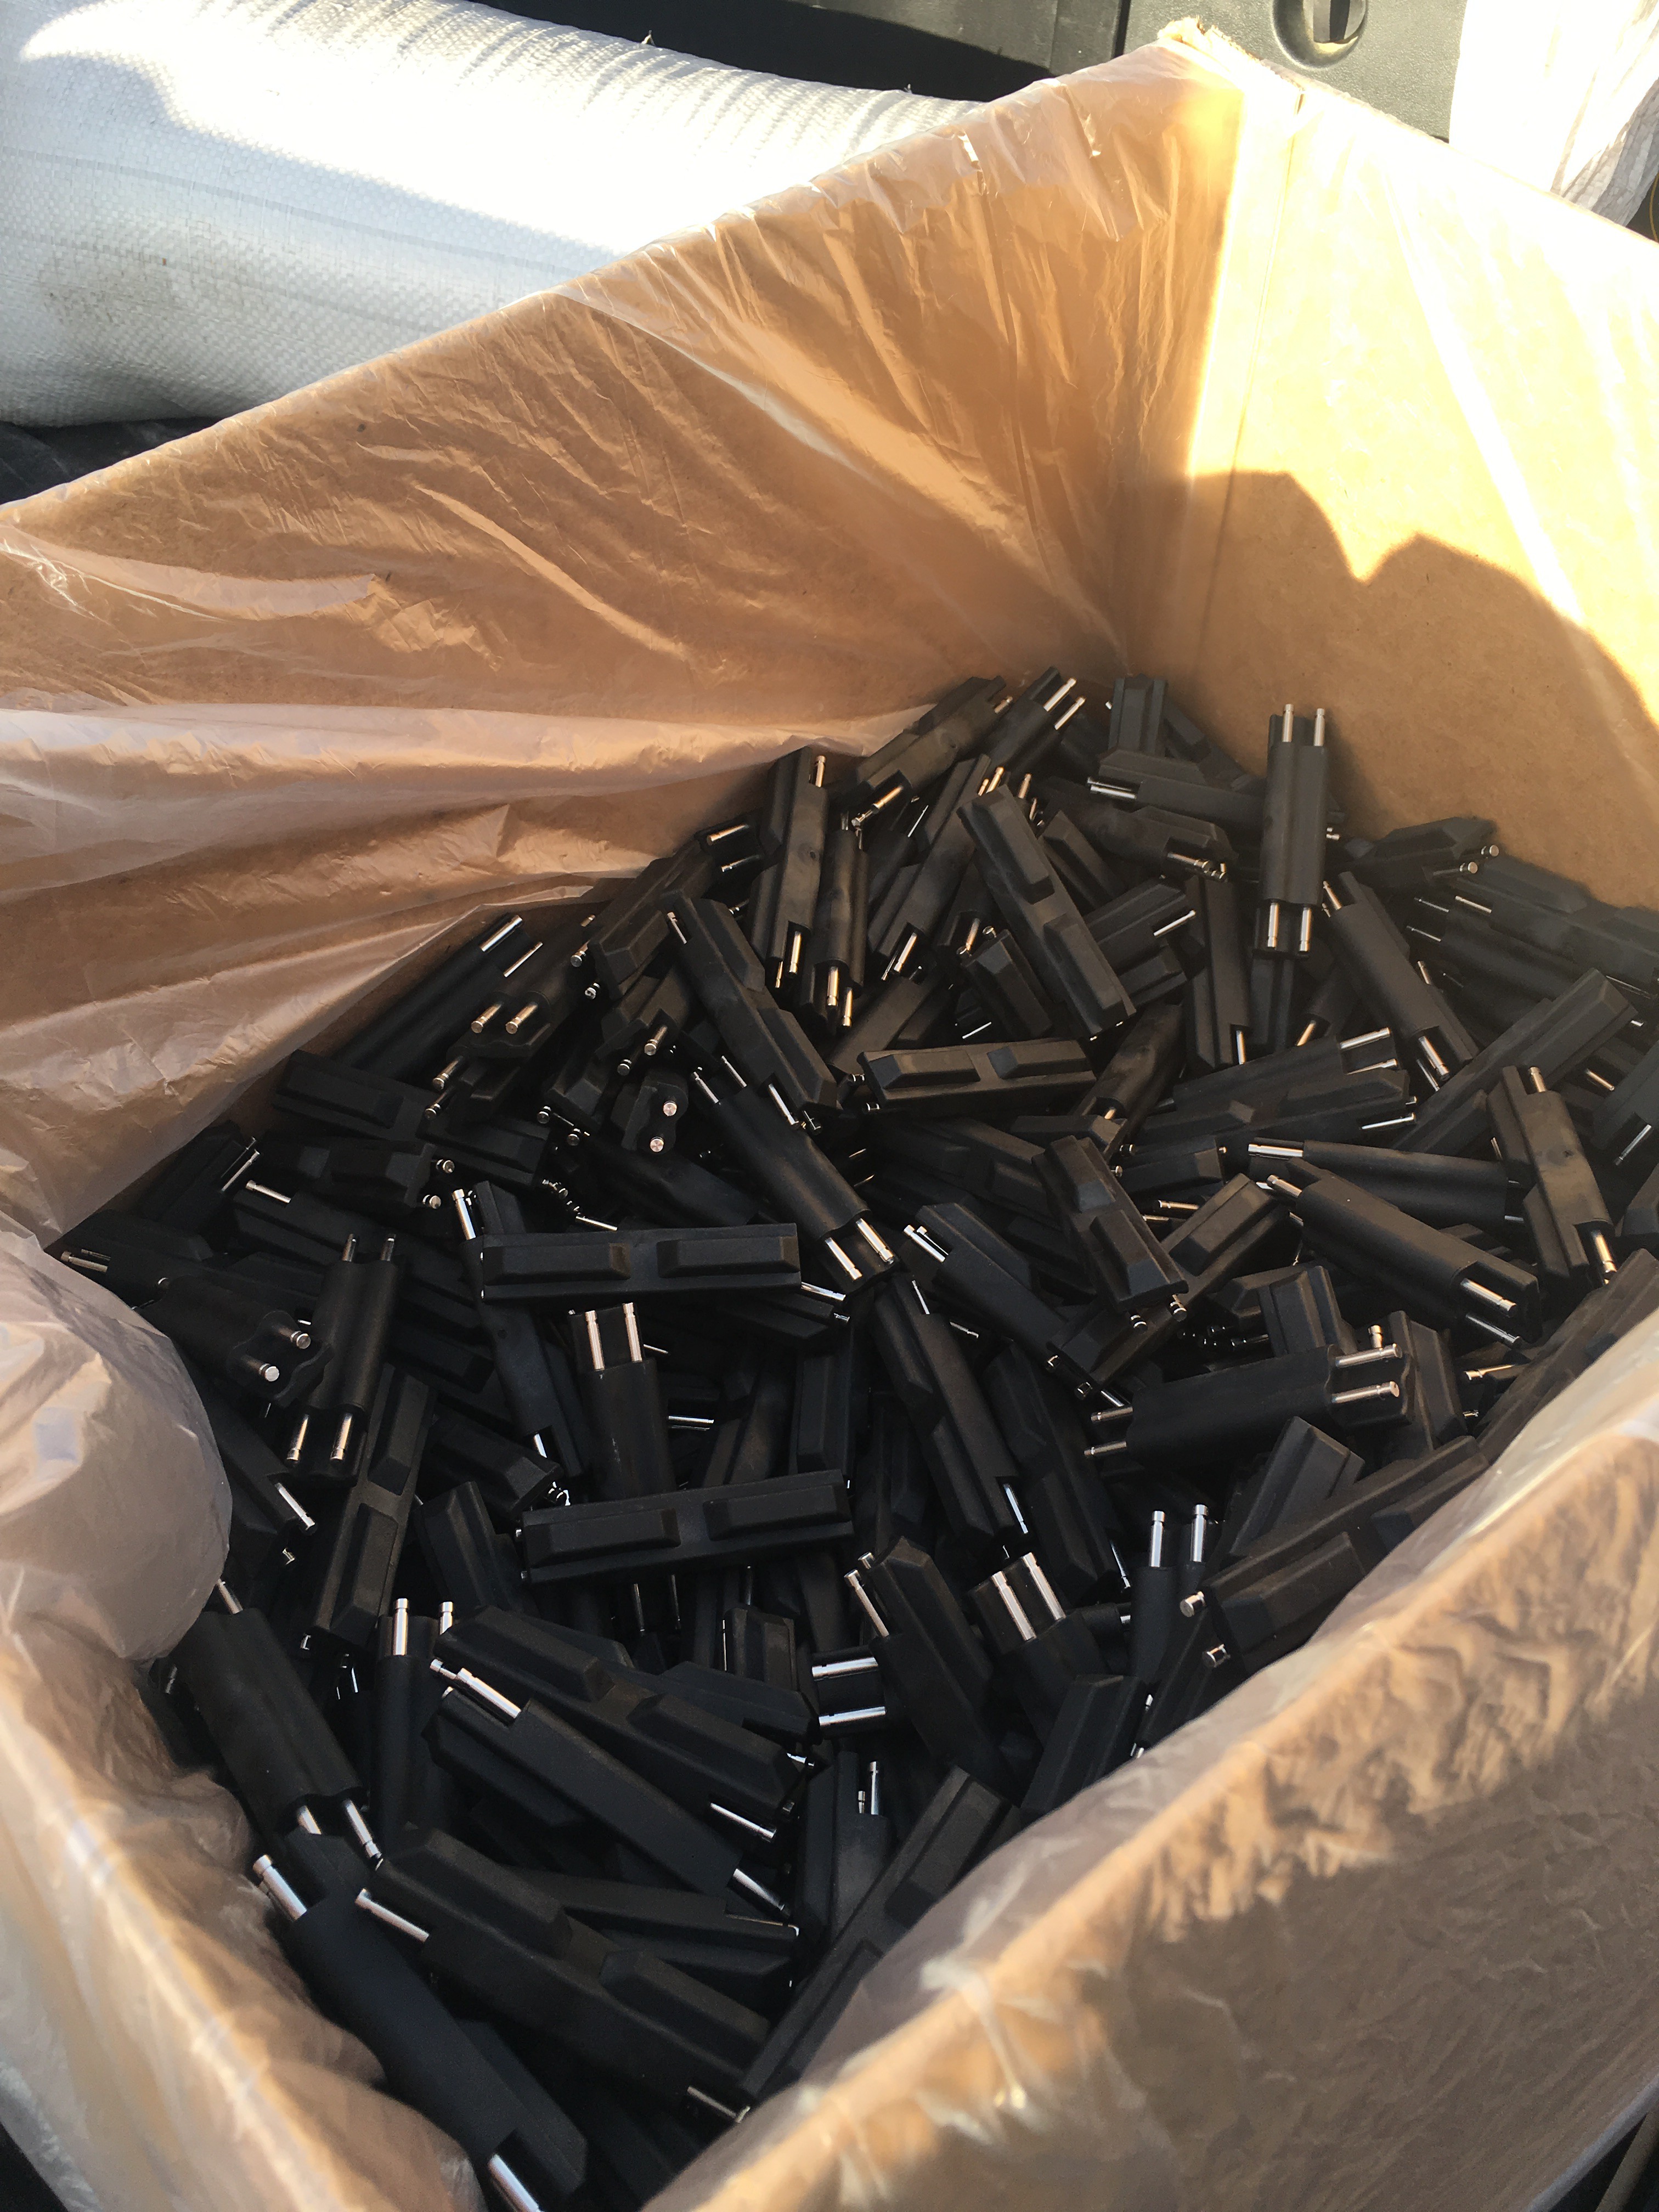
02/03/2016 at 21:19 • 0 commentsHere is a picture of the first box of about 500 parts. Probably not as exciting to others as it is to me. I should end up with about 15 boxes likes this. Two of which should arrive tomorrow.
![]()
-
Just left the injection molder
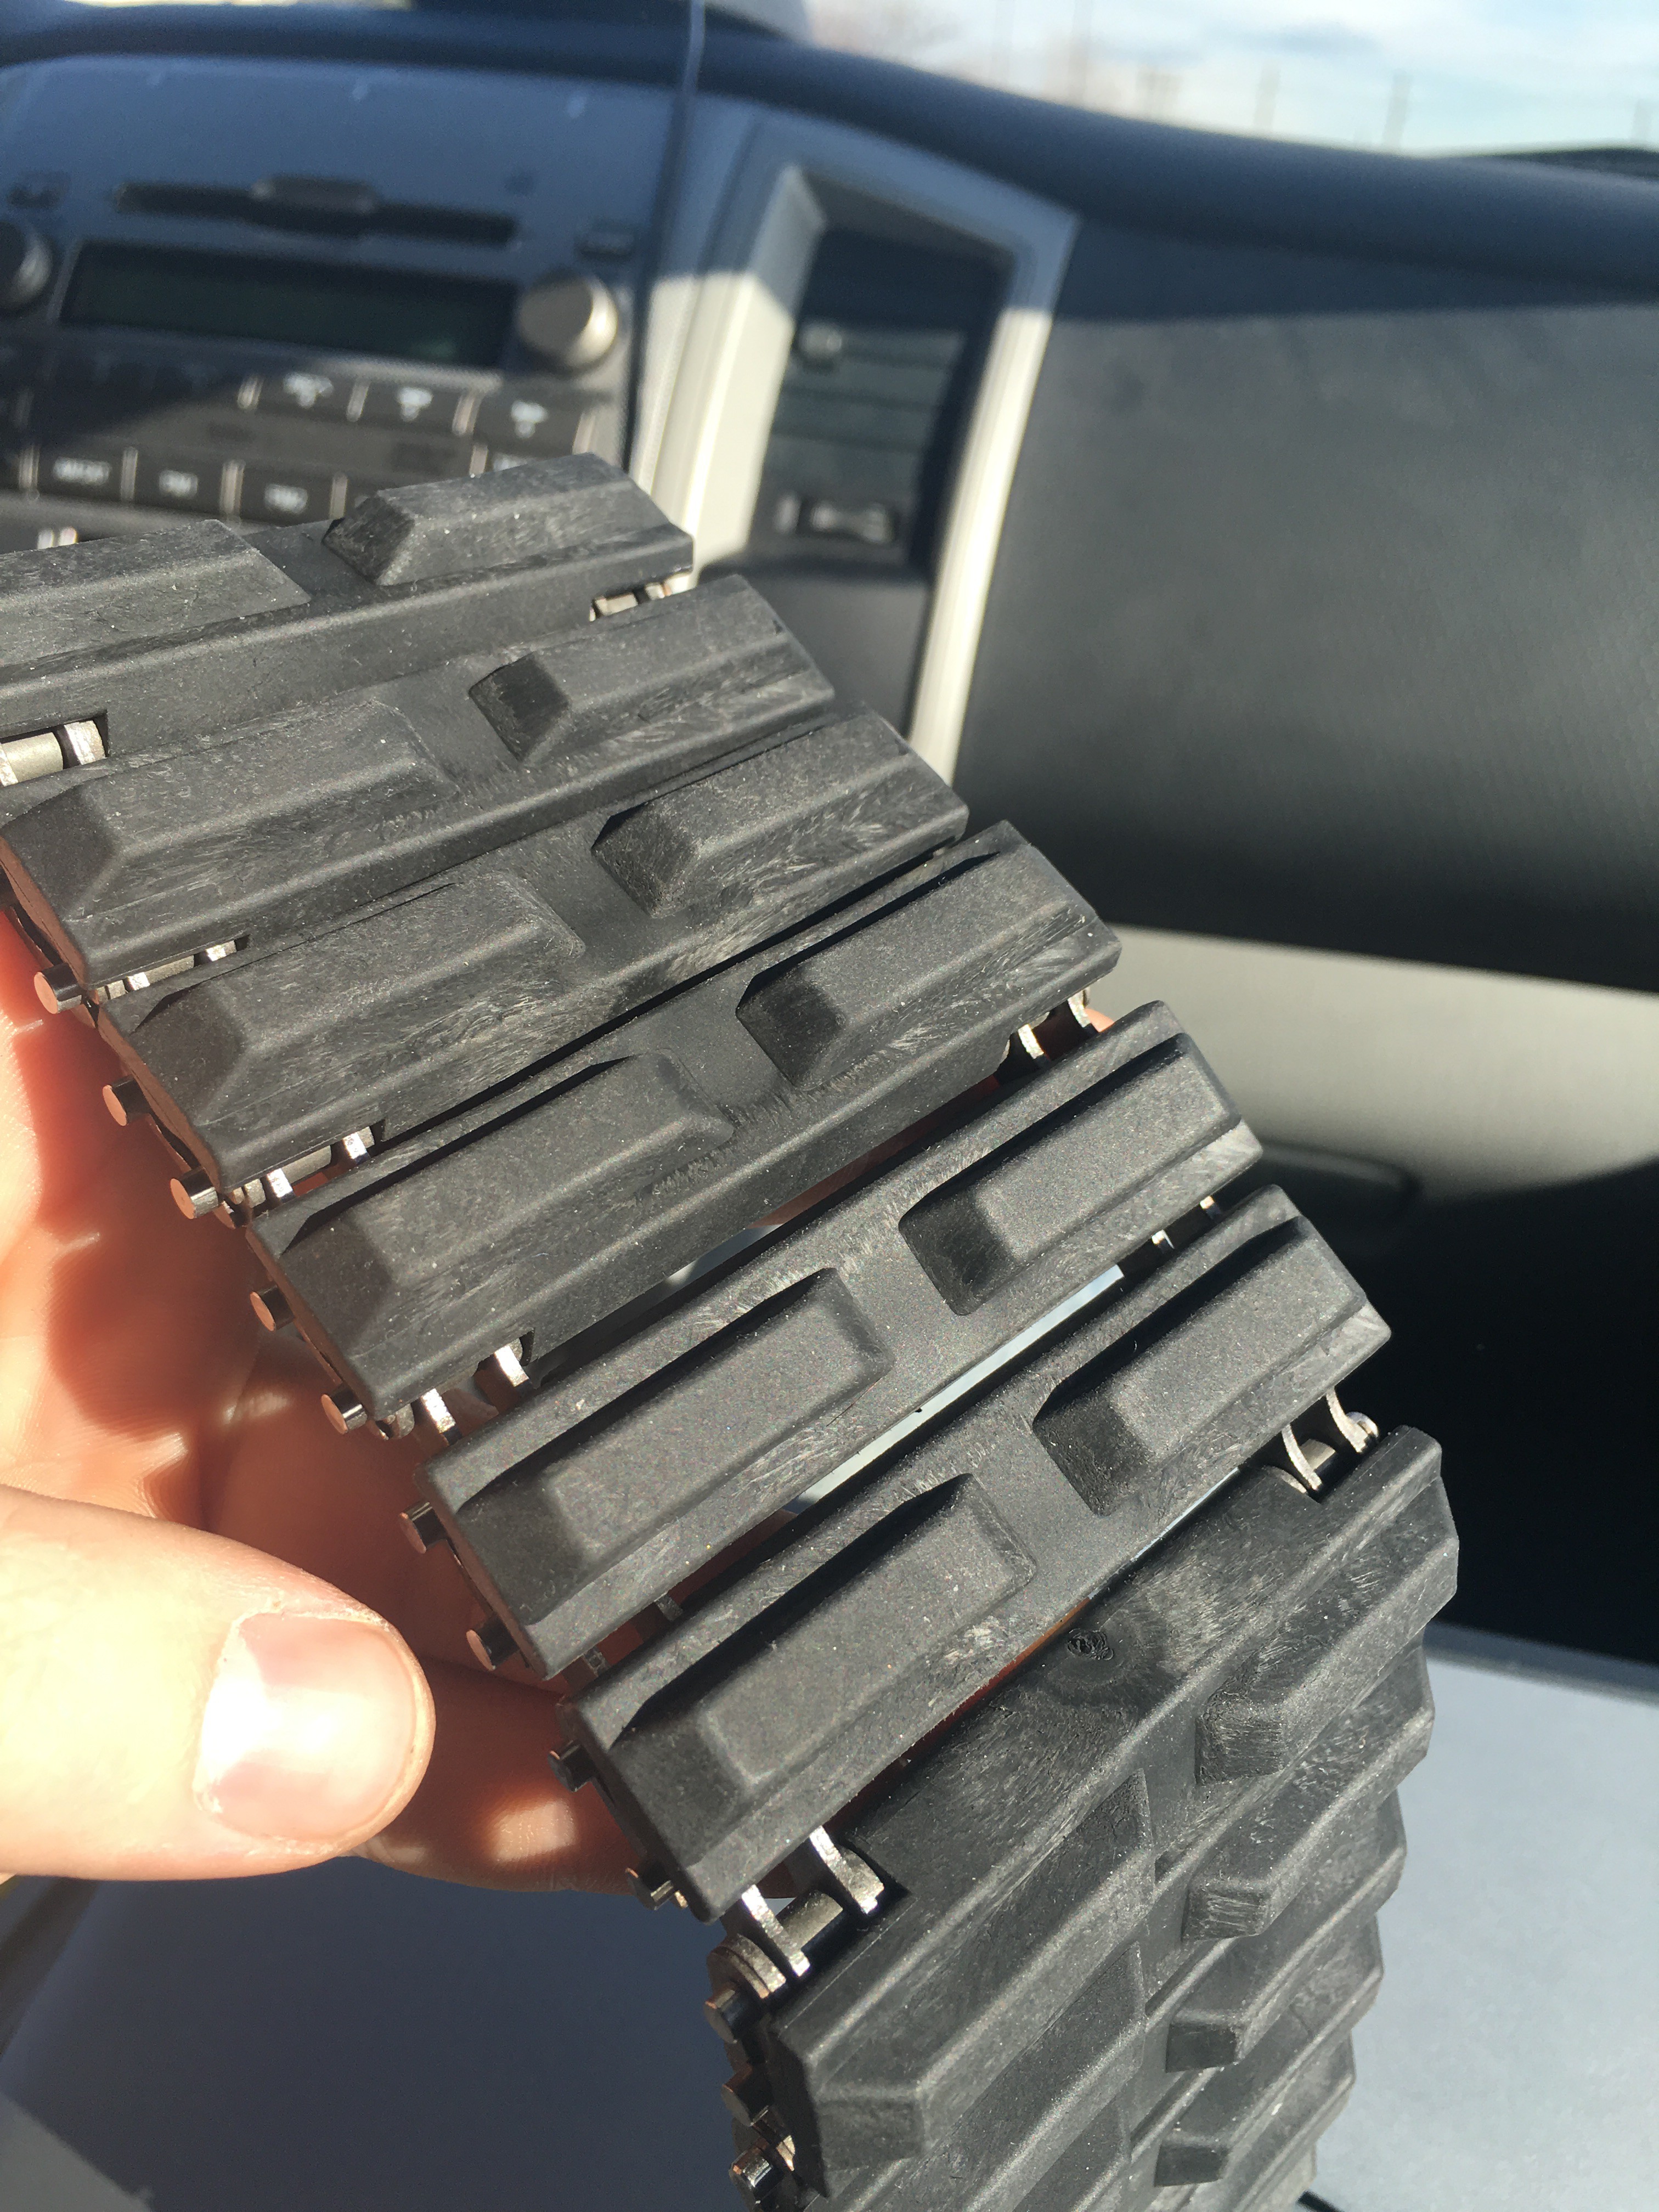
02/01/2016 at 19:11 • 0 commentsI just left the injection molder and the parts look amazing. The fit is great and the rubber is just as grippy as the ones I was making. Seeing their equipment really makes me want an injection molding machine of my very own. Maybe one day.
![]()
-
Injection Molding Big and Small
01/30/2016 at 21:12 • 0 commentsIt has been another busy week. All the orders have shipped out using the parts we made in house. The past month has been very informative about what processes work, what dont, and what just take too long or are too hard. I always knew that filling the molds by hand would be too much work in the long run. But I also did not want to just straight to injection molding. I needed to gauge my market, and get a lot more parts in hand to test with.
Over the past year my production rate has gone up dramatically. Here is a little breakdown:
- Initial 2 cavity silicone mold - 2 parts every 4 hours. (2 hours / part)
- Second 5 cavity silicone mold - 5 parts every 4 hours. ( 48 minutes / part)
- Addition of heat to silicone mold - 5 parts every hour. (12 minutes / part)
- Aluminum mold (12 minutes / part)
- 3 Aluminum molds (4 minutes / part )
No too shabby if I do say so myself. But I have reached the point where more aluminum molds will not speed things up any more and it is still tough work to get 15 parts per hour. So as I have mentioned already I am going to an injection molding company to get 7500 parts made in black. But this is not cheap and I am betting a big chunk of money that I can sell all those parts to break even. I like my odds.
So if I can go to injection molding why would I care about increasing my internal capability for making parts. Well I have several reasons. The first is that with outsourcing the injection molding I will only ever be able to make 1 color and one size cost efficiently. Changing colors has fees and different sizes requires a new mold. So I want to be able to do custom colors and custom sizes.
The second reason is for R&D purposes. I have ideas to expand my system to other sizes and shapes. That means I will need to be able to prototype those parts cheaply and easily.
The final reasons is that injection molding is not cheap. If I can make the parts myself I can keep more of the profits.
So that brings me to the conclusion that I need my own injection molding machine. I could buy a cheap one, or I could save up and buy a nicer one. But this is Hackaday. We build stuff here. So I started toying around with some ideas about building my own micro injection molding machine. It is not that crazy actually. There are quite a few point who have done this, and hackaday has featured a few. Time for me to throw my hat in the ring too.
Ever since I started this project I have been trolling the internet and found a few cool builds or products. Now I started designing my own machine. Over the years I have learned a few things about my projects. The first is that I start way too many, hardly finish them, and they always take longer than I expect. So the way I deal with this is to try and make projects scaleable. What is the minimum amount of work that gets to me to a useful product, and then how can that be improved over time. This way I get something useful earlier, and depending on how useful it is I can upgrade it.
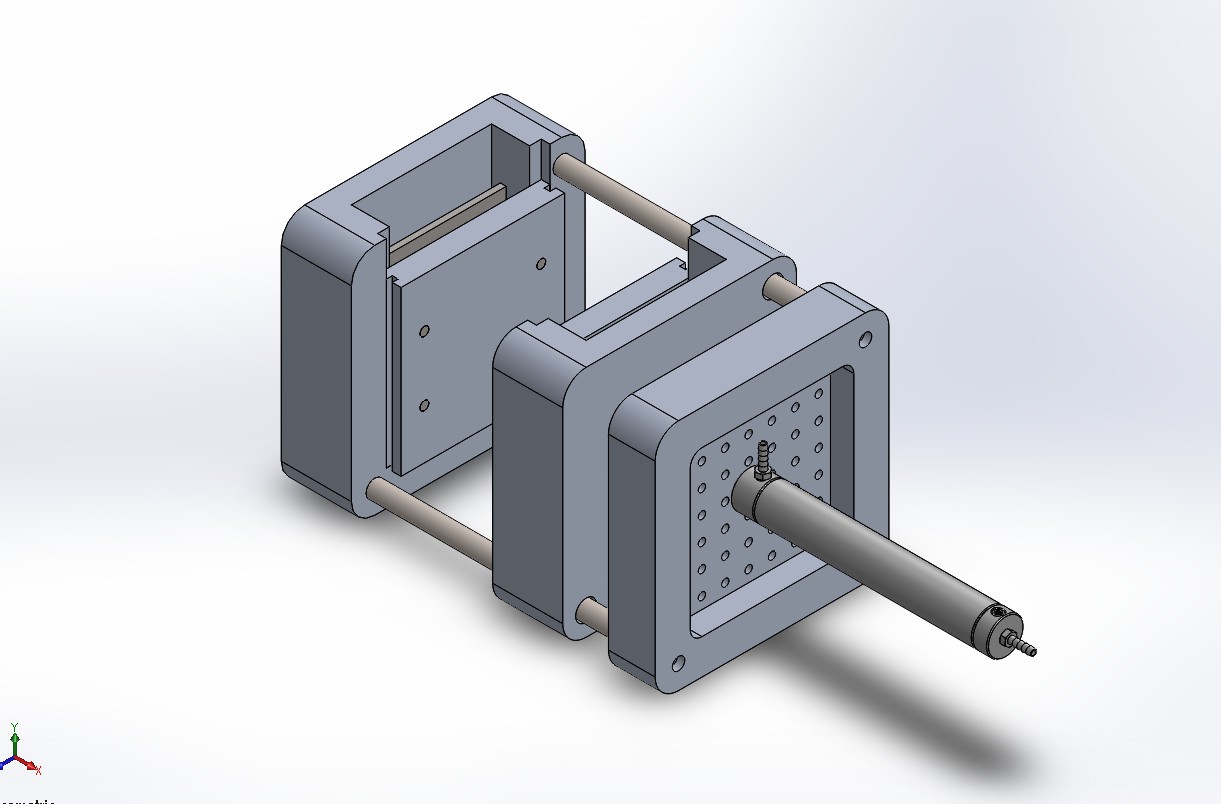
With the injection molding machine the first useful step is just being able to open and close the molds. Right now opening the mold is actually a pain in the butt. Here is a picture of the design so far and a link to yet another hackaday.io project page.
Micro Injection Molding Machine
![]()
-
Injection Molding Big and Small
01/30/2016 at 21:10 • 0 commentsIt has been another busy week. All the orders have shipped out using the parts we made in house. The past month has been very informative about what processes work, what dont, and what just take too long or are too hard. I always knew that filling the molds by hand would be too much work in the long run. But I also did not want to just straight to injection molding. I needed to gauge my market, and get a lot more parts in hand to test with.
Over the past year my production rate has gone up dramatically. Here is a little breakdown:
- Initial 2 cavity silicone mold - 2 parts every 4 hours. (2 hours / part)
- Second 5 cavity silicone mold - 5 parts every 4 hours. ( 48 minutes / part)
- Addition of heat to silicone mold - 5 parts every hour. (12 minutes / part)
- Aluminum mold (12 minutes / part)
- 3 Aluminum molds (4 minutes / part )
No too shabby if I do say so myself. But I have reached the point where more aluminum molds will not speed things up any more and it is still tough work to get 15 parts per hour. So as I have mentioned already I am going to an injection molding company to get 7500 parts made in black. But this is not cheap and I am betting a big chunk of money that I can sell all those parts to break even. I like my odds.
So if I can go to injection molding why would I care about increasing my internal capability for making parts. Well I have several reasons. The first is that with outsourcing the injection molding I will only ever be able to make 1 color and one size cost efficiently. Changing colors has fees and different sizes requires a new mold. So I want to be able to do custom colors and custom sizes.
The second reason is for R&D purposes. I have ideas to expand my system to other sizes and shapes. That means I will need to be able to prototype those parts cheaply and easily.
The final reasons is that injection molding is not cheap. If I can make the parts myself I can keep more of the profits.
So that brings me to the conclusion that I need my own injection molding machine. I could buy a cheap one, or I could save up and buy a nicer one. But this is Hackaday. We build stuff here. So I started toying around with some ideas about building my own micro injection molding machine. It is not that crazy actually. There are quite a few point who have done this, and hackaday has featured a few. Time for me to throw my hat in the ring too.
Ever since I started this project I have been trolling the internet and found a few cool builds or products. Now I started designing my own machine. Over the years I have learned a few things about my projects. The first is that I start way too many, hardly finish them, and they always take longer than I expect. So the way I deal with this is to try and make projects scaleable. What is the minimum amount of work that gets to me to a useful product, and then how can that be improved over time. This way I get something useful earlier, and depending on how useful it is I can upgrade it.
With the injection molding machine the first useful step is just being able to open and close the molds. Right now opening the mold is actually a pain in the butt. Here is a picture of the design so far and a link to yet another hackaday.io project page.
![]()
-
Another Video
01/22/2016 at 00:20 • 0 commentsHello all,
We have been selling tracks for about two months we are starting to have customers that have been able to put the track to use. Below is another awesome video of the tracks in action.
Modular Continuous Track System
A inexpensive modular tank track system that can be used for robotic and radio controlled vehicles.