Close
0%
0%

Tetoroidiv [gd0152]

A 16mm diameter, BLDC servo motor with 0 cogging.

Similar projects worth following
237 views
0 followers
A slotless, brushless servo built for Tetrinsic [gd0041].

Navigation

Prior Reading

Contents

The title tag system is explained here, and the table is updated when a change occurs. Notable logs have bold L# text.

L1
[M] Slotless motor FEMM simulation
L2
New motors for the 7.2 : 1 reducer
L3
[B] Custom rotor
L4
[R] 1642 brushed motor?
L5
[M] Magnetic interference with ferrite toroids

Preface

[2024 - May 1]

Welcome to the 3rd level of "project in a project", or the 4th depending on how you look at it:  

This project is the merge of a 16mm BLDC motor and "Tetrinsic PCB", currently now responsible for driving said motor as well as the following needed for #Tetrinsic [gd0041].:

  • controlling an addressable LED strip
  • reading the orientation of the BLDC rotor
  • reading a force sensitive resistor

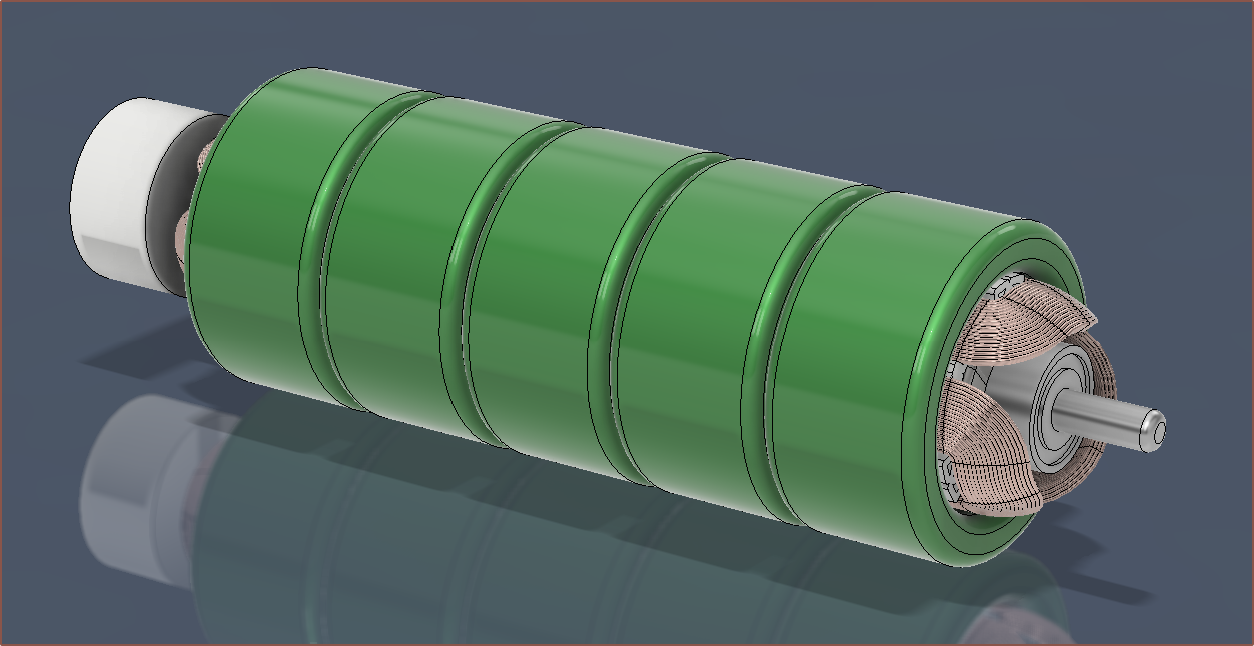
The name is the merge of "toroid" and "derivative", with the former being because of the ferrite toroids (aka ferrite core or ferrite ring) that are used in place of traditional laminations for a slotless motor, and the latter because it's like a "3rd order differential" (if you consider Tetinventory as an an integration). 
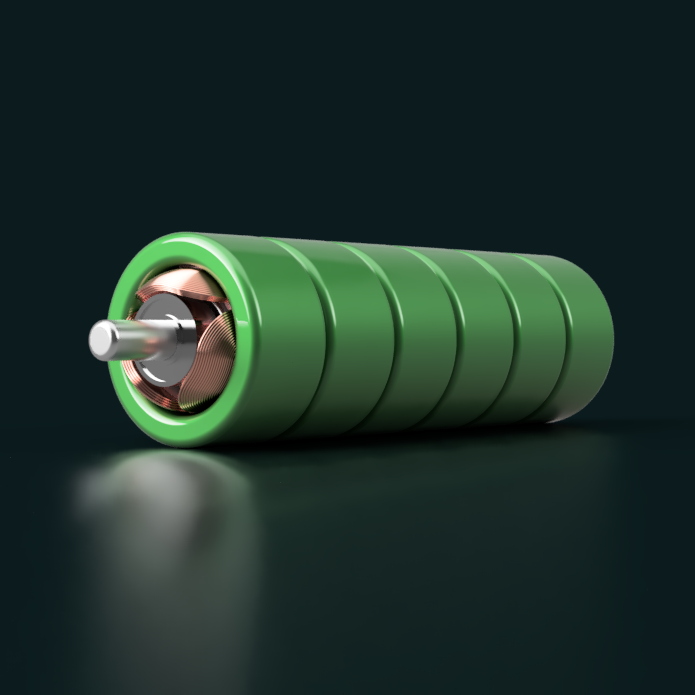
Initial concept render.

I'd rather not DIY a motor here, but the name is likely to stick even if I am able to acquire a commercially available motor, as the goal is to combine a 16mm BLDC with the custom PCB.

At the time of writing, 16mm motors between lengths 45 and 60mm are only available directly from manufacturers (e.g. on Alibaba), and the prices are high (>£30/ea) considering I'd need 8 for a pair of #Tetent's [gd0090]

  • [R] Bluetooth modules such as NRF2833 MS51SF11?

    kelvinA4 hours ago 0 comments

    I can think of 3 ways to go about a controller solution for #Tetrinsic [gd0041]:

    1. The expectable way: A small, low-cost MCU on the same PCB as the angle sensor and BLDC driver.
    2. The exciting-on-paper way: A BLE module on the same PCB as the angle sensor and BLDC driver.
    3. The monolithic way: The angle sensor on its own and all control via a single MCU on the main board.

    Now I say "exciting on paper" because it would make Tetoroidiv a bluetooth- and zigbee-enabled servo. The reasoning is because of the benefits they offer: the modules are off the shelf (thus simplifies assembly and testing) and it then means that the main board (e.g. the Tetent/Tetrescent PCB) doesn't need an additional BLE module. The "expectable" strategy means that 3 different microcontroller toolchains would be needed for the final product, whereas the "exciting on paper" strategy would reduce that to two and simplify the design of the main board due to more PCB surface and trace space.

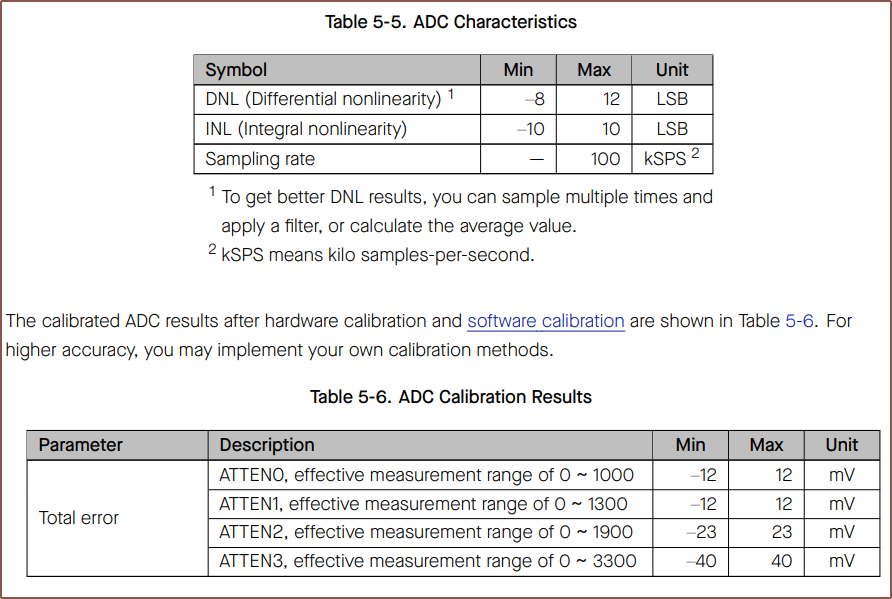
    Understandably, the strategy I originally thought of was the ESP32C6, as it's only about 50p more than the ESP32C3 and has more features (including a motor peripheral, allowing 6PWM motor control if needed) whilst keeping the same sized module. My main reservation was that the ADCs that Espressif make have a poor reputation. It took a while to even find the characteristics, which weren't in the larger Technical Specifications.pdf but in the smaller datasheet one:

    ESP32C6 ADC Characteristics

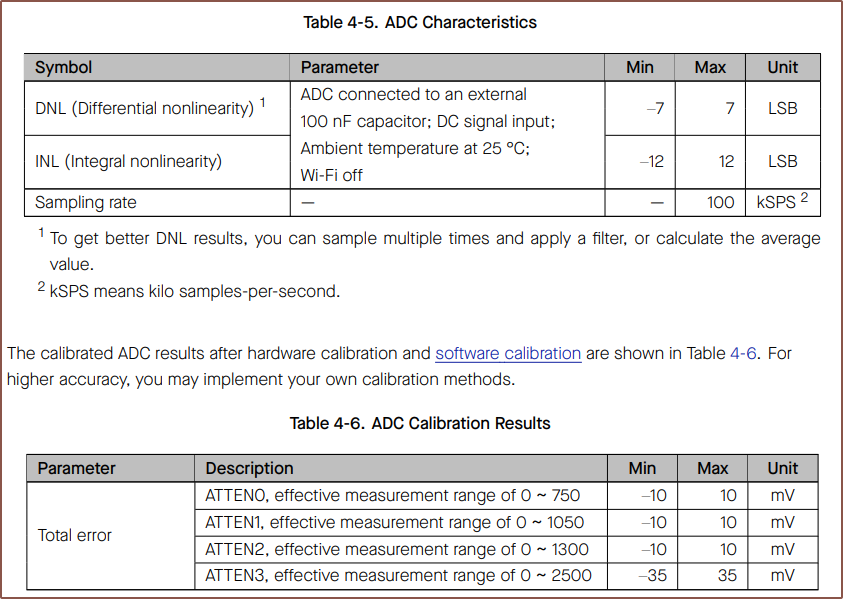
    They seem very similar to the C3 ADC:

    Now I looked into SimpleFOC and hear that the C3 is kind of decent. I've also now done some research on what those DNL numbers mean and it turns out that lower is better. It basically means the tolerance around the correct digital value. For example, if a 1.0V analog signal should be converted to the number 1000, the C3 could actually read between 993 and 1007.  I still have yet to fully understand what INL represents.

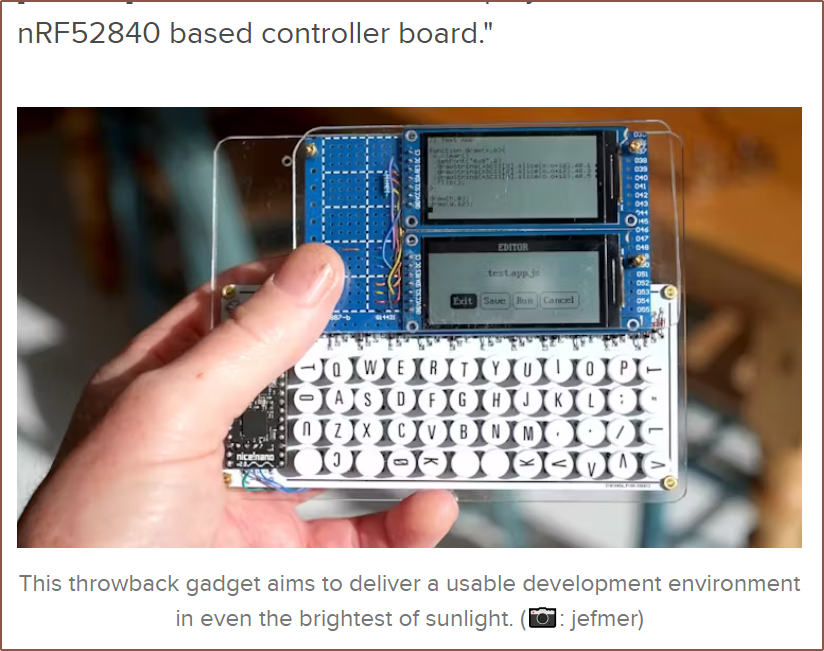
    Anyway, I was reading about PDAs powered by microcontrollers (such as the one above) and remembered that the nRF52 line of chips also existed so I went to go see what the smallest module was and I found this:

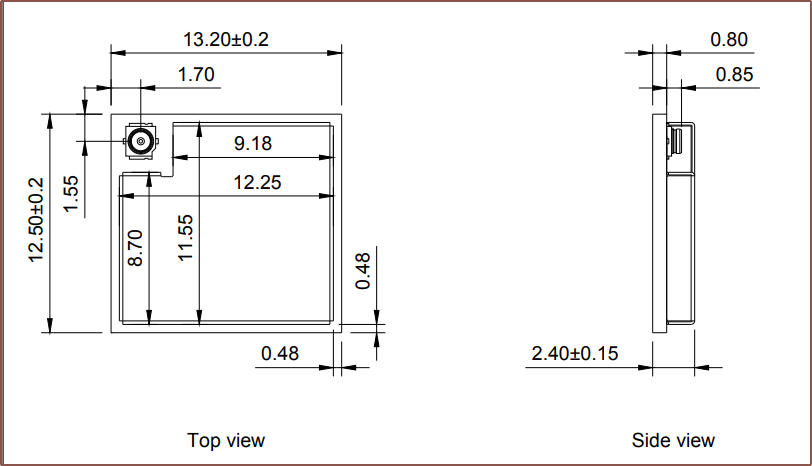
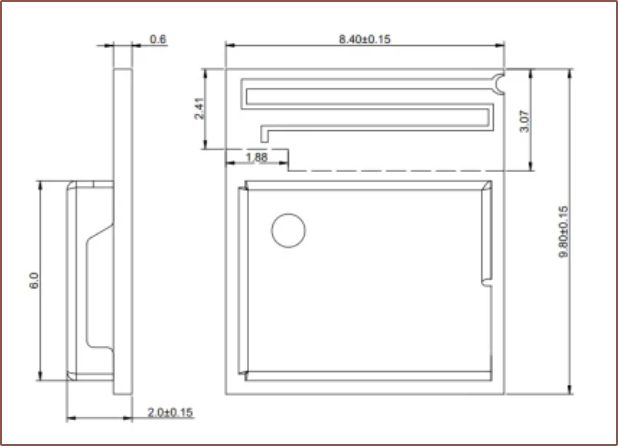
    This module has an antenna pin should I need it, but the whole thing with antenna is smaller than the C6 without so I will try using the PCB antennas first. This module is over 2X that of the C6, but in absolute terms, it's about £20 per pair of Tetents.

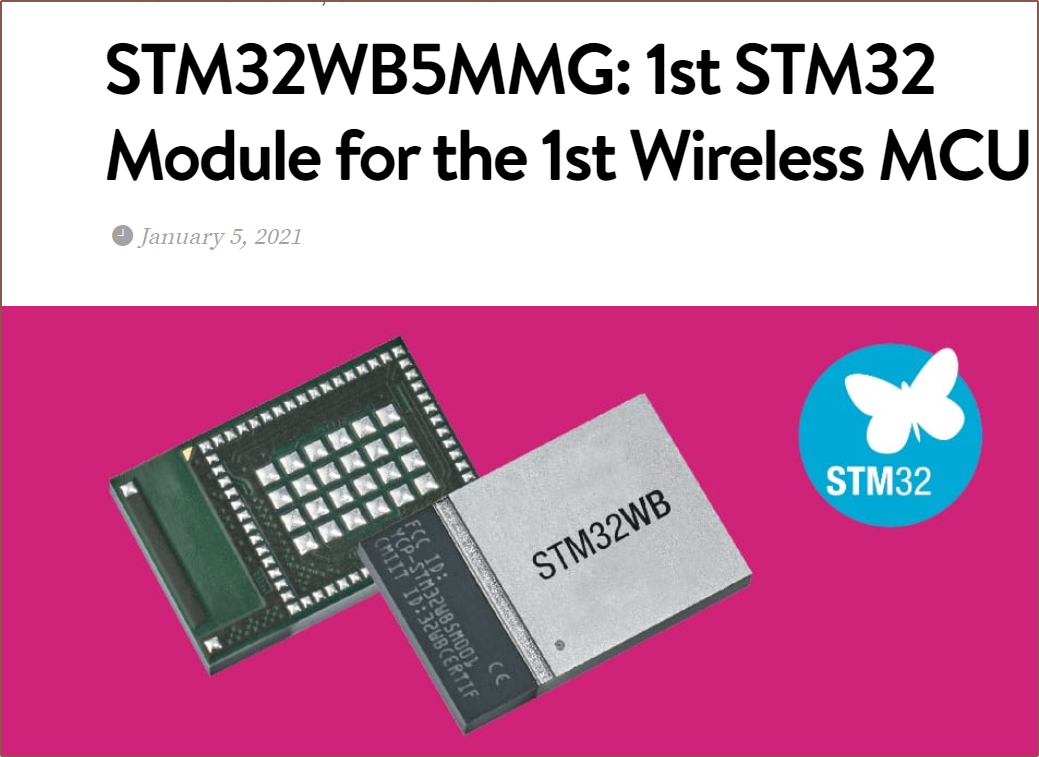
    I've also heard that STM32s have good ADCs, and the STM32WB5MMG is a module that only comes in at 7.3 x 11mm, but the price seems to be over £9/ea.

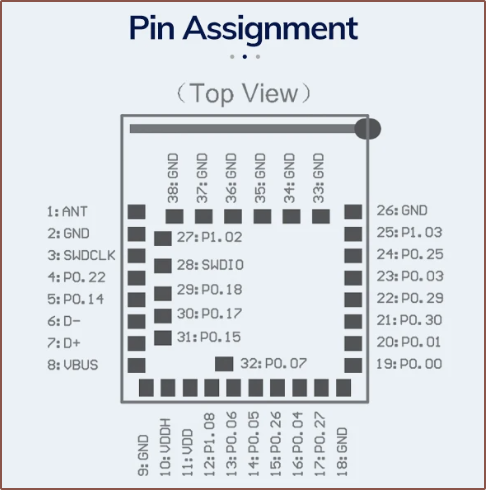
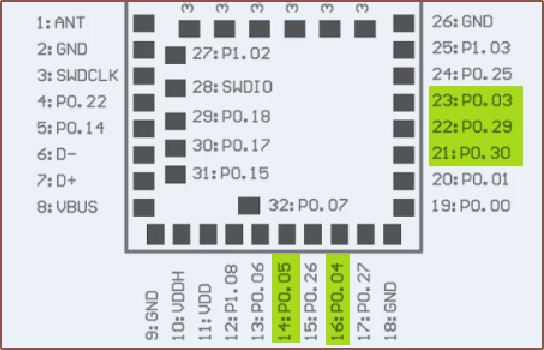
    Back to the SF11 module, it does seem that there would be enough pins to reasonably connect all components:

    Additionally, like all the other chips and components, it can run off 5V:

    It also seems to use 2-wire firmware upload, whereas the C6 would also need a BOOT and RESET pin (since there's no space on the board for buttons). Additionally, there is a Rust HAL for the nRF52 chips

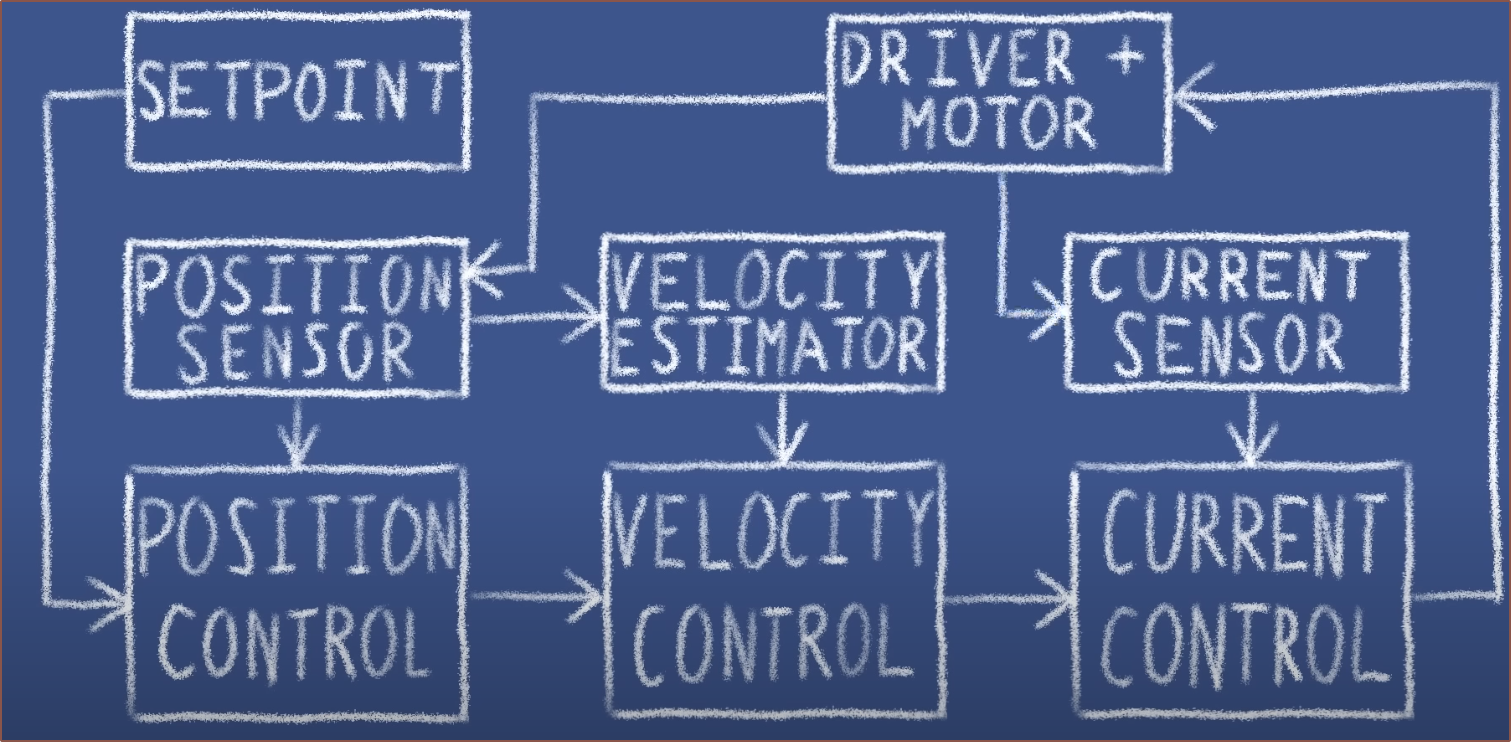
    The ADC sounds good. For starters, it supports 8 single-ended channels or 4 differential channels, as well as oversampling. It sounds closer to the specifications of a discrete ADC than what feels like an afterthought in the Espressif line. It seems that, instead of the C6 having to compute the average of the input signals, I'd be able to do something like set a 16x oversampling and achieve 4kSPS per channel (thus 192kSPS total speed), where that specific sampling frequency is chosen to match what was used in the YouTube video of this servo project:

    The first two happens at 4kHz and the current sense is 50kHz as the response is faster and doesn't rely on physical movements. 

    My plan is to target a minimum realistic speed for everything from sensor acquisition to motor control, and 4kHz sounds like a reasonable frequency to aim for.

    The module itself seems to have 5 of the 8 analog pins exposed:

    Thus, it's possible that an analog method for sensing the rotor orientation...

    Read more »

  • [M] Magnetic interference with ferrite toroids

    kelvinA3 days ago 0 comments

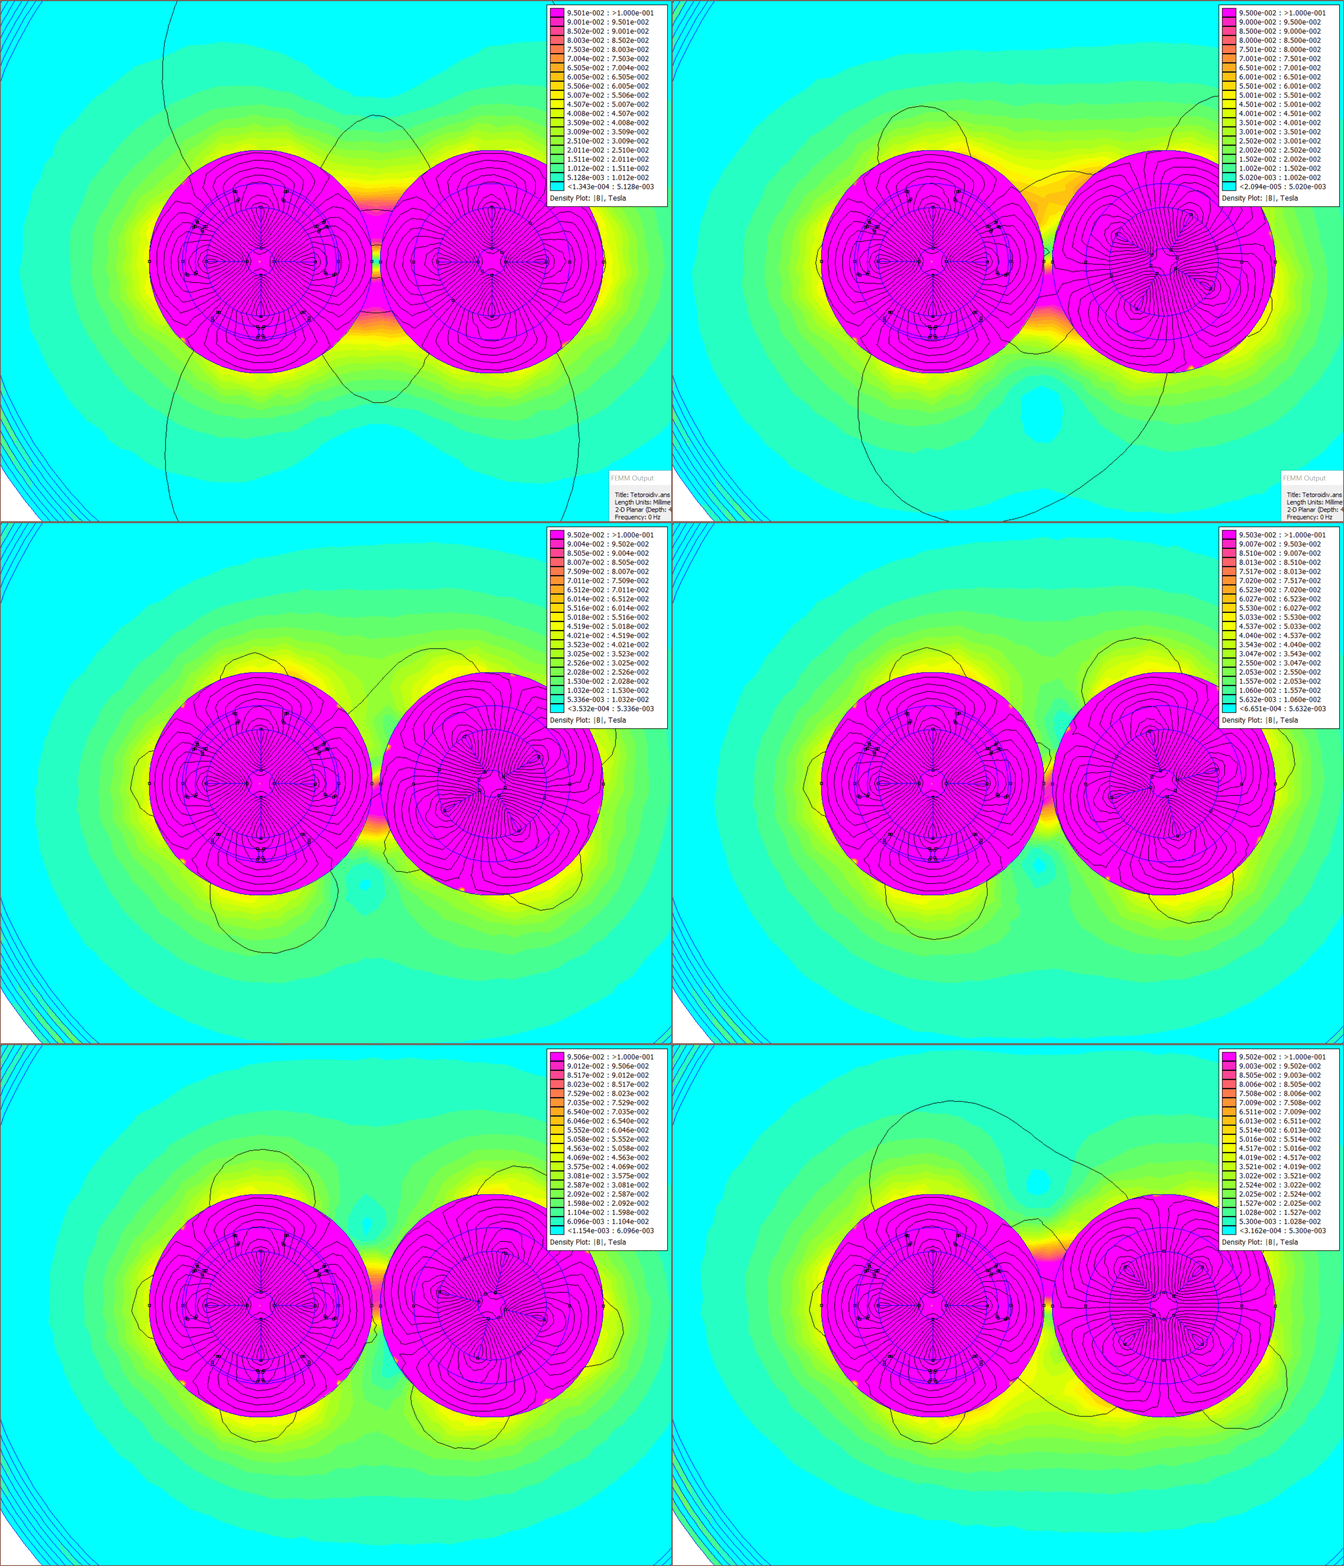
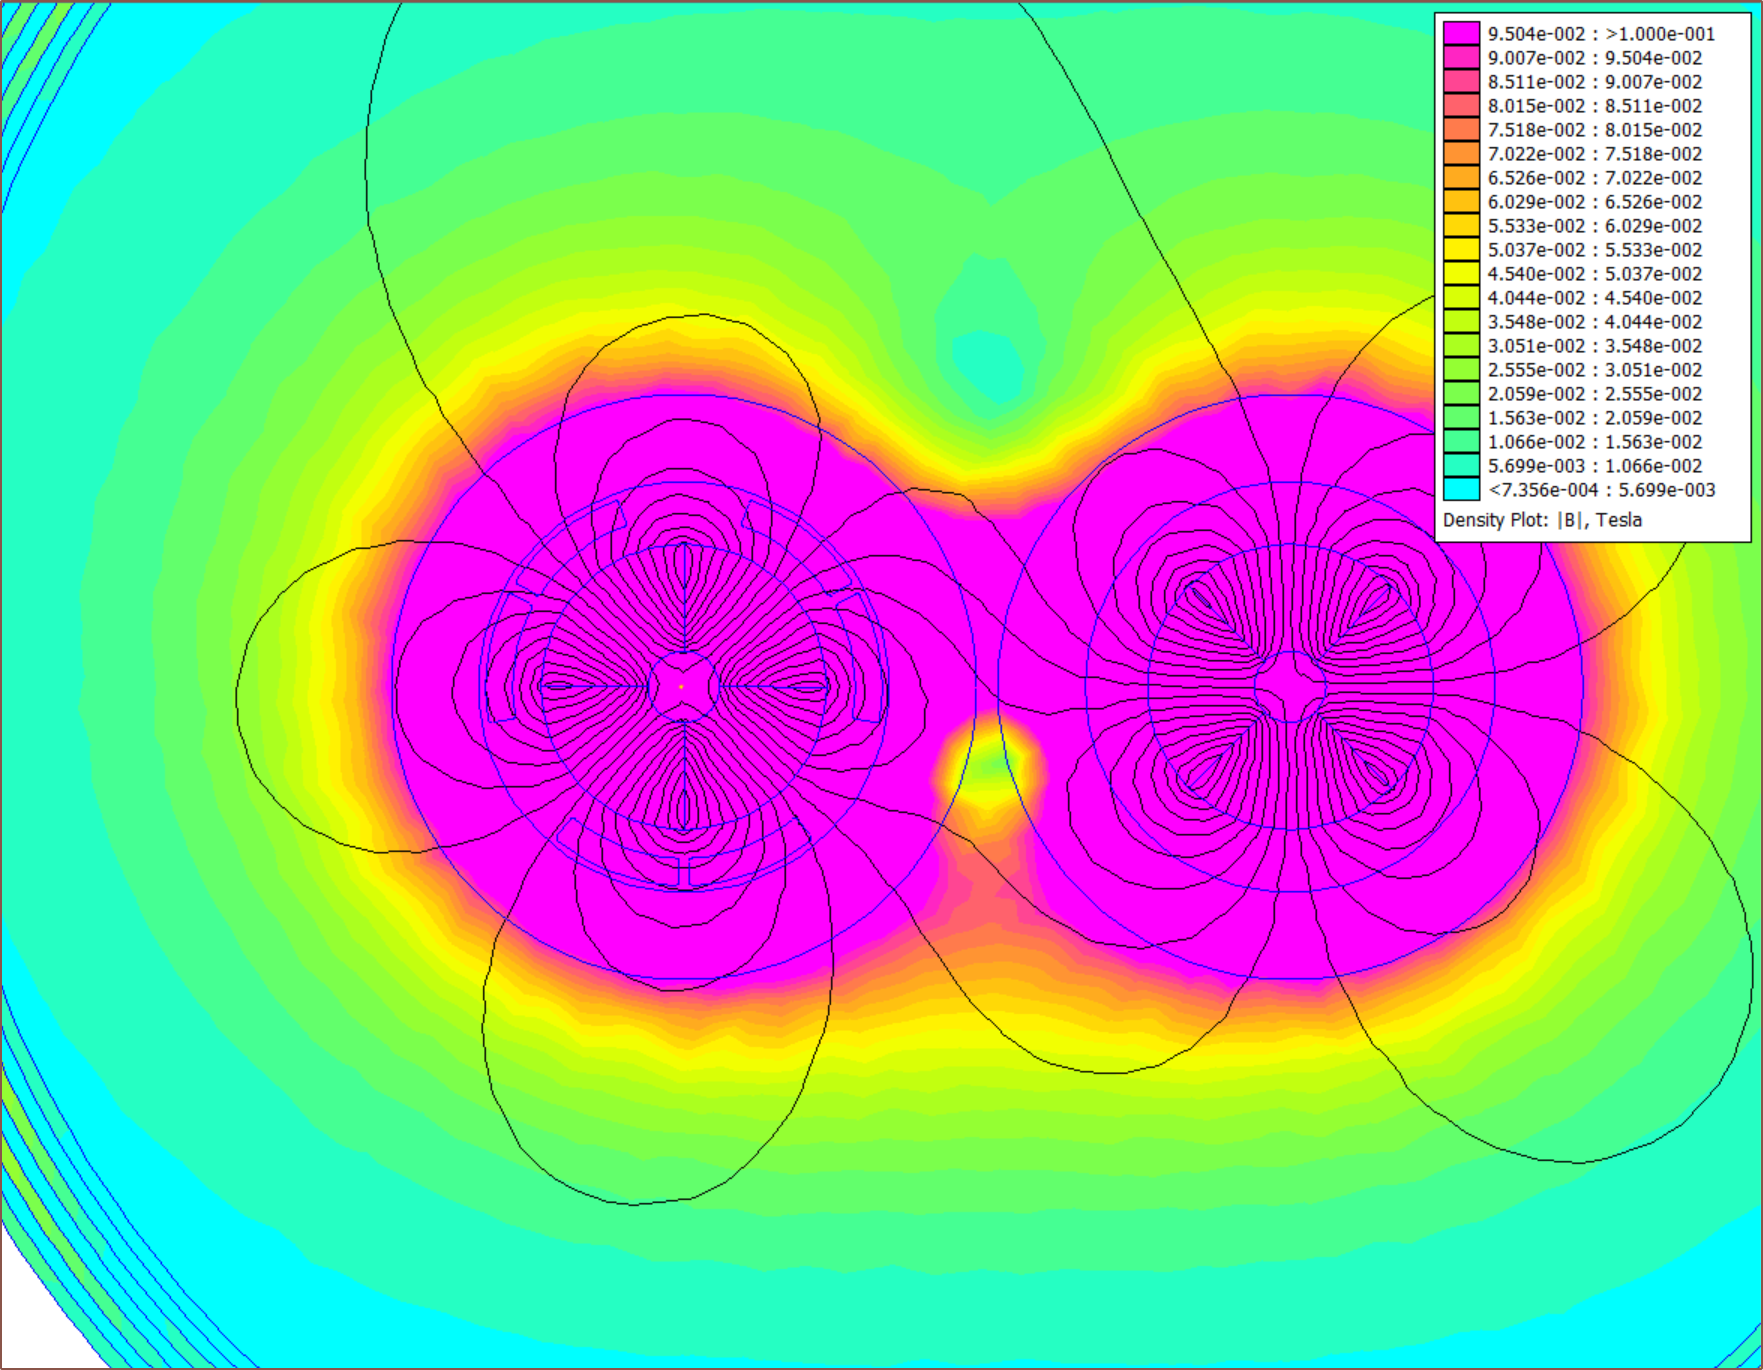
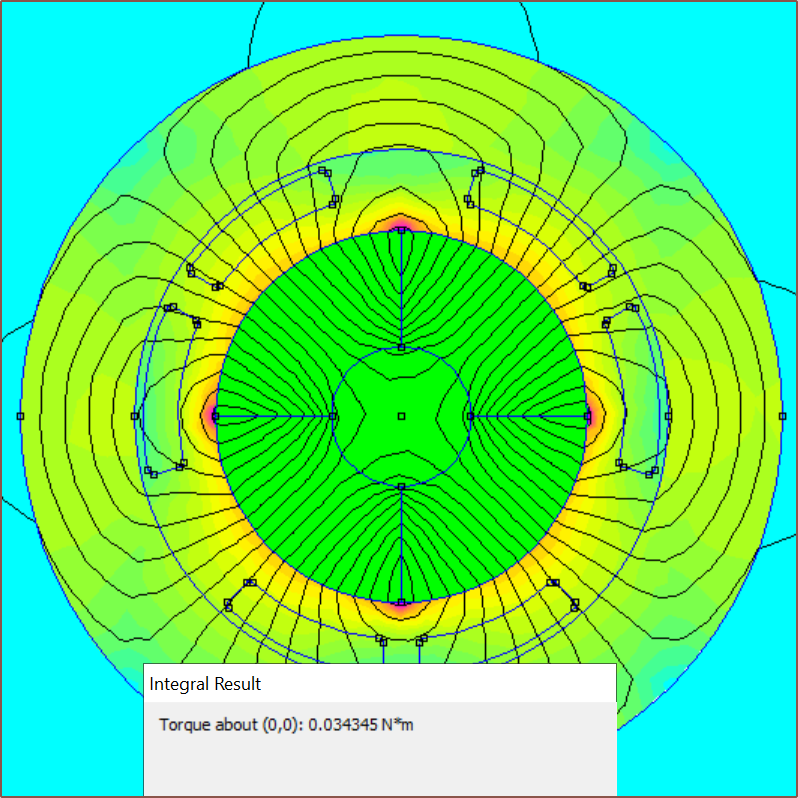
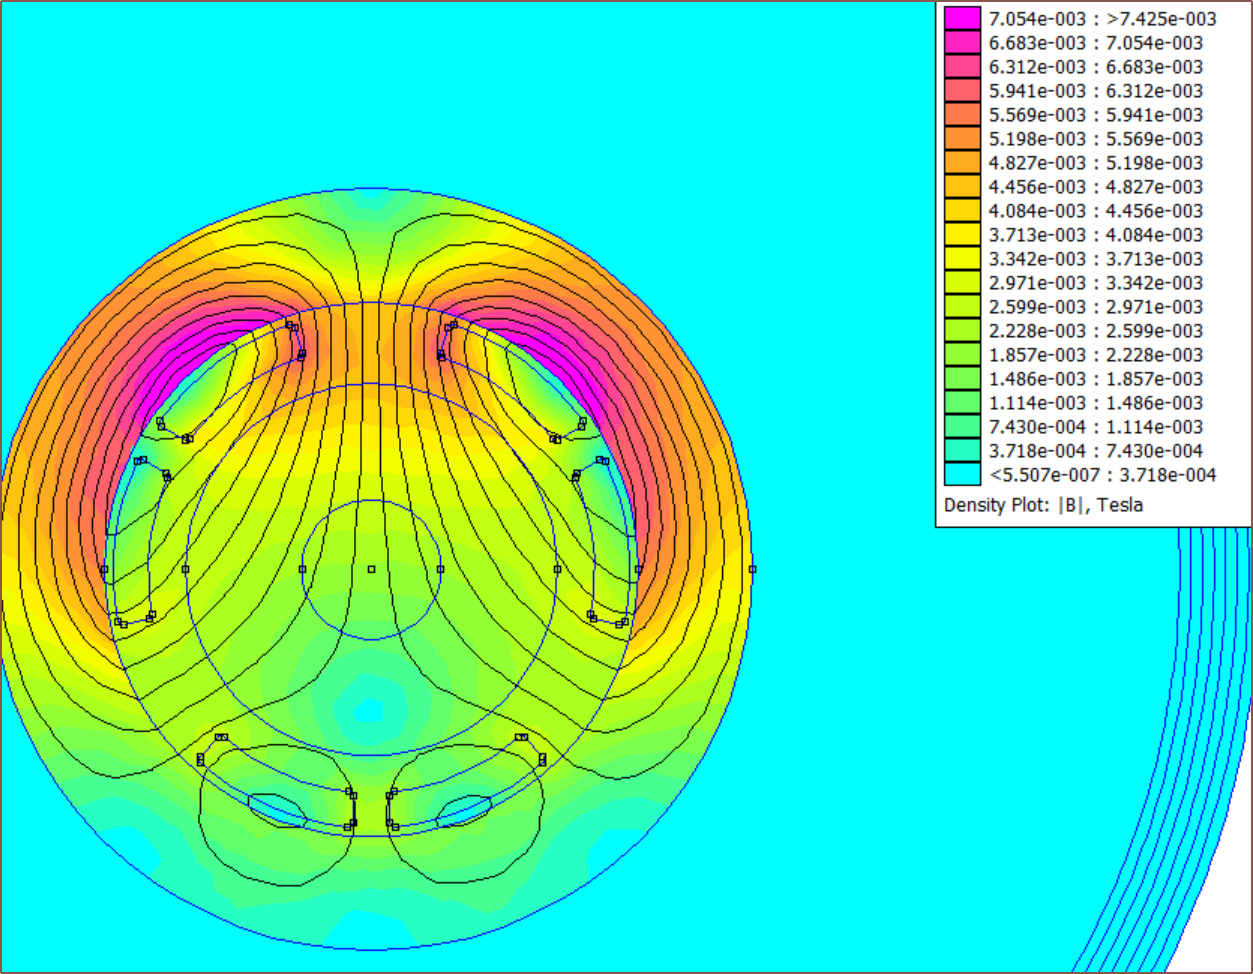
    Unlike the original simulation, the actual motors are not by themselves in free space and I was wondering if the magnetic field outside the motor was going to cause issues. It does. Below are screenshots in steps of 15 degrees for a rotor with a 17mm centre-to-centre distance:

    The colours have been capped os that anything over 1000 gauss is purple. I also got torque values and the fluctuation was a very significant: 26.0 +/- 6 mN.m. 

    I decided to see what "M-22" laminations would be, as mentioned in the BLDC FEMM tutorial, and the difference is massive:

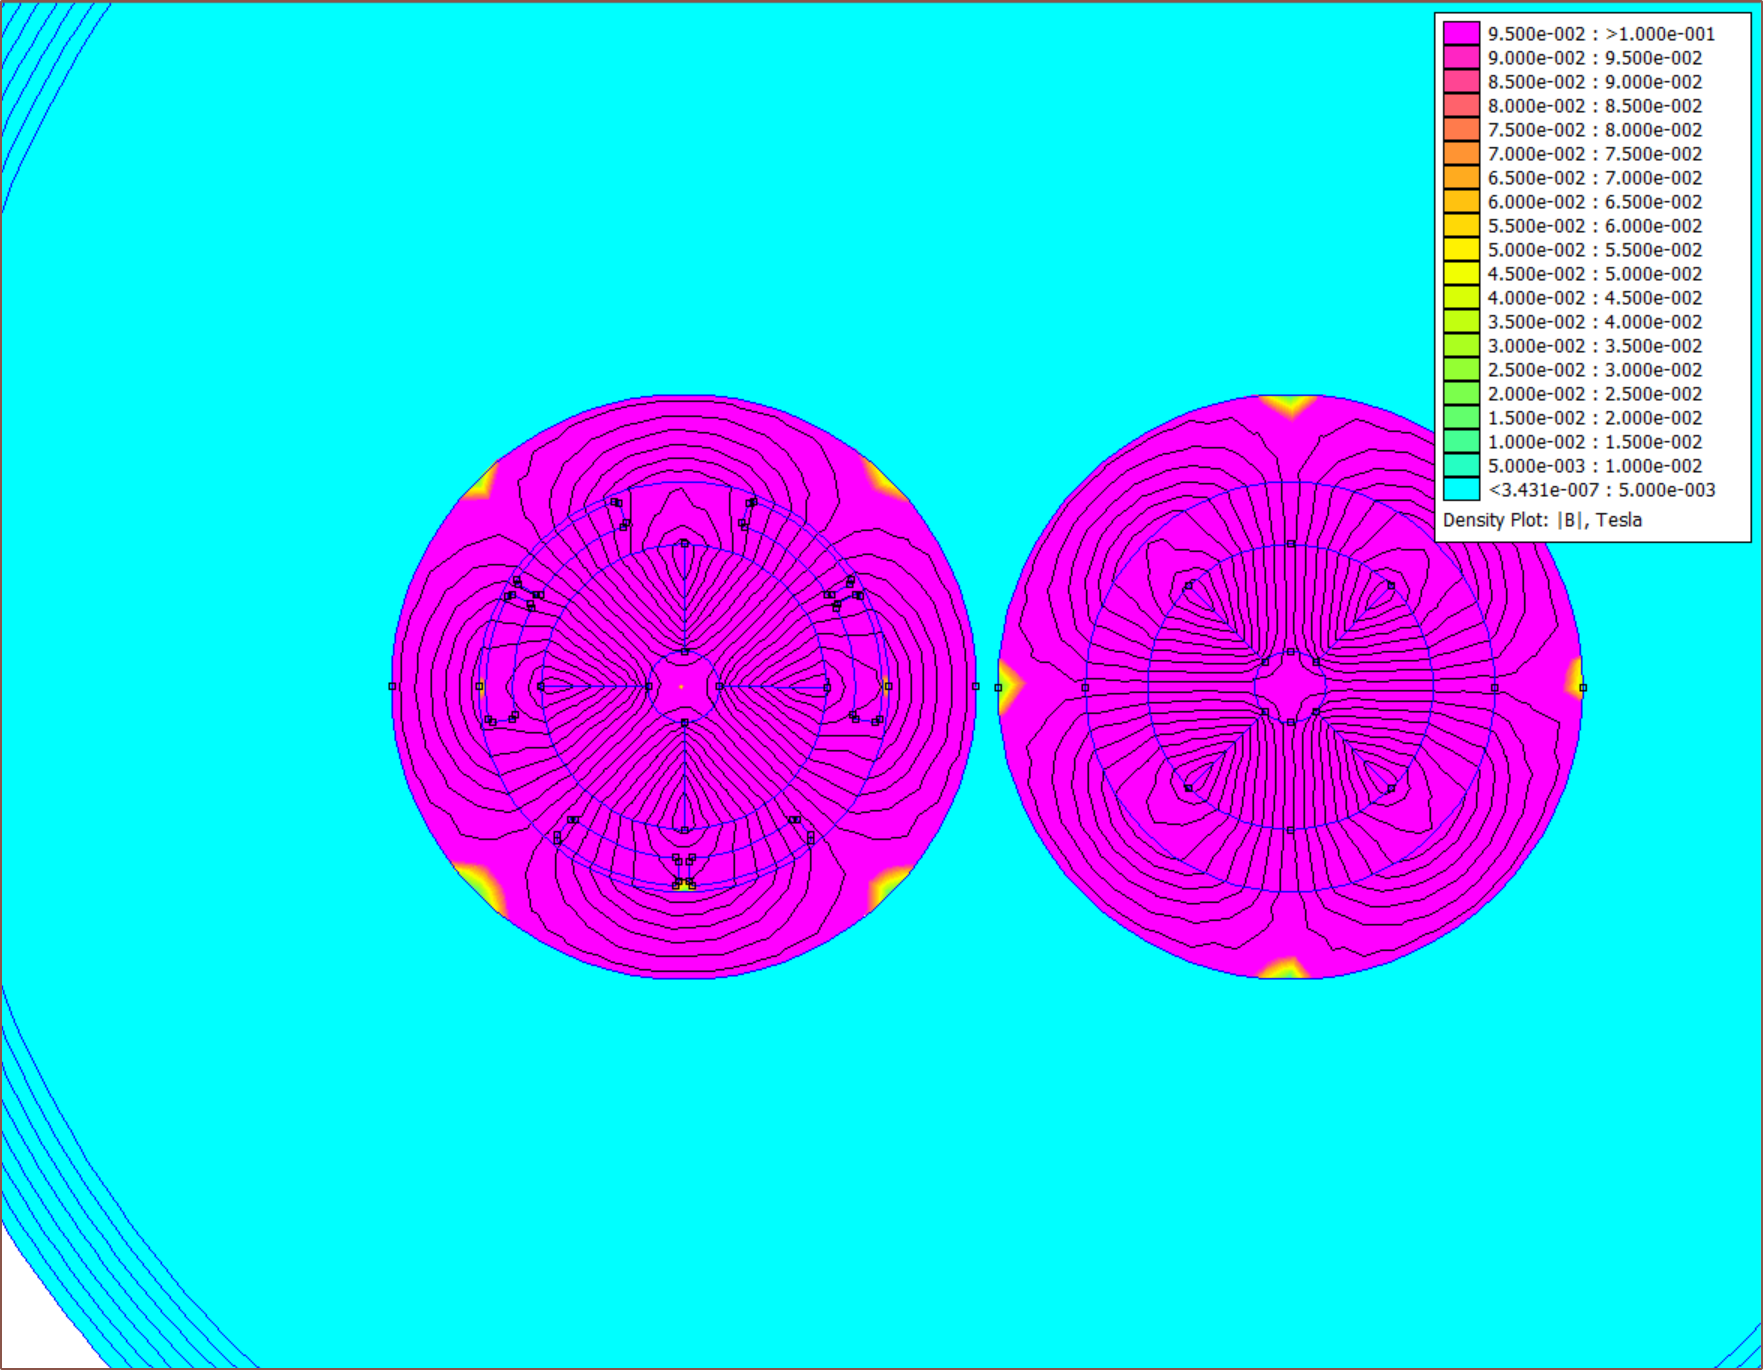
    The flux is completely contained and the torque about the rotor is 29.8 mN.m. At least I know that the ferrite toroids can get 87% the torque of proper laminations but leaks a magnetic field. 

    This is in utter contrast to the stainless steel 304 tube idea:

  • [R] 1642 brushed motor?

    kelvinA4 days ago 0 comments

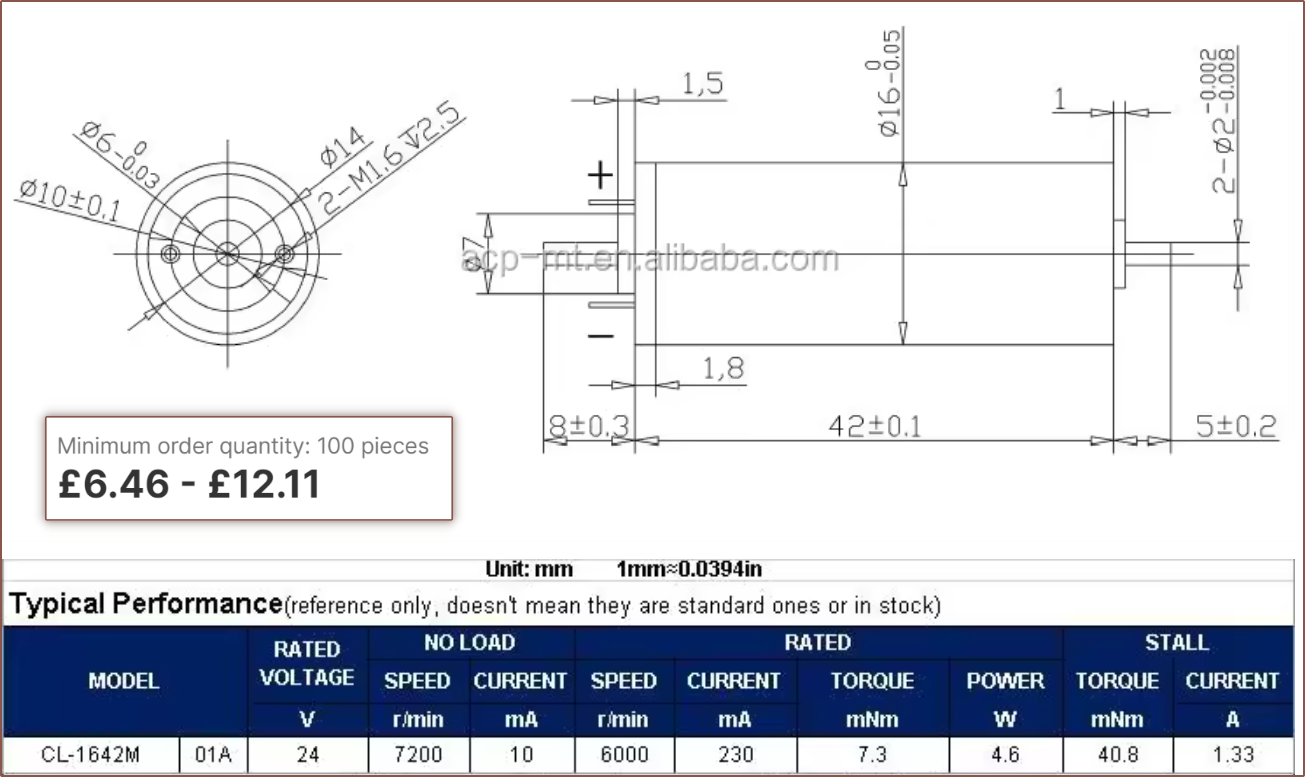
    I have looked into brushed motors (shown as copper-coloured lines) since their control requirements are much lower, and the CL-1642M motor is the most ideal assuming that the resistance of the coils can be calculated as [rated voltage] / [stall current]:

    The reason why it's ideal is because it has a 2mm dual shaft, making it straightforward to add both a magnetic encoder and POM gear, as well as using the lowest power out of all the commercial offerings.

    The main downside is that the supplier doesn't sell samples at all.

  • [B] Custom rotor

    kelvinA5 days ago 0 comments

    When I was searching for suppliers for the 4-pole rotor magnet, ABM Magnetics unexpectedly offered to create the entire rotor during conversation. Another thing that the engineers suggested was to split the rotor magnet (which was 58mm at the time, before the new 7.2 : 1 reduction):

    I communicated with our engineers and our suggestion is to divide the 58mm long magnet into 3 equal sections for the following reasons:

    1. Because the size of the magnet is OD8, ID3mm, and length is 58mm, the magnet is easily broken during processing;

    2. Dividing the magnet into three sections can reduce eddy currents and reduce the power consumption of the motor.
     

    When the magnet was shortened to 42mm, I suggested that the rotor be made from 8 magnets total (2 equal sections of 4 magnets). They're also planning to install the bearings too, so the complete solution would look something like this:

    They never mentioned price until today (I was thinking that it was going to be in the thousands but I'll stick around for the conversation anyway), but it's actually $16/rotor for 10pcs. I haven't asked about shipping price but I'm assuming it's another $50 on top.

    It seems every motor option for "new" and not "new old stock from AliExpress" is going to be £20/motor and up, and the DIY Tetoroidiv probably would be no exception since everything else about the motor (3D print, toroids and coils) cost pennies. The 5 toroids needed probably amount to £1 total, and even when printing in £40/kg PBT, I'm not sure that the overmould would even scratch 10p in cost.

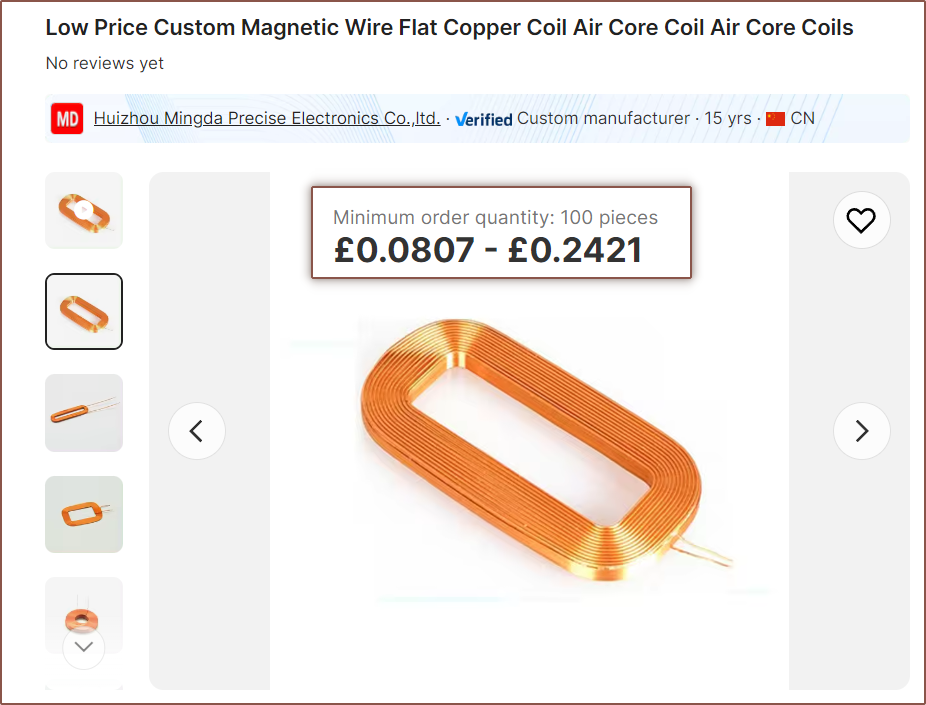
    I'm also seeing if there is a possibility that I could acquire and use air-coils instead of having to coil at home.

  • New motors for the 7.2 : 1 reducer

    kelvinA05/07/2024 at 13:25 0 comments

    As mentioned in this log, I need to go out and start looking for and designing shorter motors. This log describes what candidates I've found so far.

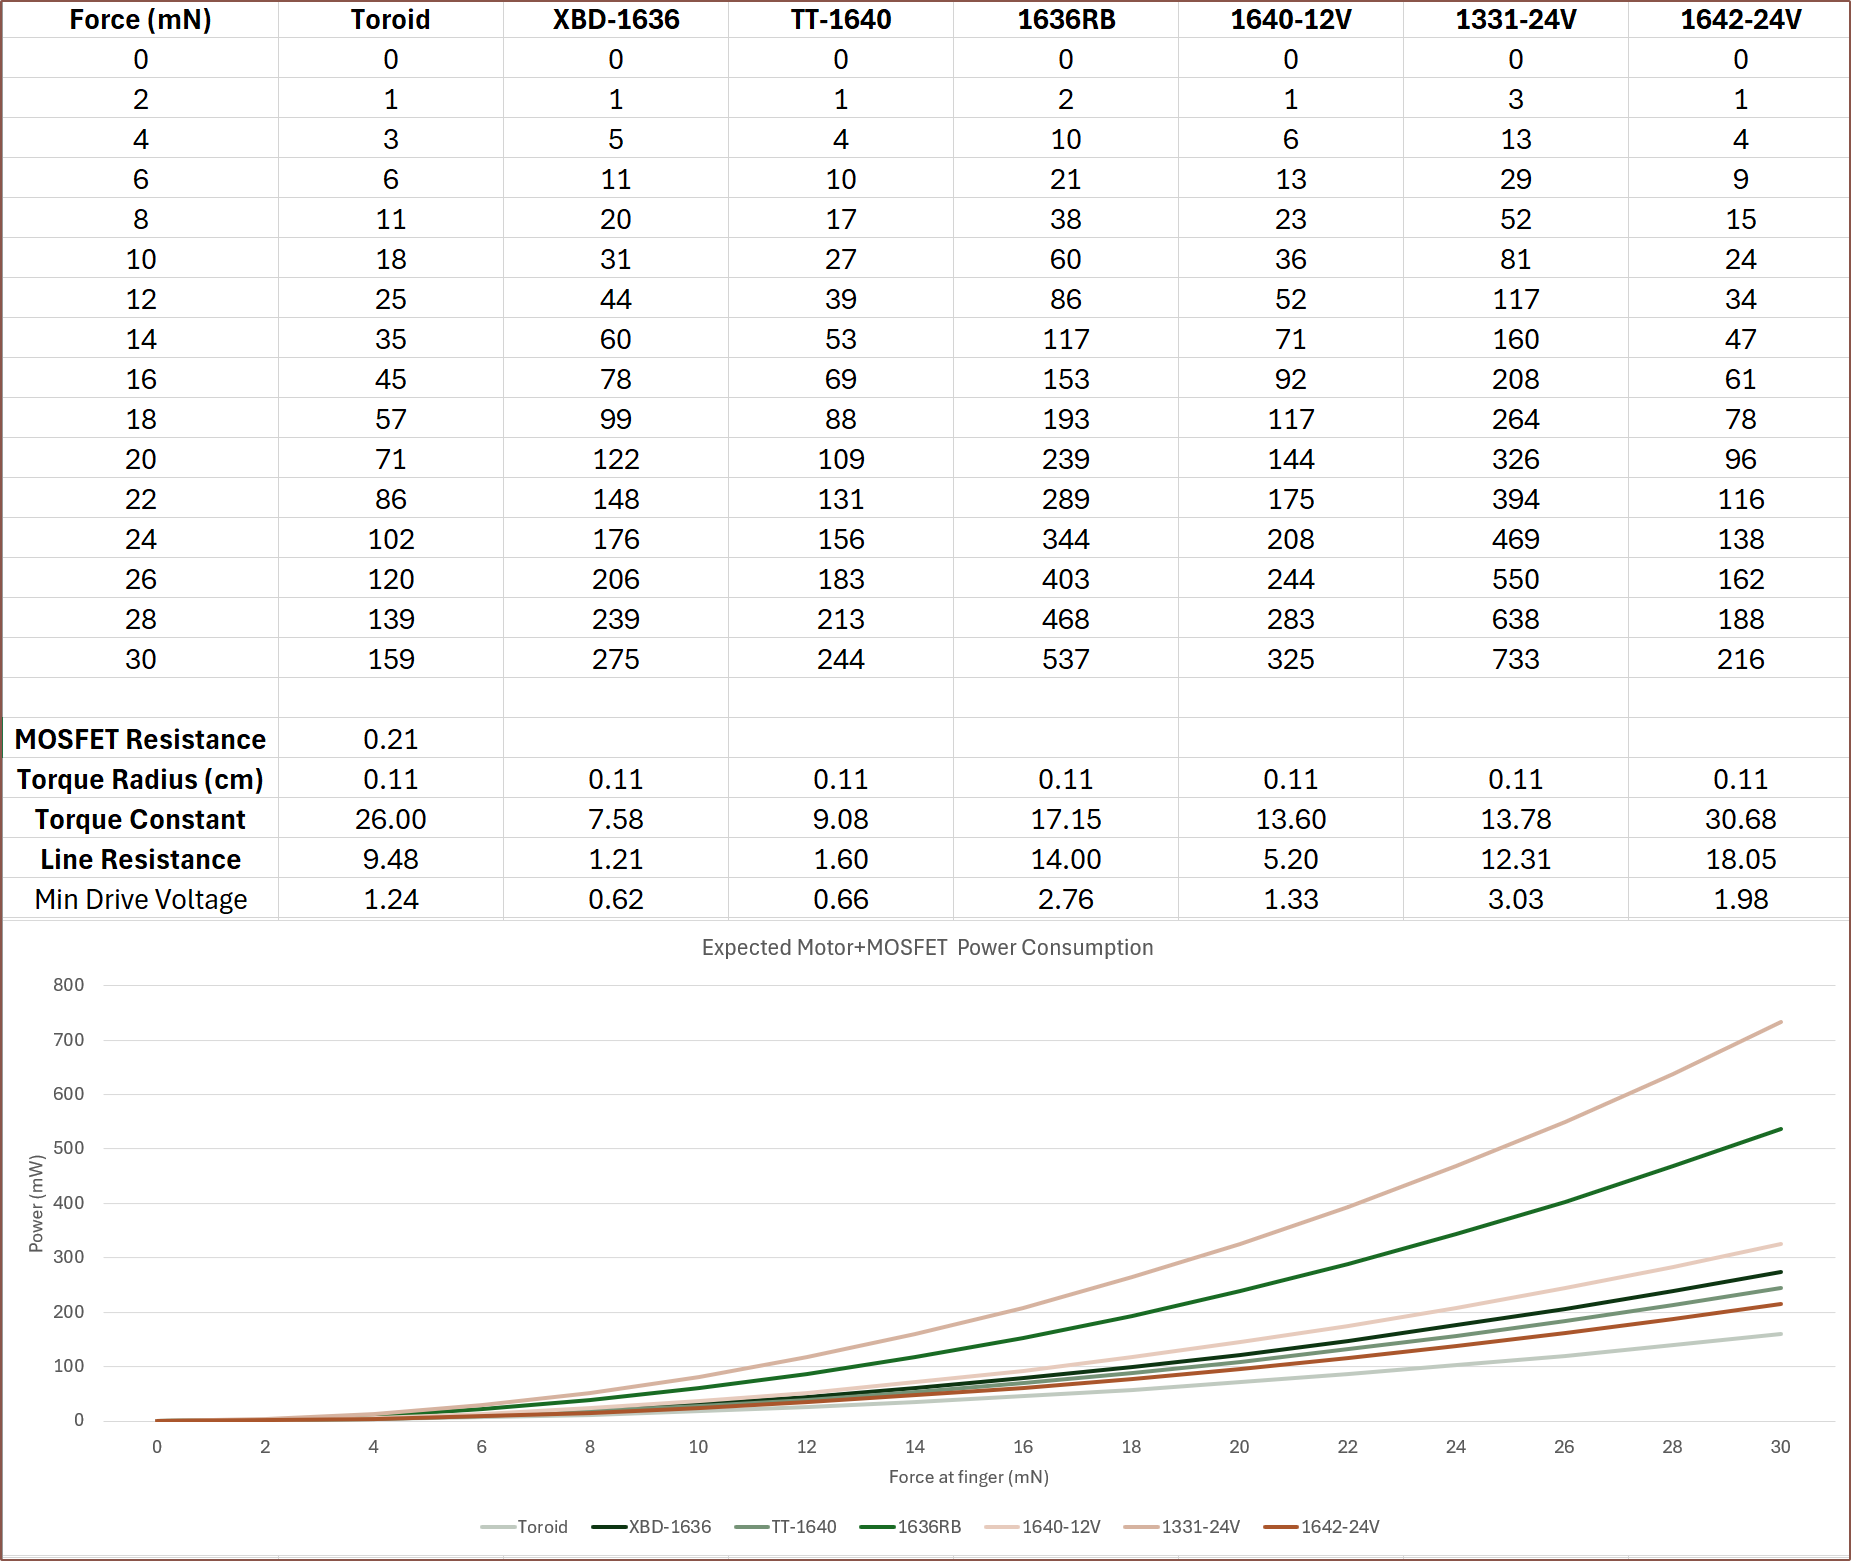
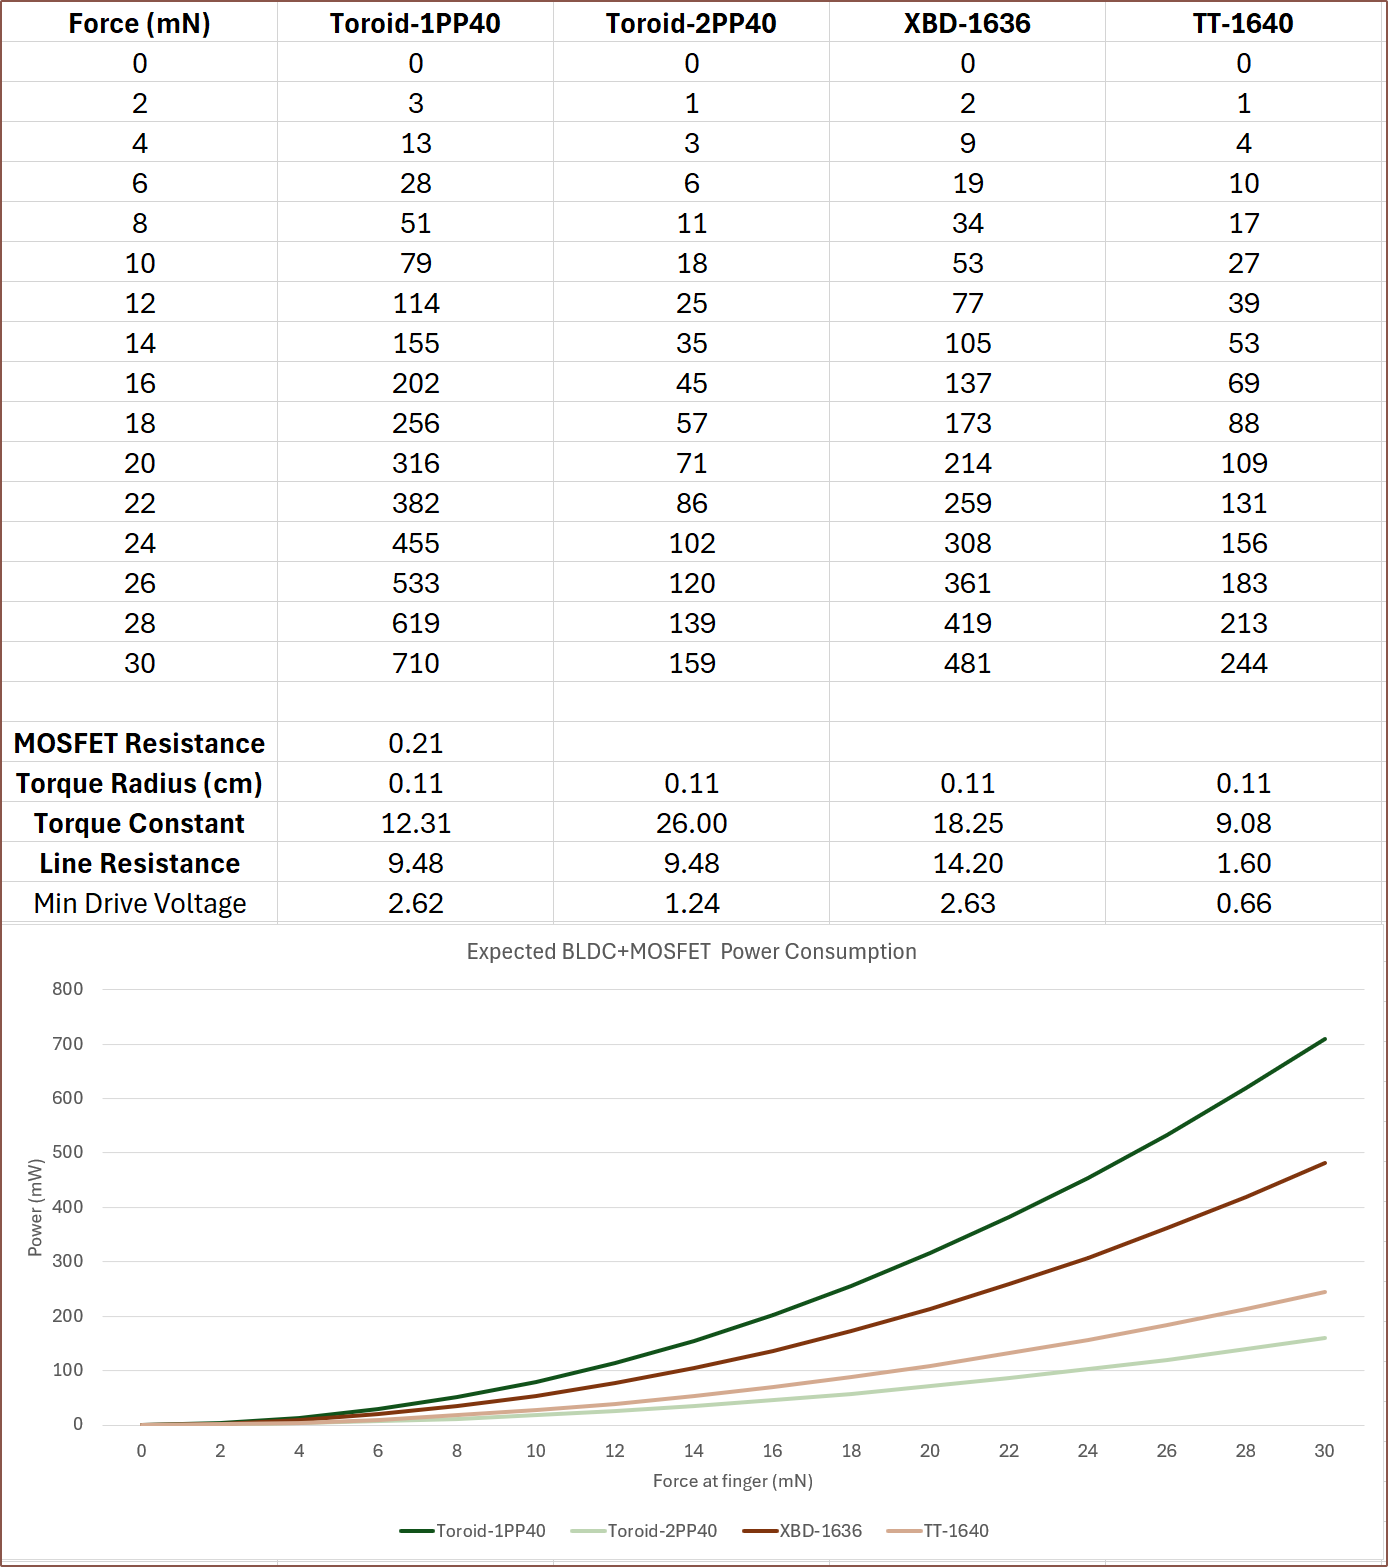
    I'm now getting under 1W of power for all shortlisted motors. If these numbers are actually accurate, it means that a solar powered Tetrescent would make sense:

    DIY Toroid

    As you can see, the difference between one pole pair and two is the difference between being the worst or best in the lineup. I have yet to see if reducing the wire diameter to 0.15mm would be worthwhile.

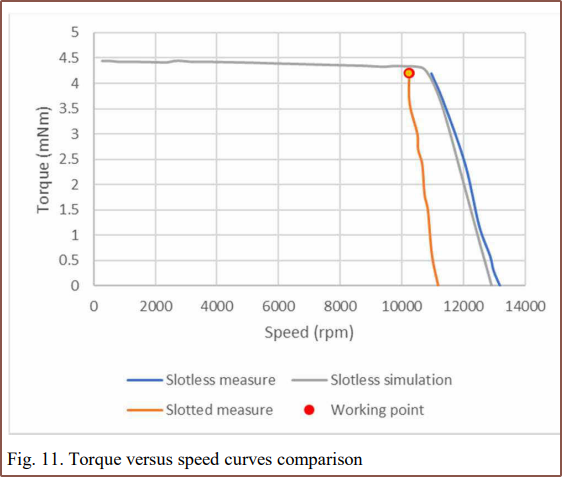
    There's also this graph from the paper:

    What I understand is that the flat part of the curve is current limited for continuous operation, and I believe that this relates to power dissipation. If I extrapolate and calculate the 0RPM wattage, I get 712mW. Considering that this DIY motor has a lower diameter and higher length, I'm assuming that it would have a better surface area : volume ratio and so its power dissipation would be at least on par with the one created by the authors. Hence, it should be possible that all these motors should be able to produce 300gf on the belt continuously.

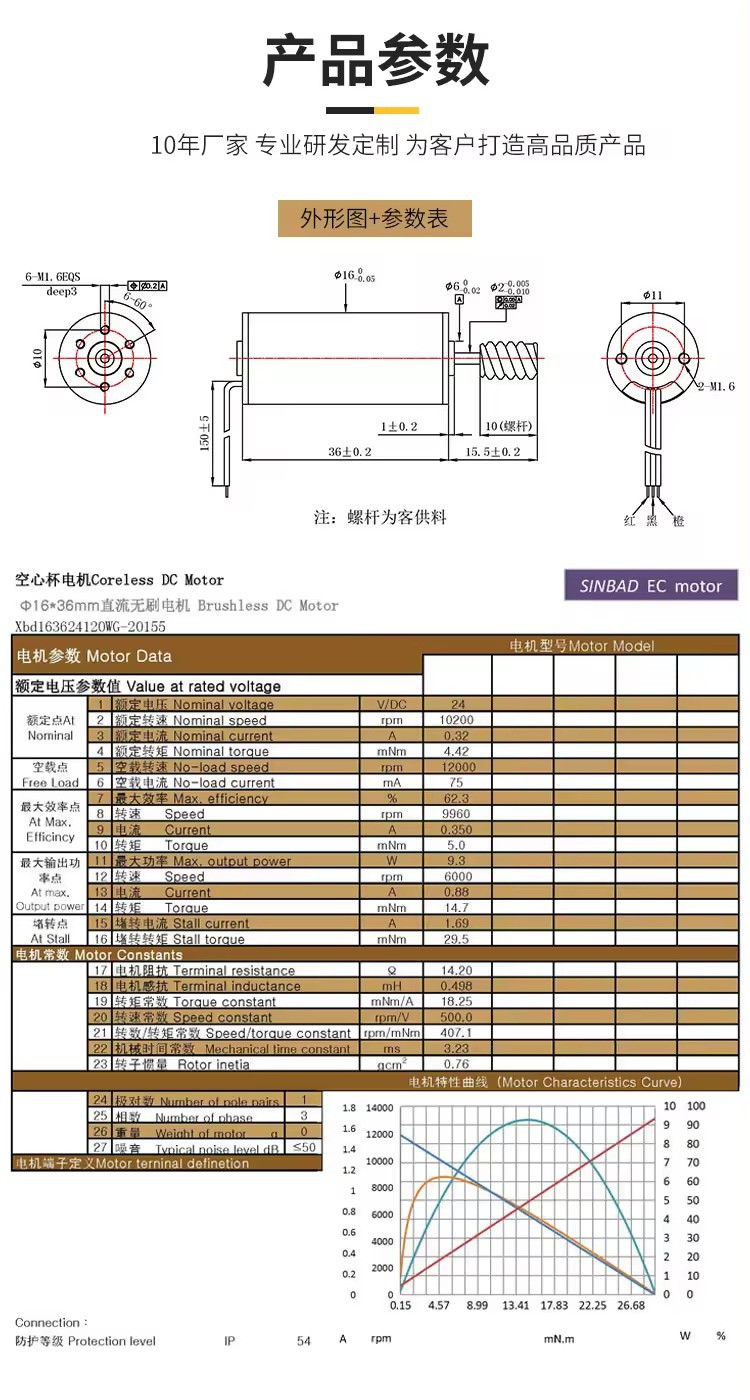
    XBD-1636

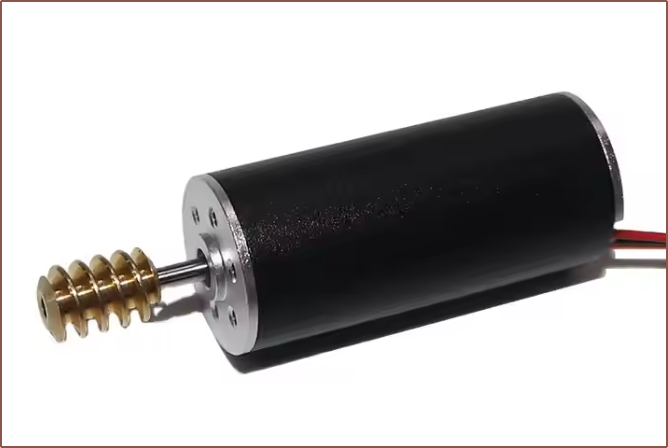
    It's another Sinbad Motors offering that has a worm gear on it. I might be able to ask them to remove it, but it's not like I'm in a rush due to the listing saying it's £28/ea (and the actual price is likely higher). 

    TT-1640-24V

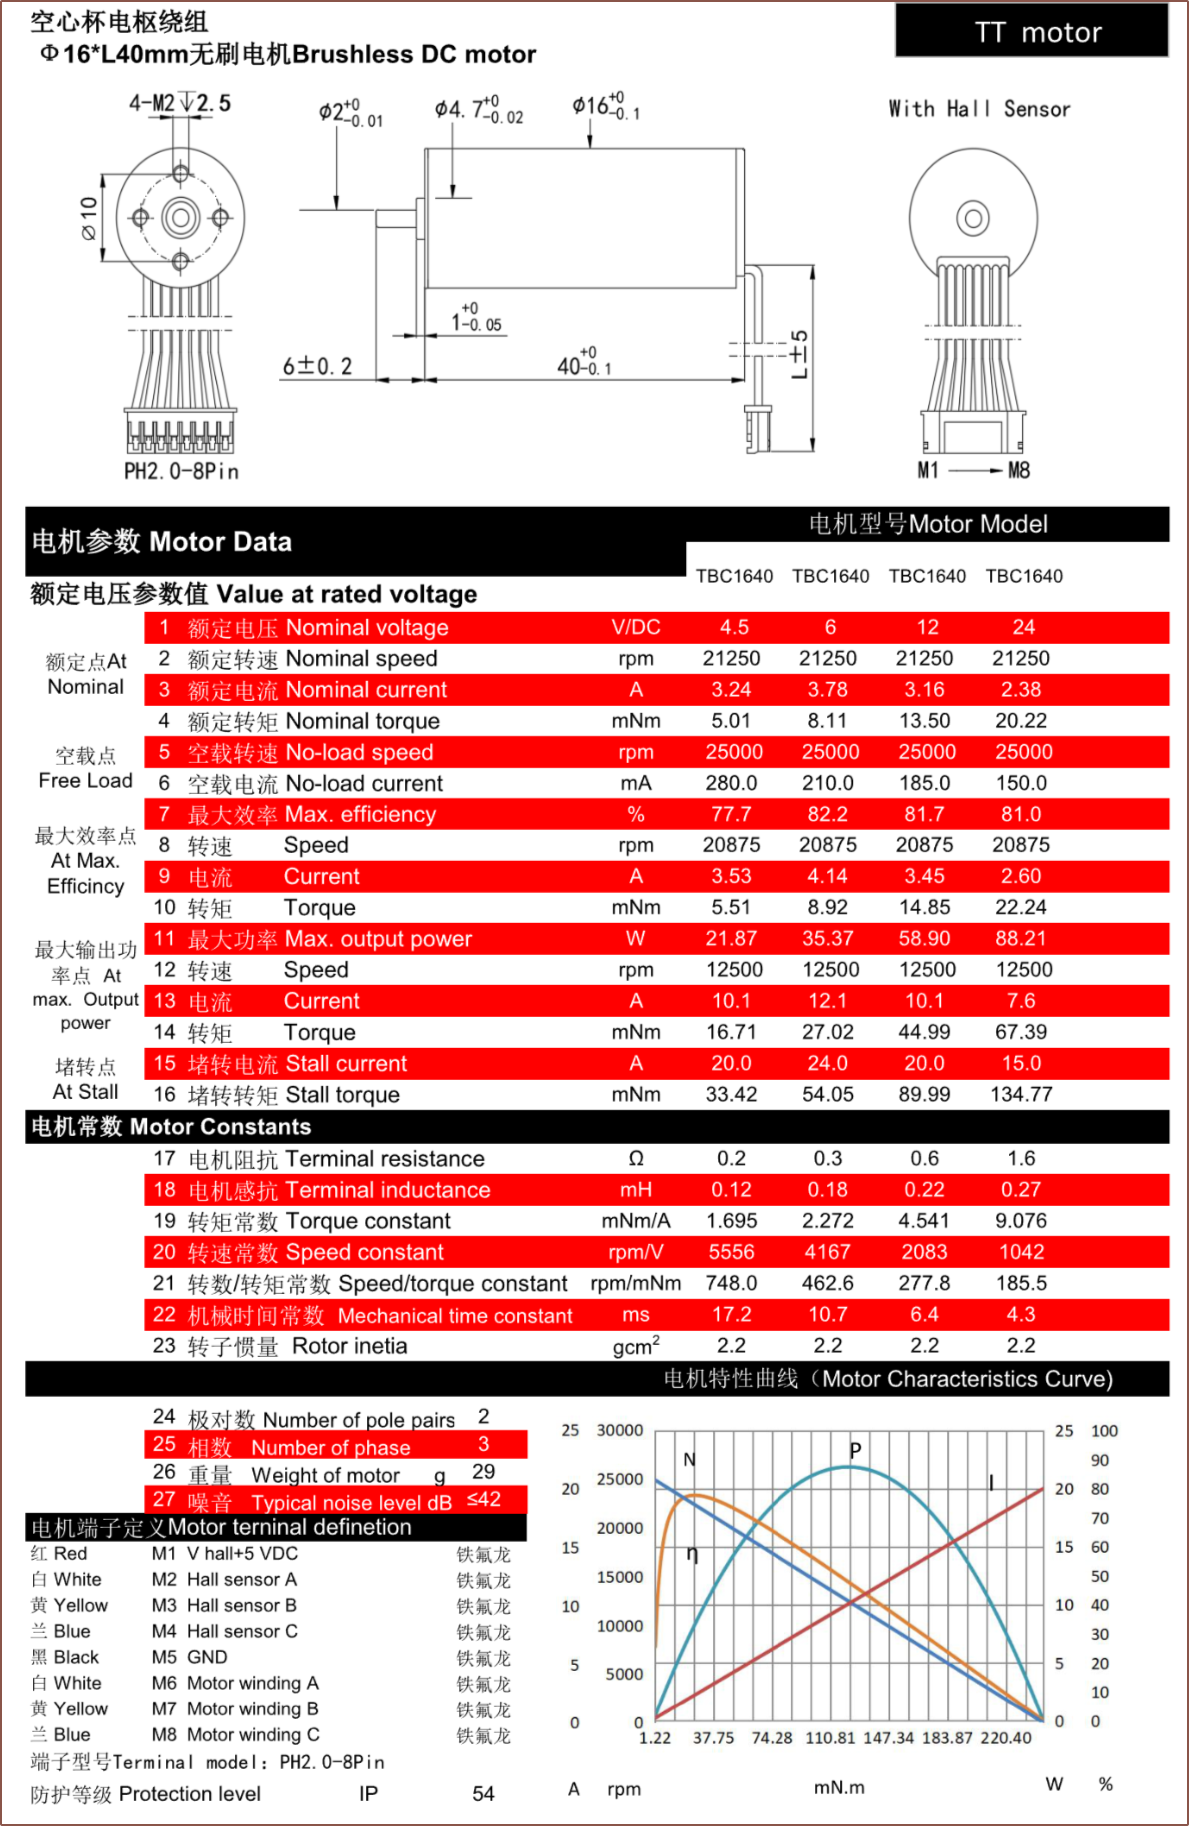
    So I once again asked TT motors for information regarding a 1636 motor, and I got a datasheet for a different motor lineup. Maybe it's the same thing just ever so slightly longer:

    I don't know why they didn't put this handy page in any of their listings. The 24V model was easily the best option, and from calculations, I'd only need a quarter of a watt to get the max desired force output.

    It's not all great though. It's $22 per motor.

    What about brushed motors?

    I was curious to see, since there are more brushed motors in this size range. Well, most of them have a gearing on them (17 : 1 and up) and power requirements that were too high. Even the best option I found, which didn't have gearing and had a handy double-shaft so that I could attach a magnet to the other side, used over 2.5W:

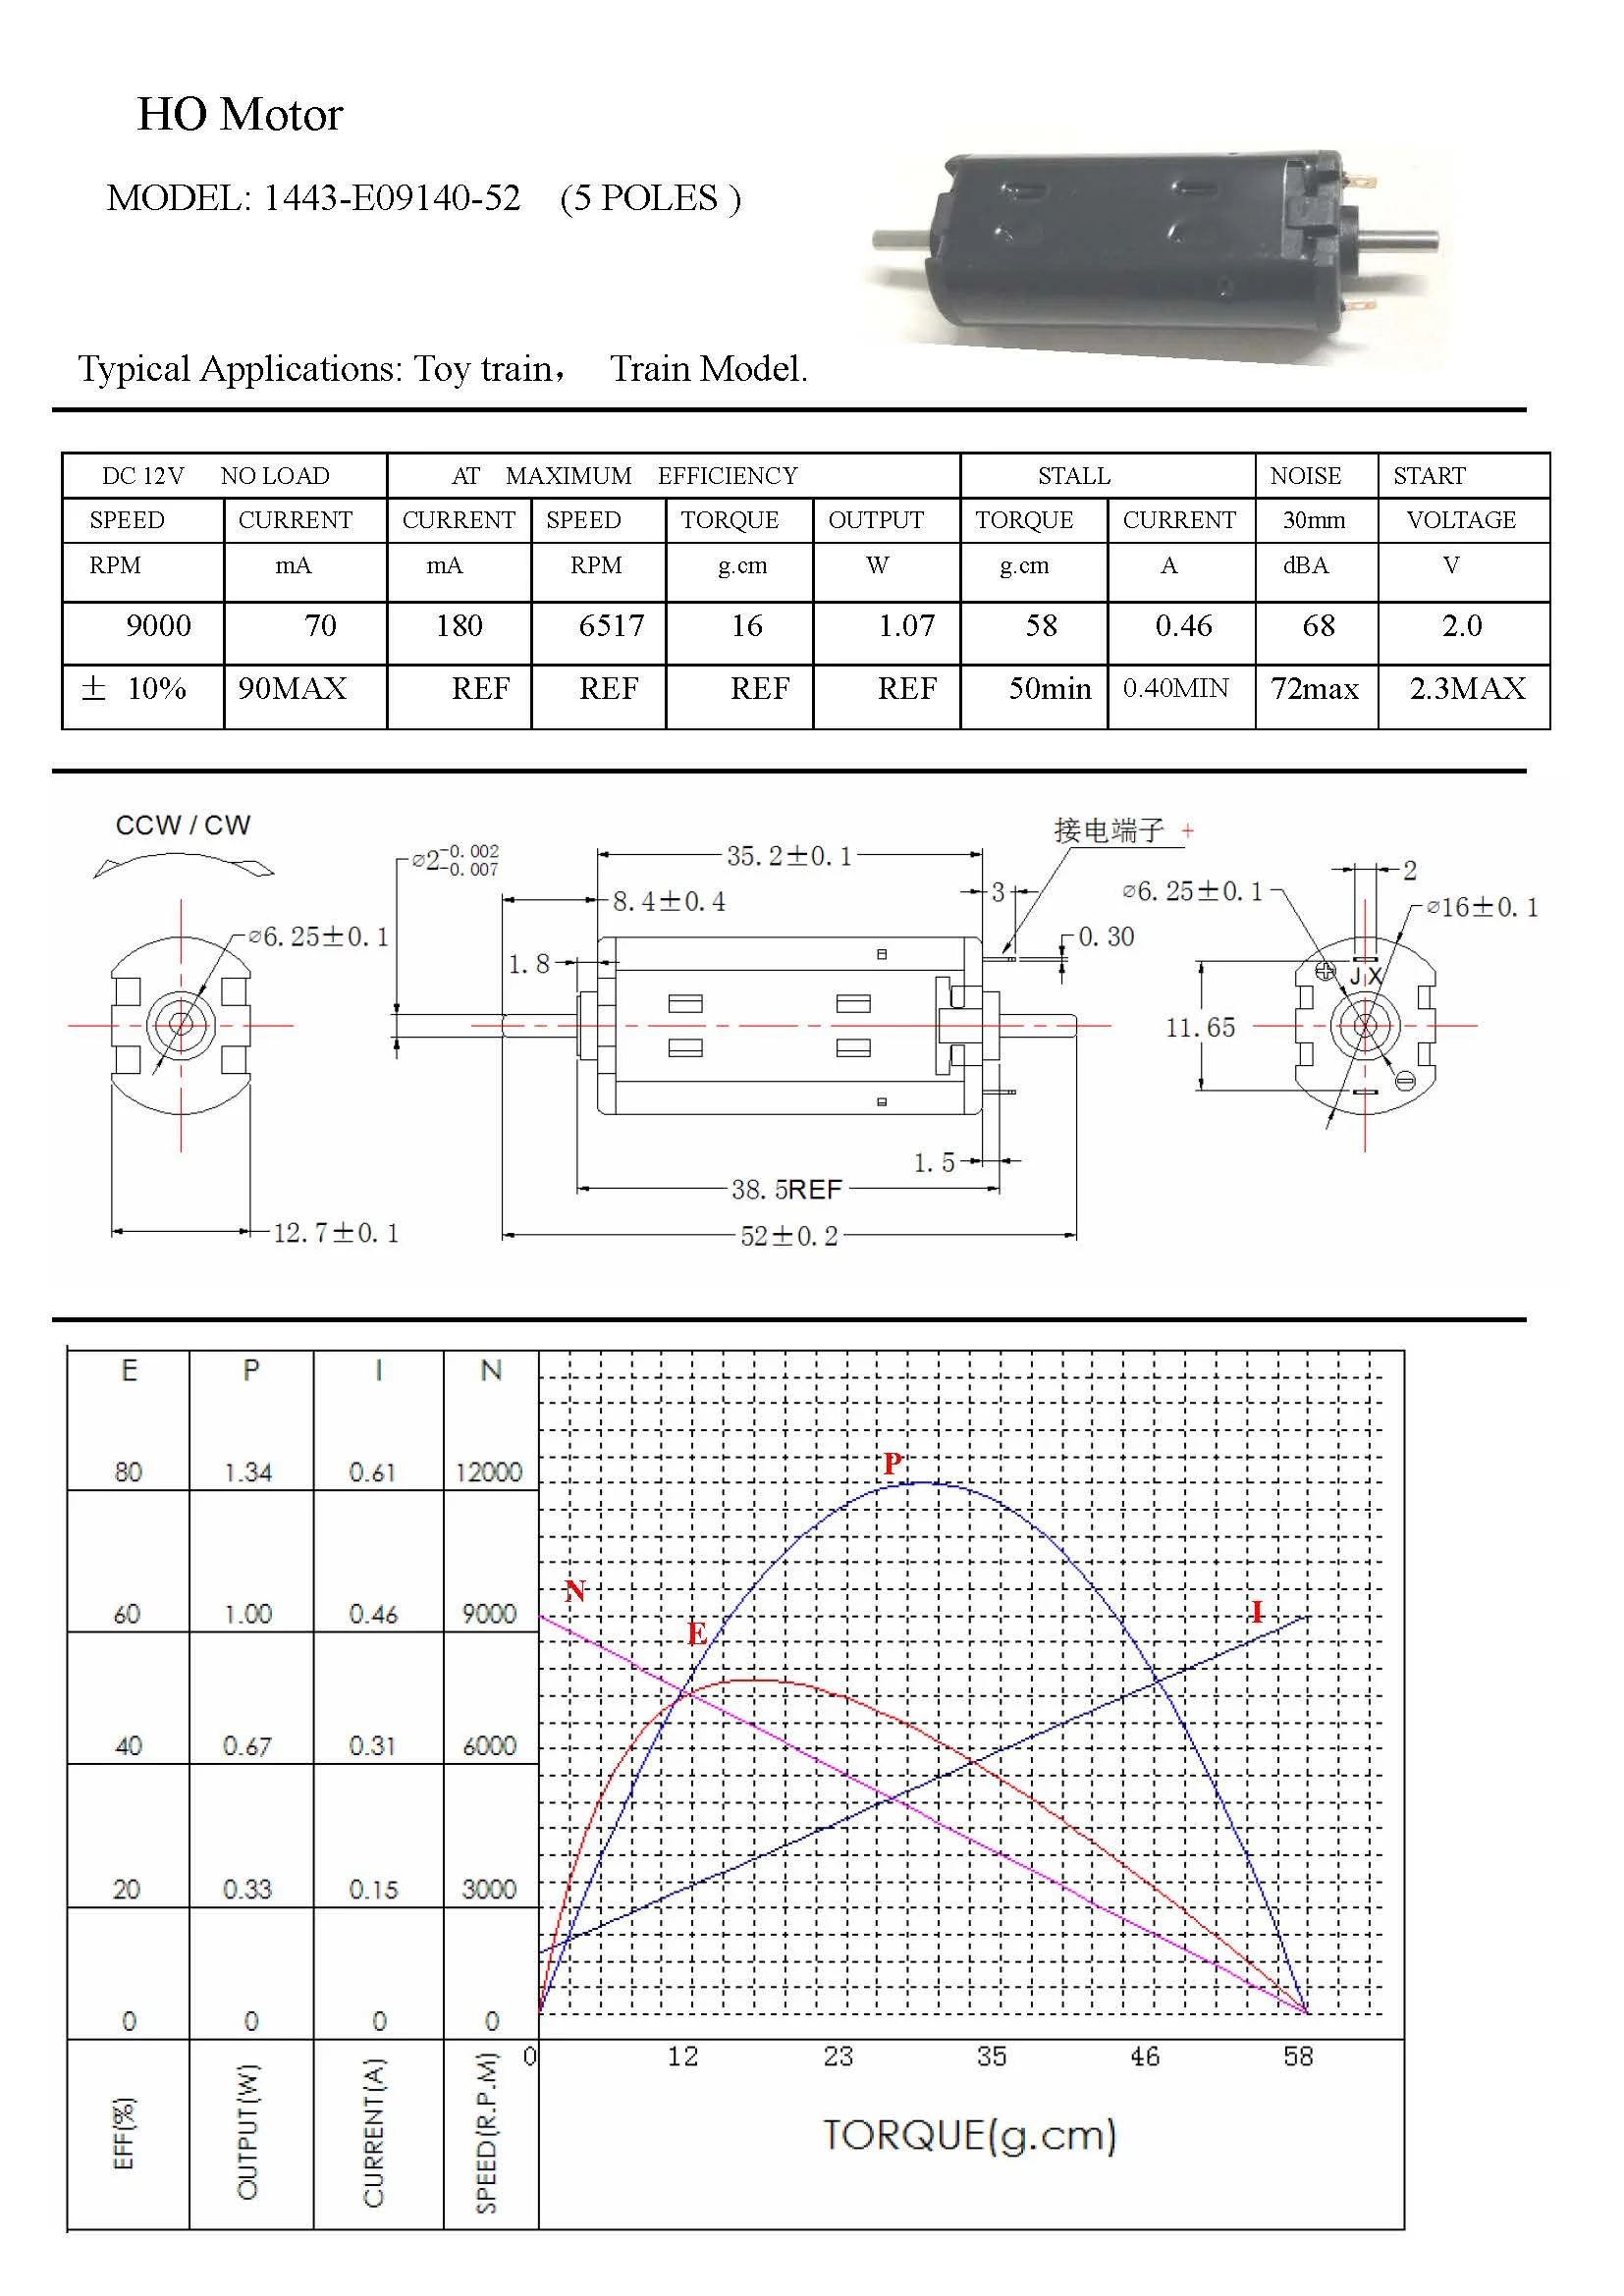
    1443-E09140-52, 5-pole brushed motor

    It actually took some digging to find the datasheet for this motor. I actually just found a typical AliExpress listing that just had cool images, like this one of it's skewed rotor:

  • [M] Slotless motor FEMM simulation

    kelvinA05/07/2024 at 11:56 0 comments

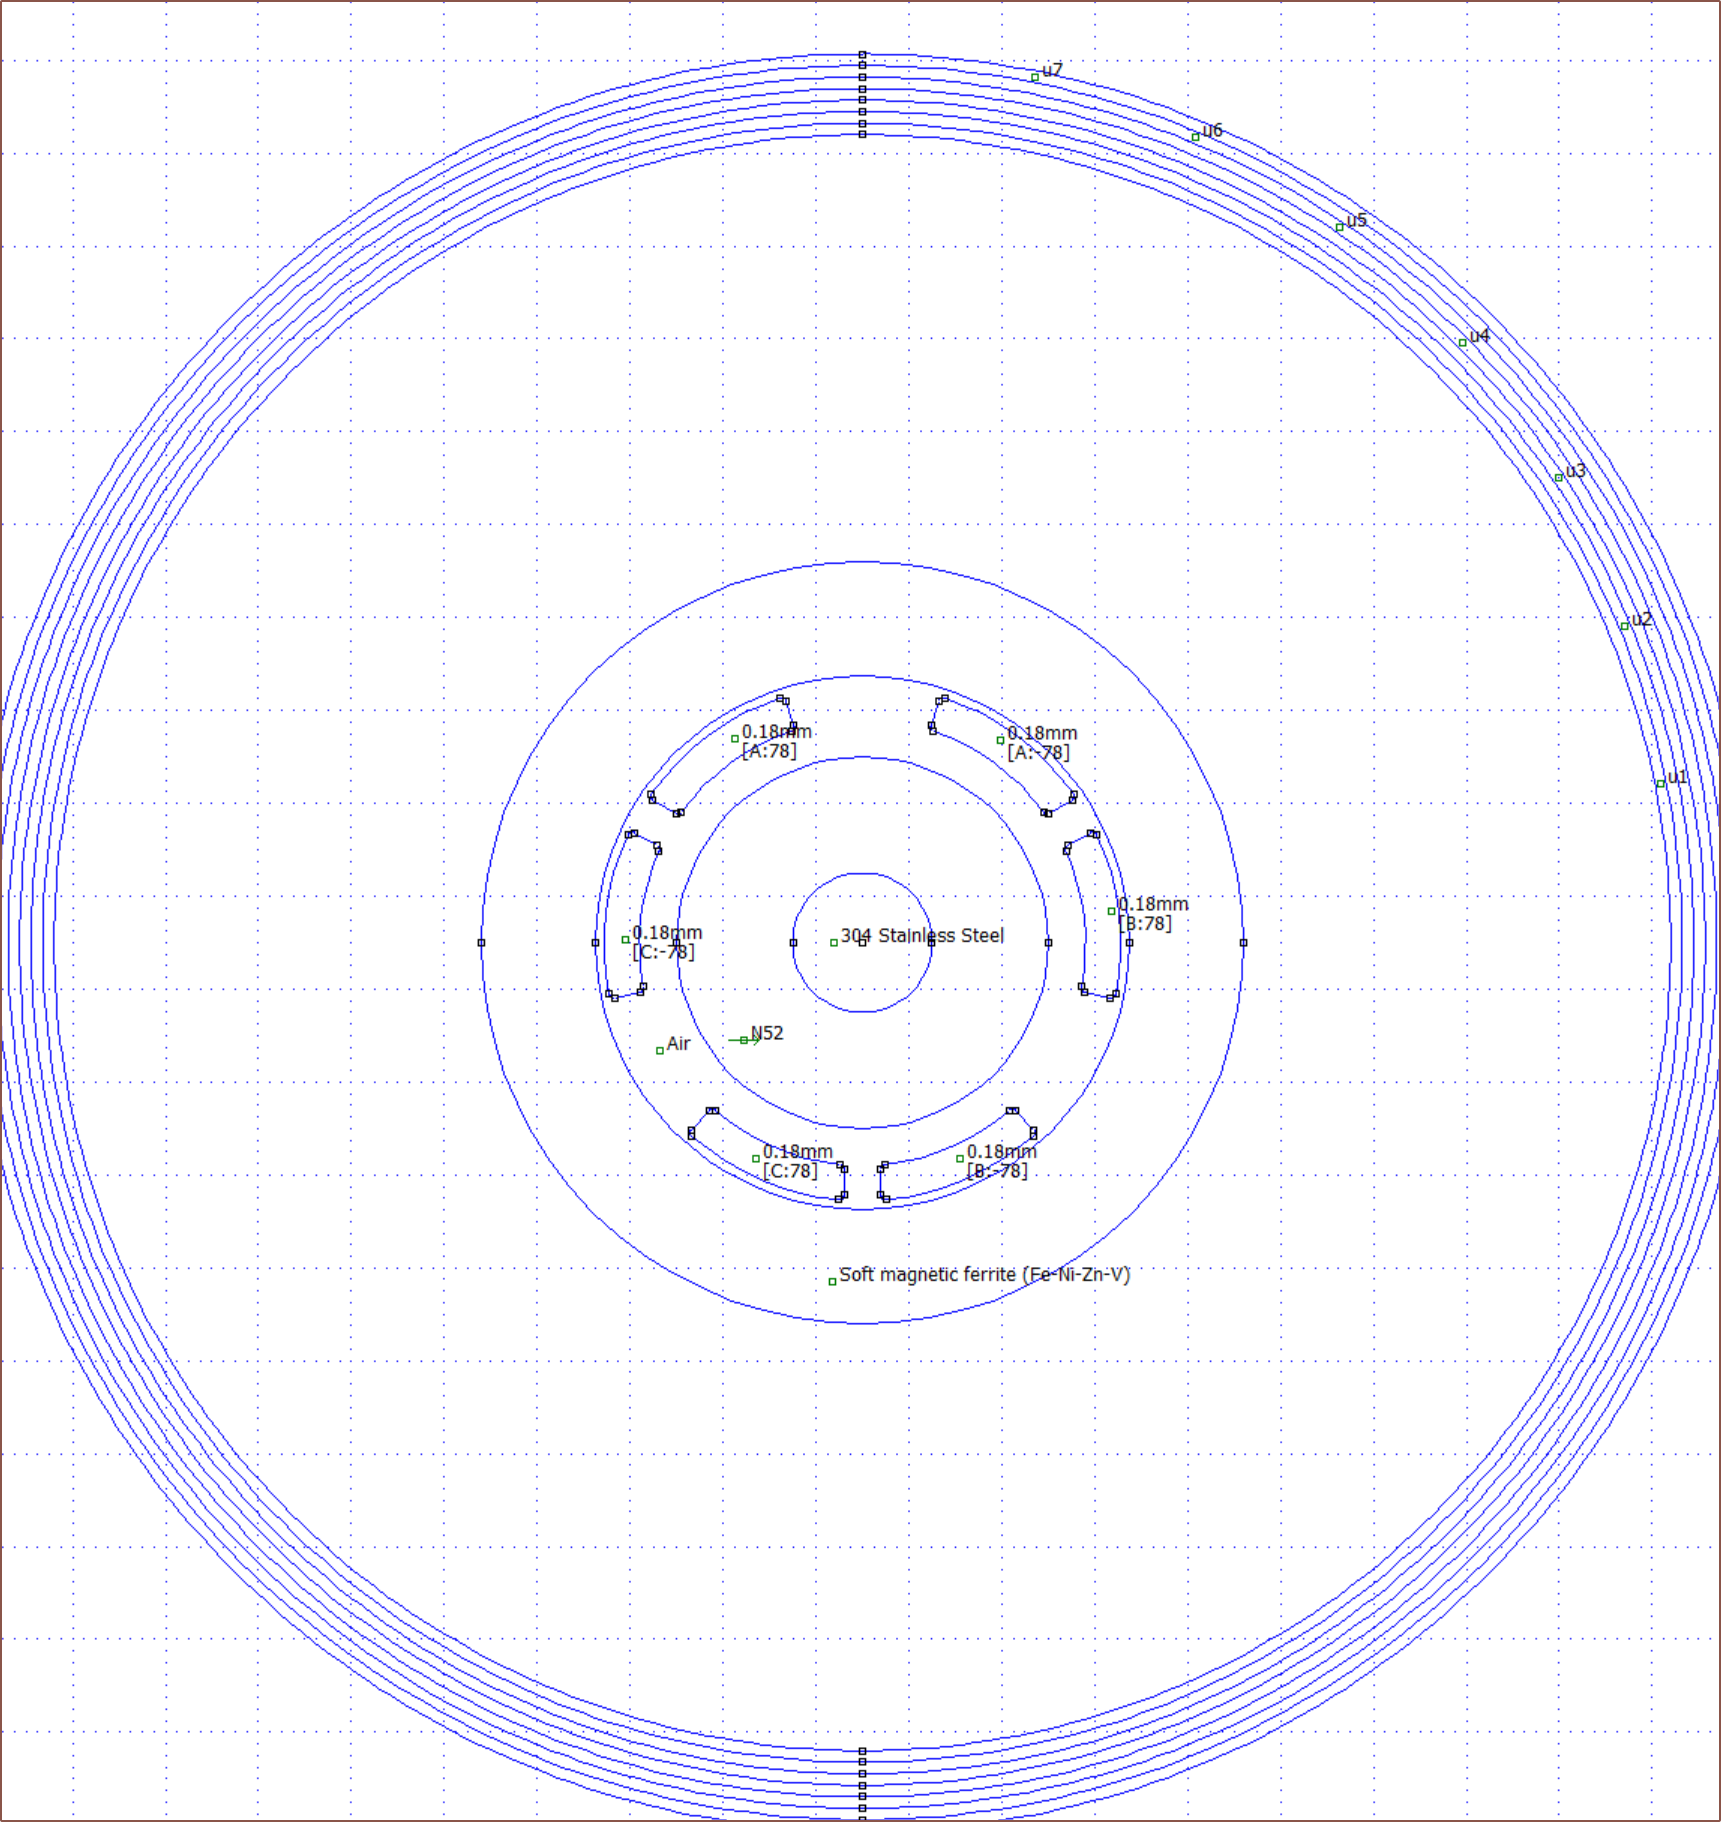
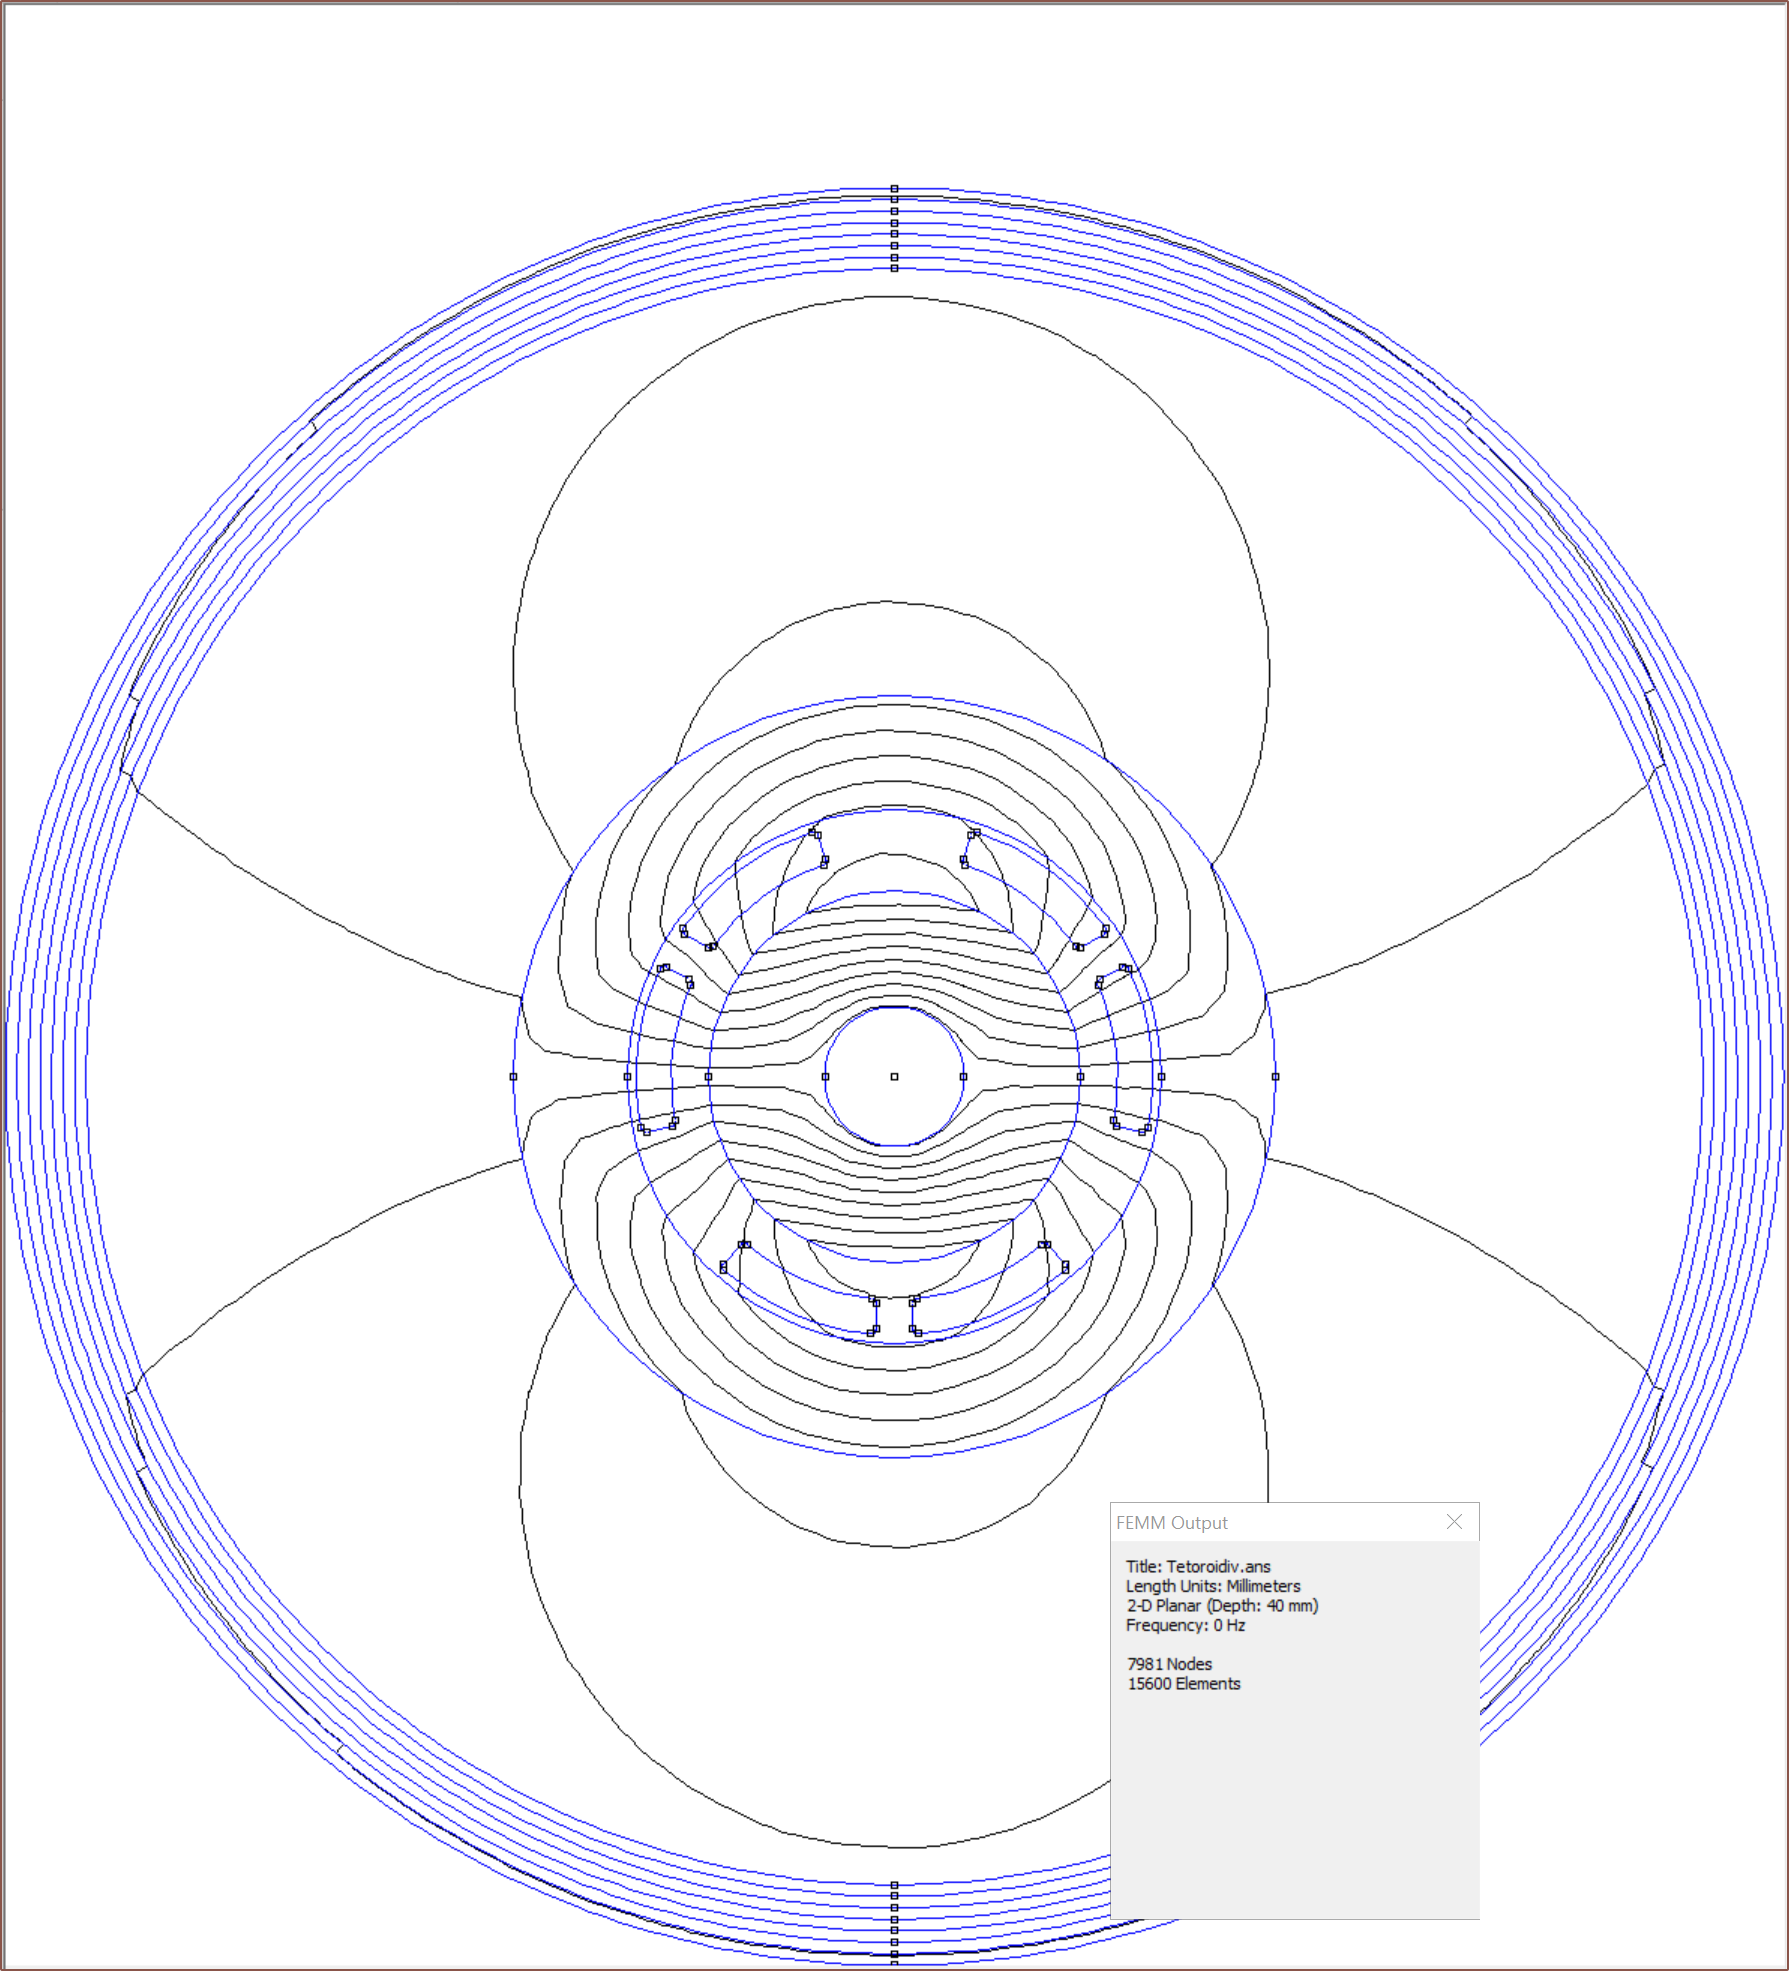
    One of my most promising siimulations: 71 coil turns, 58mm rotor length, 8mm diameter, 3mm shaft.

    During my research, I stumbled on this tutorial article that describes how to set up a BLDC motor simulation. Almost immediately, I was downloading and installing FEMM and exporting the simulation sketch from Fusion. 

    The first thing I learned was that, as far as the simulation is concerned, if the item isn't conductive and/or magnetic, it might as well be air. Thus, the overmould isn't part of these simulations because it wouldn't change the result.

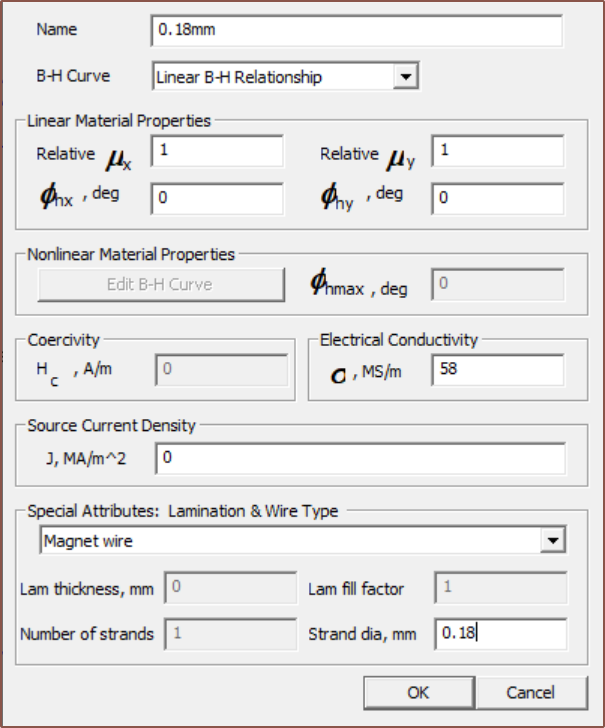
    This window called "block property" can be found in Properties > Materials > Edit Property.

    I started with at 0.2mm copper wire option, but I later found out that I can customise the material so I (eventually) renamed it to simply "Coil" and changed the wire diameter to whatever I wanted to simulate. Usually this value was 0.18mm but I did run some simulations with 0.25mm wire. 

    My first simulation set up.

    So I soon had my first simulation actually set up. I've been spending months on-and-off researching for a simulation solution for #Tetrinsic [gd0041] and I now had something at a time when I should actually be in bed. This is the first simulation result of the magnetic field:

    I found out how to turn on the nice colours. I also turned off the magnet to confirm that the coils are actually configured correctly:

    The coil strength is about 45 gauss if I'm reading the legend correctly.

    Fast forward, I tried quite a few configurations with 1A though the coils so that I could get the torque constant directly.

    • 2 pole pairs increased torque essentially by a factor of 2. Additionally, the flux is better contained inside the toroid than 1 pole pair.
    • 3 pole pairs had almost no torque. Allegedly, such a configuration is "unbalanced".
    • 6 coils (20T) were much weaker than 3. 
    • Diverging from 8mm rotor reduced performance.
    • 0.18mm wire seemed like the best balance of turn count and resistance.

    Effectively, 1 pole pair is not ideal. It means I need twice the current and thus 4x the power to get the same torque out as a 2-pole pair motor. I'm currently asking around on Alibaba to see what my options are.

View all 6 project logs

Enjoy this project?

Share

Discussions

Similar Projects

Does this project spark your interest?

Become a member to follow this project and never miss any updates