 ga
gaThis is the continuation of the first part, of this Picam setup.
8. HDRs
Taking HDRs with the Picam is very easy, and since we already take photos there's no reason to not do it.
The allowed values for camera.exposure_compensation are -25 to 25. Every 6 units represent 1 exposure stop:
for step in [-18, -12,-6,0,9]:
    camera.exposure_compensation = step
    camera.capture("hdr_imgs_" + step + ".png", "png")
-20 seems to be too dark, so the final image is not composed correctly. And 12 seems to be too bright.
If you take 7 images with this board, enfuse gets killed. So 5 images are good enough.
For compose the final image, the Picam uses enfuse:
enfuse --hard-mask --gray-projector=l-star hdr_imgs_*.png -o hdr_final.png
The mode l-star is the most natural for me.
Example of the effect on the same image taken by the Pi a couple of seconds apart:
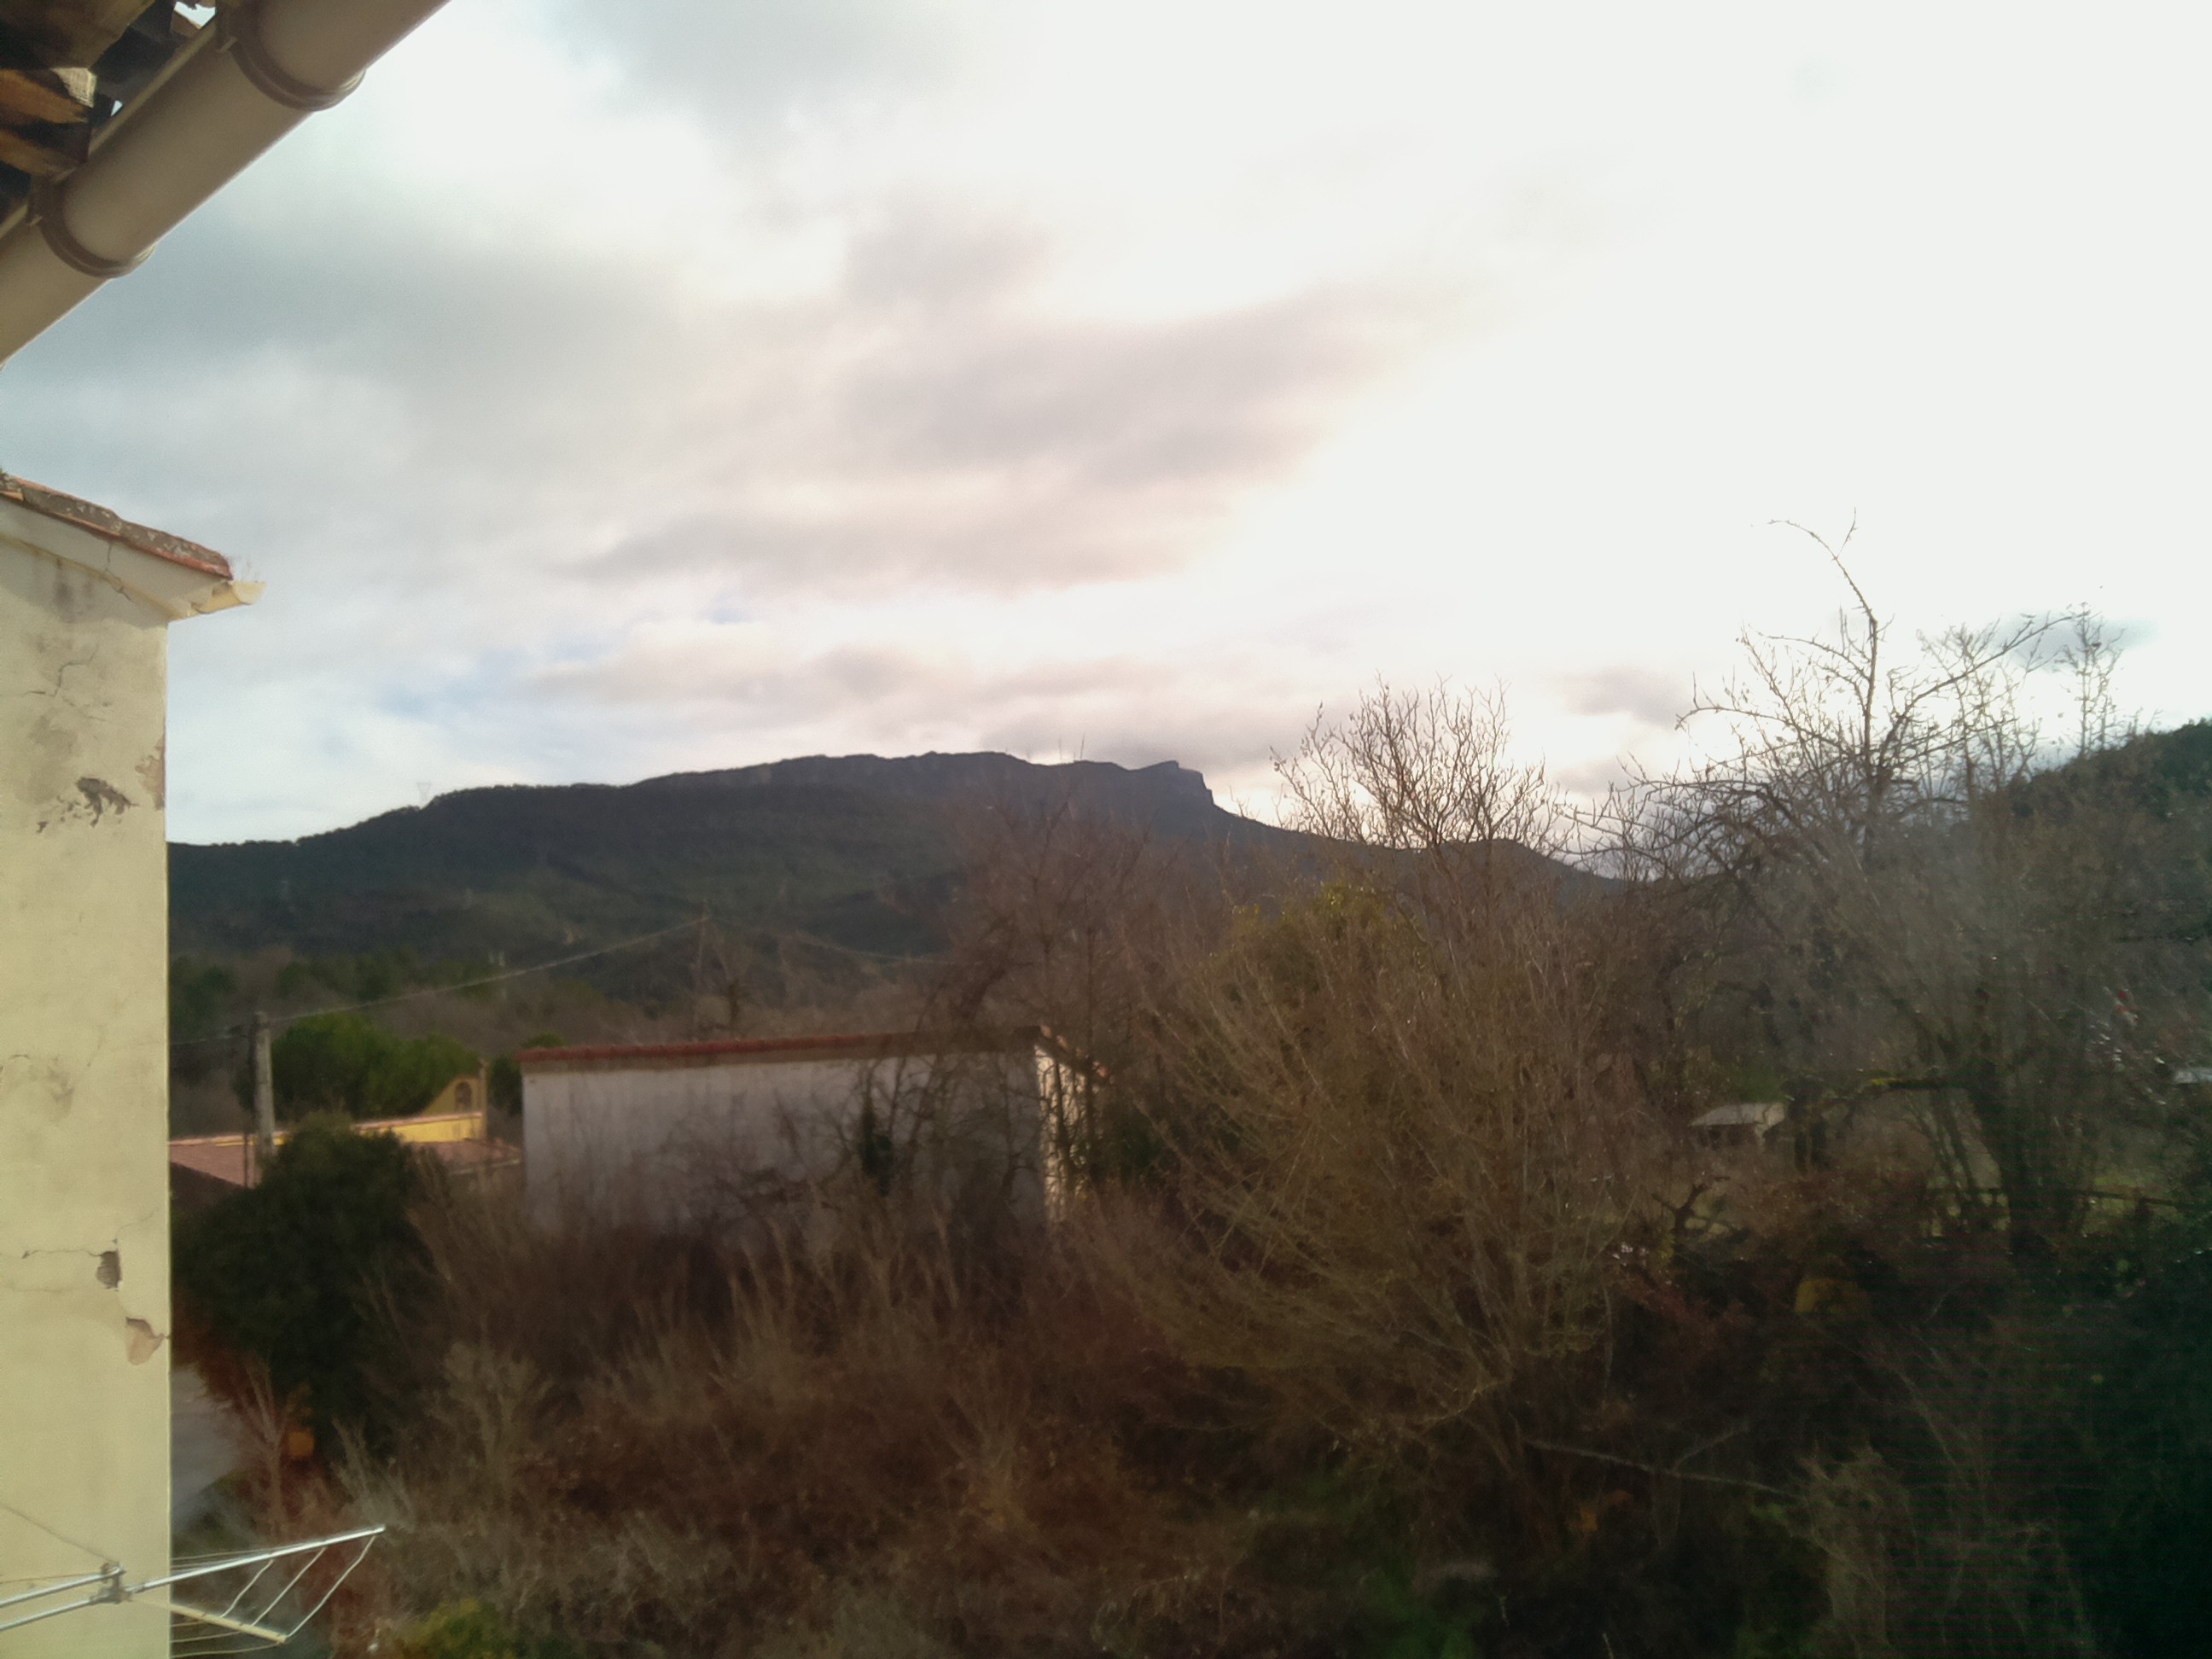 | 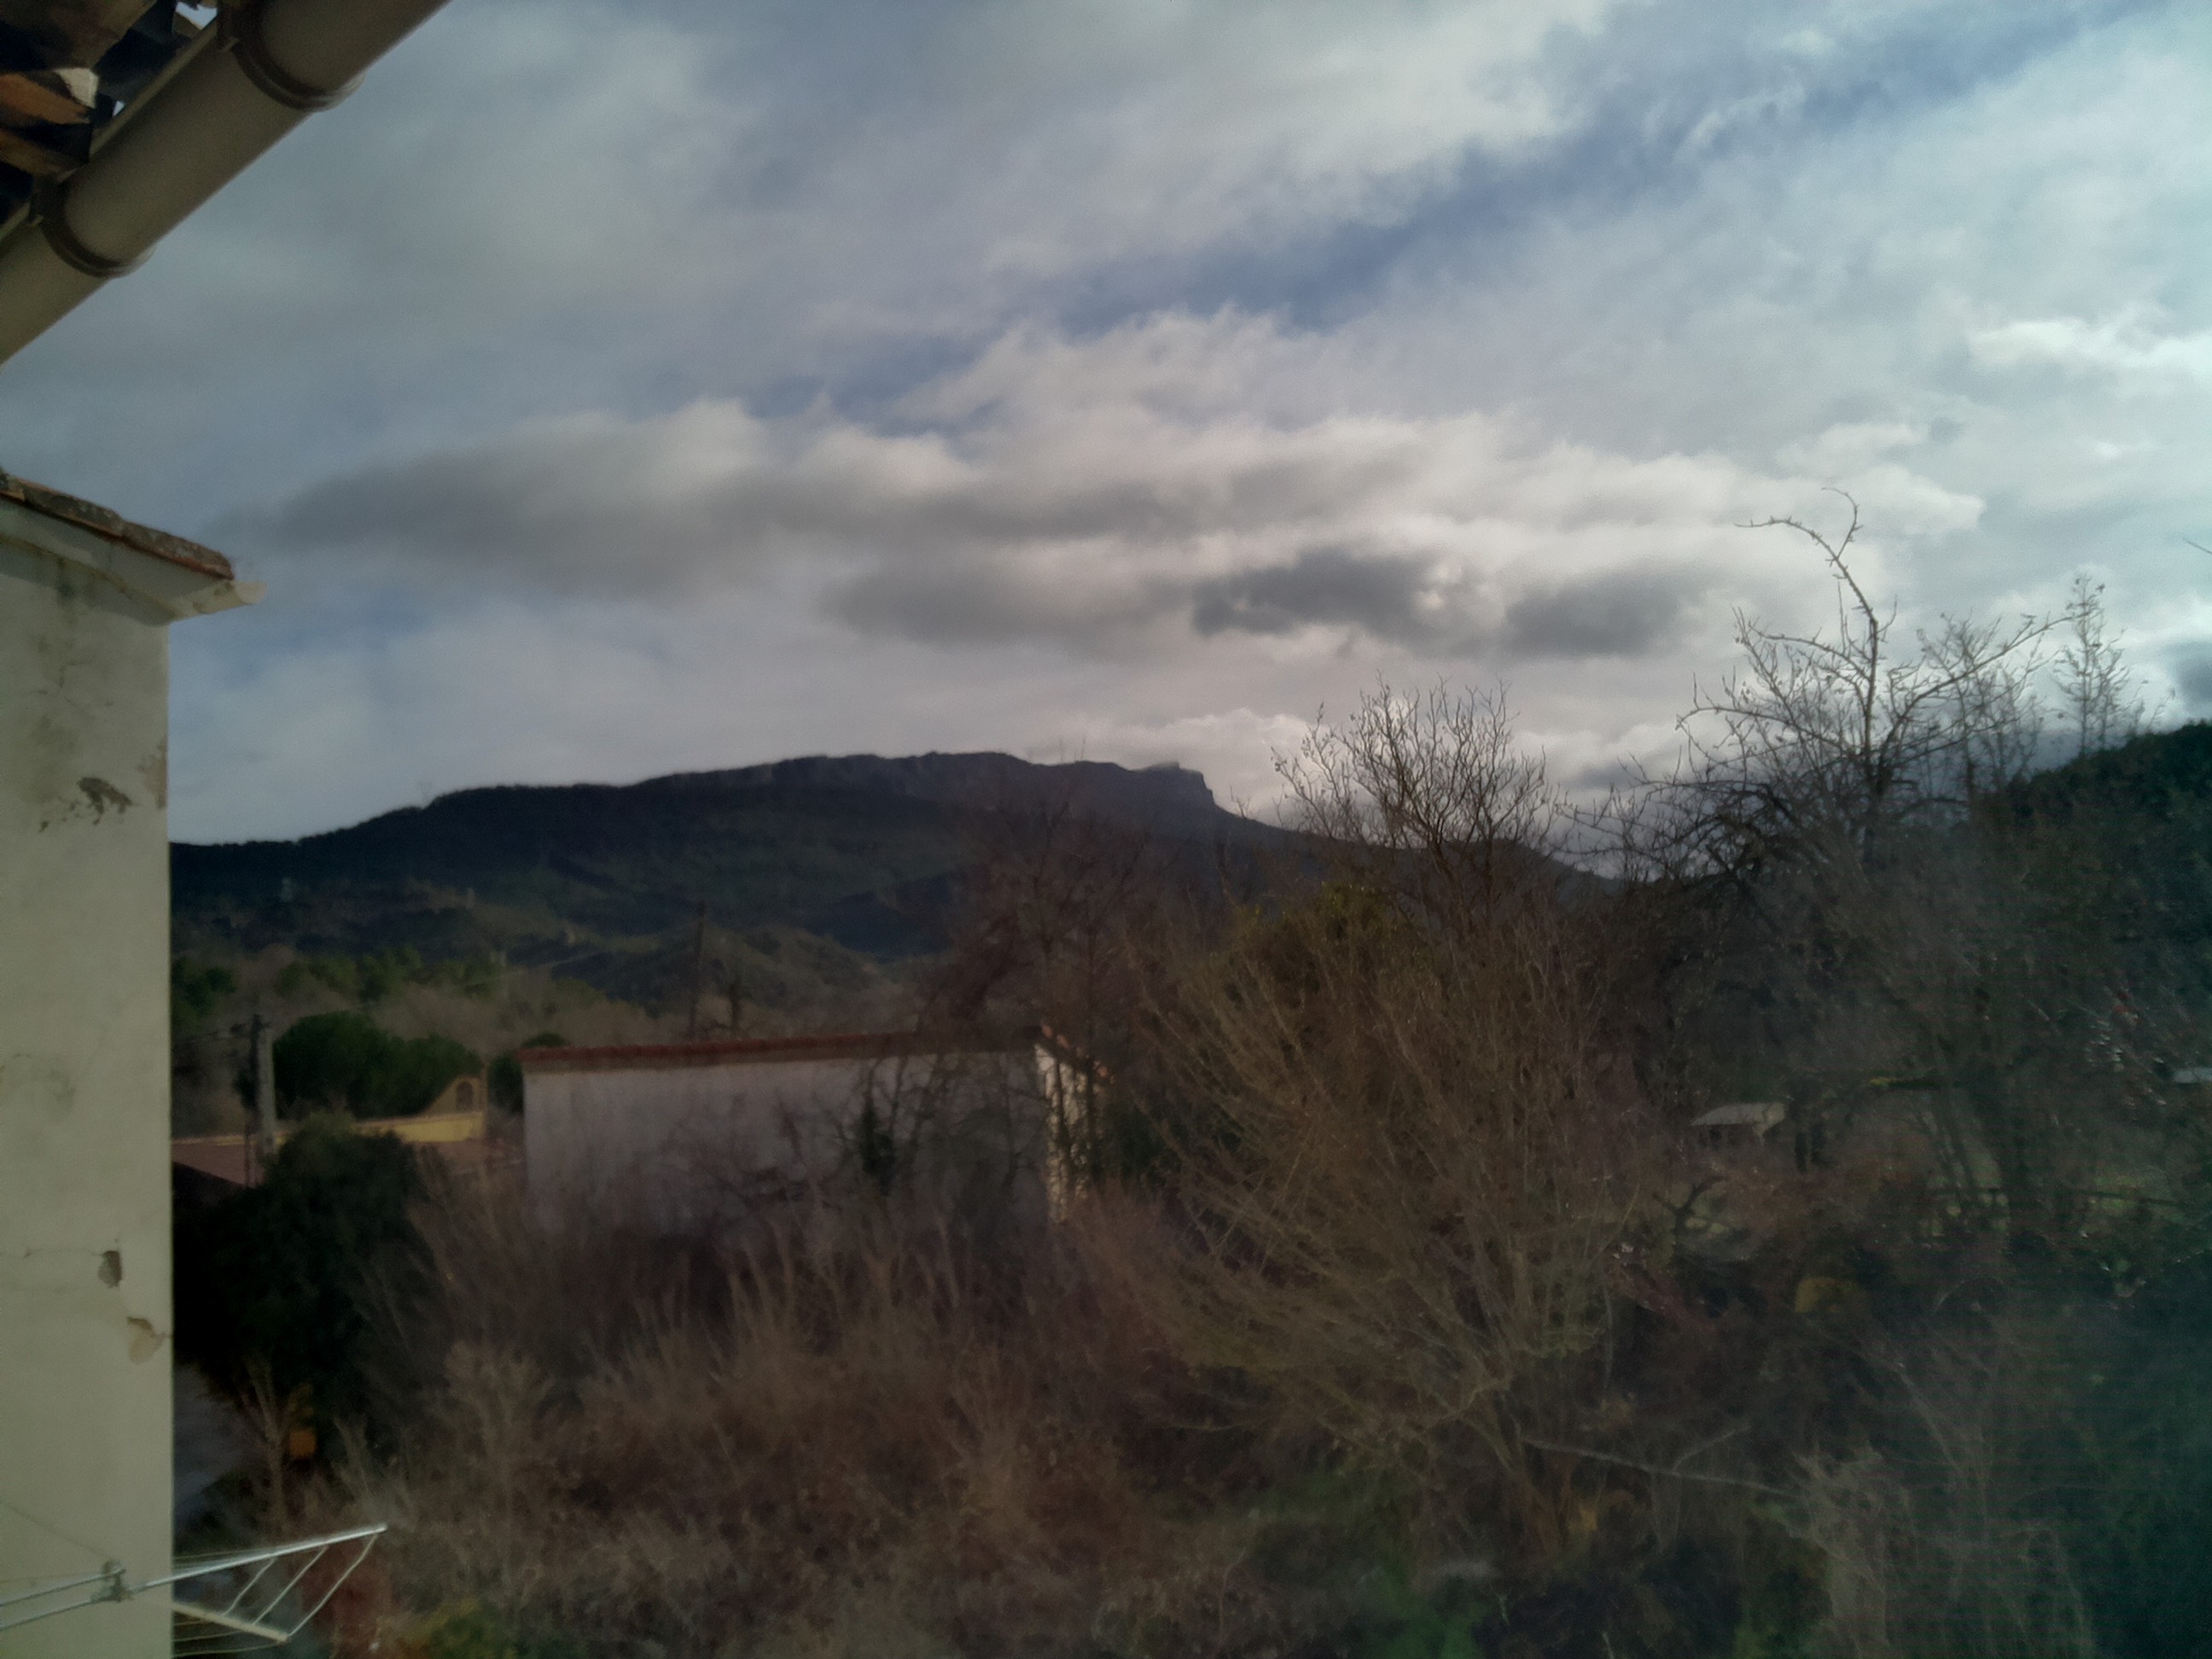 |
As stated by some of the referenced links, there are many reasons to use align_image_stack prior to compose the final image:
/usr/bin/align_image_stack --gpu -v -a hdr_aligned_prefix_ hdr_temp_files*.jpg
However this process in the Pi takes eons (adds 20 minutes to the complete process), and the results are almost the same.
The final image can be improved using convert from the imagemagick package:
convert hdr_final.png -auto-level -contrast -modulate 100,150 -sharpen 0x1 hdr_final_enhanced.png
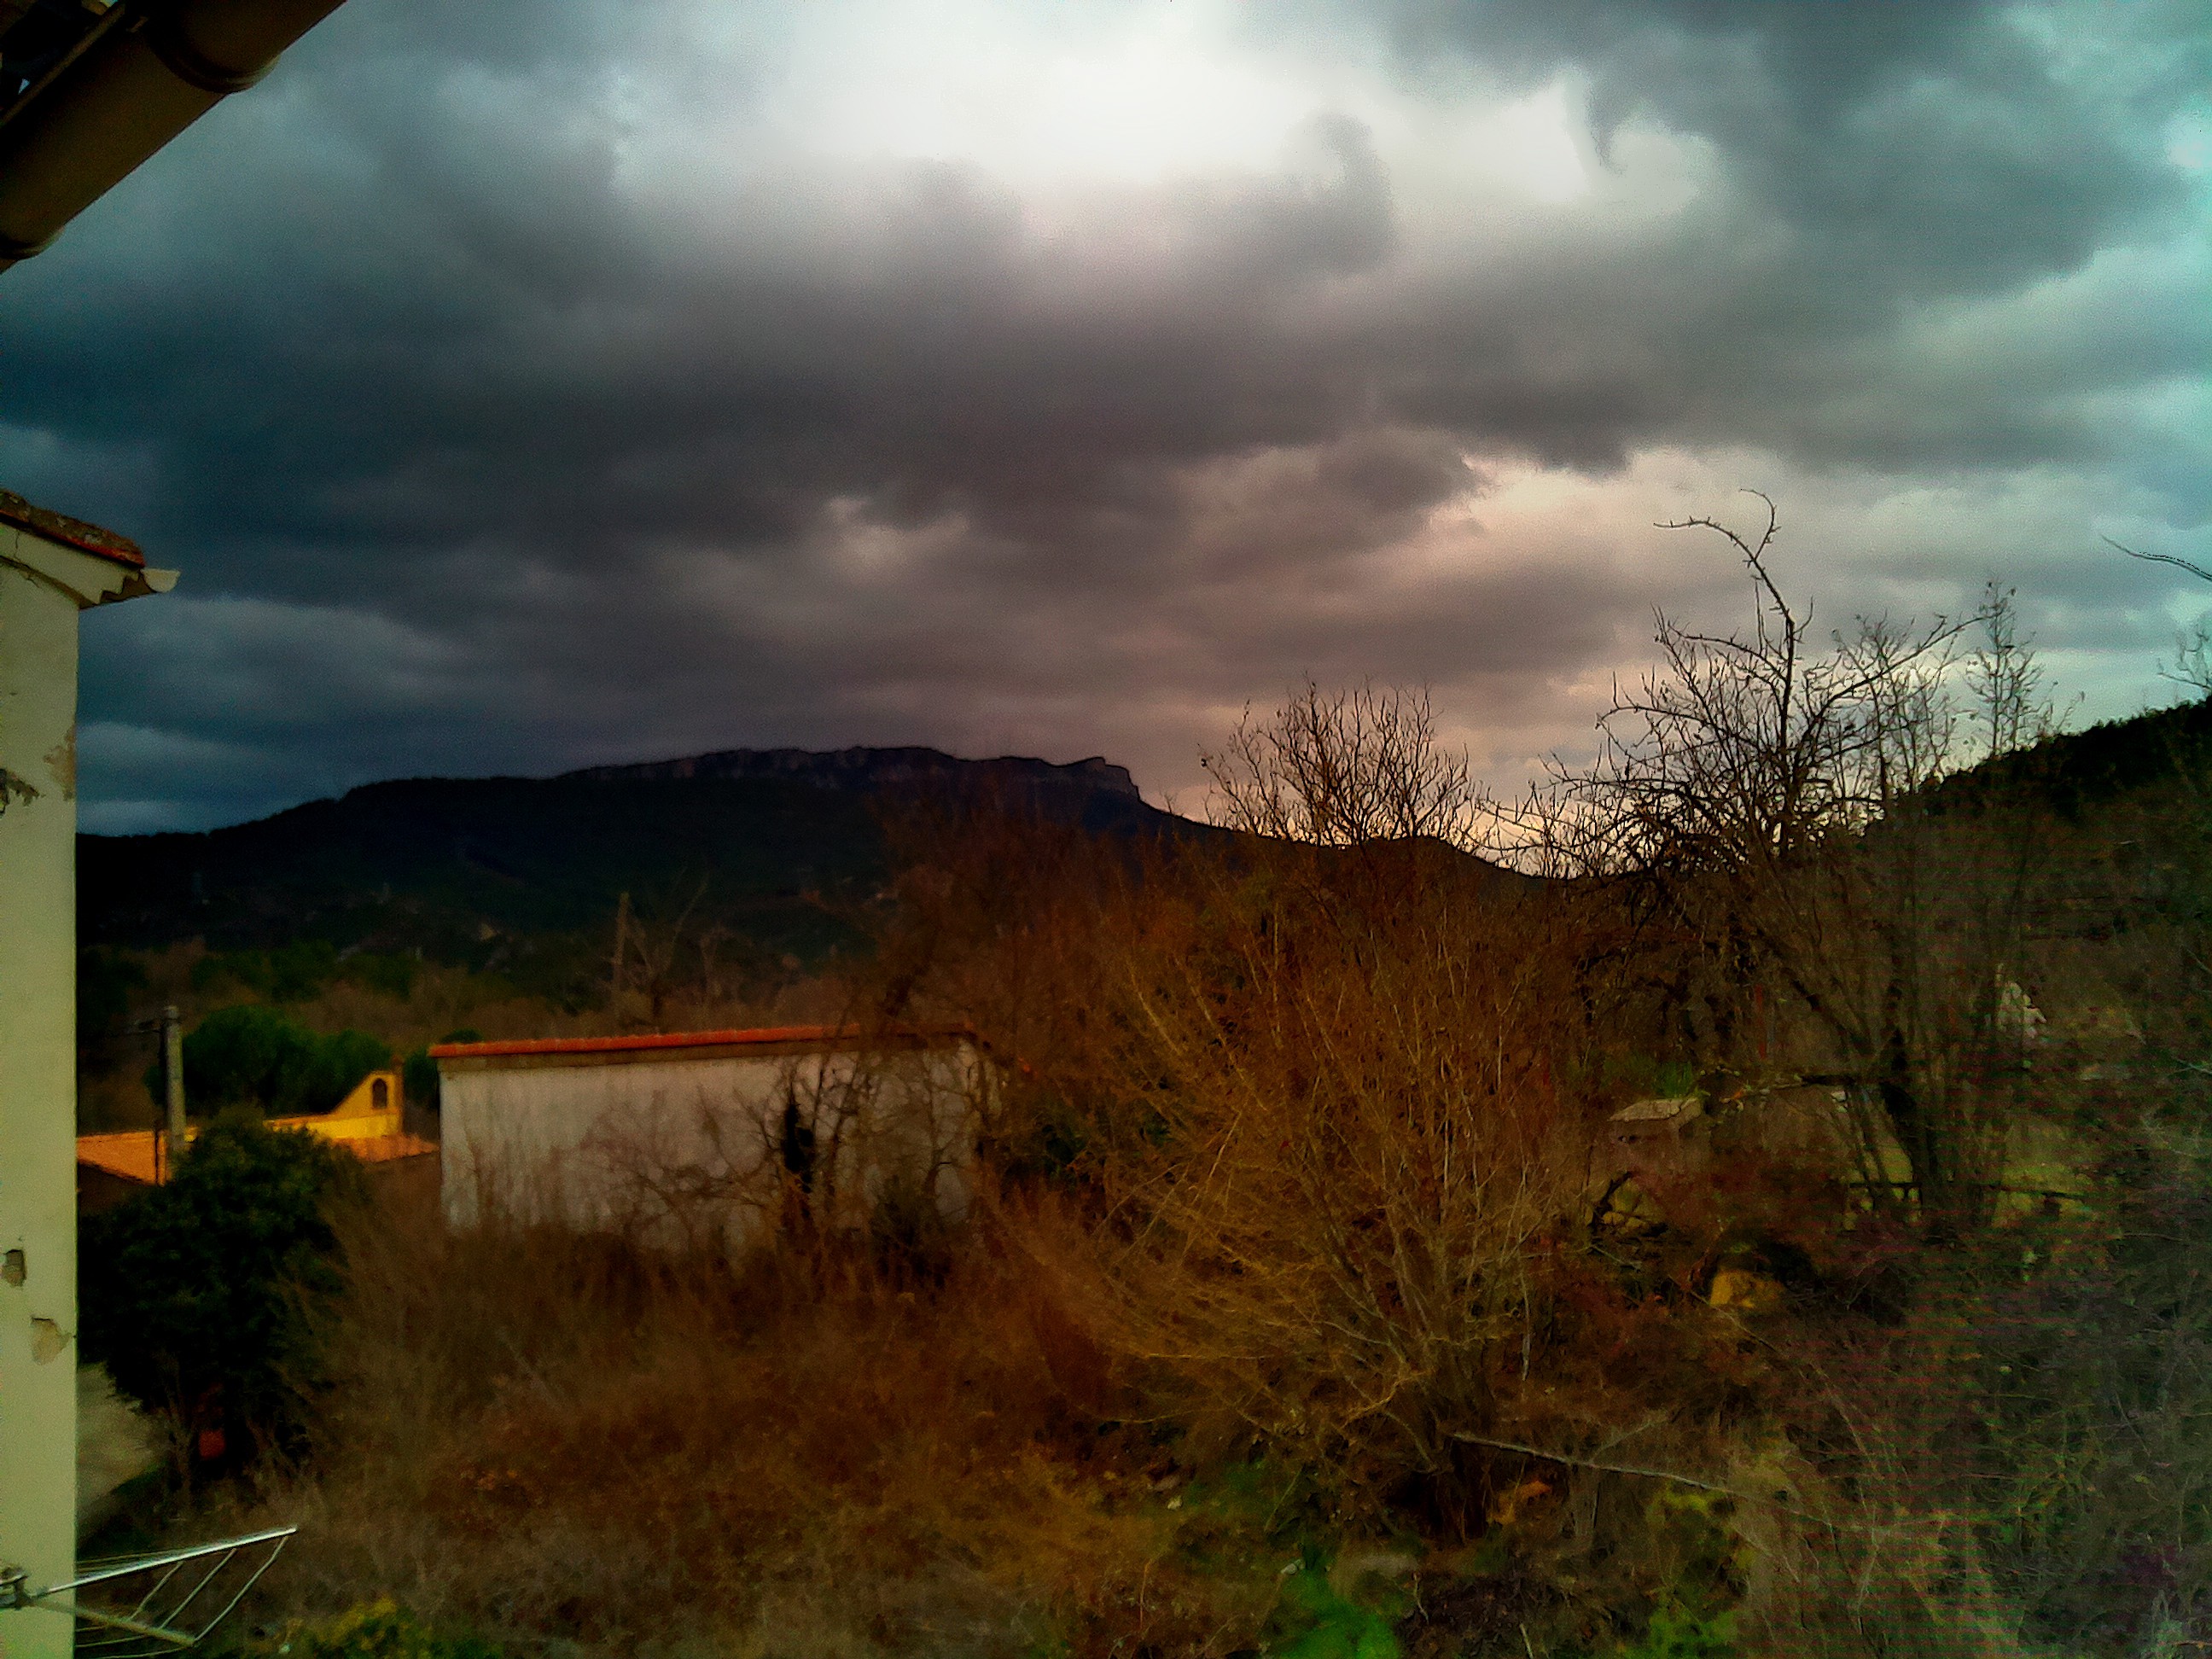
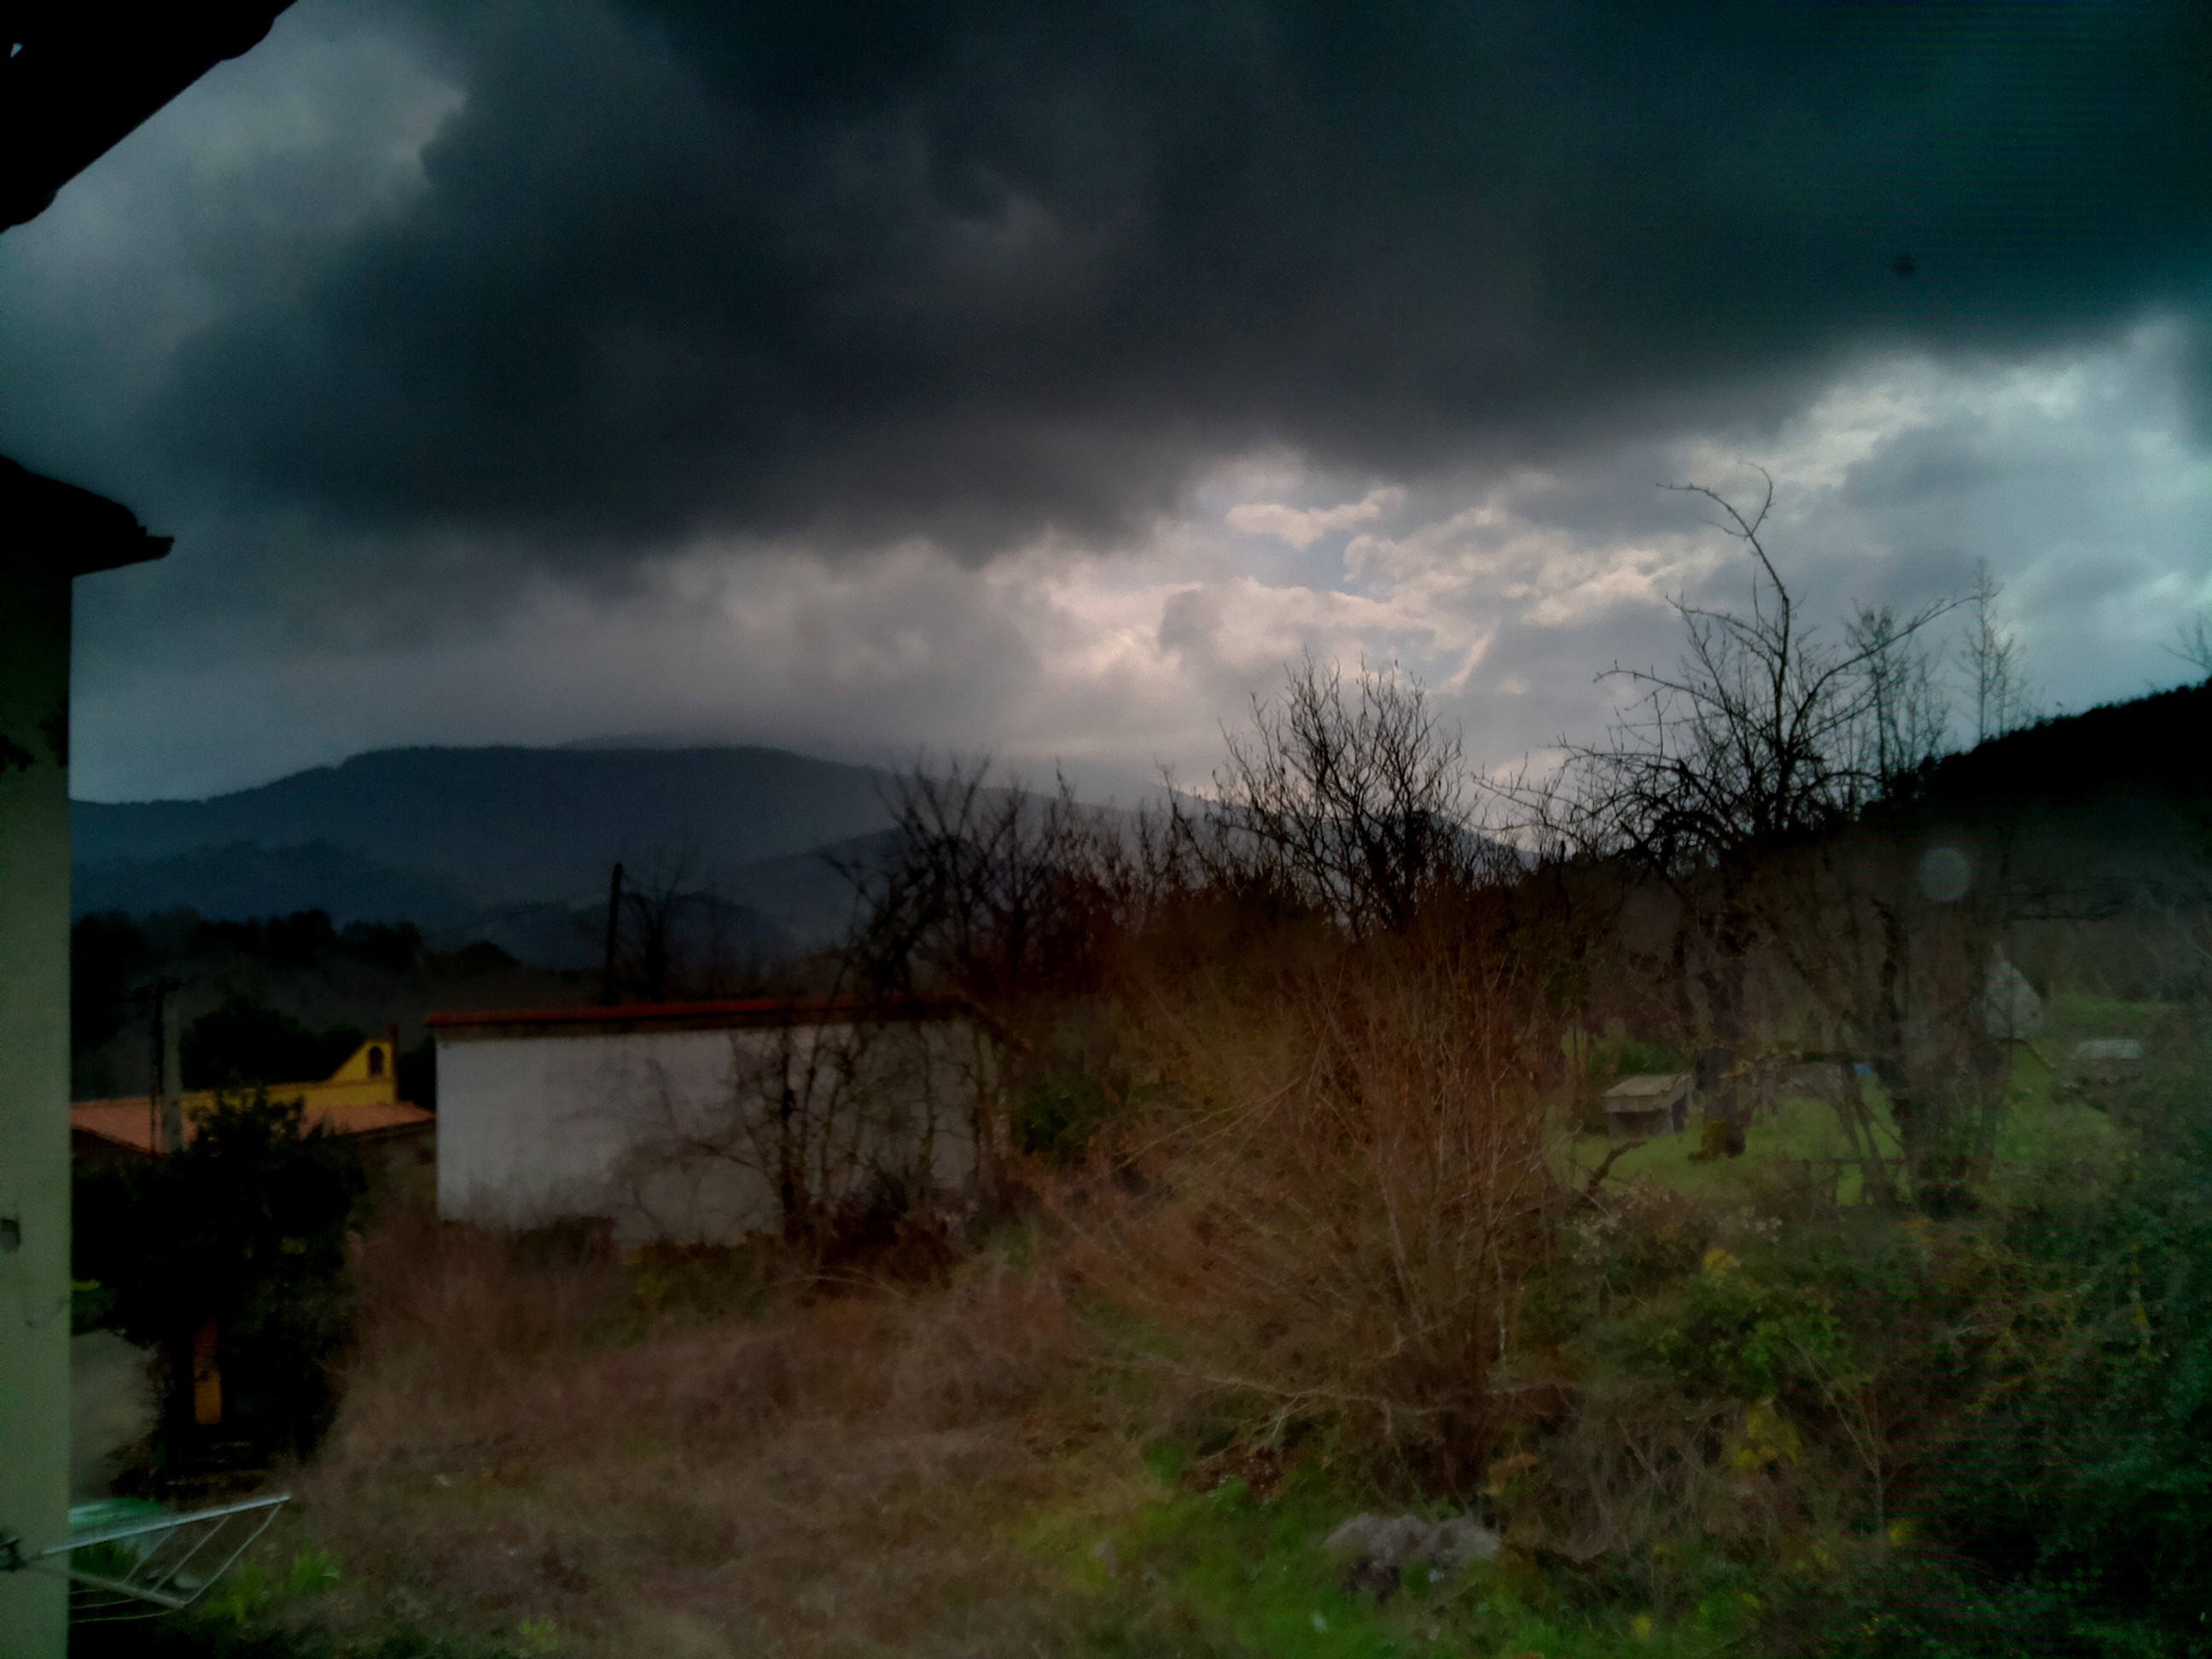
Some more examples:
Note: at least on the Raspberry Pi B+, if you have others tasks executing while you're composing the HDR, enfuse will run out of memory when composing 4 images.
References:
http://wiki.panotools.org/HDR_workflow_with_hugin
http://wiki.panotools.org/A_simple_approach_to_HDR-blending
https://www.flickr.com/groups/58483099@N00/discuss/72157594155731025/
http://wiki.panotools.org/Contrast_Blending
http://resources.mpi-inf.mpg.de/hdr/calibration/pfs.html
9. SERVOS
The servo used to move the Picam and make panoramas is this. In order to make it work, you have to install pi-blaster.
To move it I tried to use the python lib RPIO.PWM, but after every move, it caused small spins which caused continuous vibrations on the Picam. So I ended up writing directly to the device /dev/pi-blaster.
If you turn this servo beyond its limits, the servo will keep trying to move to the designated position. Also, if you turn it to a position, and something moves it (for example the wind on a very windy day, or a cat, bird...), the servo will try to move itself back to the designated position. Because of this it's important to release the PIN after moving it:
echo "17=0.2" > /dev/pi-blaster
echo "release 17" > /dev/pi-blaster
The power consumption of the Picam when the servo are runnig goes up to 1.2A. Normally it consumes 0.5A.
The Max, Mid and Min positions/values for these servos are these values:
max: 0.19
mid: 0.13
min: 0.05
If you only need one pin for the servo, specify it as argument:
sudo ./pi-blaster --gpio 25
As the servo is really small, I doubted that it could move the CS66d enclosure, which weights around 1Kg. But for my surprise, it moves it flawlessly. Moreover, the servo moves the Picam with such a force that after every move while taking panoramas, it needs to sleep for around 2 seconds to wait until the Picam stabilizes itself and stop moving.
At first I had no idea how to attach it to the enclosure. And I still had the idea to use 2 servos for make panoramas, so I tried different things:
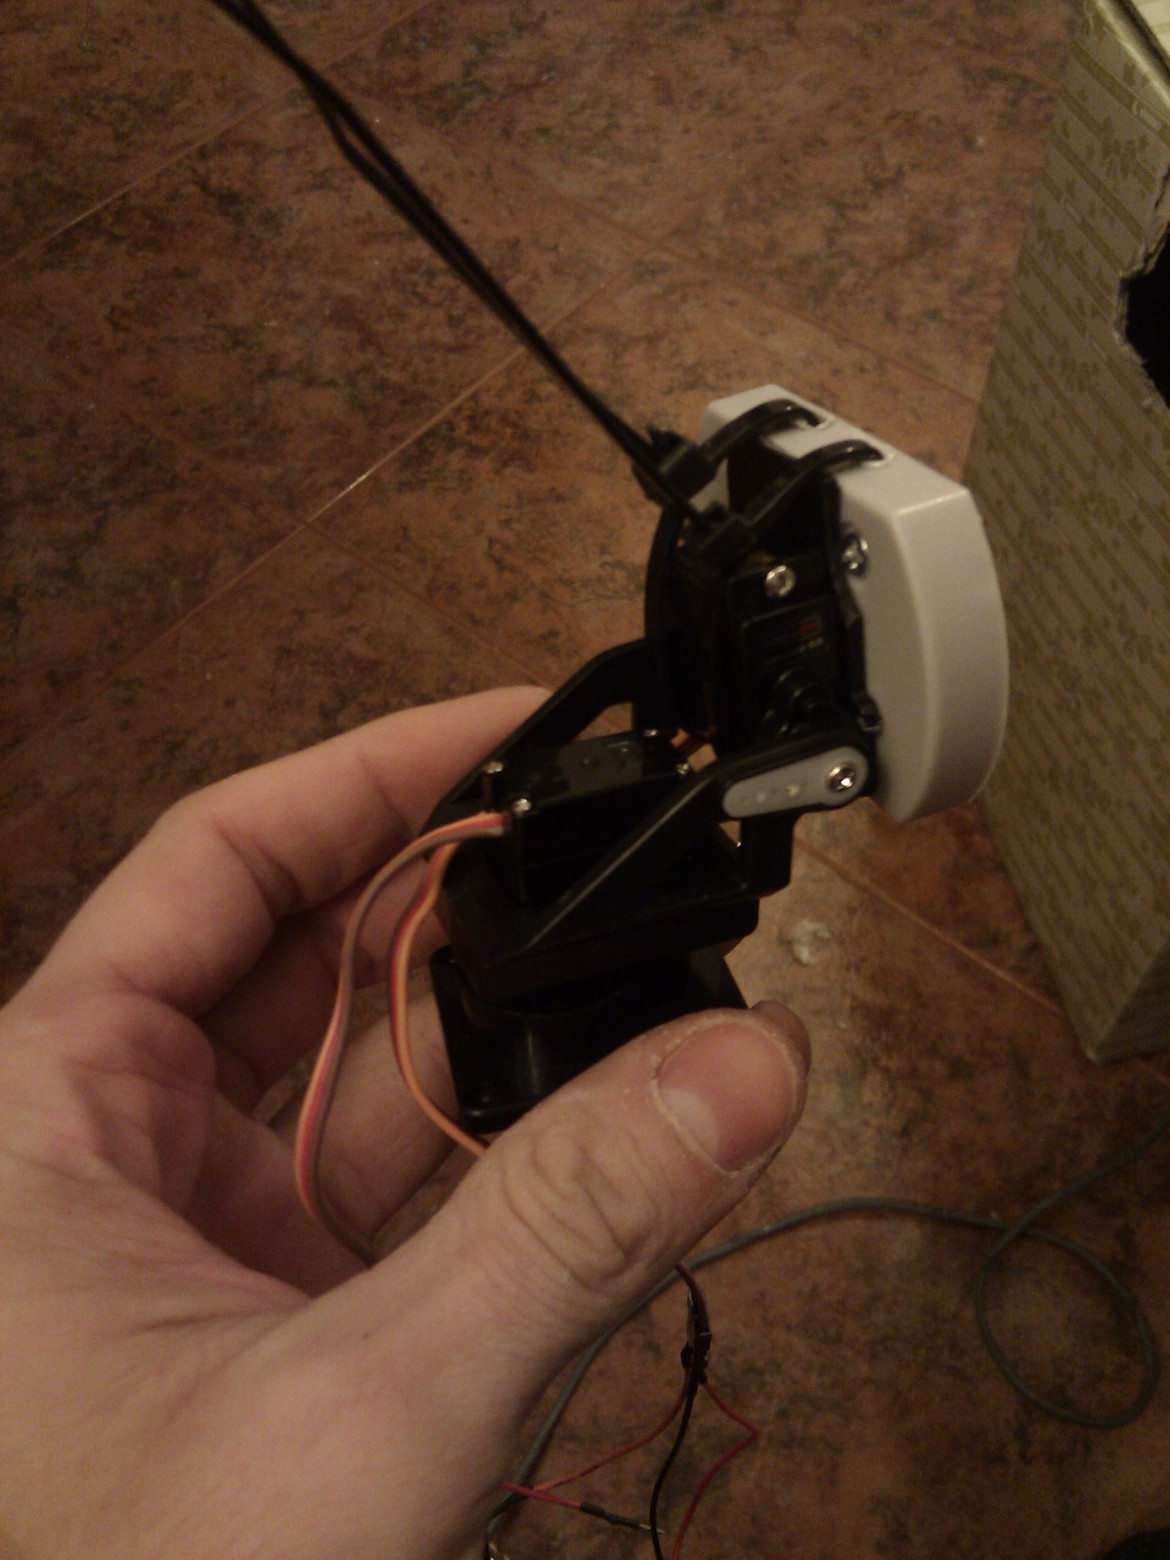
But moving it up and down was two much for this servo. So less headaches: use only one servo.
<to be completed>
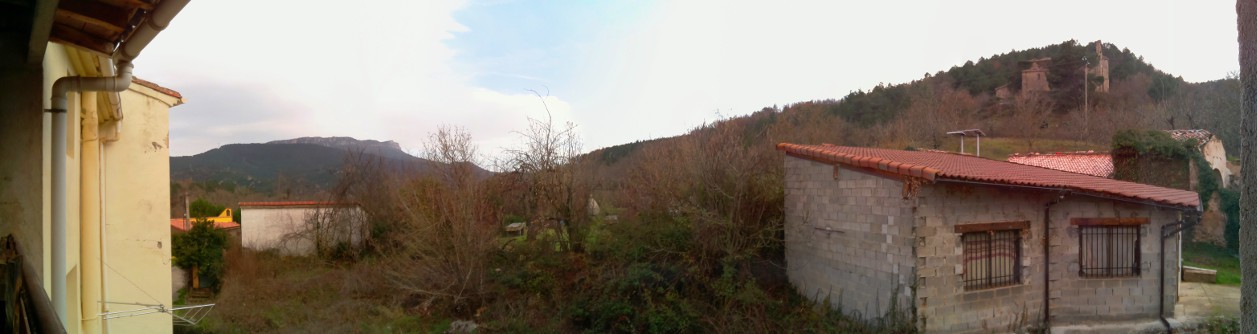
10. PANORAMAS
Every afternoon, close to the Golden Hour of the day, the Picam takes panoramas.
Right now it takes 8 photos at 8 different positions. Once the photos are taken, a thread is launched to compose the panoramas, and leave the main thread free to keep capturing more photos.
In order to create the panorama in GNU/Linux you need to install the hugin-tools + enblend, and imagemagick if you want to enhance the final result:
apt-get install hugin-tools hugin enblend imagemagick
According to my notes (~2016), using PNG files as temporal files causes error when generating the panorama, so instead JPG is used.
# create the hugin project
/usr/bin/pto_gen -o out.pto pano_temp_*.jpg
/usr/bin/cpfind -o out.pto --multirow --celeste out.pto
/usr/bin/cpclean -o out.pto out.pto
/usr/bin/linefind -o out.pto out.pto
/usr/bin/autooptimiser -a -m -l -s -o out.pto out.pto
/usr/bin/pano_modify --canvas=AUTO --crop=AUTO -o out.pto out.pto
# nona uses a lot of CPU
/usr/bin/nice -n 5 /usr/bin/nona -m TIFF_m -o out.pto out.pto
/usr/bin/enblend --compression 95 -o pano.png pano_*.tif
# enhance the final panorama
# /usr/bin/convert pano.png -brightness-contrast -5x15 -sharpen 0x1 final_panorama.png
/usr/bin/convert pano.png -auto-level -contrast -modulate 100,150 final_panorama.png
On this board, and since these tools don't use the GPU of the Pi, this process take a looot of time. Almost 1 hour to compose the panorama.
Here's the Picam hard at work:
Reference:
http://wiki.panotools.org/Panorama_scripting_in_a_nutshell
11. TIMELAPSES
Probably all the hours and headaches are worth when you get up every morning and see that the cam has generated timelapses like these ones:
The timelapses are taken at aleatory days, and the length of them are randomized between 180 and 300 seconds. They are taken on sunrise, to capture one of the Golden Hour of the day.
Taking photos continuously with the python-picamera module is very easy.
# num - number of the photo taken
# filename - path to the photo taken
for num, filename in enumerate(camera.capture_continuous("timelapse_{counter:05d}.jpg", format="jpeg")):
    print "Frame saved: ", filename
Refer to the documentation for detailed information.
Some notes:
- The reason for not use sensor_mode=1 (1920x1080), is that it crops the image. The FieldOfView is reduced.
- Also using sensor_mode=1 seems to cause gst-launch to add a green line at the bottom of the video: https://www.youtube.com/watch?v=VKqJTaG_PIc
- As we use gst-launch for generate the video using the GPU, we can not take photos at full resolution and then downscaling it to 1080p, because the GPU only encodes 1080p frames, so bigger images causes gst-launch to fail silently with this useful error: ERROR: pipeline doesn't want to preroll.
- With ffmpeg it looks like it works fine, so we can take 1080p timelapses.
- As the docs say: If you set the resolution to 1280x720 (a 16:9 wide-screen aspect ratio), and framerate to anything less than 49fps, the 1296x730 mode will be selected and downscaled appropriately.
Once we finish taking photos, we have to generate the video. Here is a good tutorial, so refer to it and read the comments for more information.
To ensure an optimal bitrate, the following formula is used:
optimal_bitrate = "%d" % (1280 * 720 * video_fps * 2 * 0.08)
And the final command is this:
gst-launch-1.0 multifilesrc location=timelapse_%05d.jpeg index=1 caps="image/jpeg,framerate=24/1" ! jpegdec ! omxh264enc control-rate=1 target-bitrate=2500000 ! avimux ! filesink location=timelapse.avi
At the time of doing this, ffmpeg had no support for GPU encoding on the Raspberry Pi. But now it has, though the package shipped with raspbian seems to not work for me, so I compiled it.
The command for generate timelapses with GPU acceleration on the Raspberry Pi using ffmpeg is this:
ffmpeg -y -an -framerate 24 -i timelapse_%05d.jpg -c:v h264_omx timelapse_final.avi
Once a timelapse is generated, a sound track is downloaded from youtube, the sound is extracted from the video to mp3 and added to the timelapse. To search a properly sound track for the timelapse, we search videos for a random combination of the words "lounge, jazz, piano, cafe, space, indian" and "chillout, ambient, instrumental, relaxing". Also the order of the results are randomized based on the allowed parameters "date", "rating", "relevance", "title", "videoCount", "viewCount". And finally, among the results obtained, we pick one randomly.
/usr/bin/youtube-dl -f 17 -o timelapse.mp3 -x --audio-format mp3 https://youtube.com/watch?v=
The script used for this task is one of the examples of the Youtube API, modified for these purposes.
After download the sound track, we generate the final video with music:
/usr/bin/avconv -i timelapse.mp3 -codec copy -af 'afade=t=in:ss=0:d=1,afade=t=out:st=" + str((timelapse_length - 1)) + ":d=1' -y -shortest timelapse_final.avi
of with ffmpeg:
ffmpeg -y -i timelapse_sunrise.avi -i timelapse.mp3 -c:v copy -af 'afade=t=in:ss=0:d=1,afade=t=out:st=461:d=2' -y -t str(timelapse_length) timelapse_final_sunrise.aviAnd finally, the timelapse is uploaded to Youtube using this example python script from the Youtube API
12. FULLMOON
One day reviewing the photos taken by the Picam, I was amazed when I saw this:
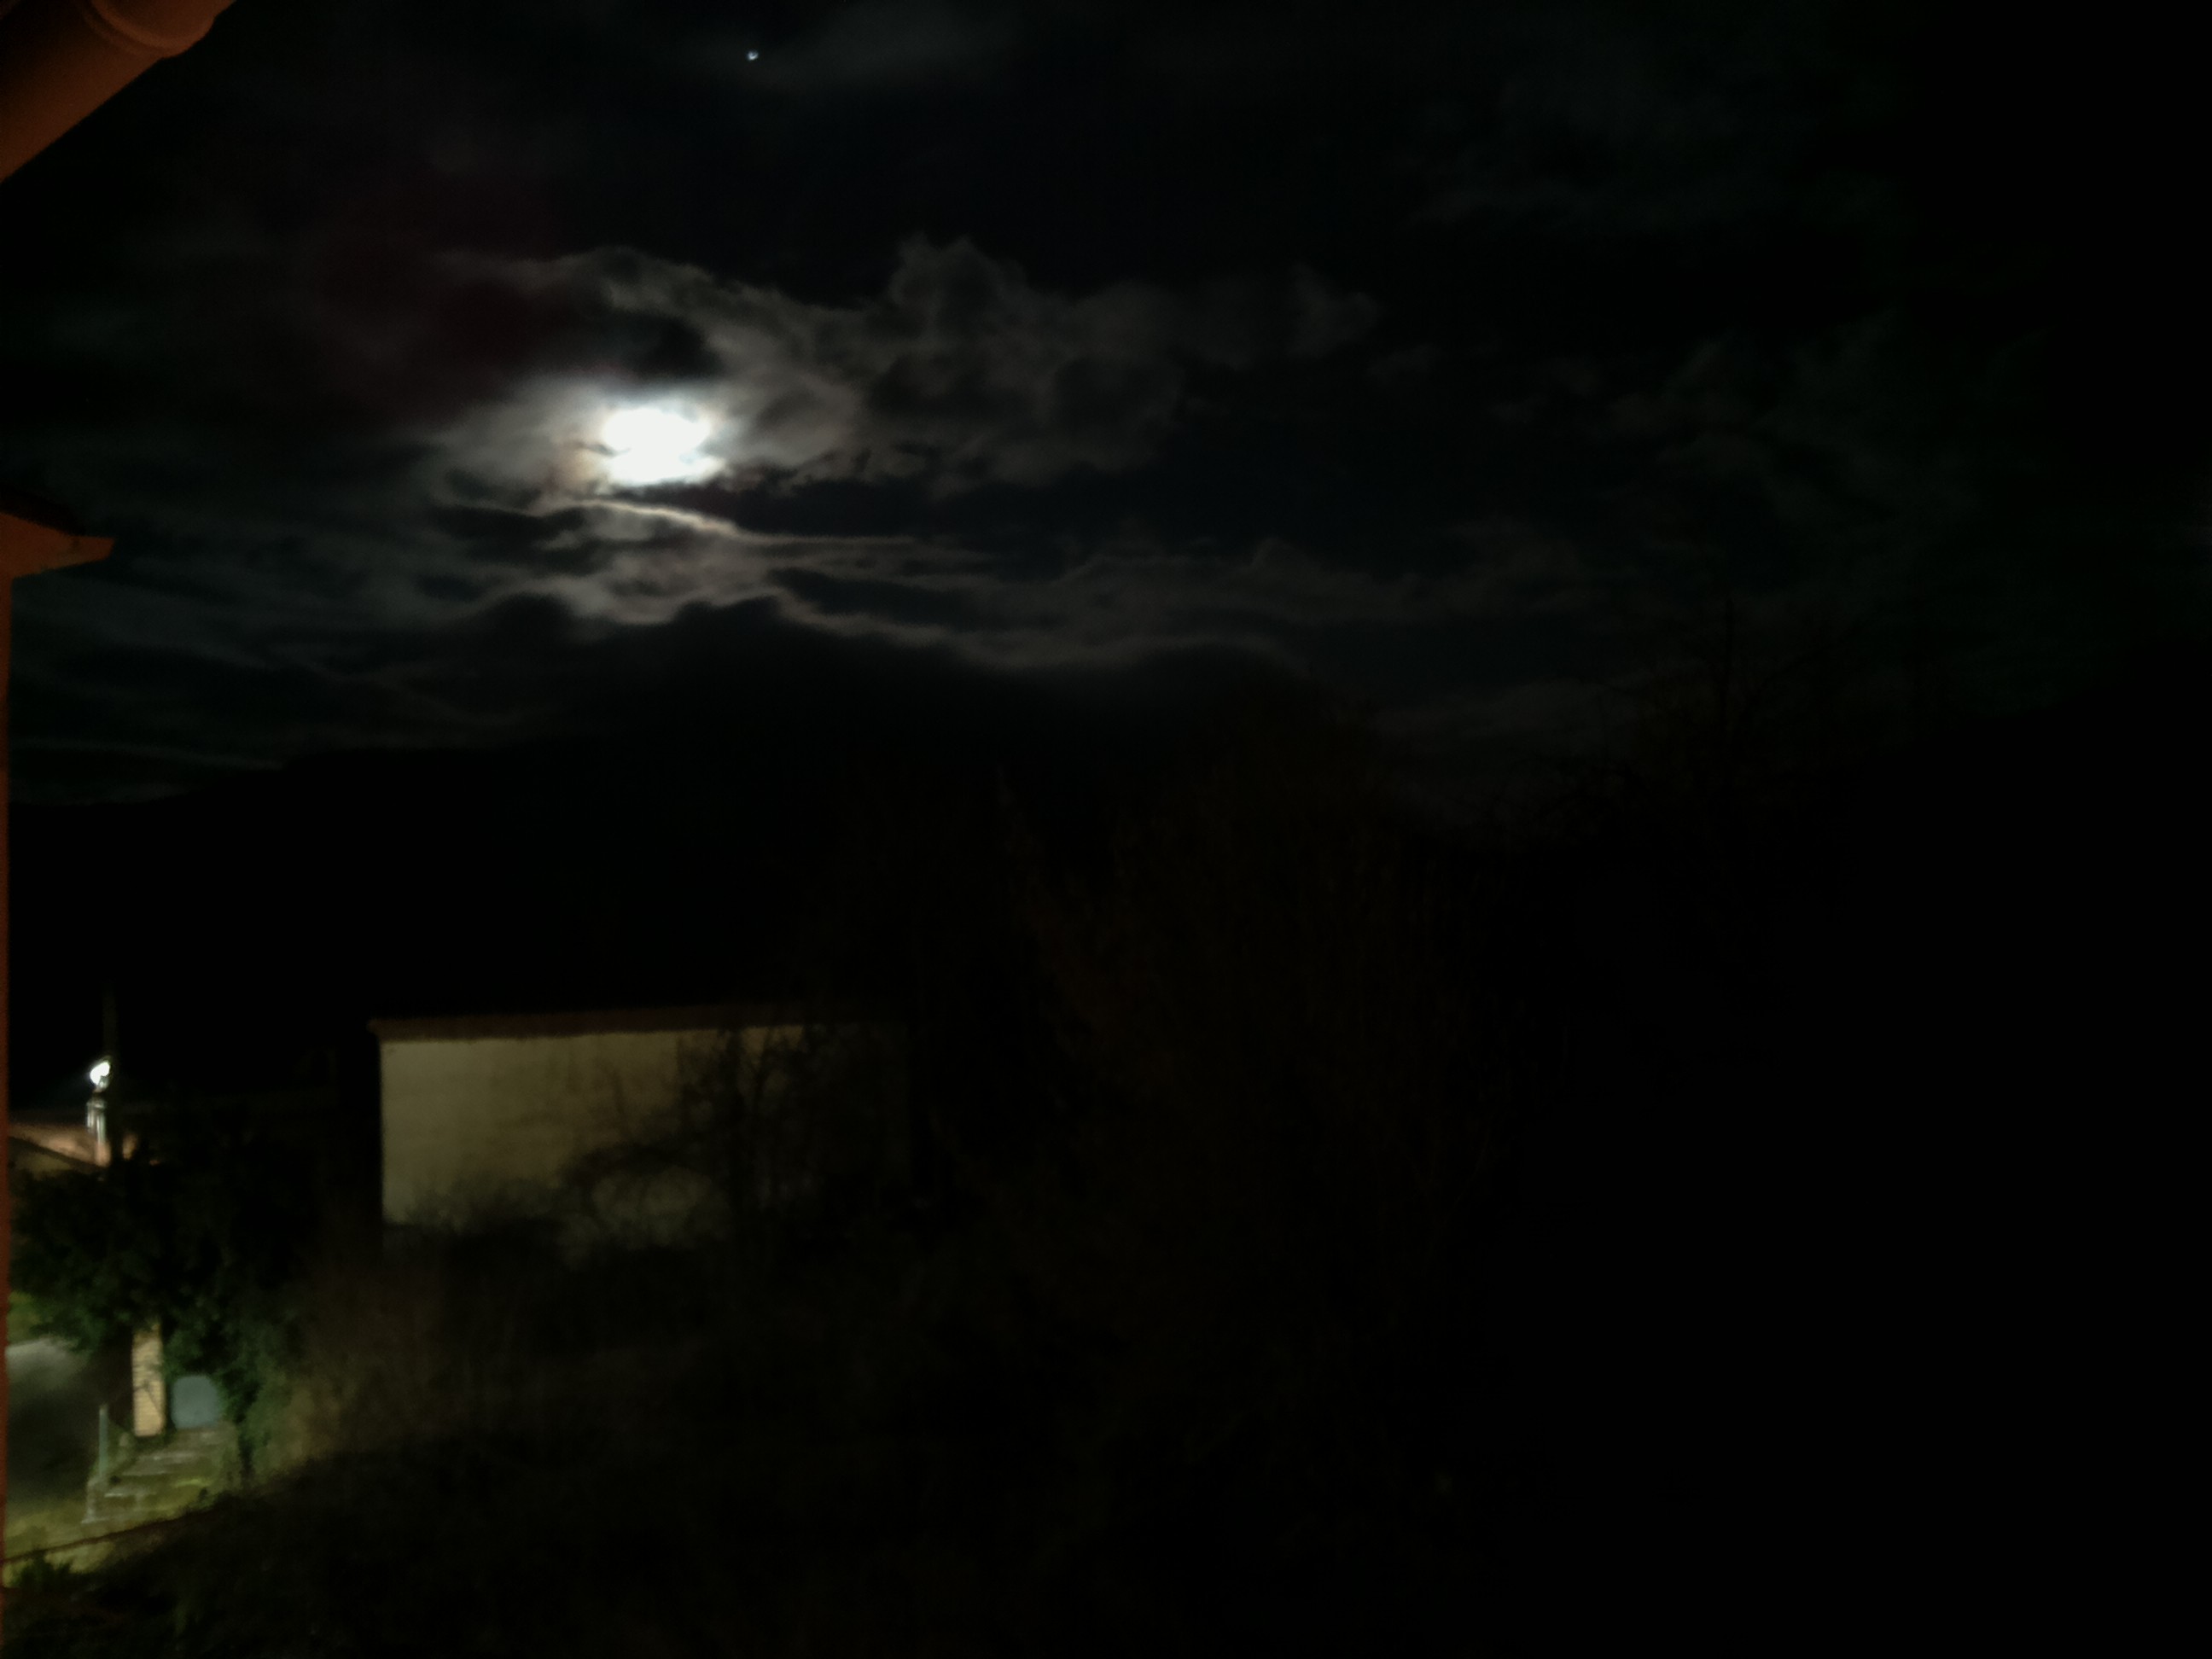
You know, it is nothing special in terms of photography. But I didn't know the Picam was able to take this type of photos.
So, if we can take fullmoon photos, why not increase the amount of photos we take if the day of the month is fullmoon?
with the python-ephem package is very easy:
#!/usr/bin/env python3
import ephem
import datetime

today = datetime.datetime.now()
bentre = ephem.Observer()
moon = ephem.Moon()

bentre.lon = '-3.45753'
bentre.lat = '42.72428'
bentre.elevation = '606'
bentre.date = today.strftime("%Y/%m/%d %H:%M:%S")
# here you can use the temperature from the DHT21 sensor
bentre.temp = 5.0

moon.compute(bentre)

fullmoon_date = ephem.localtime(ephem.next_full_moon(today))
days_to_fullmoon = fullmoon_date - today
print "Next full moon date: %s" % d
print "is today fullmoon?", (int(days_to_fullmoon) >= -2 and int(days_to_fullmoon) <= 2)
Some examples:
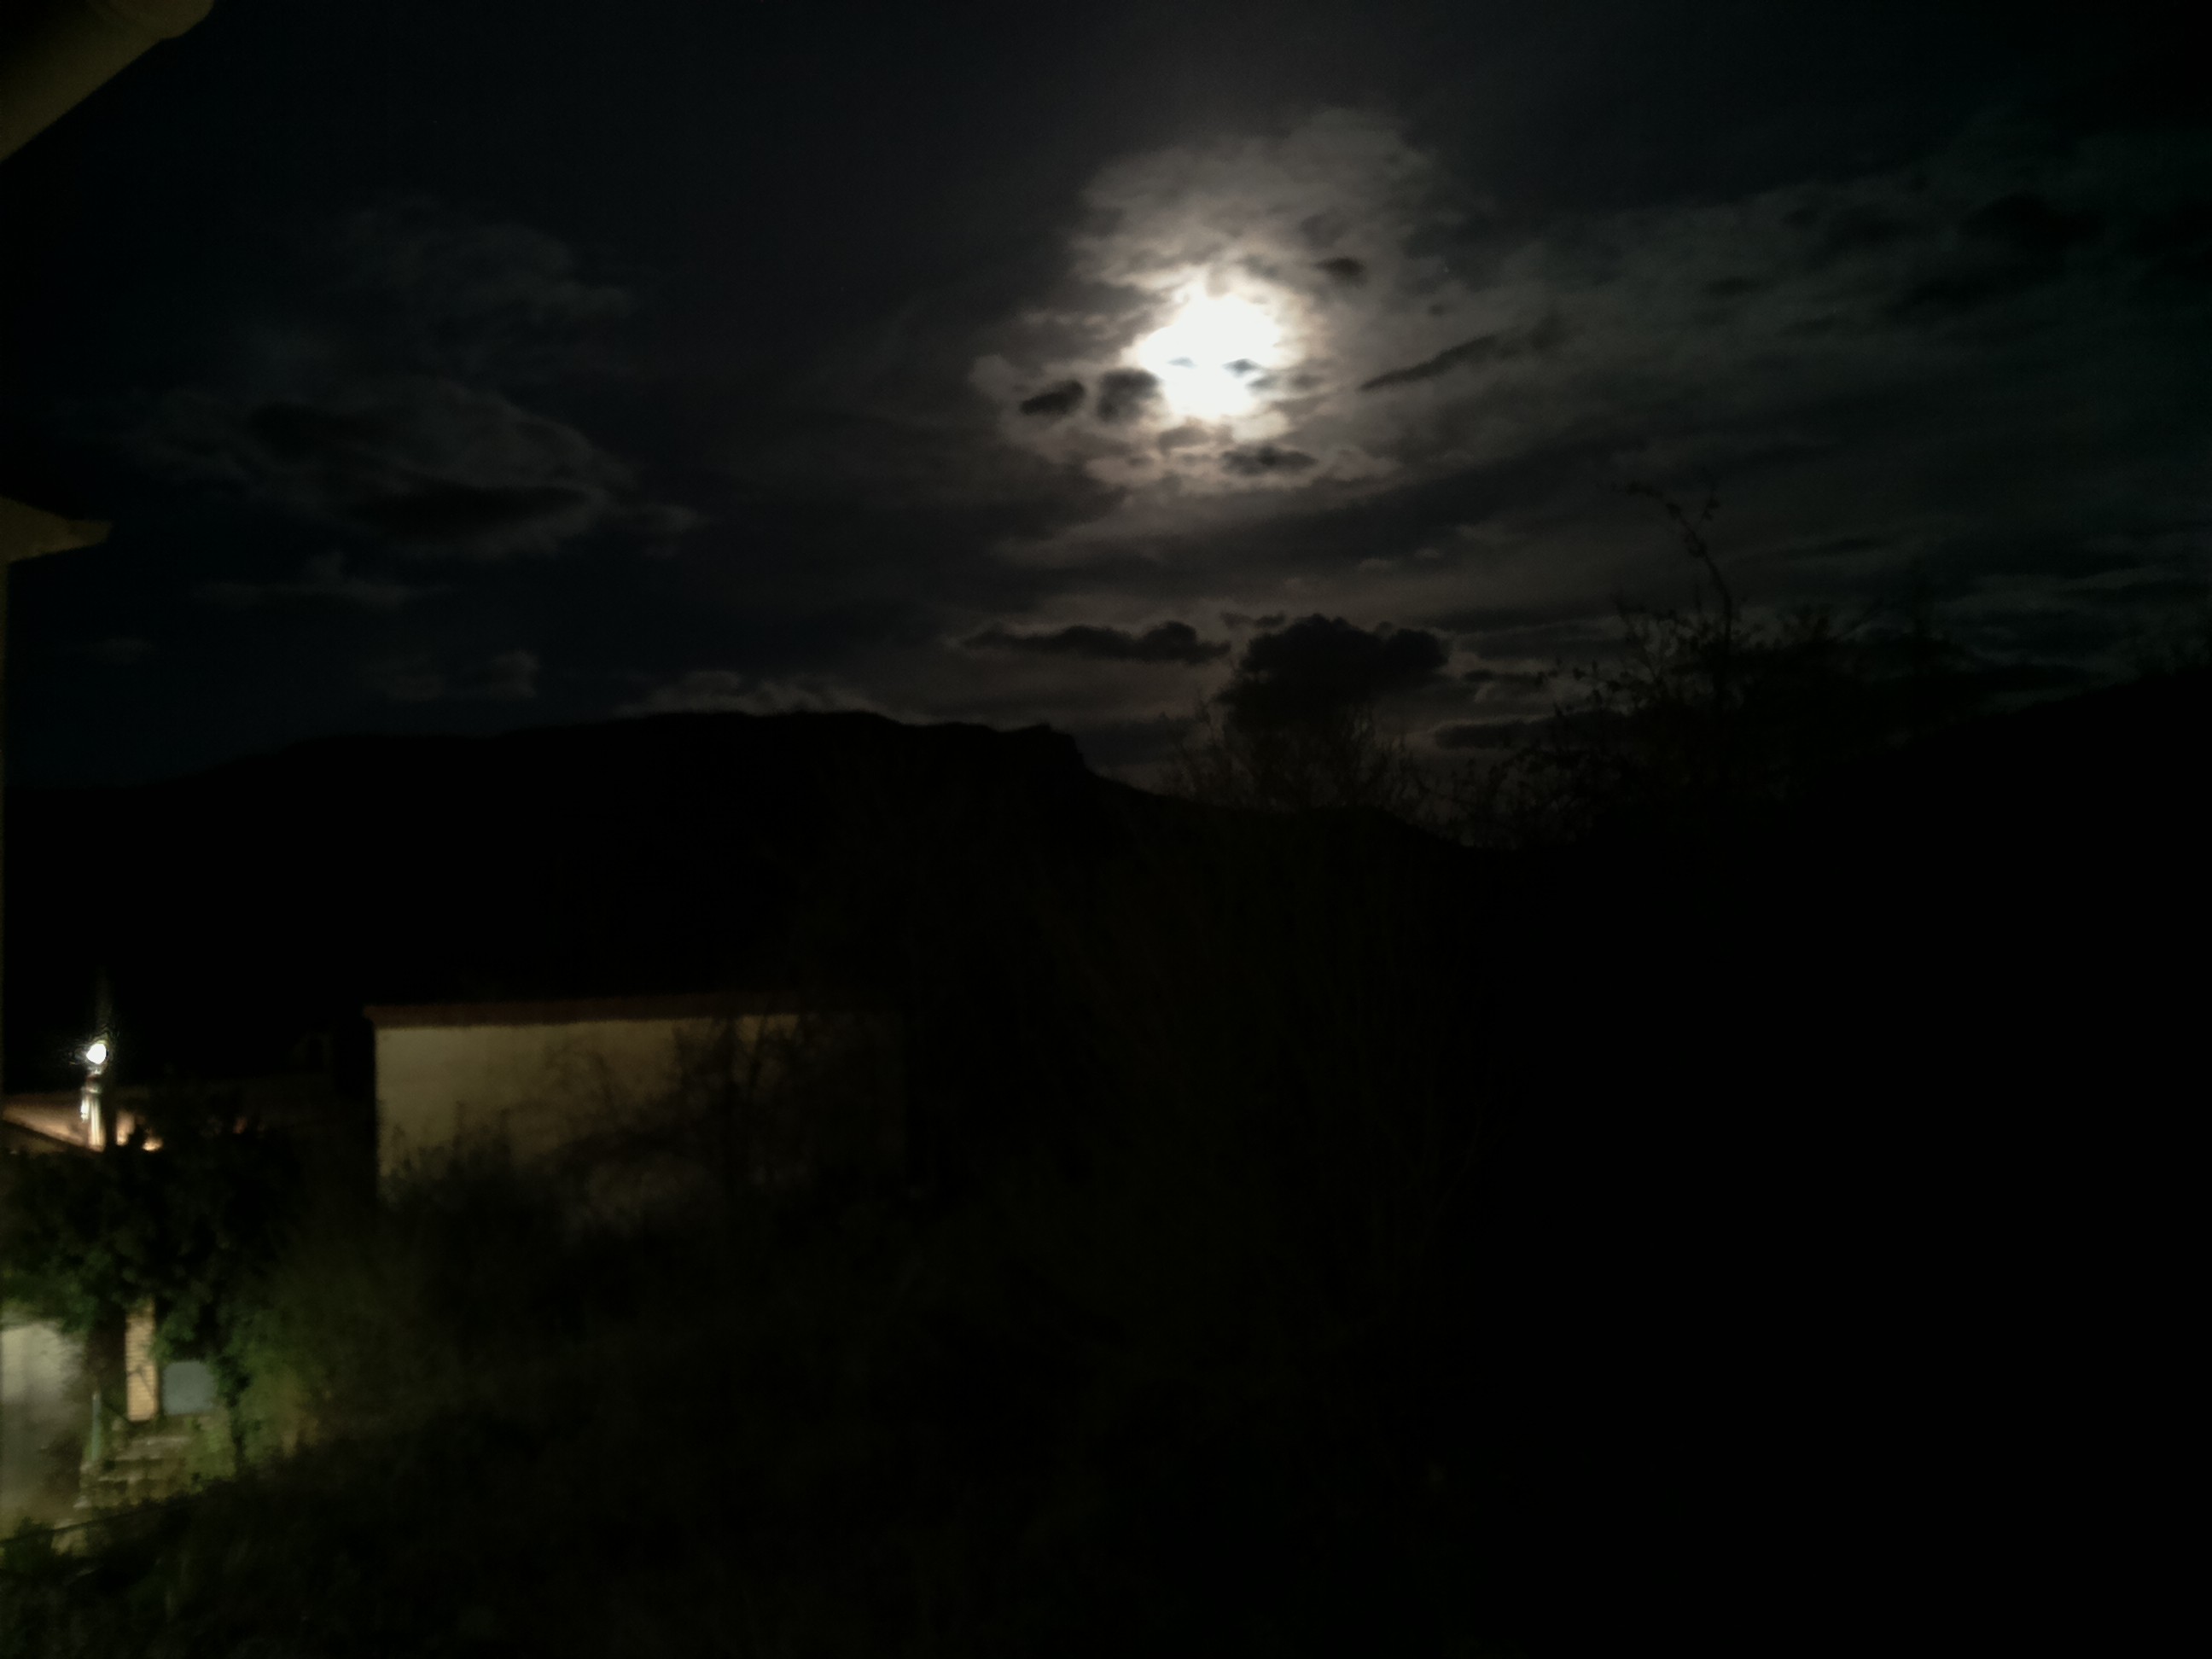 | 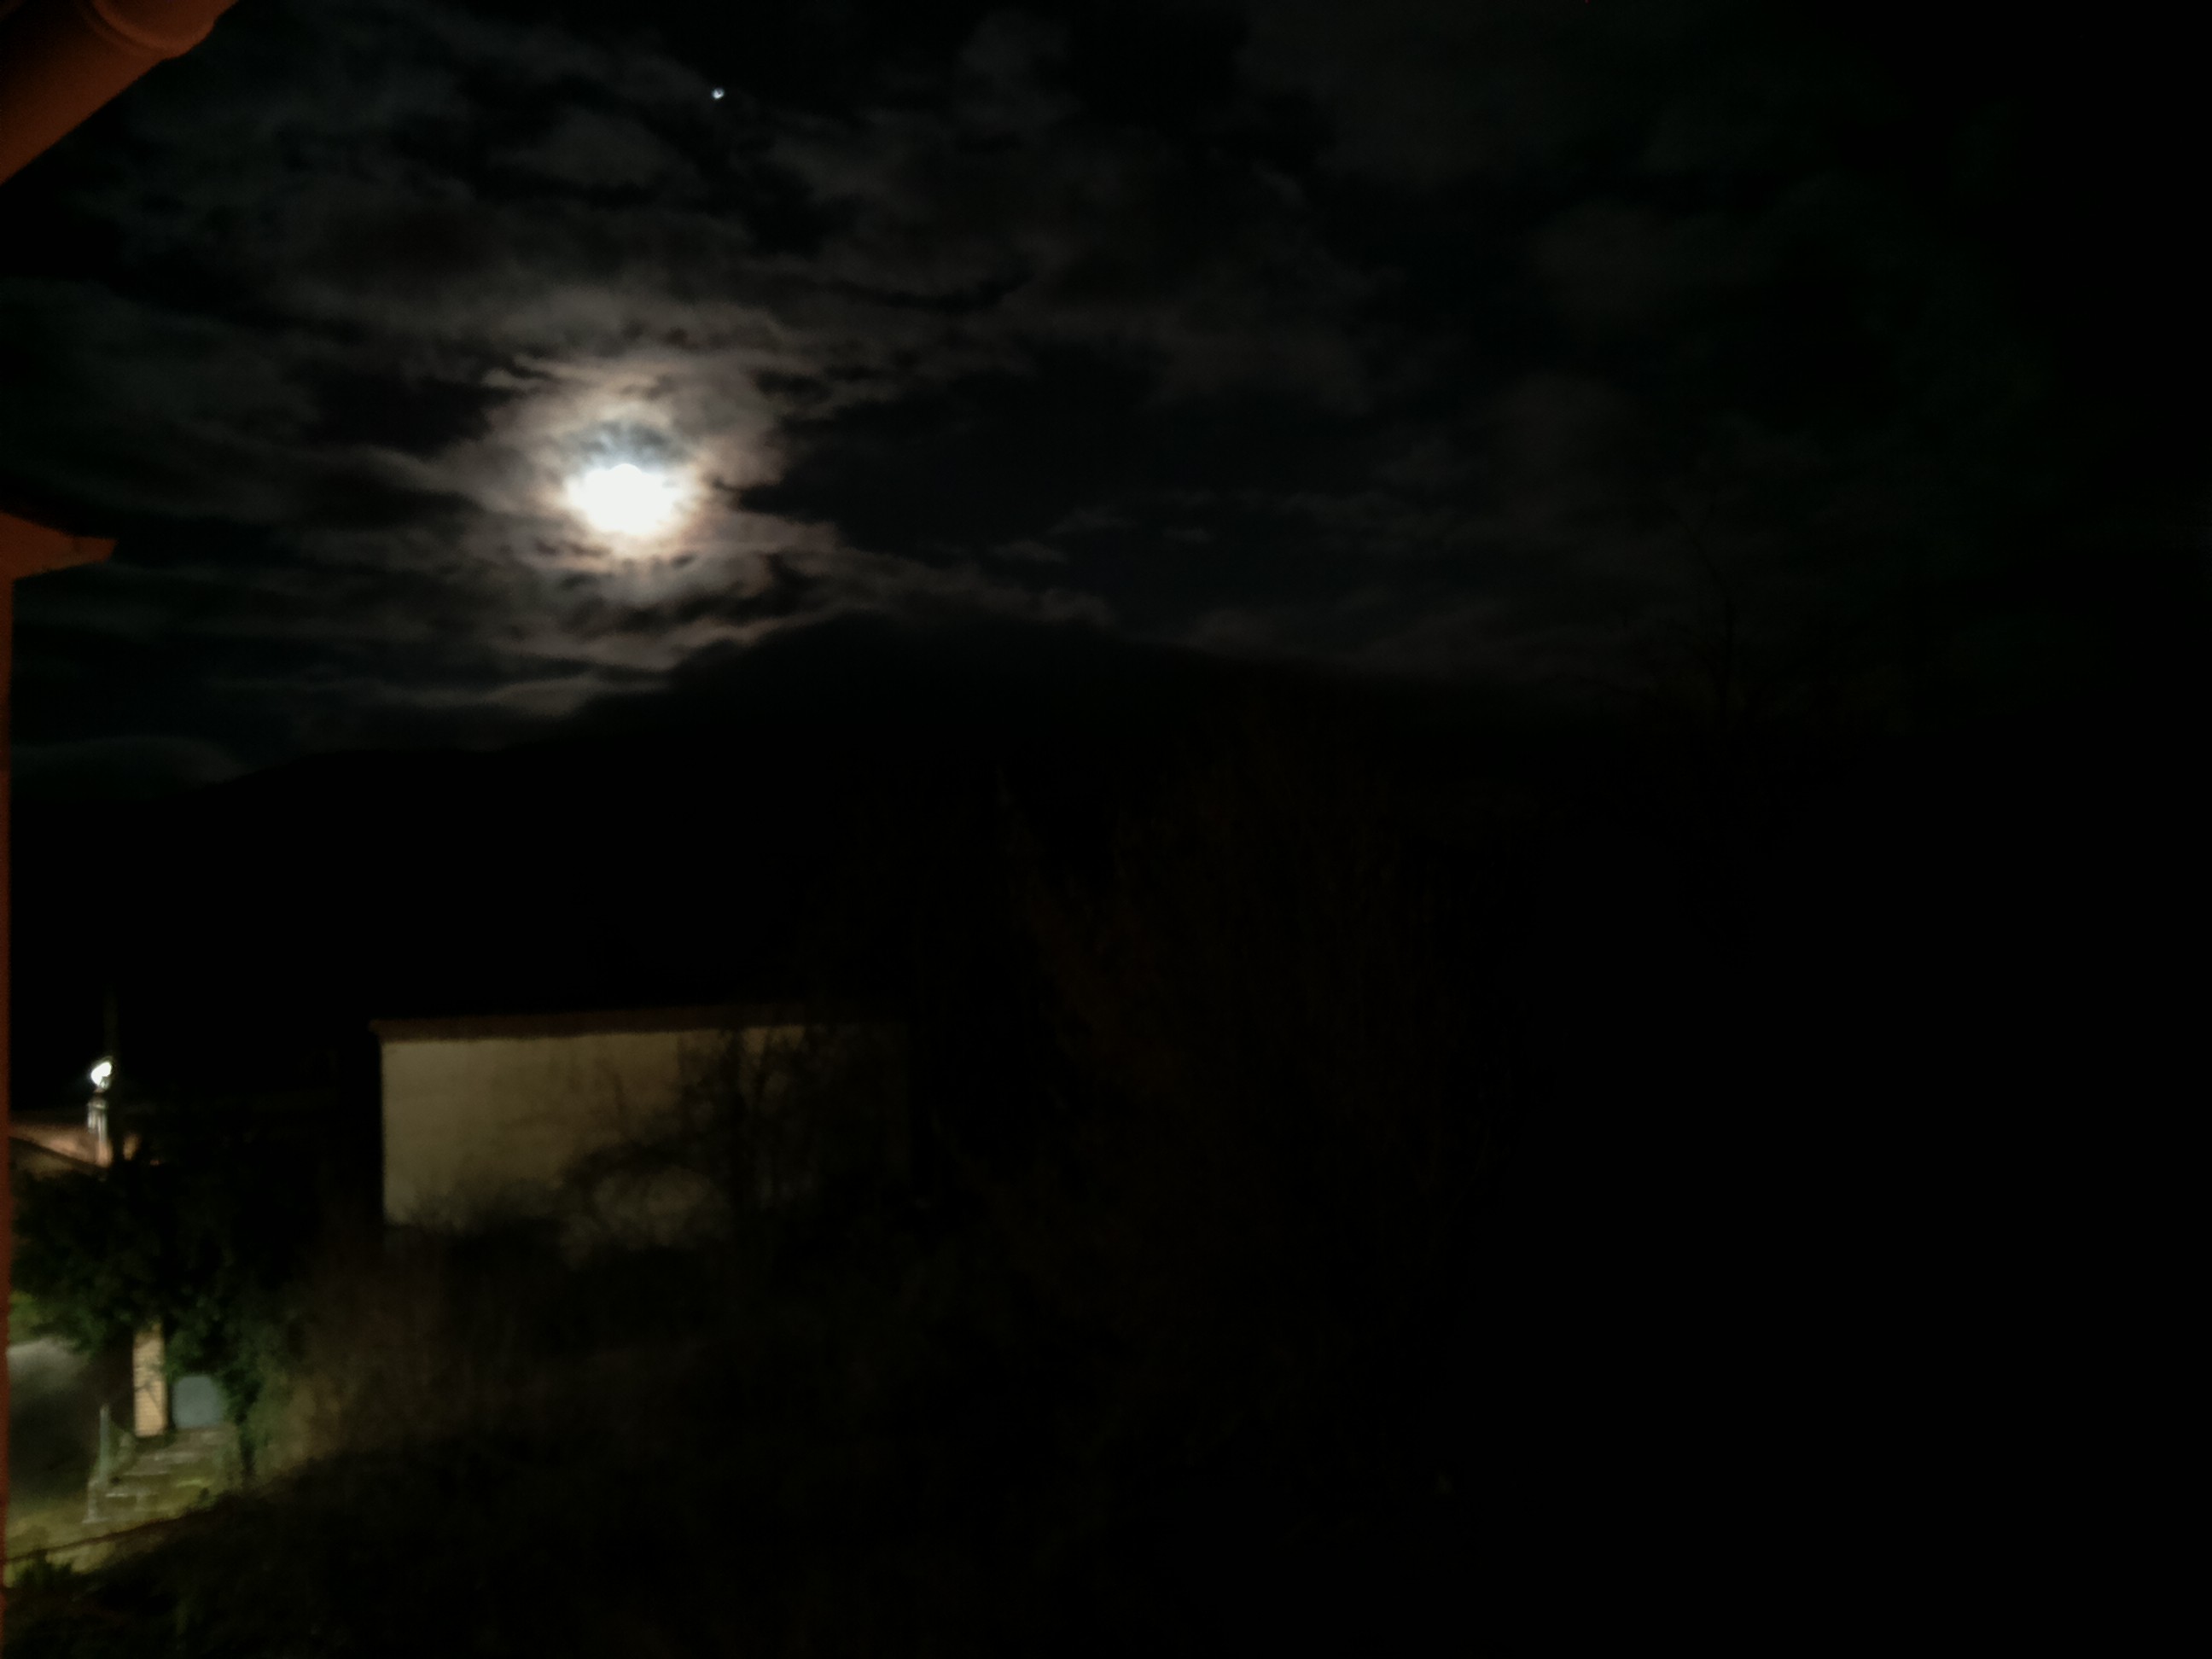 |
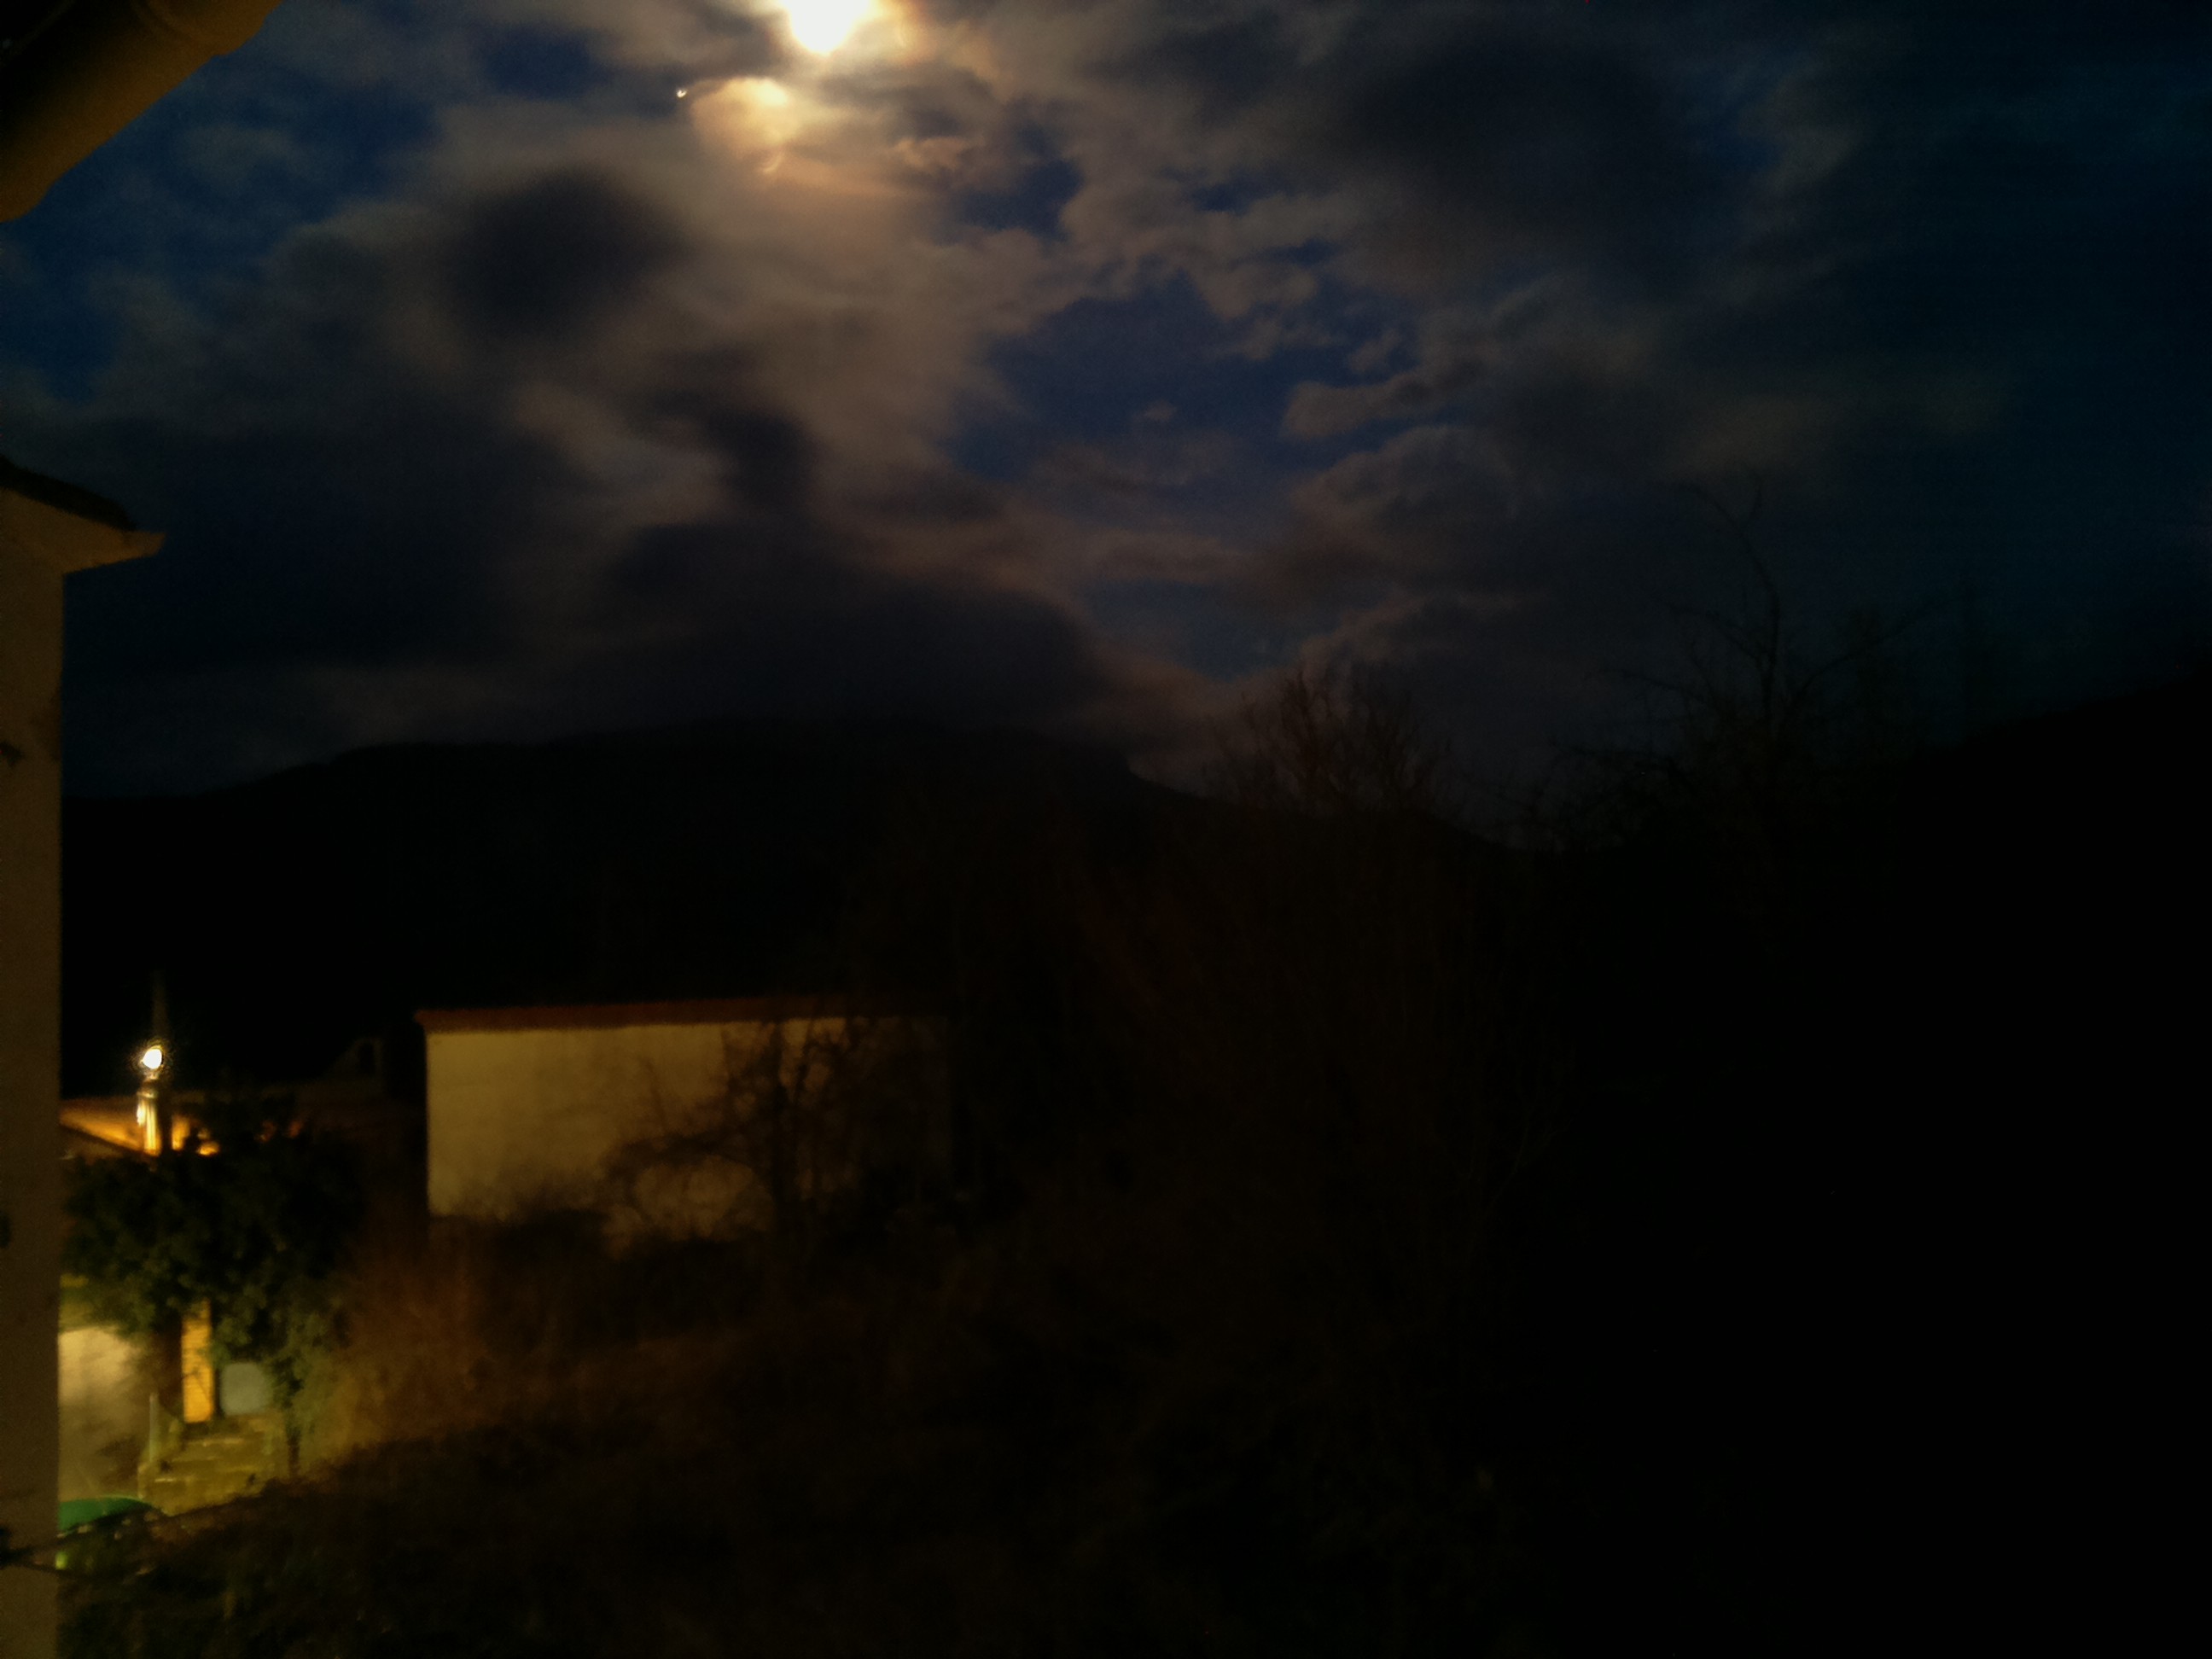
All these images are not retouched in any way. They're just as the Picam shots them.
www.mooncalc.org is a nice website you can use to see the moon transit.
13. WHATSAPP BOT
The picam is not always accesible from internet due to several reasons. So I decided to connect it to WhatsApp using yowsup and whatsapp-bot-seed.
Some features I added to Picam were:
- get photos
- take timelapses, hdrs and panoramas on demand.
- get meteorological data
- update whatsapp status and photos with the images and data taken by the Picam.
- add firewall rules
- reload services.
- move servo on demand.
As the script that controls the Picam is already too big, the whatsapp bot comunicates with the control script with the lib zmq.
14. OBJECTS DETECTION WITH DEEP LEARNING/NEURAL NETWORKS
Lately I've been playing with the idea of recognize objects in the photos the Picam takes, mainly for discard false positives of the movement sensor. At first I tried it out with OpenCV and the module dnn, using the MobileNetSSD neural network.
But I found the Squeezenet DNN, which is smaller (0.5MB) and should work better on the Pi. As the authors describe it in the paper:
"SqueezeNet achieves AlexNet-level accuracy on ImageNet with 50x fewer parameters. Additionally, with model compression techniques we are able to compress SqueezeNet to less than 0.5MB (510x smaller than AlexNet). The SqueezeNet architecture is available for download here: this https URL."
Here is a simple example on how to load the DNN with Caffe. If you want to try it out, you need to clone Caffe and SqueezeNet first:
git clone https://github.com/DeepScale/SqueezeNet.git
git clone https://github.com/BVLC/caffe.git
The files you will need are:
caffe/python/caffe/imagenet/ilsvrc_2012_mean.npy
caffe/data/ilsvrc12/synset_words.txt
SqueezeNet/SqueezeNet_v1.1/deploy.prototxt
SqueezeNet/SqueezeNet_v1.1/squeezenet_v1.1.caffemodel
And modify the script to point to the prototxt and model.
Another possibility, mainly for discard duplicated images when taking photos of movements, would be to compare the images [1] [2]:
#!/usr/bin/python
#
# https://www.pyimagesearch.com/2014/09/15/python-compare-two-images/
#
from skimage.measure import structural_similarity as ssim
import matplotlib.pyplot as plt
import numpy as np
import cv2
import argparse

def compare_images(imageA, imageB, title):
    # compute structural similarity
    s = ssim(imageA, imageB)

if __name__ == "__main__":
    parser = argparse.ArgumentParser()
    parser.add_argument("-i1", "--image1", help="image1")
    parser.add_argument("-i2", "--image2", help="image2")
    args = parser.parse_args()

    if not args.image1 or not args.image2:
        print ("  Usage: --image1 and --image2 are mandatory")
    else:
        im1 = cv2.imread(args.image1)
        im2 = cv2.imread(args.image2)

        # convert the images to grayscale
        im1 = cv2.cvtColor(im1, cv2.COLOR_BGR2GRAY)
        im2 = cv2.cvtColor(im2, cv2.COLOR_BGR2GRAY)

        # compare the images
        print "1.0 very very similar - 0.0 totally different"
        print compare_images(im1, im2, "Image1 vs. Image2")
14. TODOs
Fix the after sunset shutdown cycle, to save battery.While composing a panorama, do not take HDRs nor panoramas.- Compare images taken after detect movement, and discard the equals ones.
Add lumens, temperature and humidity to the photos uploaded to Flickr.- Use a proper lightning detector, the AS3935, and get rid off the BH1750 light sensor.
Take 1080p timelapses.- Improve youtube video quality
- Add temperature to timelapses
Try to fix the false positives of the movement detector sensor.- Catalogue every photo taken (specially the movements ones) with a DNN/CNN using machine learning. Up to now I've tried Squeezenet and Caffe on the Pi.
Maybe take just 5-6 photos for compose the panoramas. It should take less time, and the result may be the same.- Publish all the scritps to github.
Discussions
Become a Hackaday.io Member
Create an account to leave a comment. Already have an account? Log In.