 zakqwy
On a few occasions I have had the need to secure something to a flat bit of laser cut wood. In all cases, I created precise shapes that allow me to rigidly and accurately grip the object while not depending on the exact dimensions of the cuts themselves. The method requires final alignment to be performed during assembly, but does allow for post-assembly re-alignment and doesn't require any adhesives or fasteners. A few examples from a recent #NeuroBytes patellar reflex model iteration:
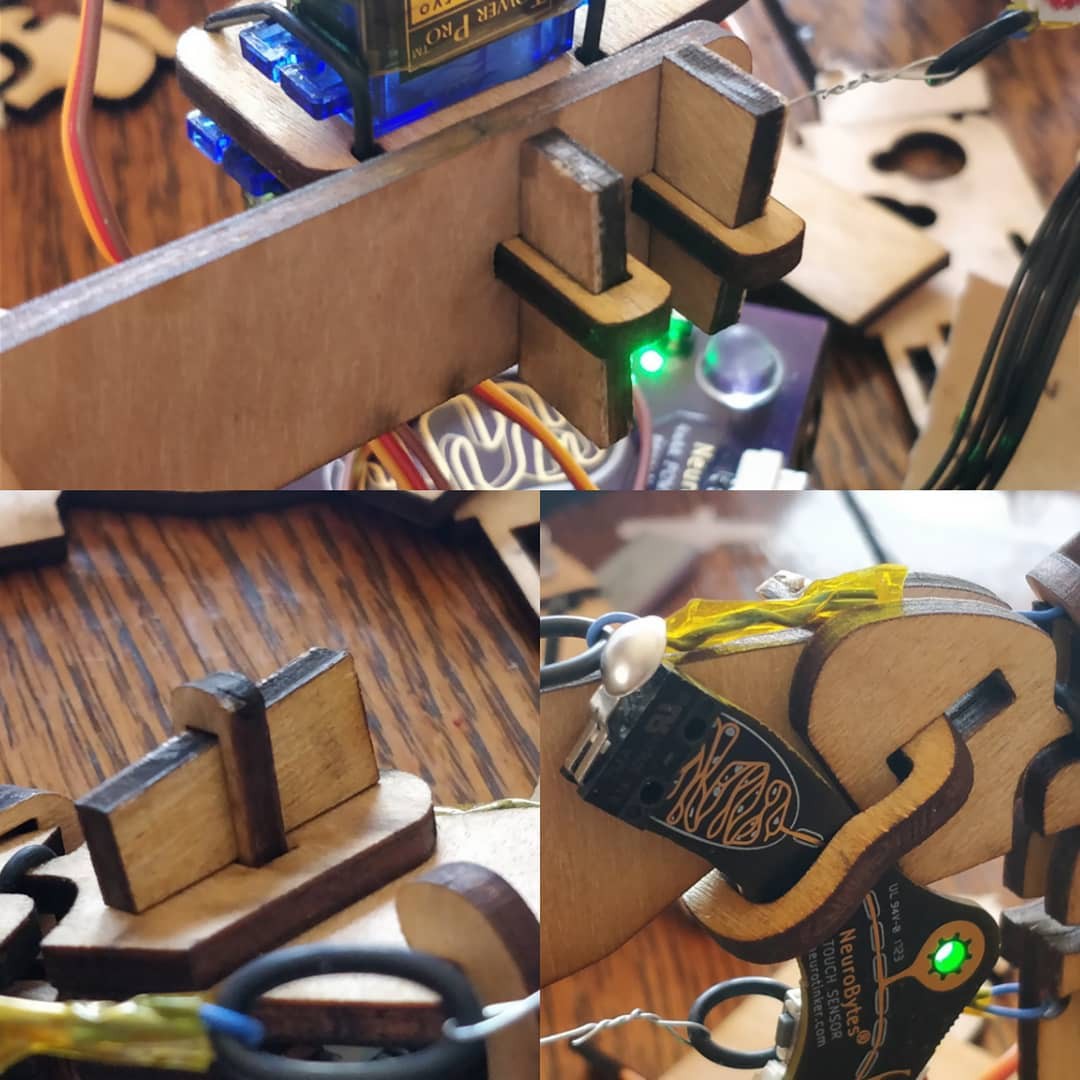
The top image is a simple T-joint, used to connect two right angle bits of 3.2mm aircraft plywood. The middle piece goes through the base in two spots and has cutouts for wedges, which are inserted and tightened during assembly to pull the joint tight. The angle isn't exactly 90 degrees due to the aforementioned kerf taper, but it works well enough for this application (a mounting plate for a demonstration model).
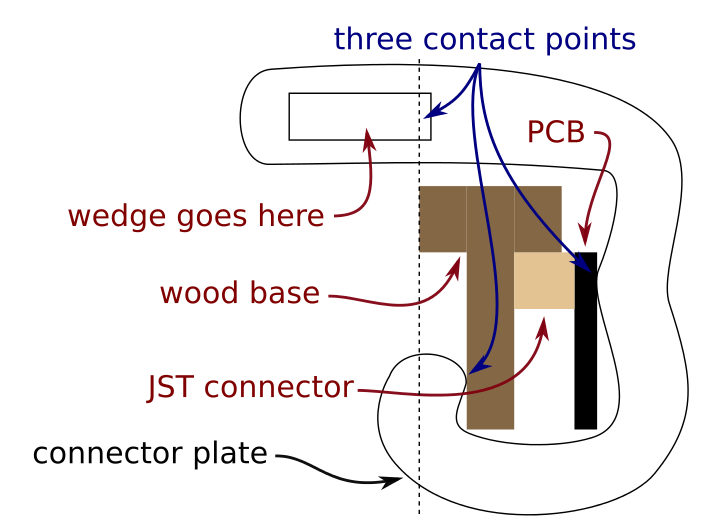 Not a great diagram but hopefully you get the idea. The wood base has several layers, and you have to imagine that the leftmost layer extends out towards the viewer along the dashed line. That way, when a wedge is inserted into the rectangular 'wedge goes here' slot, it pushes the upper bit of the connector plate to the left as its driven into place, clamping the board securely in place. I really should reference a side view or 3D model with this sectional image, but... here we are.
During installation, the connector plate slides in from the bottom (which is open and rotates into position, pivoting on the lower 'catch'. To ensure clearances with the holes in the wood base, I keep track of the connector plate's position extremes on the wood base using guides in Inkscape. Rotating the connector plate like this is a synch if you just move the cross symbol to change the center of rotation to the bottom contact point:
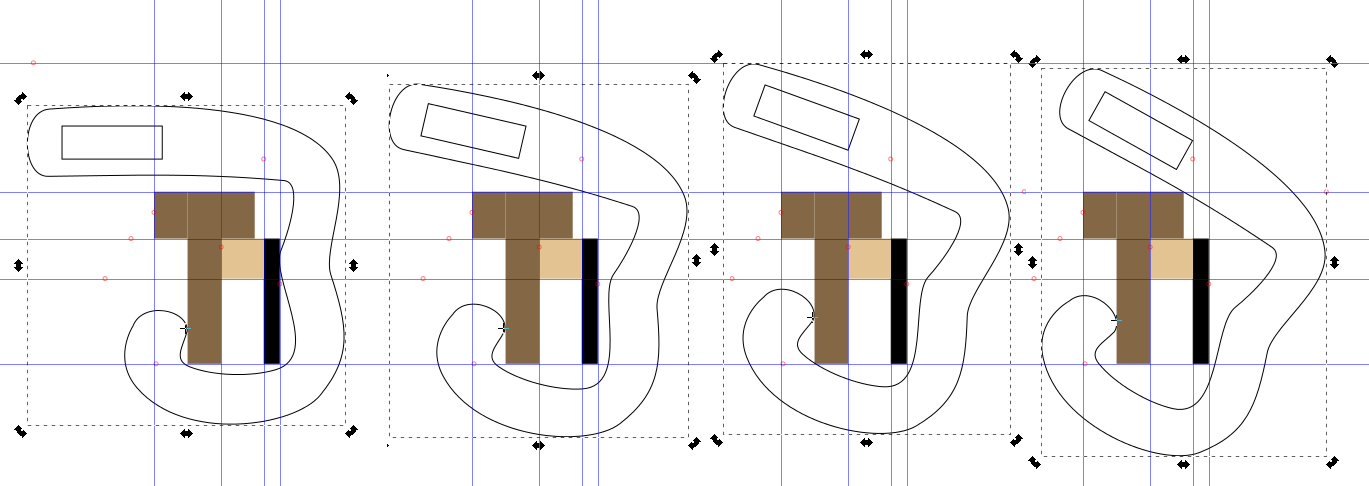 Note that in the third frame, I actually translated the connector plate up a bit so one of the corners can clear. This is much easier during real life assembly; you really just need to be sure everything clears at all points during the rotation/translation, as manual assembly makes combining both movements quite intuitive.
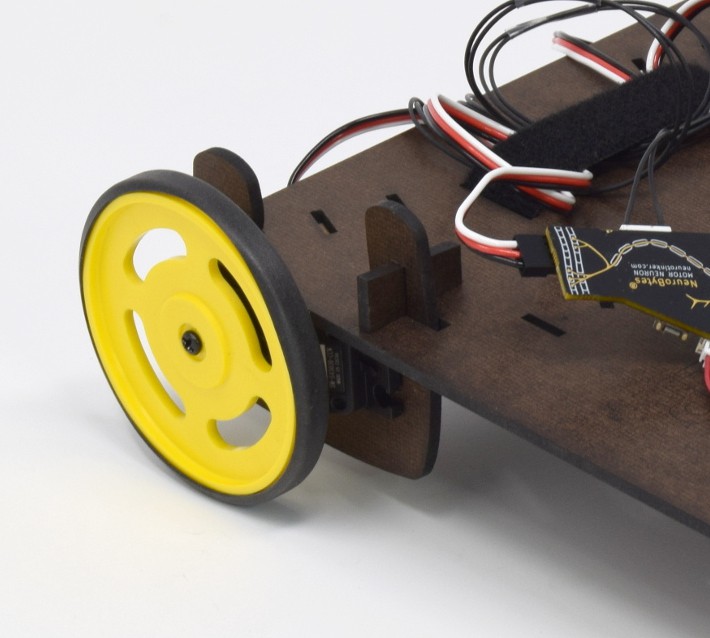
 I used a similar method to hold the servos on for the latest NeuroBuggy design. Again, I needed to secure an object (in this case, a continuous rotation servo) to a flat laser-cut sheet. The object needed to be adjustable (toe angle!) and quite secure, but also removable. The connector plate is bigger but otherwise similar to the previous example -- it slides in from the rear of the car, rotates into position, and gets secured by a wedge:
This method is still very much a work in progress. I think a lot of optimization could be done to reduce the material requirement and cut length; for example, the width ratios of the tenons and slots could be standardized (probably based on a woodworking joinery book's advice), and the curved shape of the connector plate itself could probably be generated parametrically once a few constraints are figured out. The wedges are also probably beefier than needed and the angles could be optimized. But it's a good start -- feels good to assemble something without glue or fasteners!
Discussions
Become a Hackaday.io Member
Create an account to leave a comment. Already have an account? Log In.