 TwinkleTwinkie
I have a friend, his name is Hyr0n, and he's been afflicted with the notion that "GIF" is pronounced" JIF, as in Peanut Butter. We all love Hyr0n so we forgive him for this deliberate misunderstanding but that doesn't keep him and I from ragging on each other at every opportunity so in that spirit I created the "Peanut Butter" SAO in 2019.
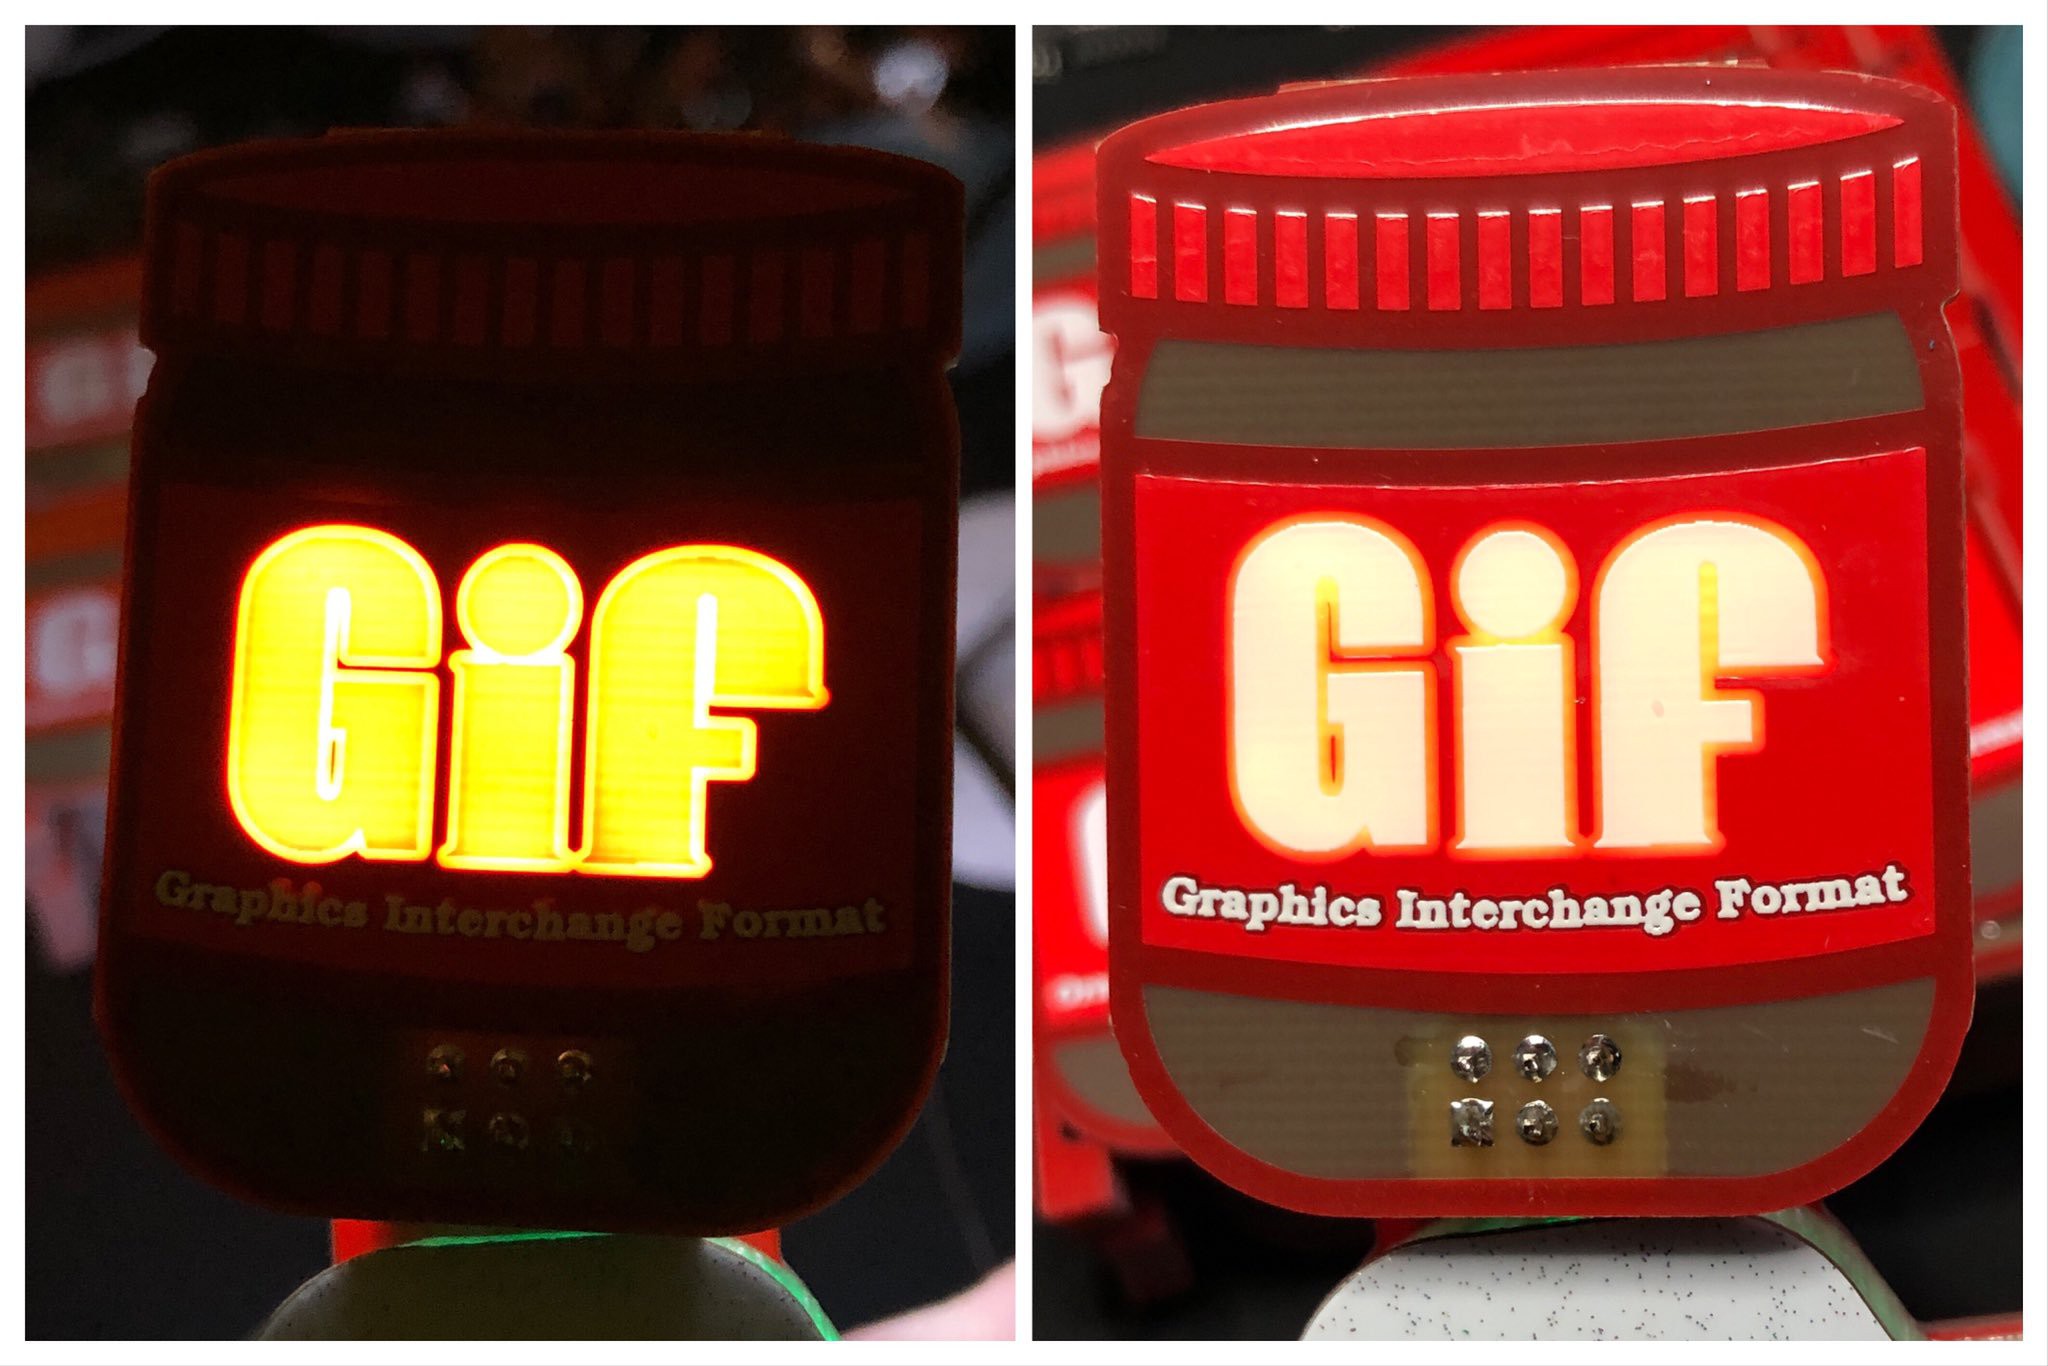
The idea behind this shit post of a shitty add-on was to simply present "Gif" in the same format as the beloved "Jif" peanut butter. However this quick last minute SAO turned into an exercise in controlling light bleed and there were some lessons learned that I'd like to share with everyone.
2 Layers is not Enough
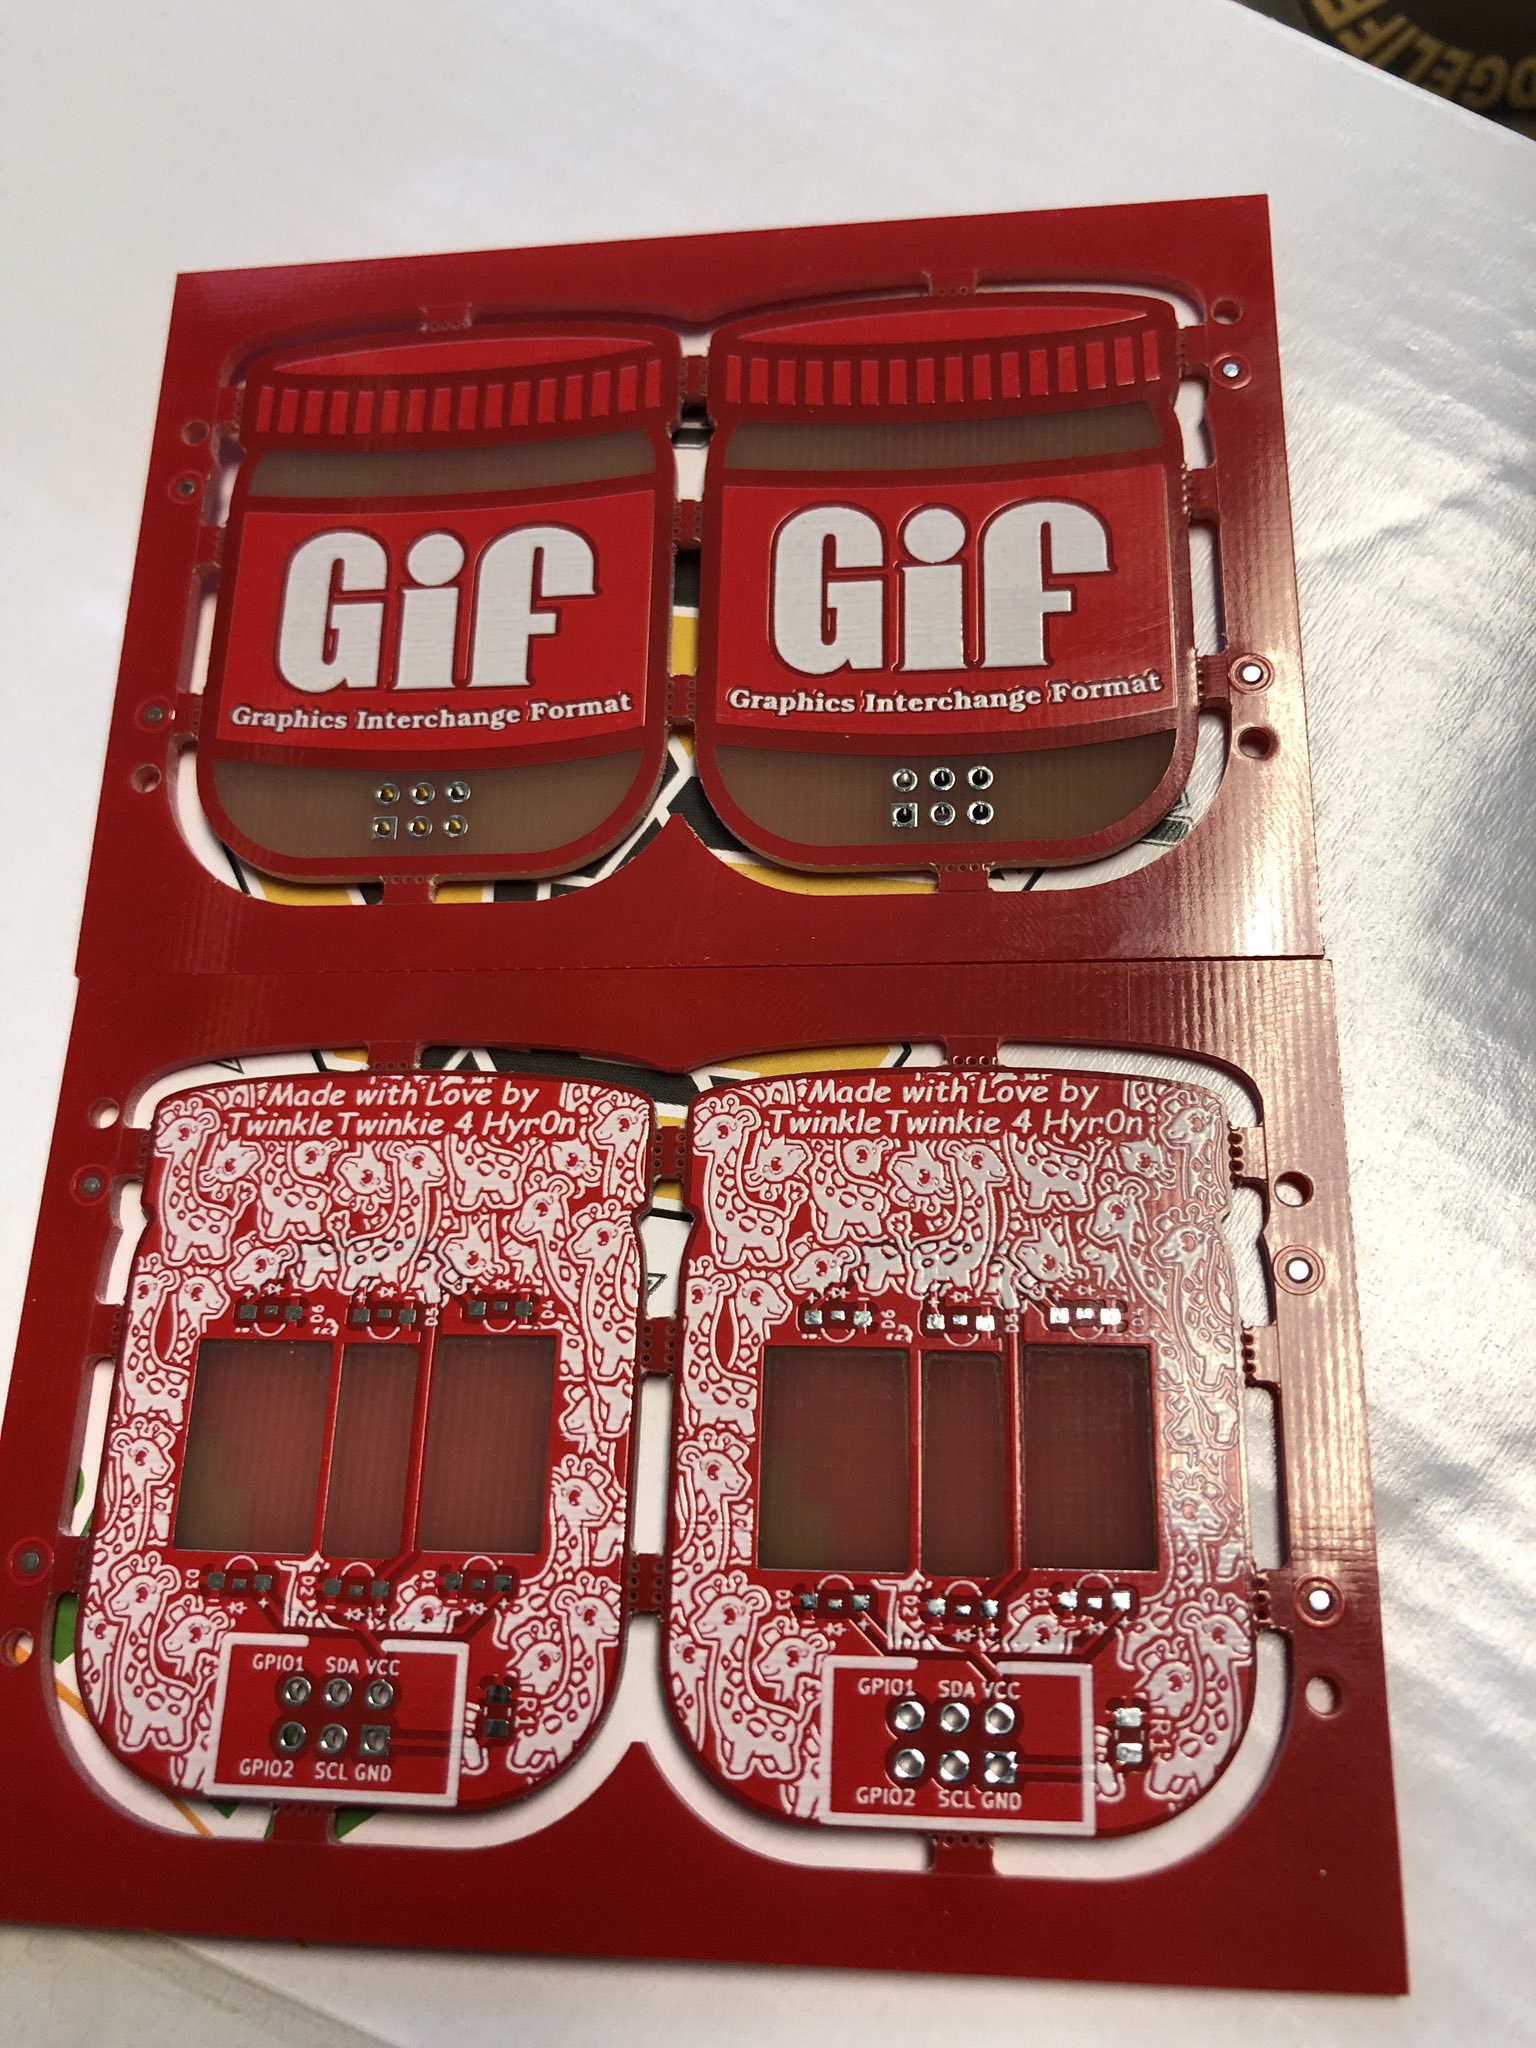
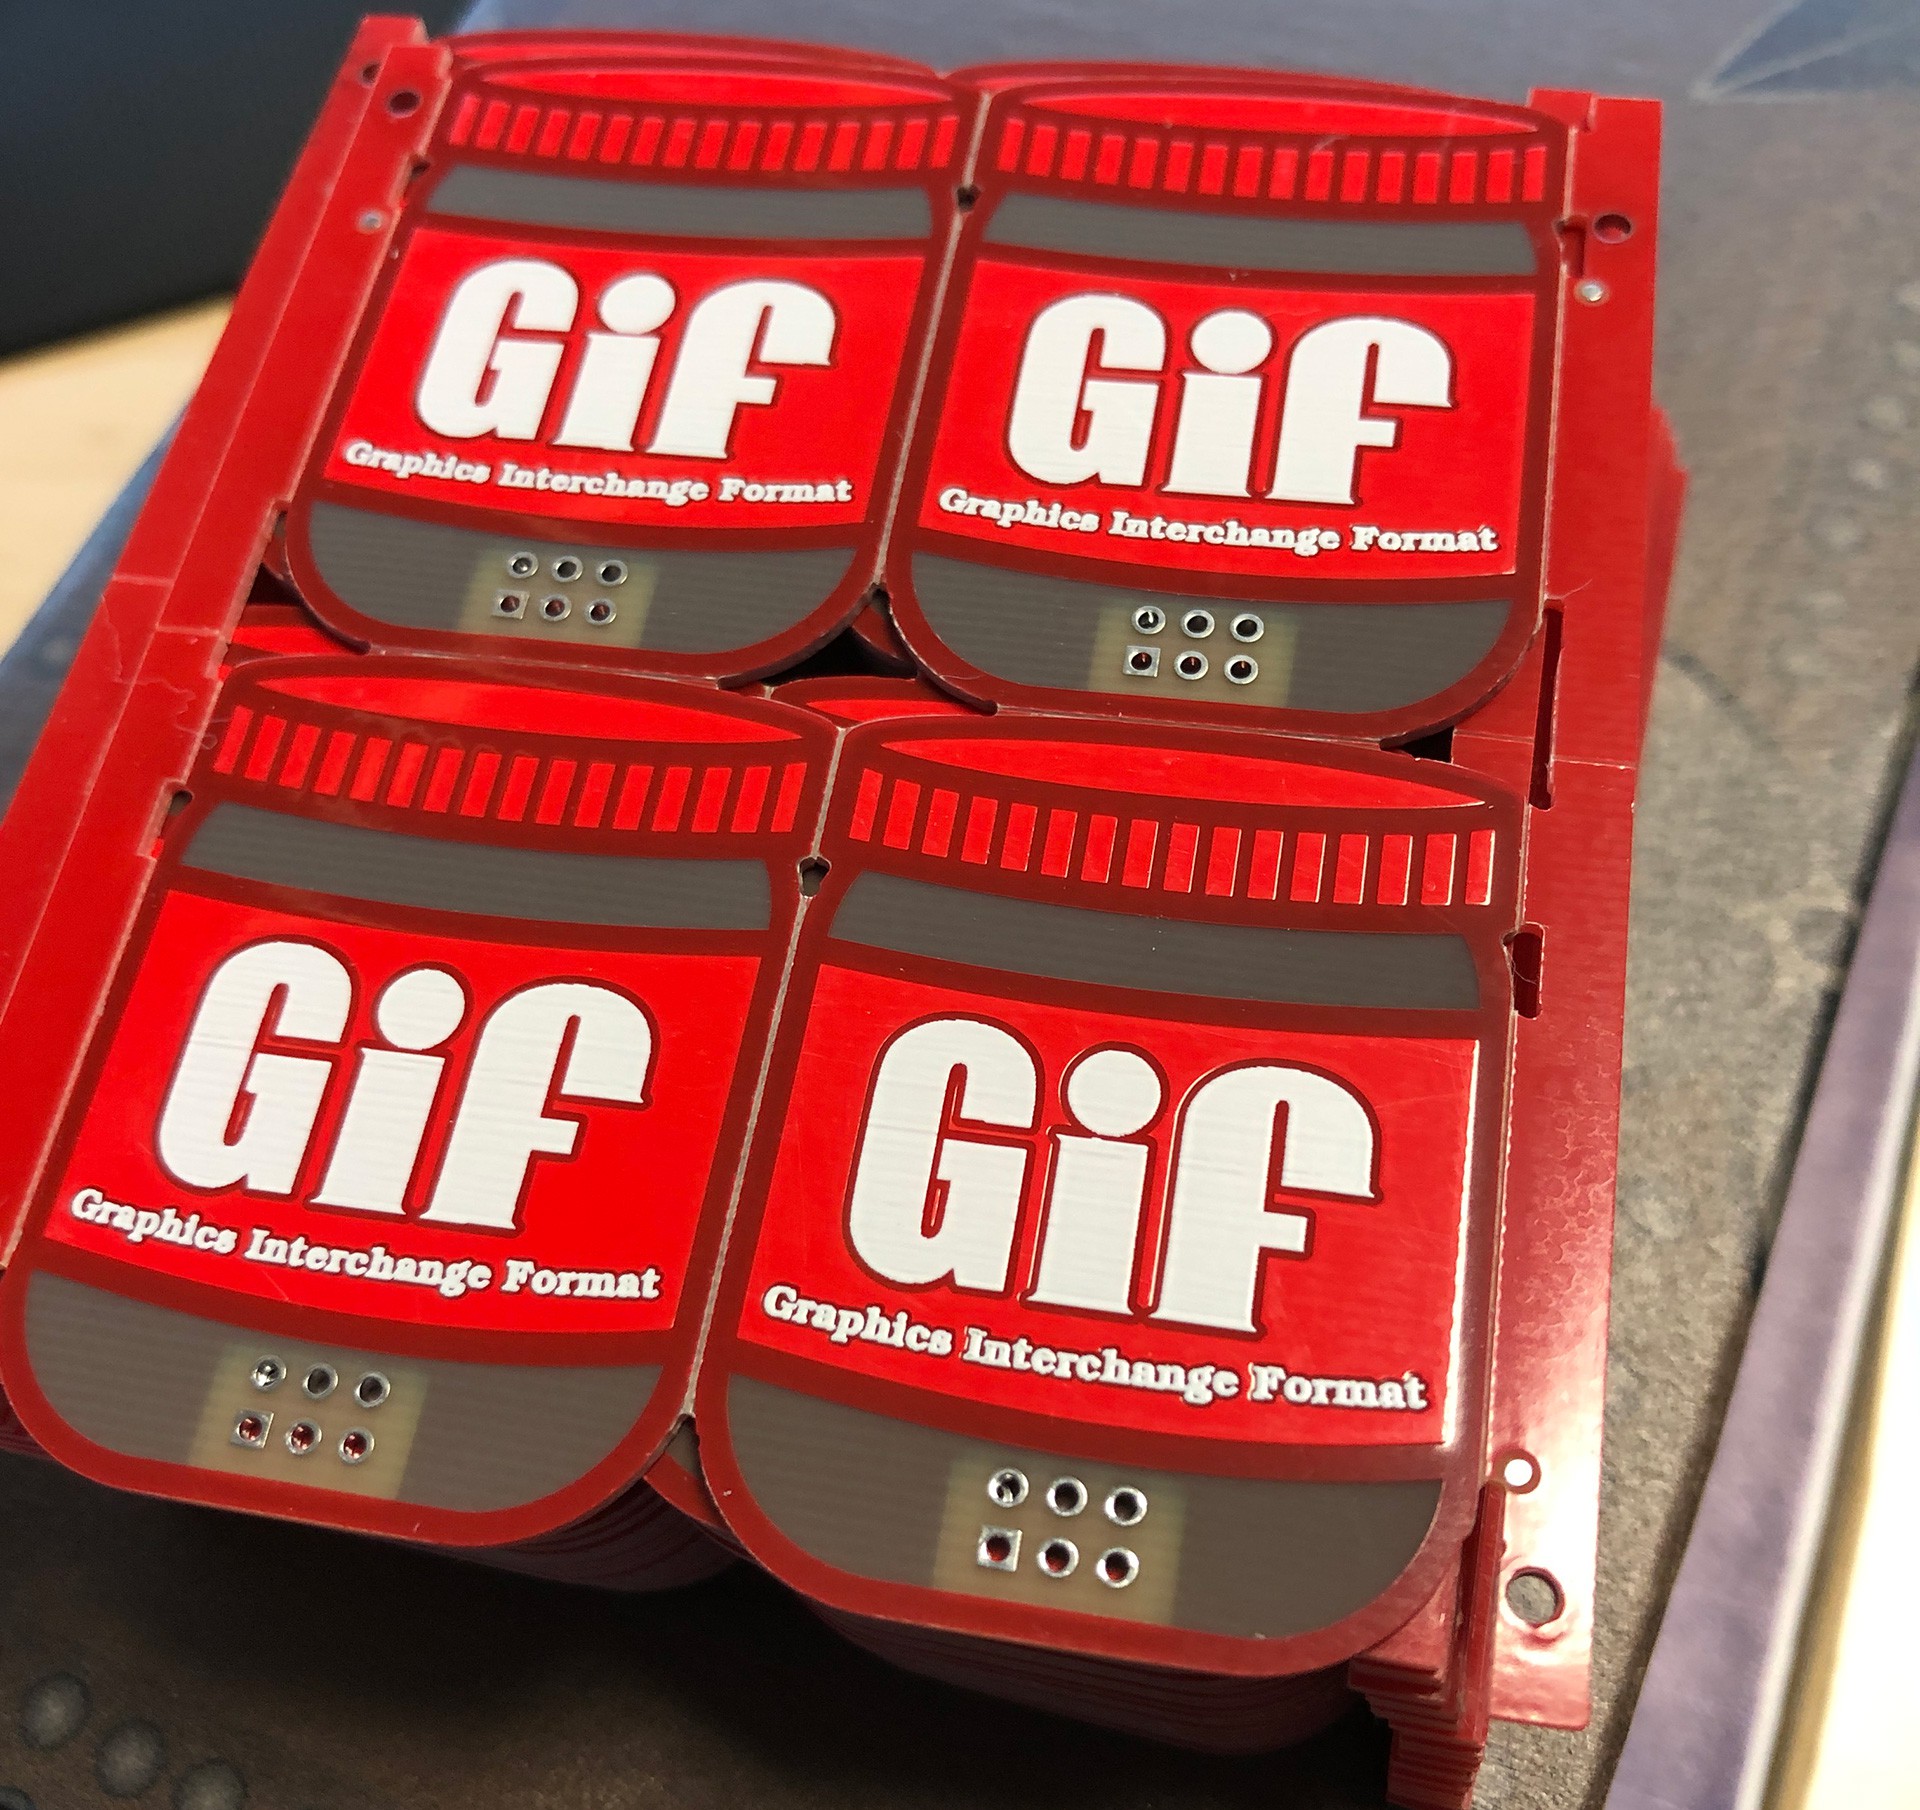
The original design for "Peanut Butter" was incredibly simple. Featuring a mock up of "Gif" in the same spirit of a jar of "Jif" I spent most of my time making a G out of a J and then filling the back with a bunch of Giraffes so as to split the difference on the two arguments, and thus making both sides think they were right. I quickly threw together a schematic that featured 6 white LEDs that would back light "Gif" and sent it off to fab with the extra bit being I had it panelized to see what that would look like and here is the result:
The results were great! Except that is until I put on the LEDs and gave them power.

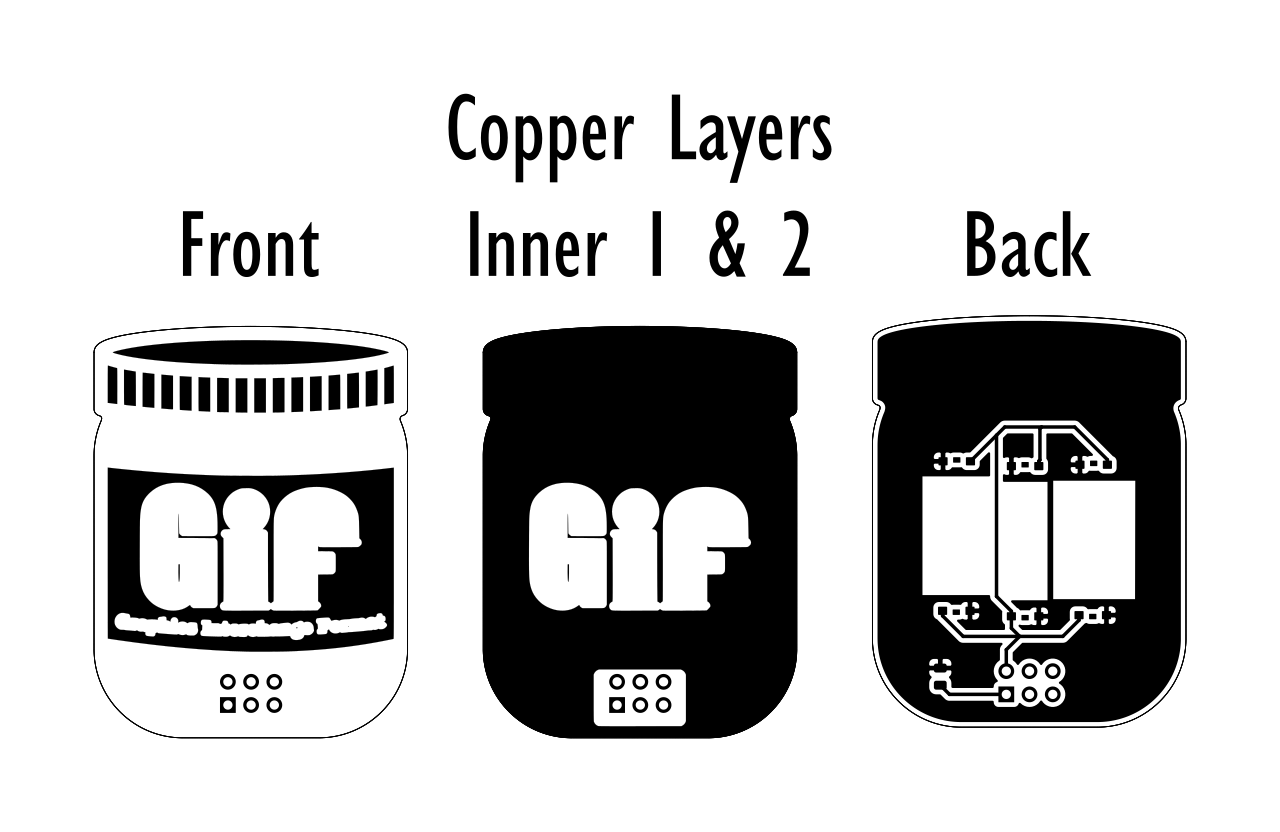
The light bleed on this was really bad, I only wanted to light up the words and despite using side mounted LEDs that were only pointing inwards on the letters the light was so bright that it covered way more than intended. So I chewed on this for a couple of days and then it occurred to me that maybe I could add more layers between the top and bottom and control where the light was visible without affecting the top copper art.
The second revision of Peanut butter had 4 layers with "Gif" being the only open areas in the copper on the two inner layers. I probably could have done this with only one layer of copper but I wanted to be sure it'd block as much light as possible and you can't order a 3 layer board anyway.
This change worked perfectly and due to a misunderstanding on my part when ordering these instead of ordering 25 boards I ordered 25 panels so I had a lot more to give away.
![]()
Controlling light bleed? You need more "Layers"!

 If you're designing a board where light will be intentionally shone through the back and if you're looking to control exactly where that light is shown without affecting the top copper layer then you'll need to use inner copper layers to get the results you're looking for.
In general this realization made other projects easier as well. When you only consider using two copper layers then suddenly the back copper layer becomes a consideration for the art you're trying to display on the front. If you don't want visible trace lines or are trying to control the way light is presented then you can utilize multiple layers to achieve your end goal. You might be wondering how much more this might cost you and that varies from fab to fab but from JLCPCB the cost of moving to 4 layers from 2 isn't that much more and if you panelize your designs you can get a lot more individual boards for your money.
Discussions
Become a Hackaday.io Member
Create an account to leave a comment. Already have an account? Log In.