 Daren Schwenke
I need to let air in and out for cooling my LEDs, and let the sound from the speaker out. This means holes... but I don't really want them.
So far I've been able to maintain the dimensions of the original gun and it would be a real shame to mess with that too much.
I think I can keep all the holes I need on the bottom panel though.
I could probably get away with not cooling the LEDs externally as long as people don't try to use this as a flashlight, but you know someone is going to do it and then it will melt down.
So for cooling, either the intake or exhaust needs to be ducted to the outside. It's a lot easier to duct the intake here as the exhaust has gears and such moving it it, so that's what I'm doing.
For the speaker, it needs to mount directly to some panel to isolate the two sides of the speaker from each other. If you don't do this, you lose like 80% of your volume and pretty much all of your bass response.
Problem is, I'm pretty much out of room if I want to keep my scale dimensions. If I put the speaker in the center, it intersects the fan duct. Moving it forward, there isn't enough room between the fan duck and the gearing. Moving it back, I got the battery.
So I toyed with making the top panel really thin and letting the speaker try to transfer through. A quick experiment told me that sucked. Virtually all the high frequencies were gone.
So I think I'm going to raise up the battery carrier and mount the speaker under it.
Here is about what the holes I need will look like.
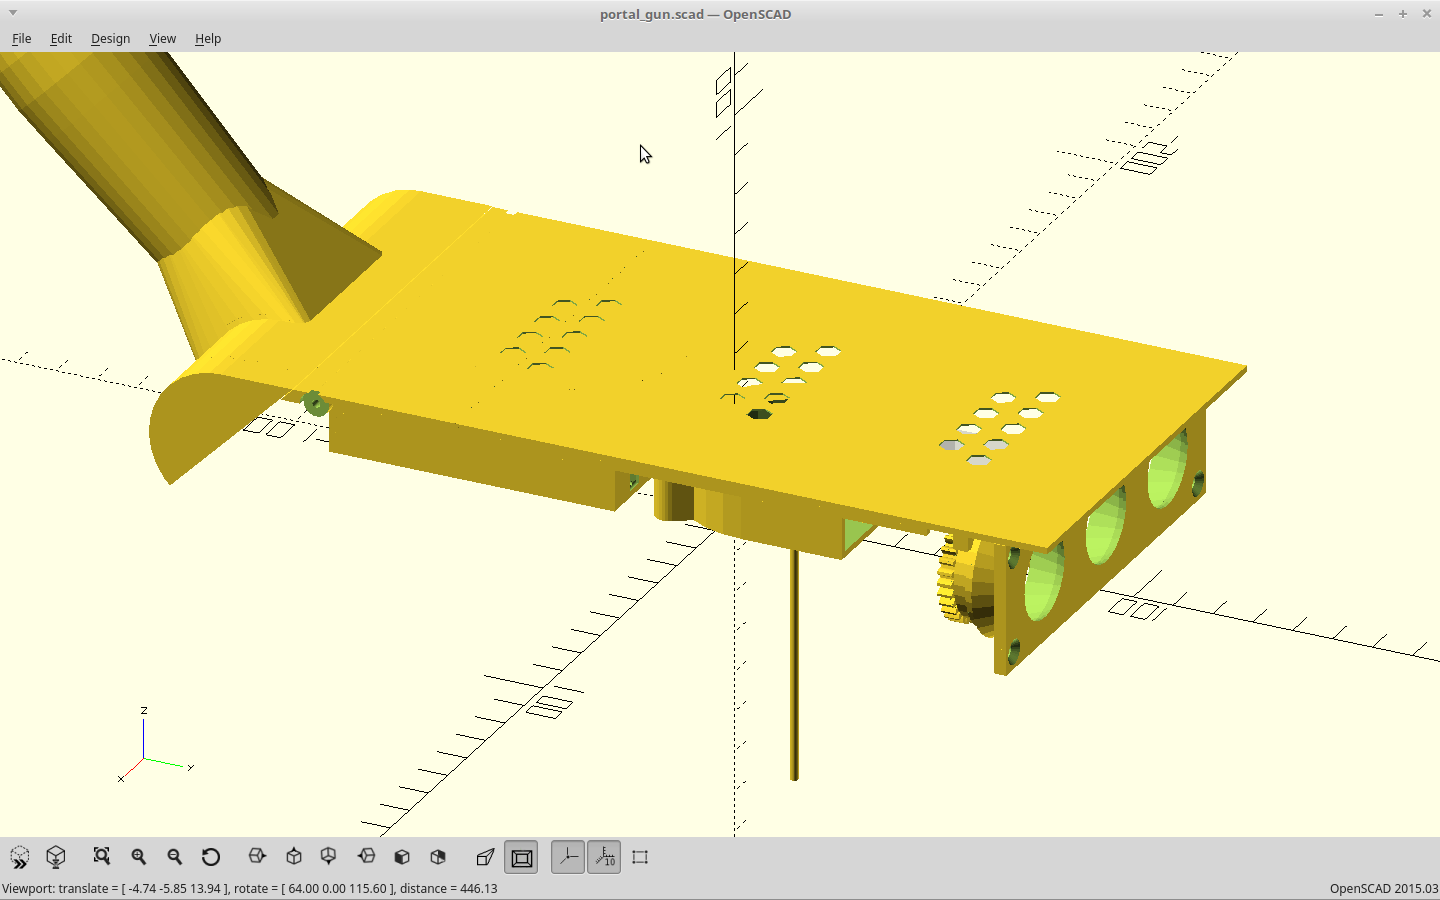
Left is the speaker, middle is the air intake, right is exhaust.
I am going to get a lot of light leaking from the forward set of holes, but I think I can fix that.
Working on it.
EDIT: We took a couple days off here to enjoy our new toy and take in the Falcon 9 launch, but now back at it.
I've settled on smaller holes and more of them. They still occupy a hexagonal pattern and have an even multiple of <nozzle_dia> between them. This lets the slicer trace a nice continuous path with no gaps when routing the walls. I also corrected the fact that I forgot to rotate the hexagons 30 degrees so the edges line up.
The overall size was adjusted with the height now being 34mm for less plastic and better scale for the front bezel. As every dimension not tied to components scales with the height, the whole thing is smaller now. This puts the largest component at < 200mm so pretty much anyone can print this now.
Discussions
Become a Hackaday.io Member
Create an account to leave a comment. Already have an account? Log In.