 Ryan Bailey
An update on progress so far
Now might be an opportune time to get my bearings on the state of the project so far. Based on the subsystems outlined in the main block diagram, I'll try to break down where things are now. The basic schematic and layout is actually done already. This was primarily to ensure that everything fits mechanically. I anticipate some schematic adjustments over time but so far everything seems good (and without resorting to 0201 passives either).
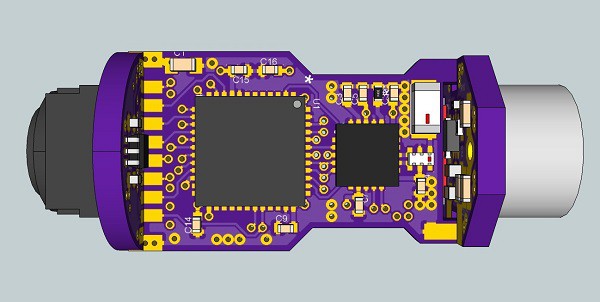
There's a few mm left in there somewhere.
The Rough Prototype System:
Jumble of wires, take 1:
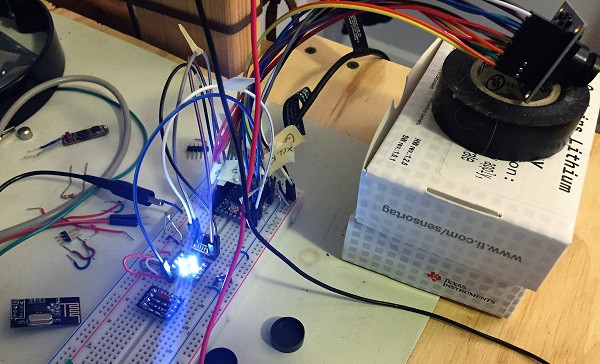
Pictured approximately from the lower left corner to upper right: nRF24L01+ communications module, magnetic reed switch breakout board, white LED 'flash' breakout, 128Mbit flash memory breakout, Teensy 3.2 board, OV7670 board. Note: the plan is to use the OV2640, but the basic control scheme and interface is very similar to the OV7670.
Not pictured: good posture.
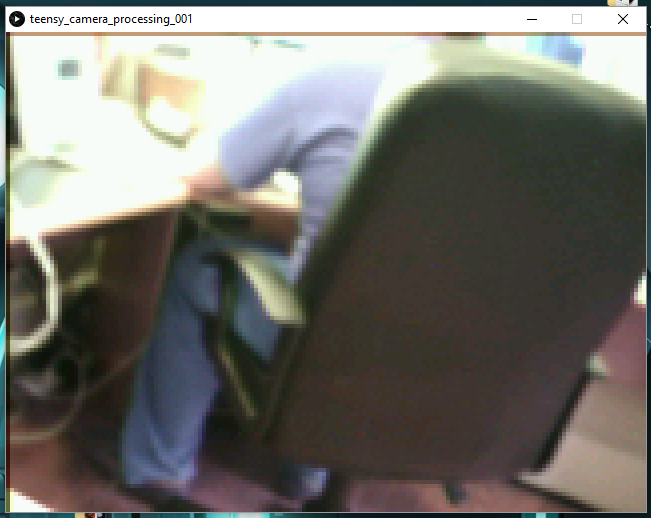
Above: image captured with the prototyping setup. For the sake of simplicity, the resolution right now is 160x120. The prototype setup right now captures a train of 30 images, stores them to memory, then transfers the image data to the connected PC. Next steps include doing this both wirelessly and at the maximum resolution of the OV7670 imager (640x480).
Major Subsystems
Battery/Power
- 1.3V LDO regulator (camera core voltage): Done. This was prototyped as a byproduct of my first-attempt proto board for the camera module itself. While I'm still working on issues with melting the camera during assembly, the regulator performed just fine - nice 1.3V output maintained under a 60mA or so load.
- 2.8V boost regulator: Done. This was actually prototyped for an unrelated project in the distant past. The design is more or less the same so I expect similar results. The magnetic reed switch I plan to use in the final design was also used to turn on/off the power supply via the EN pin.

Angry melted camera, happy little LDO. Seat-of-my-pants reflow no longer adequate.
Camera
This area still needs a lot of work, especially since success with this device is so closely coupled to the new microcontroller. However, some initial tests have been done with a Teensy 3.2 standing in for the more compact STM32F411.
Microcontroller
See Camera. The Nucleo board I bought is already hooked up and I'm working on porting the work I did on the Teensy over to it.
Memory
Done(ish). The test software I used needs a little refinement and expansion but at the moment, I can erase the entire IC, store several dozen images, and read them back.
Communications
More or less done. I've used the nRF24L01+ in past projects so I'm pretty confident in using it again.
Mechanical
Not much here so far. I plan to consult a friend with more 3D printing experience about this and perhaps get some rough test capsules printed in the coming weeks.
Discussions
Become a Hackaday.io Member
Create an account to leave a comment. Already have an account? Log In.
Hey can i really liked your project, Best of luck.
Are you sure? yes | no