A lot has been going on since the last build update. There are no formal build instructions yet for a very good reason; with machines like this you have to build something and then iteratively develop it. This means the design deviates from the original, which was a best-guess at what would work, based on our previous designs.
So, progress so far:
- A version 1 Medicycle has been built well enough to allow testing of mechanicals and software. It does self-balance. You can ride it.
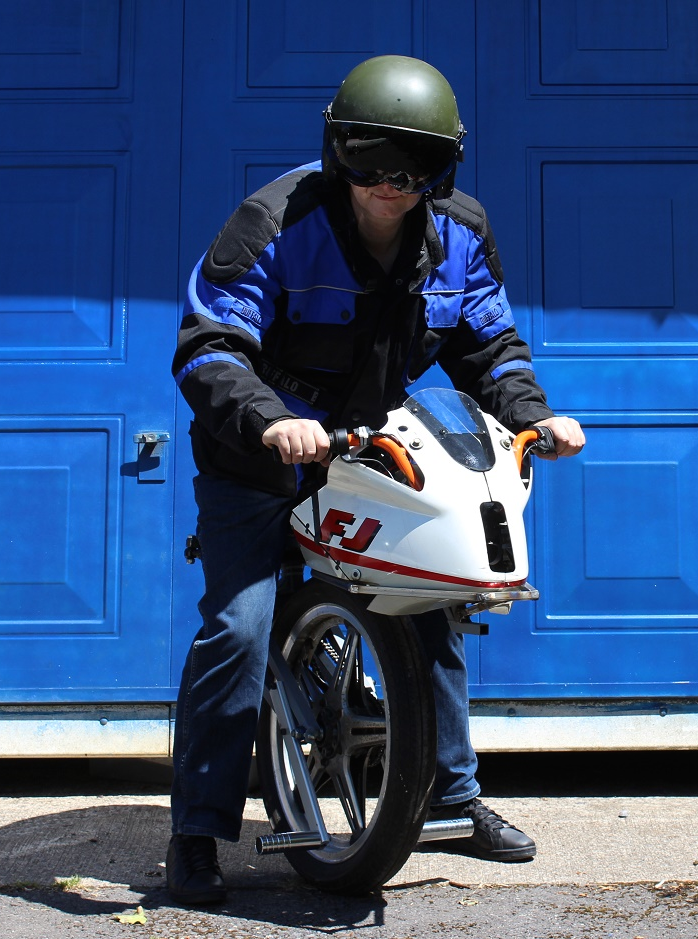
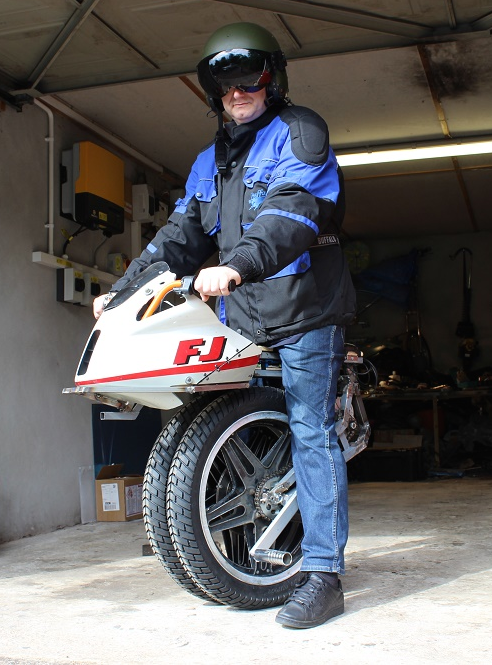
- The first version with a single narrow tyre was almost impossible to ride despite the pivoting mechanism that allowed you to move your weight around over the wheel by pushing down on the relevant footpegs. Therefore the lower frame containing the entire drivetrain has been widened to take a second wheel in tandem on the same axle. Note that there is still only one motor, the two tyres turn together and are joined to each other. If the machine works well like this, then they can ultimately be replaced with a car wheel of similar width. However, as a test machine, this configuration gives lots of adjustment options.
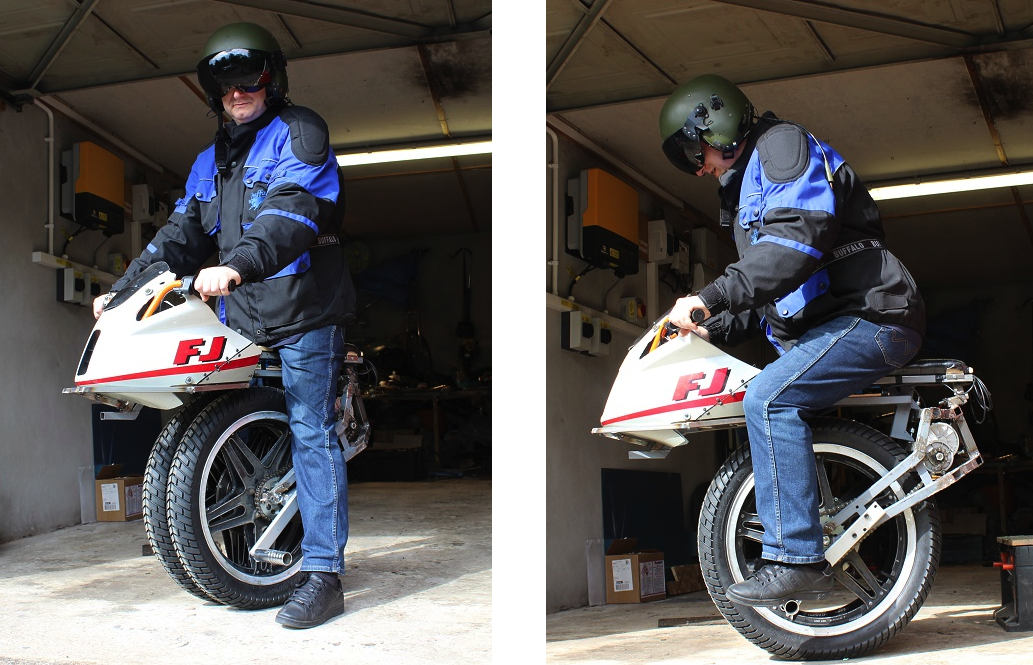
- The pivot system at rear of frame now has a locking bolt you can screw in which stops it pivoting if you so wish. Again this gives more options for practical experimentation. The previous Uni-Mig01 scooter John previously built was perfectly controllable with an 8 inch wide go-kart tyre simply by shifting your weight and adjusting speed in turns, so we are not sure we need the pivot in the frame or not. More testing will determine this.
https://sites.google.com/site/onewheeledselfbalancing/Home/one-wheeled-scooter
- The Arduino Mega 1280 balance controller now has both a digital inertial measurement unit (IMU) and also a more old-fashioned circa 2008 analog IMU as well. We can now compare the performance and reliability of each and we have software versions to work with each type of sensor package. The analog IMU’s may be out of fashion now but they simply put out a varying voltage proportional to tilt, which is quite comforting if you believe in the KISS (Keep It Simple – Stupid) approach to reliability.
- The instrument pod has been changed and now has three LED 7 segment displays (which look cool) plus we have added a 20 x 4 row LCD backlit display as well (much easier to read in bright sunlight), which can display more data and is handy for debugging software.
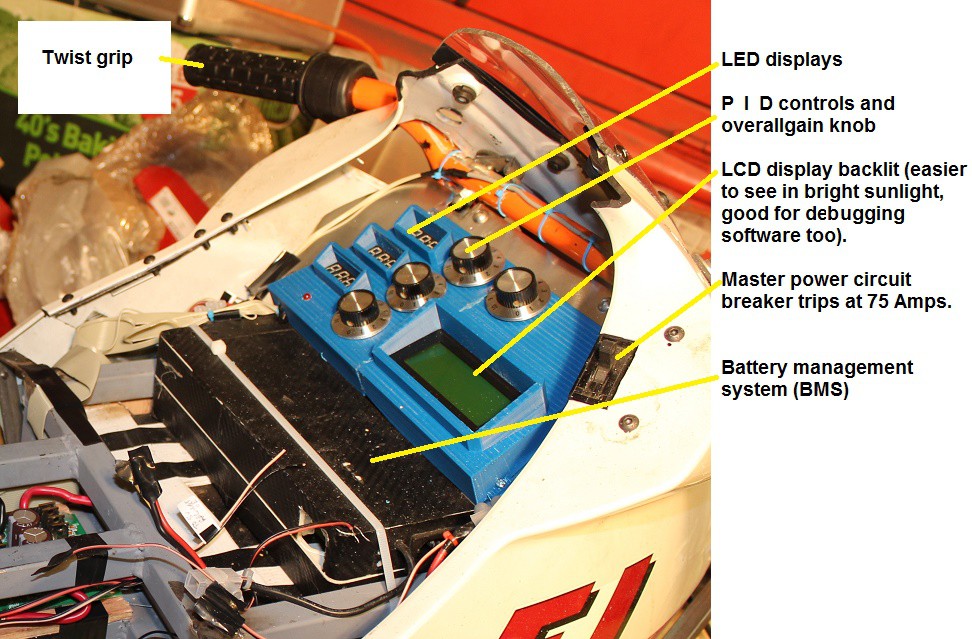
- The P, I and D plus “overallgain” control knobs seen in the previous update are now more widely spaced and a slightly retro-design with position numbers on each (they don’t go up to 11 though – yet). We could possibly later have a 3 position switch for the “overallgain” ride-quality settings labelled “soft,” “quite twitchy” and “insane.”
- The twist-grip “accelerator” on the left handlebar is proving to be really useful in riding this machine. You can ride it by leaning forwards to make it go forwards, and back to slow down. However if you twist the handgrip, it alters the target angle from vertical the machine “aims for” when it is self-balancing. If you set this angle as a forward-tilt using the twist grip, then the machine starts to fall forwards, and the self-balancing software speeds up the motor to stop you falling over any further. The effect of this is to make the machine just tilt forward and off you go, no leaning required. If you back-off on the twist grip, it will lean back a little and slow down. This gives you good control of speed.
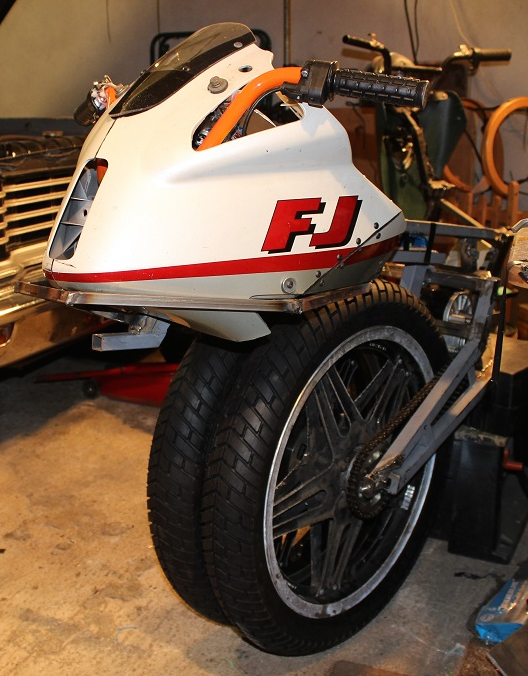
- If we put a motorbike saddle on this it will be too high, wrong shape and feet will not touch the ground. Therefore the saddle will be made of marine ply so foam and a vinyl cover can be fitted, folded under and staple-gunned to the underside of the wooden panels. The padded panels will be arranged so they form an inverted U shape viewed from the rear. This stops your inner thighs contacting the tops of the tyres, always a good idea. The saddle will deliberately not vary in shape along its length (unlike in a modern motorbike) so you can adjust your seating position easily in the fore/aft direction to find a comfortable balance point that suits you, with your arms in a comfortable position.
- Wearable wireless monocular display is also coming along well but we will save that for another update.
- As you can see from the pictures, it does already self-balance and it can be ridden by a human being.
 Nick Thatcher
Discussions
Become a Hackaday.io Member
Create an account to leave a comment. Already have an account? Log In.
At present both rims are on a single axle and joined together. I have thought about a kind of "automated turning" where the inner wheel would lift slightly on its own suspension but that would mean a suspension arm and a (heavy) motor for each wheel. The machine is quite heavy already so I am wary of adding more complexity in the metalwork. It would be good in longer term to experiment with all kinds of unusual linkages, however as it stands this machine is already an incremental step ahead of my last one. I need on this occasion to make something that has a reasonable chance of working so it cannot be radically "experimental." I will optimize it and learn any lessons I need to learn. Every machine we make is another small step into the unknown so maybe in a year or two who knows how the design will have evolved! This is one reason why the current design has an upper and a lower frame. I can change wheel/drive arrangements by altering the lower frame, while all the power and control electronics remain unchanged in the upper part. It is one of those hobbies where you can always think of an improvement or something else worth trying - it will never be completely finished.
Anyone want to give me a Piaggio MP3 front end to play with?
Are you sure? yes | no
I'm curious about the current dual wheel setup. Are they on a single rigid axle so that they remain concentric or do they slide relative to each other like in Piaggio's MP3 frontend suspension (http://j.mp/UCy1Ye)?
Are you sure? yes | no