 Ricardo Ferro
-
11Step 11
Programming
![]()
First download the latest Raspbian Jessie from here https://www.raspberrypi.org/downloads/raspbian/, and follow the installation guide link on that page
-
12Step 12
On The Raspberry Pi Zero in Terminal and type these commands to install the
RTL8723BU Wifi+Bluetooth 4.0 module (should take about 1 hour to compile)First Lets install the Wifi drivers
pi@raspberrypi:~ $ sudo apt-get install raspberrypi-kernel-headers
pi@raspberrypi:~ $ git clone https://github.com/lwfinger/rtl8723bu.git
ls
cd rt*
sudo make
sudo make install
sudo insmod 8723bu.ko
ifconfig
sudo reboot
Next we are going to install the Bluetooth 4.0 Driversgit clone https://github.com/lwfinger/rtl8723au_bt.git cd rtl8723au_bt git checkout -b kernel origin/kernel git branch git pull sudo make sudo make install sudo rebootCheck if everything is working perfectly with the wifi + bluetooth (connect multiple bluetooth devices).
![]()
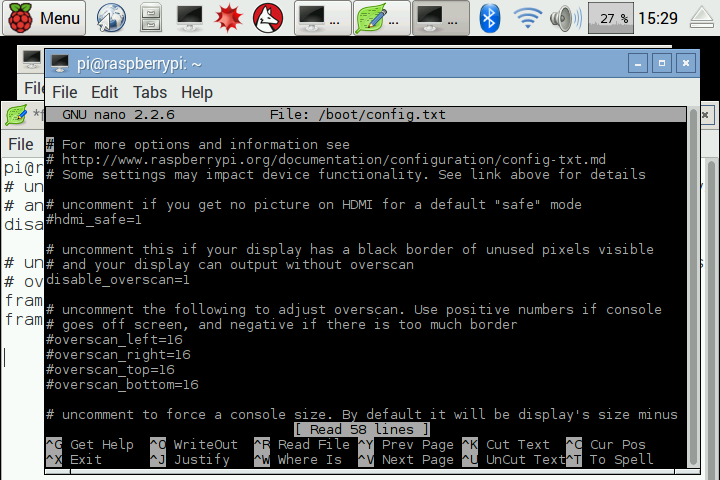
*Type this command, we are going to edit the screen dimension output since i noticed some overscan space. Originally the video glasses is advertised 240x360 but its actually 720x480 after i noticed some empty overscan space. We are going to use some overides in the /boot/config.txt.
pi@raspberrypi:~ $ sudo nano /boot/config.txt

now just uncomment "disable_overscan=1" and set framebuffer_width=720
framebuffer_height=480

"#" uncomment this if your display has a black border of unused pixels visible
"#" and your display can output without overscan
disable_overscan=1

"#" uncomment to force a console size. By default it will be display's size minus
"#" overscan.
framebuffer_width=720
framebuffer_height=480
CTRL+x
Y
press enter to saveNext install cloudsight and unirest.
sudo pip install cloudsight sudo pip install unirest pi@raspberrypi:~ $ sudo pip install cloudsight pi@raspberrypi:~ $ sudo pip install unirest -
13Step 13
![]()
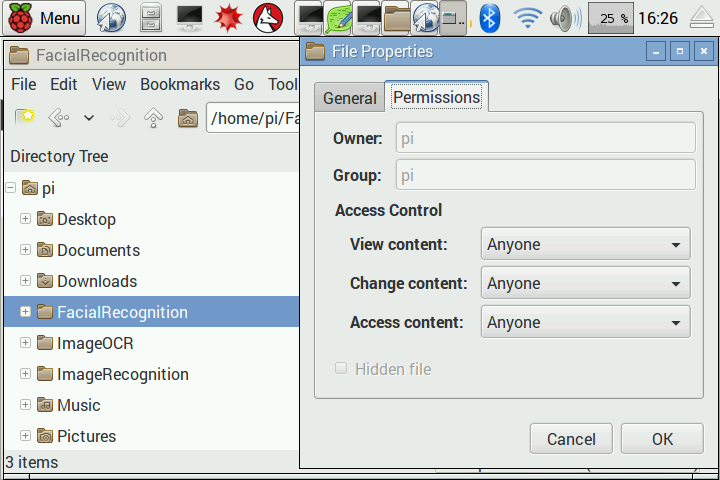
Create 3 folders in home/pi/
FacialRecogntion
ImageOCR
ImageRecogntionYou can either chmod 777 via command line or right click the FacialRecogntion,ImageOCR,and
ImageRecogntion folders and make sure Anyone is selected for all 3 sections. -
14Step 14
![]()
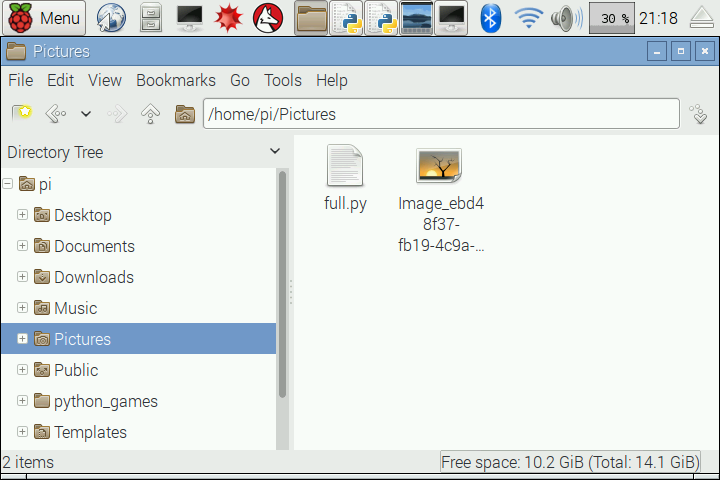
Download the full.py to the Pictures folder (its included in the Thingfiles)
Make sure the full.py permissions is set 777 or the 3 sections in the Access control set to anyone
-
15Step 15
![]()
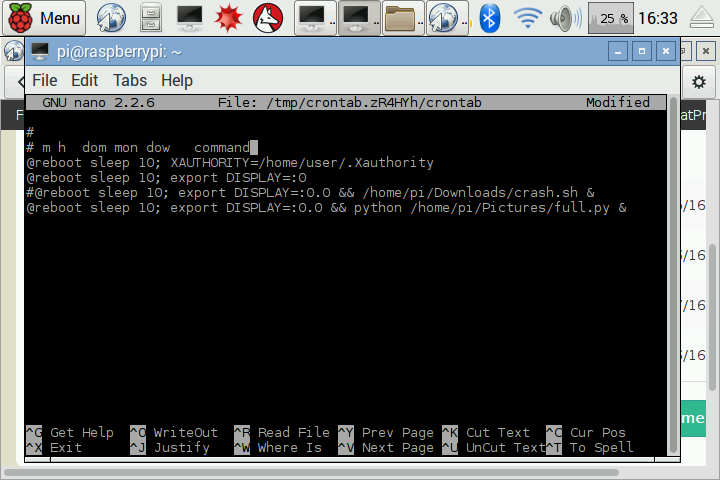
Finally in terminal we will acces crontab -e .This is a file which contains the schedule of cron entries to be run and at specified times. In this case we want to run the file at every reboot.
pi@raspberrypi:~ $ crontab -e @reboot sleep 10; XAUTHORITY=/home/user/.Xauthority @reboot sleep 10; export DISPLAY=:0 @reboot sleep 10; export DISPLAY=:0.0 && python /home/pi/Pictures/full.py & -
16Step 16
Assembly
Assembly is usually the easy parts.
![]()
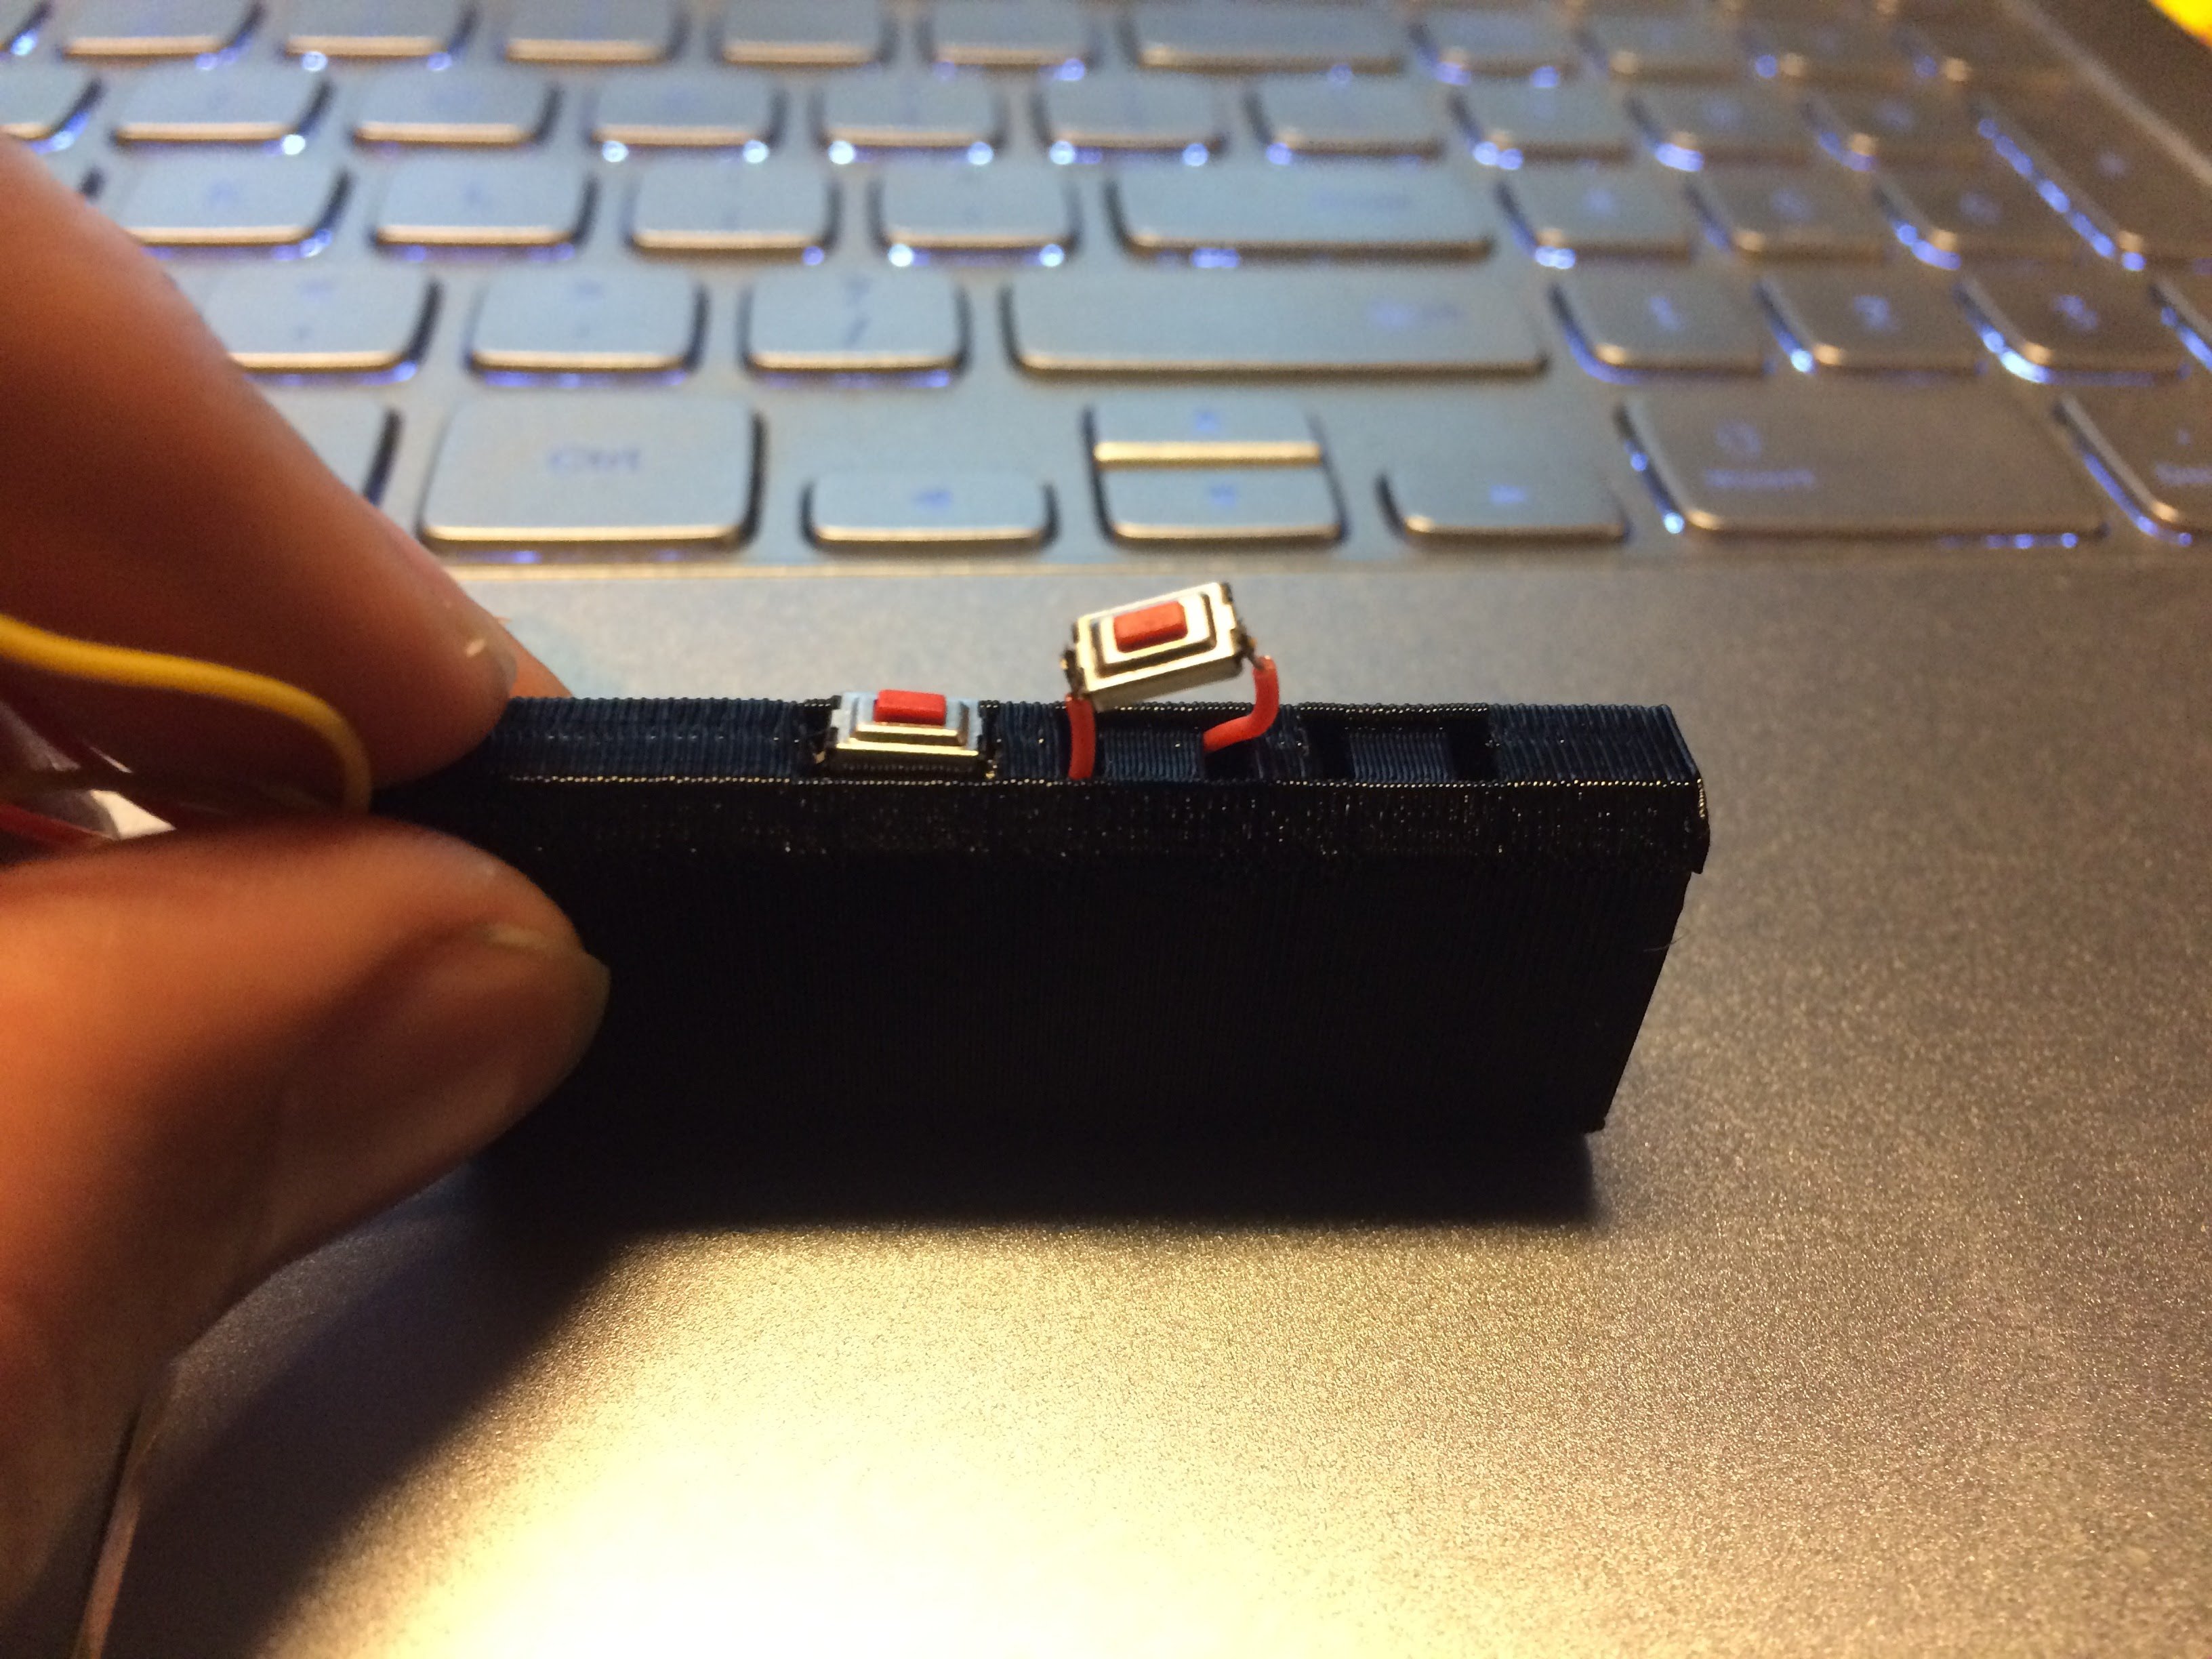
Start by threading the smd wired through the buttonbridge
-
17Step 17
![]()
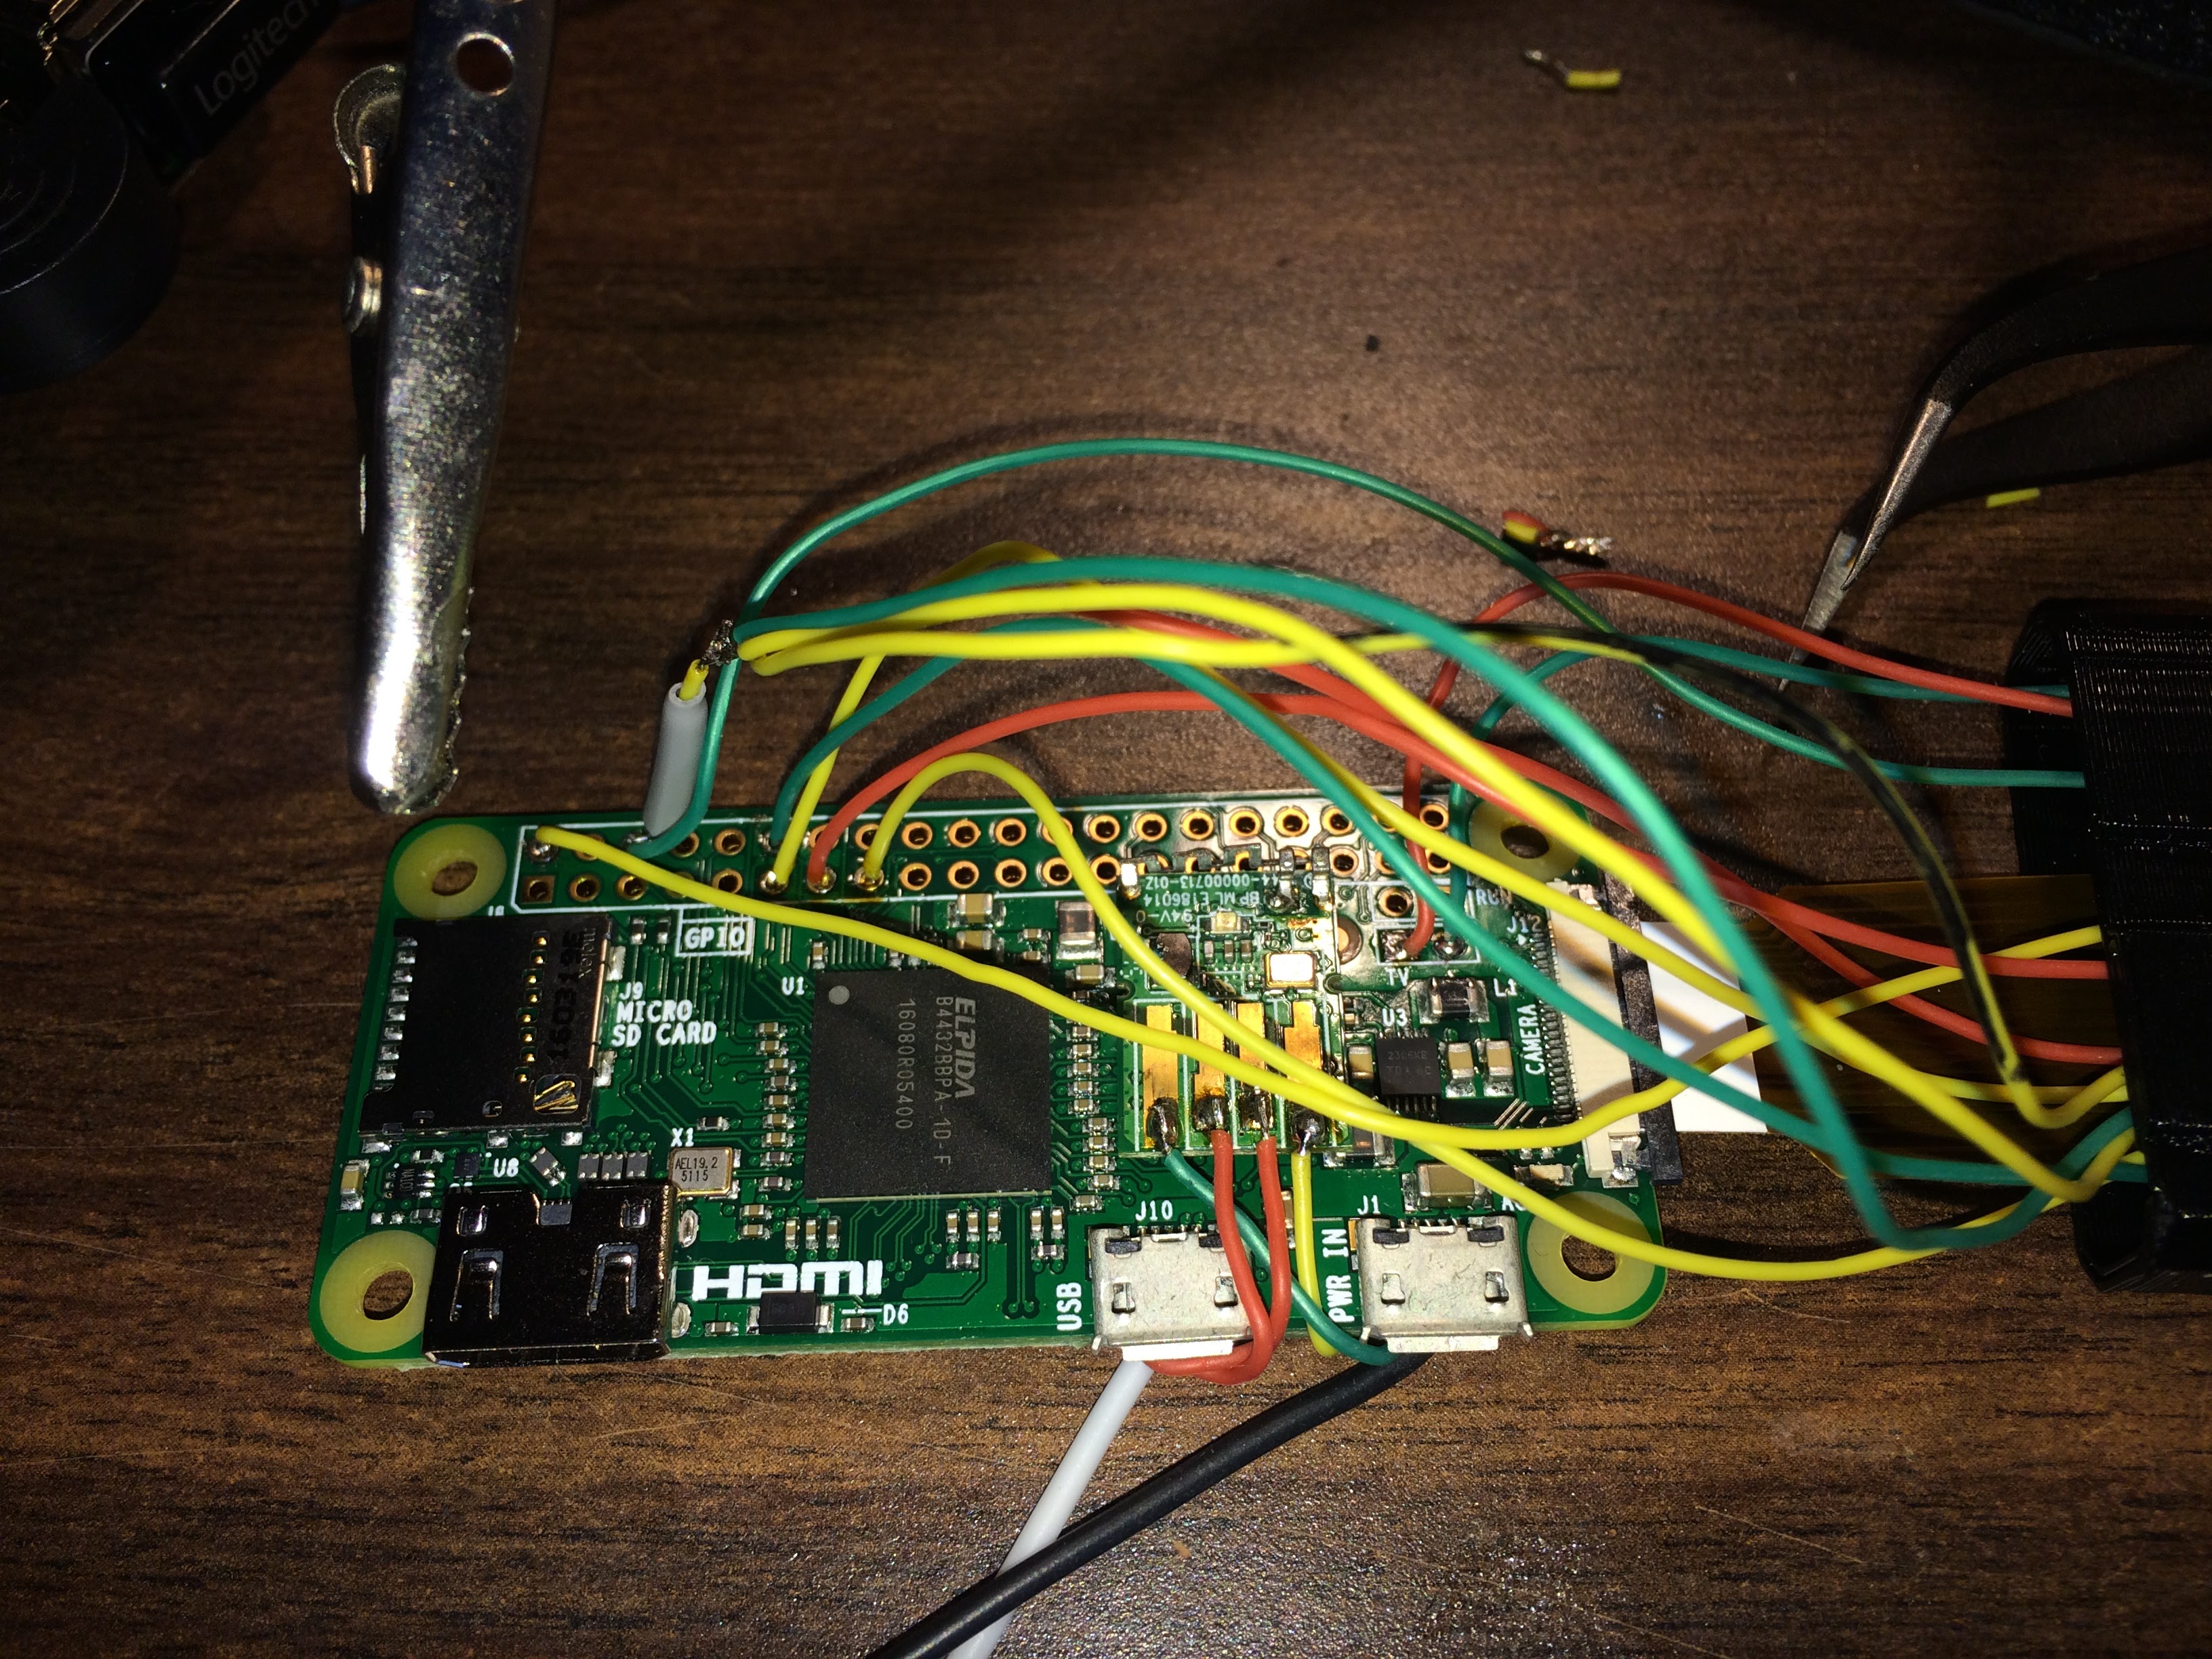
Next solder the ends of the smd buttons to the Pi Zero, and connect the camera cable to the Pi Zero
-
18Step 18
![]()
Slide the Pi Zero through the PiHolder, with curved tweezers carefully guide the jst connecter and the camera cable through Buttonholder piece and the front bridge piece.
-
19Step 19
![]()
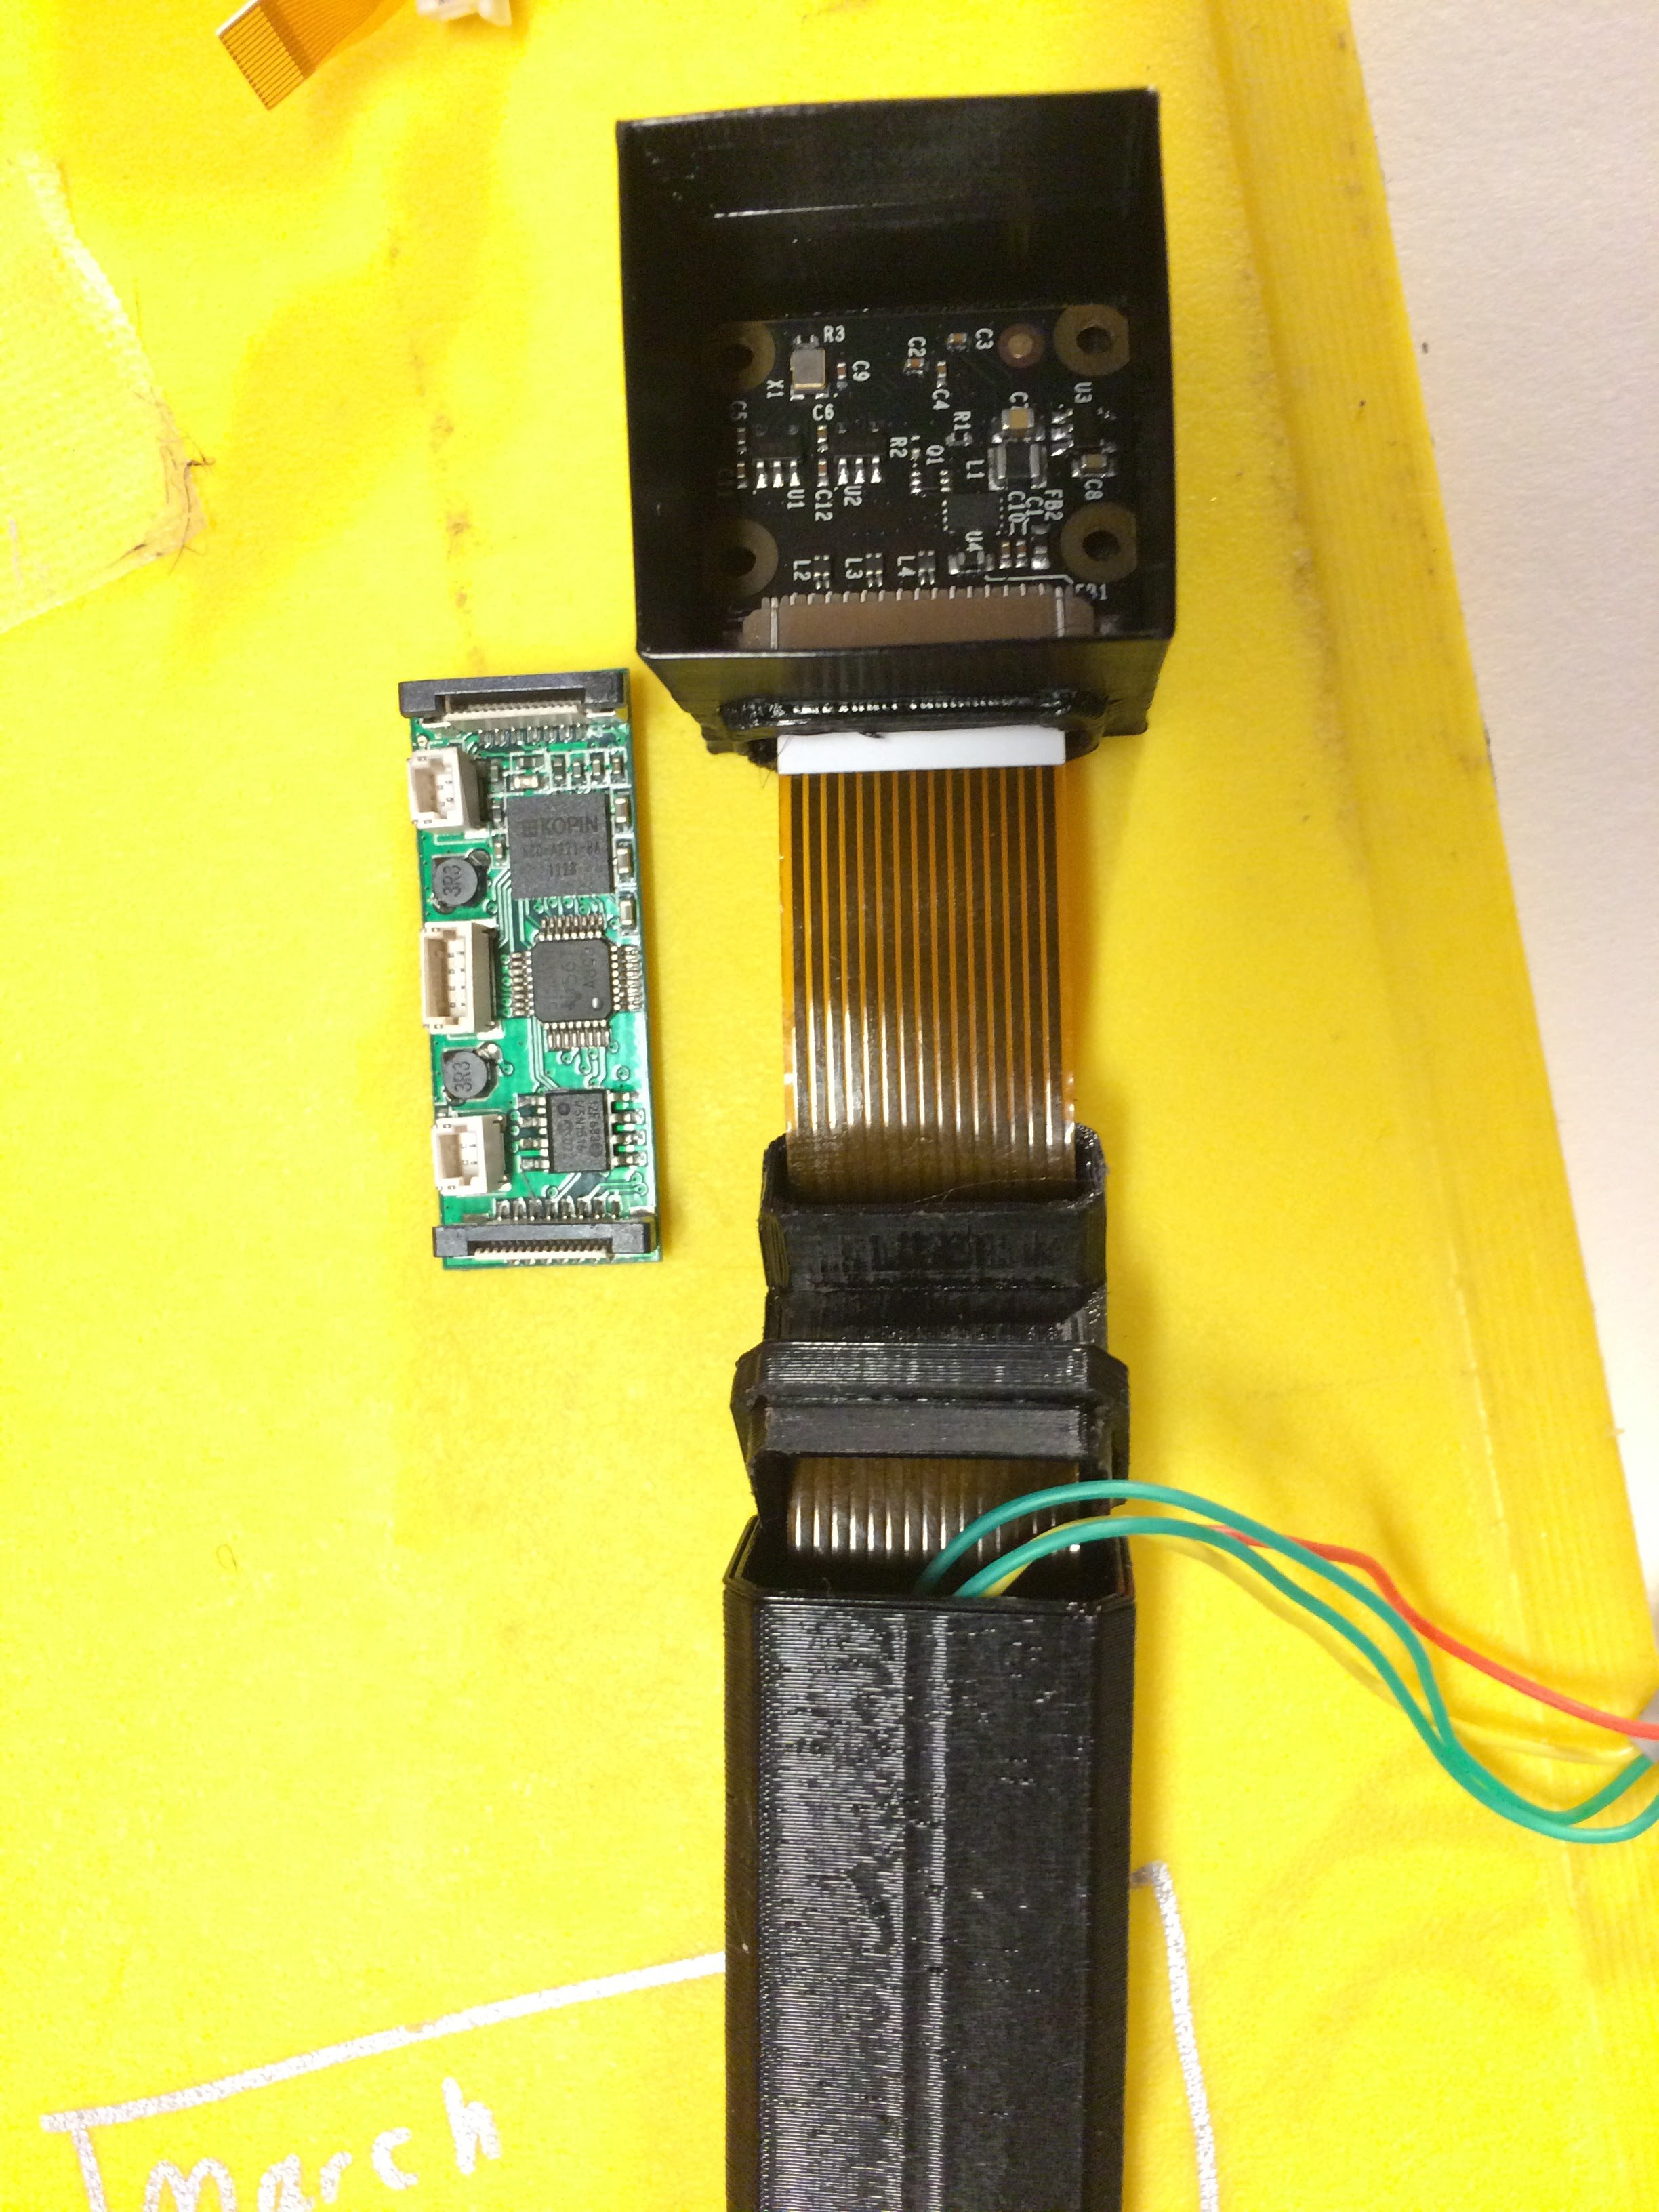
Place the camera in the eyepiece.
-
20Step 20
![]()
Use a little piece of tape to hold the magifyholder to the eye lens
Raspberry Pi Zero Smart Glass
Pi Zero Smart Glass can help you identify objects using image recognition technology. Easily make your own smart glasses with the Raspberry


Discussions
Become a Hackaday.io Member
Create an account to leave a comment. Already have an account? Log In.