 Paul Larson
Hardware Overview
- Raspberry Pi Zero
- Don't forget a 5V DC power supply and microSD Card!
- 50x WS2811 LED Strand
- (I chose the 5V round strand)
- Older-style C7 Christmas Bulbs
- I haven't bought these yet. Need to check Goodwill or a craft store.
- The idea is to gut the bulb to cover up the ws2811 strand bulbs.
- You could use a C9 bulb as well, but they are a little bigger.
- 80's style wallpaper or blanket
- I bought my fabric from Joann Fabrics, 1 yard was more than enough material for a smaller installation.
- I tried to match the 80's style wallpaper as much as possible.
- 5V power supply
- Minimum 3A. I found one at my local electronics store for $5, 4A.
Software Overview
- Raspian
- Python
- Adafruit Neopixel Library (This has recently been updated and is incompatible with my code. Please use this file for the time being)
- GitHub Code
Schematics
WS2811 Strand
The strand has the following layout/measurements per Amazon:
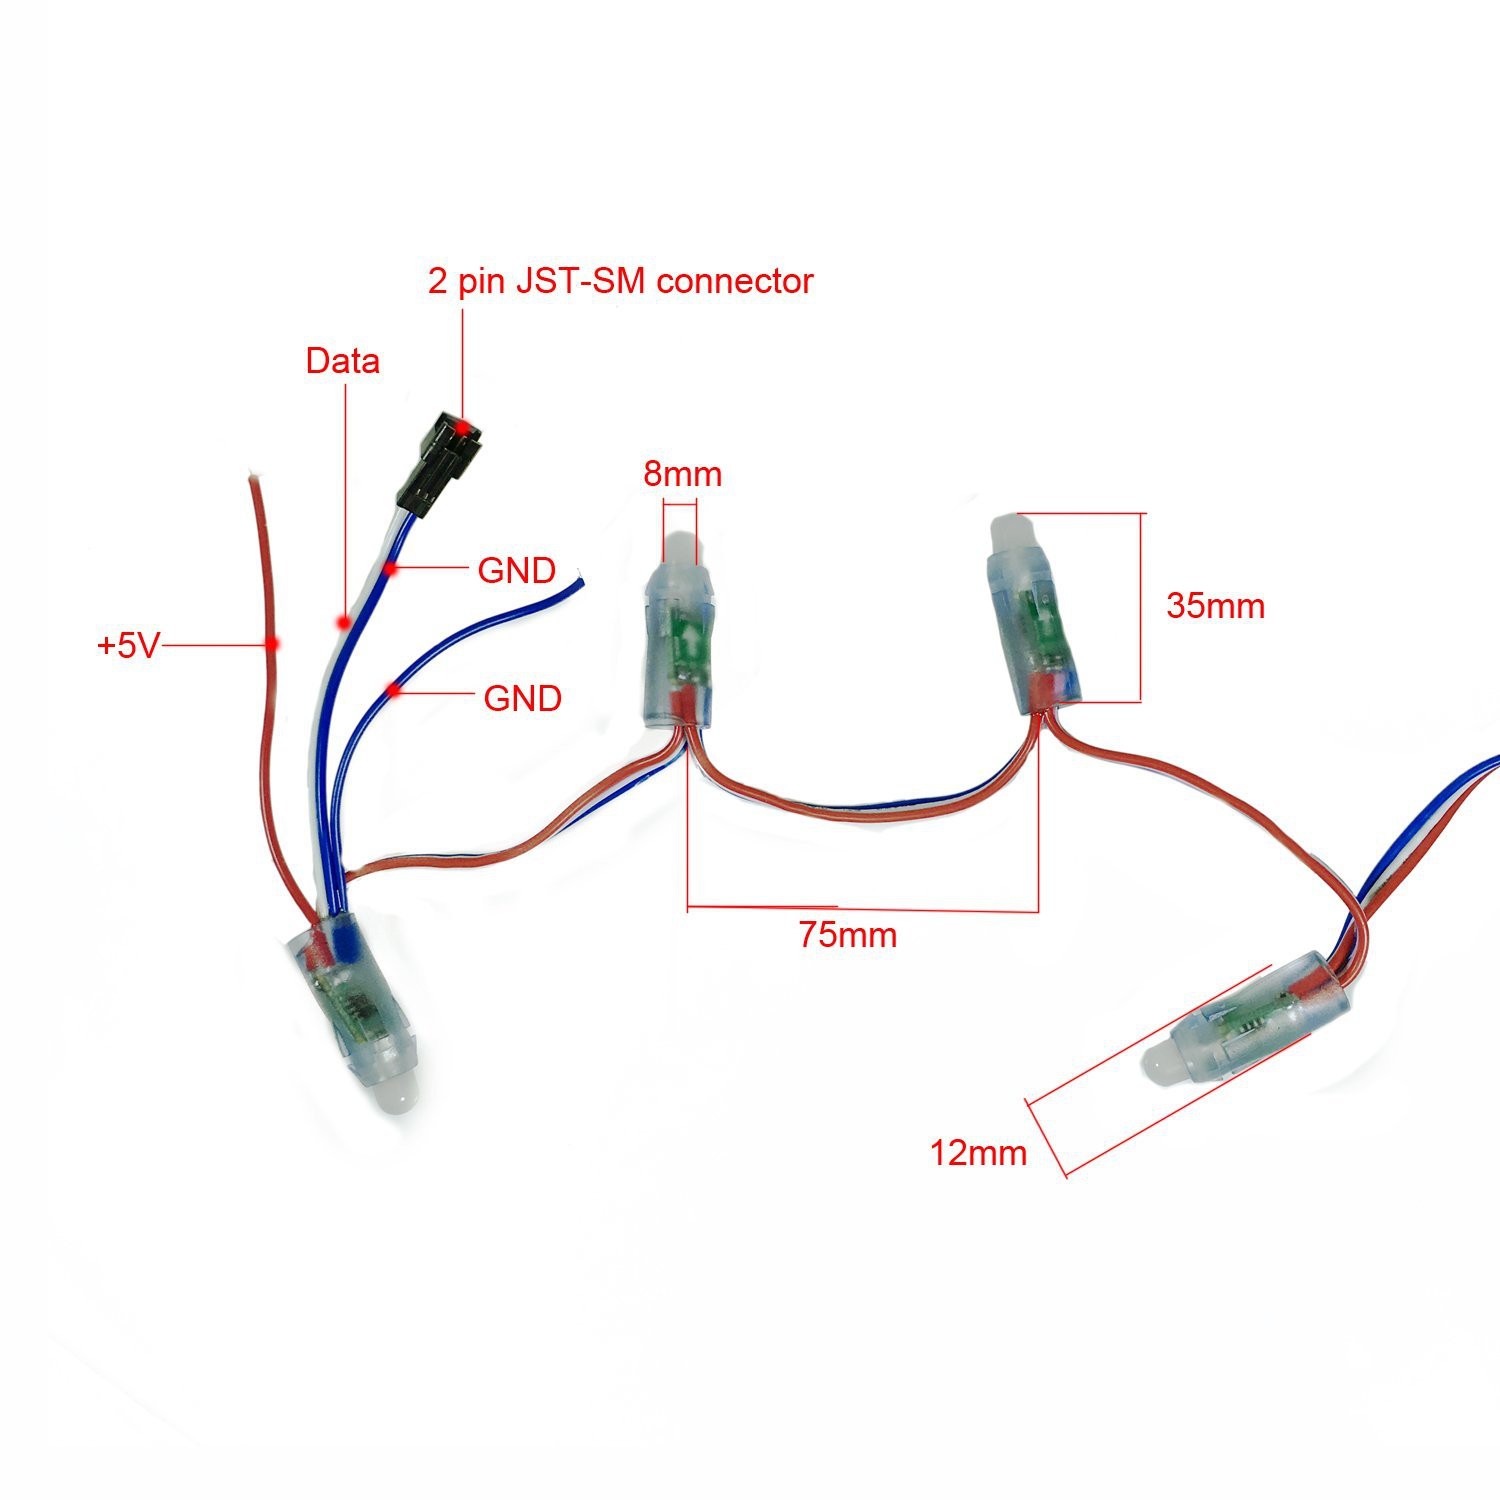
The wires are color-coded as follows:
- Blue: Ground
- Red: 5V Power
- White: Signal
Signal
Make note of the direction of the signal. Each WS2811 IC has a data-in and data-out port. You want to make sure your Raspberry Pi signal is connected to the data-in port, which is the white wire connected to the side of the PCB with a white arrow. The white arrow should be easy to see, it is on the opposite side of the IC on the PCB. If you hook everything up and don't get any output, you probably hooked the Pi up to the wrong end. Just reverse ends and you should be set.
Power
I suggest using a dedicated power supply (not shared with the Pi). You will need at least a 3A supply to handle all lights on at once. I am using a 4A supply I bought at my local electronics store. I've seen some users have added an electrolytic capacitor to the power strand to help with the dips in voltage when the strand is in use. I am not using one and things seem to be okay. Performance may very with your supply though.
Raspberry Pi
There are only two wires that are connected from the Pi to the WS2811 strand: Signal and Ground. For signal, I went with pin 18 (default per the Adafruit Neopixel library). I kept both wires short, roughly 3 inches long, and had no issues driving the signal directly from the Pi.
As mentioned earlier, I suggest using a separate 5V power supply to power the Raspberry Pi. Sure, my 5V supply for the lights could handle the Pi (I have an extra 1A to play with), but I suspect the Pi could behave strangely if it's connected to the same supply that is drawing ~3A on and off.
Software
Raspberry Pi
There are plenty of tutorials on how to set up the Raspberry Pi. The three you should only need to follow (in order) are:
- OS Installation
- Disable Audio in Kernel (very important!)
- find all snd* modules that are currently loaded using modprobe -l or lsmod
- create a new blacklist file that blacklists all of the snd modules
- sudo vi /etc/modprobe.d/snd.blacklist.confThen add a blacklist line for each snd module. For example:blacklist snd_bcm2835blacklist snd_pcmblacklist snd_timeretc...Once you've added all the snd modules, save the file.
- reboot the pi so snd modules are no longer running. When the Pi reboots, the sound modules will be disabled so the PWM output will be a lot cleaner.
- Adafruit NeoPixel Demo
Once you have the Adafruit Neopixel demo up and running, you should be able to run my code with no issues. If you do have issues, feel free to contact me.
Code
All code is on GitHub and is commented. If there are any questions, feel free to ask here or on GitHub.
To run the code, copy it to your Pi and run "sudo python strangerlights.py"
Future Improvements
One improvement for this project would be to cut the strand of lights and re-solder with a bunch of green wire. That way you have bulbs that are further apart than 3 inches and it closely resembles the old-school strands. Since these operate at 800KHz, you should be able to get a decent distance between bulbs. A quick google search brought up 10 meters, but you may be able to get more with higher quality cables.