 Shervin Emami
I decided to name this project "DepthIR". And I definitely want this project to be fully open-source, and even though I'm a big user of Linux & open-source software, I had a quick look at license options, and decided that I didn't want to use a GPL license on this project because GPL doesn't allow commercialization of the project. I don't expect to earn money from this project, but I don't want to stop others from building & selling it, especially if it means they are helping blind people in their region by manufacturing & selling blind devices like this. So I decided to use an Apache license, since it is an open-source license that also allows commercial use and compared to Creative Commons, it adds a bit of some legal protection as well. So I've created a project on GitHub to host the software and hardware design files for this project. (https://github.com/shervinemami/DepthIR)
Now that I realize the phototransistor takes milliseconds not microseconds to ramp up to the full signal value, I can look at the waveform using an Arduino directly instead of using an oscilloscope! So I wrote some code to record the values from the phototransistor, to easily test different resistor values (for the resistor in series with the phototransistor) and see what sort of range I can reliably detect and how sensitive it is to the angle of the object and the color & shininess of the object. If I had more time I would do a detailed analysis, but for now I'm just going to post the Arduino code I wrote and show a few test results using a dull grey box, since it should give roughly average reflection, then I'll continue with building a working prototype.
You can find the code for this test on Github at:
https://github.com/shervinemami/DepthIR/tree/master/Test_IR_Sensor
The Arduino code in file "Test_IR_Sensor.ino" will send an IR pulse and display the analog sensor readings around the time the pulse was sent. To see the sensor readings, open the Arduino Serial Monitor or any serial terminal, and set it to 115,200 baud rate. (The default baud rate of 9600 bps is too slow since we are sending lots of text!).
The essence of the code is this:
  // Turn the IR emitter on for a short time while we measure it.
  digitalWrite(EMITTER_PIN, HIGH);

  // Record many analog values and keep them for later analysis.
  for (int i=5; i<512; i++) {
    // Read from the ADC. Takes around 0.1ms per reading.
    sensorValues[i] = analogRead(SENSOR_PIN);
  }

  // Turn the IR emitter off for a long time.
  digitalWrite(EMITTER_PIN, LOW);
Note that the code measures the IR sensor 5 times before the loop, then turns the IR LED on, then continues measuring the IR sensor for a total of 512 measurements. The measurements take roughly 0.1ms, so the first 5 values (0.5ms) should always be small, and then if you follow it across until you find the large values, you can subtract 5 from that number of readings and then multiply by 0.1ms to get the time it happened after the IR LED turned on.
For example, if a run has 20 small numbers (0's, 1's and 2's) and then some large numbers (4 or higher), then:
(20 - 5) * 0.1 = 1.5
So that would have meant there was a delay of roughly 1.5 milliseconds for the Arduino to see the IR signal.
Note that the IR LED stays on for the whole time the analog readings are being obtained, since we are still trying to figure out how long the LED should stay on for us to get a nice measurement.
Here are some results when the emitter LED gets around 40mA (using a 7.2 Ohm resistor):
Without any object at all (Infinite distance):
0 0 0 0 0 0 0 0 0 0 0 0 0 0 0 0 0 0 0 0 0 0 0 0 0 0 0 0 0 0 0 0 0 0 0 0 0 0 0 0 0 0 0 0 0 0 0 0 0 0 0 0 0 0 0 0 0 0 0 0 0 0 0 0 0 0 0 0 0
With a box at 100cm:
0 0 0 0 0 0 0 0 0 0 0 0 0 0 0 0 0 0 0 0 0 0 0 0 0 0 0 0 0 0 0 0 0 0 0 0 0 0 0 0 0 0 0 0 0 0 0 0 0 0 0 0 0 0 0 0 0 0 0 0 0 0 0 0 0 0 0 2 0
With a box at 80cm:
0 0 0 0 0 0 0 0 0 0 0 0 0 0 0 0 0 0 0 0 0 0 0 0 0 0 0 0 0 0 0 0 0 0 0 0 0 0 0 0 0 0 0 0 0 0 0 0 0 0 1 0 0 0 0 1 2 1 2 1 3 0 2 1 2 1 2 2 4 3 3 4
With a box at 60cm:
0 0 0 0 0 0 0 0 0 0 0 0 0 0 0 0 0 0 0 0 0 0 0 0 0 0 0 0 0 0 0 0 0 1 1 0 1 1 0 3 0 2 4 2 3 4 4 4 6 5 7 6 6 8 7 8 8 7 7 9 8 10 10 7 10 8 10 10 8 10
With a box at 40cm:
0 0 0 0 0 0 0 0 0 0 0 0 0 0 0 0 0 0 0 1 1 2 1 4 5 7 8 11 13 12 15 19 16 16 20 19 21 23 22 23 23 23 25 24 25 26 24 24 25 24 25 27 25 27 24 25
With a box at 20cm:
0 0 0 0 0 0 0 0 0 0 0 14 37 58 79 95 107 116 123 126 133 133 137 139 136 139 139 138 139 140 141 137 138 139 137 138 139 135 136 136 137 138
With a box at 10cm:
0 0 0 0 0 0 0 0 22 147 265 354 417 467 497 524 544 560 572 577 586 589 590 596 598 597 600 597 598 599 592 597 598 590 592 593
With a box at 5cm:
0 0 0 0 0 0 0 0 462 730 749 762 763 766 771 770 770 773 773 771 776 775 773 776 774 773 776 774 773 777 772 774 777 772 775 775 771
So looking at the values, we can see the dull grey box isn't really detected at 1m, but as it comes closer, it's clearly detected! Remember that the first 5 values were before the LED was turned on, so ignore the first 5 numbers of each row. If we're only interested in measuring objects upto 20cm away, we could just look at the value 1ms after the LED is on (the 15th value in the sequences above). But since I want to detect objects around 80cm away, the device should wait 2ms to get the IR sensor reading.
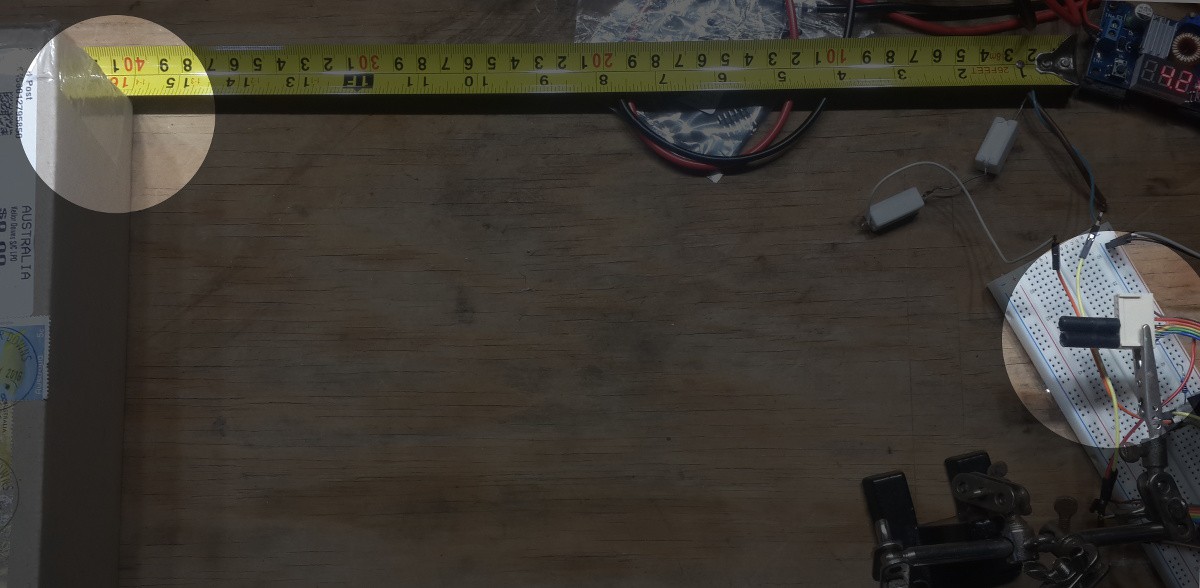
Here is a photo of the simple setup I used to get the recordings above, with the IR emitter & receiver and ruler highlighted:
Discussions
Become a Hackaday.io Member
Create an account to leave a comment. Already have an account? Log In.