Why hoverboards?
There are plenty of cheap small robots available and there are plenty of expensive large robots available, but it is hard to find cheap robots that can move a reasonable amount of weight. And what good is a robot if it can't move anything around? Hoverboards, as it turns out, include a convenient collection of components that can be used to power and drive a cheap, capable robot.
- High torque, direct drive, brushless motors (with large diameter wheels)
- Motor controller
- High capacity battery
- Battery charger
Great! Lets make a hoverboard robot
The hoverboard motor controller is programmed for a human controlled, self-balancing system. This system consists of two gyroscope sensors feeding data to the motor controller, which responds by moving the motors to keep the gyros "flat". This is what keeps the human upright most of the time.
But we want to replace the squishy human with a cold unfeeling robot. Some people have already shown how to remove the human from the hoverboard control loop by sending fake gyro data. These examples include Low cost two wheels drive - hoverboard hack and How I hacked the Self Balancing Scooter. Unfortunately the original firmware is written such that it will increase the speed of the wheels if it is fed a constant gyro angle. This behavior makes it challenging to move the motors at a constant speed.
Well, what now then?
Fortunately most hoverboard motor controllers use a common micro-controller (STM32F103 or a clone) that can be reprogrammed. We can write new firmware to use a custom communication protocol to drive the motors in a way that is betted suited for robotics applications.
Check your hoverboard motor controller for compatibility with available firmware
There are at least two different motor controllers in common use by hoverboard manufacturers; one with a single motor controller that drives both wheels and another with a controller for each wheel and a data connection between them. This project currently includes custom firmware compatible with the single board controller. See this google doc for further instructions on identifying different hoverboard motor controllers.
Remove the motor controller and attach programming header pins
Before you can reprogram the motor controller you'll need to first remove it from the hoverboard (for detailed instructions see the physical assembly blog post). You'll also need to remove the motor controller board from the aluminum heat sink plate - it is attached via the remaining screws through the transistors.

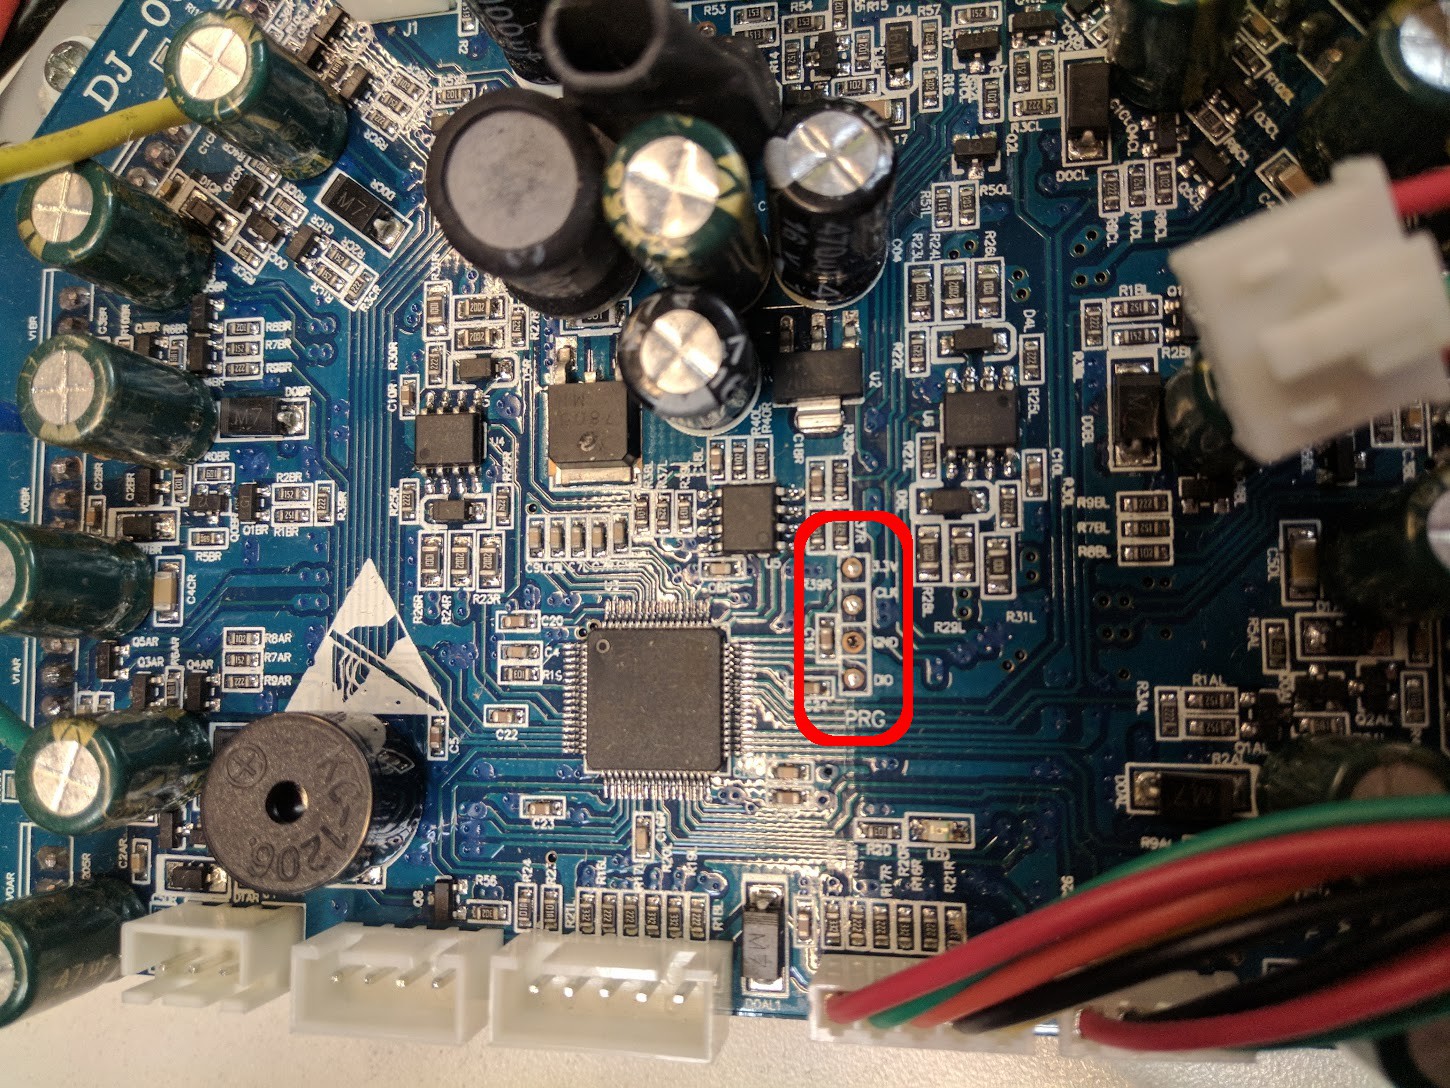
Once the motor controller is removed, you'll need to solder the programming header pins to the board - don't worry, it's not very hard. Some motor controllers have the programming header pin holes filled with solder (as shown in the picture above). If they are filled you will need to clean them out using either a solder sucker or solder-wick. Once the holes are clean, solder four regular 0.1" spacing header pins to the board.
(Though not strictly necessary, you can breakout the STM32F103's reset pin for more reliable programming. You can still reprogram the board without this step, but it may require more retries.)
After soldering on the programming header pins, reattach the motor controller to the aluminum heat sink plate.
Flash the new firmware
Connect an ST-link V2 to your freshly soldered header pins (and the reset pin if you added it). The hoverboard motor controller does not need to be - and probably should not be - connected to anything besides the ST-link while you are flashing it. Follow these instructions to download and update the firmware.
Does it work?
You left the upper cover of the hoverboard attached and the motors still bolted to the frame, right? Place the newly flashed motor controller back where you removed it from and reconnect everything except the wires going to the gyro boards. Then connect your serial device of choice* to the TX, RX, and GND pins of the leftmost gyro connector, which is likely the connector with the longer cables). Power on the hoverboard and send a command to the motors. The firmware documentation includes an example of the control instruction format.
* Make sure it is 3.3v serial as 5v serial will permanently damage your hoverboard motor controller
 Isabelle Simova
Discussions
Become a Hackaday.io Member
Create an account to leave a comment. Already have an account? Log In.
Dear sir,
I study the FOC driver (at link you listed) and even tested it. I found that the UART communication between robot controller and driver only handle two motor with one command, and when made FOC ad ADC/PWM the two motors not accurate positioning (i.e. one motor start fast than other) and so robot rotate (i.e. motor not synchronous together even with same ADC values applied to each motor-side).
Are you have solution to make the FOC driver : run motors synchronous if same ADC/PWM applied to them, second how to control each side by different commands (by UART) that may make two side work with same speed and position.
Best regards
Are you sure? yes | no