Close
0%
0%

Volume85

A simple programmable infrared volume controller using Digispark or ATTiny85 and PT2257

Similar projects worth following
It can learn remote control codes without the use of a computer

I bought a new LG tv, and with my surprise, it doesn't have an analog output to connect to an external amplifier in order to override the terrible internal speakers. So having already a small amplifier and a pair of decent loudspeaker, i bought a cheap optical dac, but again... the optical output has fixed volume.

So I developed this project taking the idea from this:
Remote Volume Control for Old Stereo Amp by Vitim

In order to reduce the size, I removed the display and used a Digispark board (but you can use a single ATtiny85 chip) instead of the Arduino nano.

Having two free pins remaining, I used them to get the circuit capable of learning on the fly the remote controller codes used by the TV, instead of statically programming in the firmware code.
This is done with two header jumpers:
-short the first and press the volume down button on remote until led blinks;
-short the second and press the volume up button on remote until led blinks;
-short both and press the mute button on remote until led blinks;
-remove jumpers; the codes are saved;

This is the schematic:

https://tools.upverter.com/eda/#tool=schematic,designId=5f894e11d822c93e

ATTiny85-IR-remote-volume-controller.png

Schematic

Portable Network Graphics (PNG) - 39.52 kB - 05/31/2018 at 20:11

Preview

IRvolume85.ino

Arduino sketch

ino - 4.58 kB - 05/31/2018 at 19:46

Download

SoftI2CMaster-master.zip

Soft I2C library compatible with ATtiny85

Zip Archive - 66.83 kB - 05/31/2018 at 19:44

Download

tiny_IRremote.zip

Infrared remote controller library compatible with ATtiny85

Zip Archive - 8.59 kB - 05/31/2018 at 19:43

Download

  • 1
    Circuit

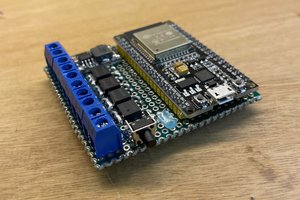
    Since the schematic is very simple, I used a prototype board with wires direct soldered on the components. Only one note: the internal voltage regulator got very hot if used to feed the power to the DAC. So I used an external classic LM7805. And the only advantage of the Digispark board over a single ATtiny85 chip has gone...

  • 2
    Software

    You need the Arduino IDE configured to support the programming of the ATtiny85 chip, and the chip as to be programmed with an ArduinoISP. Follow this instruction:
    Programming your Attiny85 with an Arduino Uno as ISP
    Remember to add the two libraries included in the files section.

    If you have a Digispark board with bootloader, since my code is written for a bare ATtiny85 chip, you need to upload via usb from command line. Enable verbose output in arduino IDE, copy the path of the hex file generated from the log, and issue this command:

    micronucleus /tmp/arduino_build_871172/IRvolume85.ino.hex

    (replace with correct path)

View all instructions

Enjoy this project?

Share

Discussions

Similar Projects

Does this project spark your interest?

Become a member to follow this project and never miss any updates