 Jonathan Bumstead
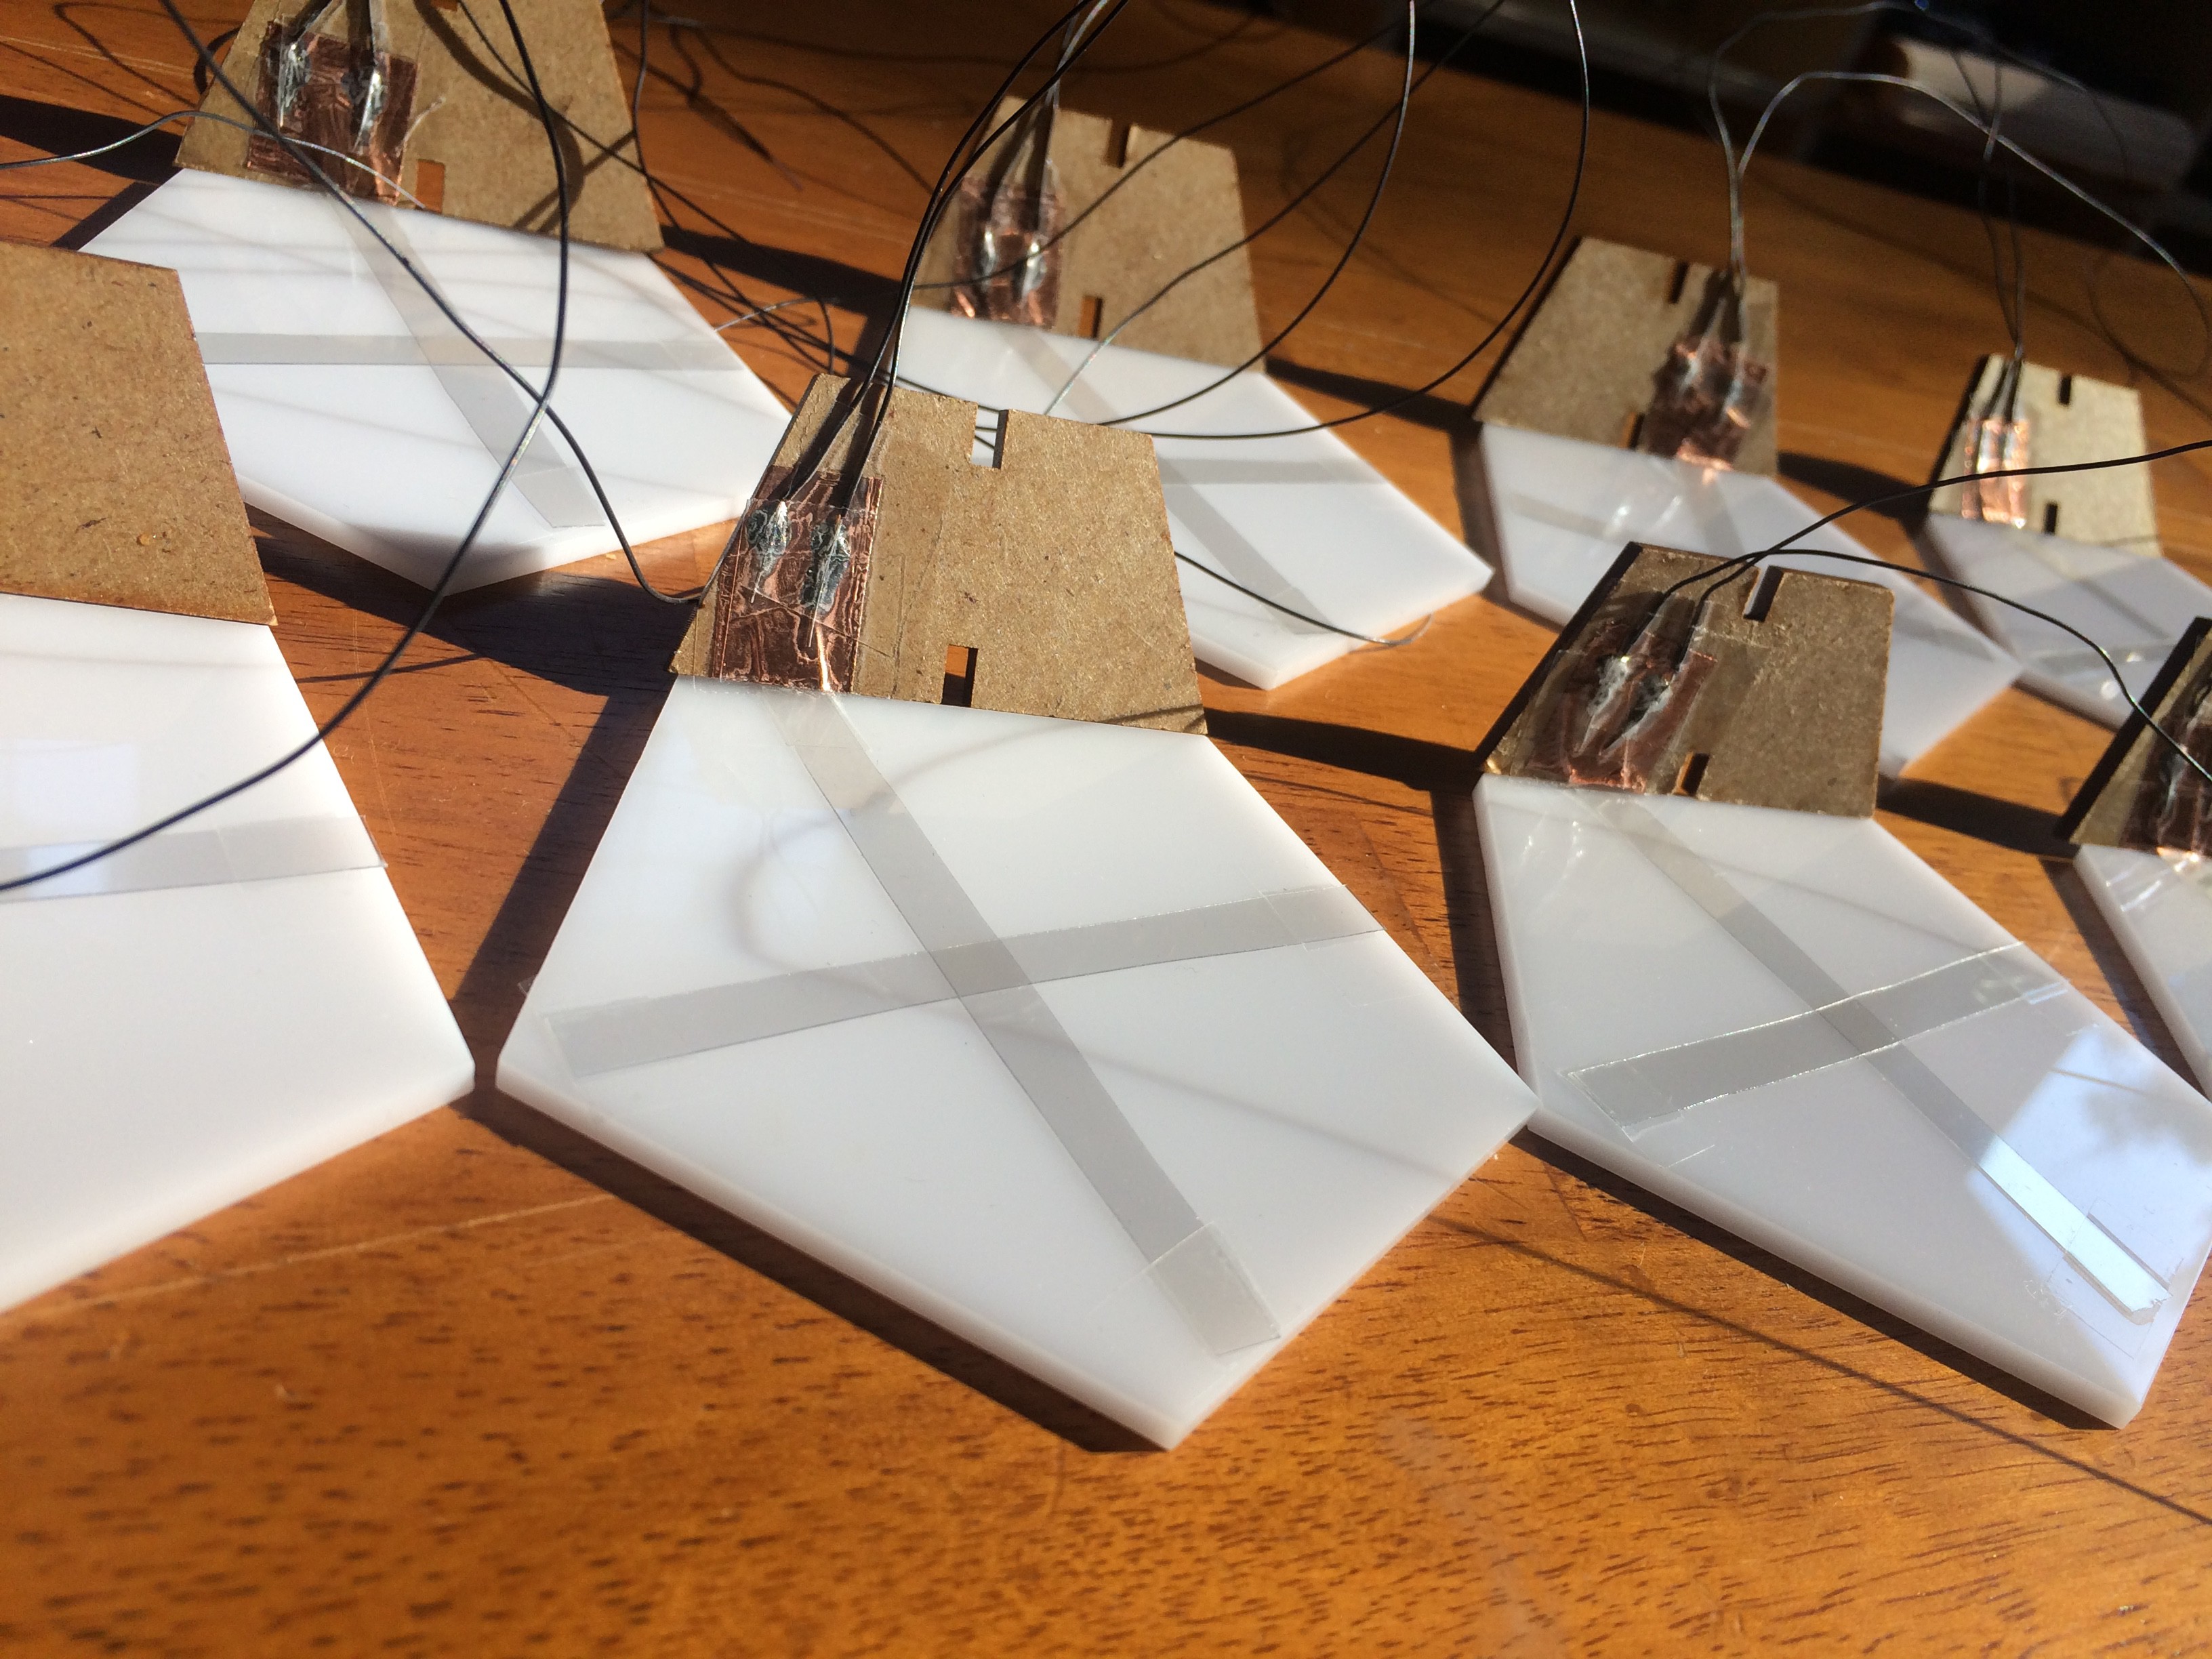
Here is my first attempt for using capacitive touch keys with the Bucky Glow. The challenge again is finding a transparent material that is conductive (usually copper sheets are used for these types of sensors. First I cut the ITO coated plastic into strips and taped them onto the plexiglass. An edge of the ITO plastic was connected to a copper sheet that was taped onto a wall of the Bucky Glow. The copper is required to soldering wires to the ITO plastic. NOTE: do NOT bend the ITO plastic or it will no longer be conductive. I made this mistake and it took a while to figure it out.
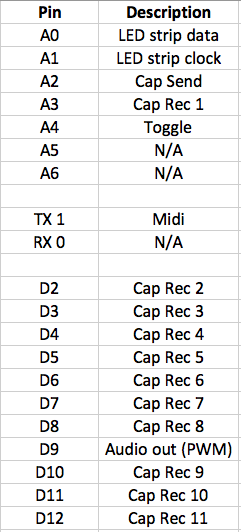
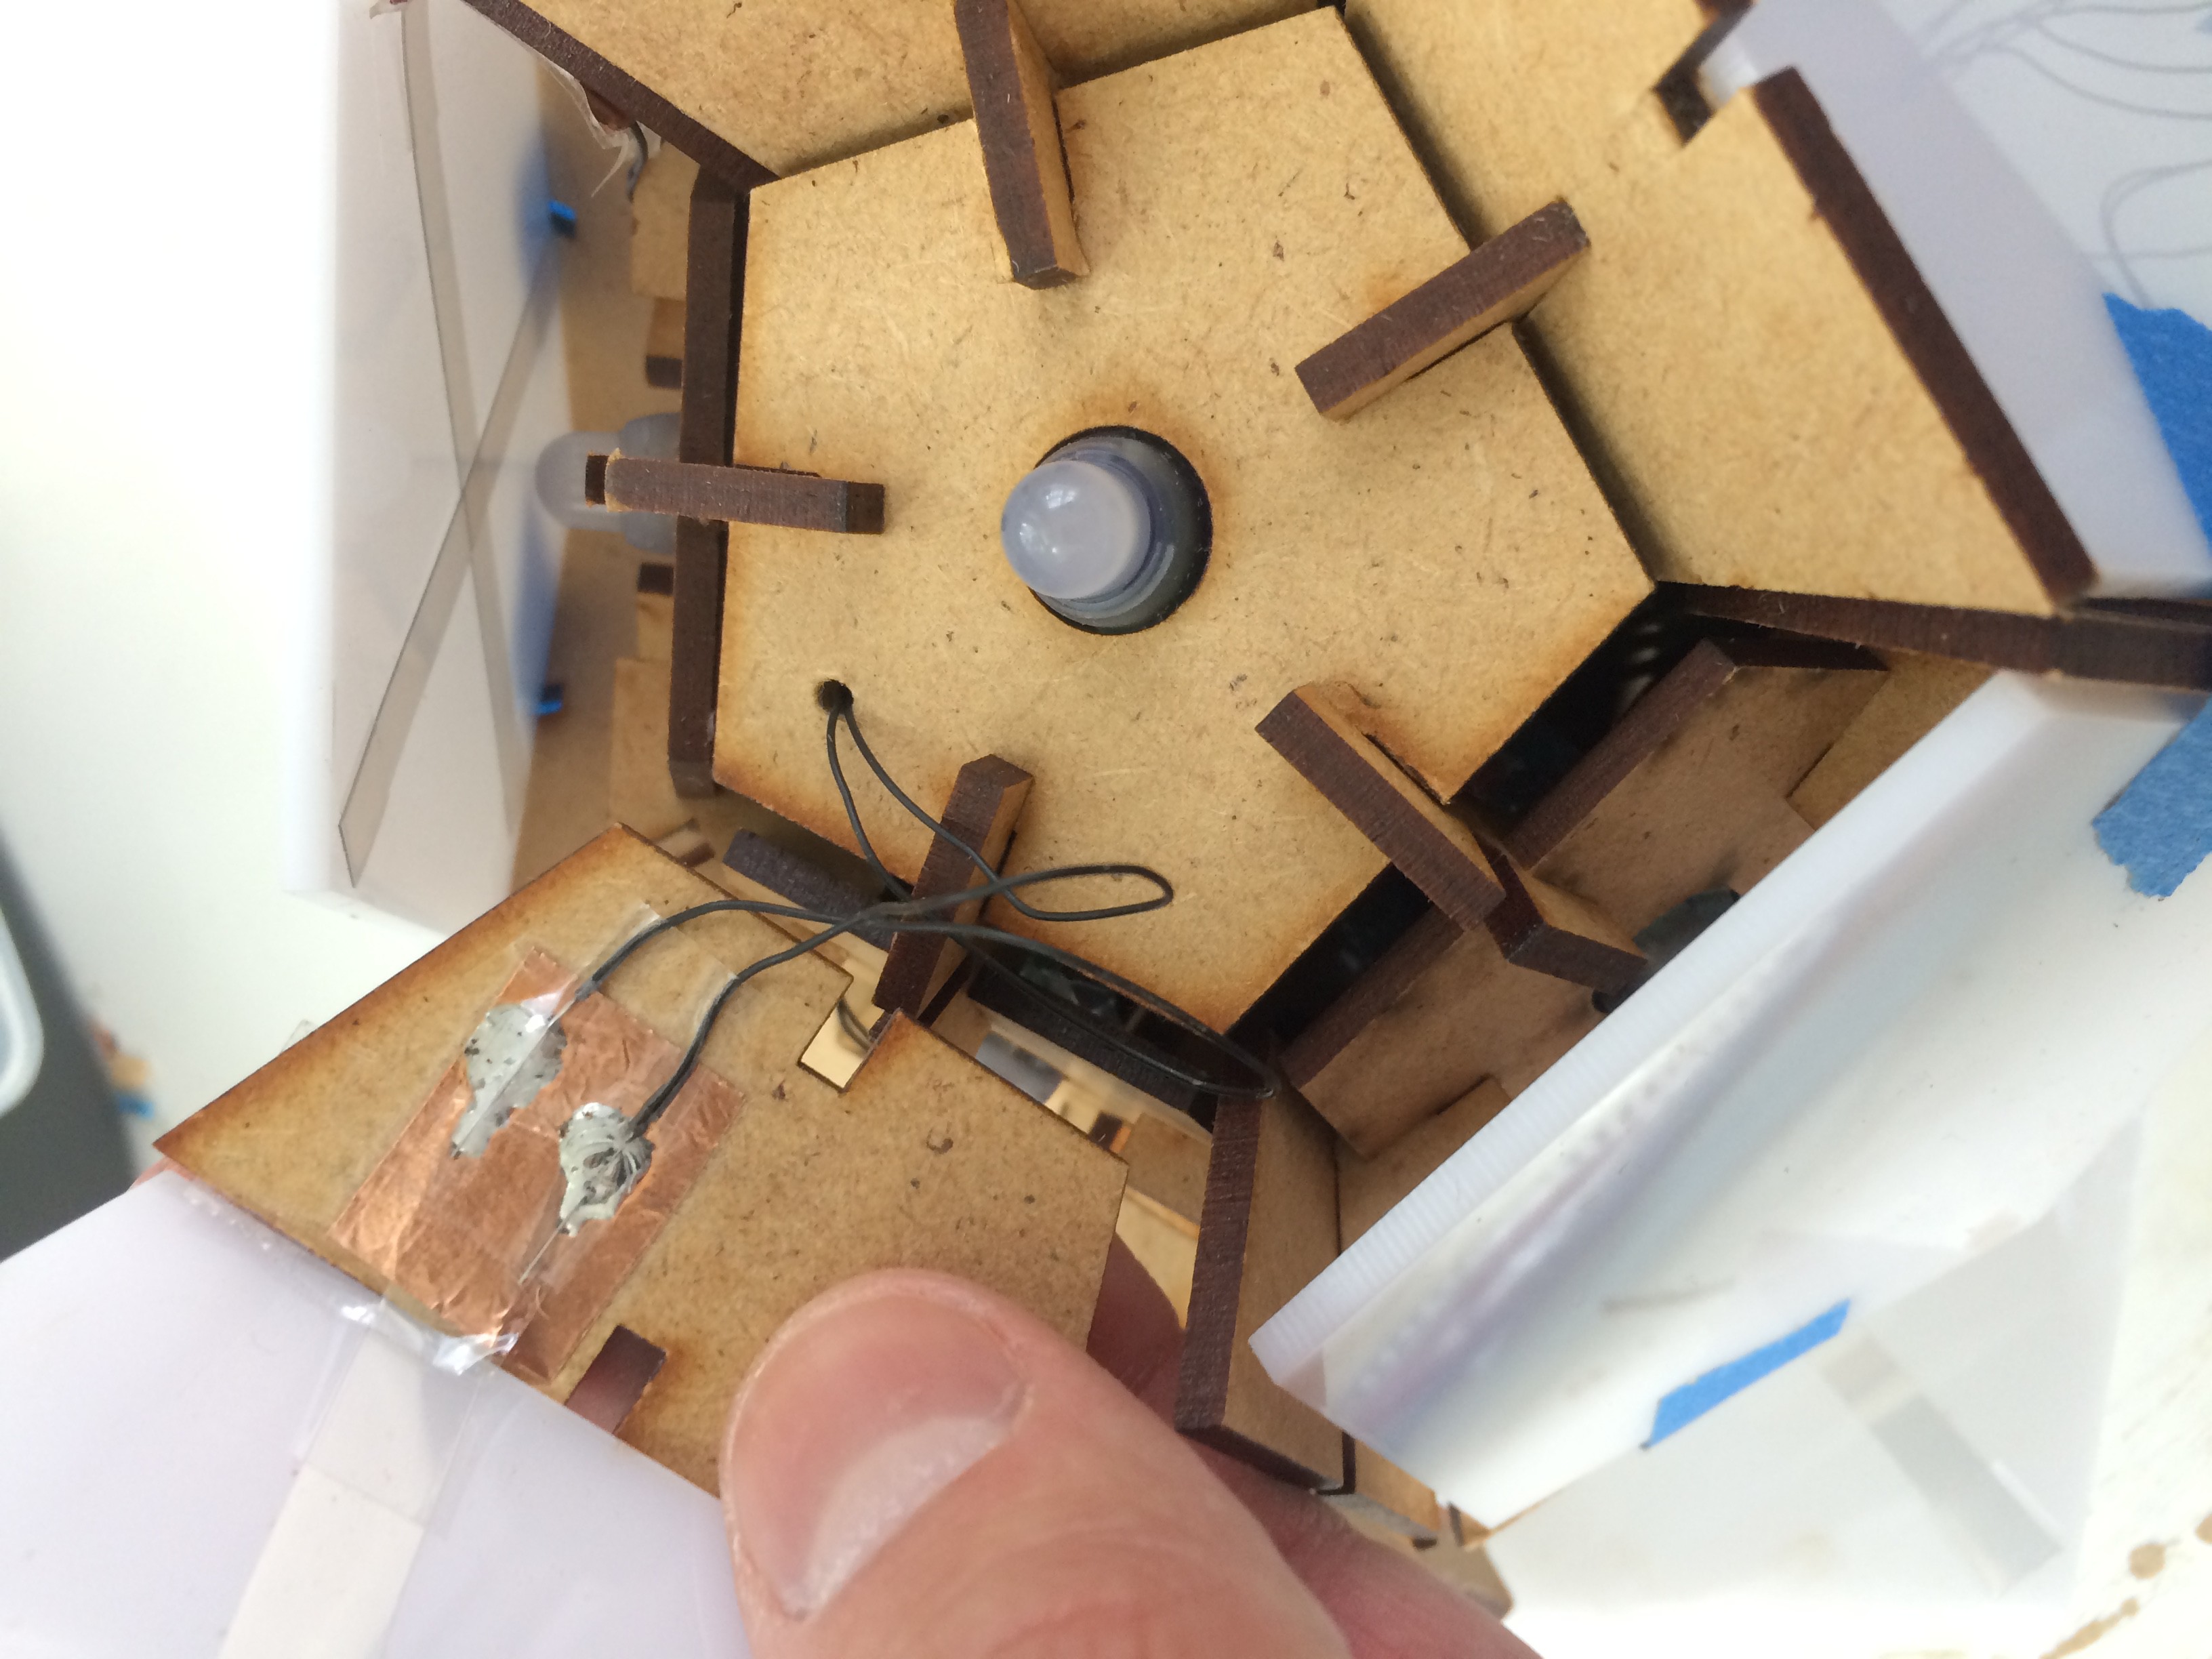
After completing all 11 plexiglass ITO keys, I assembled a Bucky Glow with cables from the capacitive touch sensors running down through the Bucky Glow to the Arduino. Here is the pin layout of this prototype:

And here is the video of the resulting capacitive touch faces for the musical instrument!
Discussions
Become a Hackaday.io Member
Create an account to leave a comment. Already have an account? Log In.