 TM
TMI really like the cardboard box that comes with the Voice Kit. Unfortunately, after several cycles of assembly and disassembly, the box starts to look a bit lived in. I also wanted to add extra features like a screen and blinking lights. So, I broke out my copy of OpenSCAD and created a PLA plastic clone of the original.
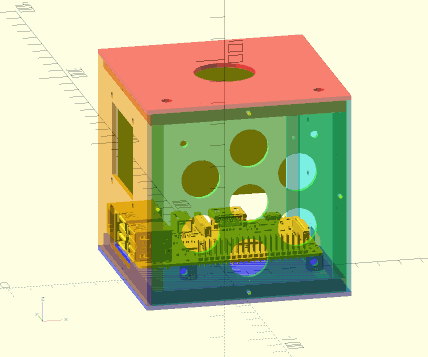
I'm uploading .stl files for all of the parts of the box (including variants with no screen/fan/blinkt), but you really should download the source file (VoiceBox.scad) and play around. The program looks for a file of utilities (Utilities.scad) in a sub directory (Utilities) of the directory containing VoiceBox.scad (or a sub-directory of your libraries folder if you have one set up). Just edit the "use" statement at the top of the file if you have trouble.
I printed the case using Inland "Natural" PLA from Microcenter. If you're using an opaque filament you'll need to use the windowed version of the right face (VoiceBox_right_with_window_for_opaque_filament.stl).
The faces are held together with 2x6mm round head self-tapping screws with washer. I got mine from Newegg, you may prefer to salvage them from Happy Meal toys. You'll have to modify the "M15" constant used to define the screw hole sizes if you can't get anything small enough.
P.S. Print the front face last, and leave it to cool on the print bed overnight, maybe even with something flat and heavy sitting on it. If you're impatient and remove the piece from the bed while it's still warm it will bow in the middle due to contraction of the seven large circular holes.
Discussions
Become a Hackaday.io Member
Create an account to leave a comment. Already have an account? Log In.