 Ellie T
Note: The project actually started two months ago, so I'm trying to organize and compress logs from my Evernote journal to Hackaday!
There are tons of underwater housing made with PVC everywhere, so my challenge was: can the design be easier or cheaper? Can the parts be easily obtained and cut with tools that most small workshops would have?
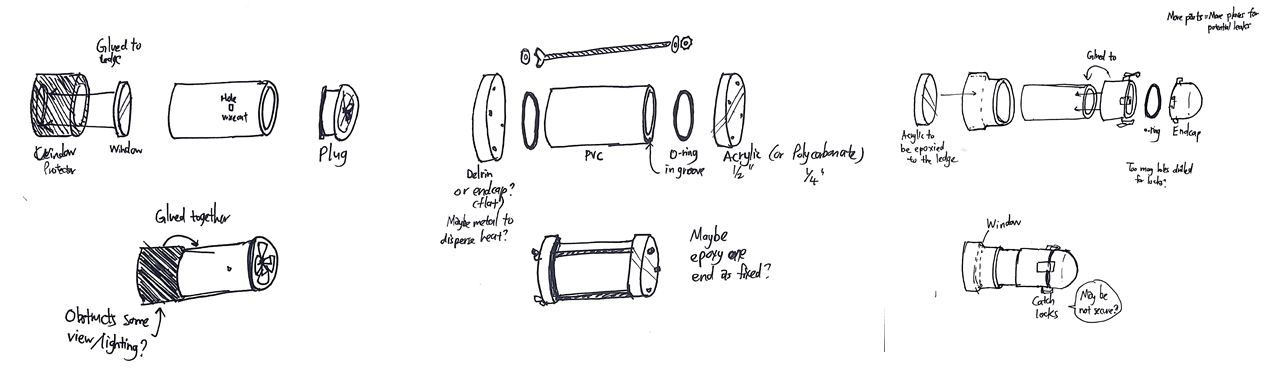 (The middle and right design were inspired by MBARI's SeeStar and Jonathan Bergshoeff's low-cost housing design.)
In the end, after brainstorming with the team a bit I decided to choose the simplest design on the far left with 4 parts: a end cap/plug, main body, window, and window frame. I didn't have the tools to easily cut circular grooves on the PVC for the O-ring to sit in for the middle design, and the latches on the right design seemed like extra work and parts (I really the easiness of opening and closing it tho).
To ensure a good bond with PVC glue, I picked clear PVC as the window material. It isn't as clear as acrylic, but we'll see how it goes! I couldn't decide whether it'd be better to put the window BEFORE or AFTER the window frame's ledge. Hmmm. So I made two versions!
*EDIT: I later realized acrylic can also be bonded with PVC cement if it has important compounds (MEK and acetone), although not as good as Weld On adhesives that is recommended for acrylic.
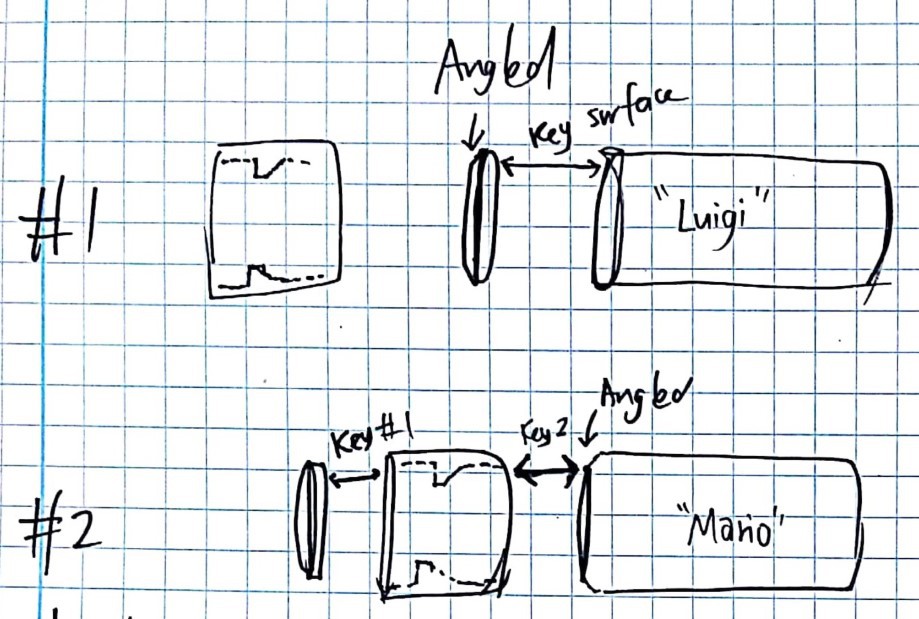
After cutting the parts I inspected the PVC coupling in more detail and realized that the coupling I had, had a ledge which was flat at one side, and slanted at the other. To try and fit the slanted edge, I tried used a sander to put some kind of slant on the window. It was crude and didn't fit perfectly, but at least the window fit better than before!
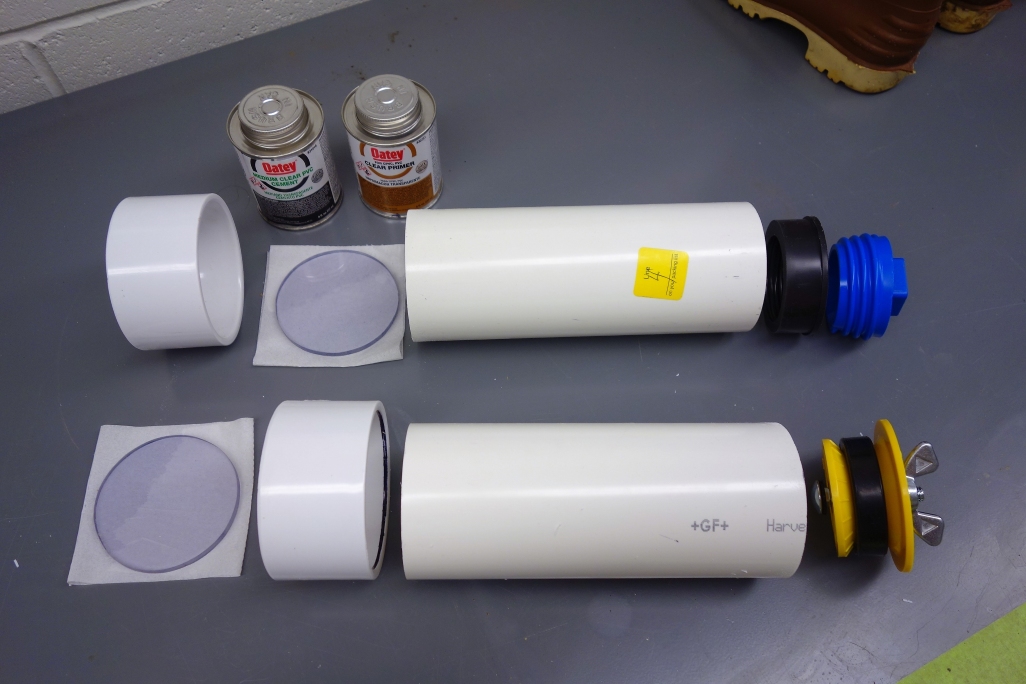
Used PVC primer on contact surfaces, and glued the parts with PVC cement. Those things sure get real sticky fast! It was harder to glue Mario because I had to do it in two stages: one for the coupling 'frame' and then the window. I also used A TON of glue because there was this gap between the window and the body due to the ledge and I wanted to fill that out.
Luigi was much easier to glue! After smearing all the stuff on I placed the window on the body (vertically) then pressed the coupling down on top of them really REALLY hard until all the surfaces was flush. I really like that the window is glued to the body - it is the main, most important contact to prevent leaks. Then the coupling 'frame provides a secondary guard against leaks.
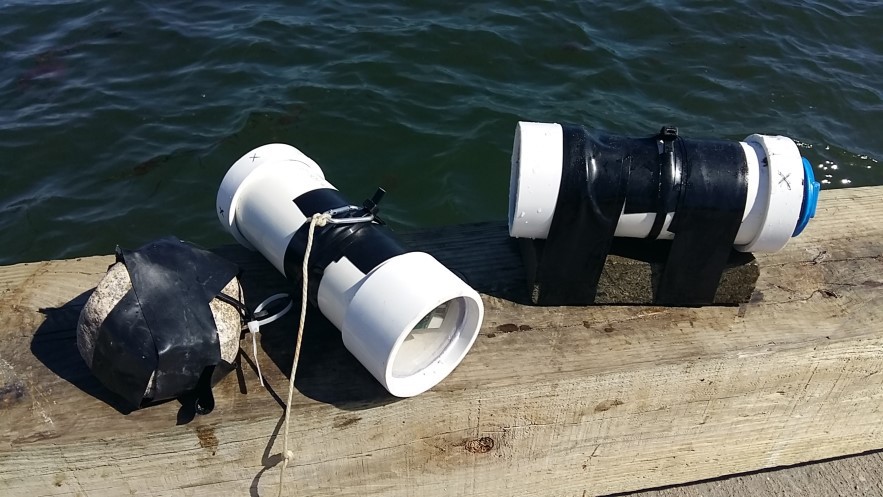
After a day of drying, we brought Mario and Luigi out to the water for first leak tests! I didn't have weights, so I just found some rocks and taped/zip-tied them to the housings. Each housing also had its own Ziptie loop which held pretty well.
They went down to about 16-18ft (about 5m) for a quick check for major leaks, then sat in the water overnight just in case there were minor leaks that needed more time to show. Here's a raw deployment video from a GoPro that I tied to the string:
(Warning: Spinning video may cause dizziness)
From this video, I realized that the field of view decreases A LOT in water, due to a higher refractive index. On land, the whole unit fits into the view of the GoPro's fisheye lens, but in water it barely does! Hmmmm. Looks like super wide angle lens will be the way to go underwater.
I also realized that Luigi was loosely anchored to a rock and this is not ideal for taking images - i'd need a stable anchor/weight like Mario's where the housing is secured to the weight! Unless I really want pictures that 'float' around since the housing is floating and moving with the seafloor currents.
Results:
Took them out the next day and there were no leaks. This housing is operational up to 18ft (about 5m) woohoo!
Housing Next Steps:
- How far can they go before a leak breaks in?
- Can I drill an extra hole somewhere for the sensor?
Discussions
Become a Hackaday.io Member
Create an account to leave a comment. Already have an account? Log In.