The Plight of the Chord
The goal of our project is to design a musical interface which emphasizes common tonal relationships in western music theory.
Our team believes the layout of instruments such as the piano and guitar do not emphasize the relationships betweens tones used in building chords. Traditionally, building chords relies on a user’s understanding of music theory or intuition of relative pitch. This creates a learning curve for beginner musicians in building common chords quickly.
Creating a Solution
Matt, Chase, and I came together to solve this problem. The interface we came up with is the Key Kontroller. The basis idea of the Key Kontroller is that you have a Key selection interface on one side and tone selectors on the other. Once a Key is selected (i.e. the key of C), all of the tone selectors are mapped out to common chordal tones of 1 3 5 7 9 11 13. For this example, it would map to C E G B D F A. This allows the user to have the same patterns for simple and complex chords.
Once the user gains the familiarity of this format is it almost encourages someone to want to play beyond the simple chords. We wanted to instill the desire to explore and create rather than fear of playing the wrong note. For our first key selector, we picked the Circle of Fifths as a starting point because of all of the musical relationships that can be realized in proximity of each tone and the added benefit of the compact factor in comparison to a piano layout. We are exploring other options such as the piano or a hexagonal grid pattern for a selector as well. This brought us to our first layout below.
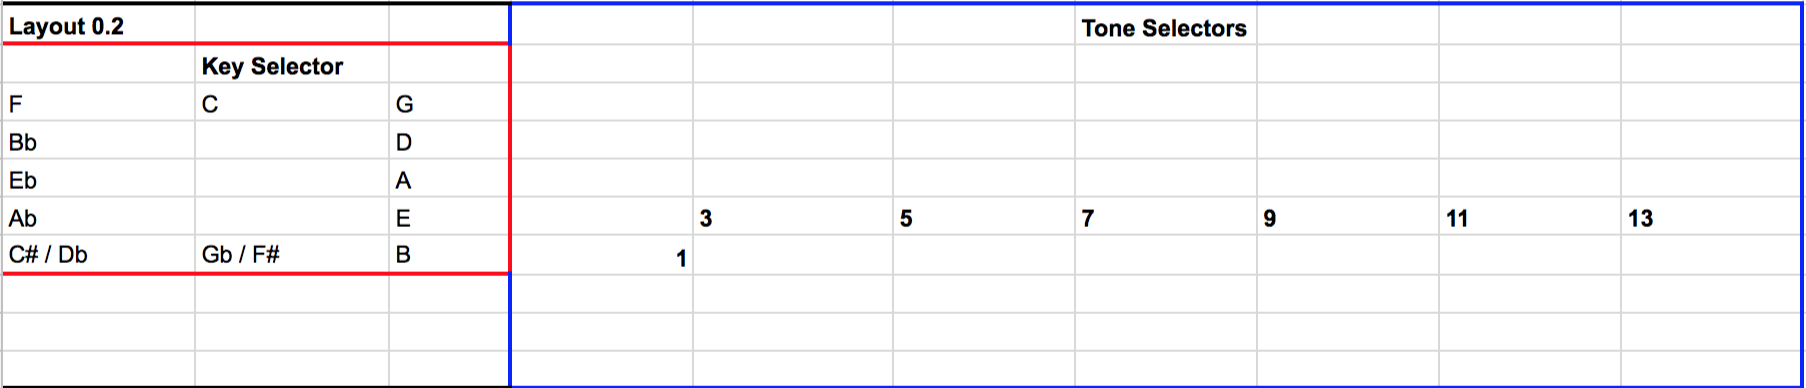
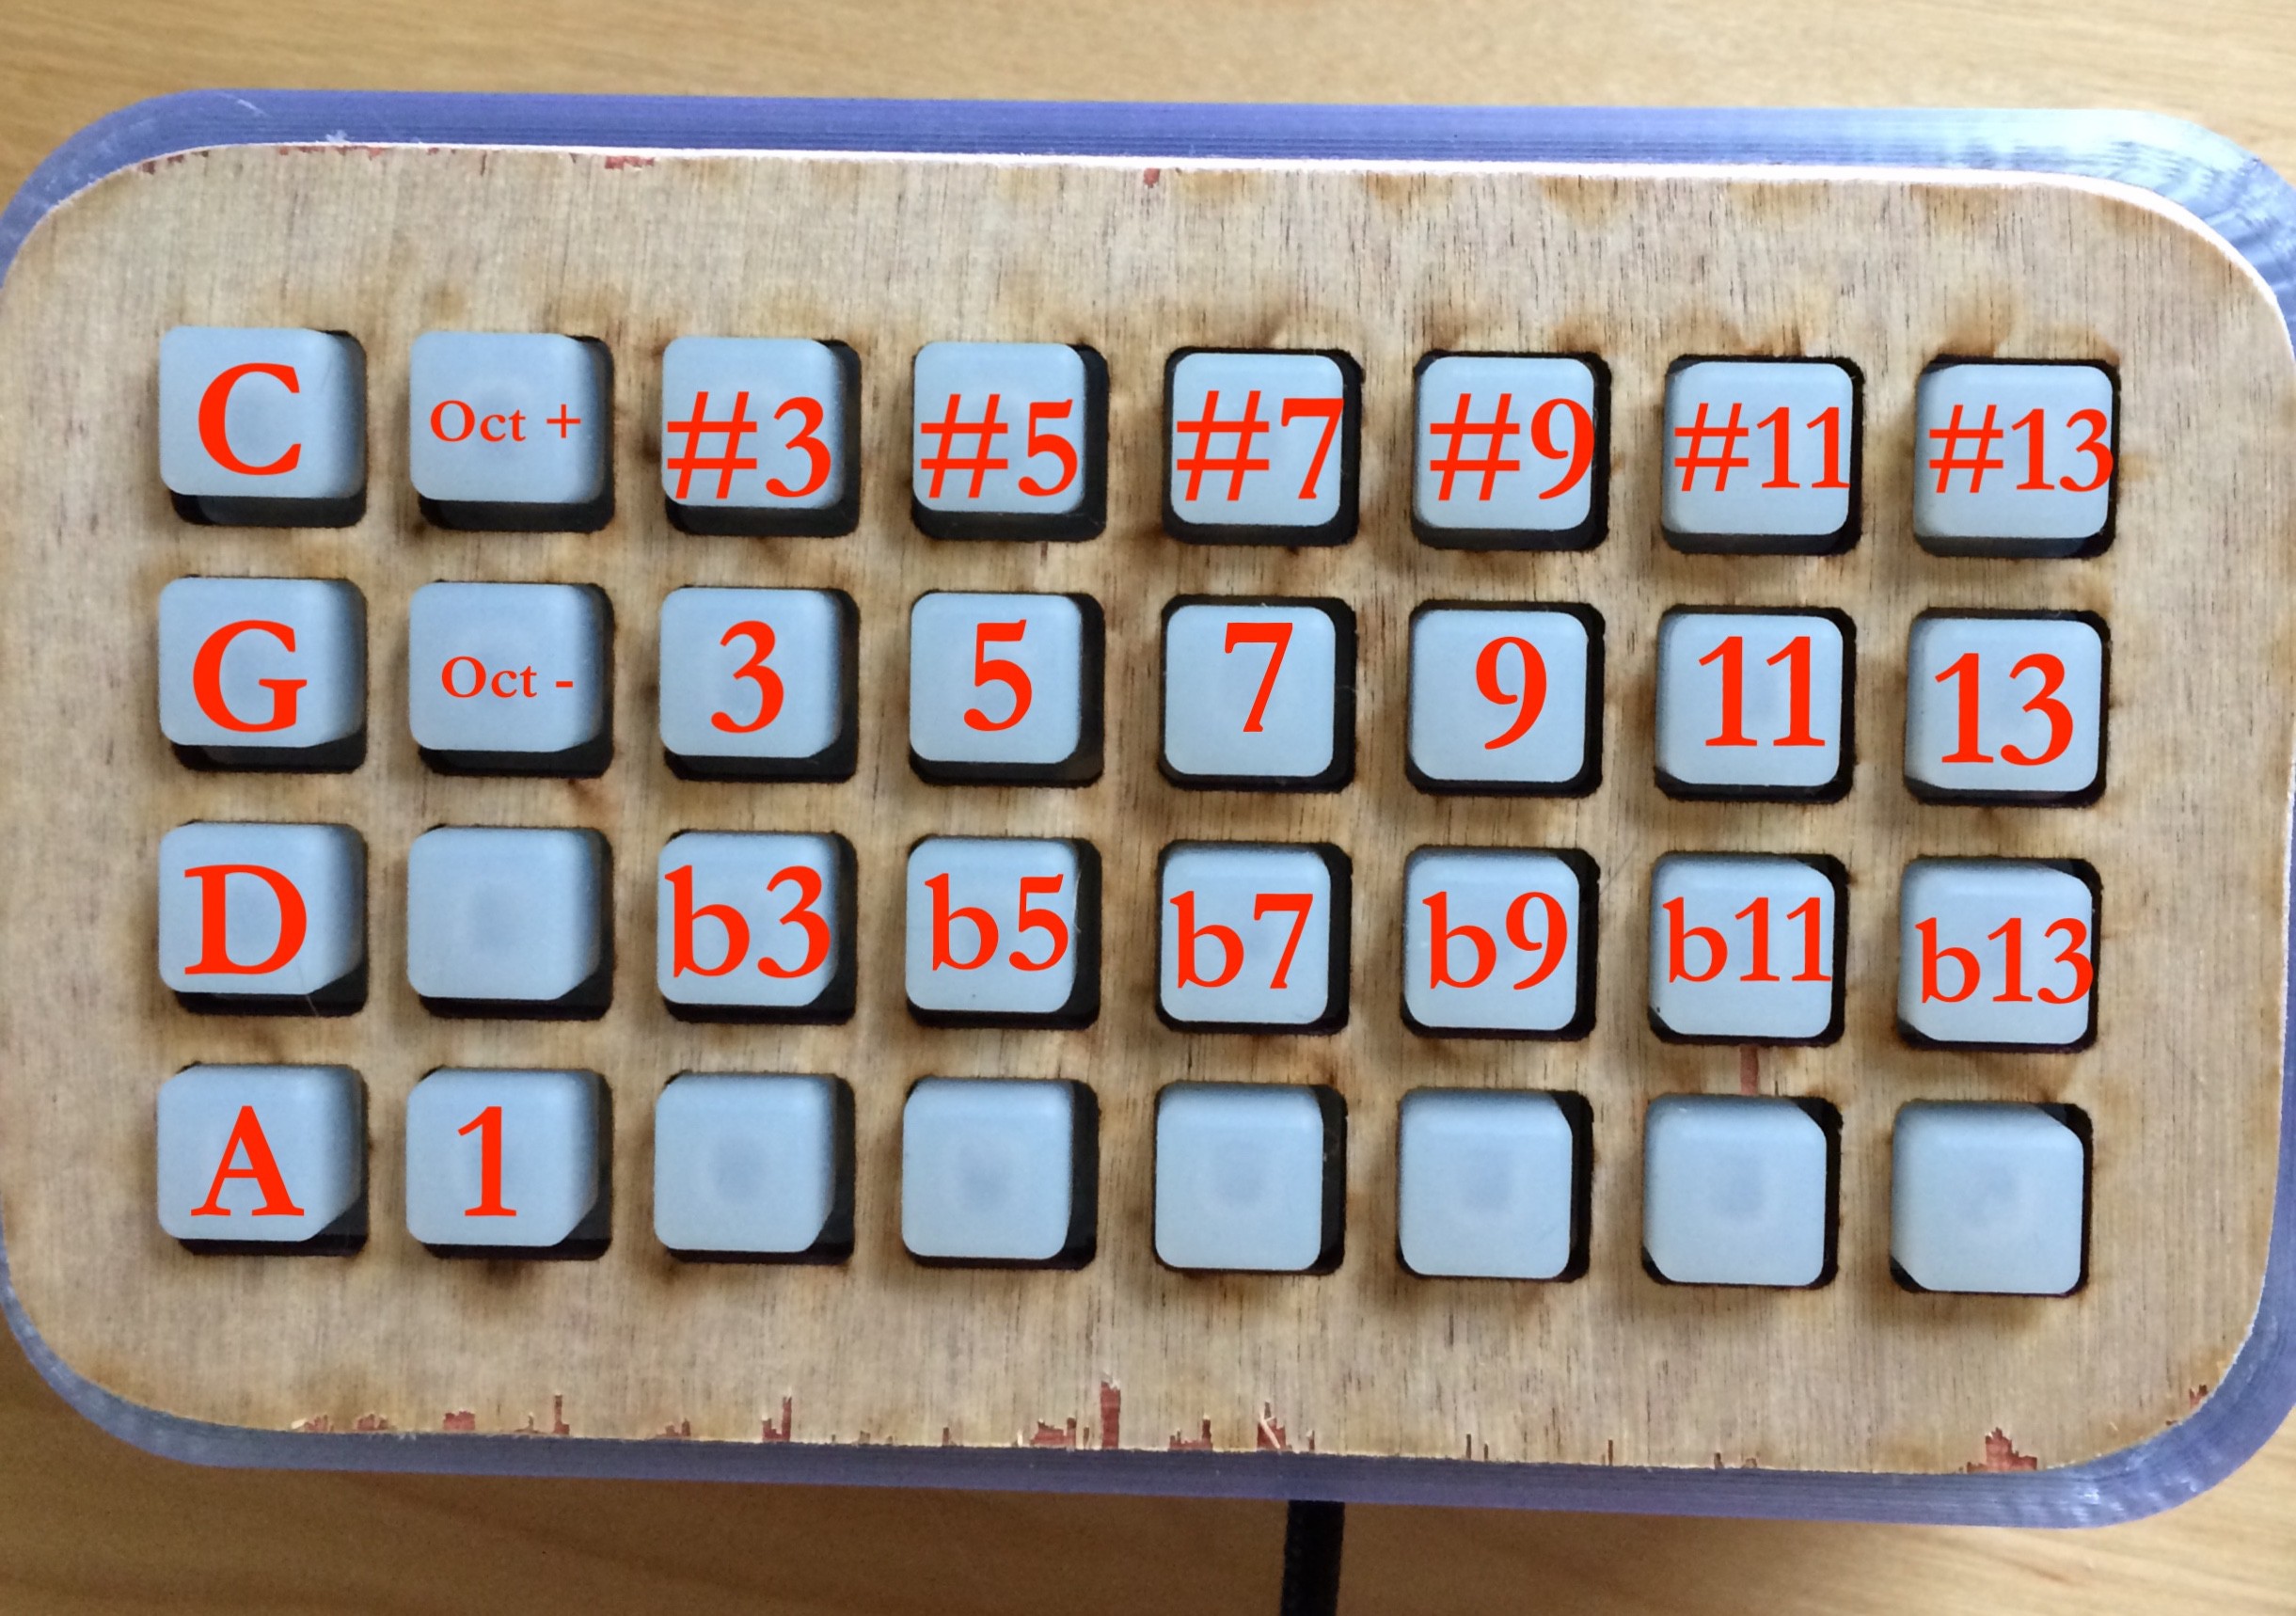
However, we did not want to limit the user in what they could play. We did not want to make the mistake that a lot of controllers made in forcing someone to choose a scale. It limits the user in the notes they can play and forces the user to change scales in a live musical setting, which can be cumbersome and stressful. To solve this we added flat and sharp modifiers: b3 b5 b7 b9 b11 b13 and #3 #5 #7 #9 #11 #13. We also wanted to add the notes 2 4 6 10 12 14 with their flats and sharps. We also added idea of an Octave Up, Octave down, and raised root (8) and lowered root (-8). This allows the ability to play melodies and have more freedom. Because sometimes playing the wrong note is the best note! This resulted in our second iteration.

Creating a Working Prototype
After laying out what buttons we wanted, we needed to see if we were crazy and had to much pizza and beer. So we shredded up paper and tried to layout the buttons as a demo prototype.

The prototype seemed to feel comfortable, but we need to take it one step further. We decided to develop some code to see if this thing was playable. We set on using Adafruit's Trellis PCB due to it being open sourced, its light up buttons for feedback, and we knew we could already communicate with music software using MIDI. Because we only had 32 buttons with two trellis PCBs from a previous project. We decided to focus on 4 Key Selectors (C G D A), Octave Up and Octave Down, 1 (the Root), 3, 5, 7, 9 11, 13, and their flat and sharp equivalents. The one or the root was put at bottom corner to mimic the shape of your hand and allow your thumb to press the root easily like a piano chord.
We are excited to show you the next step in our project. Our next Build Log should be a video showing what we have developed so far. Feel free to post questions and comments below!
Discussions
Become a Hackaday.io Member
Create an account to leave a comment. Already have an account? Log In.