 sjm4306
Just a quick progress update and some lessons learned. I finally got some time to button up the SNES controller (get it? ... buttons ... nevermind ... ). Watch it in action here. Here you can see the controller happily charging. Dont worry I ended up plugging that controller wire hole with a 3d printed plug in a slightly darker gray that looks quite nice.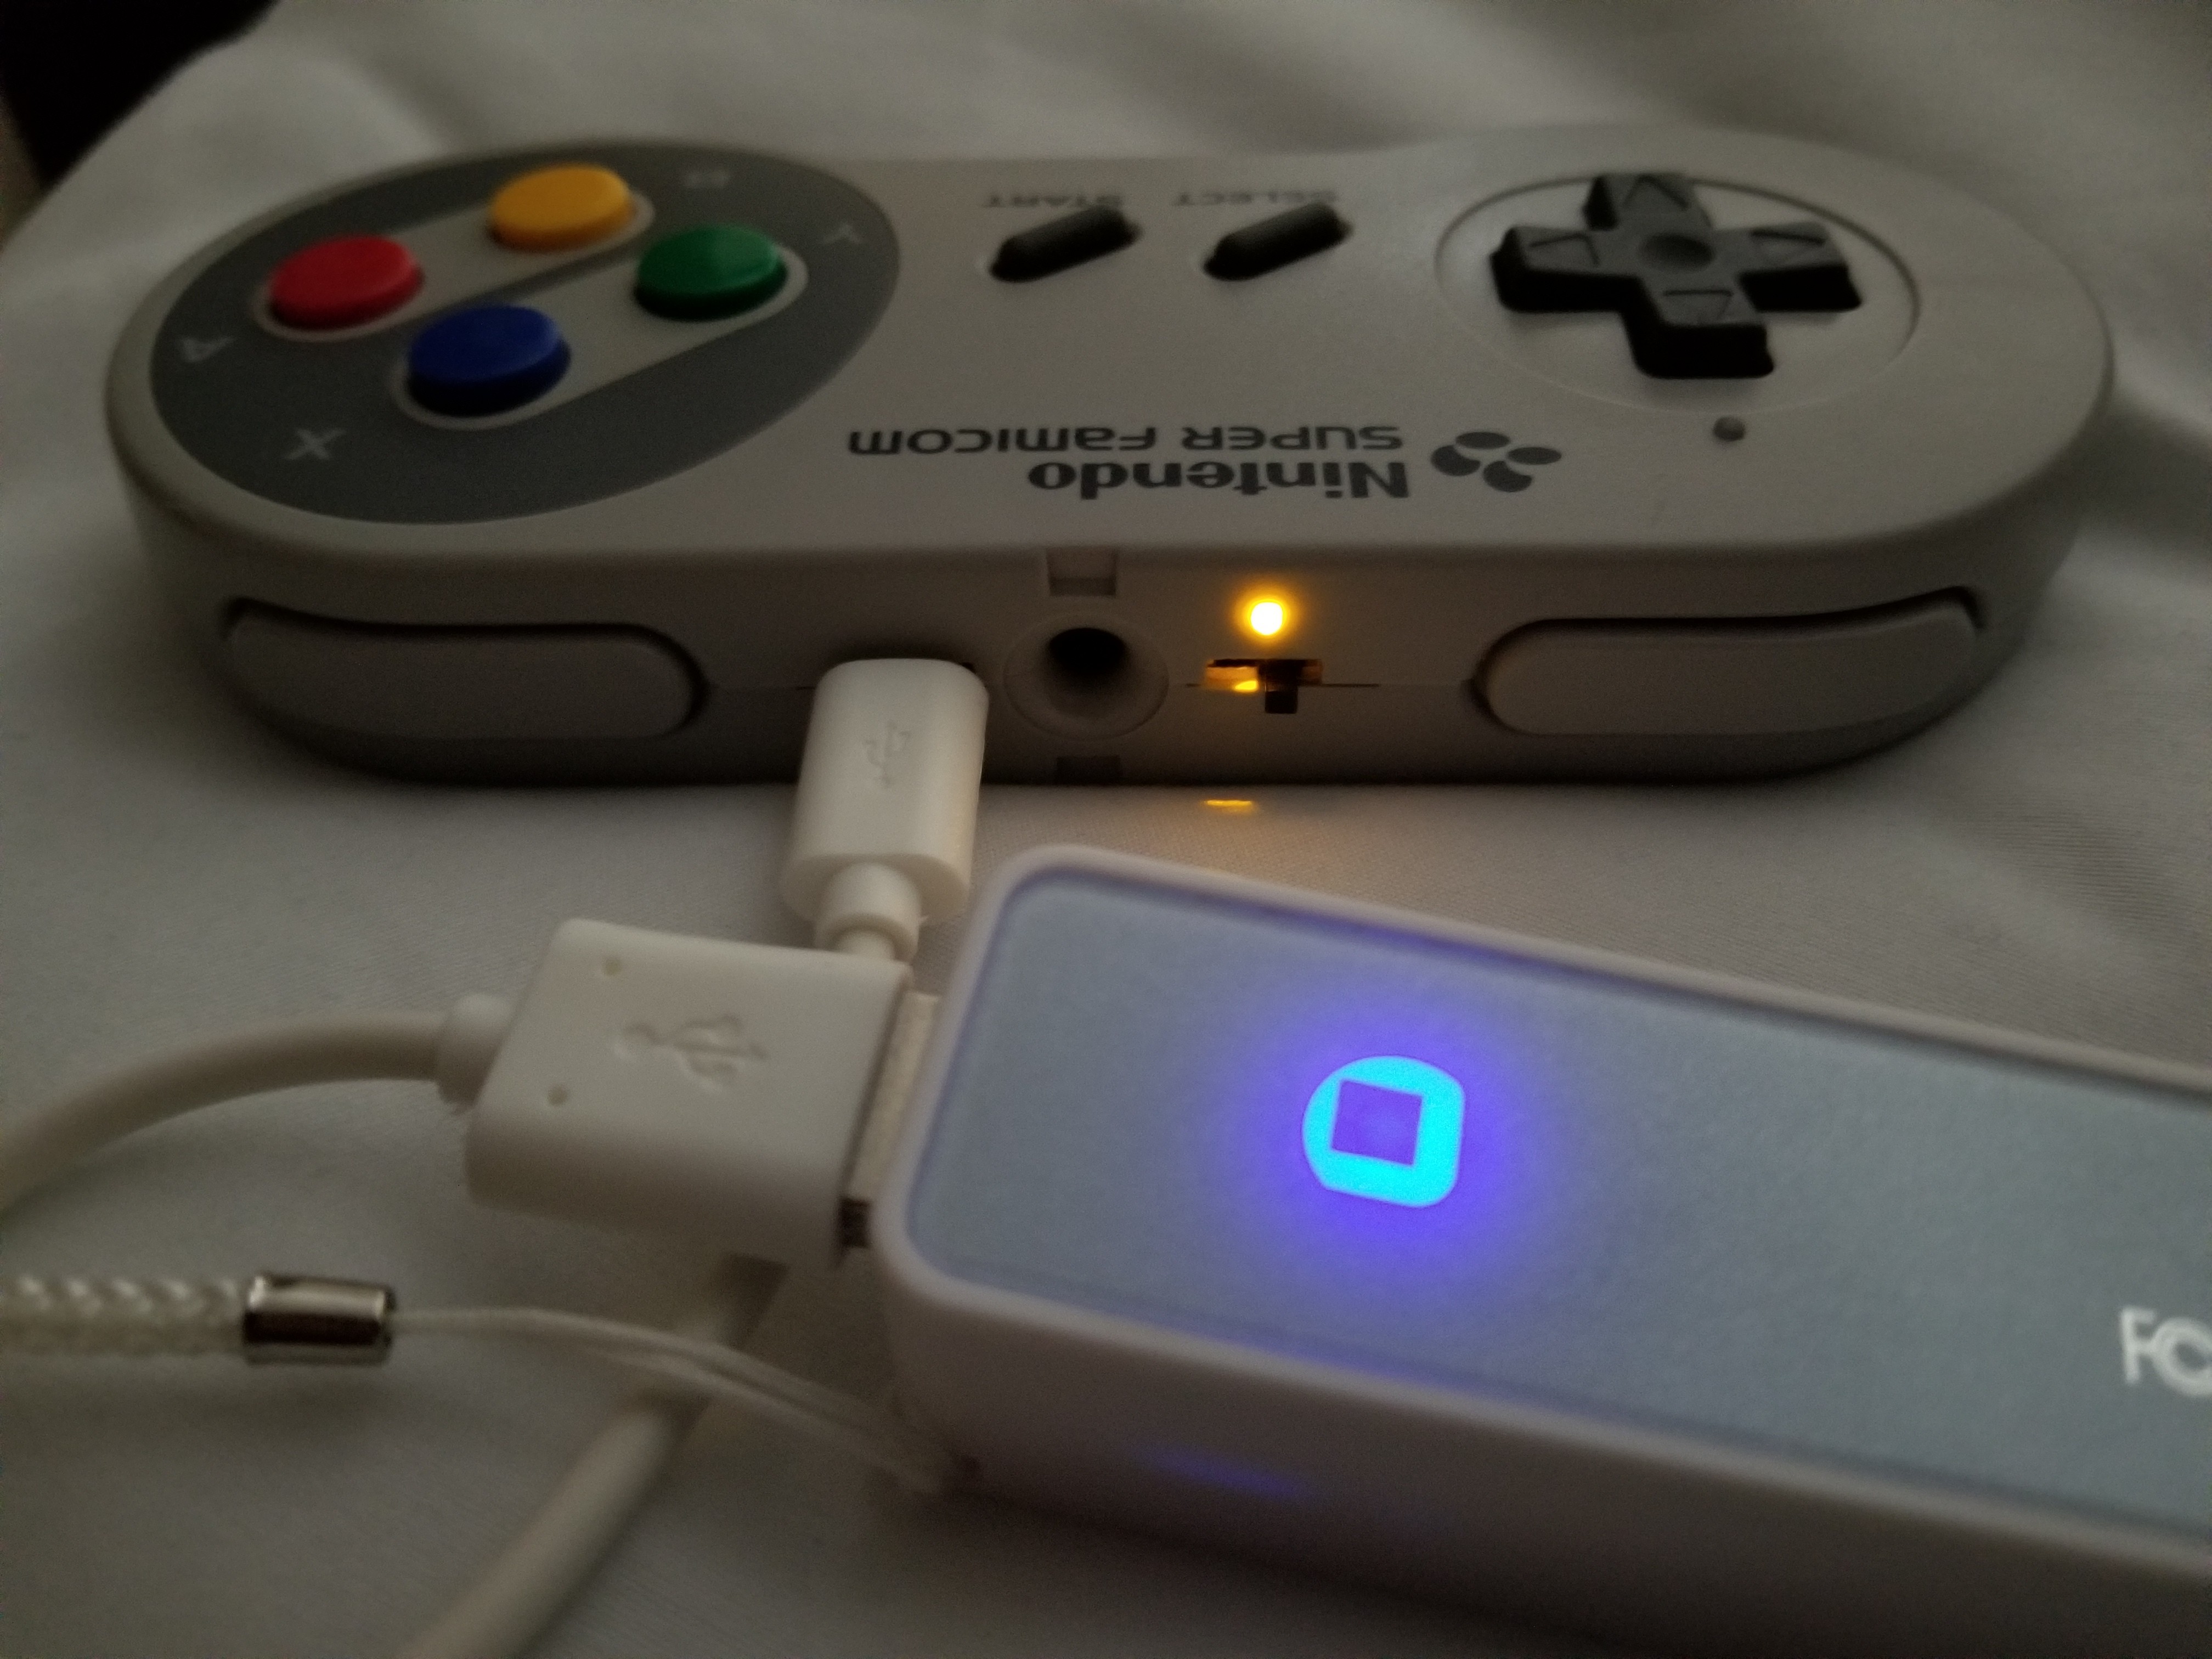
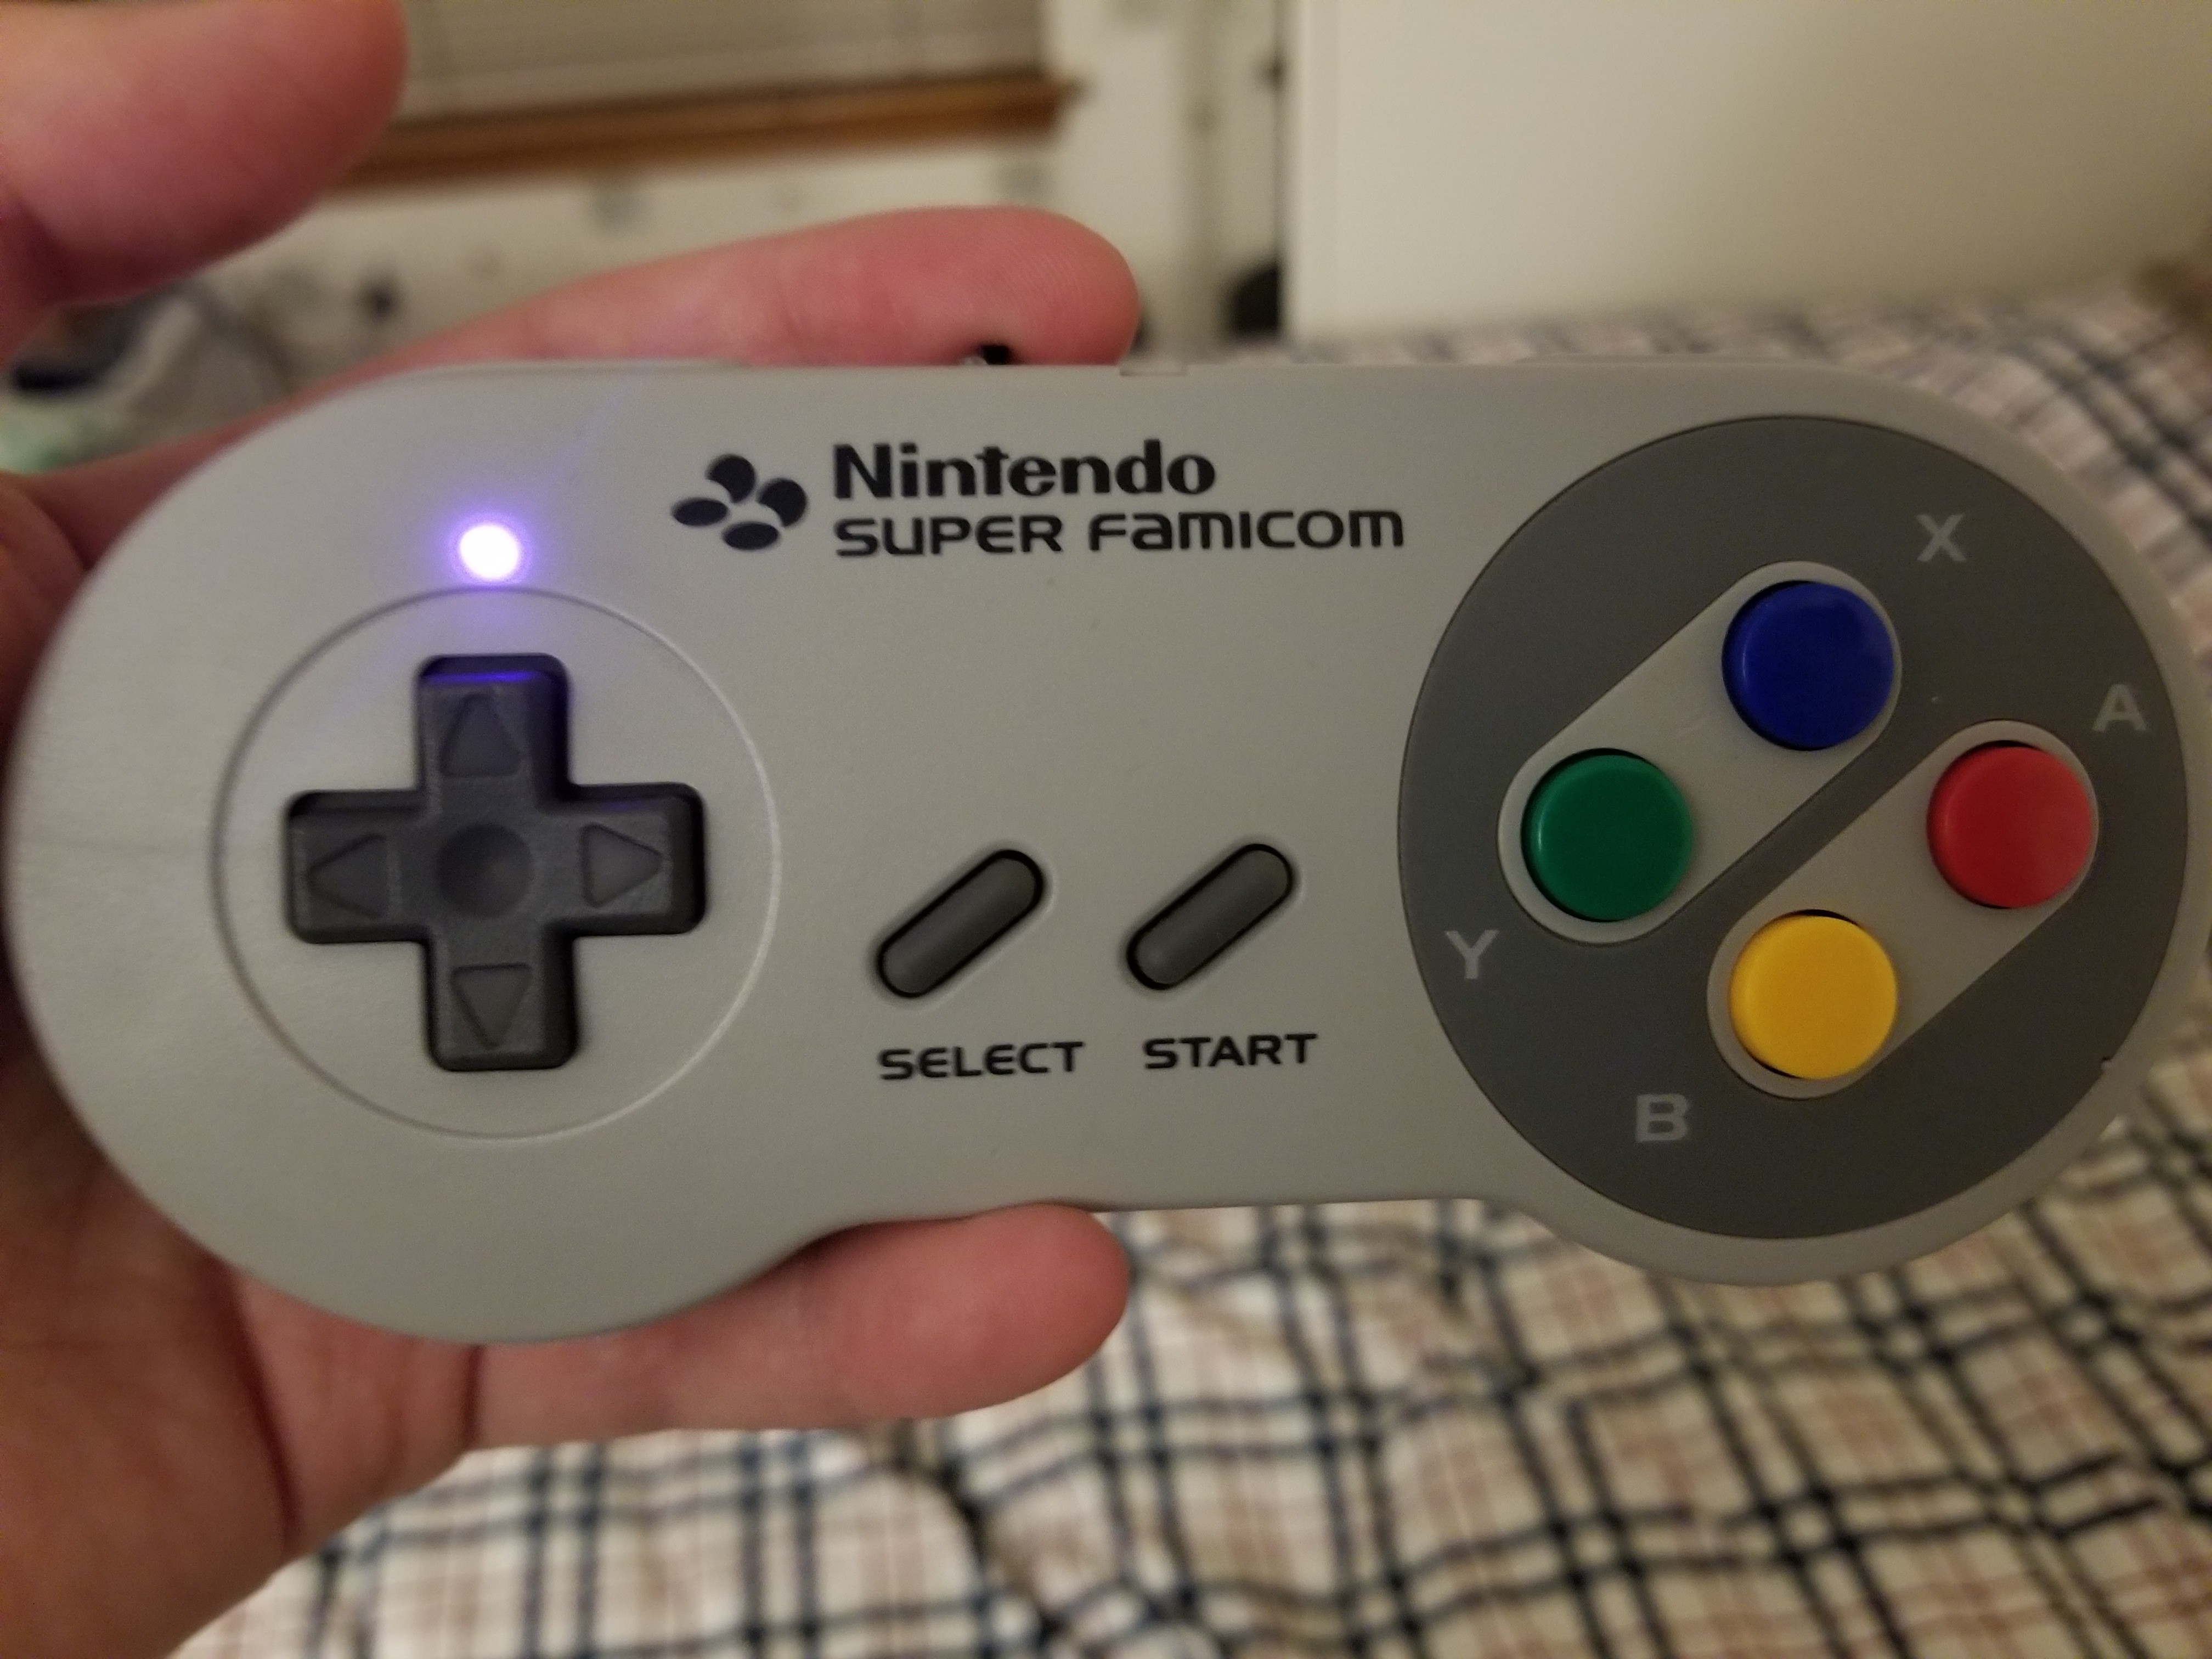
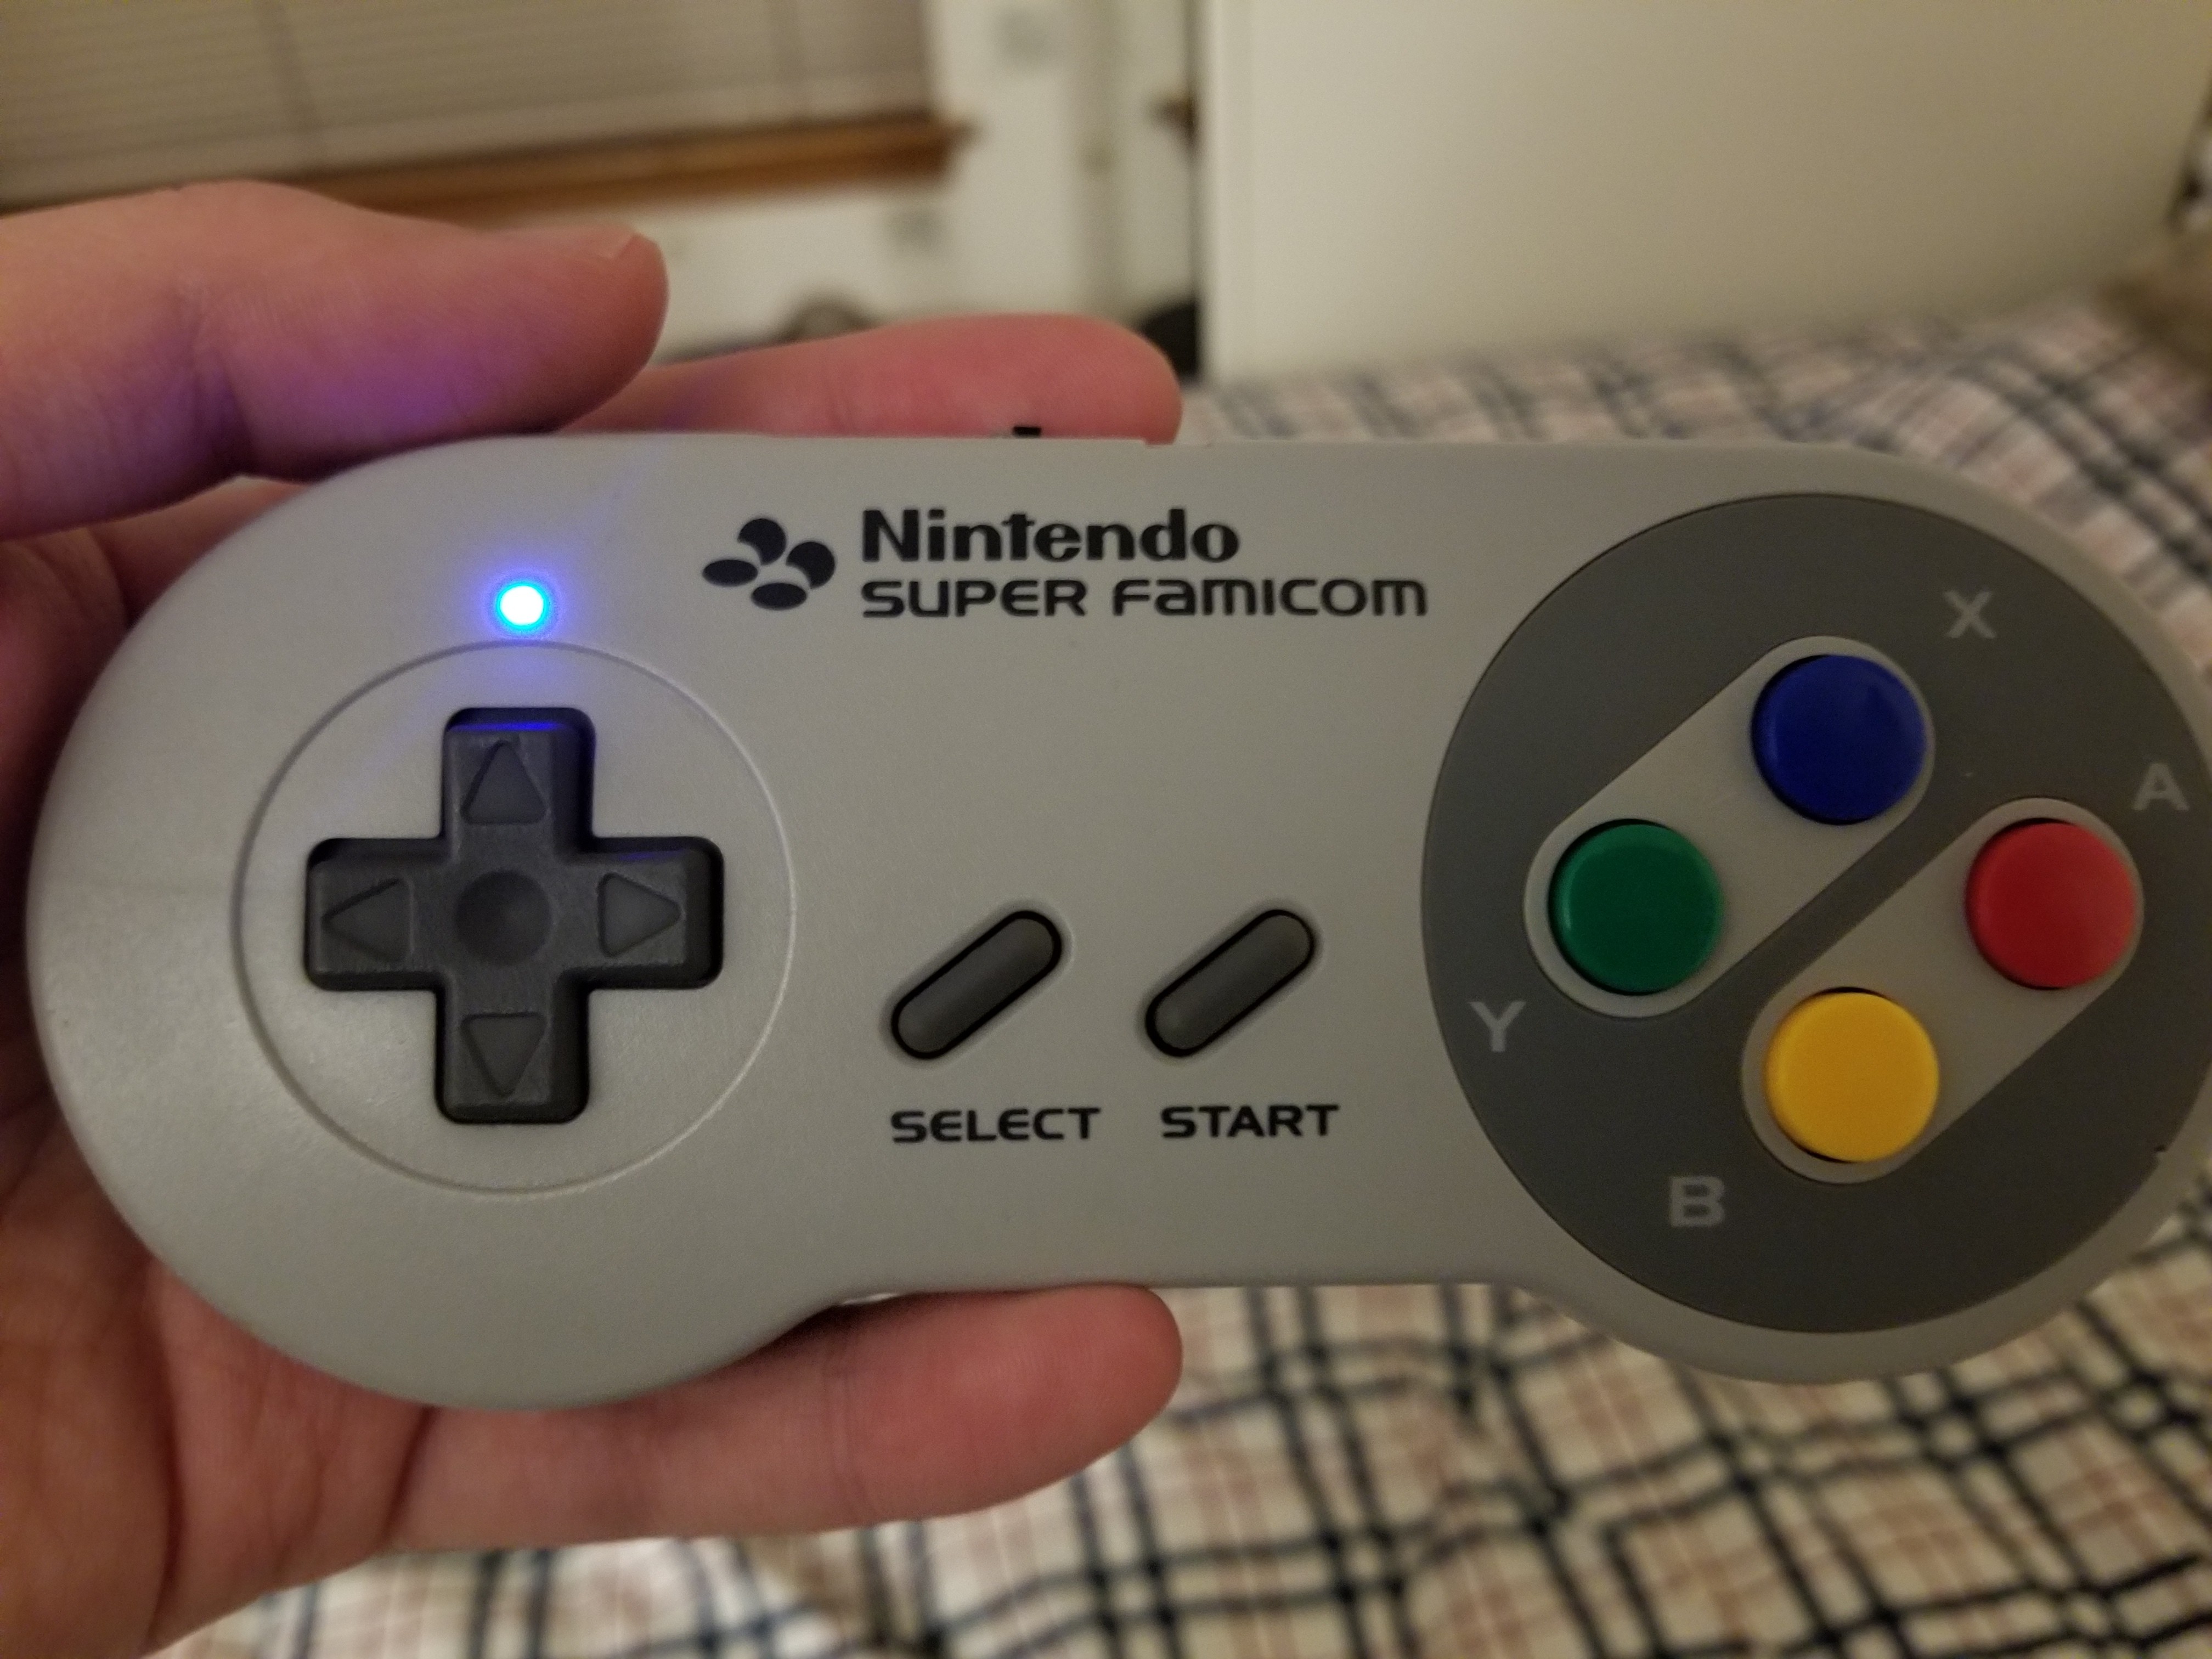
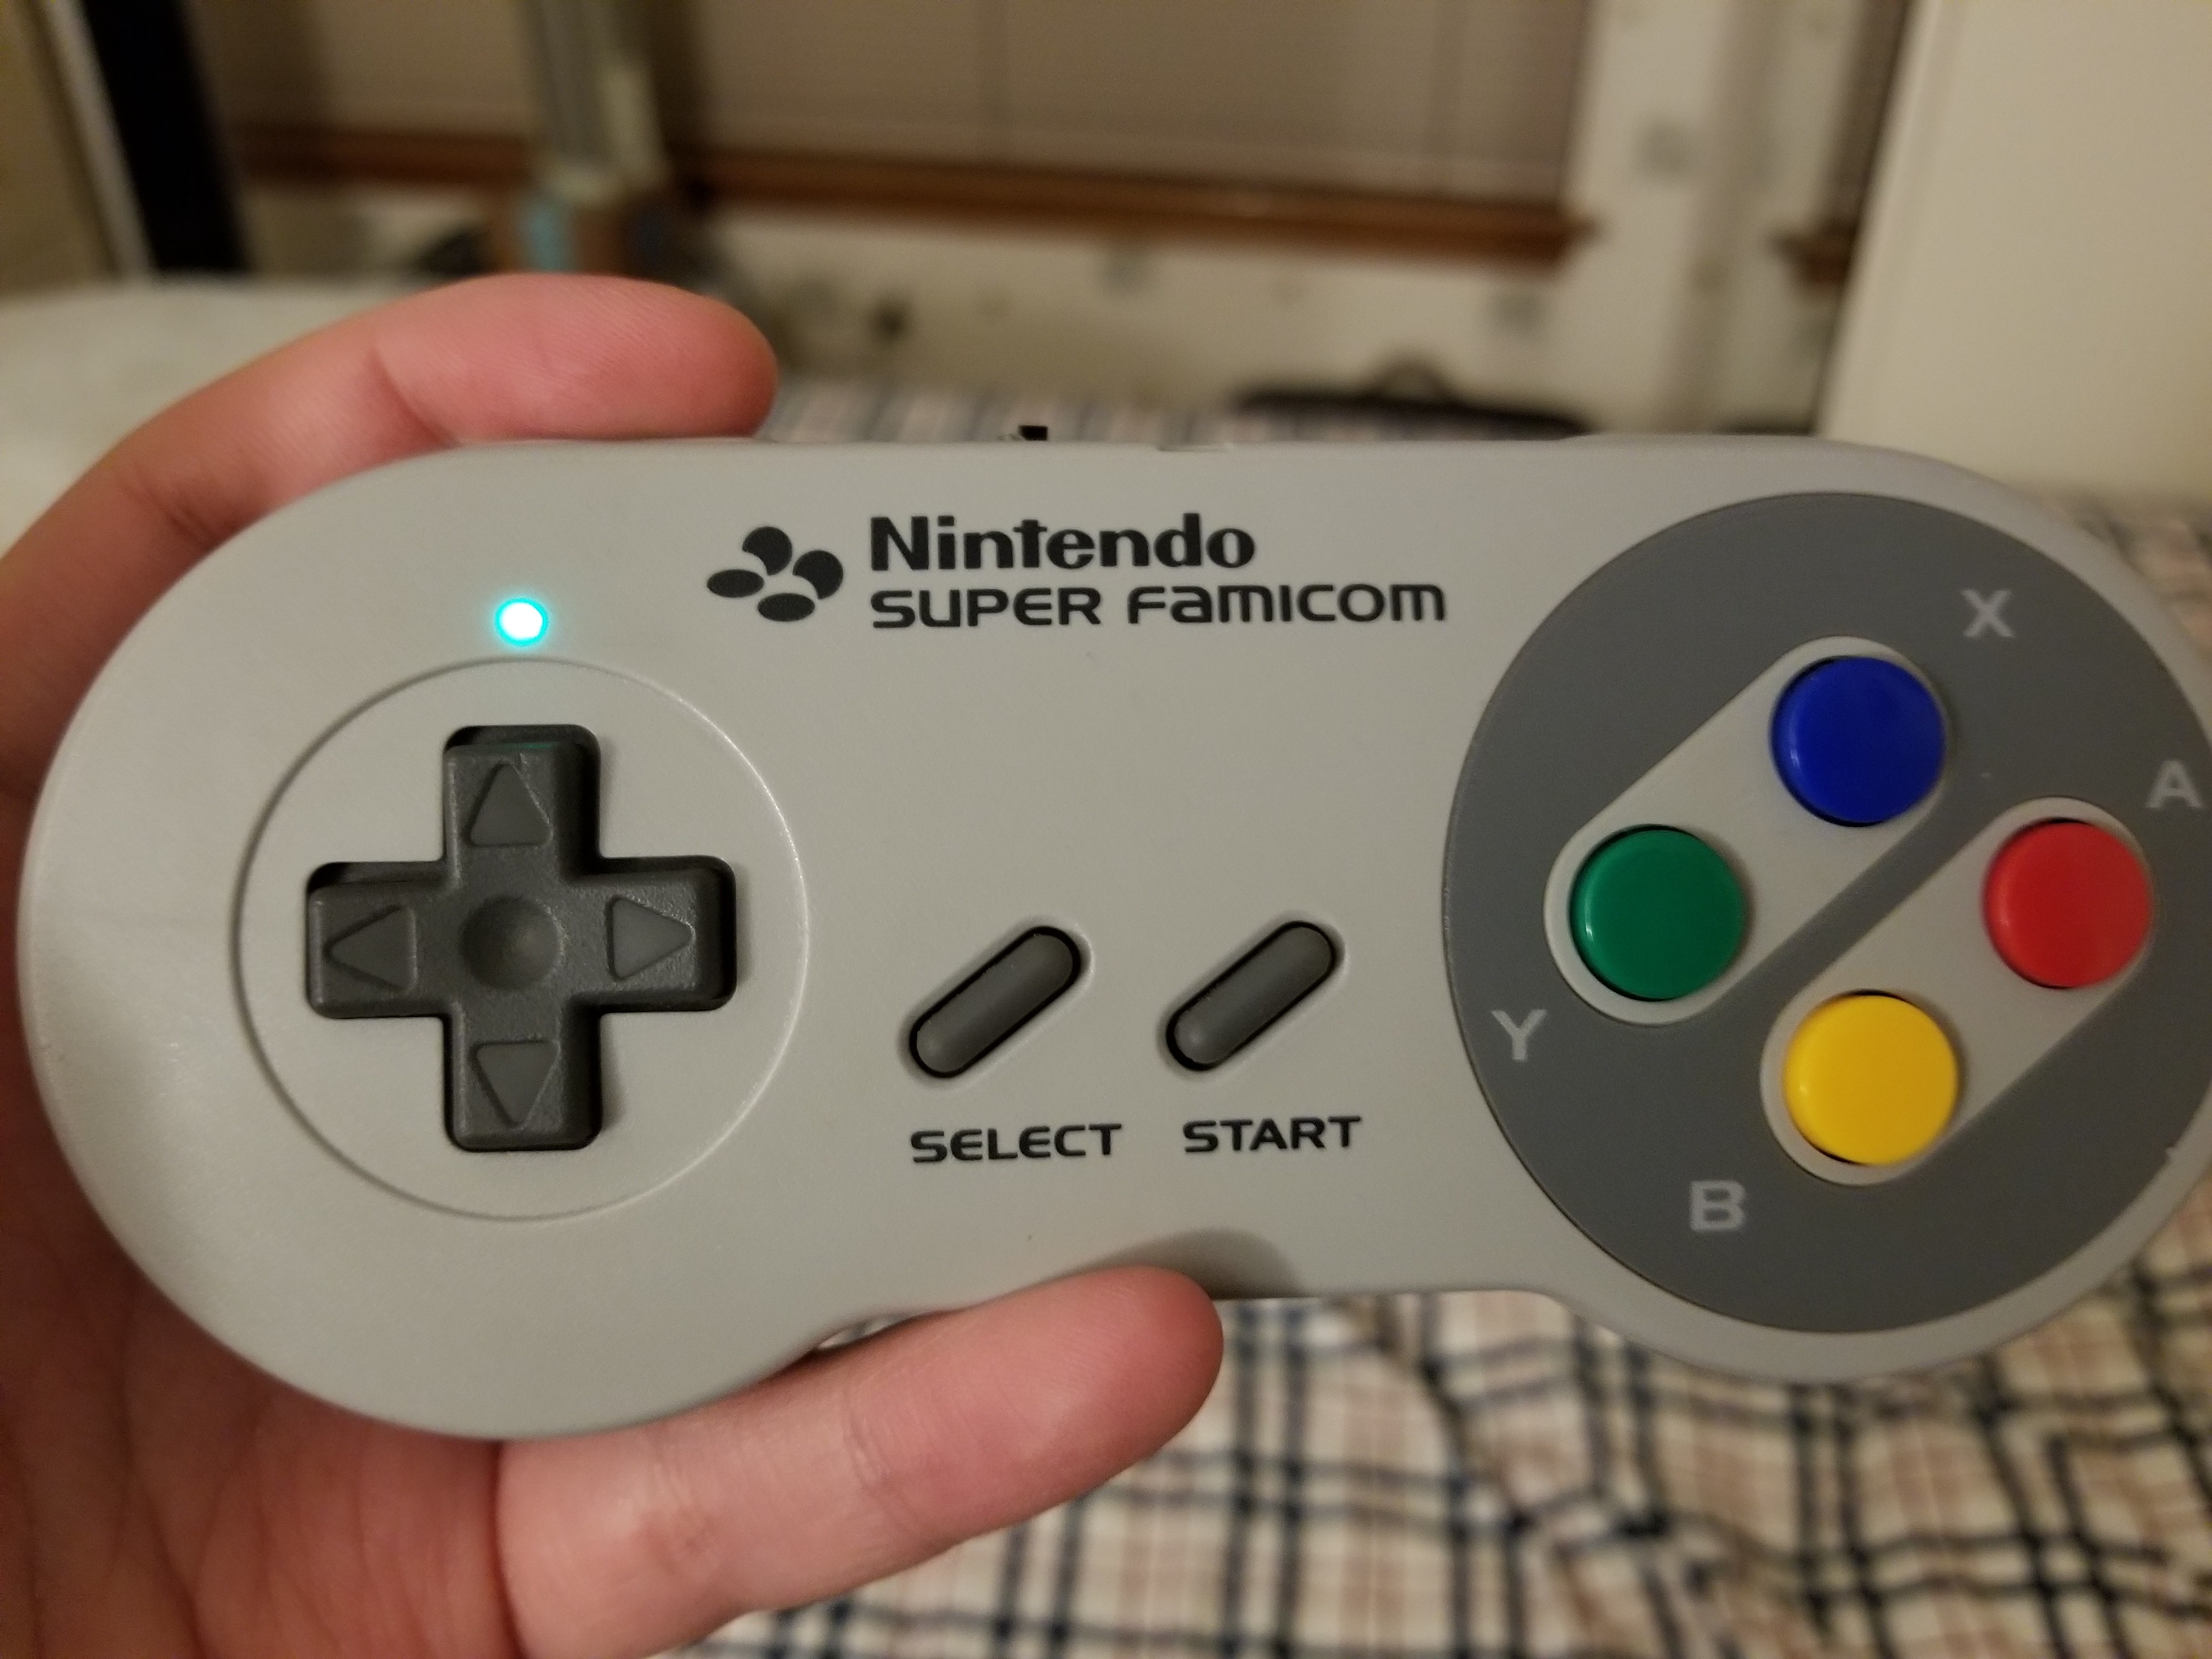
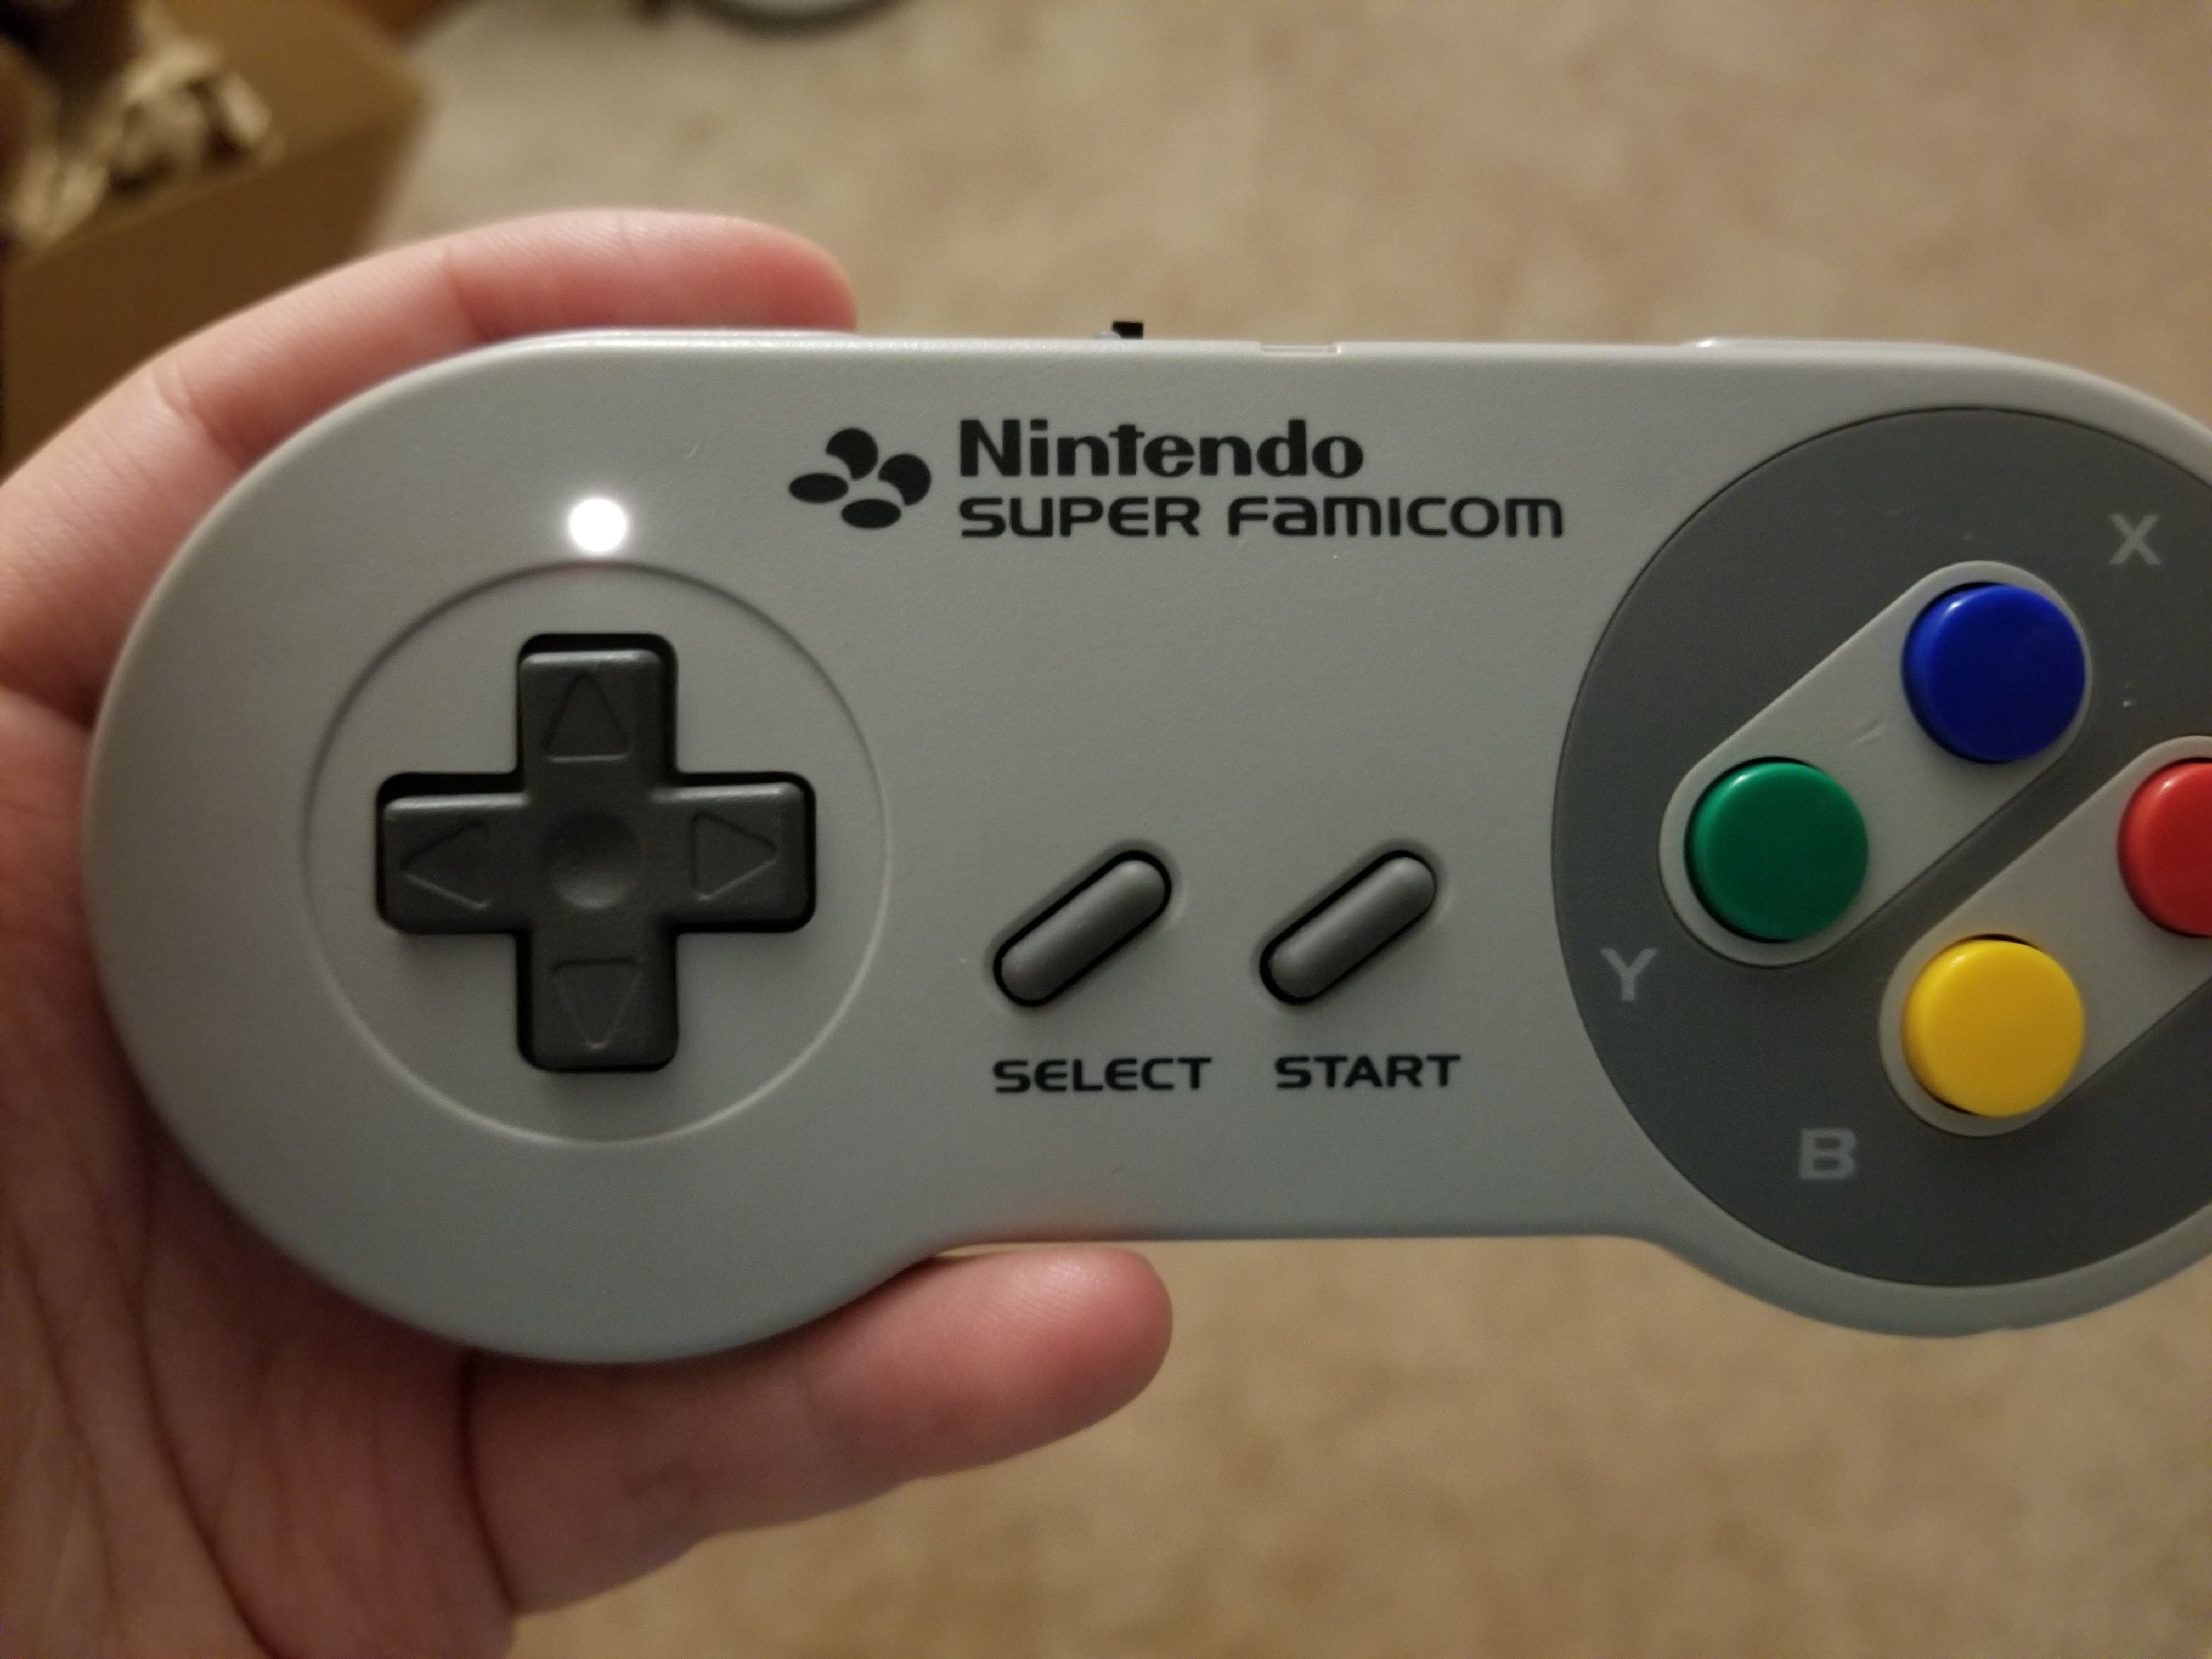
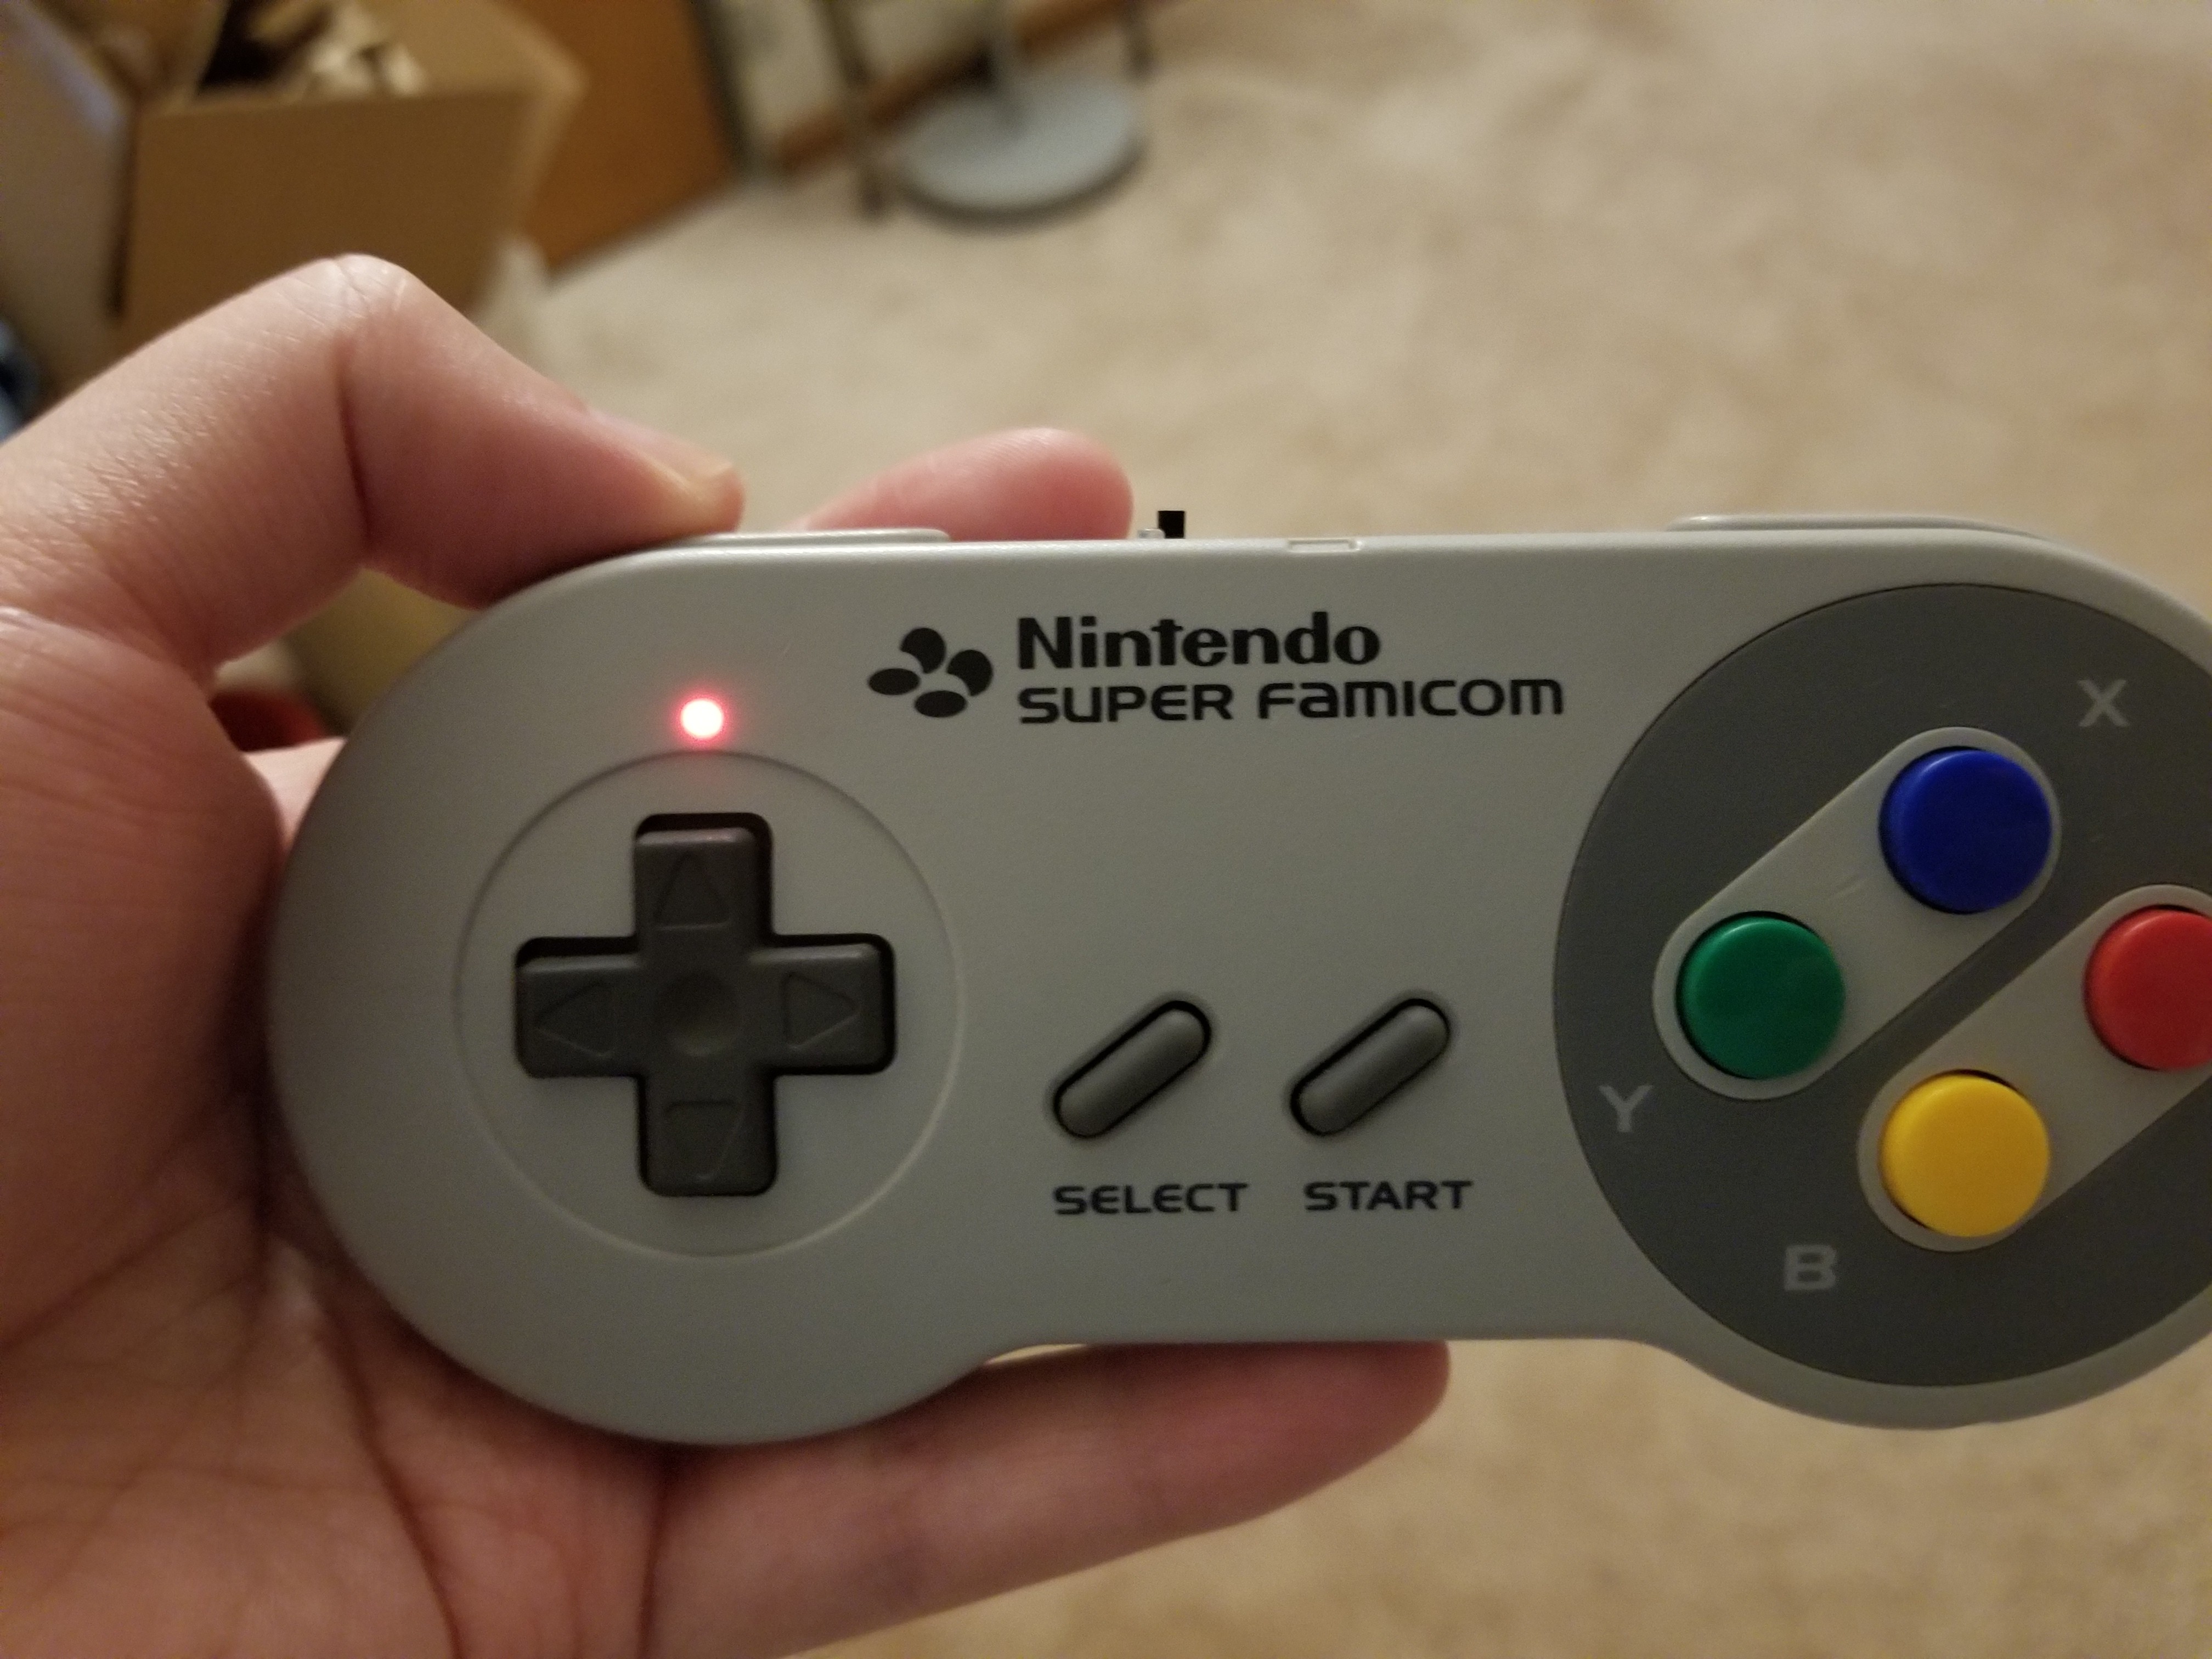
And on the front the multifunction RGB indicator does a great job of notifying status at a glance. I had originally wanted to put a 5mm led in the cable hole at the top but quickly realized it wouldn't be very useful or visible. The RGB indicator flashes purple when in the unpaired/pairing state, and when paired will light up in a solid color to signify the battery level (pwm driven). For instance blue means battery level is high, green is mid, orange is low, and red is very low. I currently just have it on solid and have used it for half an hour with only 0.2-0.3V drop from 4.2V full charge so I expect even burning current on having it constantly lit wont be too detrimental for me. If you want to squeeze more battery life though it would be easy to periodically briefly blink the color as I have updating the led color programmed as a task which is triggered by a counter and flag. The coolest part I think is that both the rgb and charging indicator use light pipes ... but not commercially available ones. I ended up using transparent 1.75mm pla filament. I cut off a stub, lightly heated it with a lighter to allow me to press it to a flat surface to flatten and widen it so it holds itself in place inside the hole and finally sanded the other end smooth so it diffuses the light. Then all that is necessary is to drill a 1/16th hole and dab a tiny bit of glue and you are done.

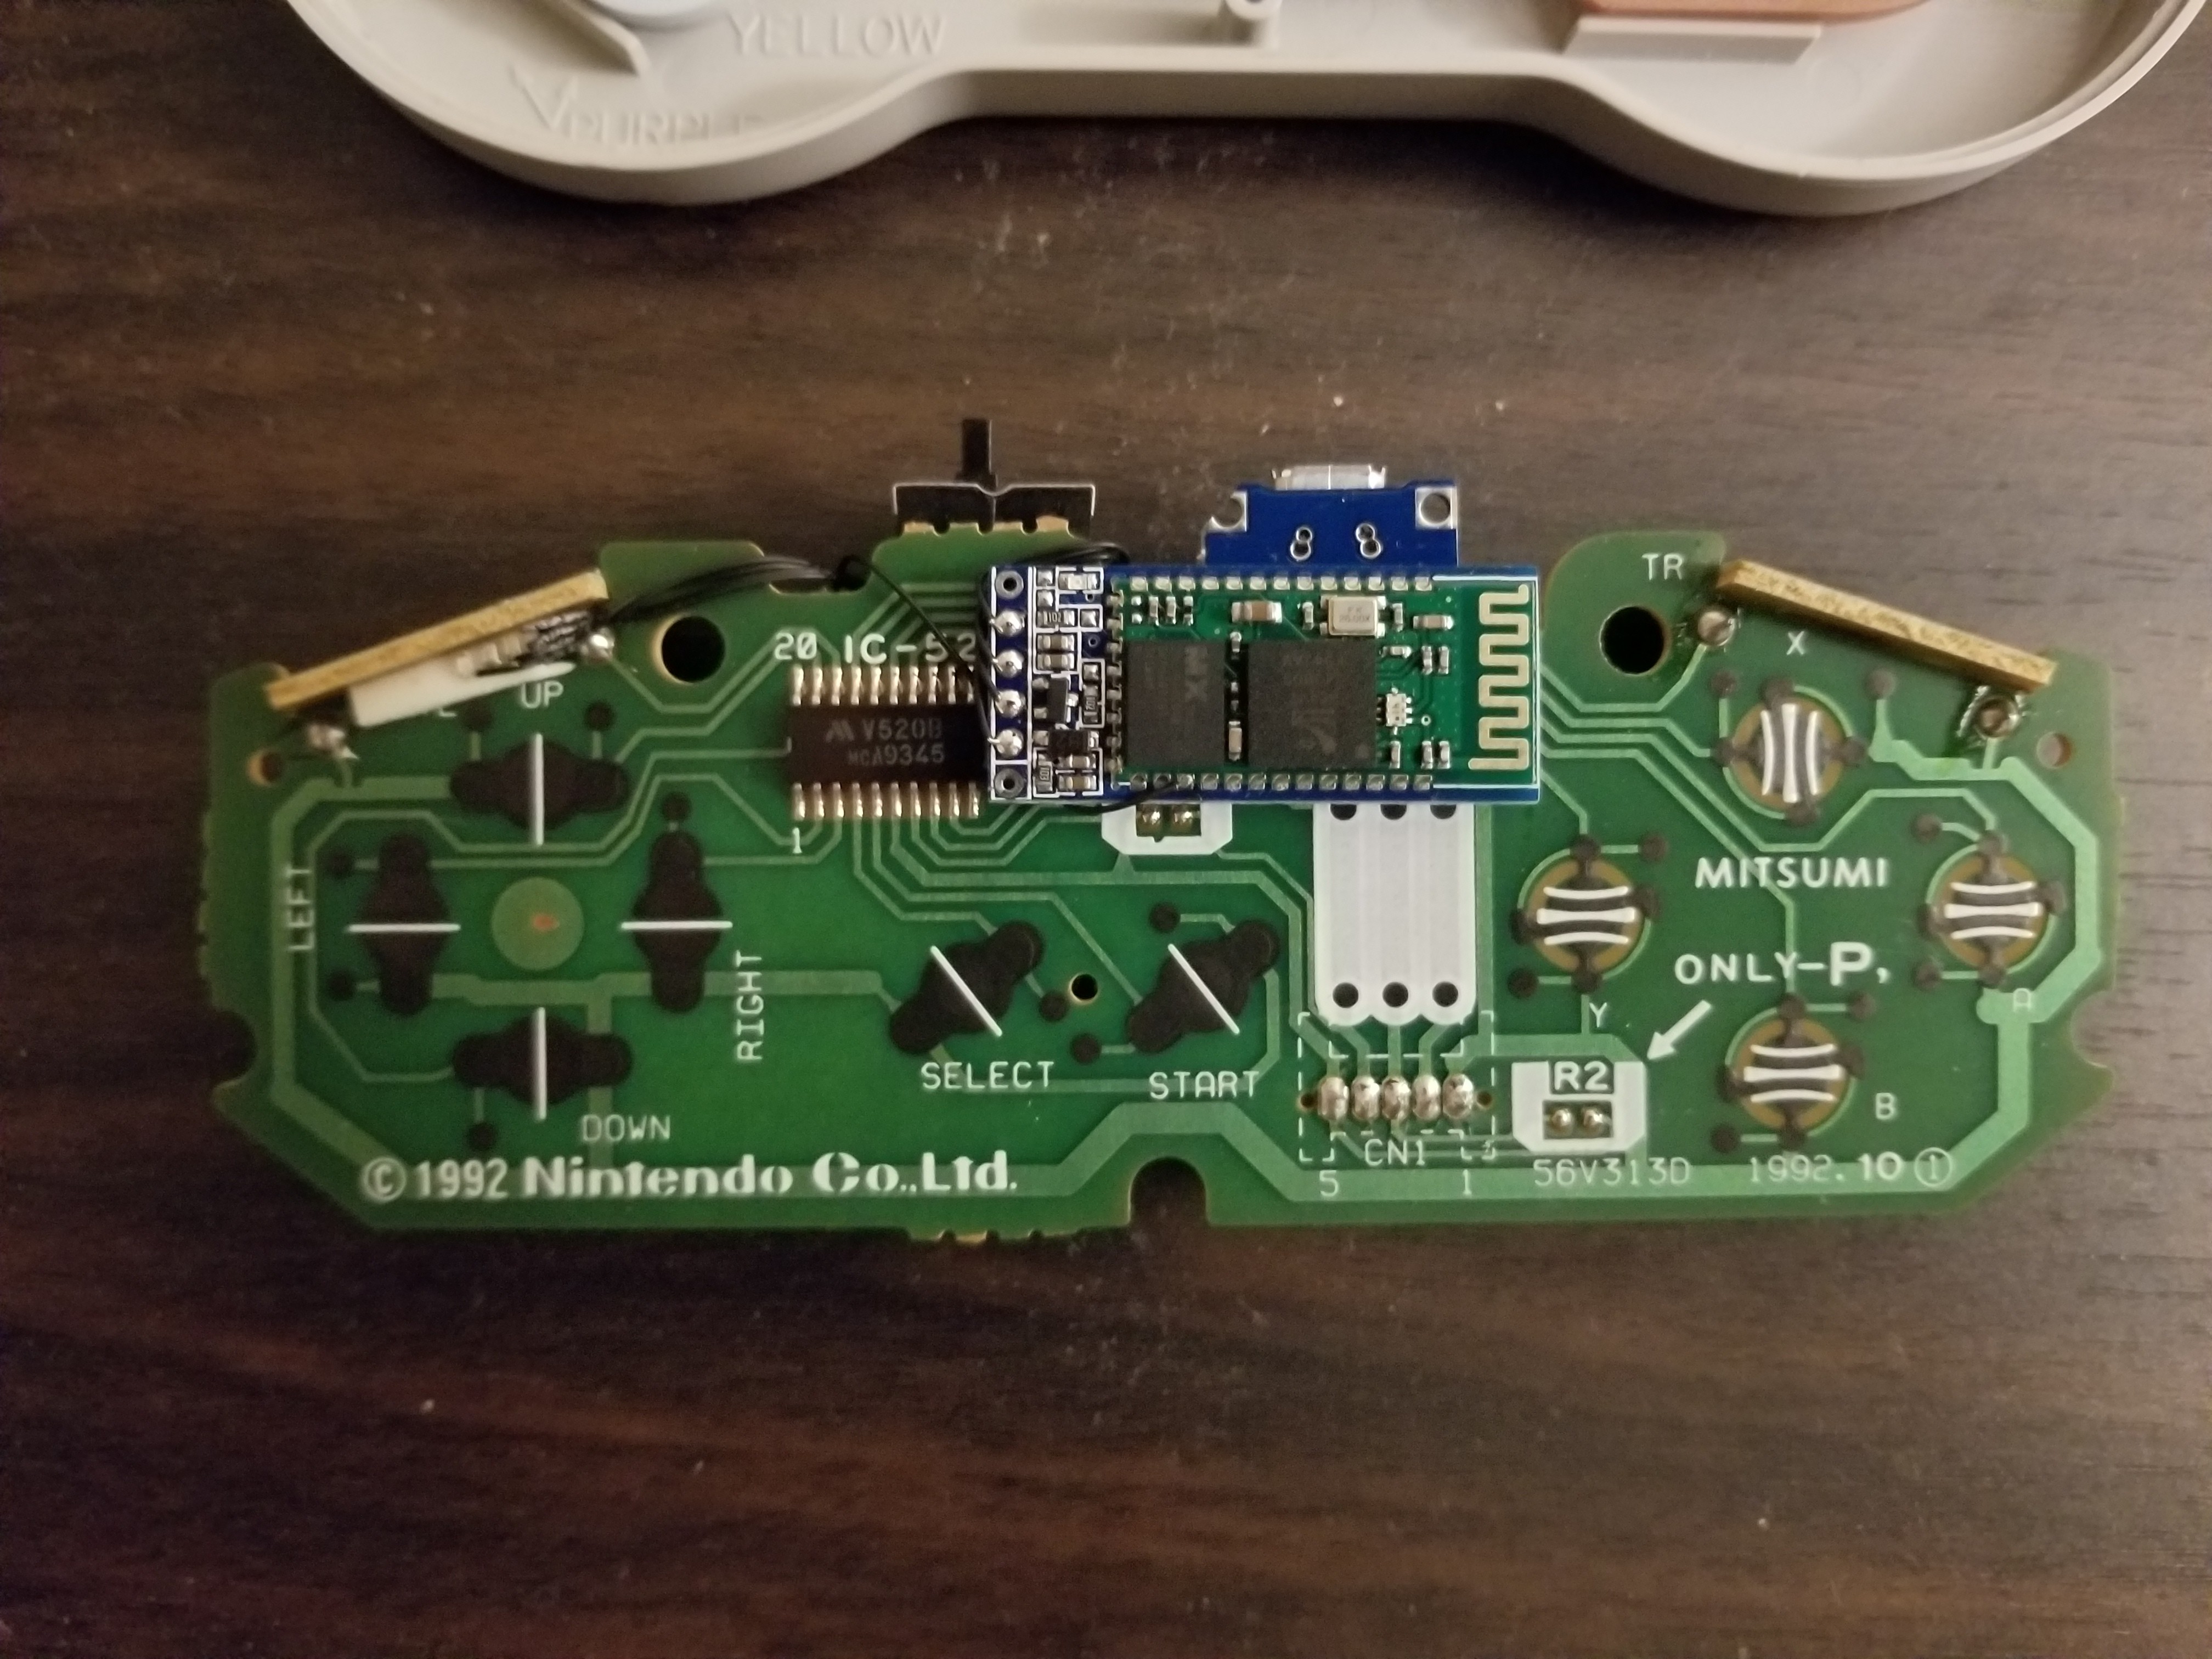
Another issue I had as there is hardly any space between the shoulder button and the dpad inside the shell and I didn't have any 0603 rgb leds on hand so I ended up soldering tiny 0603 individual red, green, and blue leds in common cathode configuration to fit in the space I had as seen here attached right above the up button on the board.
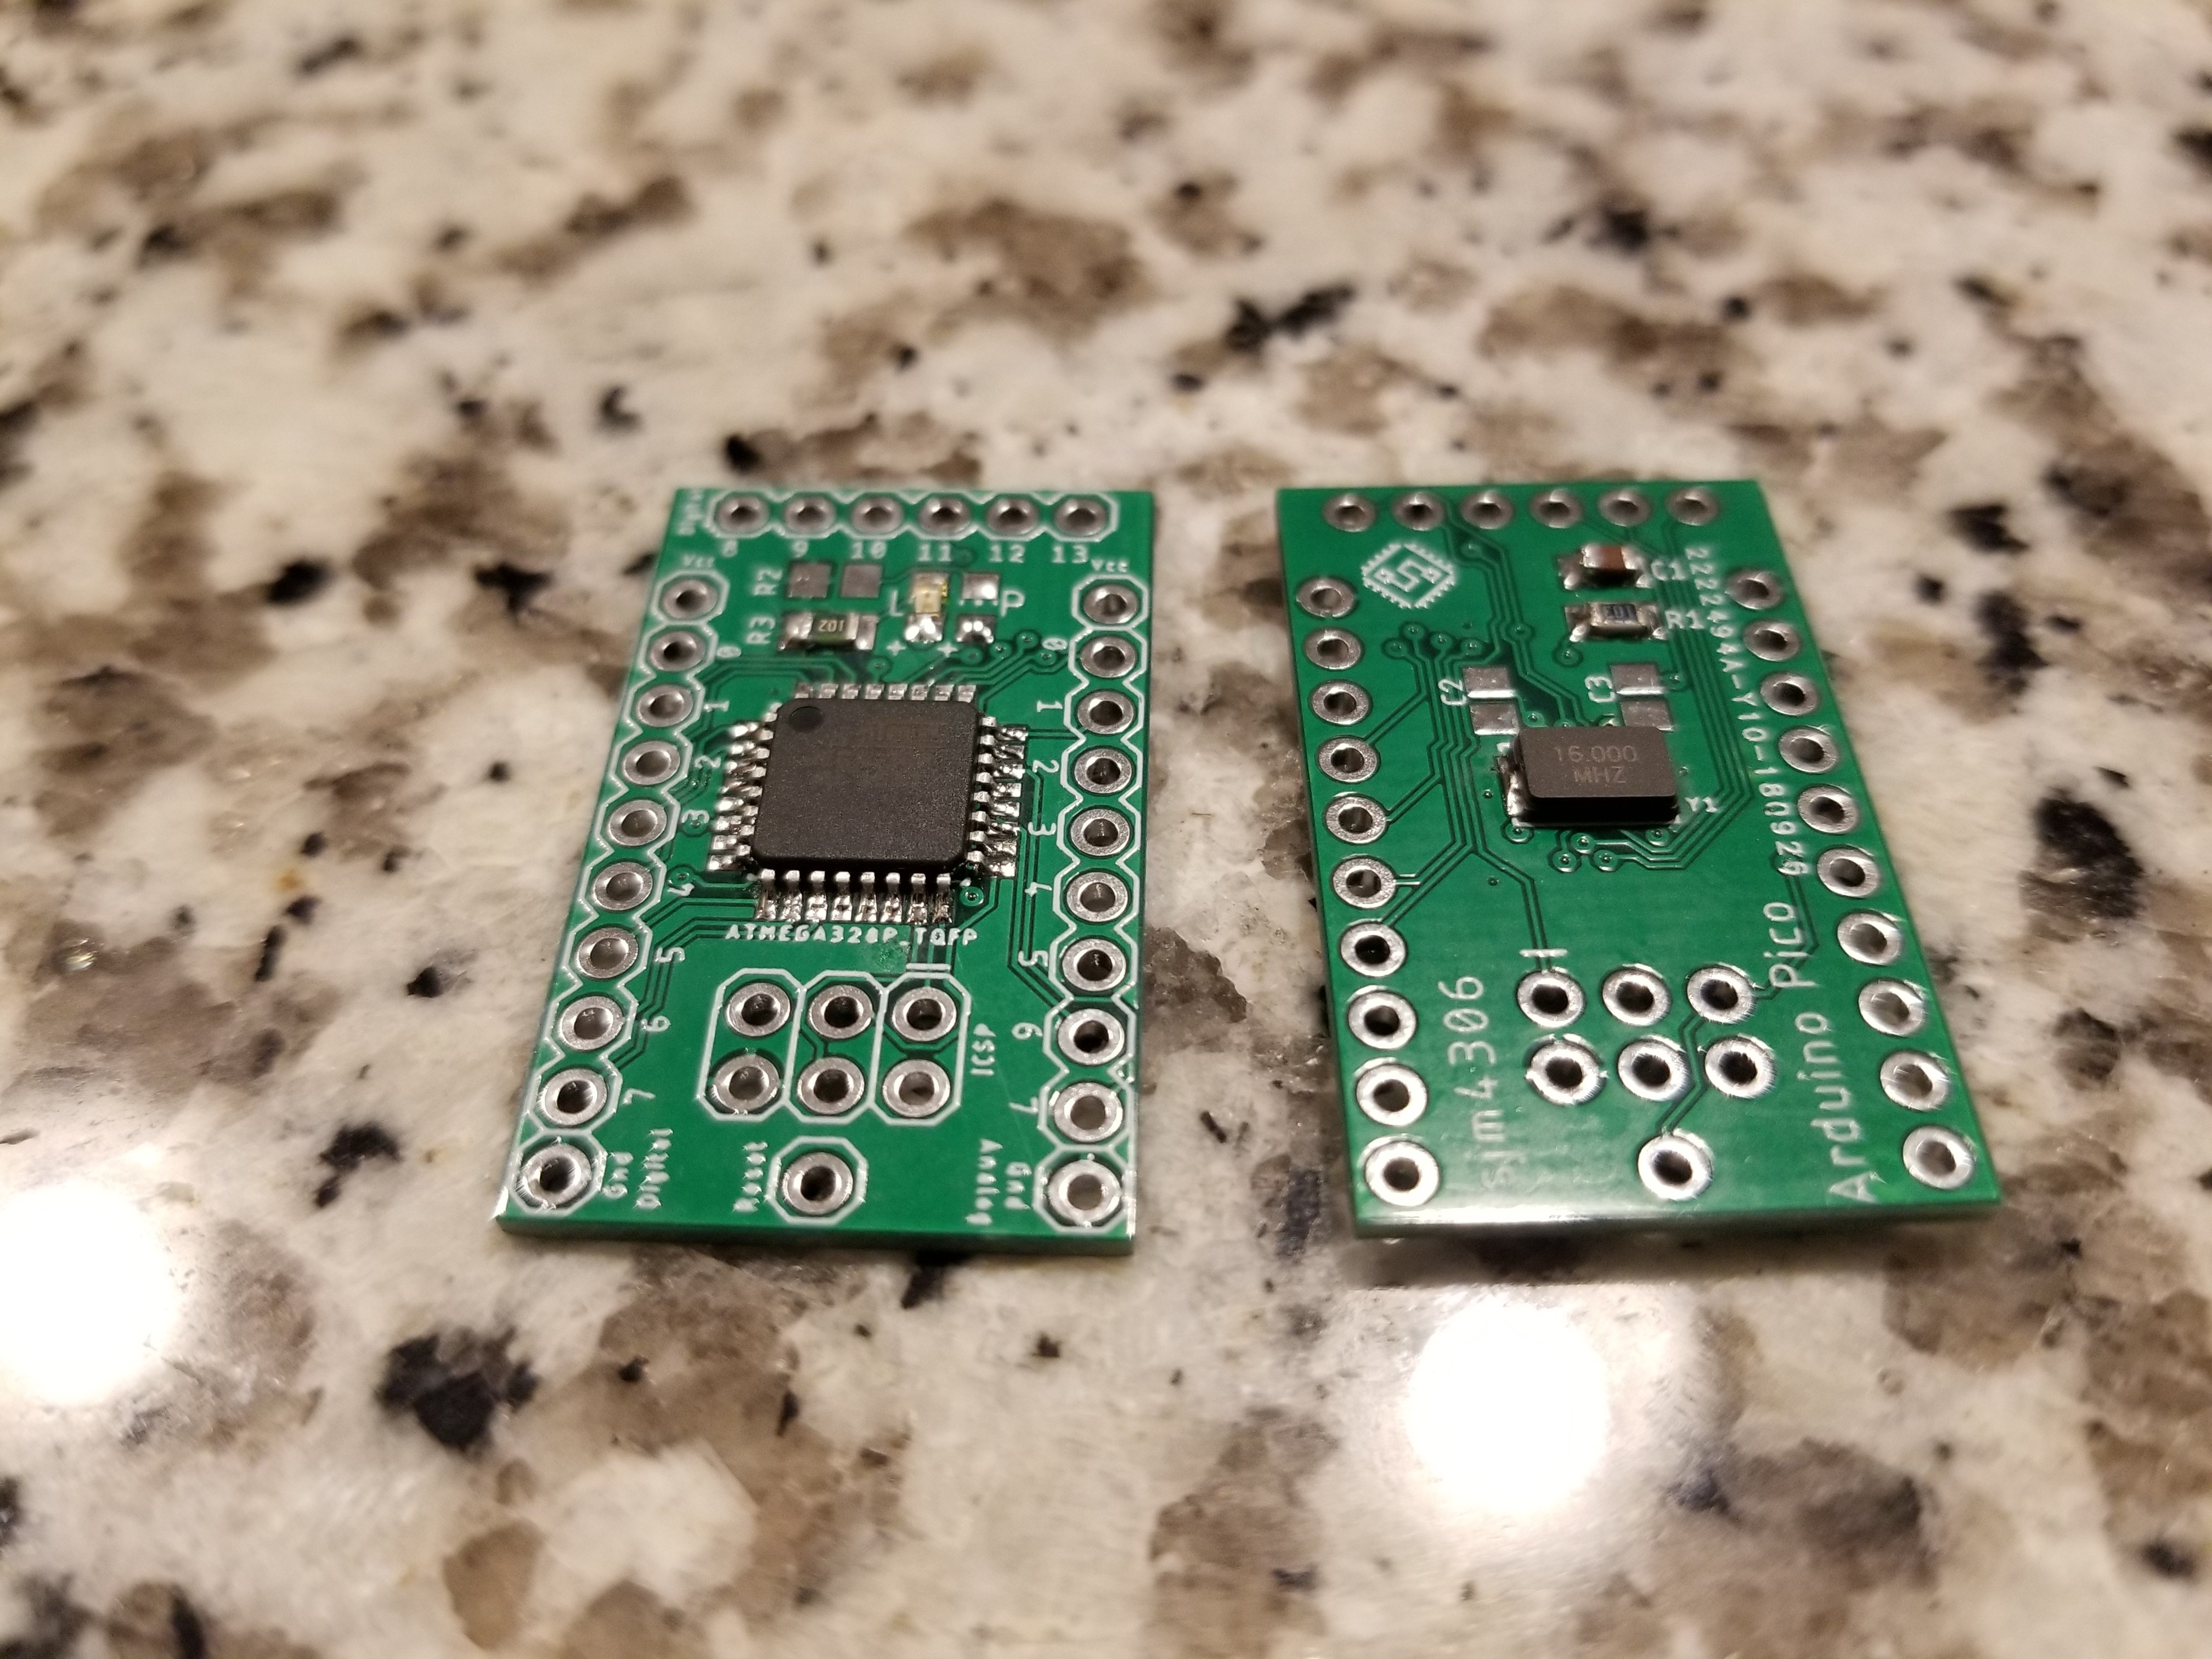
And here are the tiny boards that are the heart of the transmitter and receiver soldered up and ready to install. Really impressed with how fine the silkscreen in, great job JLCPCB and thanks for them sponsoring a video for this project! Check them out here: $2 PCBs (in 48hours): https://jlcpcb.com
So now that I am done the SNES controller (I may build an accompanying NES version in the future) I just need to pretty up the receiver dongle in the next part of this series.
Update: Ran an extended battery test yesterday for a good 6 hours to check that the RGB indicator works as intended and everything is operating correctly.
Pairing (Purple blinks alternate with measured battery life)
High (Blue) : 4.2>=Vbatt>3.9V
Mid (Green) : 3.9V>=Vbatt>3.6V
Low (Orange/Yellow, looks white in pic I assure you it is not irl) : 3.6V>=Vbatt>3.4V
Very Low (Red) : 3.4V>=Vbatt
Discussions
Become a Hackaday.io Member
Create an account to leave a comment. Already have an account? Log In.