 DIY GUY Chris
About: MEGA Development of Automated System is a free community responsible for creating electronic projects and automated systems standing on robotics engineering field which is a breeding ground for creativity an... More About MegaDAS »
Hey what’s up guys here is again a new tutorial and a new special project, and this time I’ve picked up a real needed project for all electronics maker, today’s project is on how to create your own Arduino training platform, this step by step tutorial will be the best guide for you guys to try this project and for sure there are some basic electronic knowledge required out there but do not think twice to try it because it is an amazing one.
Since quite a while now I’ve been administrating an Arduino Facebook groupand I saw for many many times people were asking about what is the best Arduino kit for practicing and from where to get the best deal to start electronics and a frequent question is about the luck of Arduino kit distributors in some countries, so obviously there is a problem out there which requires our intervene and as a maker I decided to start this tutorial on how to create your own Arduino training platform specially because this project will help me to avoid the wasted time that I spend on wiring the components to the breadboard each time I try to test my codes but instead through having this ready to go platform, life will be easier.
This project is so handy to make specially after getting the customized PCB that we’ve ordered from JLCPCBto improve the appearance of our platform and also there is enough documents and codes in this guide to allow you create your own training bench easily.
We've made this project in just 5 days only, just two days to finish the hardware design for the PCB making and three days to finish the platform assembly and test it as well.
What you will learn from this tutorial :
- Selecting the right components depending on your platform
- Making the circuit to connect all the choosen components
- Assemble all the project parts
- Start your first code with this platform
Add TipAsk QuestionCommentDownload
Step 1: Details About the Training Bench
The idea is so simple; I choose some basic electronic components like displays, LEDs, sensors, controllers and different kind of actuators and connect them together through a PCB and keep it all the time assembled and ready for action, a kind of plug and play method.
Features of our platform
Arduino MEGA2560

The main component of this platform will be an Arduino mega2560 which will be the heart of our training bench since it is the linker of all the used components, keeping the signals moving all the way from sensors and controls to the indicators and actuators. This development board is so handy to use and powerful electronic board due to its AVR microcontroller, you can get more details about this microcontroller through this link.
Displays

I’ve used some displays like a 20x4 LCD display based on I²C communication protocol in order to display some messages and adjust the displayed caracters on this screen and also we are inserting a 7 segment 4 digits display since its is realy needed for beginner to learn how this display works.
Controls

About the inputs of our platform we have an 8 switchs bar so we can control some indicators using these switchs without forgetting the two double axes joysticks that has double axes control and a push button, using these joysticks we can control for example the speed and direction of a motor since it has an analog output signal that changes regarding the joystick axes position.
Indicators

Talking about the indicators, I’ve included 8 Red LEDs and two RGB LEDs and also we have a buzzer there which makes playing with this platform funnier.
Sensors

We can't make a beginner training platform for coding without involving some sensors is it this is why I choosed some frequently used sensors like the DHT-11 sensor for...
Read more »
 Jefferson Bueno
 selena1995
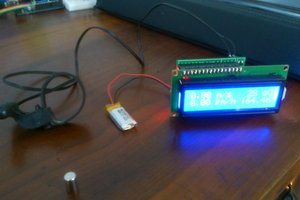
 Clovis Fritzen
Download