 Stephen Holdaway
Up until now I've been manually processing my scanned negatives into positives simply by fiddling with the RGB curves.
The process is roughly to invert the R, G, and B curves, then move the white and black points to cancel out the the different response of the film to red, green and blue:
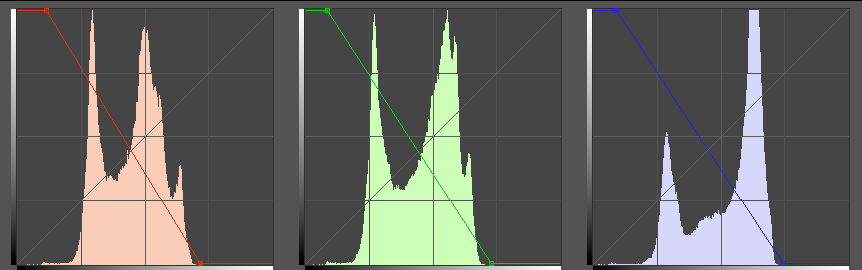
After 10 minutes of tweaking, adjustment layers and comparing to a reference image, I would have something that looks kind of ok, but the colours were always way off vs the reference print, hence why I haven't written about this process.
The problem with this approach is that it's very unscientific; it's all done by eye, and manipulating the curves tool with the mouse is imprecise. I tried out the Photoshop plugin Color Perfect a while ago which was better, but a high price tag combined with a terrible UI stopped me purchasing it.
I looked into writing a Lightroom plugin to automate this conversion process, but it turns out someone else has written a plugin with the same idea called Negative Lab Pro. I haven't bought this yet, but the results it gives are fantastic:
 |  |
For comparison, here are the two scans I've had done professionally of this negative, and my best manual curves attempt (right):
 |  |  |
Discussions
Become a Hackaday.io Member
Create an account to leave a comment. Already have an account? Log In.