 Jamie
JamieNetwork Topology
For this project I decided to go for a star network topology to build my smart thermostat, this is a system where there are a number of nodes, all connected to a central hub (see below).
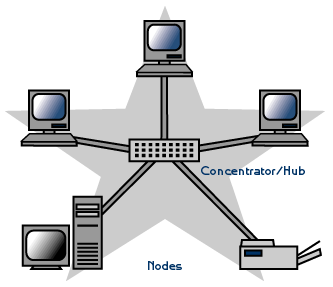
Star network topology
This model brings various benefits and can be described as the status quo for IoT project architectures (I am super original). It's benefits include the fact that it is modular and can be easily extended via adding in new nodes and functionality as required. Finally this network topology lends itself perfectly to the use of the Message Queue Telemetry Transport (MQTT) protocol for intra-device communication. This is an extremely lightweight protocol that works on a publish/subscribe model and is already implemented in many home automation scenarios.
Turning a Model Into Reality
Now I had the desired topology, I had to find components that would work well with MQTT and the node/hub architecture.
Some people decide to use a full home server as their hub, but that would almost certainly defeat the point of building this system to save myself money, not to mention it would be ridiculously under-utilised. Instead I decided to use a spare Raspberry Pi 3B that I have. Not only does this run 'full' versions of Linux, but it also uses very little power.
For the node elements of the network I will be utilising the NodeMCU development board. This is a board based on the ESP8266 WiFi module, however it has components attached that allow programming directly from the Arduino IDE (in fact any IDE that has Arduino plug-ins available; I use VSCode).
To summarise, I plan to use a Raspberry Pi as a hub and the nodes will communicate via the hub using the MQTT protocol. Currently I am planning to utilise two nodes, one that will sense the temperature and another to control the heating system. There will be logic running on the Pi to parse the temperatures that are sent to it and the same program will decide whether to turn the heating on or off as a consequence of the inputs. This signal will be sent via MQTT to the node that controls the boiler.
In my next project log I will be (hopefully) detailing setting up the Raspberry Pi to run as a hub, allowing all the devices to communicate via MQTT.
Discussions
Become a Hackaday.io Member
Create an account to leave a comment. Already have an account? Log In.