 Matt Bradshaw
It's alive!
Ordered 10 PCBs from JLCPCB, which arrived while I was on holiday. They didn't seem to suffer from the postman having left them under the bench behind my house in rainy England for several days. I ordered a few remaining components and soldered everything in place.
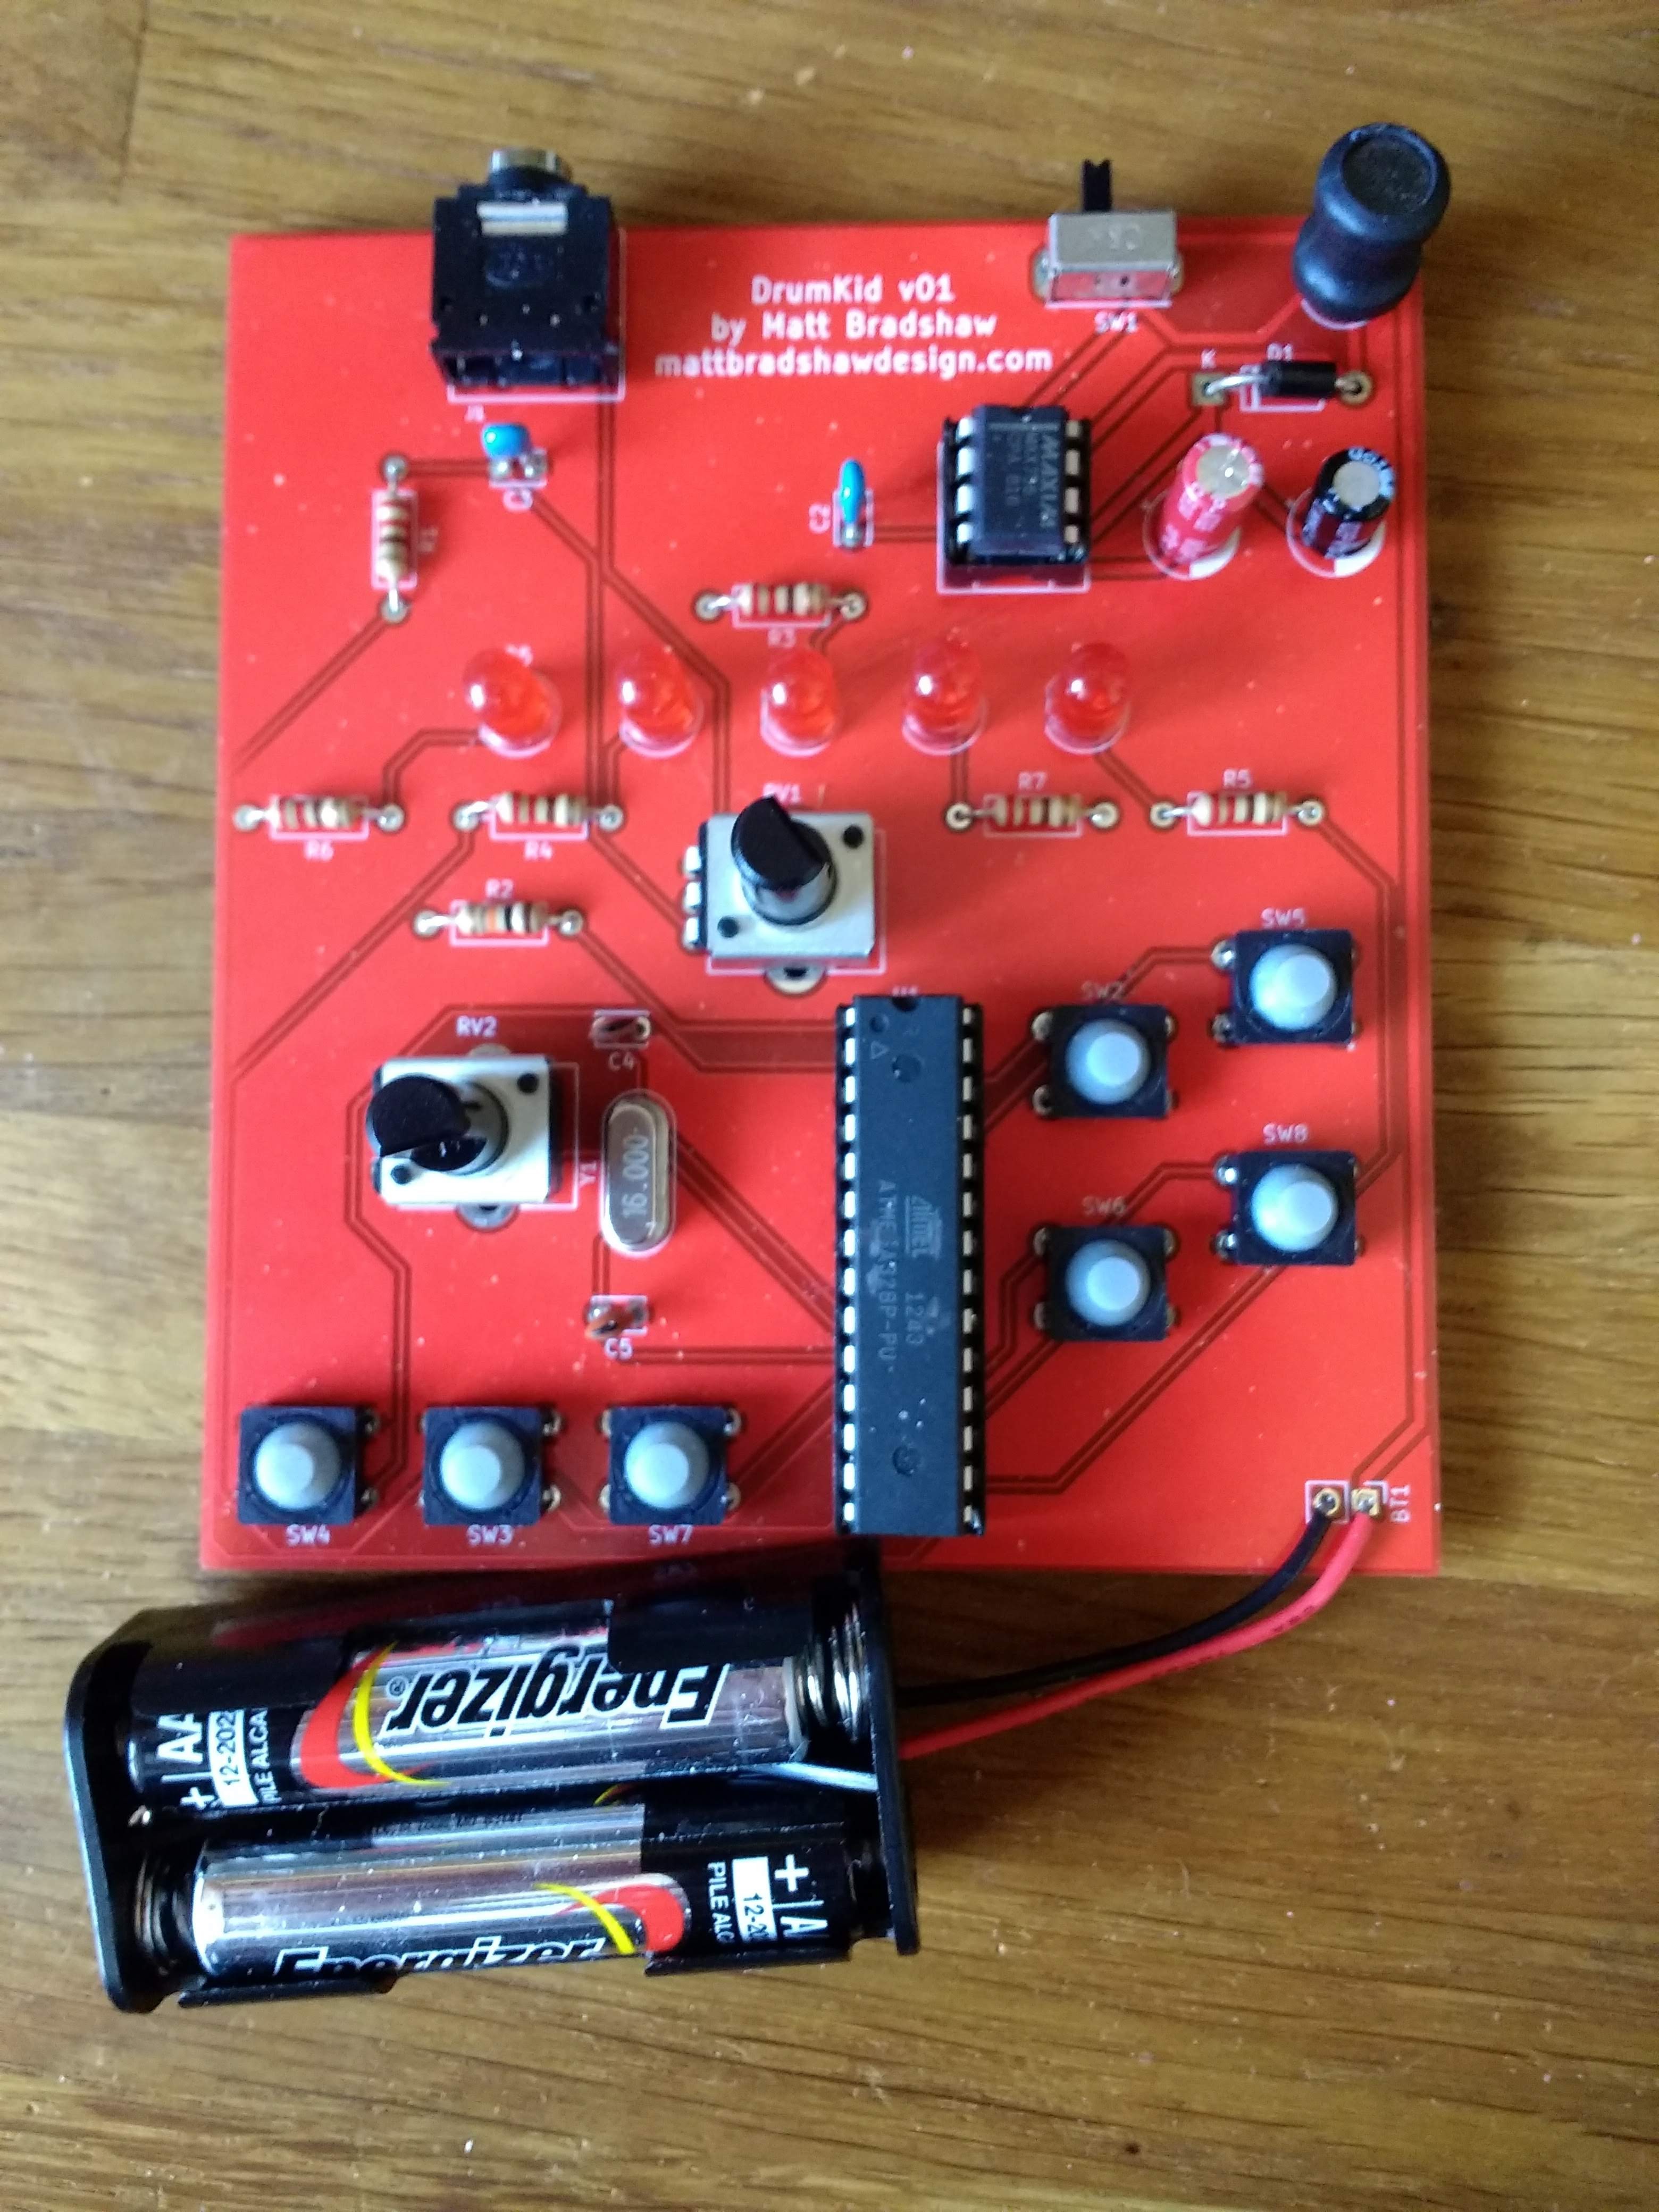
Nervously, I turned on the power and... success! Well, almost. The ATMega328 runs fine from the two AAA batteries via the MAX756 voltage regulator, the LEDs work and the volume control works. Drum sounds comes out of the headphone socket, but the unwanted high-frequency noise from the breadboard circuit is, despite being quieter, still definitely present.
Knowledgeable people may be able to spot the problem simply by examining the photo of the PCB - I'm pretty sure that I need to add one or more decoupling capacitors close to the ATMega328's power pins. Powering the original breadboard design straight from 5V sounded fine, with the high-frequency noise only appearing once I employed the batteries and voltage regulator, so the problem was almost certainly a noisy power supply.
After some haphazard googling, I realised that adding capacitors would likely clean up the 5V signal and therefore solve my problems. I tried adding some capacitors to the breadboard design, and the noise was instantly and dramatically reduced, which was a big relief. I don't know of a good way to bodge several capacitors into this PCB, plus there are a few other imperfections, so I think I'll make a second revision, which might even end up being the final version if I'm lucky.
Here are my current thoughts for a second revision:
- Add decoupling capacitors - maybe even leave holes for more capacitors than anticipated, so I can experiment with different arrangements of multiple decoupling capacitors (apparently different values of capacitors in parallel will suppress different frequencies of noise)
- Move the voltage regulator closer to the microcontroller to further reduce noise
- Move the headphone socket (and power switch?) closer to the edge of the board - this will make case design easier
- Move the capacitor which is currently directly behind the headphone socket, so that I don't bend it with my thumb every time I plug in my headphones
- Rotate the potentiometers, which are currently mounted sideways (idiot)
- Add mounting holes, preferably in Lego-friendly dimensions to improve hackability
- Possibly add "breakout" holes either side of the ATMega328, partly to aid debugging/design, but also to make the design more hackable by others (e.g. breaking out the RX/TX pins would enable a hacker to add MIDI input/output)
- Maybe even leave space on the top panel for optional MIDI in/out sockets
- More/better labelling - add component values, maybe label the ATMega328 pins with their Arduino pin names, and maybe also add some fun graphics because why not?
For now, though, while I've got a working (if noisy) PCB, I'm going to concentrate on case design, because I'd like to know if there are any problems with the layout of buttons and knobs before I design a new PCB. Here is my rough plan for the next couple of weeks:
- Design and 3D-print a simple case for DrumKid - the final product is now unlikely to be 3D-printed (probably made of laser-cut wood layers instead), but 3D-printing will allow me to rapidly test/iterate the dimensions/ergonomics
- Do some more work on the code - the current Arduino sketch which is loaded onto the ATMega328 is really just a proof-of-concept, designed to test whether the buttons, knobs, scheduled sample playback and audio effects work properly. The "aleatoric" element, which is really the heart of the DrumKid concept, has not yet been implemented, so this is a good next step - adding this, in conjunction with a basic case, will give me a first proper, testable prototype which I can try out with my band
- Design the second version of the PCB and order it
Discussions
Become a Hackaday.io Member
Create an account to leave a comment. Already have an account? Log In.