 JSook
JSook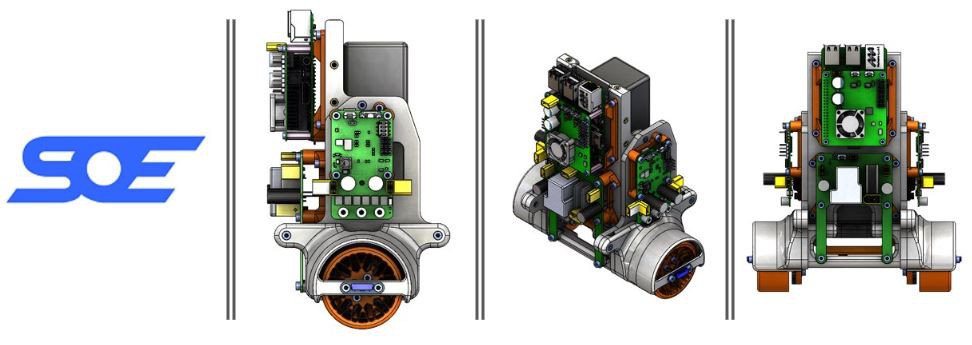
Robots can be complicated, everyone knows that. Bobble-bot is design to be as simple as possible. It only takes a few tools to assemble the robot - a 2.5mm allen wrench, a 2.0mm allen allen wrench, and something to cut zip-tie tails. Easy-peasy!
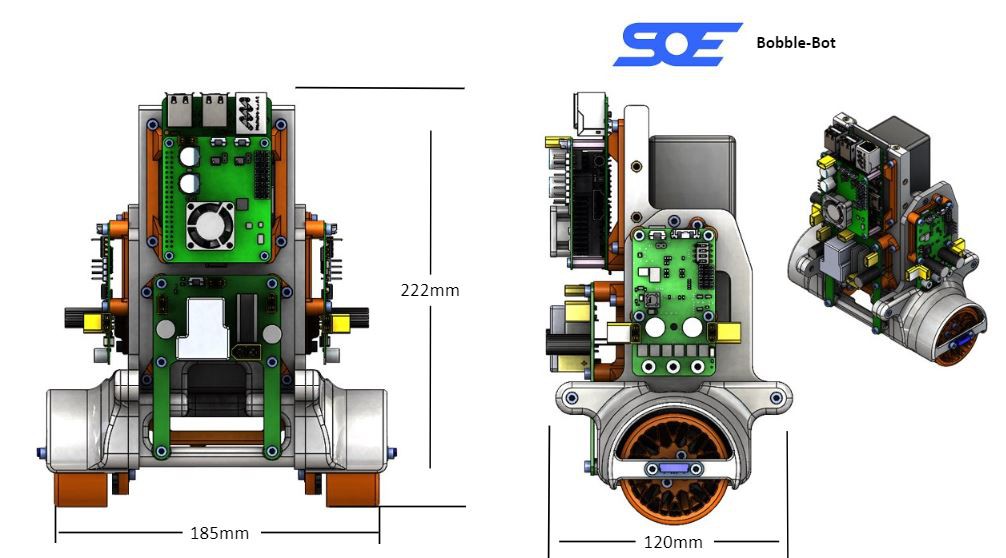
Hopefully you've seen the Bobble-Bot assembly video in a previous post. It only took about 30 minutes to take a whole bot from loose components to fully bobbling. The robot itself is small, light-weight, and easy to handle. About 185mm x 222mm x 120mm without extra peripherals, roughly 3lbs.
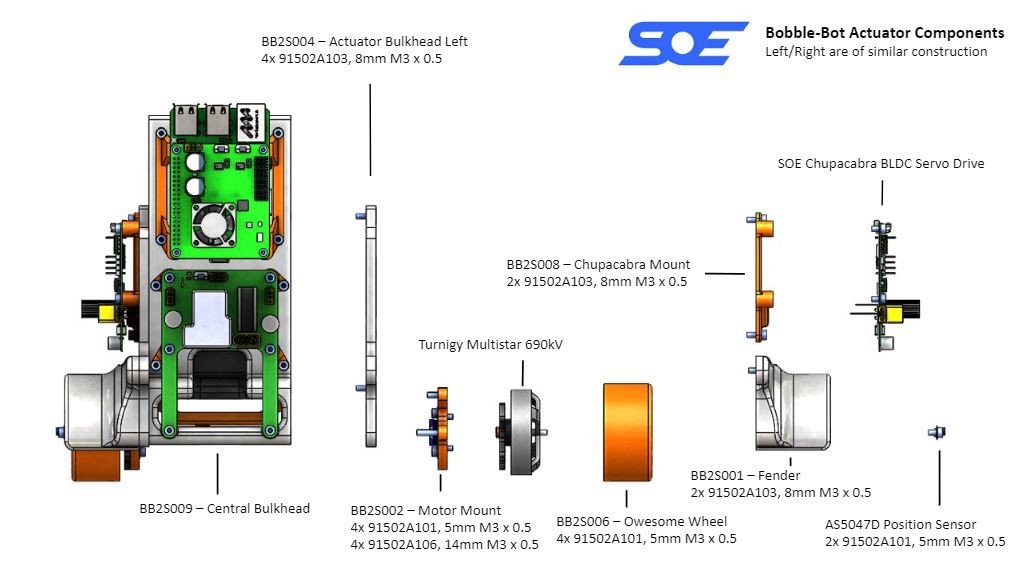
The robot is easily split into three sections. The right actuator, left actuator, and center section. The Actuators are nearly identical save for a couple mirrored components. It takes eight unique parts and a handful of screws to assemble each actuator. The two actuators are then easily bolted to the Central Bulkhead of the robot, P/N BS2S009.
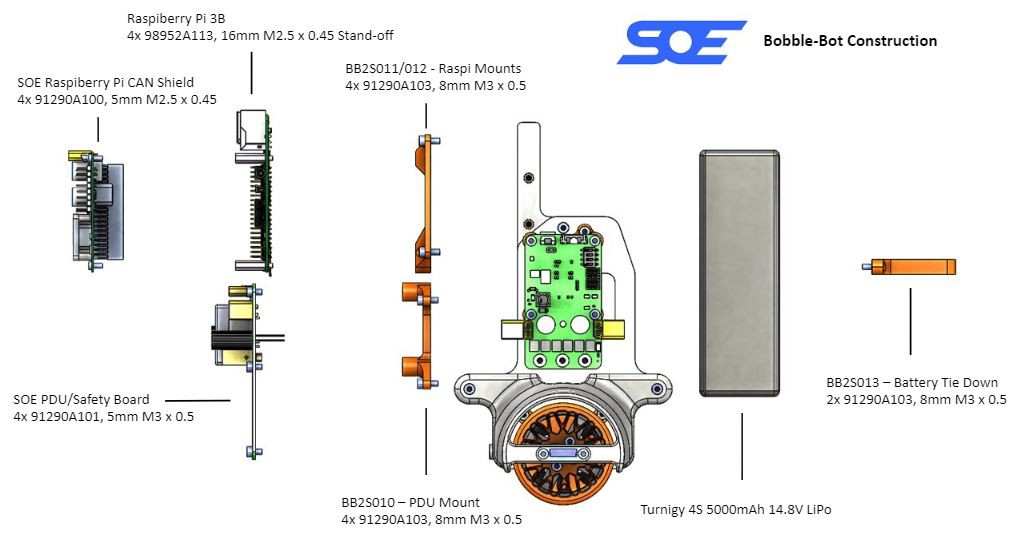
The center section of the robot secures the Raspberry Pi 3B, with the SOE developed CAN shield, and SOE developed Power Distribution Unit (PDU), and the battery. The Bobble-Bot has unique mounts for each of these components.
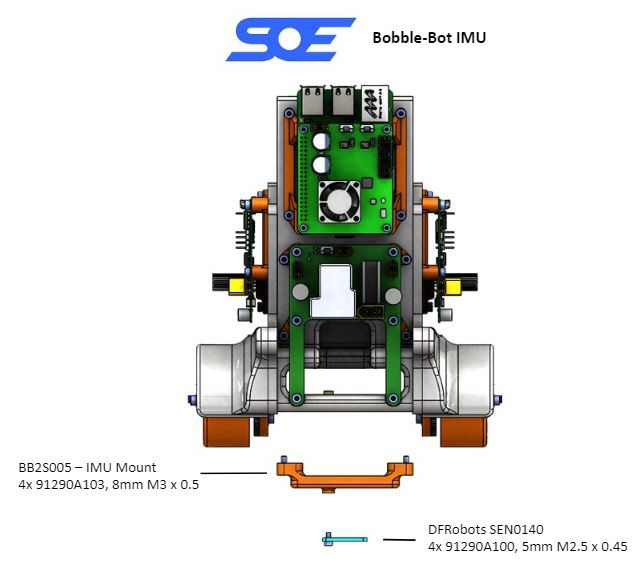
The last component to be attached is the DFRobot SEN0140 10 Axis Inertial Measurement Unit (IMU). The IMU is mounted between the wheels, aligned with the axis of rotation of the wheels themselves. This mounting configuration minimizes the complexity of transformations required to get useful data from the sensor.
To complete the assembly of the bot, a few cables are required. Each Chupacabra Servo Drive requires a power connection from the PDU as well as a CAN connection to the Raspberry Pi. Each wheel has a magnetic encoder that is connected directly to its Chupacabra. The Raspberry Pi gets a power connection from the PDU and a CAN signal to trigger the PDU's safety circuit. Finally, the IMU is connected to the Raspberry Pi's GPIO pins.
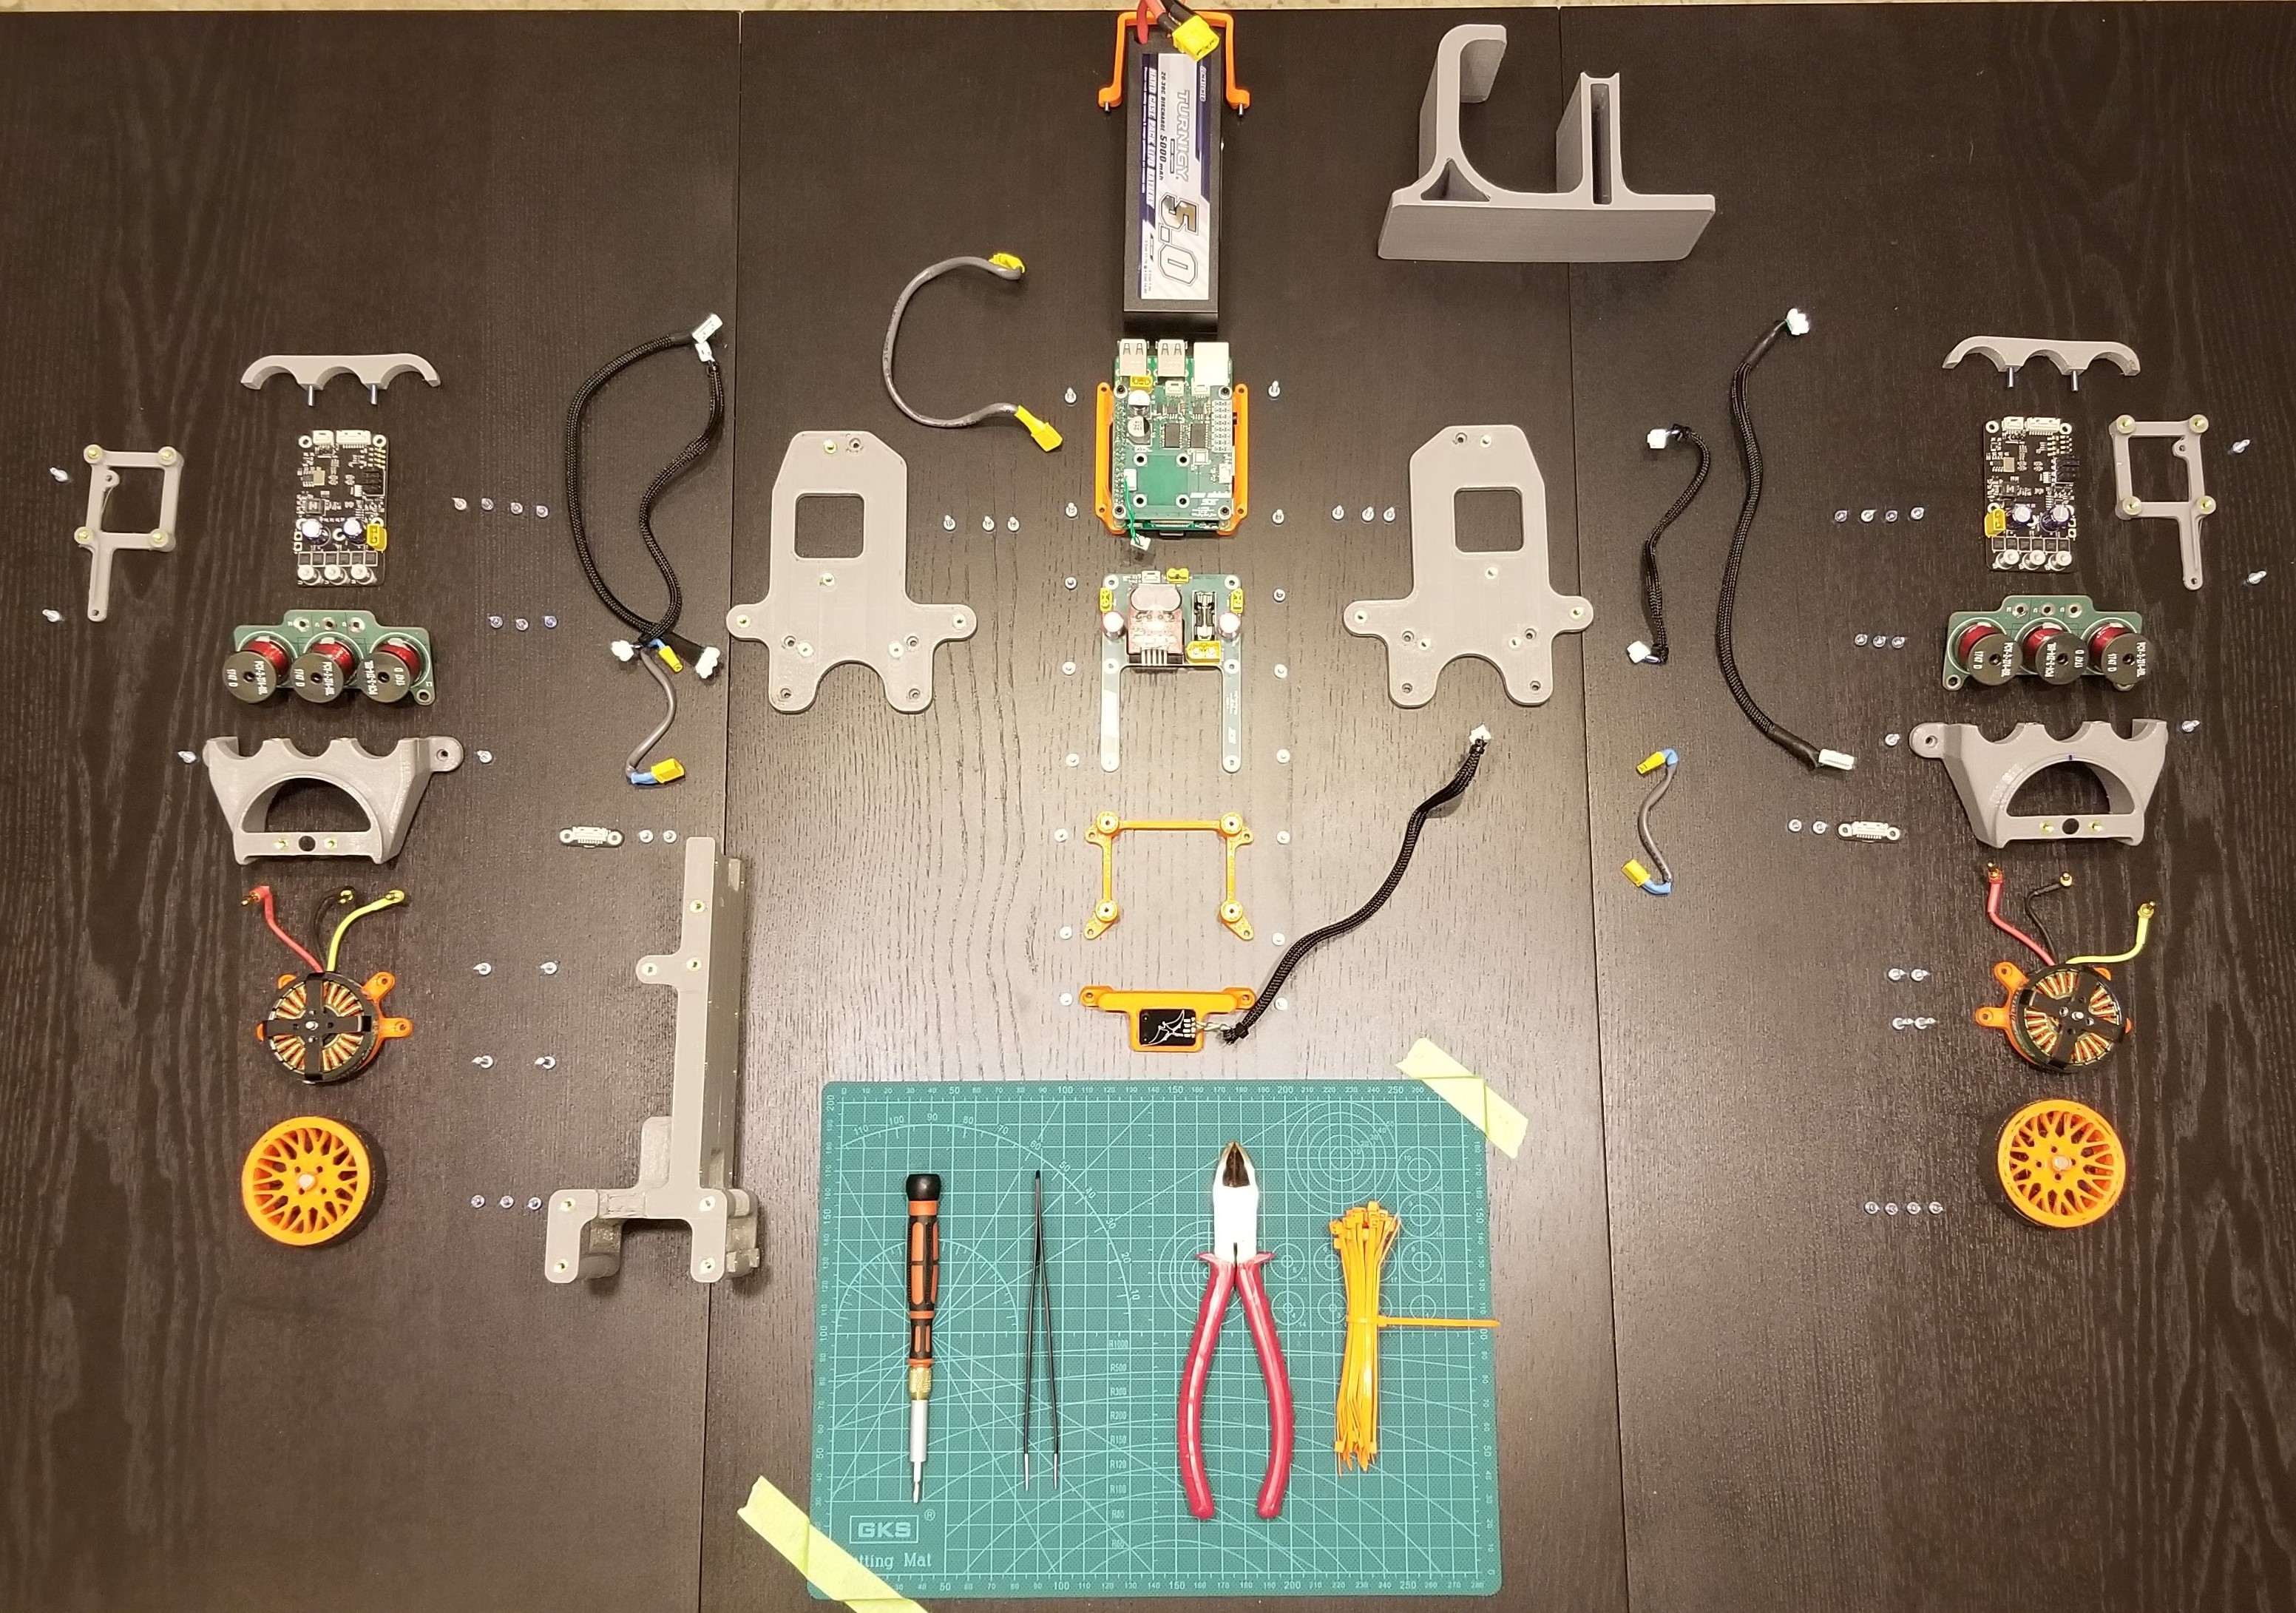
That's it! Being geared toward students, Bobble-Bot is intended to be completely customizable. All, and I mean all, of the structural components are 3D printed. The Bobble-Bot also has 6 threaded inserts on the top half of the robot that can be used for any custom peripherals you can dream up. The Raspberry Pi has ample GPIO availability, four USB ports, and an ethernet port all ready to be exploited to your robotic delight.
This is Bobble-bot - What will you build?
- Josh

Discussions
Become a Hackaday.io Member
Create an account to leave a comment. Already have an account? Log In.