 Kevin Arne
Initial Goal
At first, this name tag project was meant to lend me an air of credibility when teaching woodshop classes at Decatur Makers. I'm a relatively young-looking guy and anticipated that some folks might wonder "what is this child doing teaching me woodshop safety?" so I designed a tag I could wear for classes. I also realized that other members could make these tags so it would be easier for our members to get to know each other.
First Cut
The first version had my full name, the Decatur Makers logo, and some icons that were meant to show the areas of the space I was an expert in (woodshop, Arduino, and laser in this case). I lasered it out of some plywood and added some blue/green paint to the etched areas.
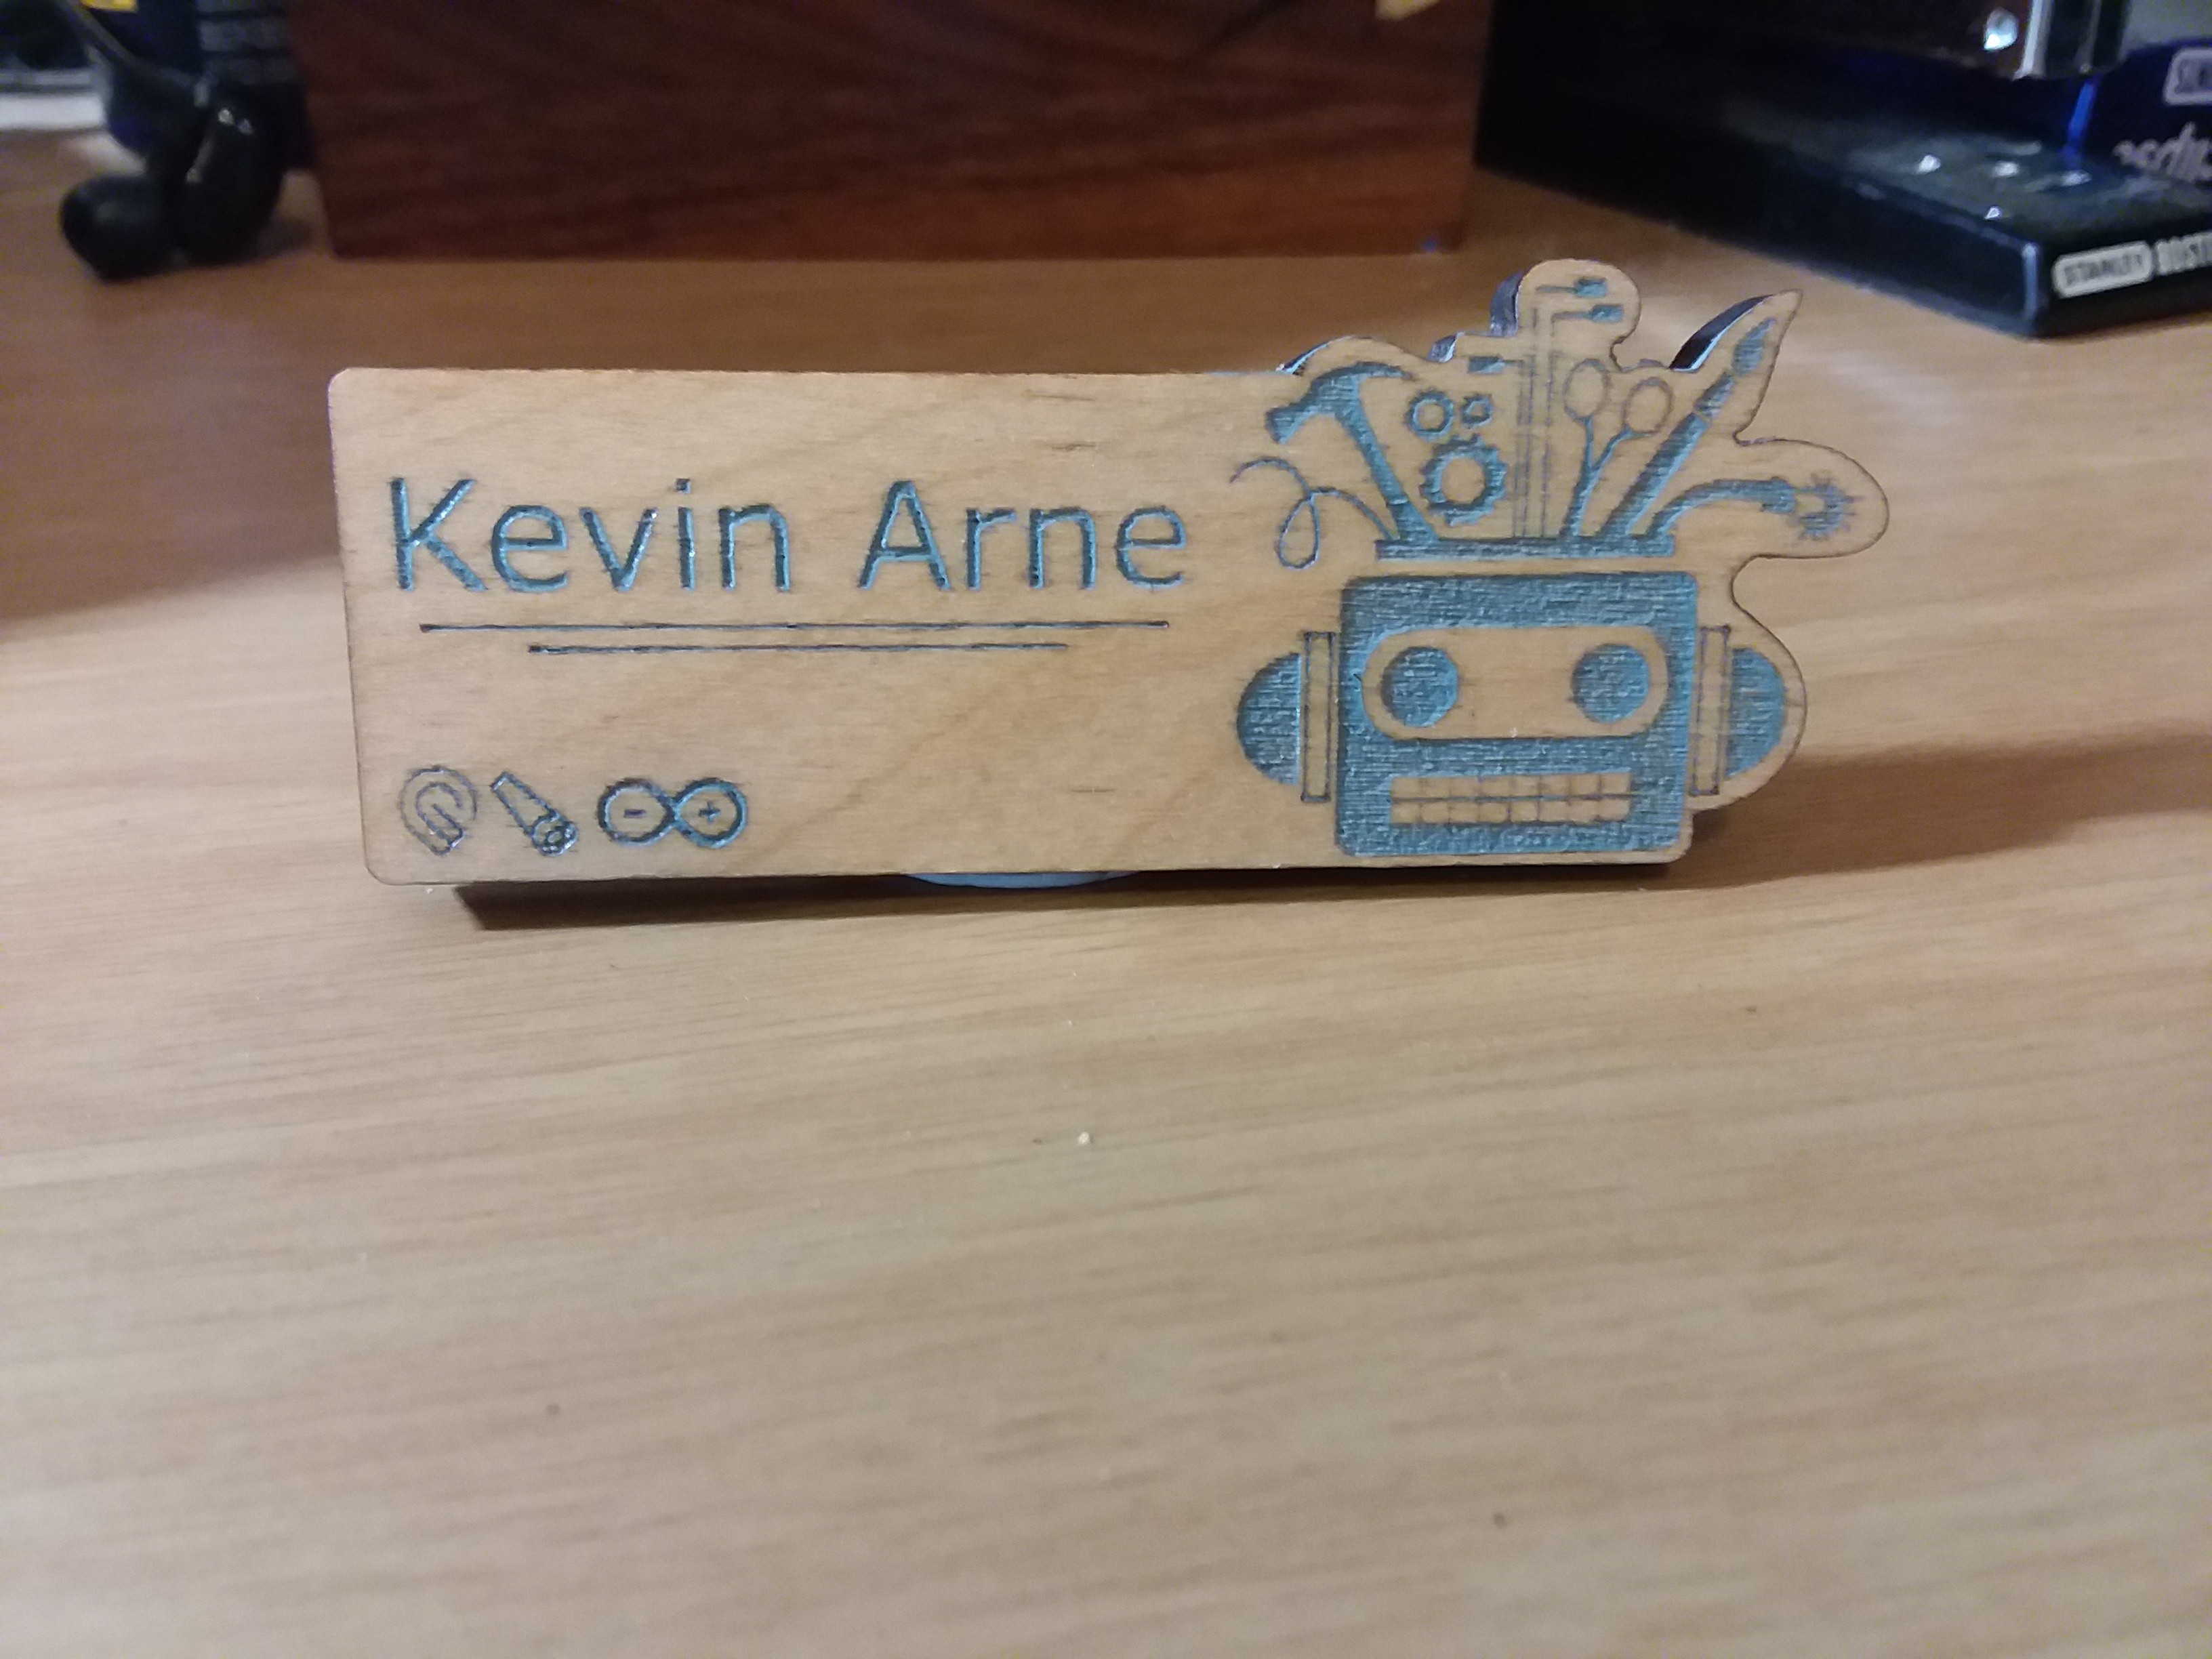
This one looked ok to me, but I wasn't thrilled with how the paint wicked out into the surrounding wood. The whole thing also just felt a little too subdued. I really wanted it to be easily legible from a distance.
Version 2
To fix the issue with color bleeding into the surrounding wood, I put a thin coat of water-based poly on first. I tried another one with a deeper engrave that I then filled with epoxy, which I hoped would make it pop a little more.
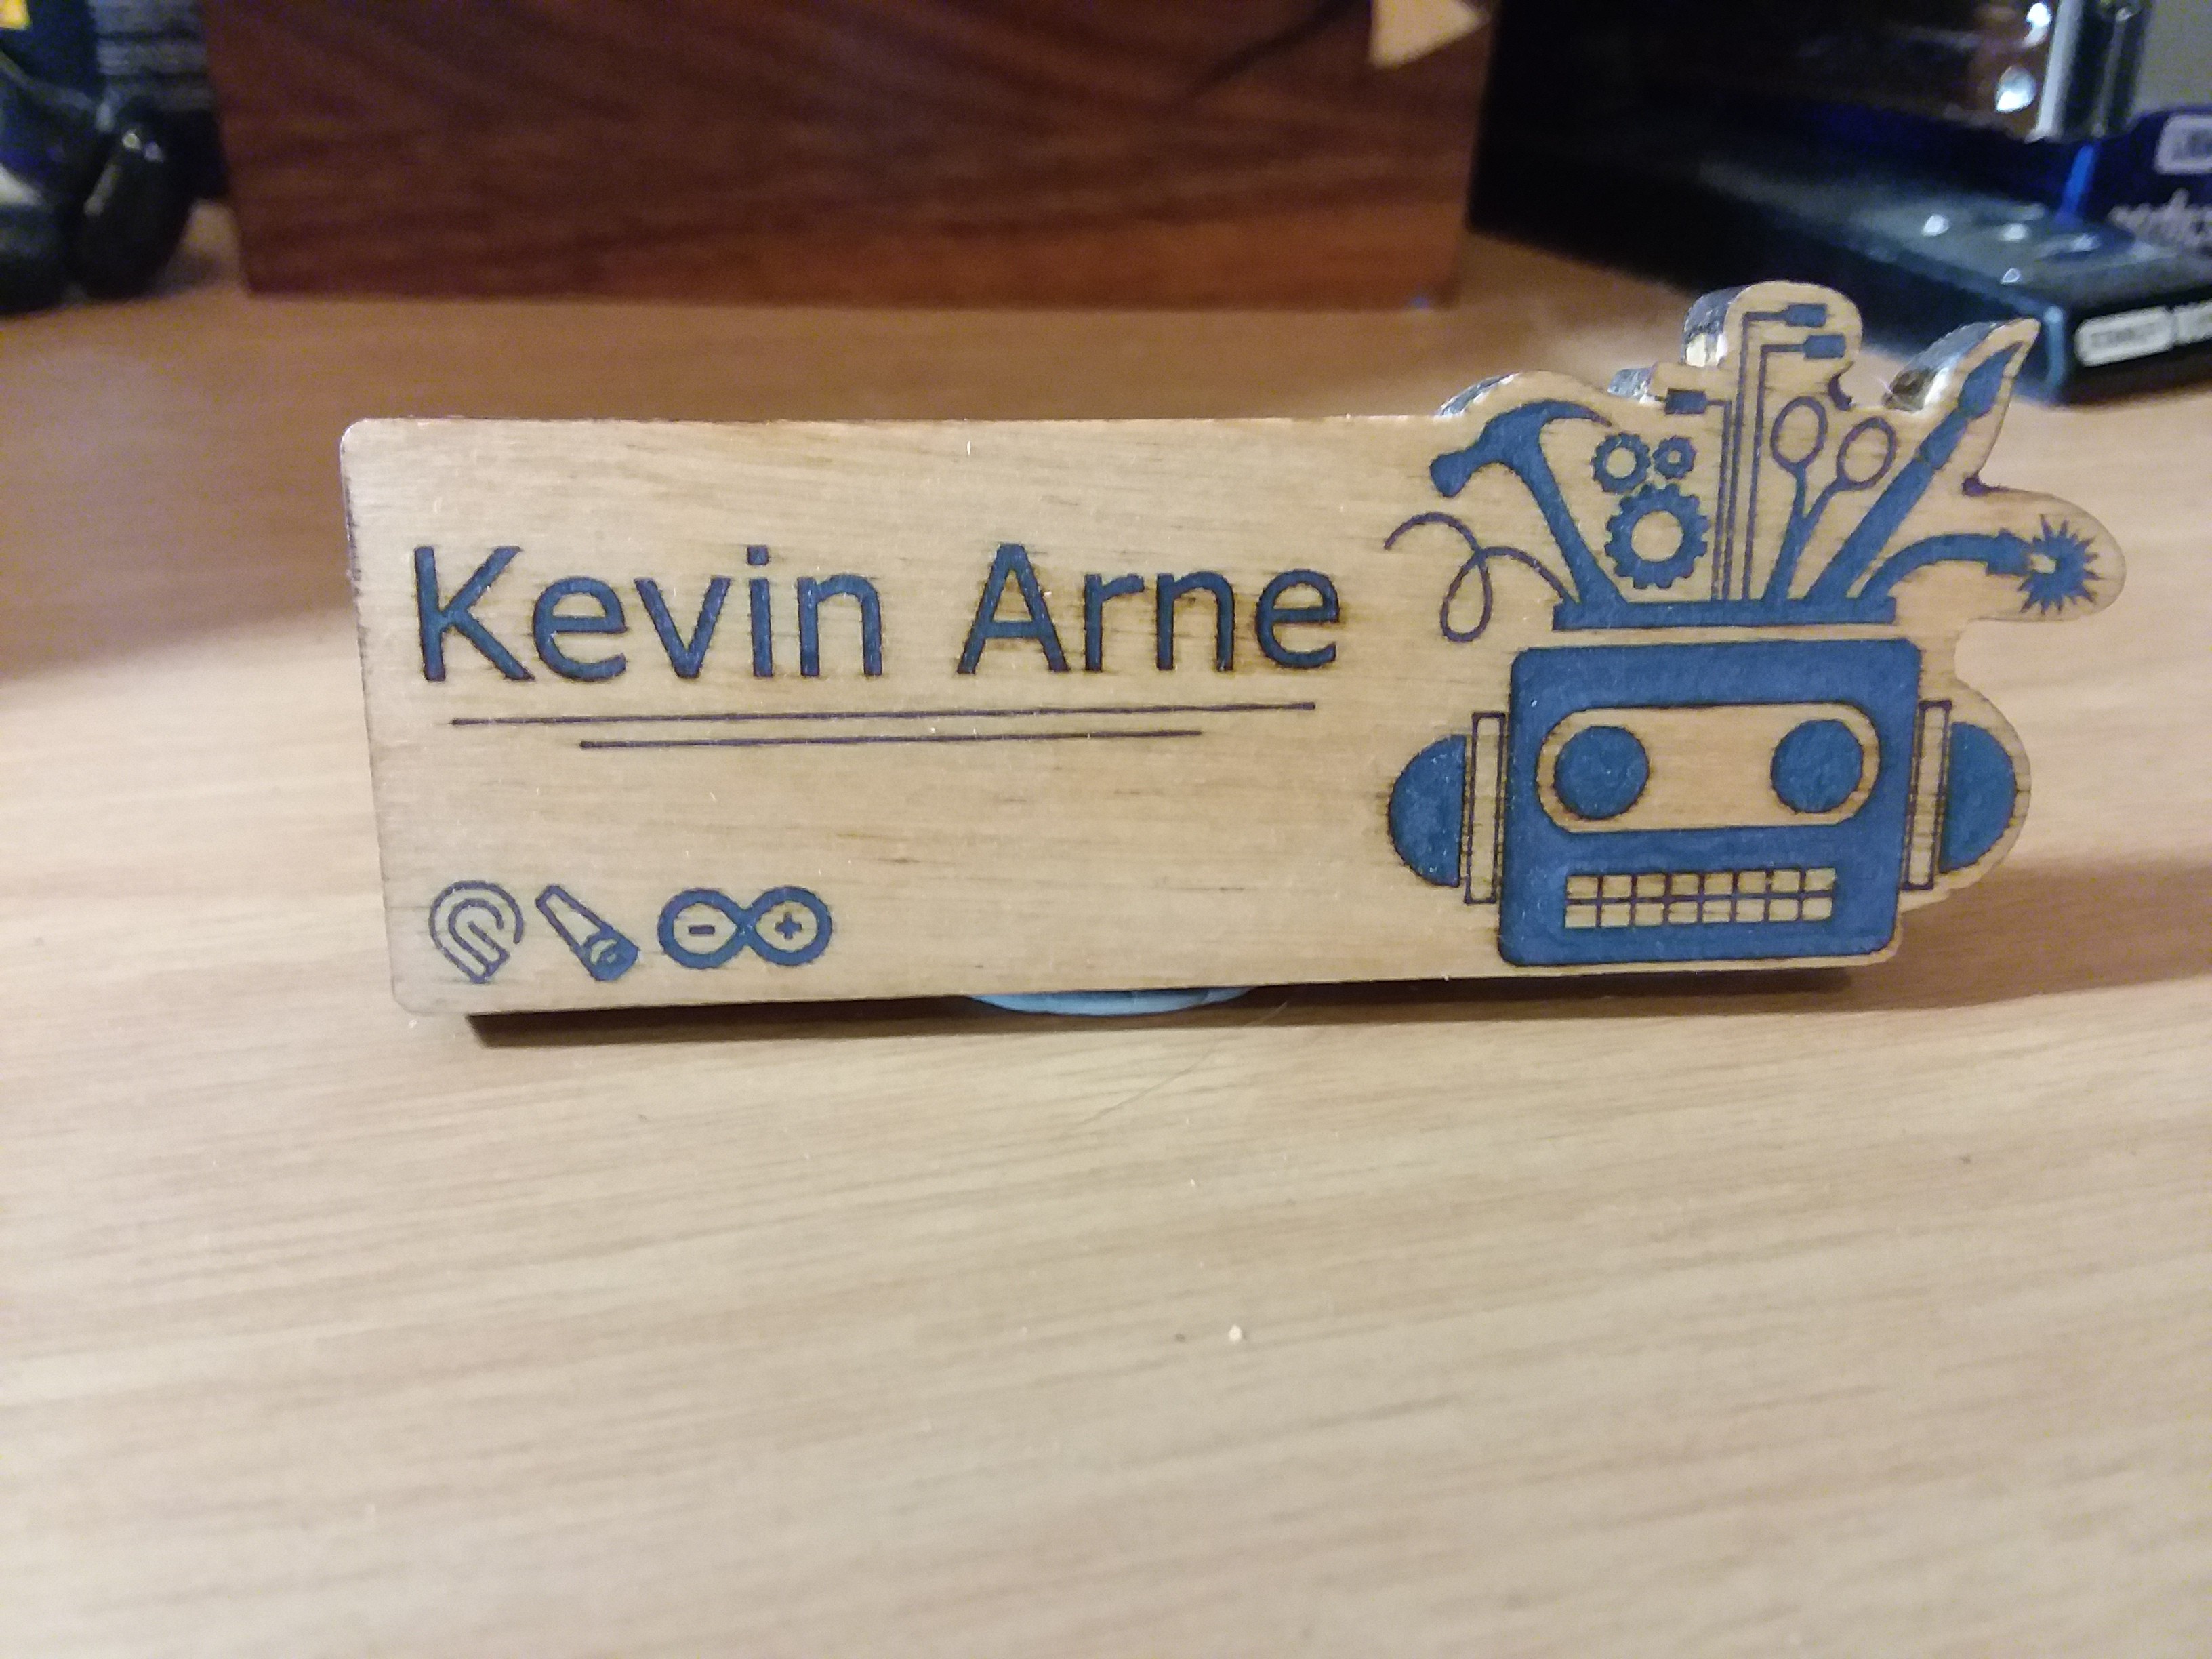
Although the epoxy did stand out a little better, I didn't like the sanding process to get the epoxy to look decent. The whole thing also started to feel a little busy to me.
Version 3
I decided to drastically simplify the whole thing, making the name stand out more by eliminating some of the busy-ness. I got rid of the icons on the bottom and removed my last name, leaving just a larger first name. I coated this one in a few coats of water-based poly and attached a name tag magnet I found on Amazon.
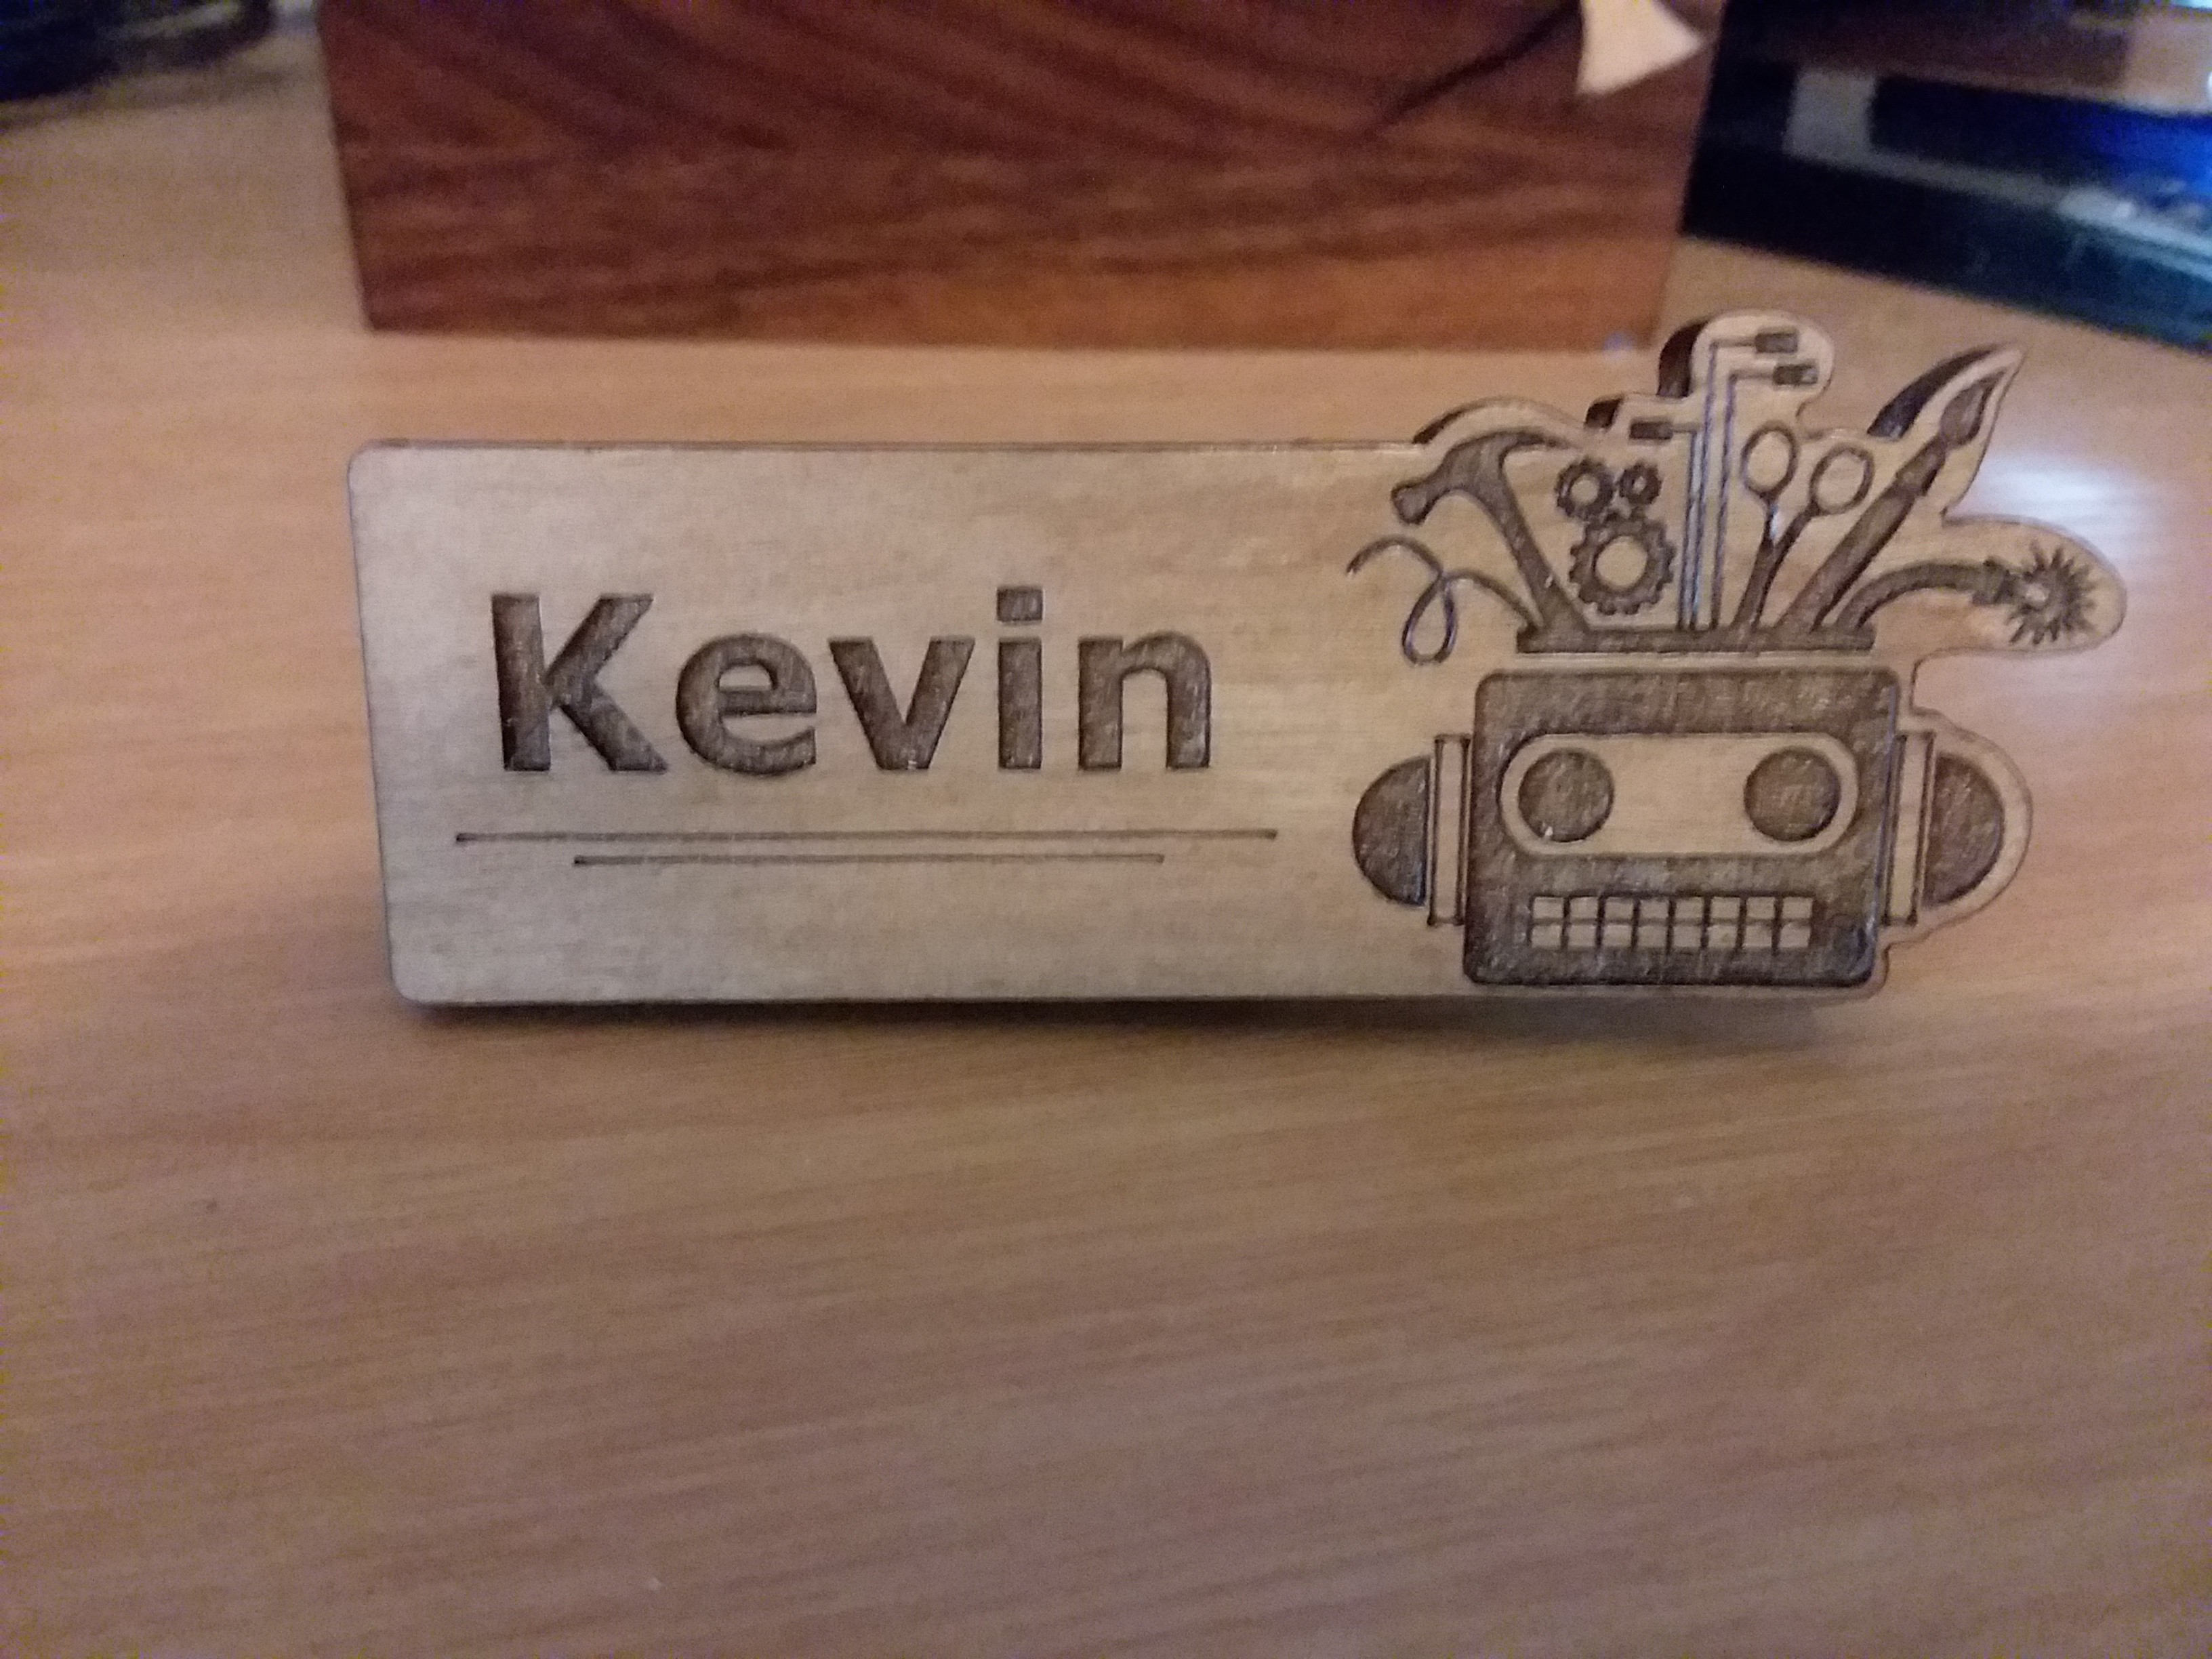
I really like this version and still wear it pretty regularly. It's not terribly flashy, but it does the job of a name tag very well.
Version 4
Then I went to NOMCON and found that my name tag wasn't flashy enough for anyone to ask me about it. That's a huge problem for someone as introverted as me because if others aren't starting conversations with me, they probably just aren't going to happen. I needed to go flashier. I'd recently been getting into designing custom PCBs, so I decided to make one that lights up. My first thought was having reverse-mount LEDs shining into the back of the board, powered by a CR2032 battery, and defusing through the board to gaps in the solder mask and copper layers on the front.
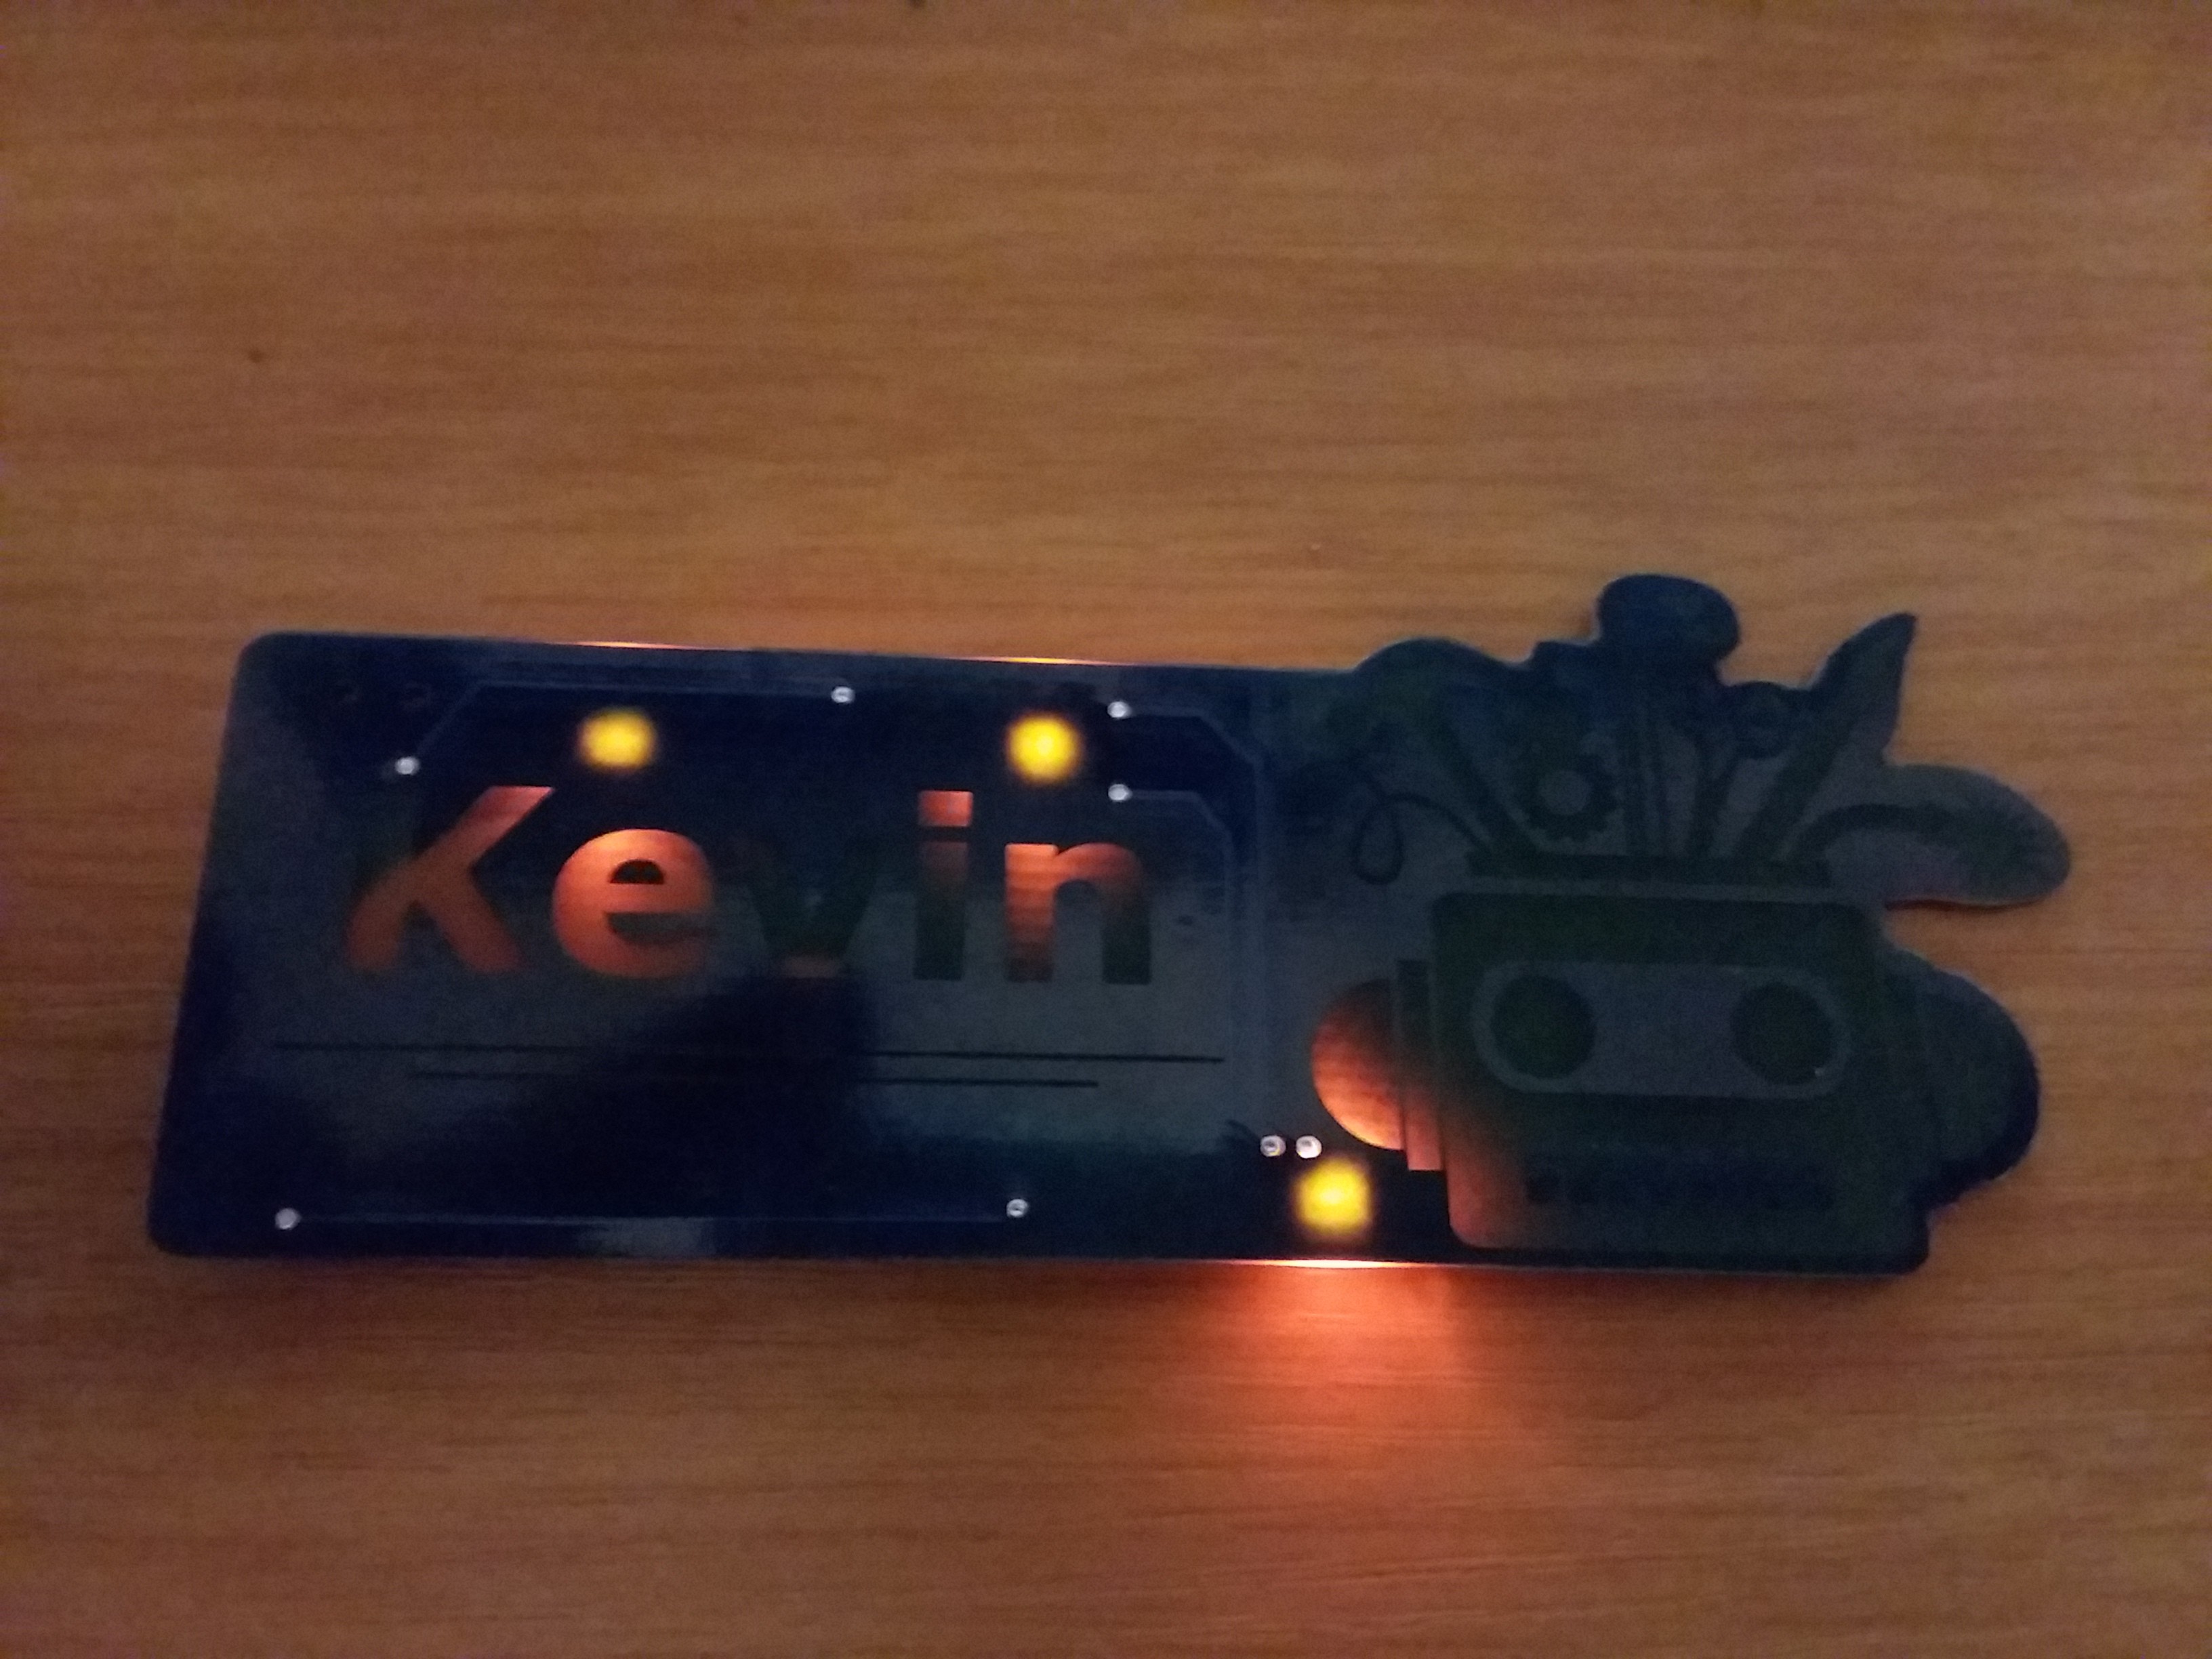
The first version of that didn't really work. I didn't have copper fill on the front, so the LEDs were visible straight through the board. The lights also just didn't diffuse very far.
Version 5
At this point, fitting the LEDs, CR2032, magnet, and switch on the PCB getting a bit challenging. I decided to lengthen the board a bit so I could have 6 LEDs around my name and a few behind the Decatur Makers logo. This time I also did a copper fill on both sides of the board, which I hoped would keep more of the light inside the board until it could reflect out of the openings for my name.
Major failure. The addition of more LEDs just meant that they each got less current, so the name was barely lit at all. The ones on the logo shone straight through and were pretty clearly points of light rather than diffused light. At this point, I decided this concept wasn't going to work as well as I'd hoped, so I decided to pivot to something that should look cooler.
Version 6
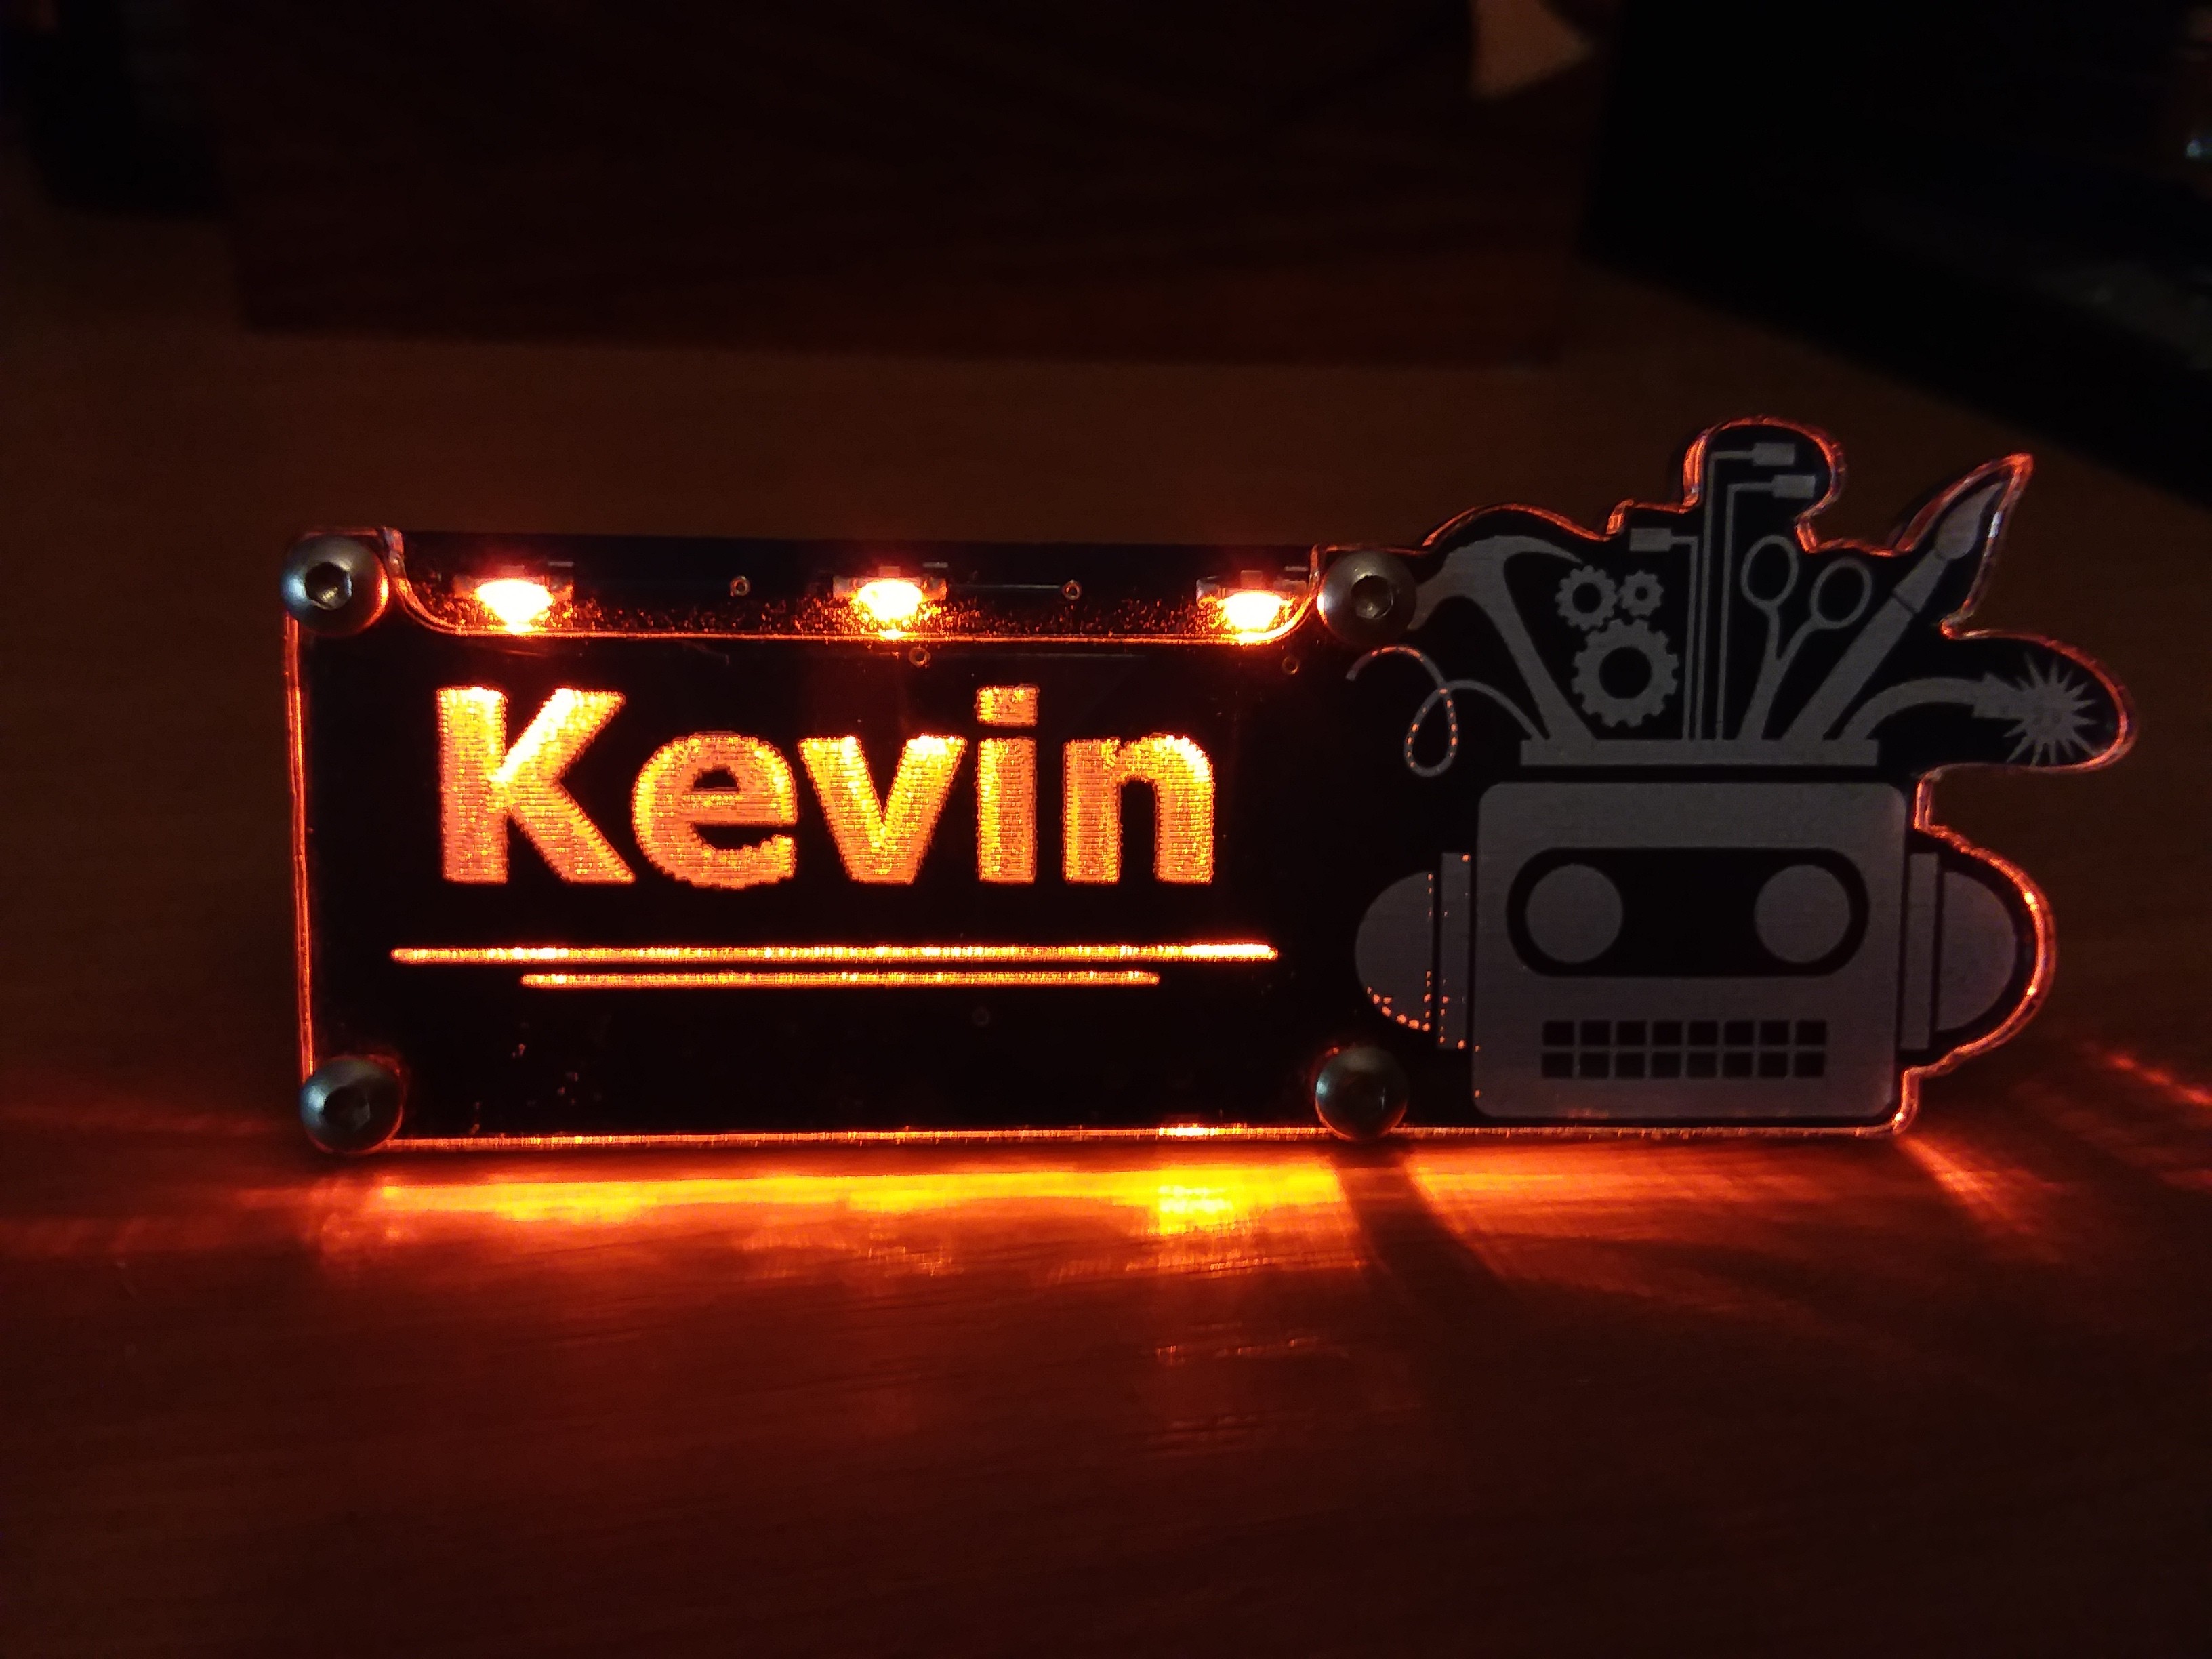
Edge-lit acrylic looks really cool, so I decided to add some right-angle LEDs to the front of my board and attach a piece of engraved acrylic to the front.
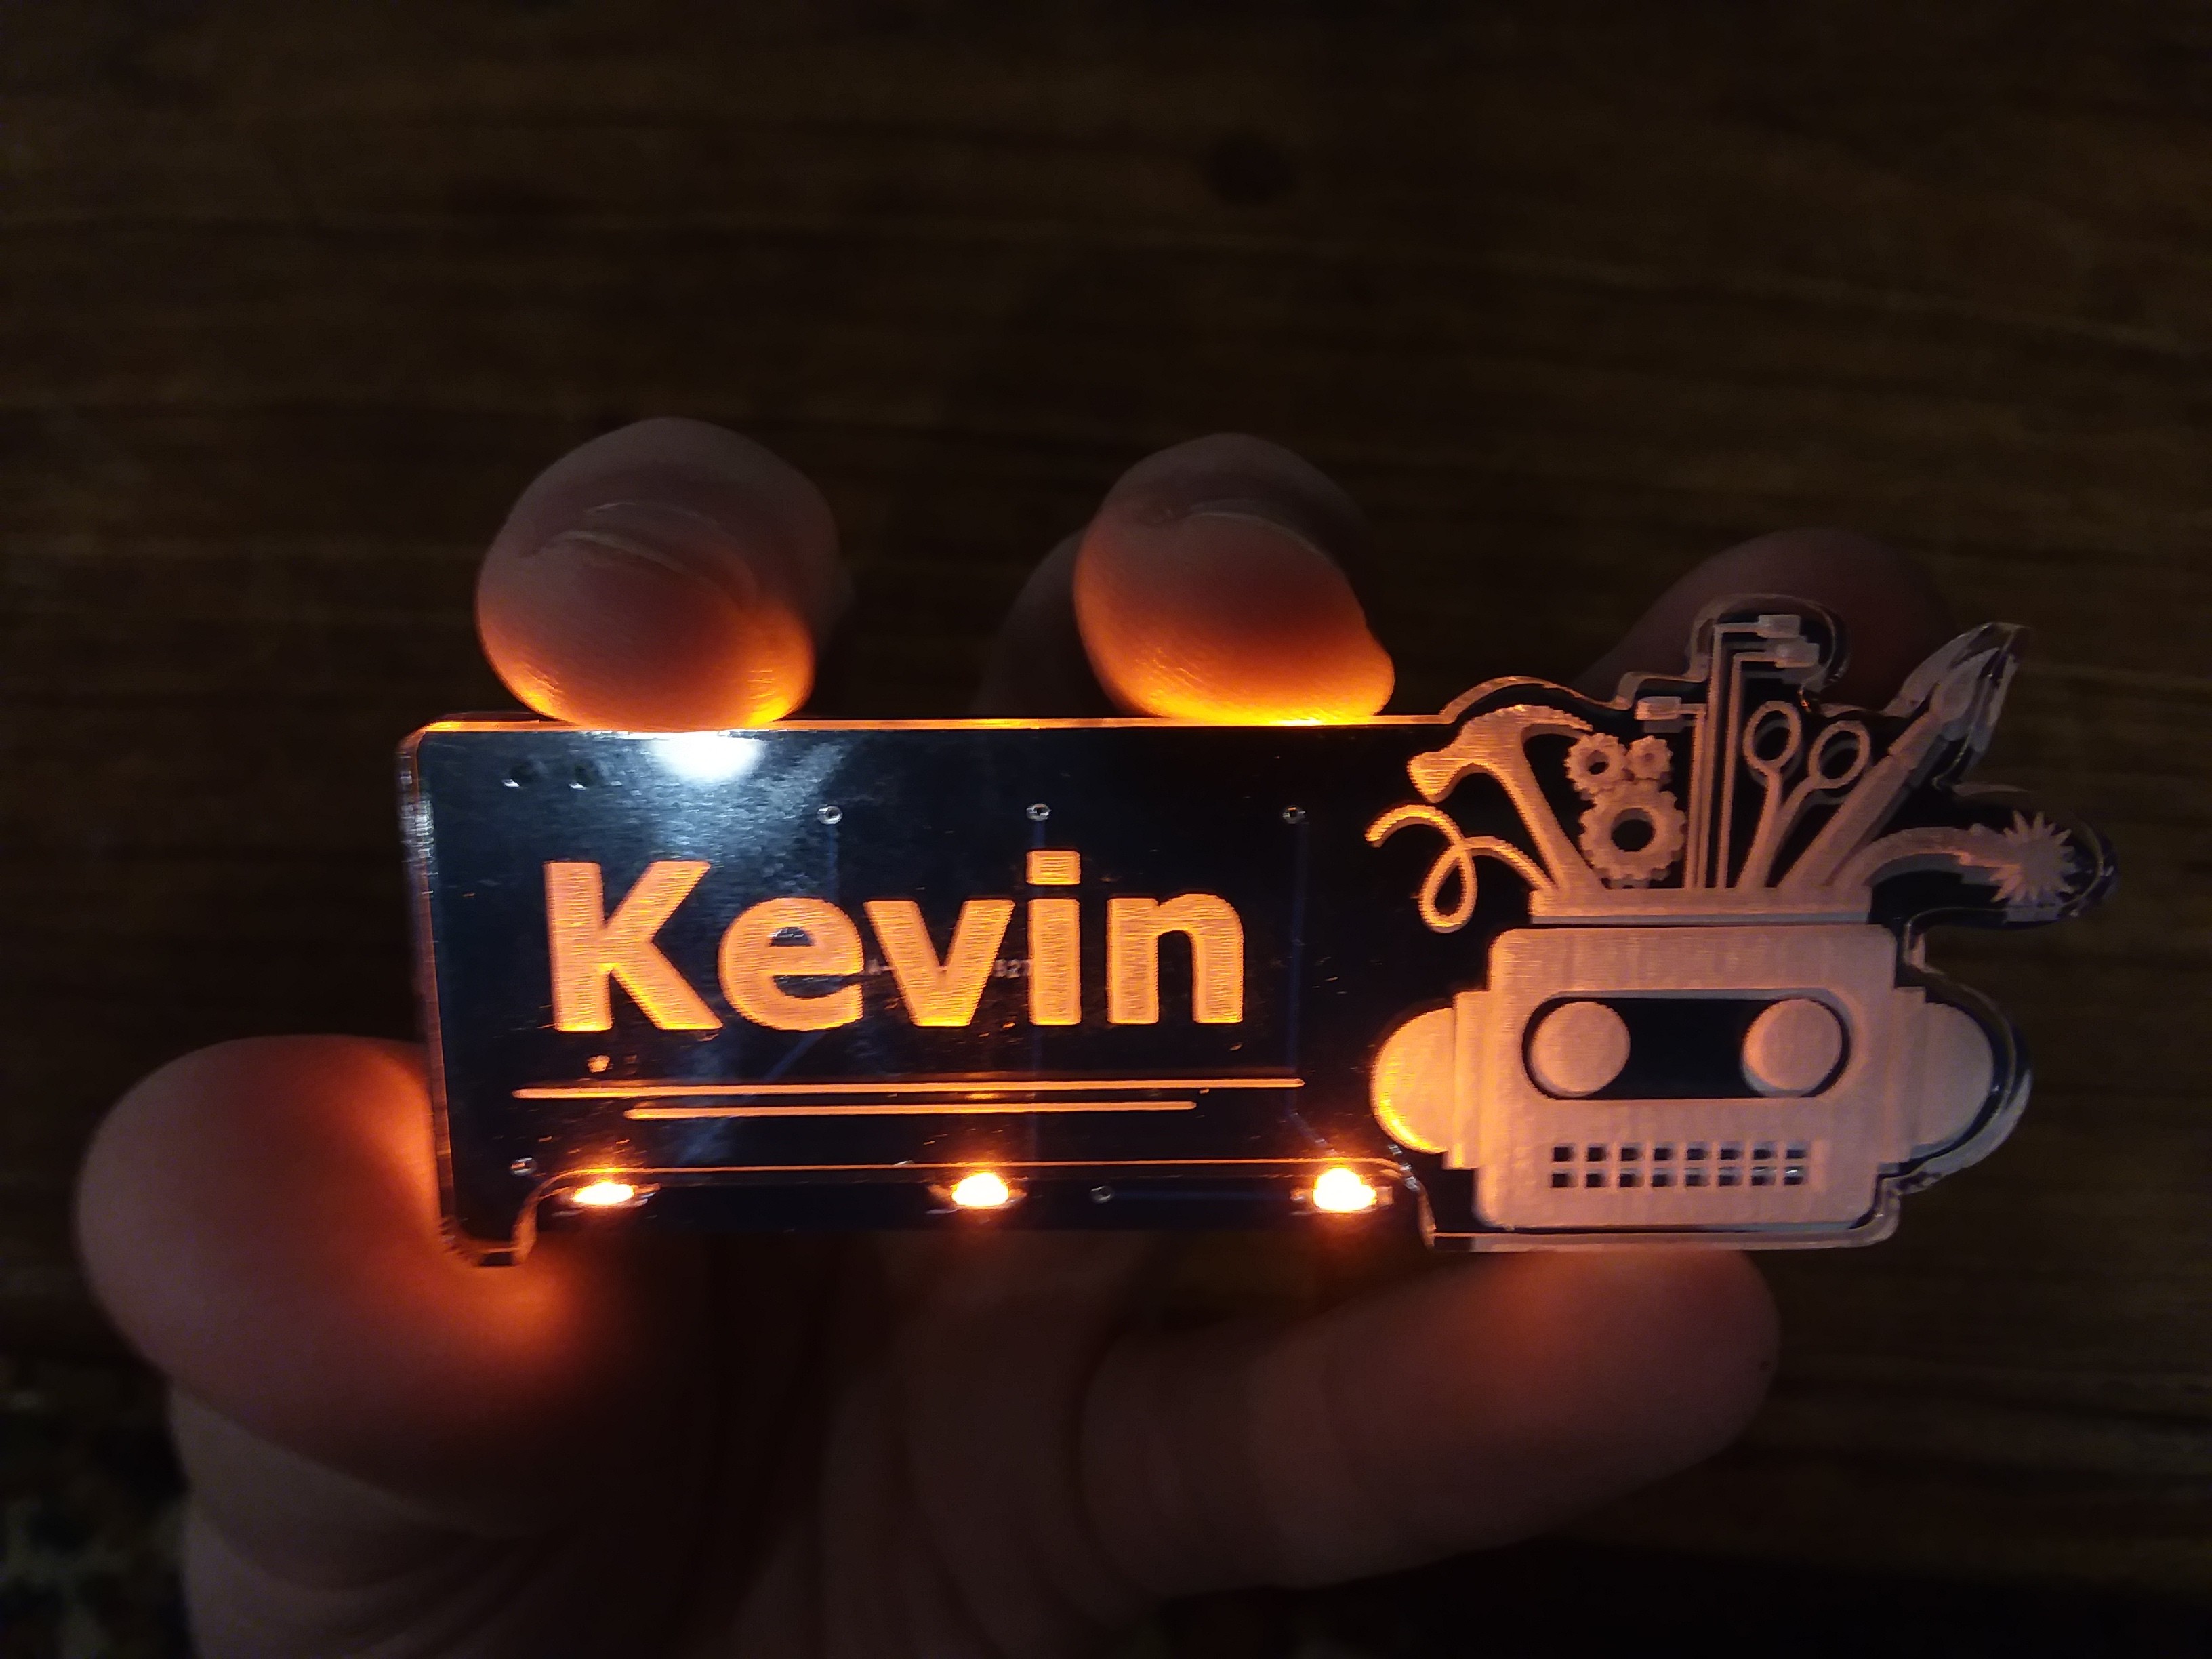
I liked the look of this one, but noticed a few issues:
- Acrylic doesn't glue nicely to anything other than acrylic, so neither hot glue nor epoxy would hold it to the PCB for any extended period of time.
- LEDs facing upwards shine right in my eyes.
- The logo didn't light up very much because there weren't any LEDs aimed straight at it.
Version 7
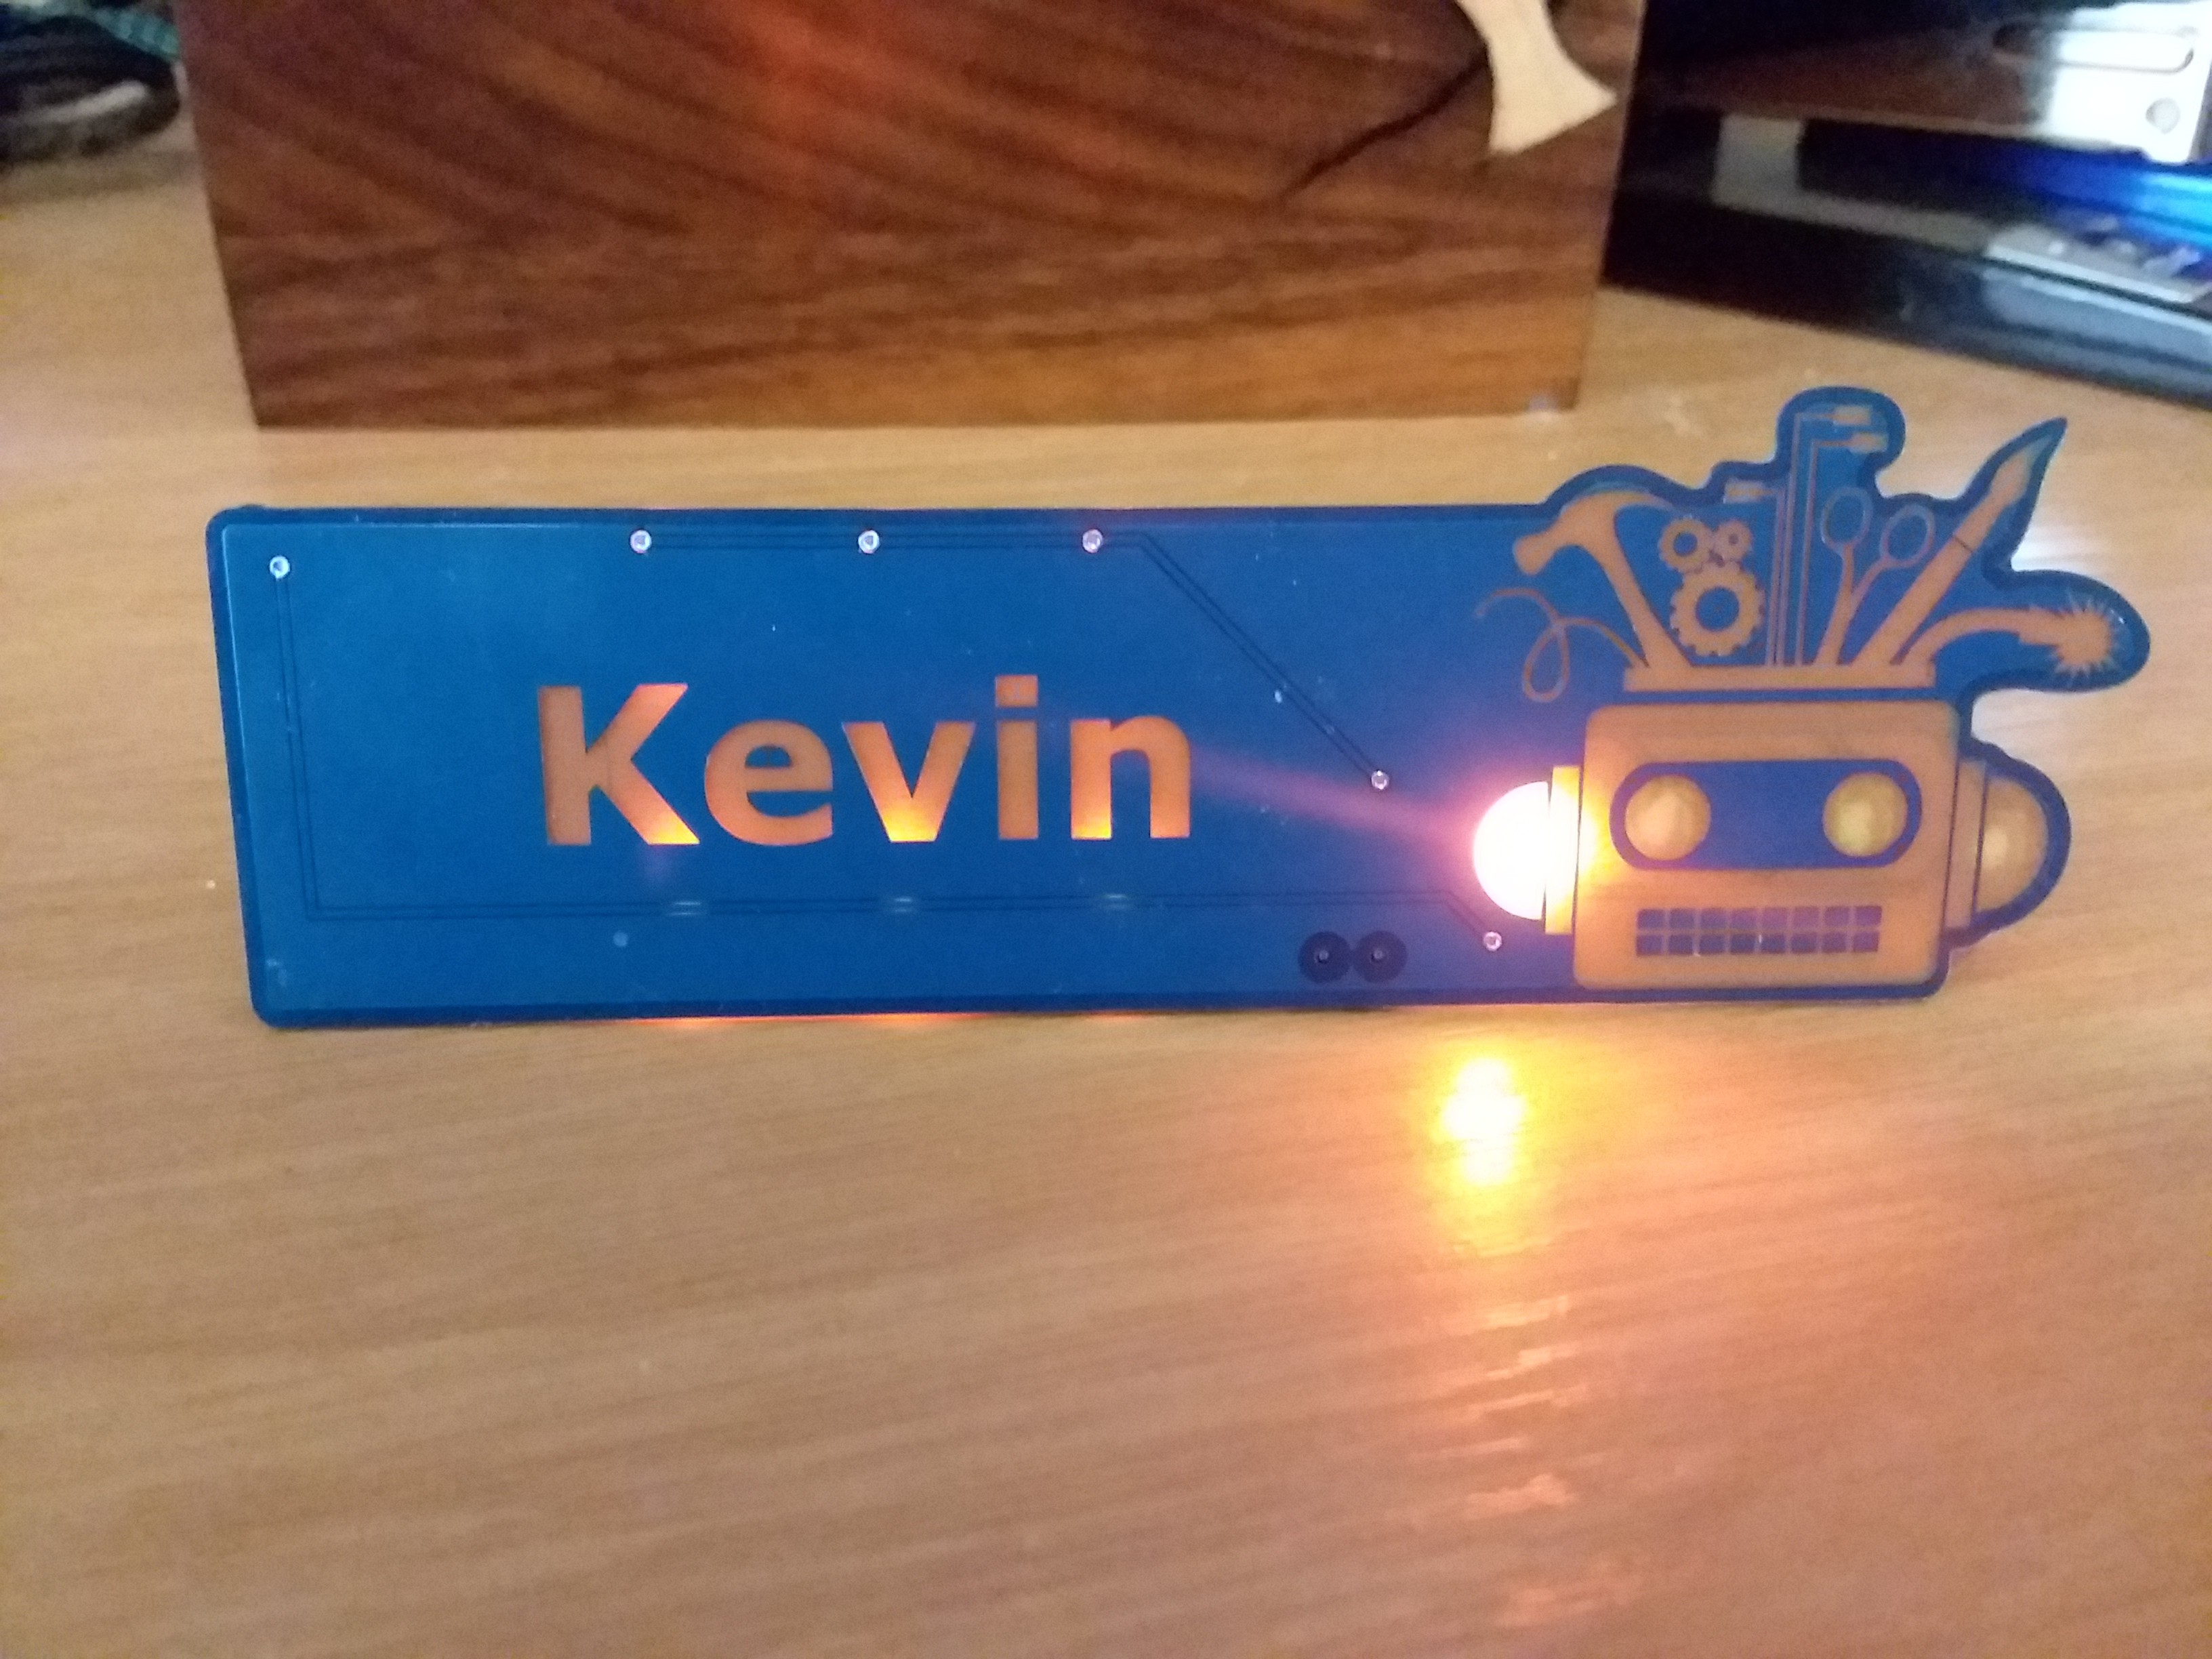
For this version, I changed the position of the LEDs so they'd face downward and added some holes for M2.5 screws. I also just left the logo on the silkscreen layer rather than trying to engrave it.
Really like how this version came out. In normal indoor lighting, both the name and logo show up pretty well. This is probably the last version of the makerspace one, but I plan on prototyping some more general name tags here soon using the same concept.
Discussions
Become a Hackaday.io Member
Create an account to leave a comment. Already have an account? Log In.