 Ben Brooks
Not too long after having built my keezer, I decided I wanted to be able to weigh each of the kegs. Unfortunately, this wasn’t something I had considering during the initial build so I had very little clearance between the top of the tallest keg and the bottom of the refrigerated compartment. Designing a weight sensor that was as thin as possible become paramount and a strain-gauge type sensor seemed too thick. This led me to initially design a sensor using a very thin piece of anti-static foam (much like that used to hold sensitive electronics for shipping) sandwiched between two thin pieces of plywood with copper tape applied on the inside face of each. I wrapped the whole setup in some heavy-duty tape and by measuring the electrical resistance between each side of the foam, a crude weight sensor was born!
While it appeared to work well enough during multi-day tests (I was initially aiming for an error of between 5-10% of the actual volume), after having them installed for an extended period of time drift was a real issue. This was exacerbated by the fact that I tend to go through beer fairly slowly, never allowing me to get a good calibration value for a given sensor. Ultimately condensation that collected at the bottom of the keezer caused each of the sensors to fail completely after a year or so.
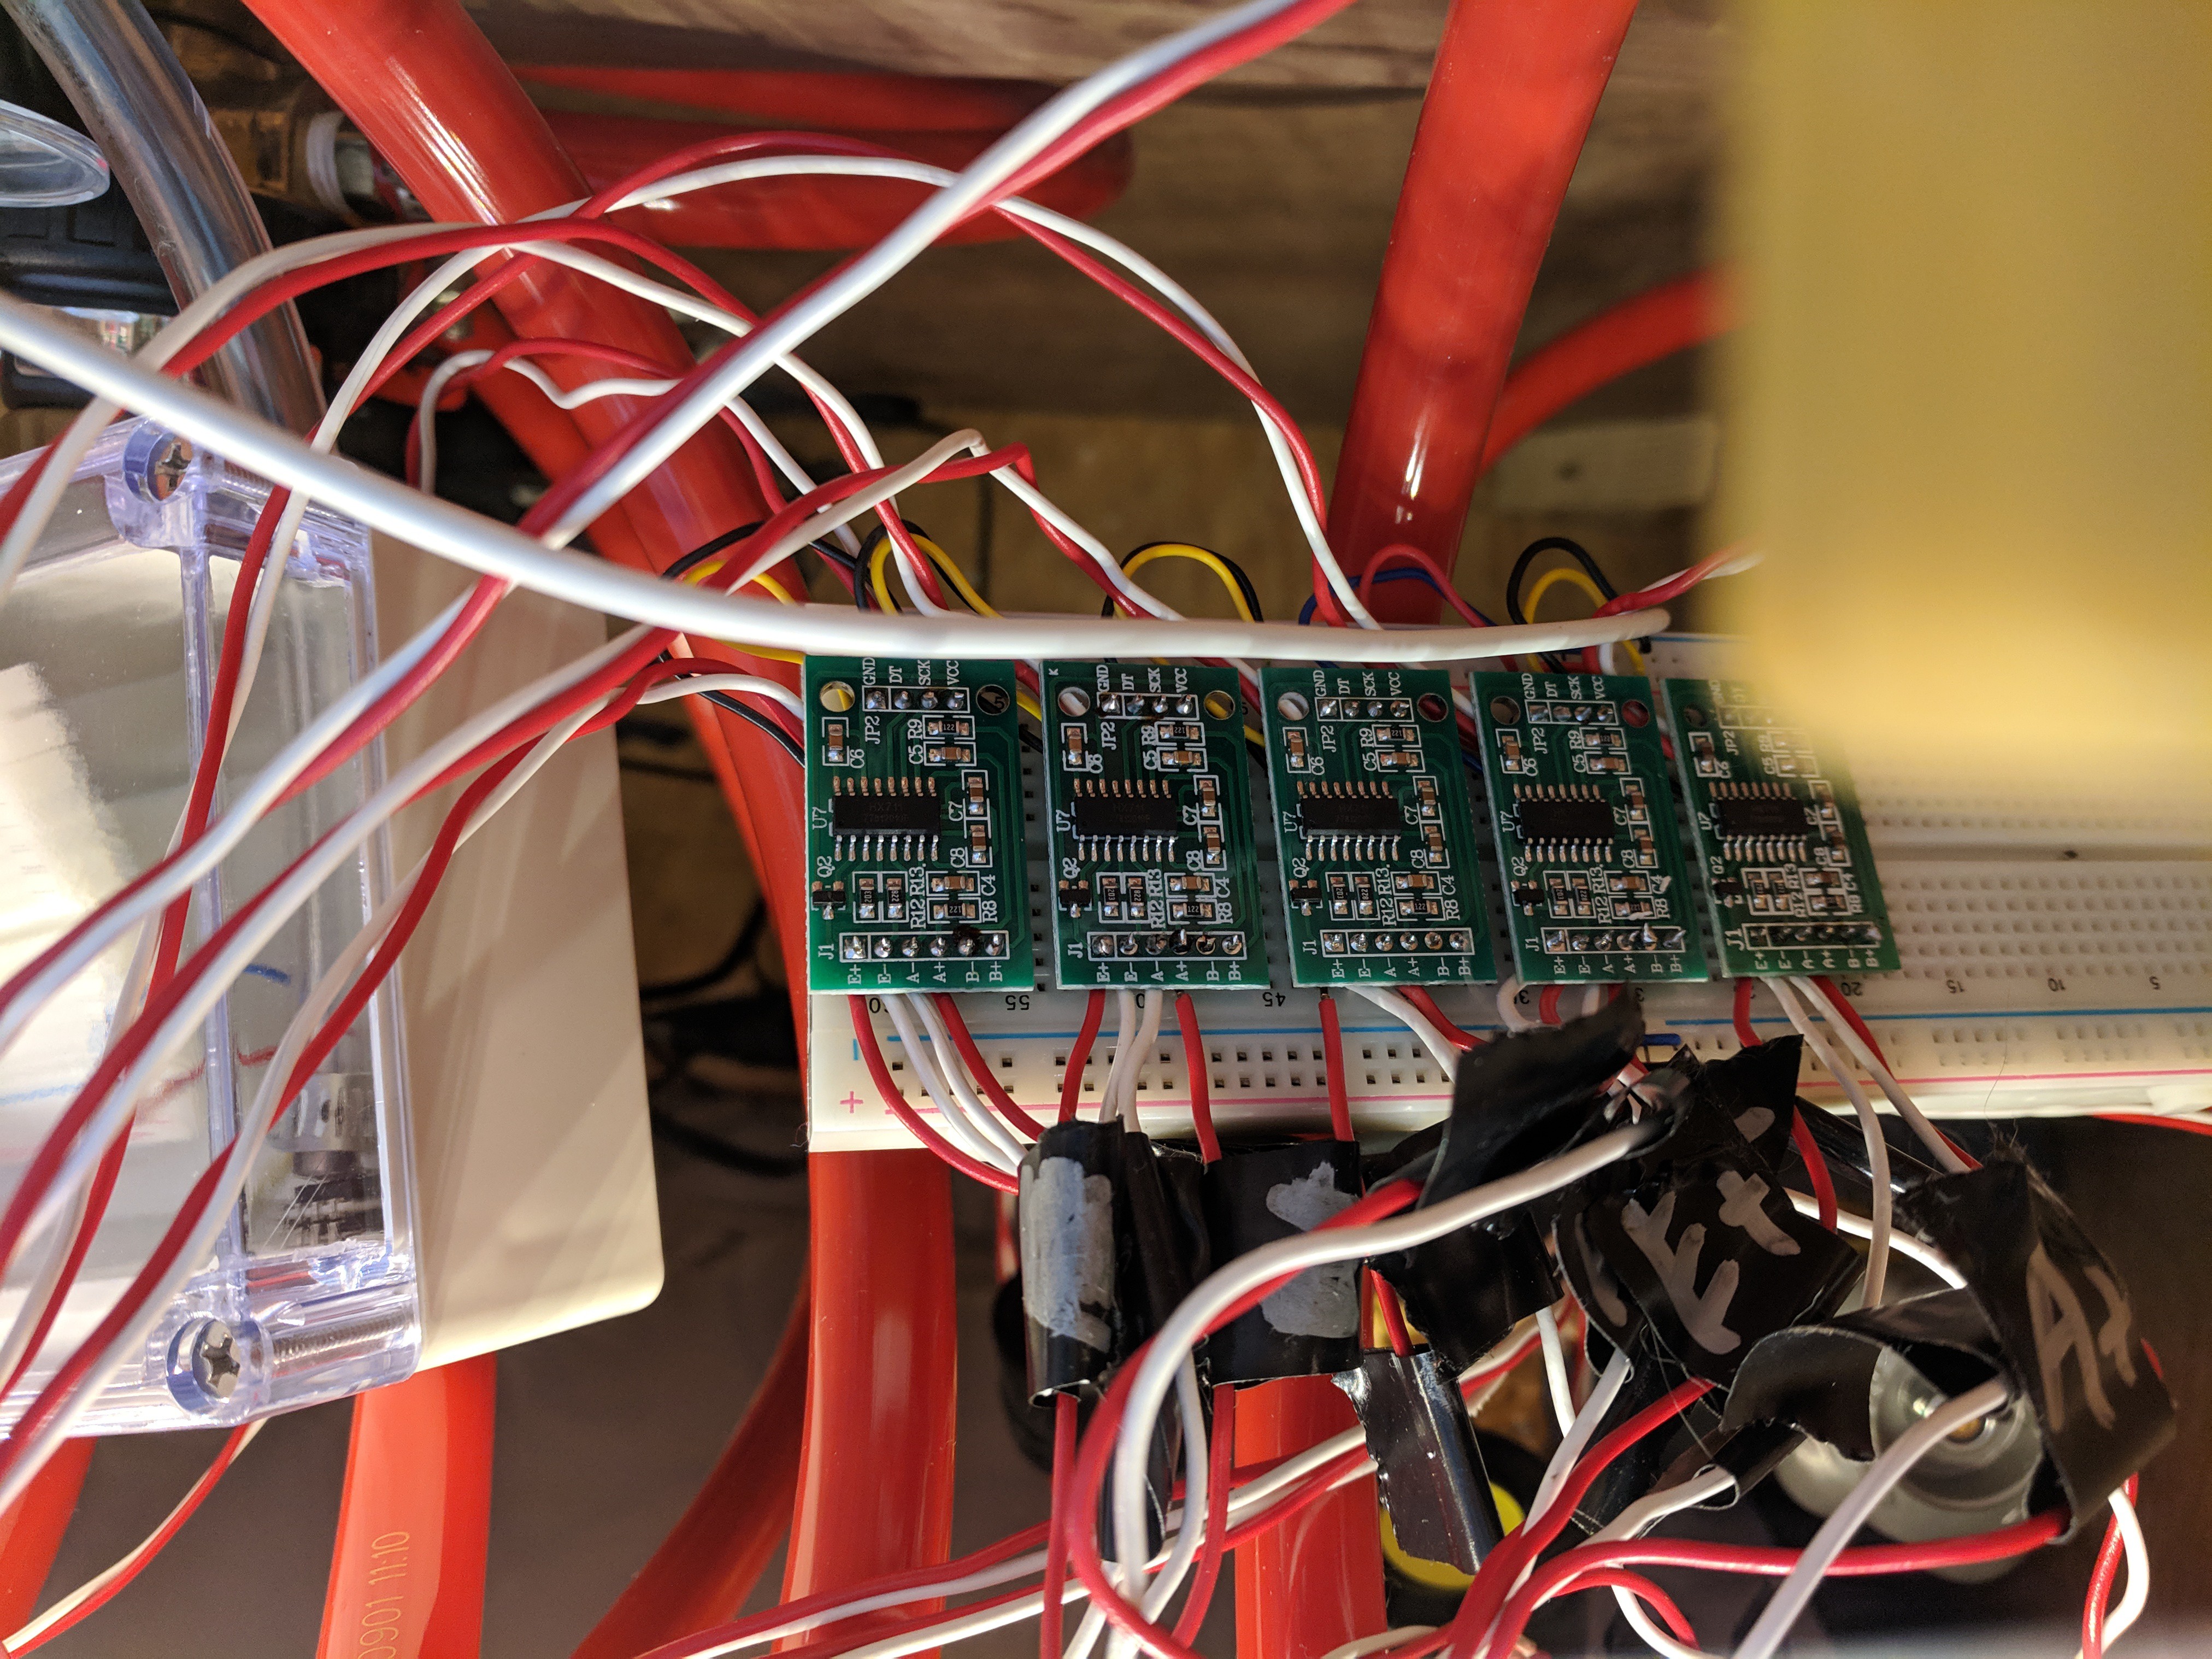
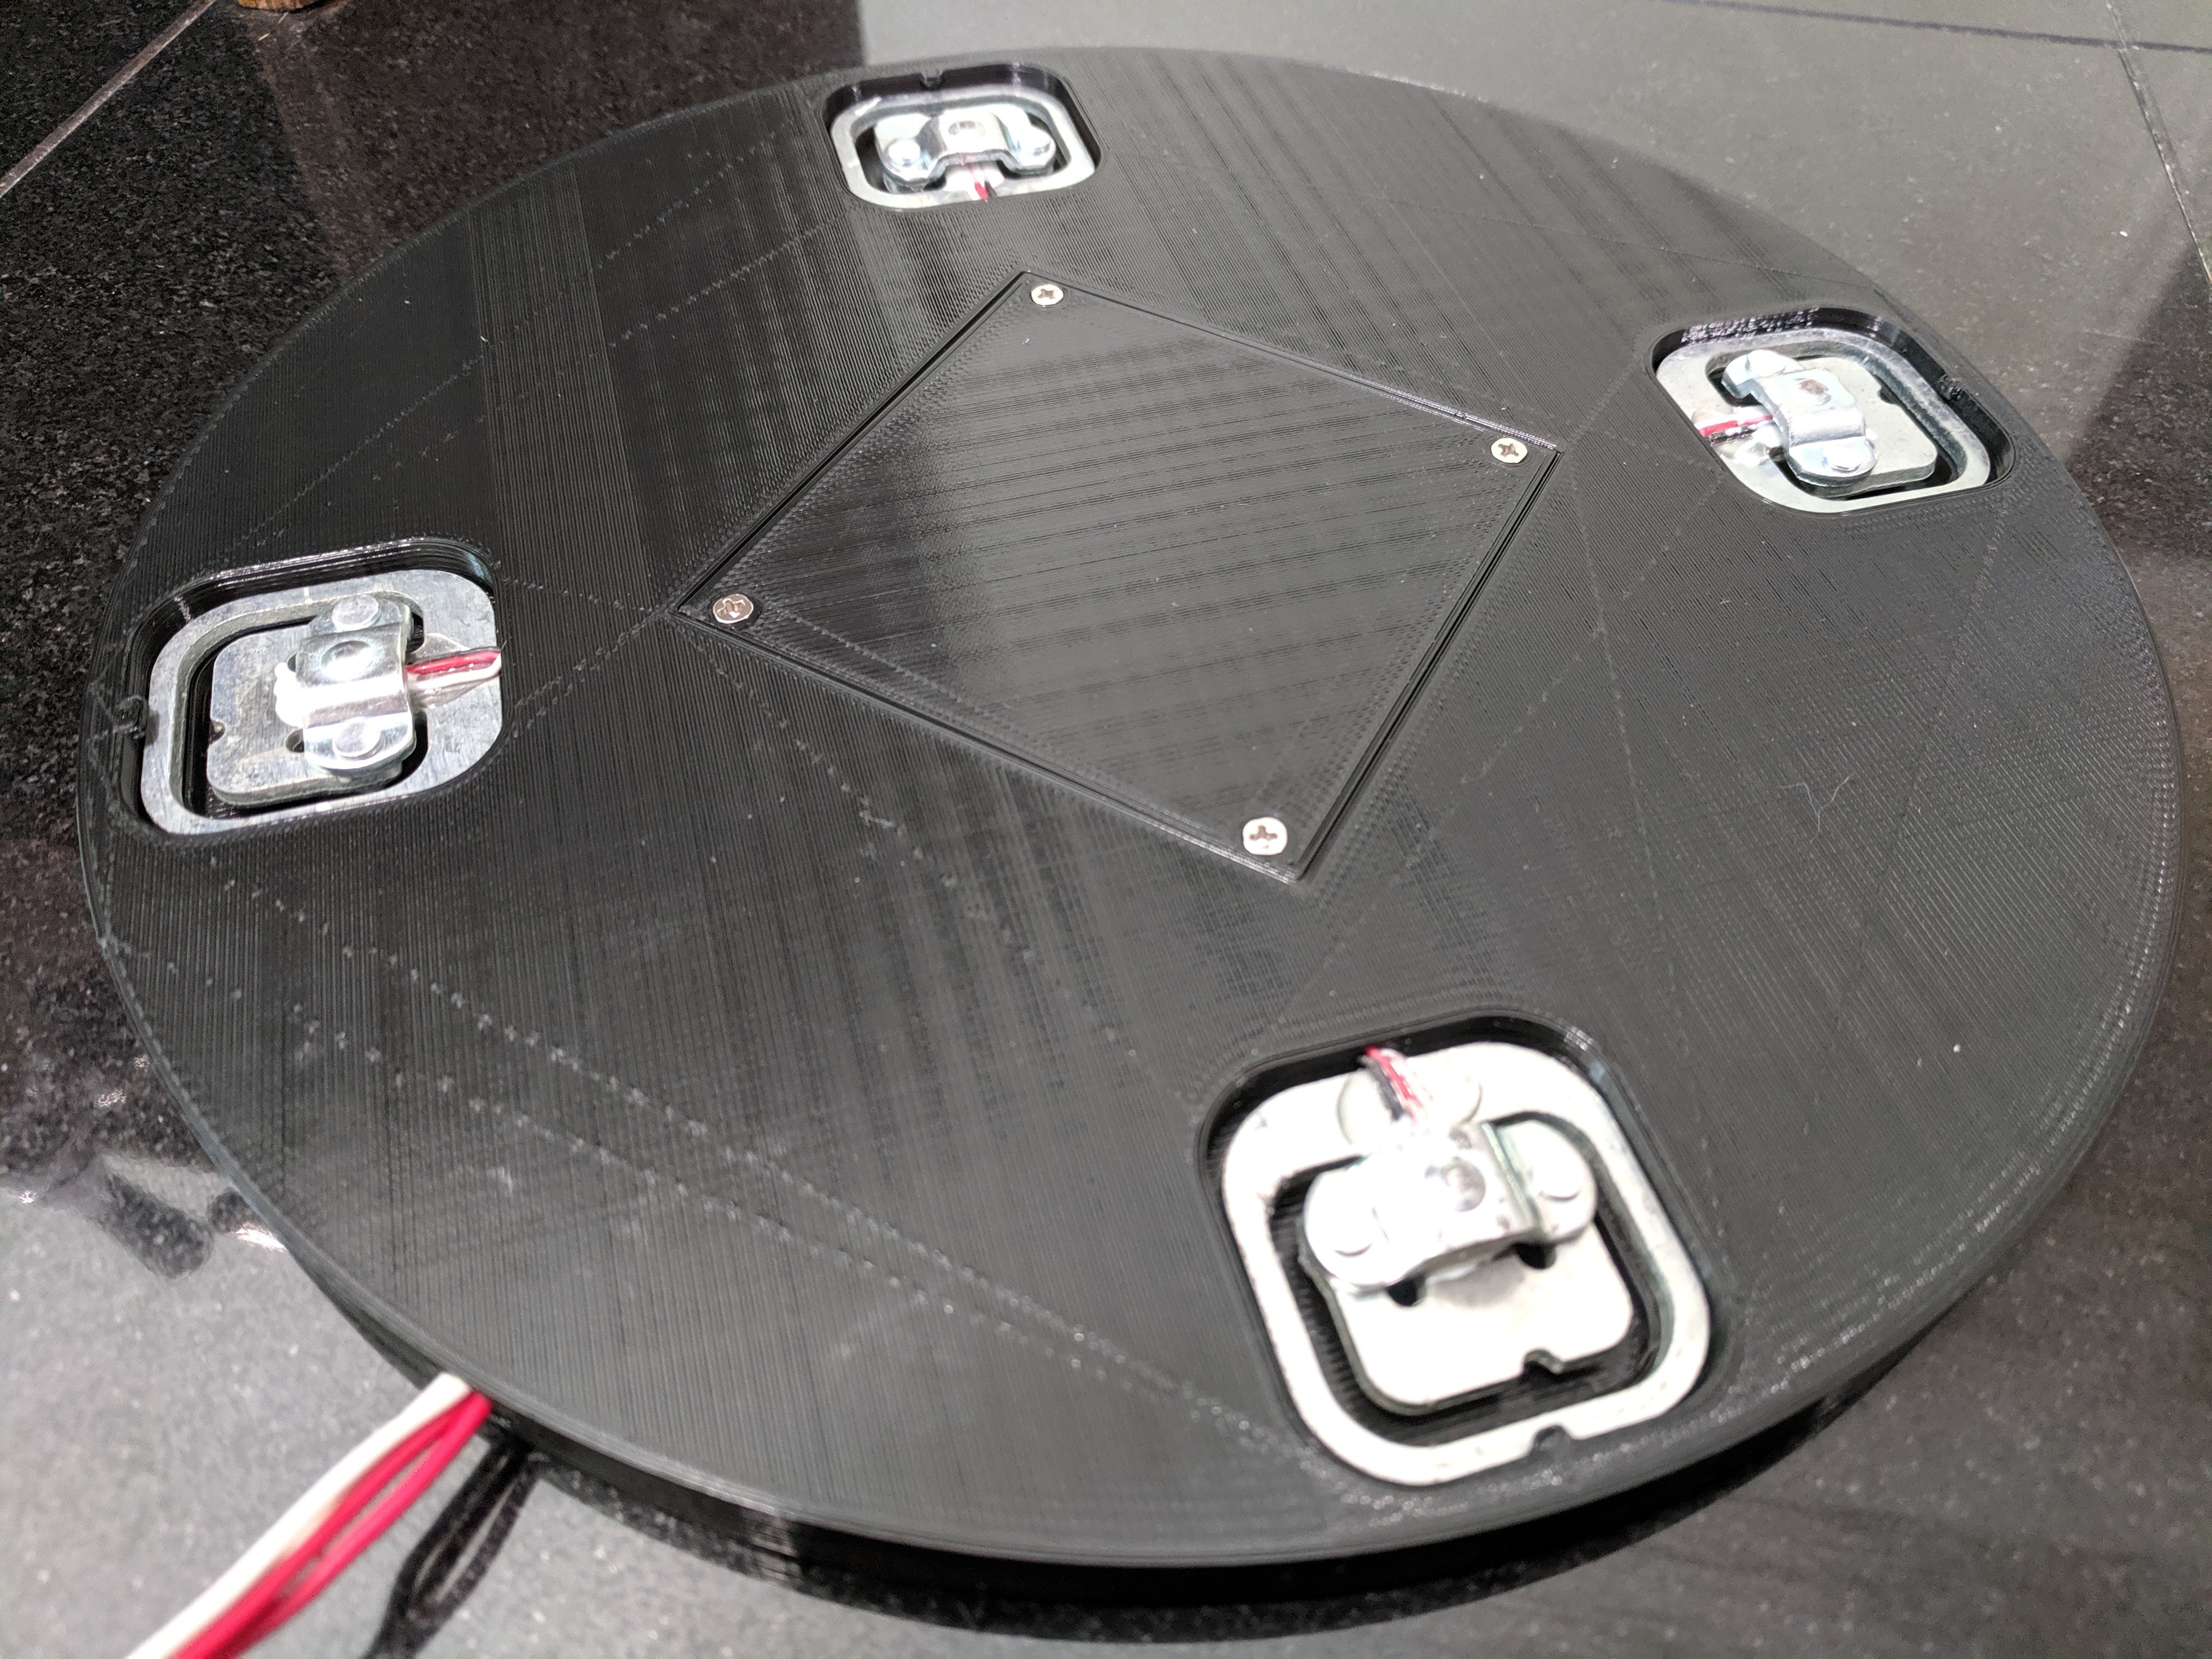
I subsequently built new sensors utilizing strain-gauges mounted on the same pieces of plywood and found that I was able to make them thin enough to work within my size constraints. They were MUCH more accurate and once down to the refrigerated temperature there was no discernable drift with time. I was now able to very accurately measure the weight of each keg.
Originally, I had installed manual ball-valves on each of the taps and a combination lock on the back of the keezer to allow me to lock the entire thing up when not around. While working on other parts of this project I decided that it would be fun to install some solenoid valves to do this automatically. After some searching, I found some that appeared to be food-safe and was ultimately able to add them to the setup.
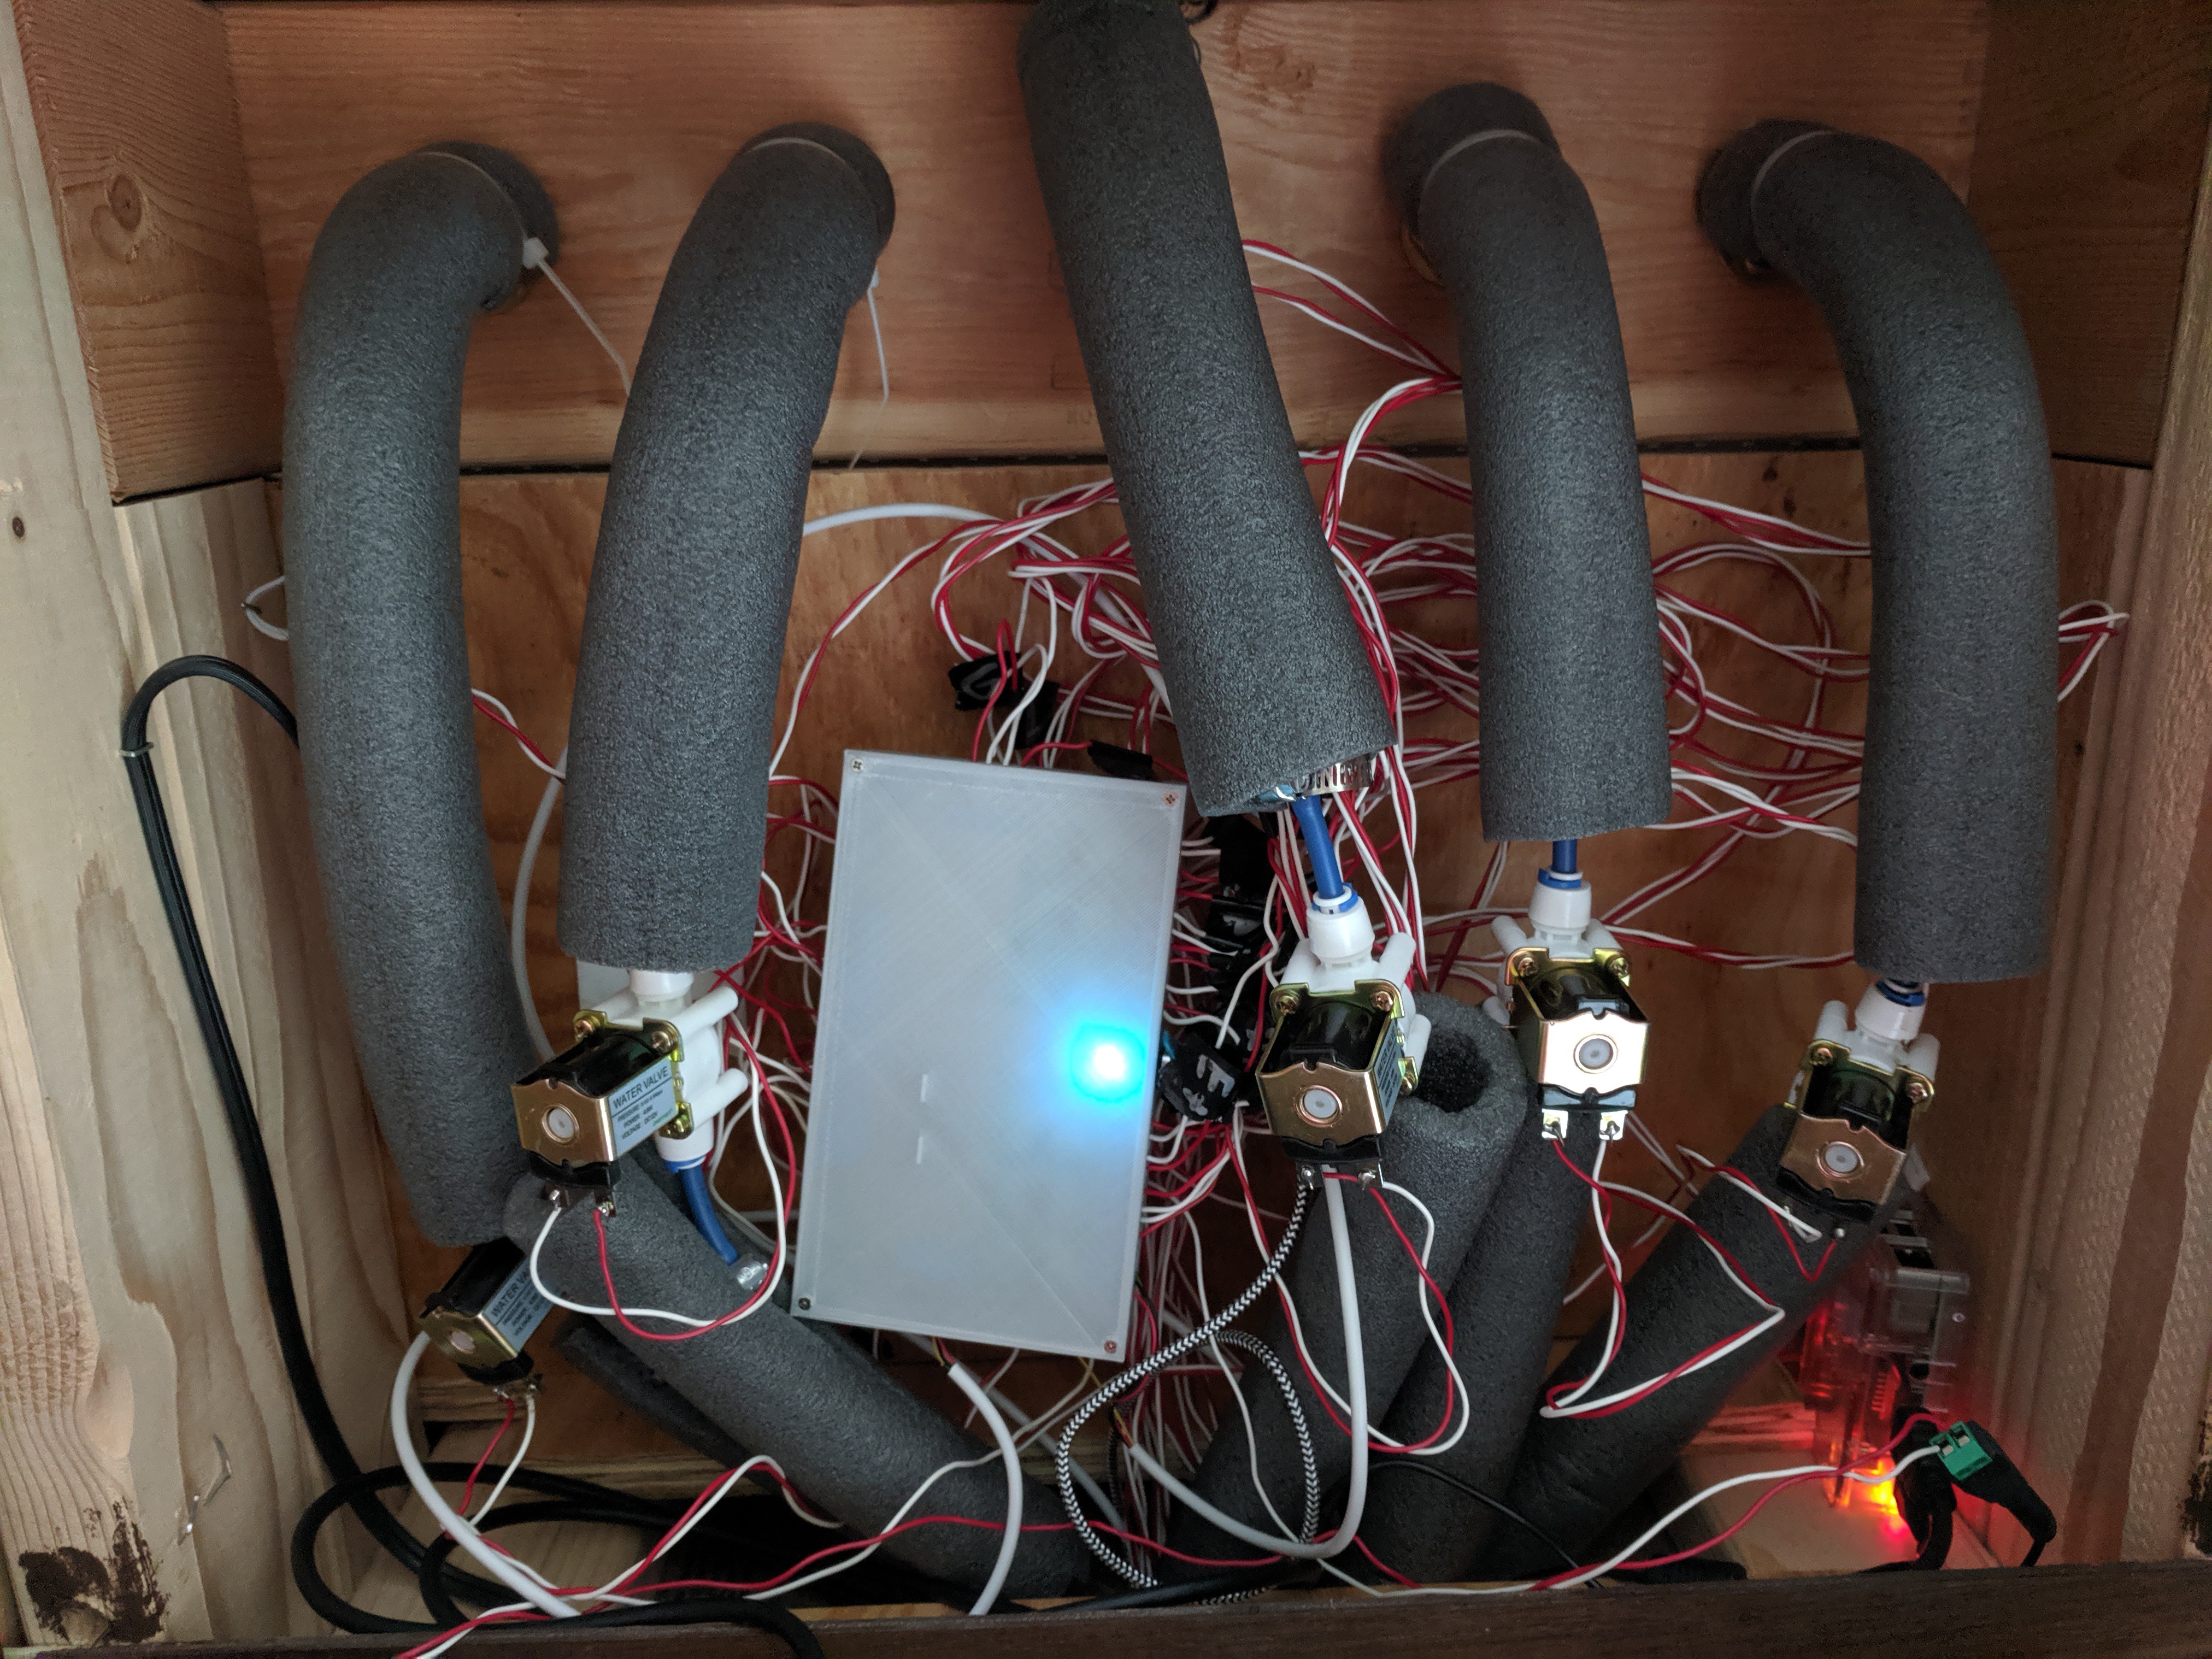
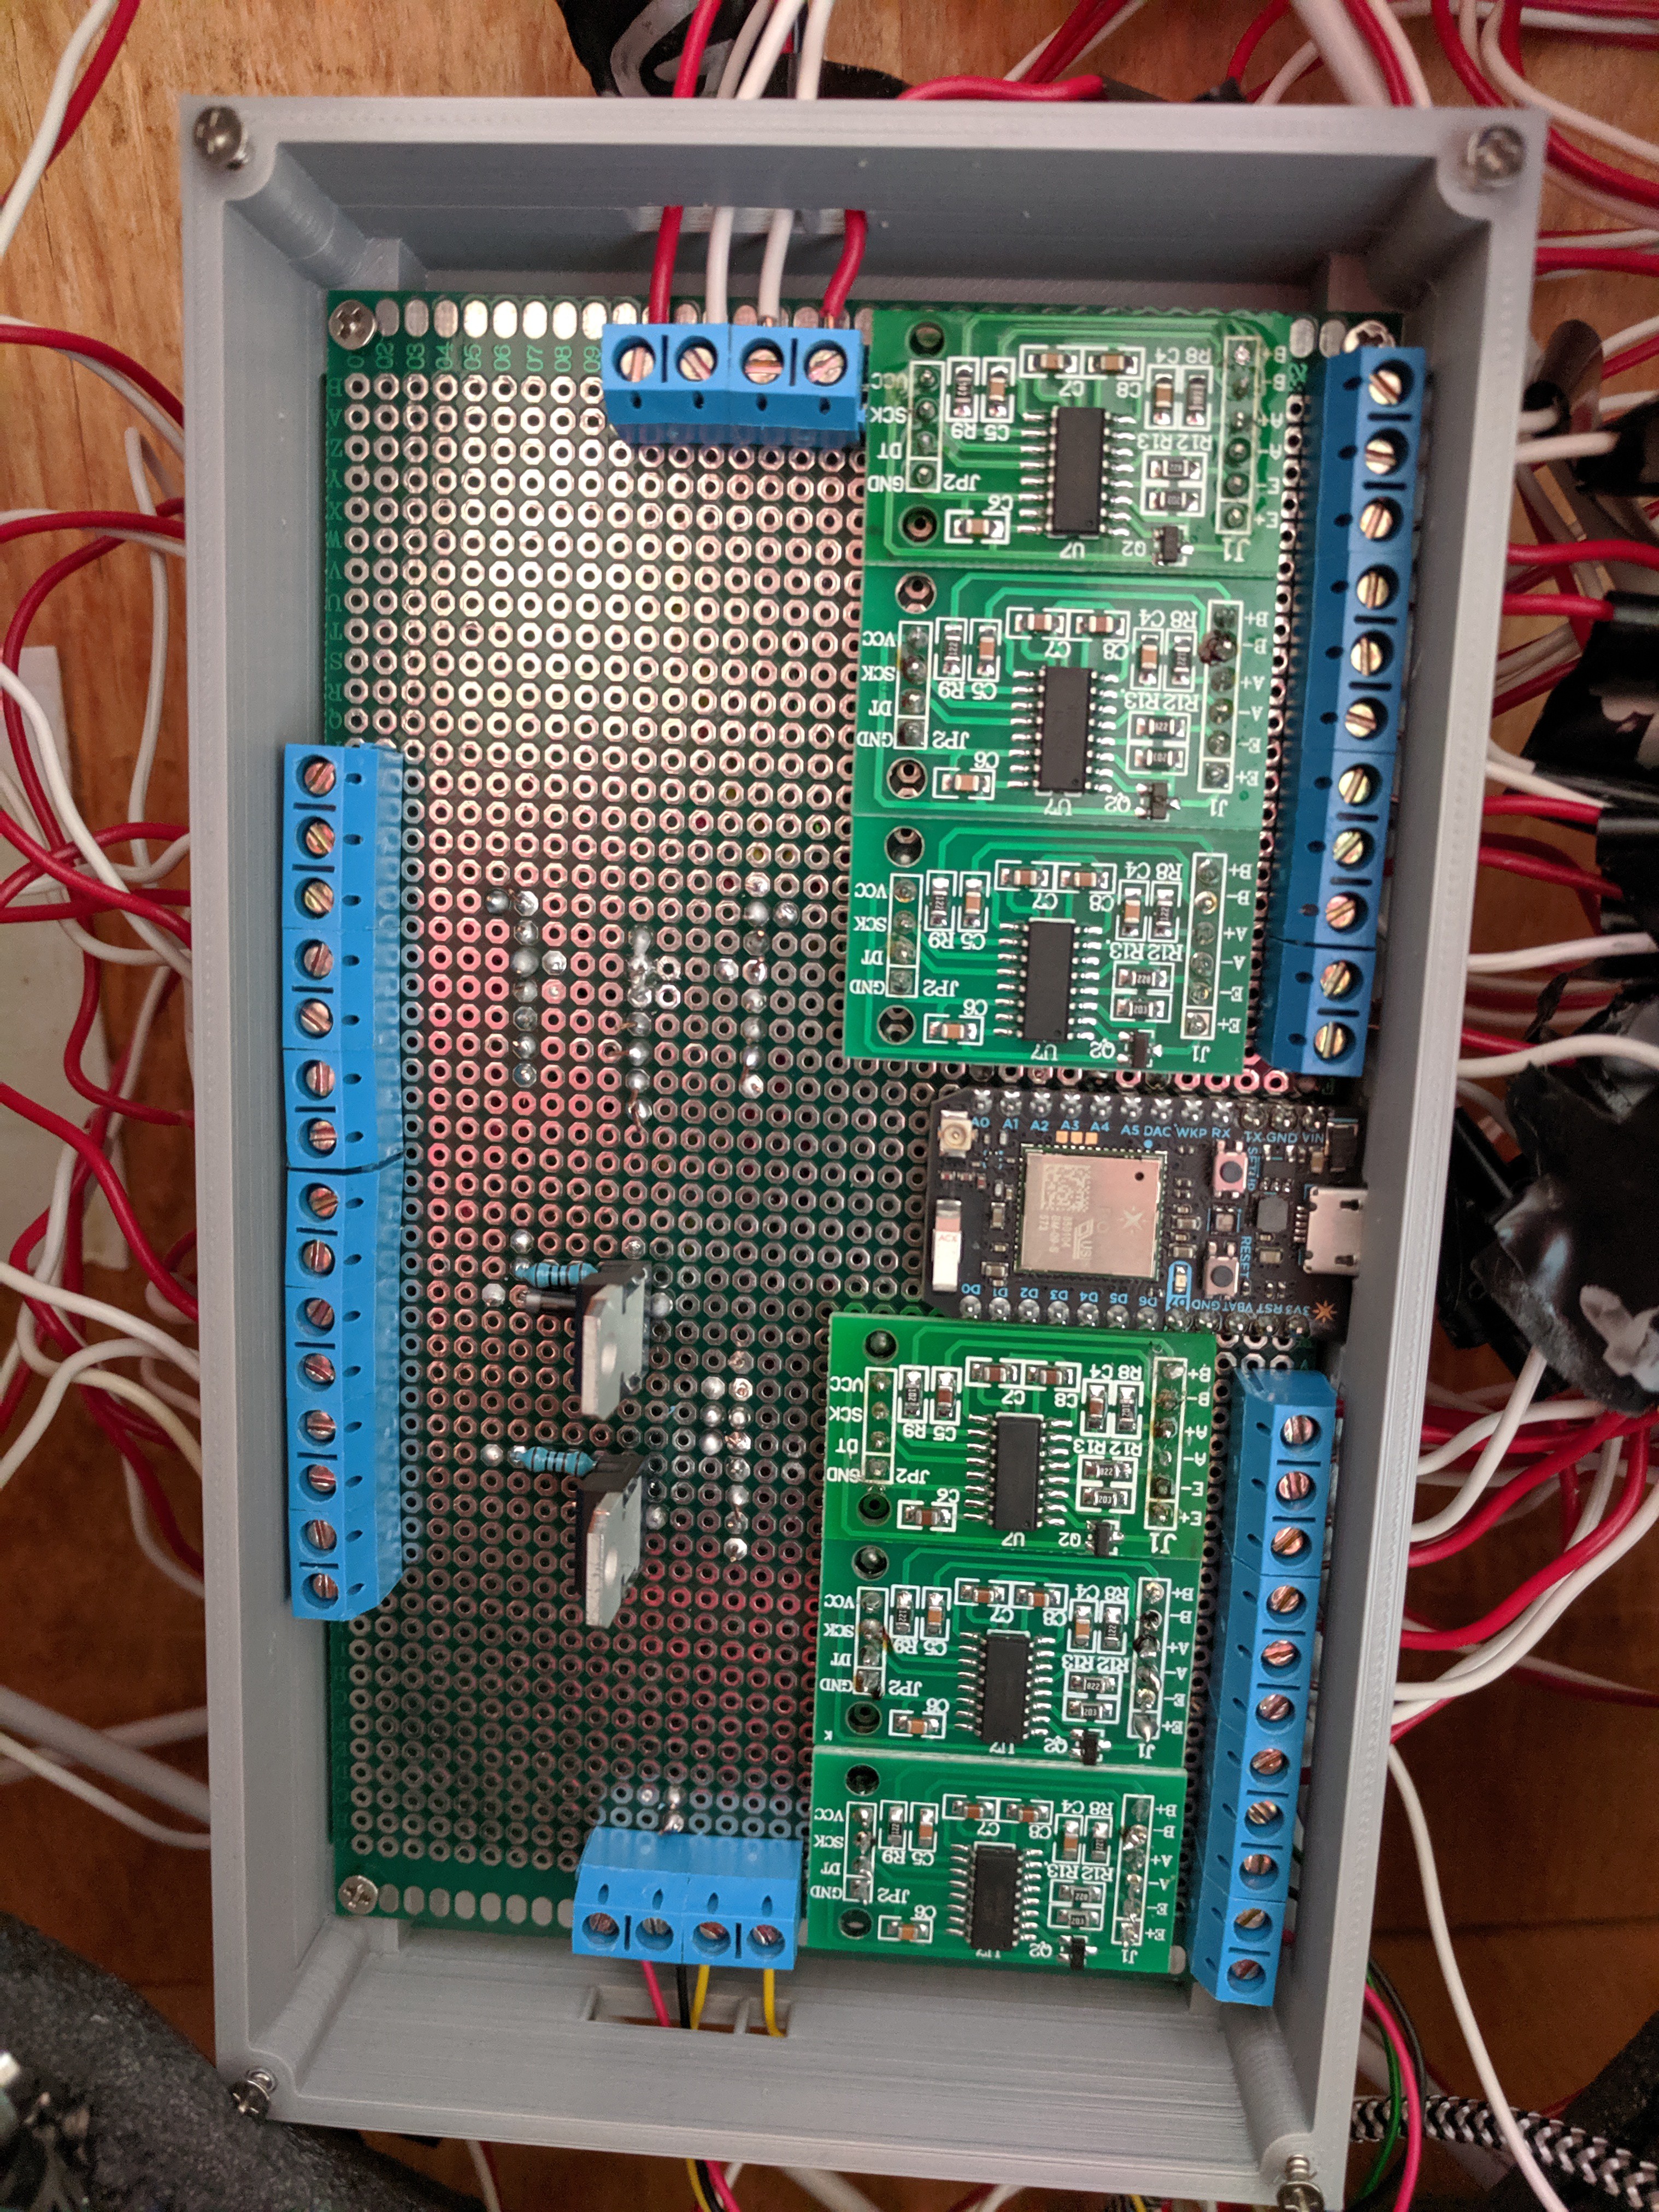
Using the same transistors I bought to control the solenoids I was able to also control the LEDs I originally installed under the taps as well as the computer monitor I added to display all of the information I was collecting. I was able to buy a driver board to control the monitor I had from a deceased laptop and used a Raspberry Pi to display a simple HTML file I created. Programming/HTML being my weak-spot, I stumbled upon some chart tools that Google offers for free to give my display the semi-professional look I was aiming for. Voilà! I had a working keezer controller operating on a Particle Photon, albeit a little rough looking between the plywood weight sensors and the breadboard. I also connected my Photon to IFTTT so that I have an ‘on’ and ‘off’ button for the valves, lights and screen on my phone that works anywhere I have internet.

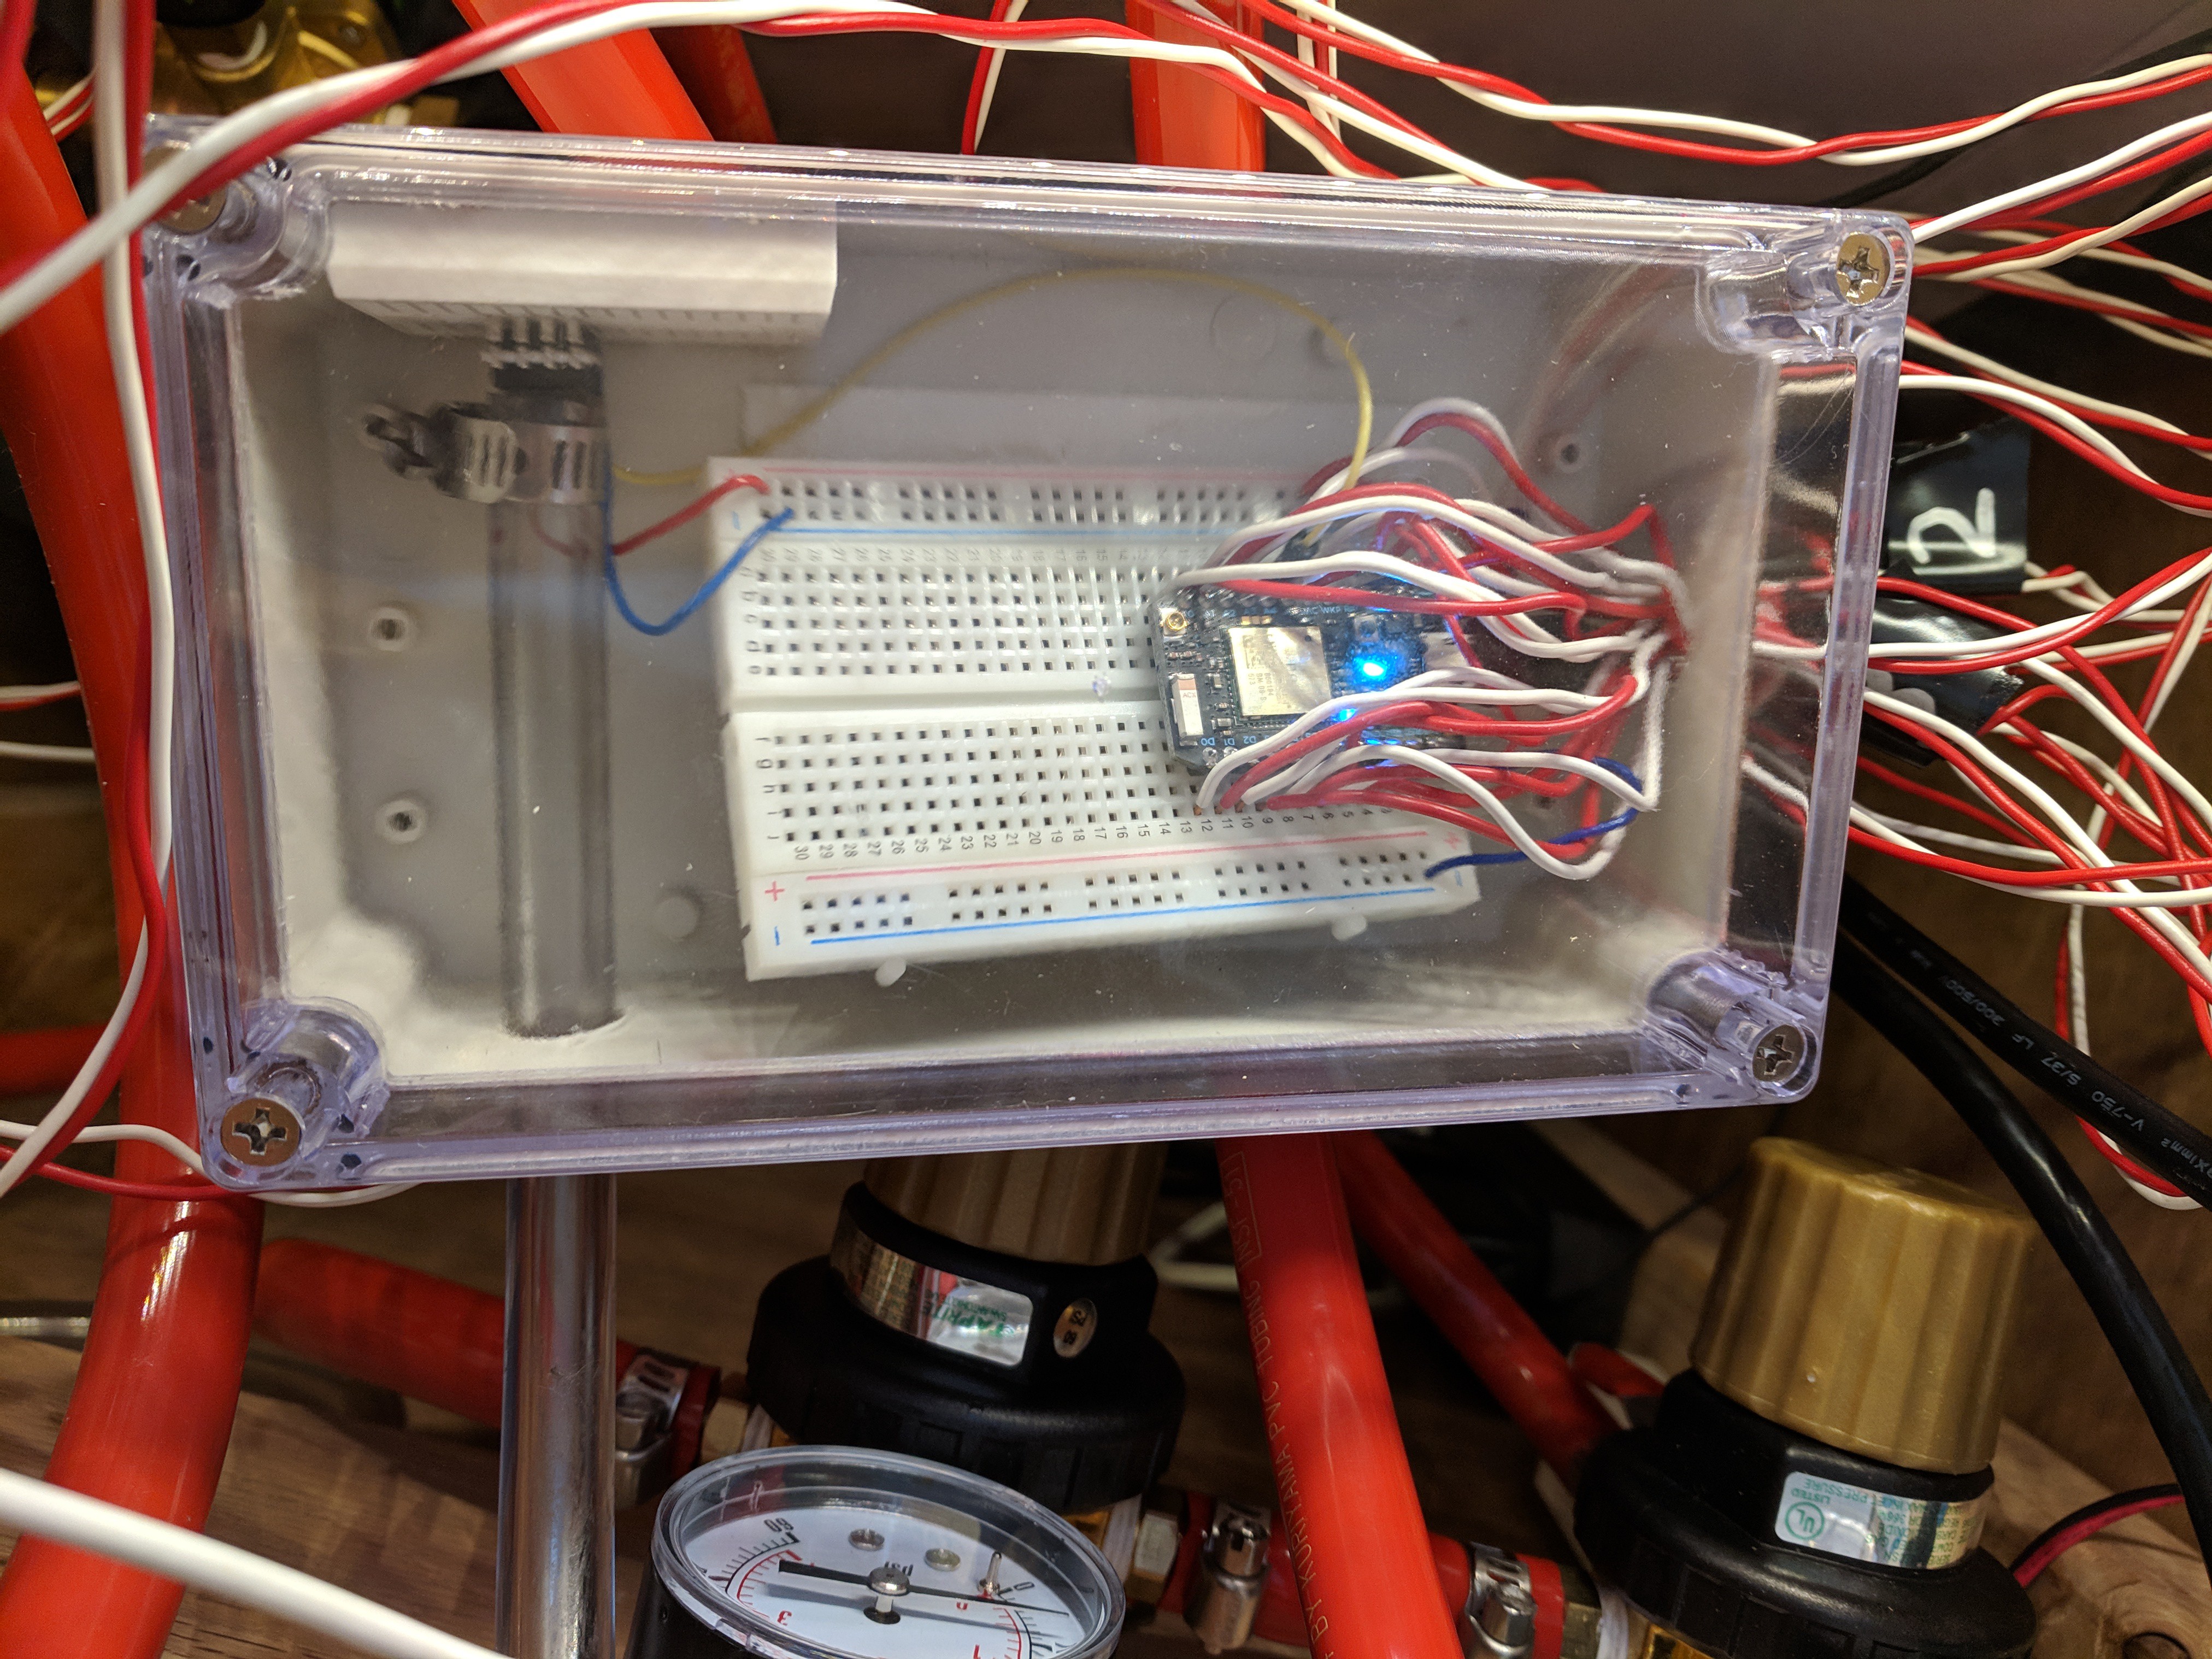
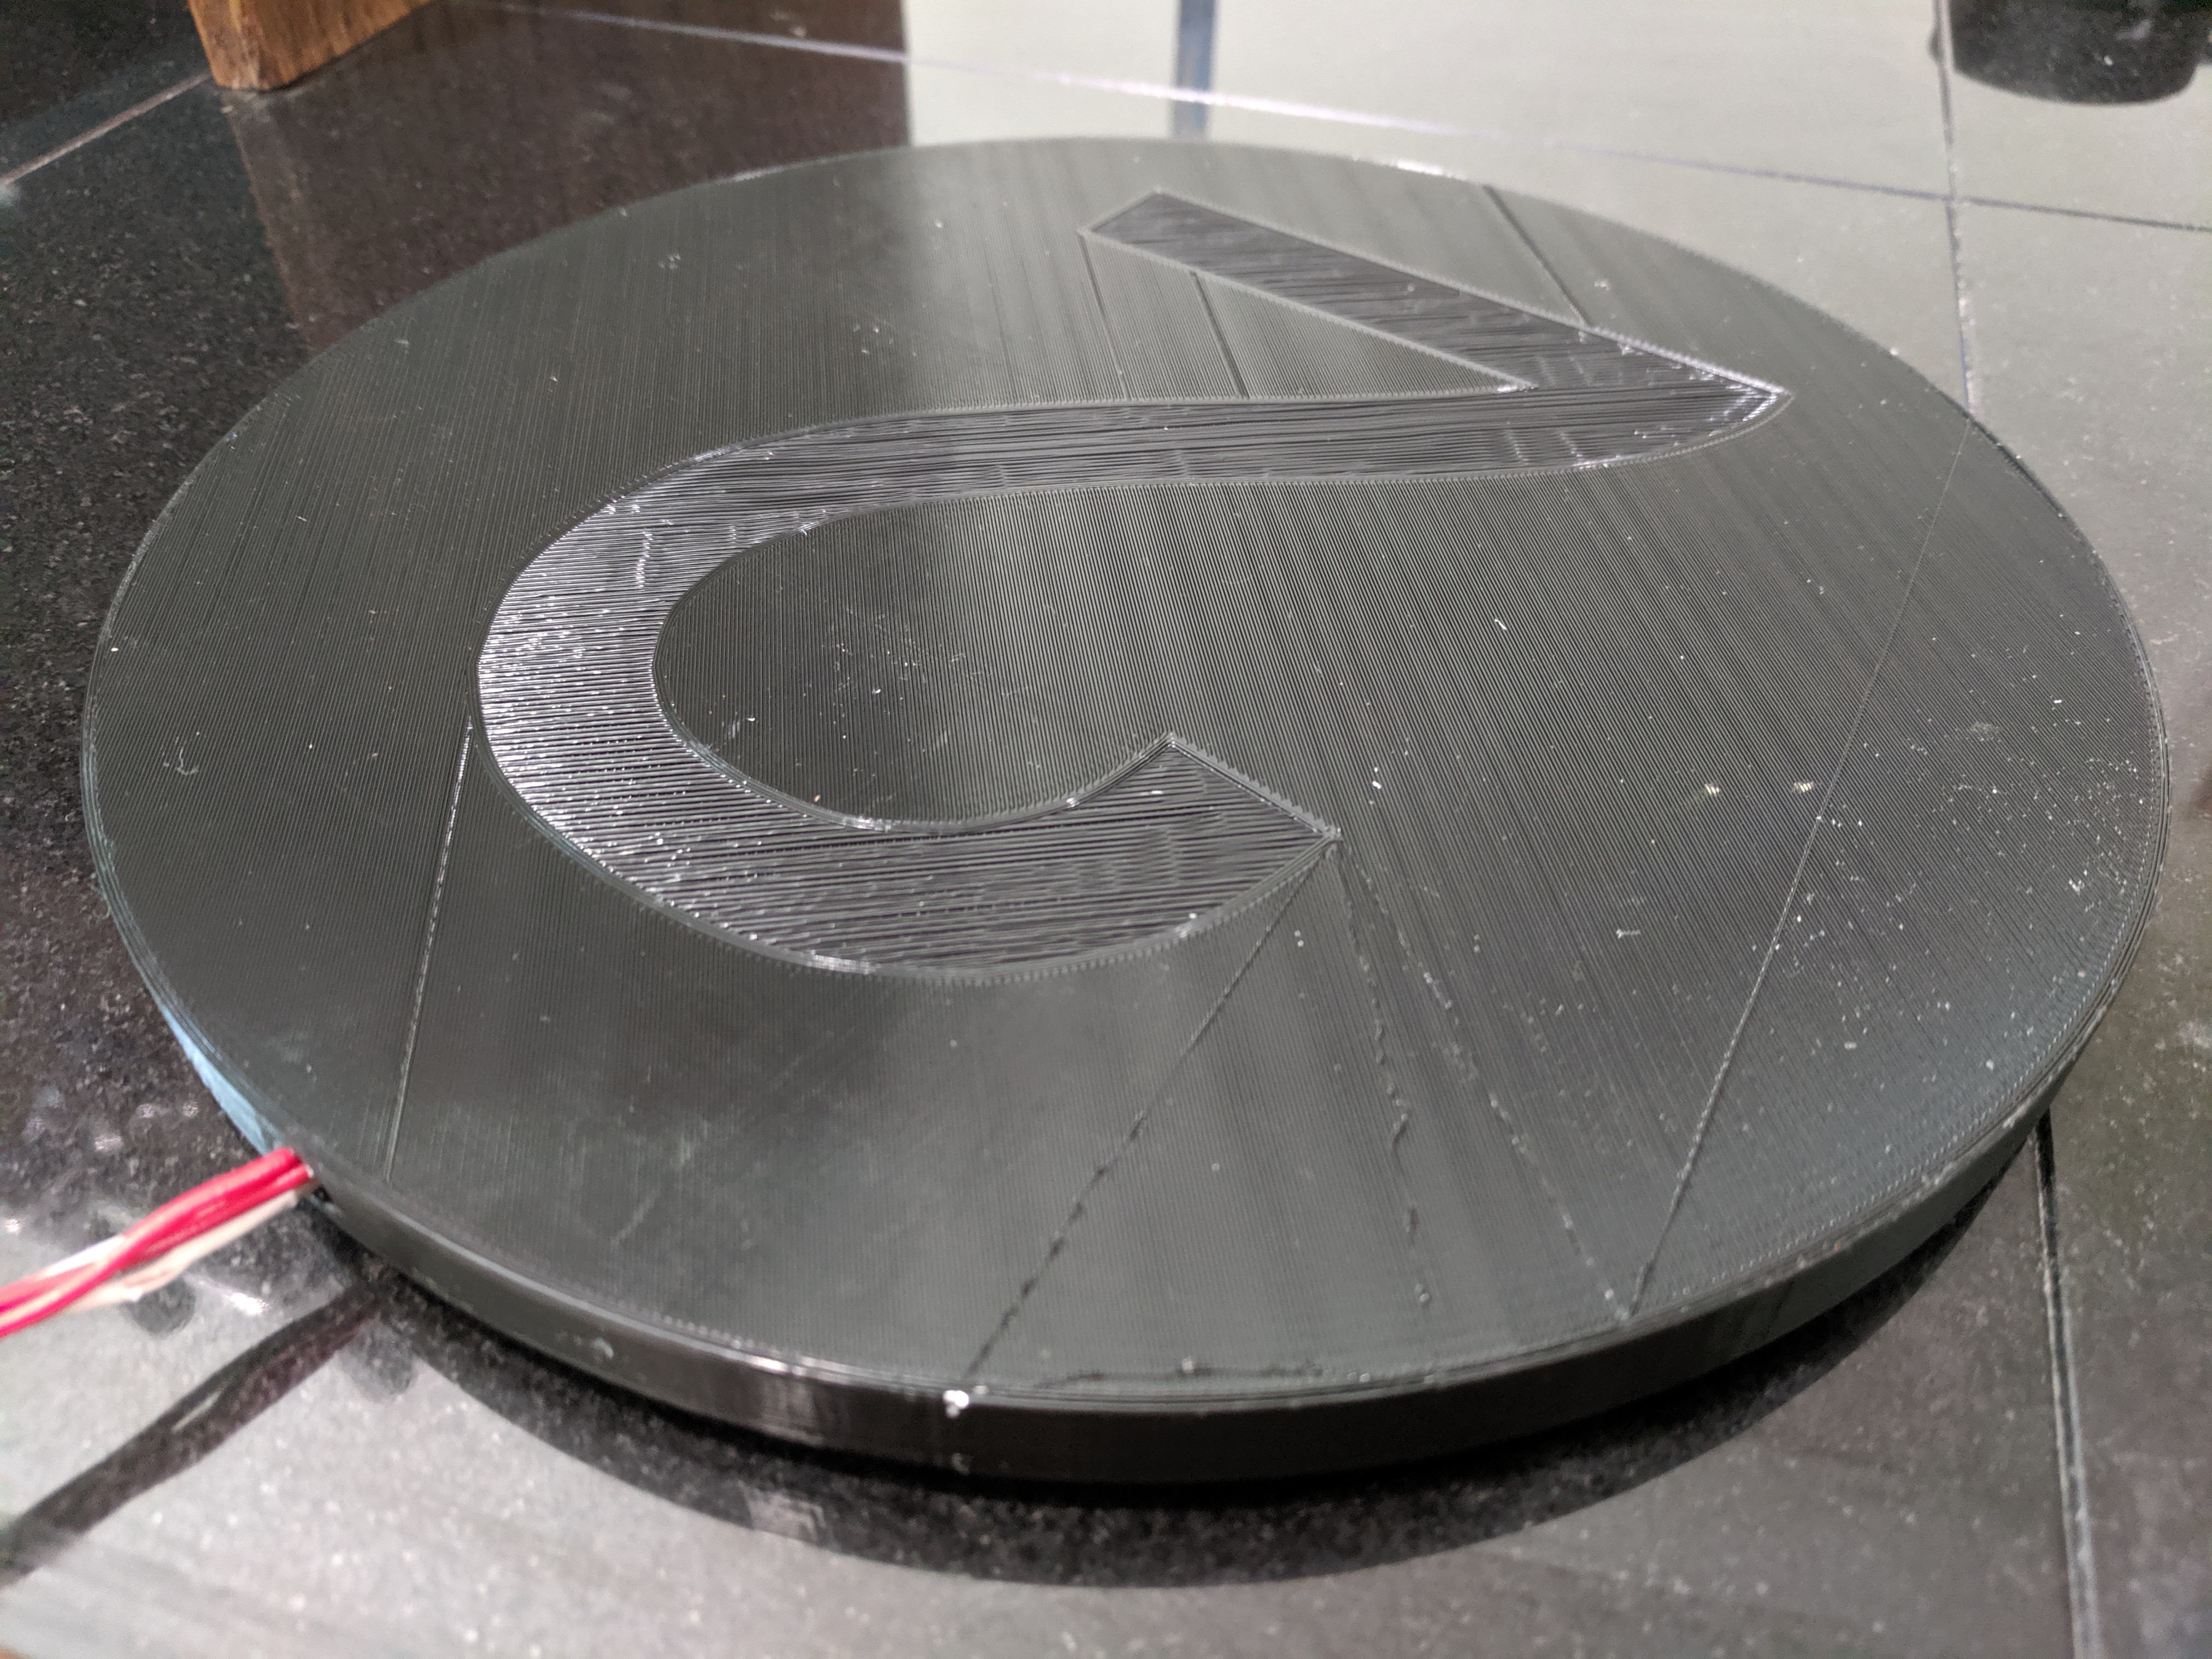
Fast-forward a little bit and I recently got a 3D printer. Designing and building a weight sensor seemed an obvious early project and was easily done.

Next was to solder up a proper board for the entire thing and put it in a printed case.

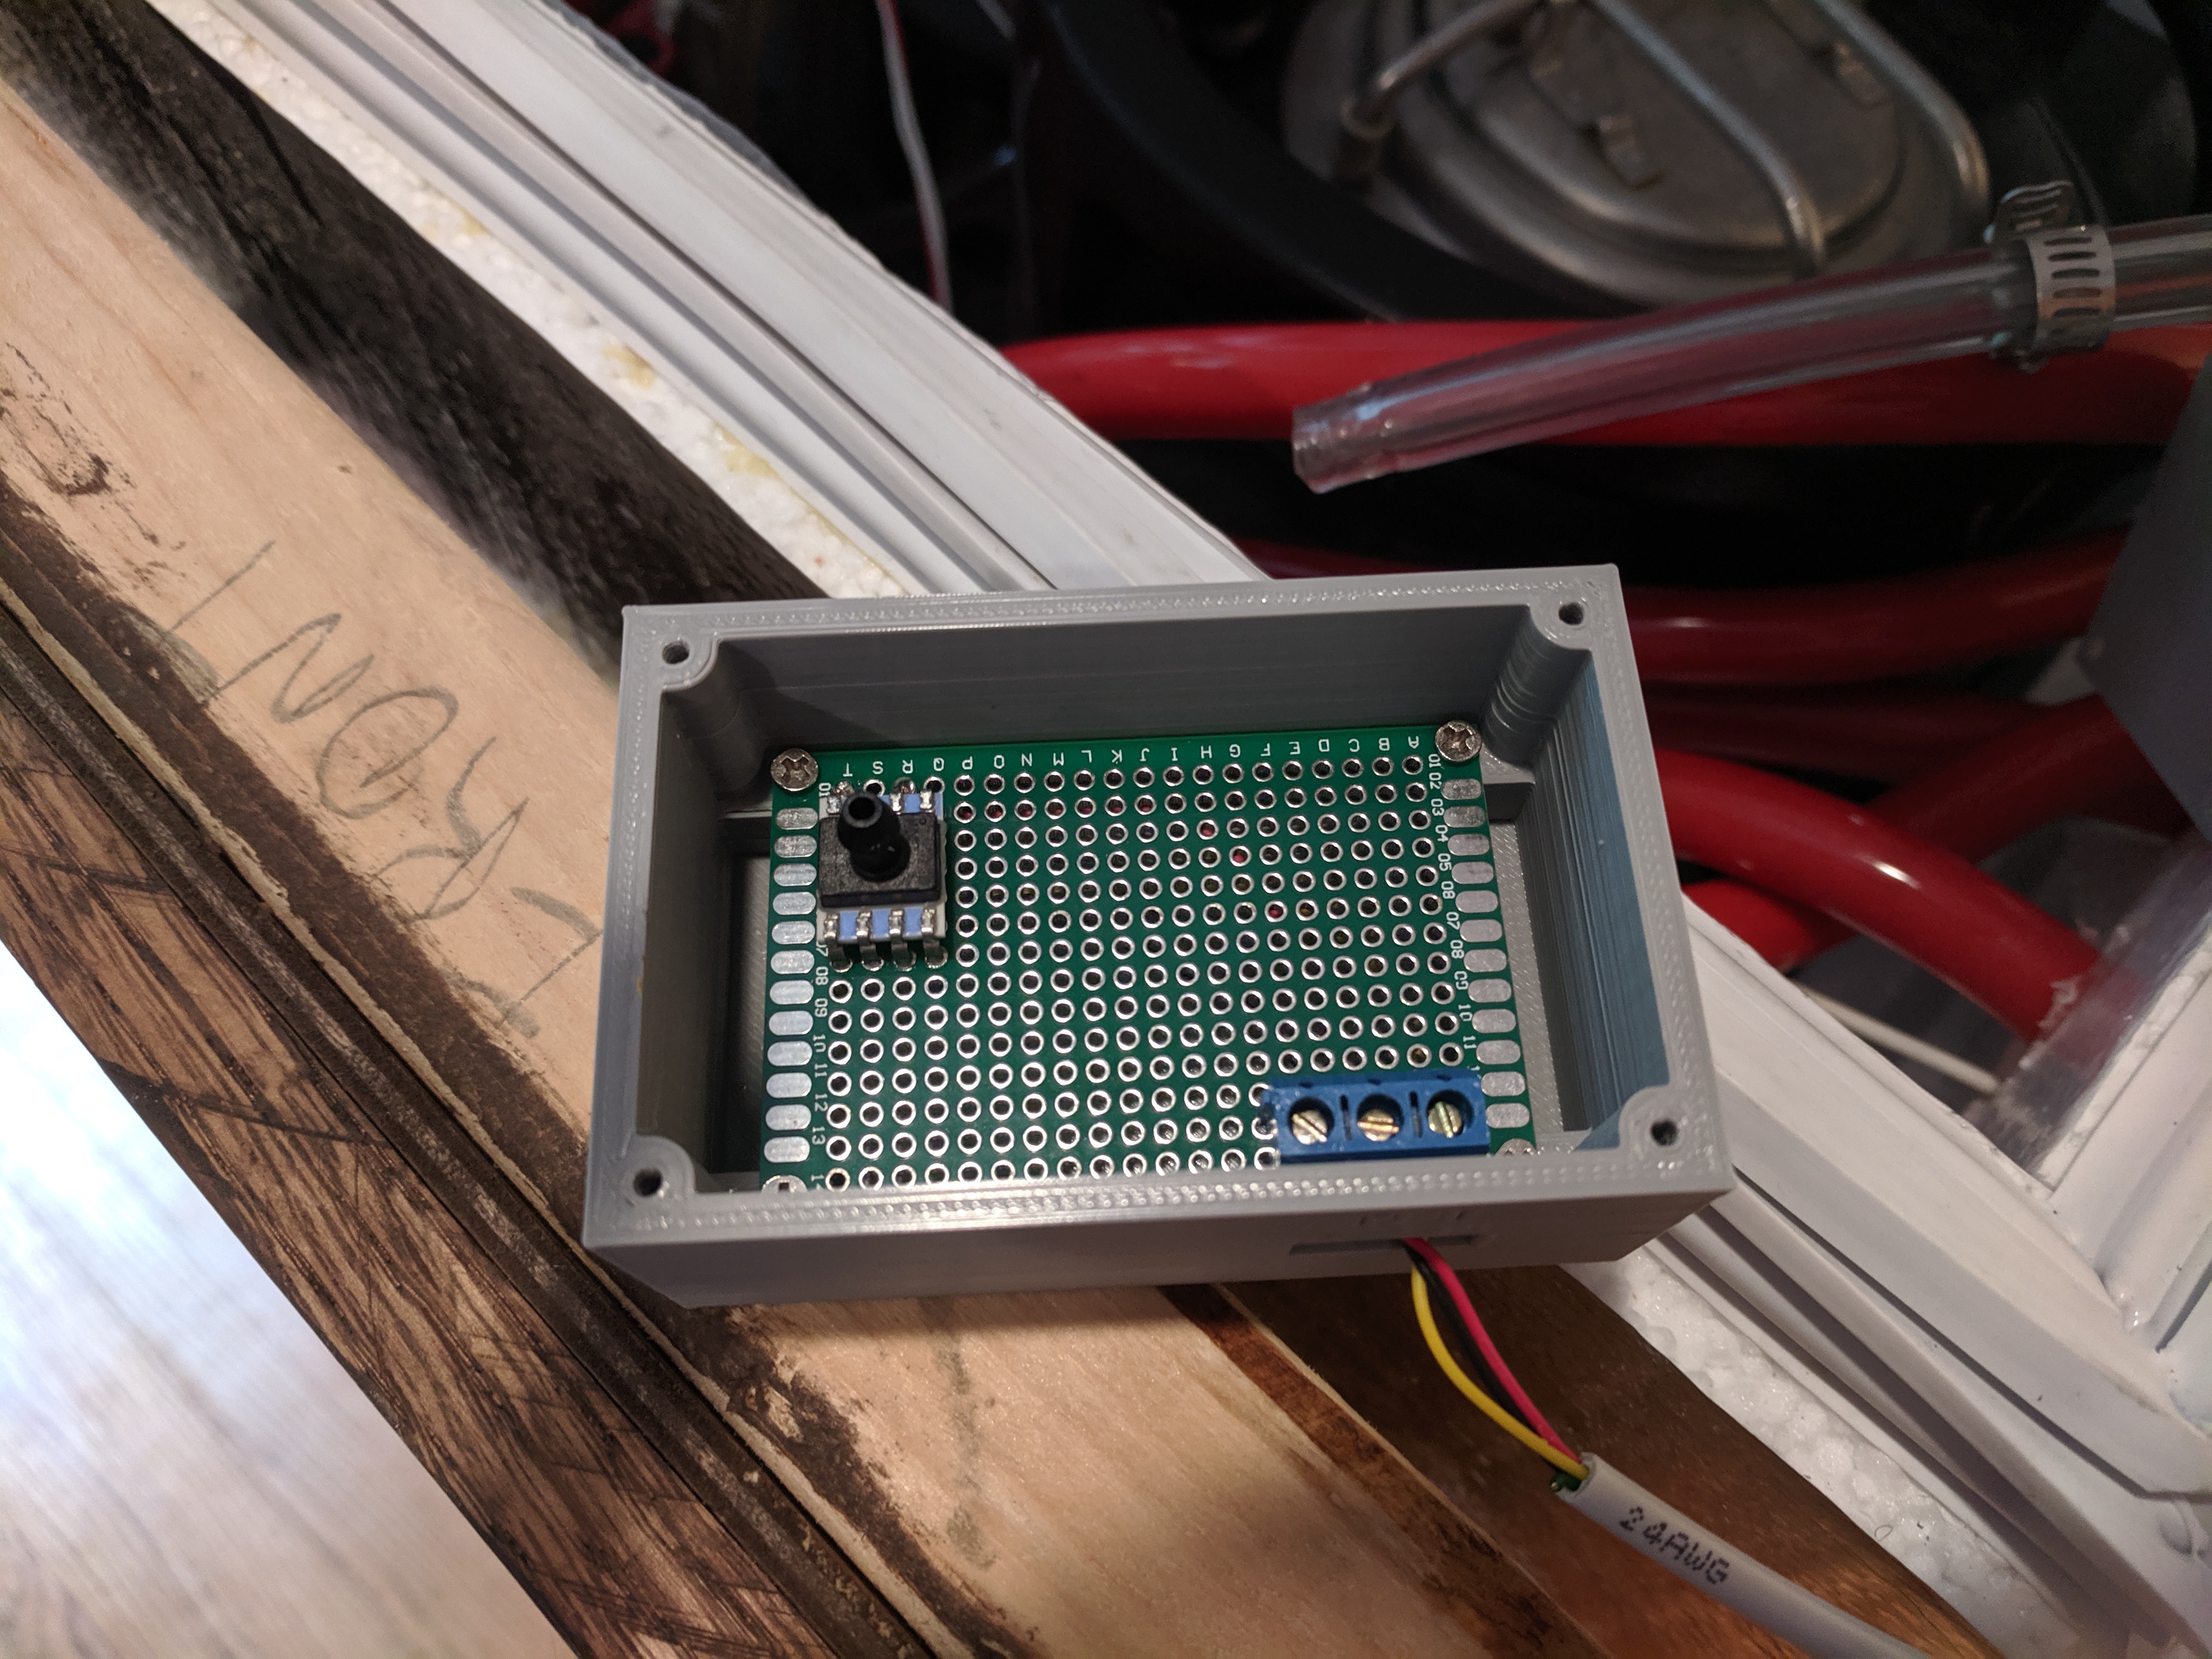
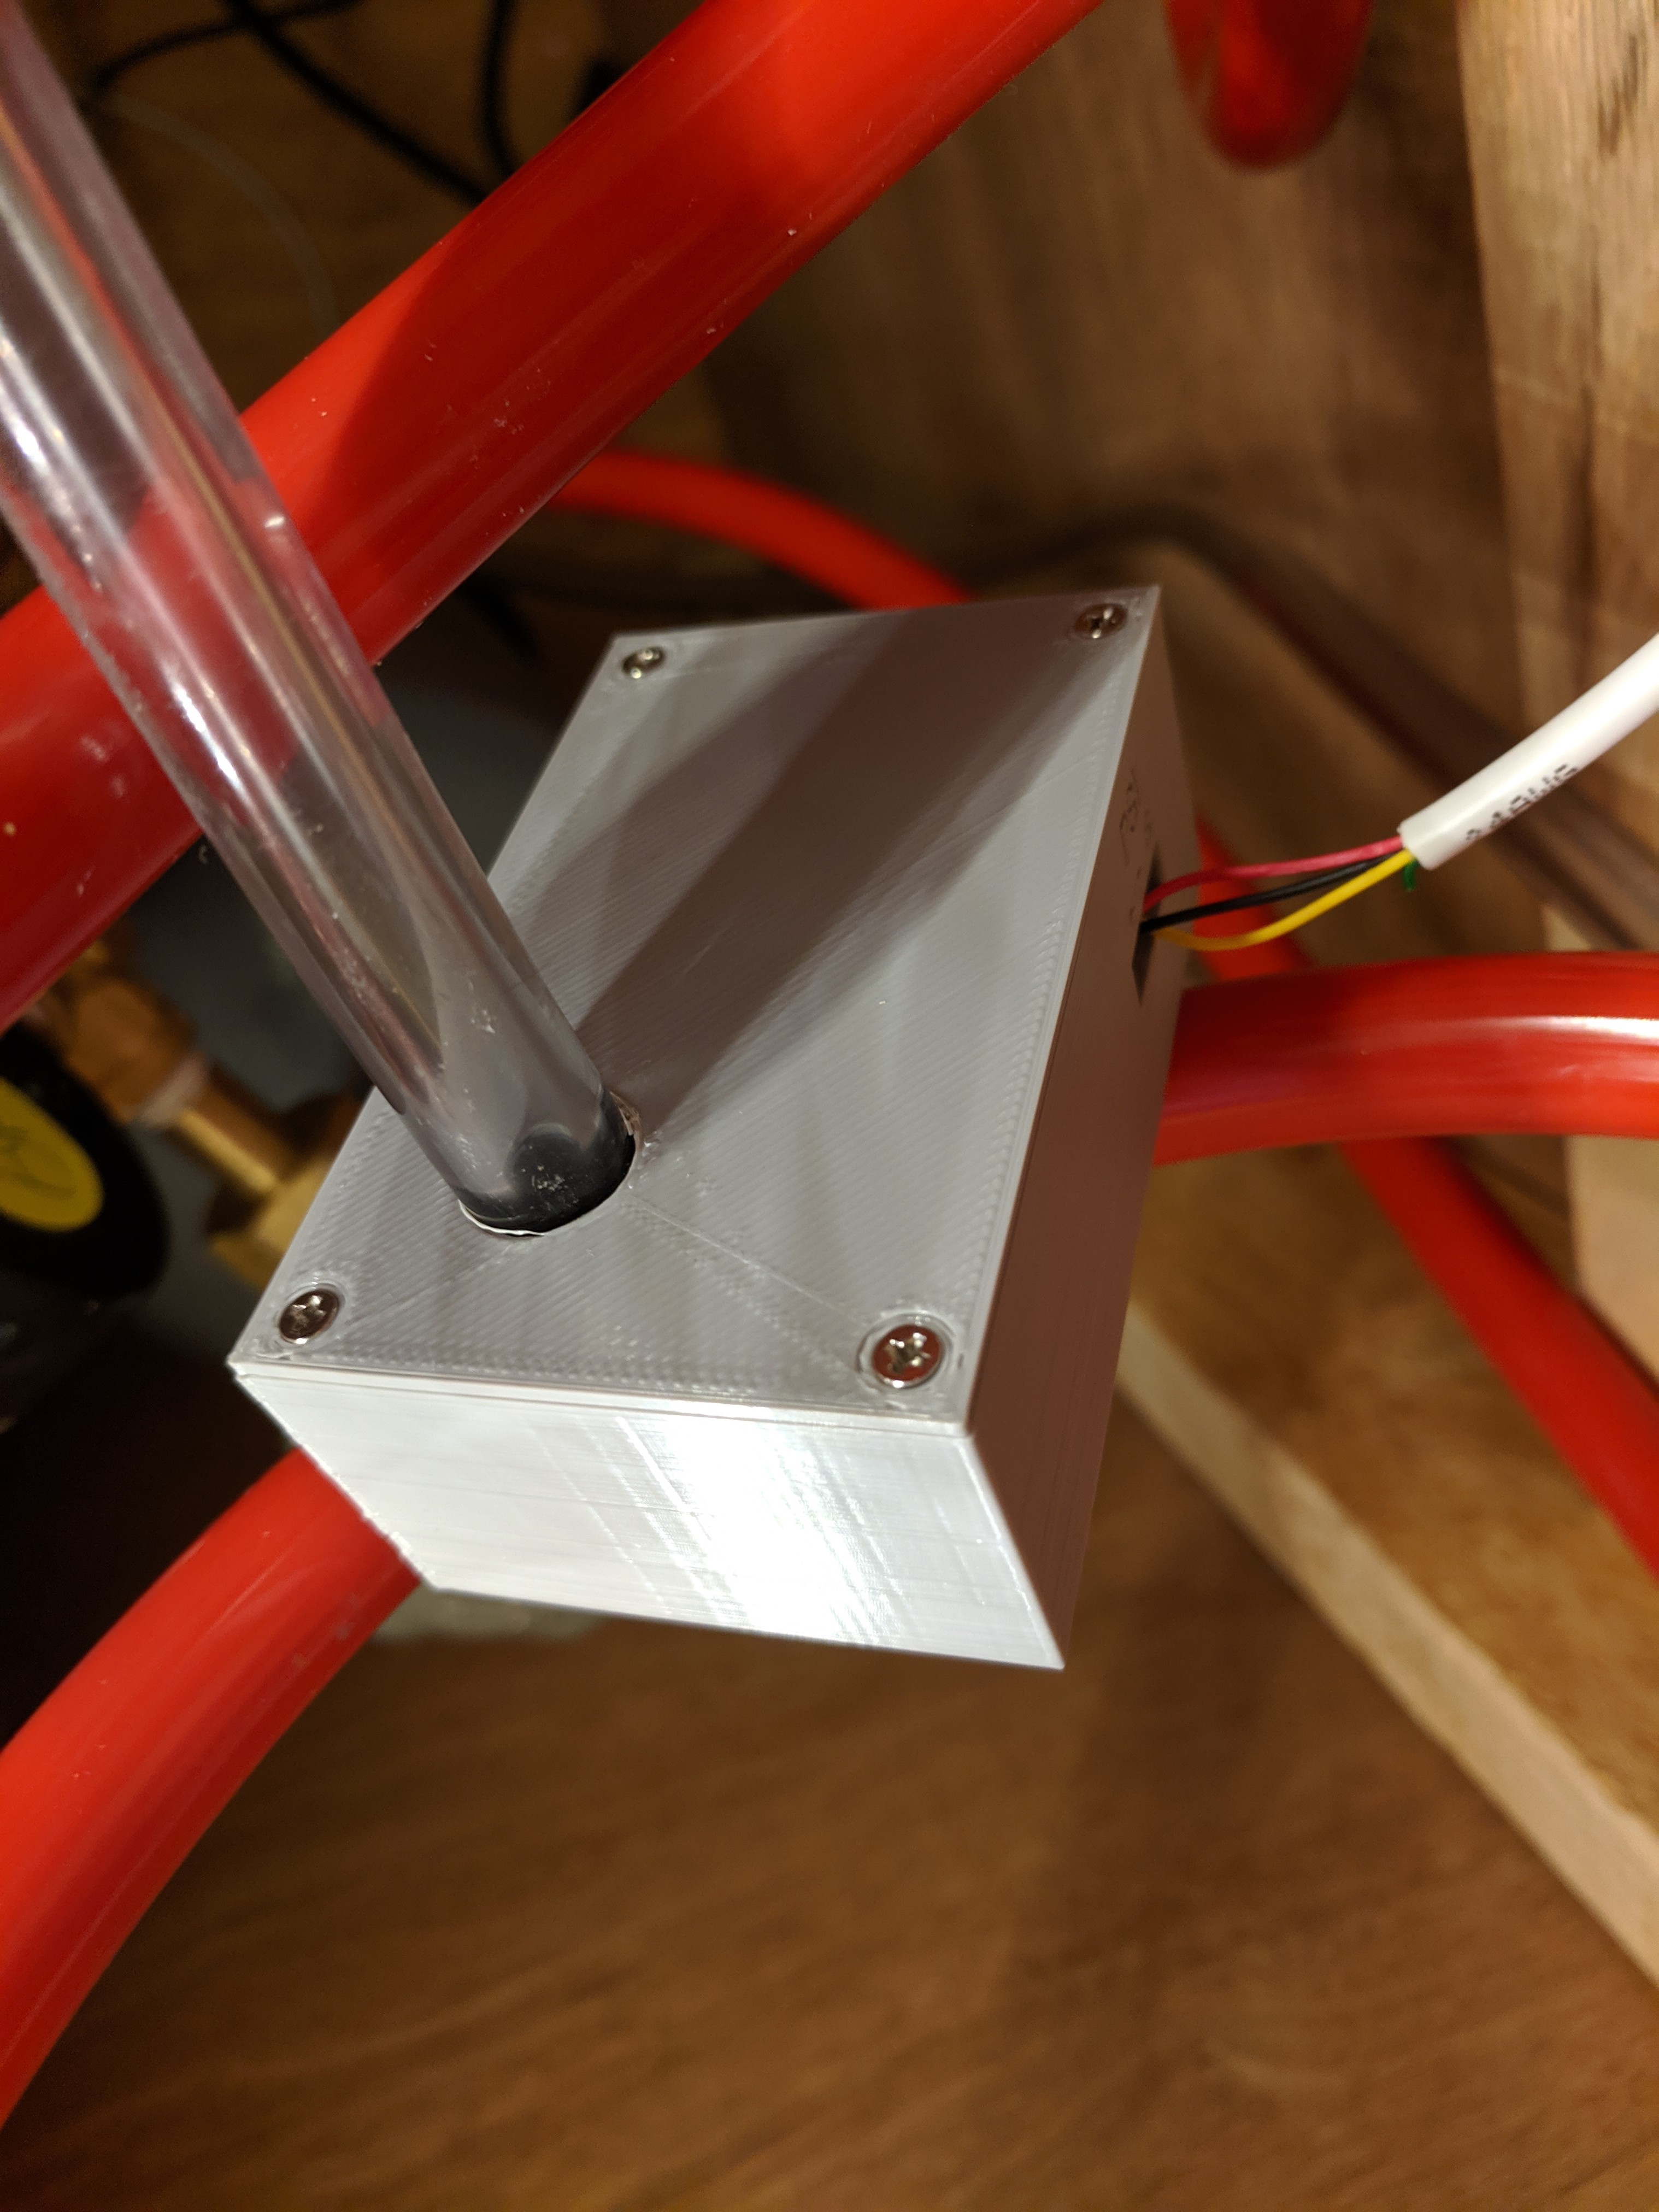
Additionally, I mounted the pressure sensor remotely within the keezer.
The end-result is a great little controller that allows me to both monitor my keezer via a display and control it easily from my phone.
If you look at the 3D files, you’ll notice that I also made a small stand for the weight sensor. This was due to moisture collecting in one corner of my keezer (even with humidity control in place) causing the strain gauges of one sensor to corrode. I made the stand to keep moisture from touching any of the components and I simply mop up the pooled water with a towel whenever I open up the keezer.
Future Additions/Upgrades
Perhaps the most obvious one is to actually control the temperature rather...
Read more »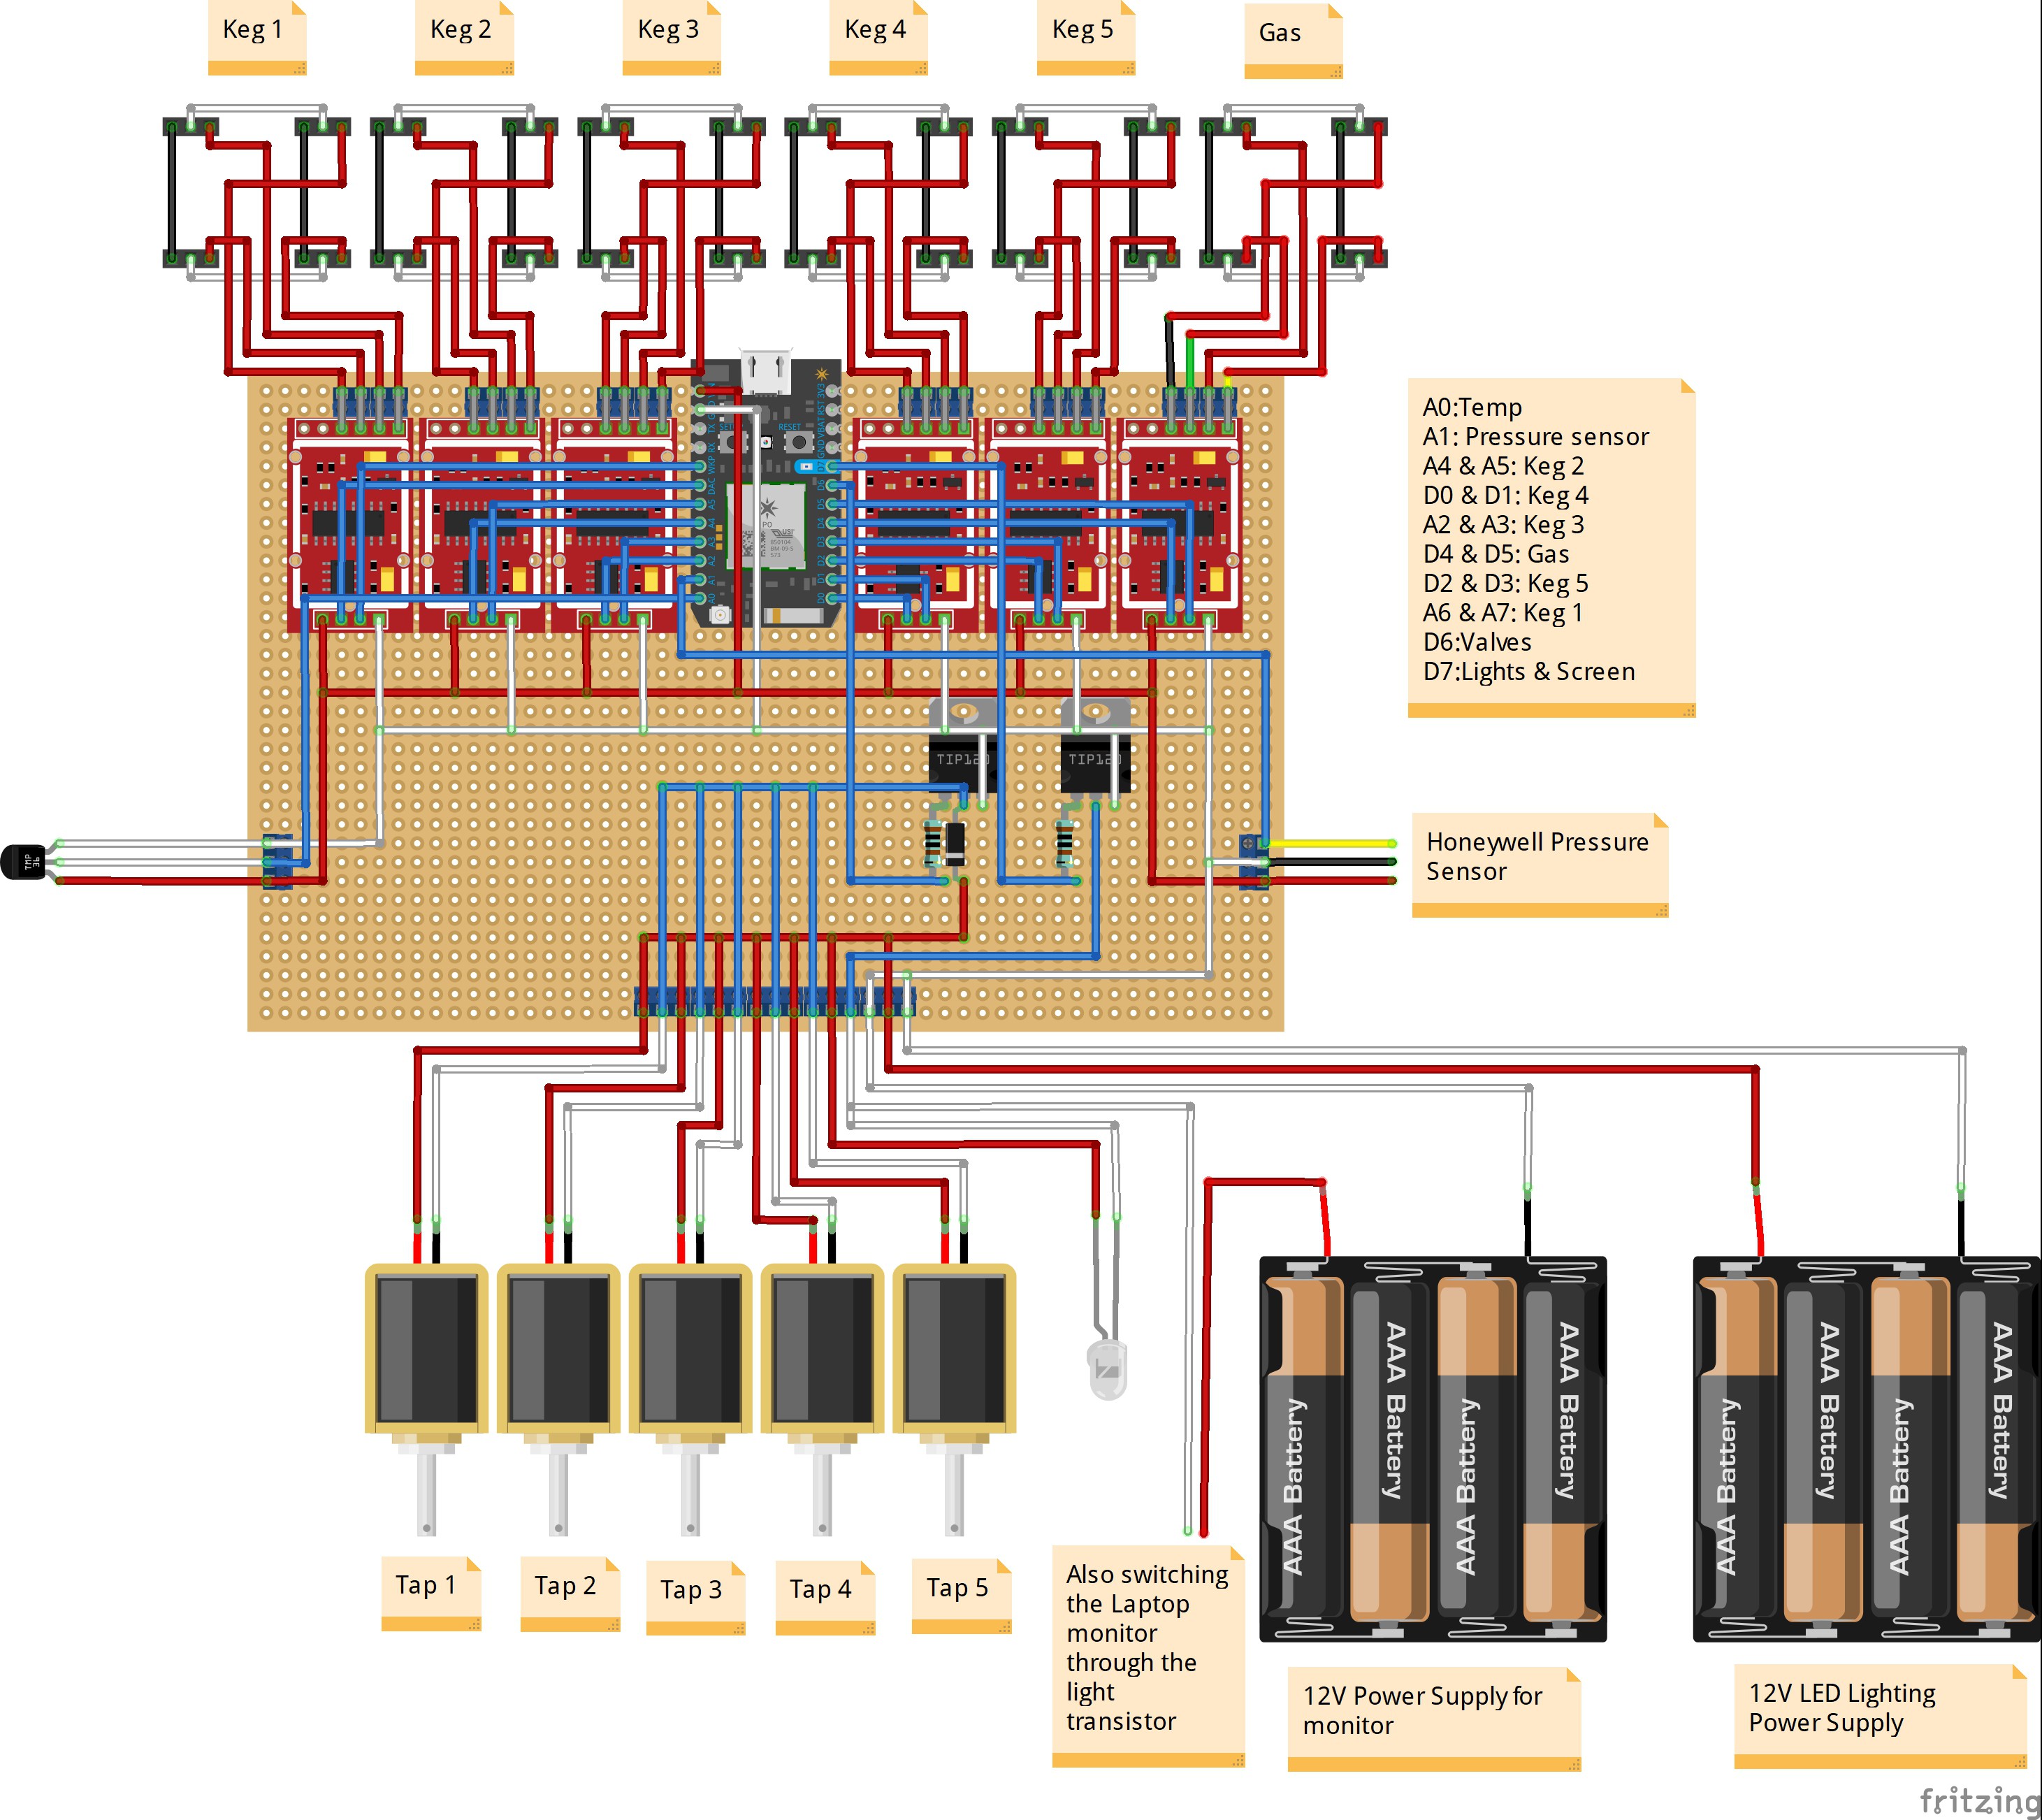


 shlonkin
 sparks.ron
 Minimum Effective Dose
 Blecky
Love this build! I'm working on a keezer build myself and re-using your 3D-printed scale in an attempt to measure specific gravity. Thanks for putting the design files up