 ServError
Step back in time to April 2019. Oculus had revealed two new headsets soon to reach consumers; The PC powered Rift S and the standalone Quest.
Unlike previous products, both flaunted the ability to track reliably without the use of external markers or sensors. The Rift S, while a nice upgrade from the original, did not garner the attention of the Quest with its promise of a healthy game library without a tether or computer.
I couldn't bring myself to abandon my game library and simulators though, and decided that the only option was clearly to build my own untethered experience around the yet-to-be-released Rift S.
Having seen some early attempts at consumer VR backpacks from the likes of MSI, Zotac, and HP, I set out to build my own upgradeable backpack computer that left me in control of components, batteries, etc.
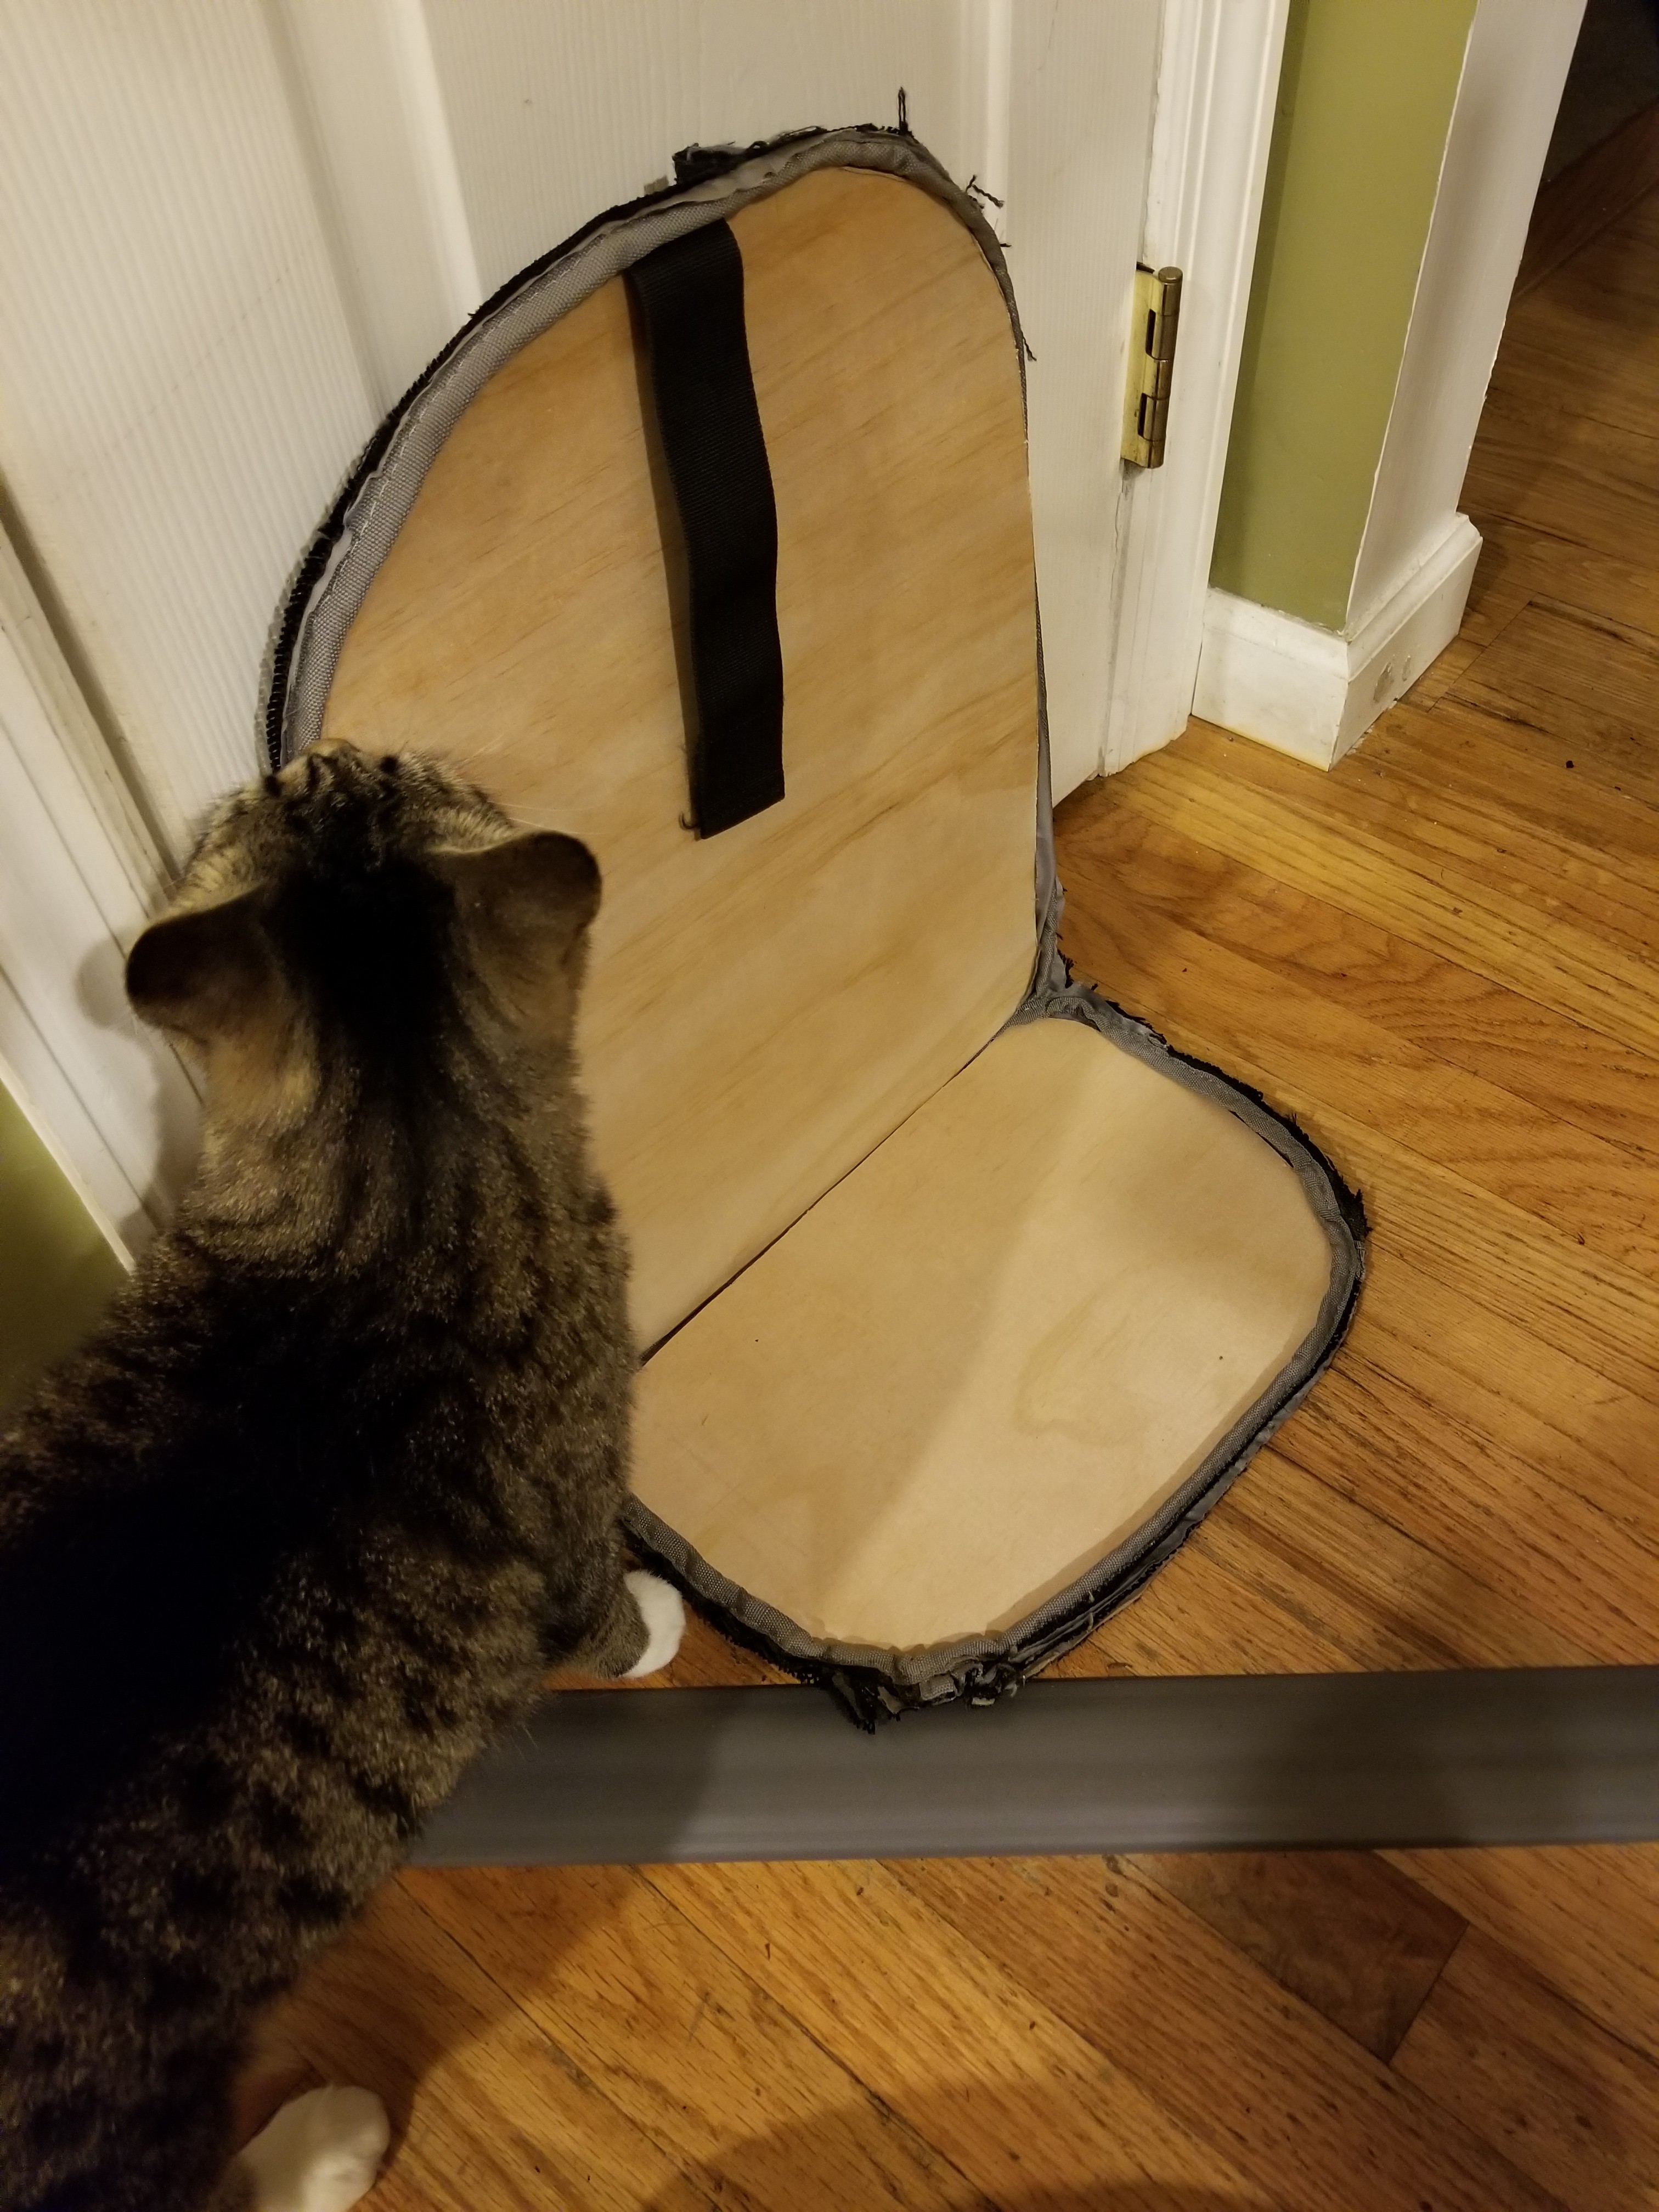
First came the actual backpack straps and padding. I grabbed a well padded but damaged backpack and got to work cutting most of it away from the only portions I cared for.


Next, the internal padding of the back and bottom section shown served as a good template for some plywood cuts which would serve as my frame.

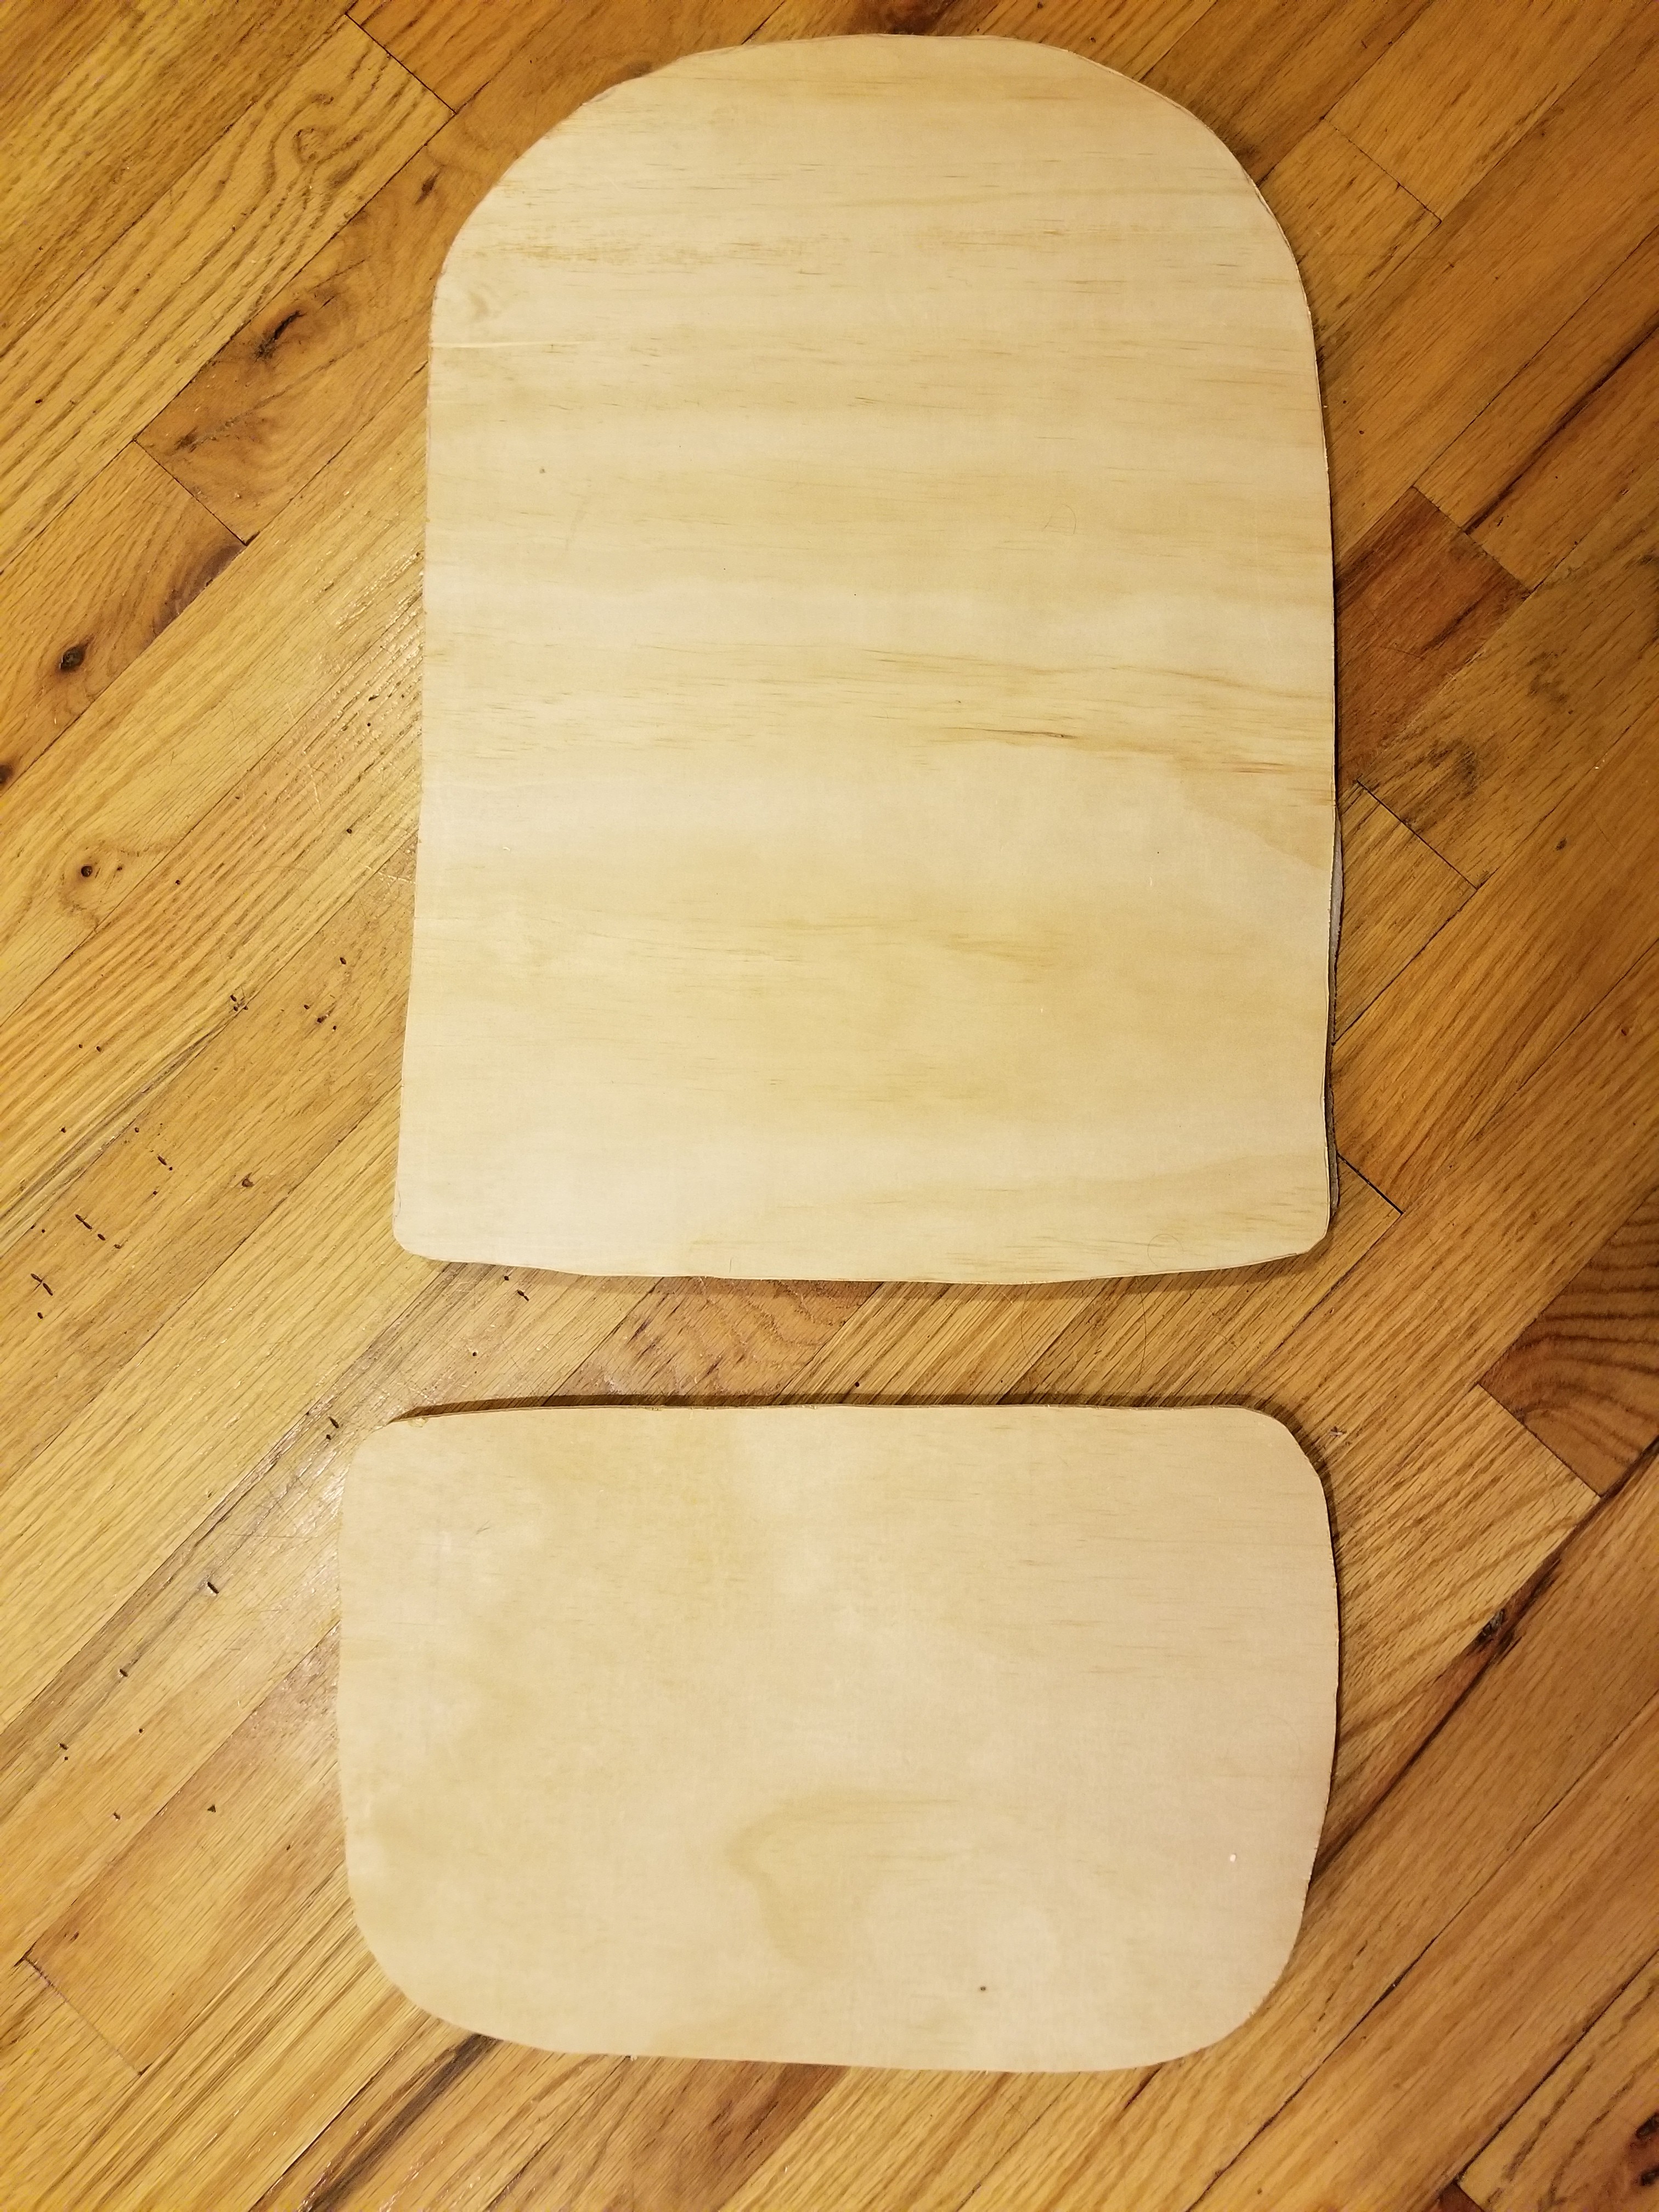
Not the prettiest, but definitely functional for my needs. I test fit the plywood into the backpack and found it snug enough to stay together on its own. My quality inspector also came by to verify my work so far.
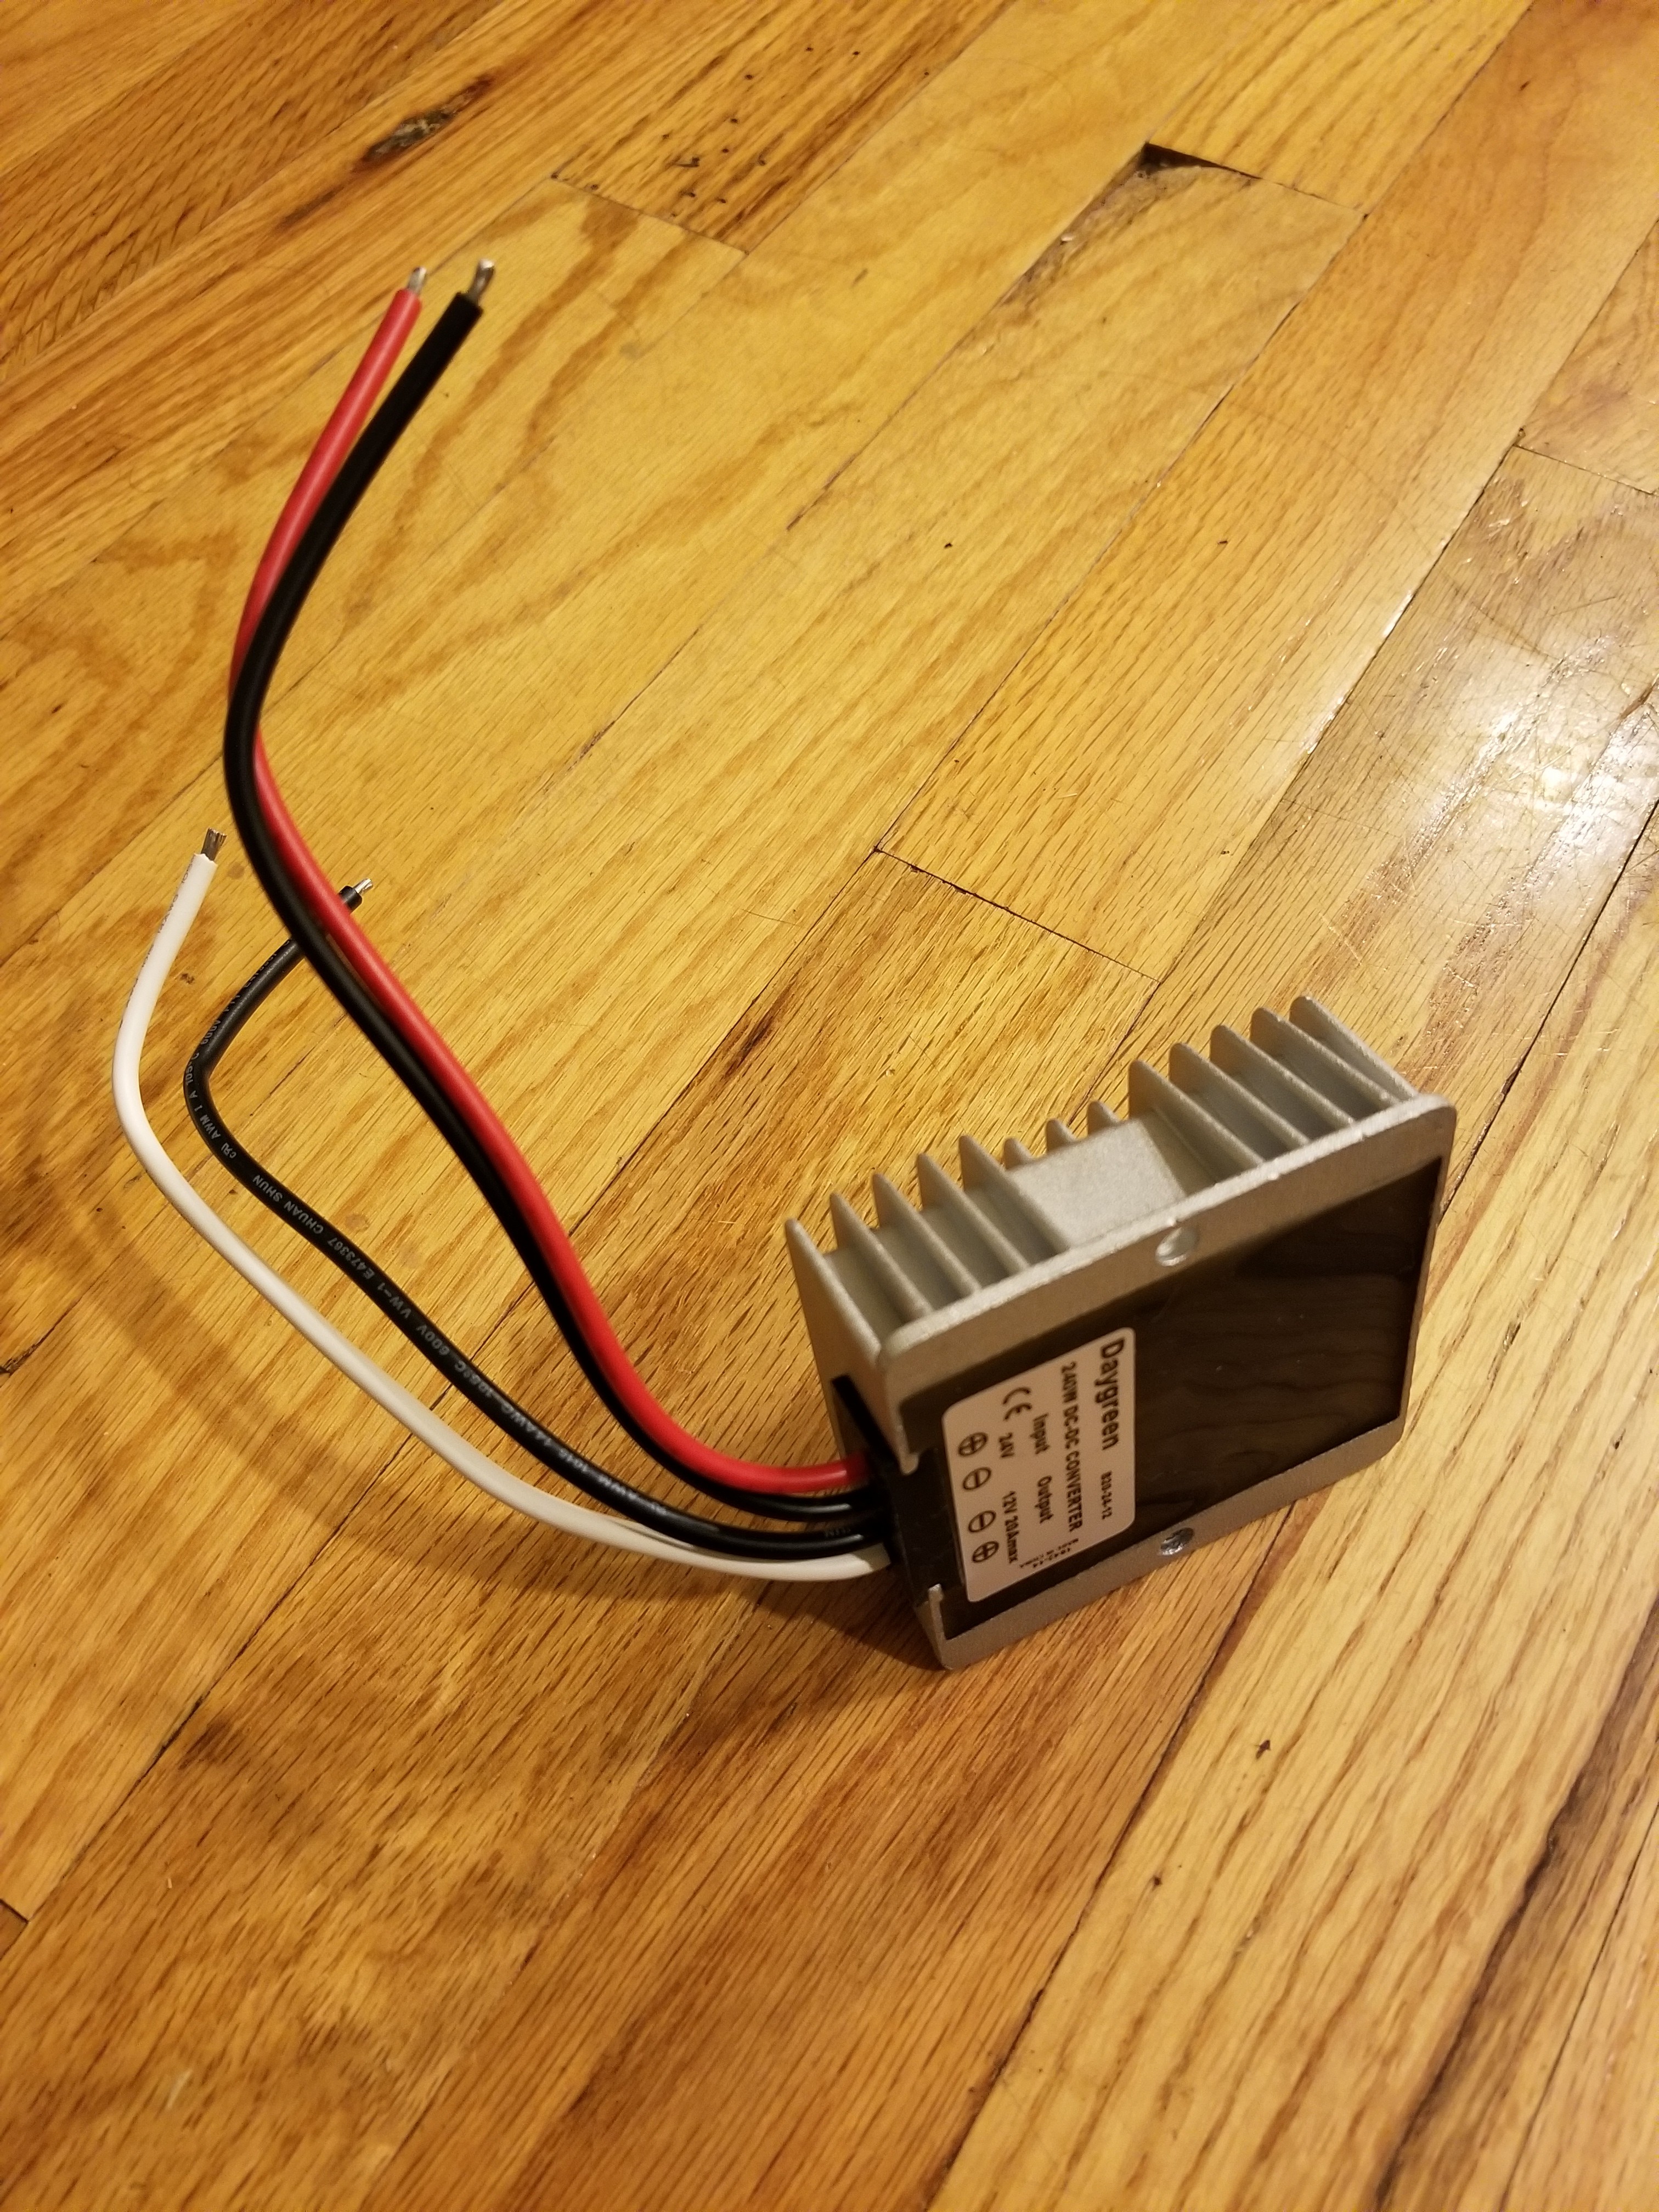
Now it was time to pick out some parts. I originally thought to use a 12v buck regulator which would feed off the battery pack and into the GPU and possibly the main system. I ordered a 240w unit and set it aside.
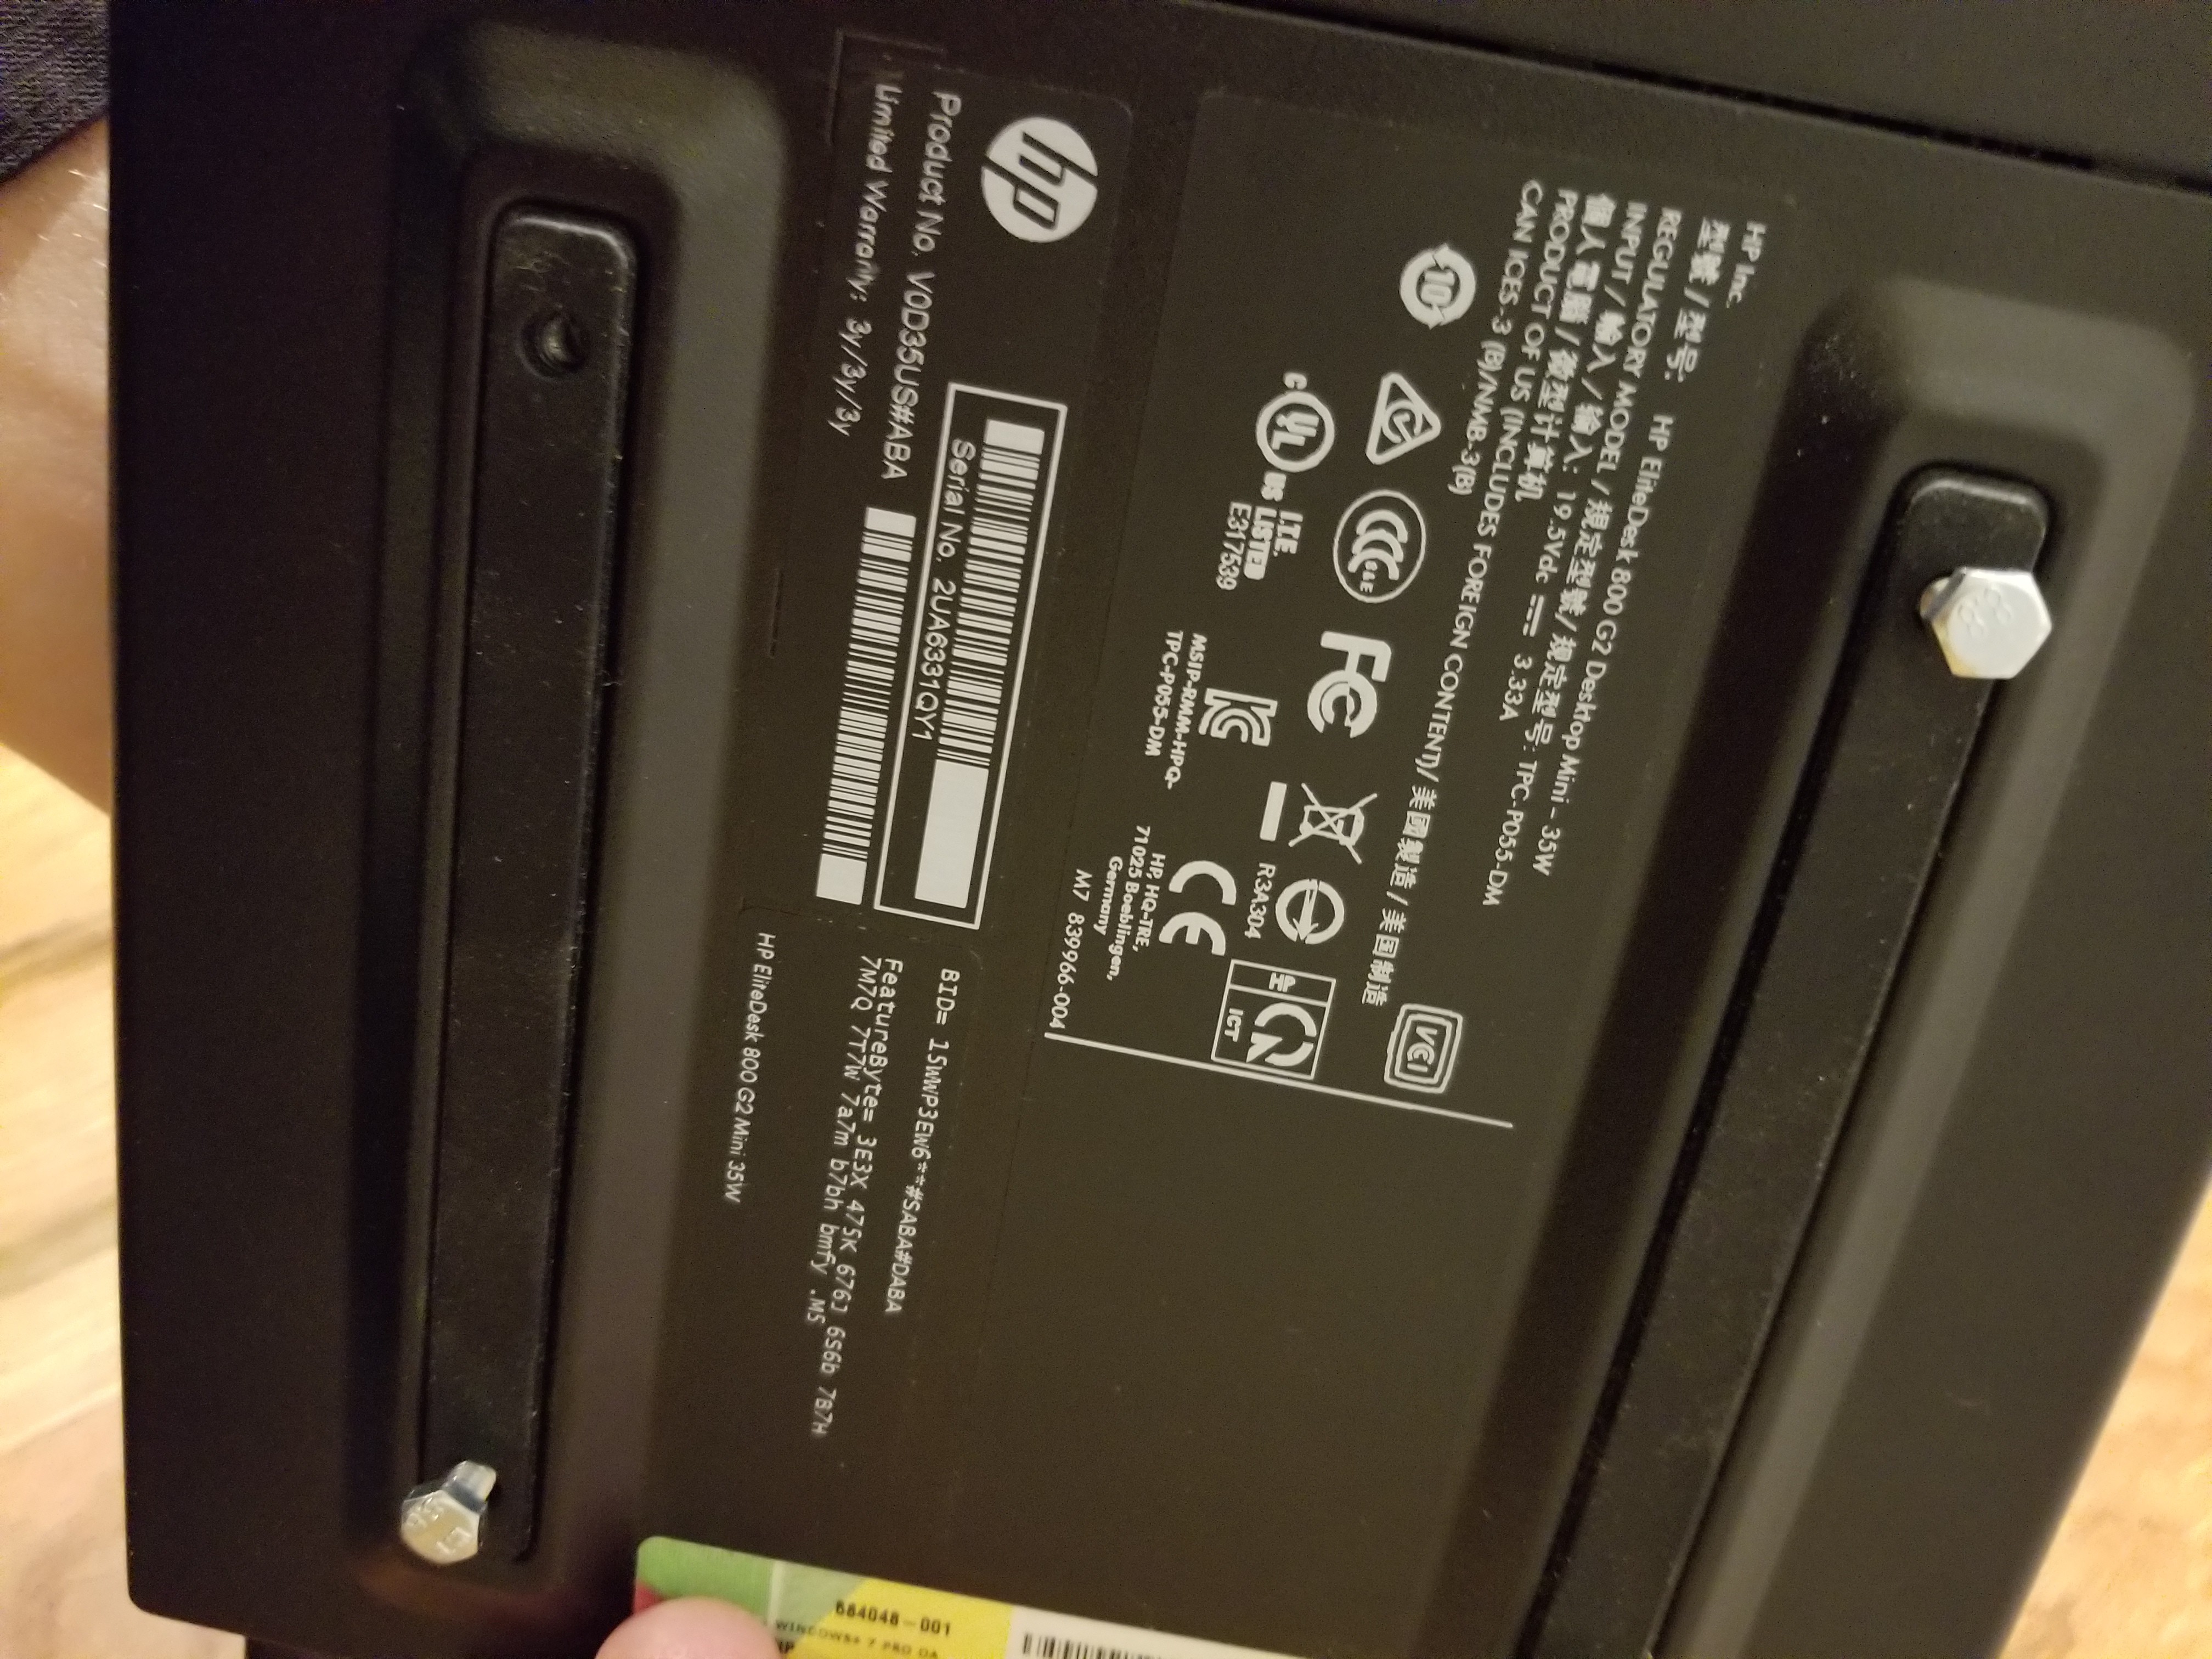
Looking at what I already had at my disposal, I pulled an HP micro computer with a 35 watt i5-6600t processor. After adding some more ram, an SSD, and a WLAN card with matching antennas, it looked like I had a pretty good candidate.
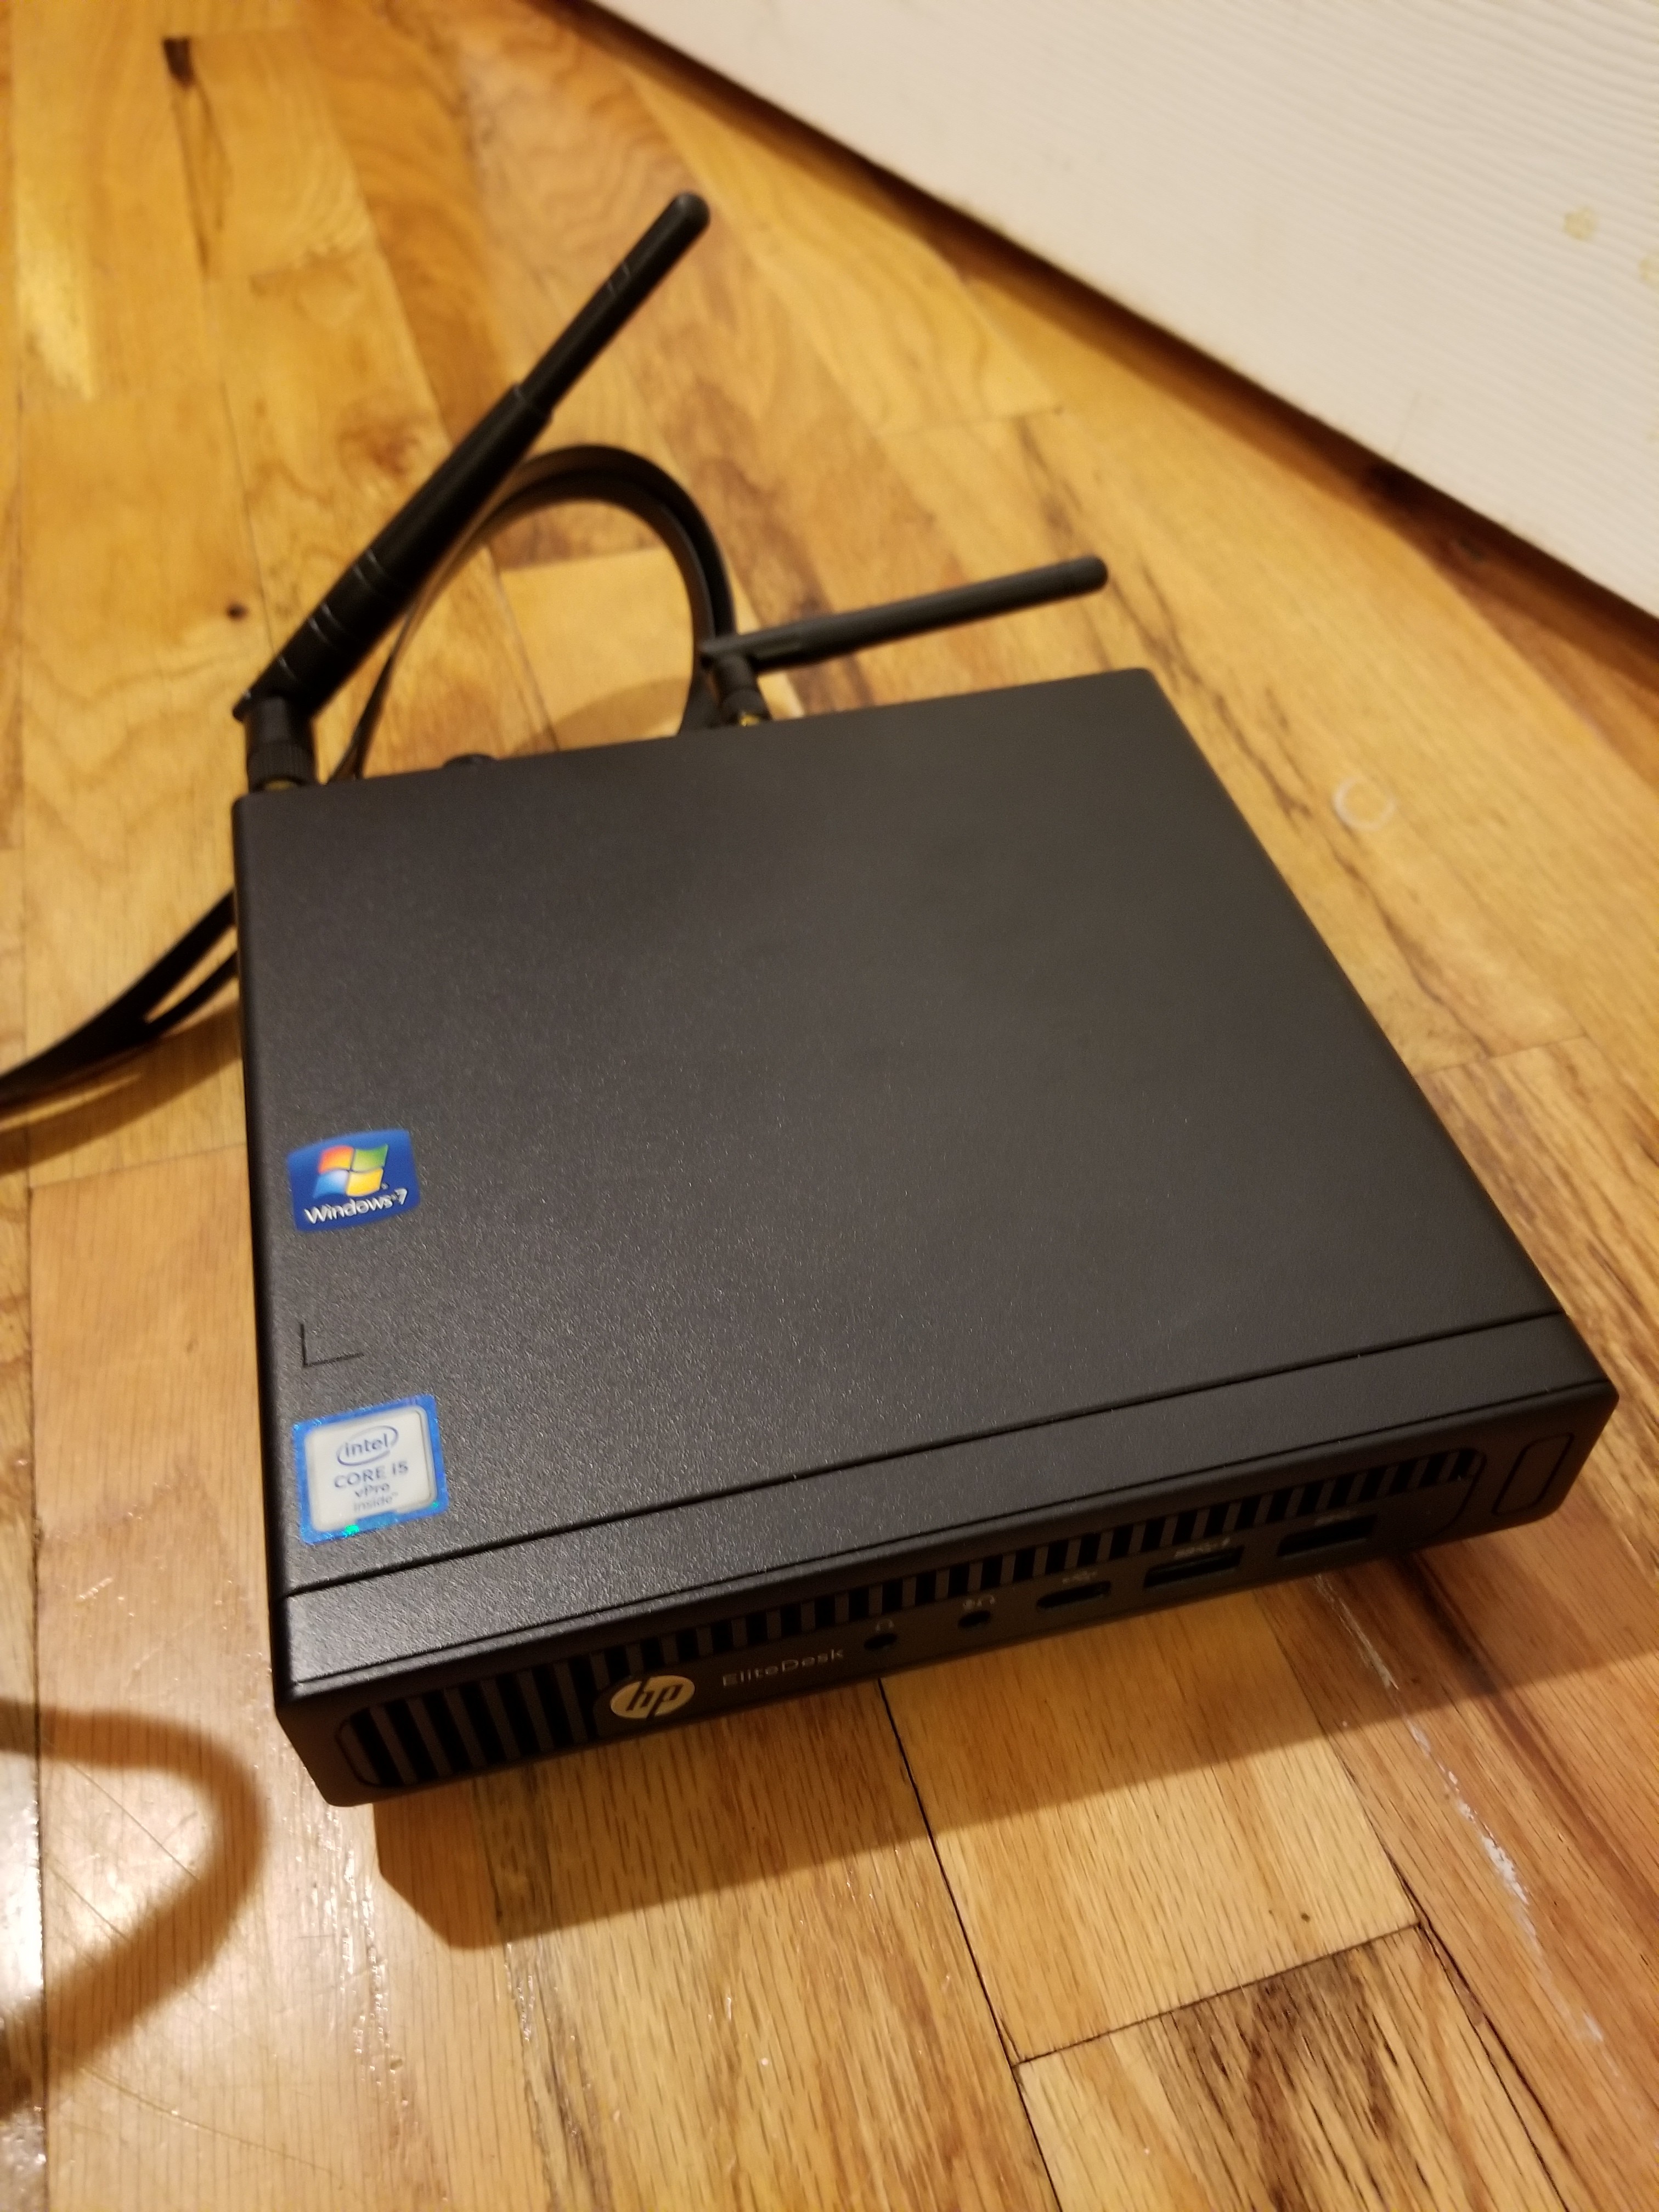
Four mounting holes on the bottom of this unit were going to make this a very easy build....
Now for the graphics card. A used GTX 1060 with a 120 watt power draw was an easy pick considering their low price (~$100 used). How do you get a full sized GPU into a micro PC you ask? Expensive and overspecialized adapters of course!
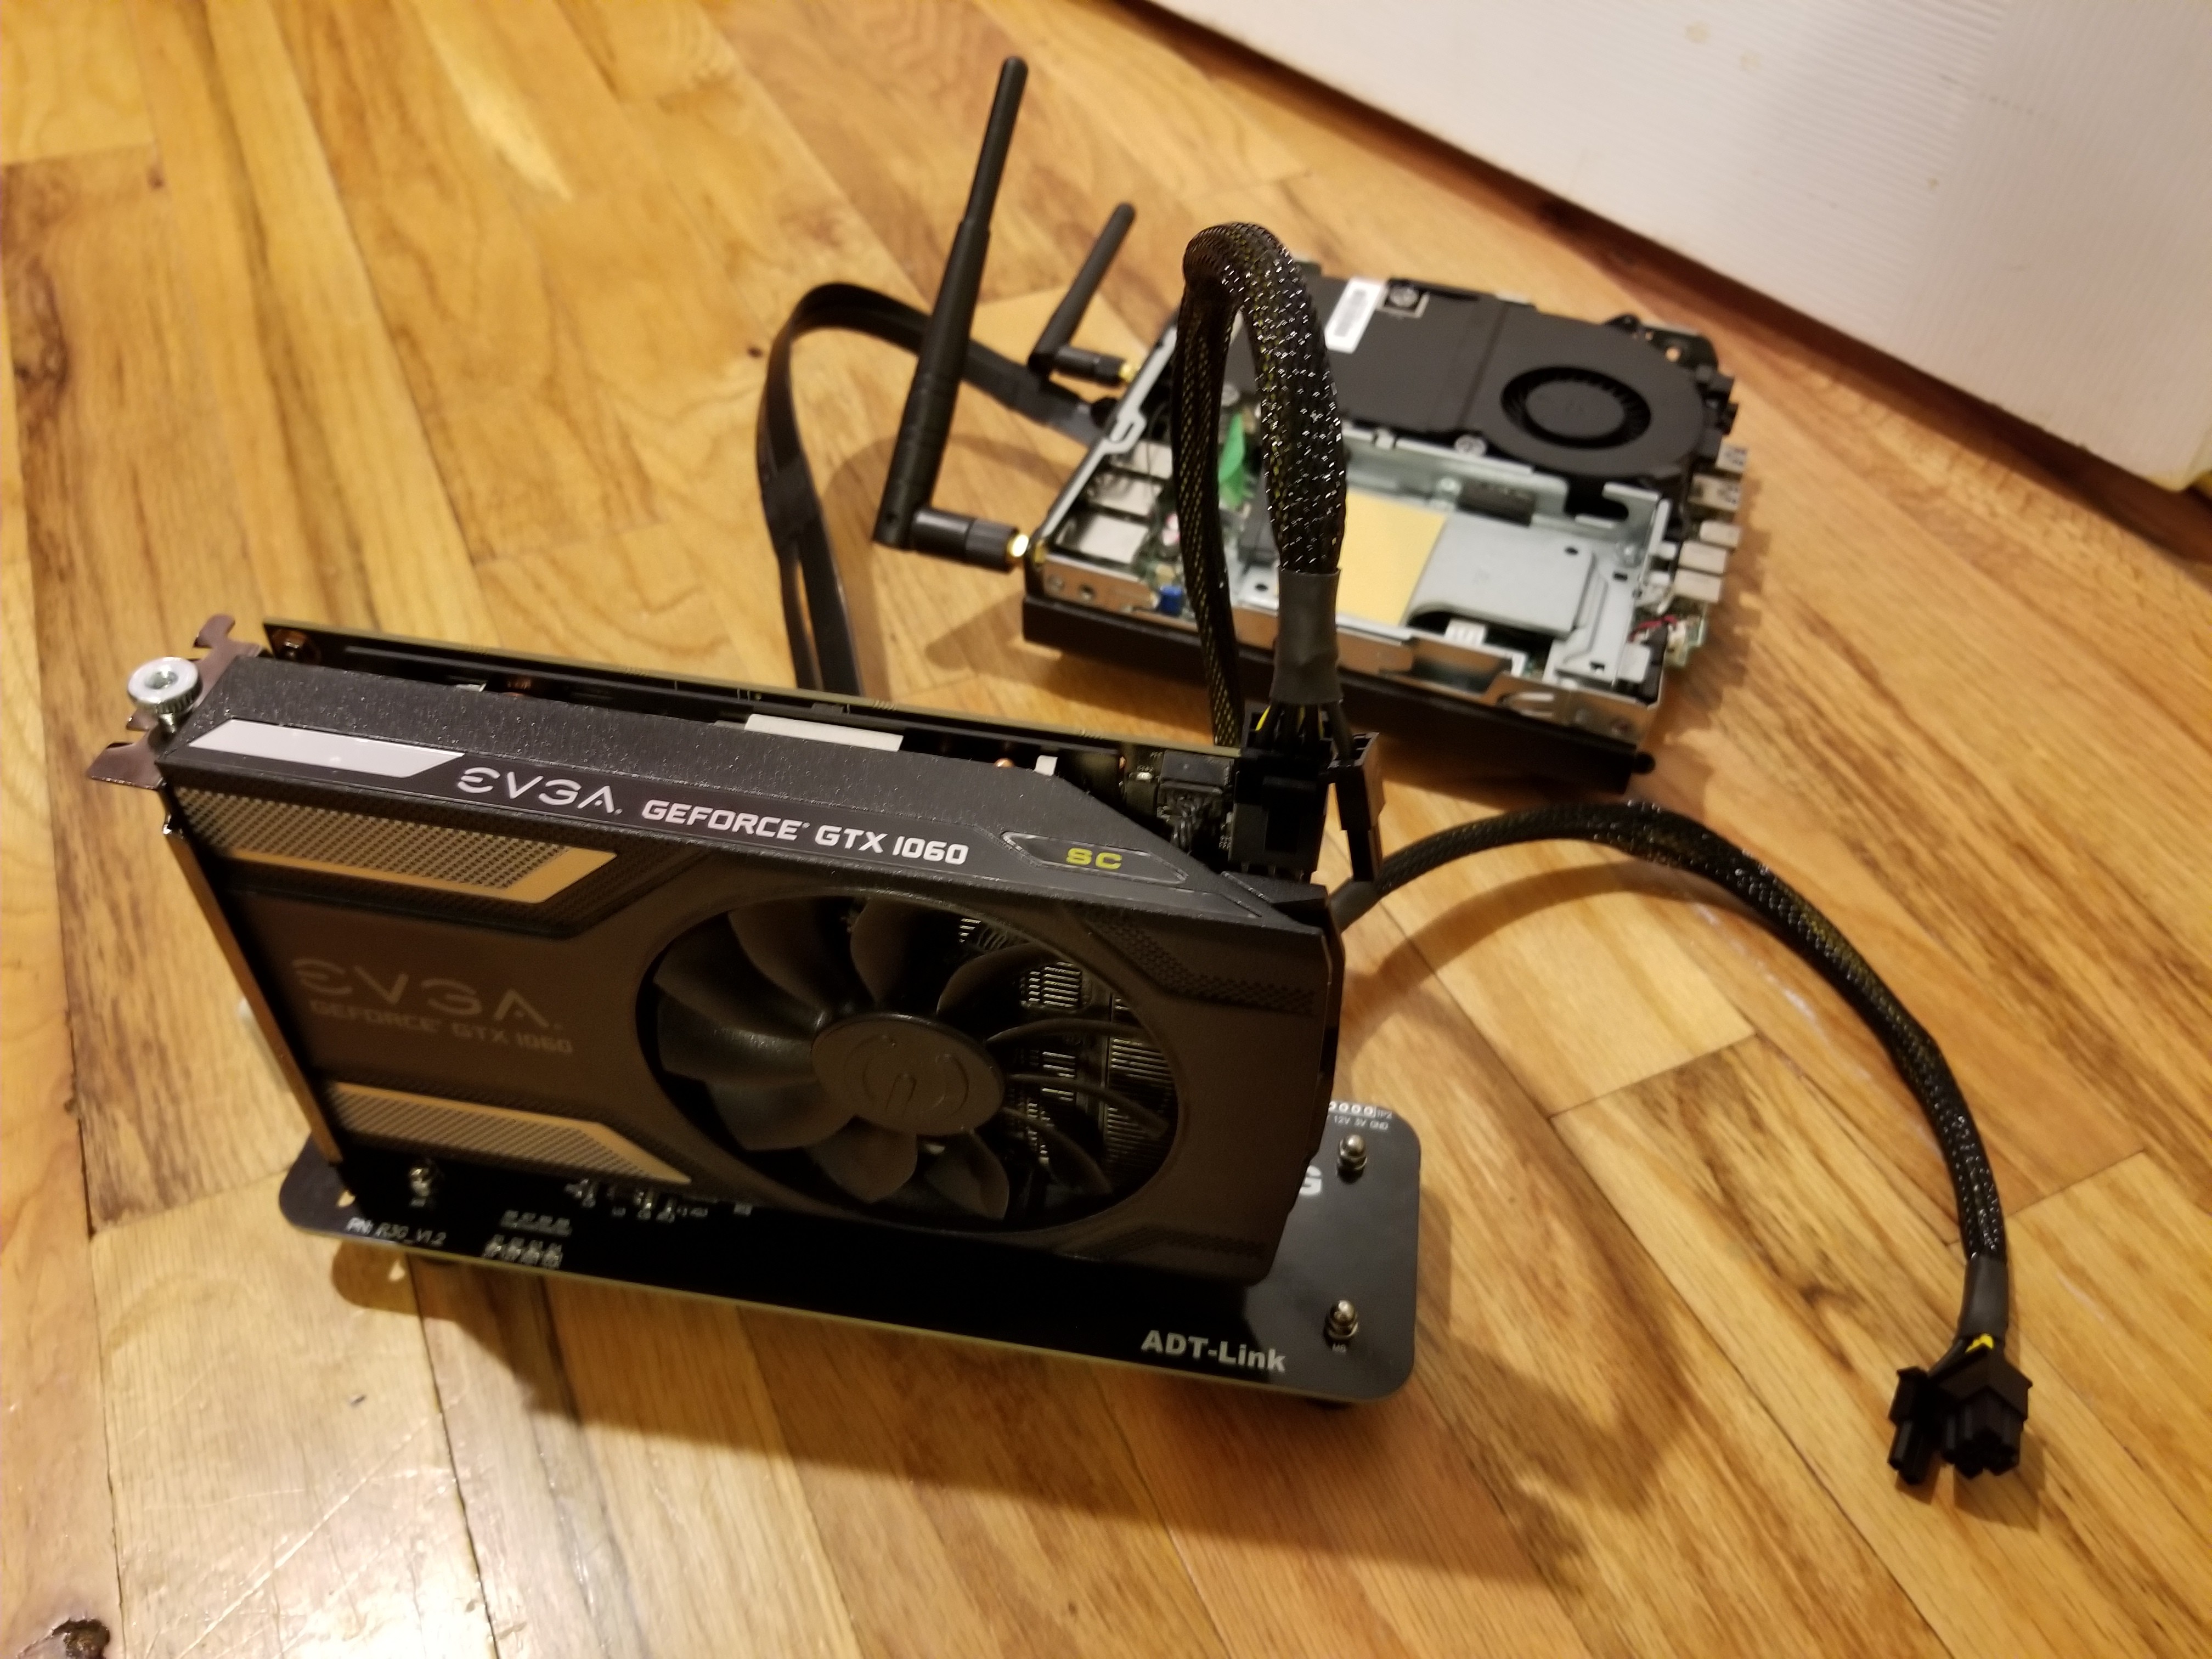
ADT-Link makes various nice products, one of which convert from internal M.2 pcie ports to full size 16x ports and is especially suited for graphics cards. Removing an extra, optional serial port on the micro PC (a serial port, really HP?) left me with just enough room to route the cabling to the adapter board.
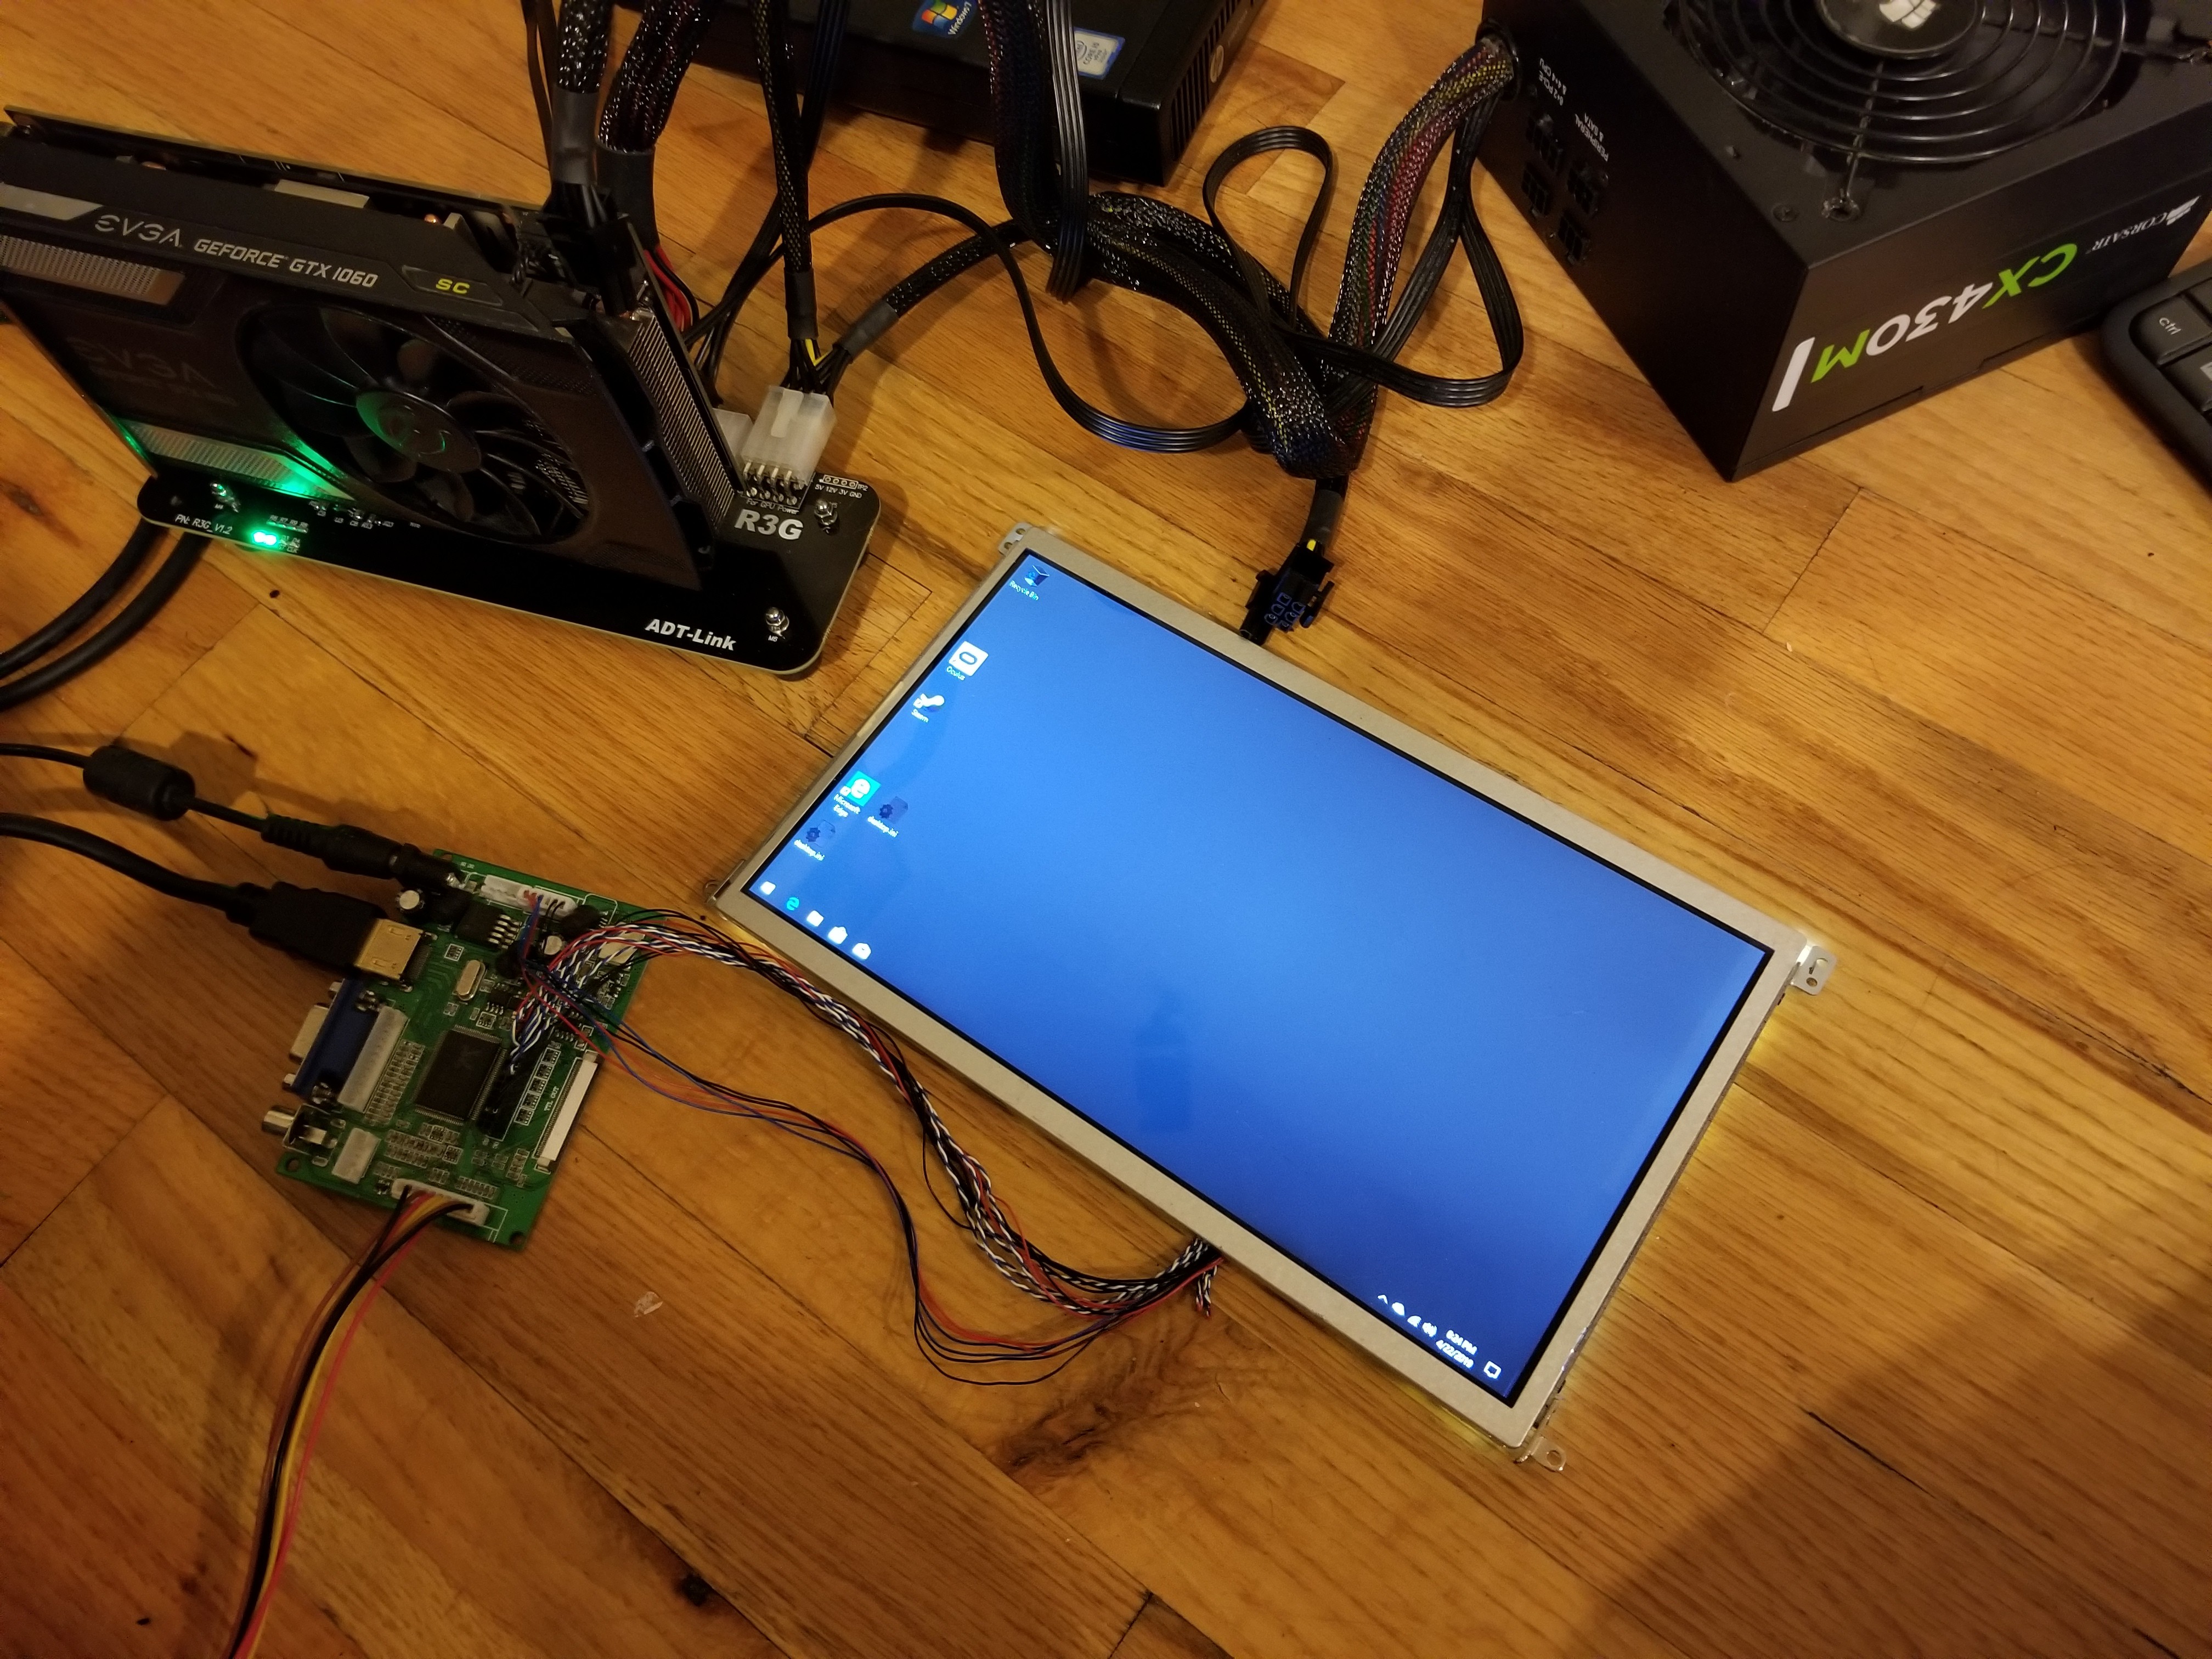
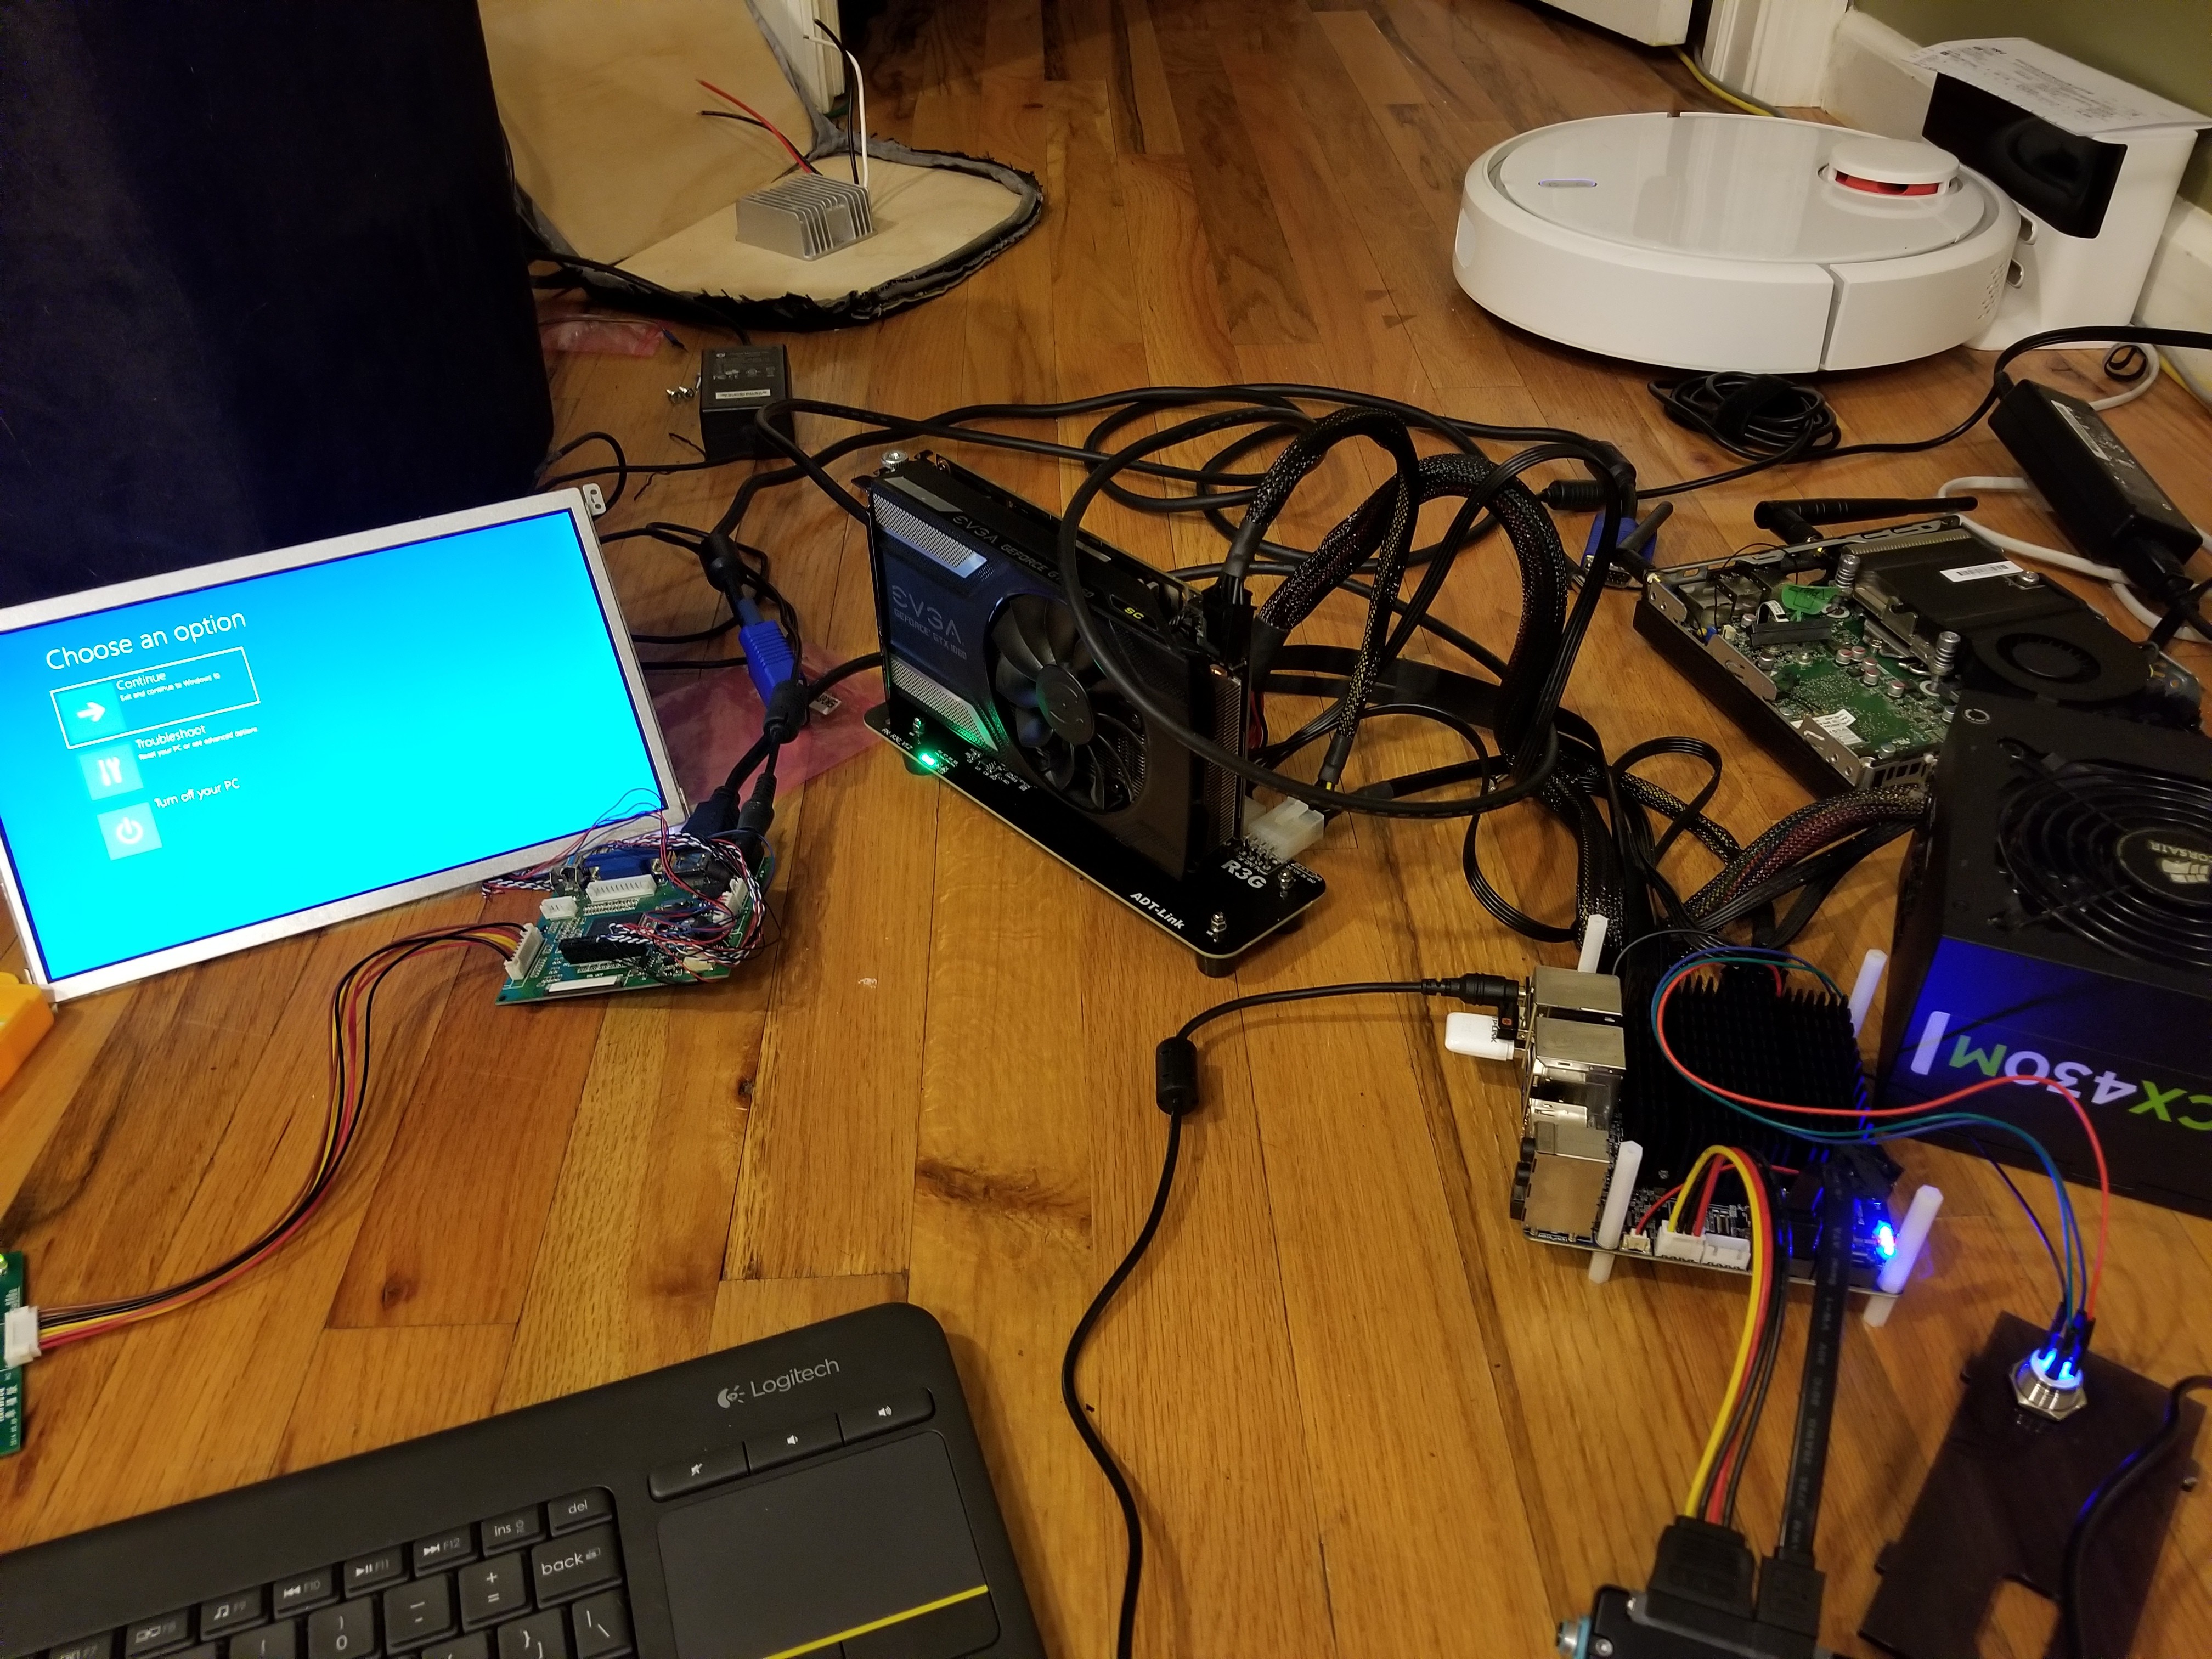
With the major components all together, how about a quick power on test? I grab a test display, spare power supply, and various cables to hook everything up.
And......total failure. Playing with the various jumpers and a few learned tricks about using external GPUs finally gets me some signs of life.
However....
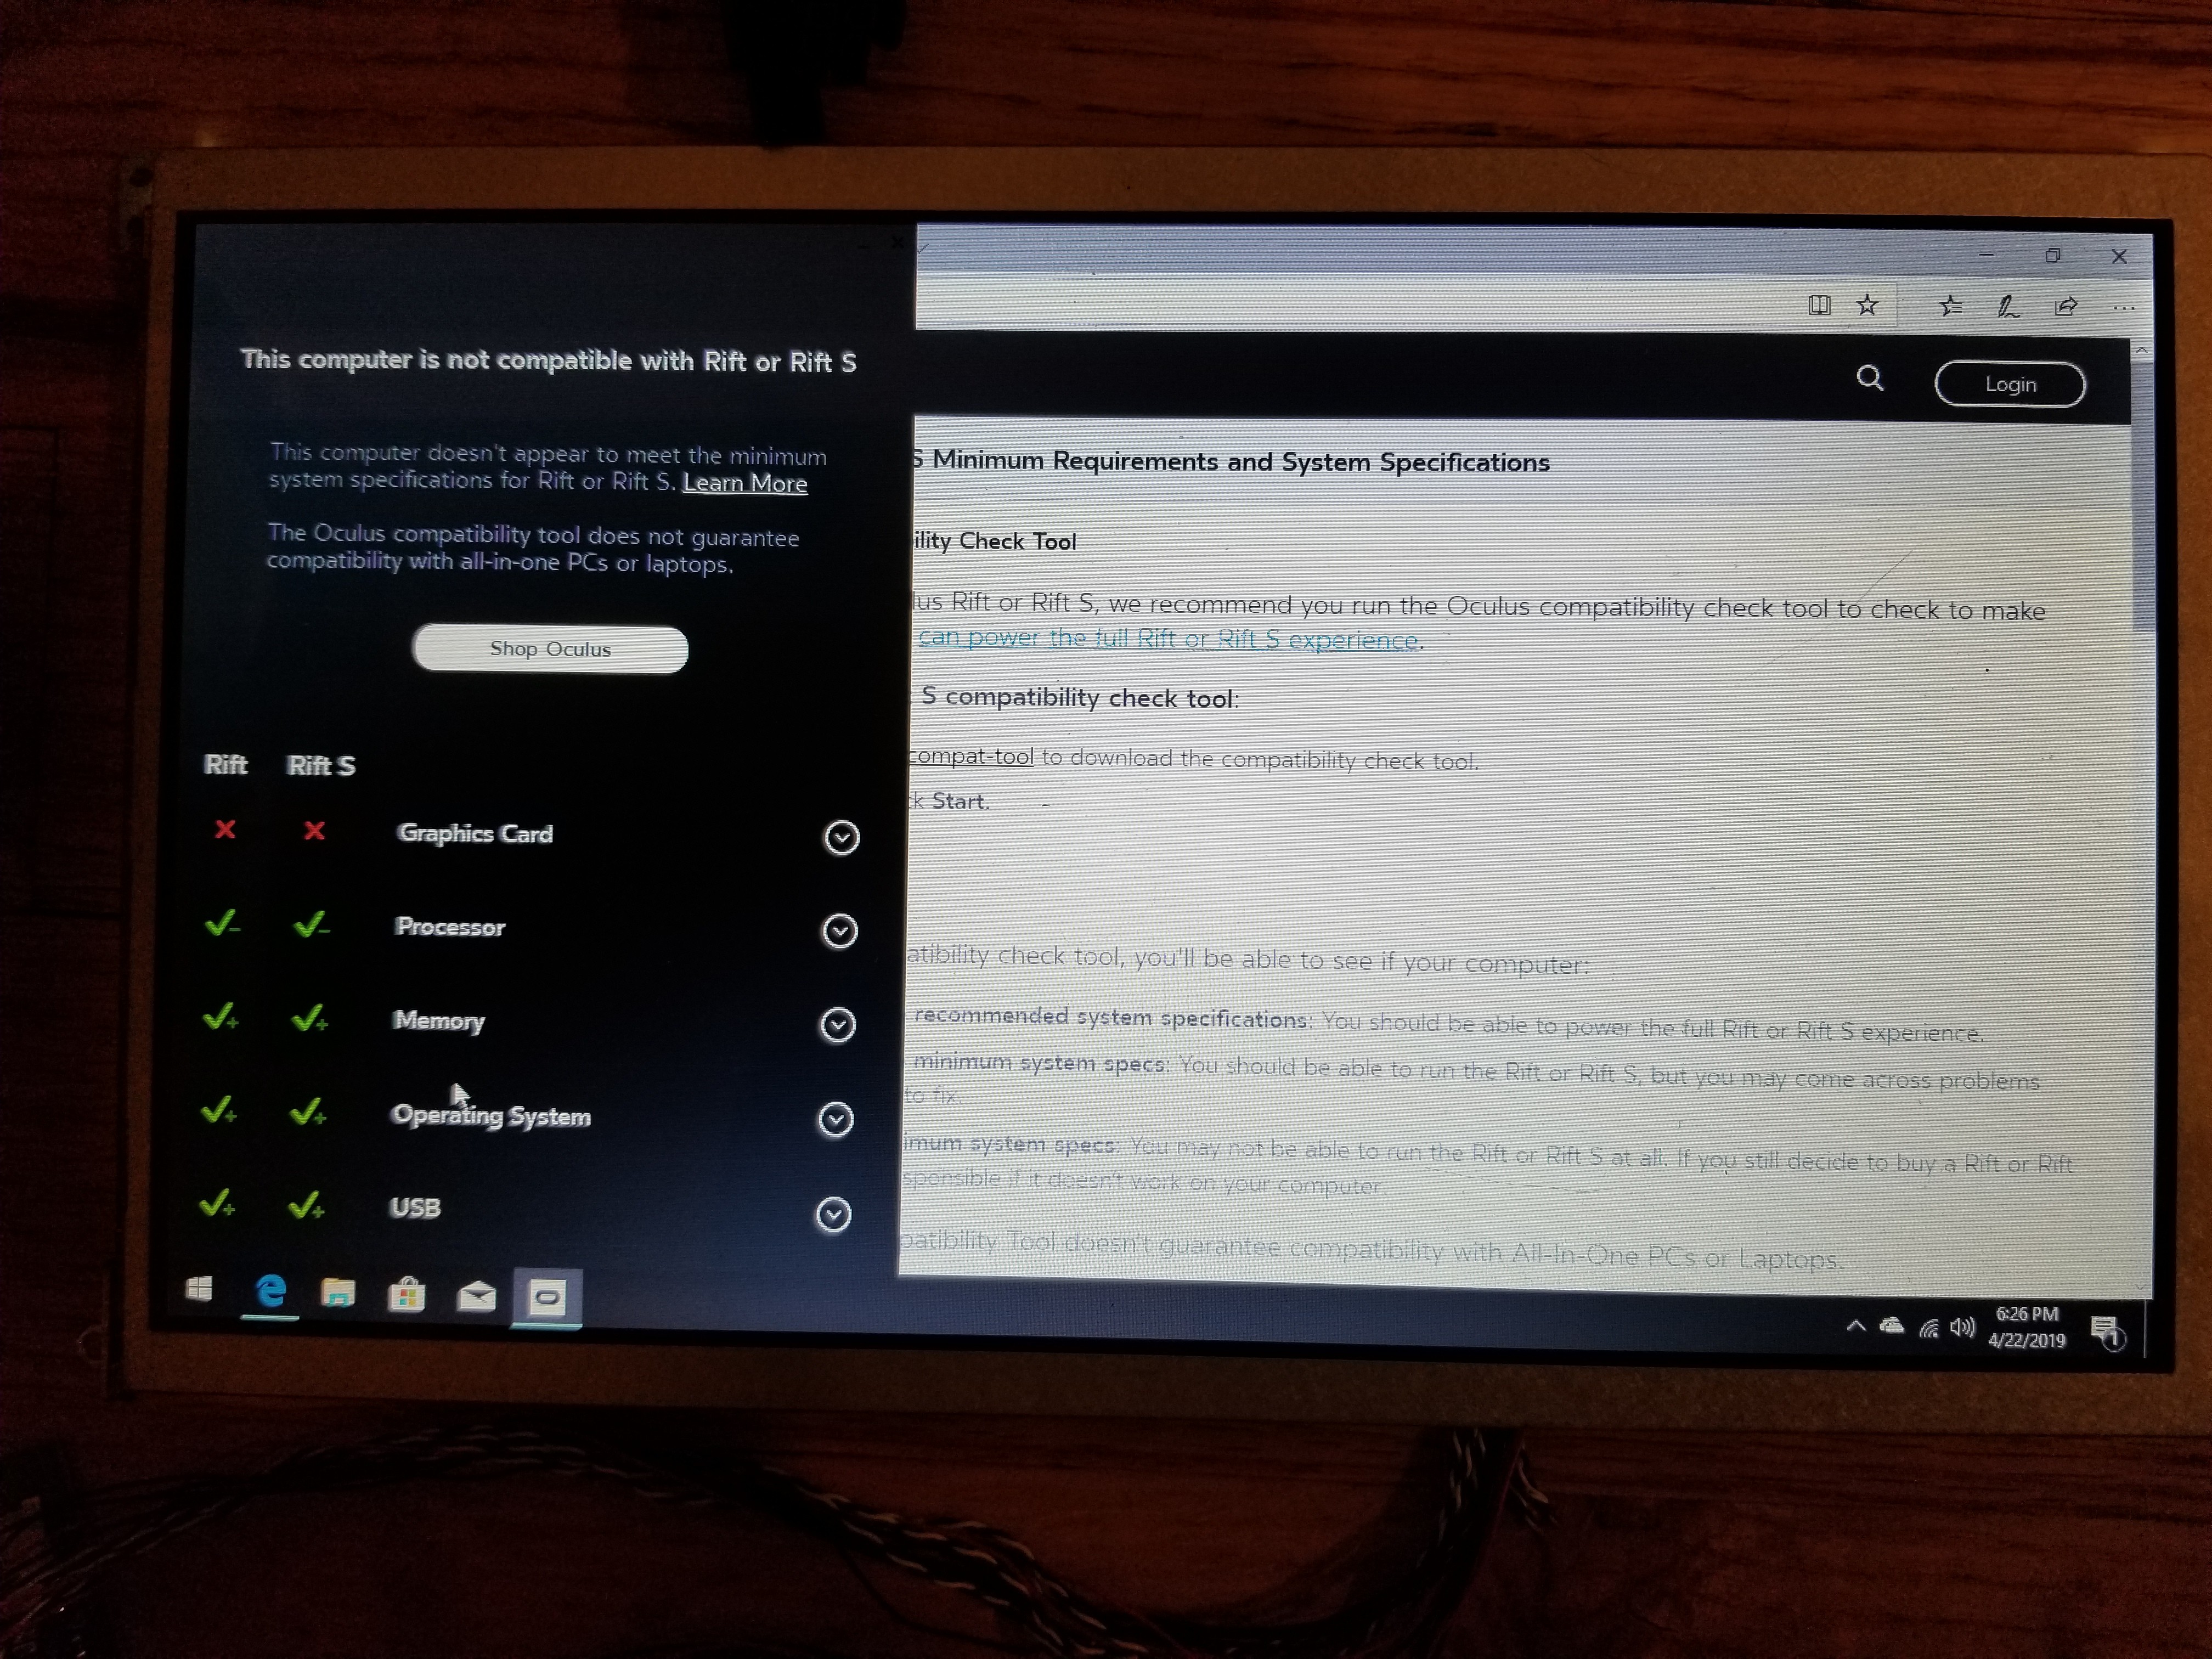
The graphics card isn't initializing properly. It looks like the boot process on this HP has some safeguards that really hate fun. I check for any possible workarounds but sadly don't see any.
With my first build an outright failure, I decide to cheer myself up by making a quick "stupid" build. One Odroid H2 later and...
Success! Well, aside from the fact that the Odroid has nowhere near the power necessary for this project. Just for giggles, lets see what the compatibility tool has to say.
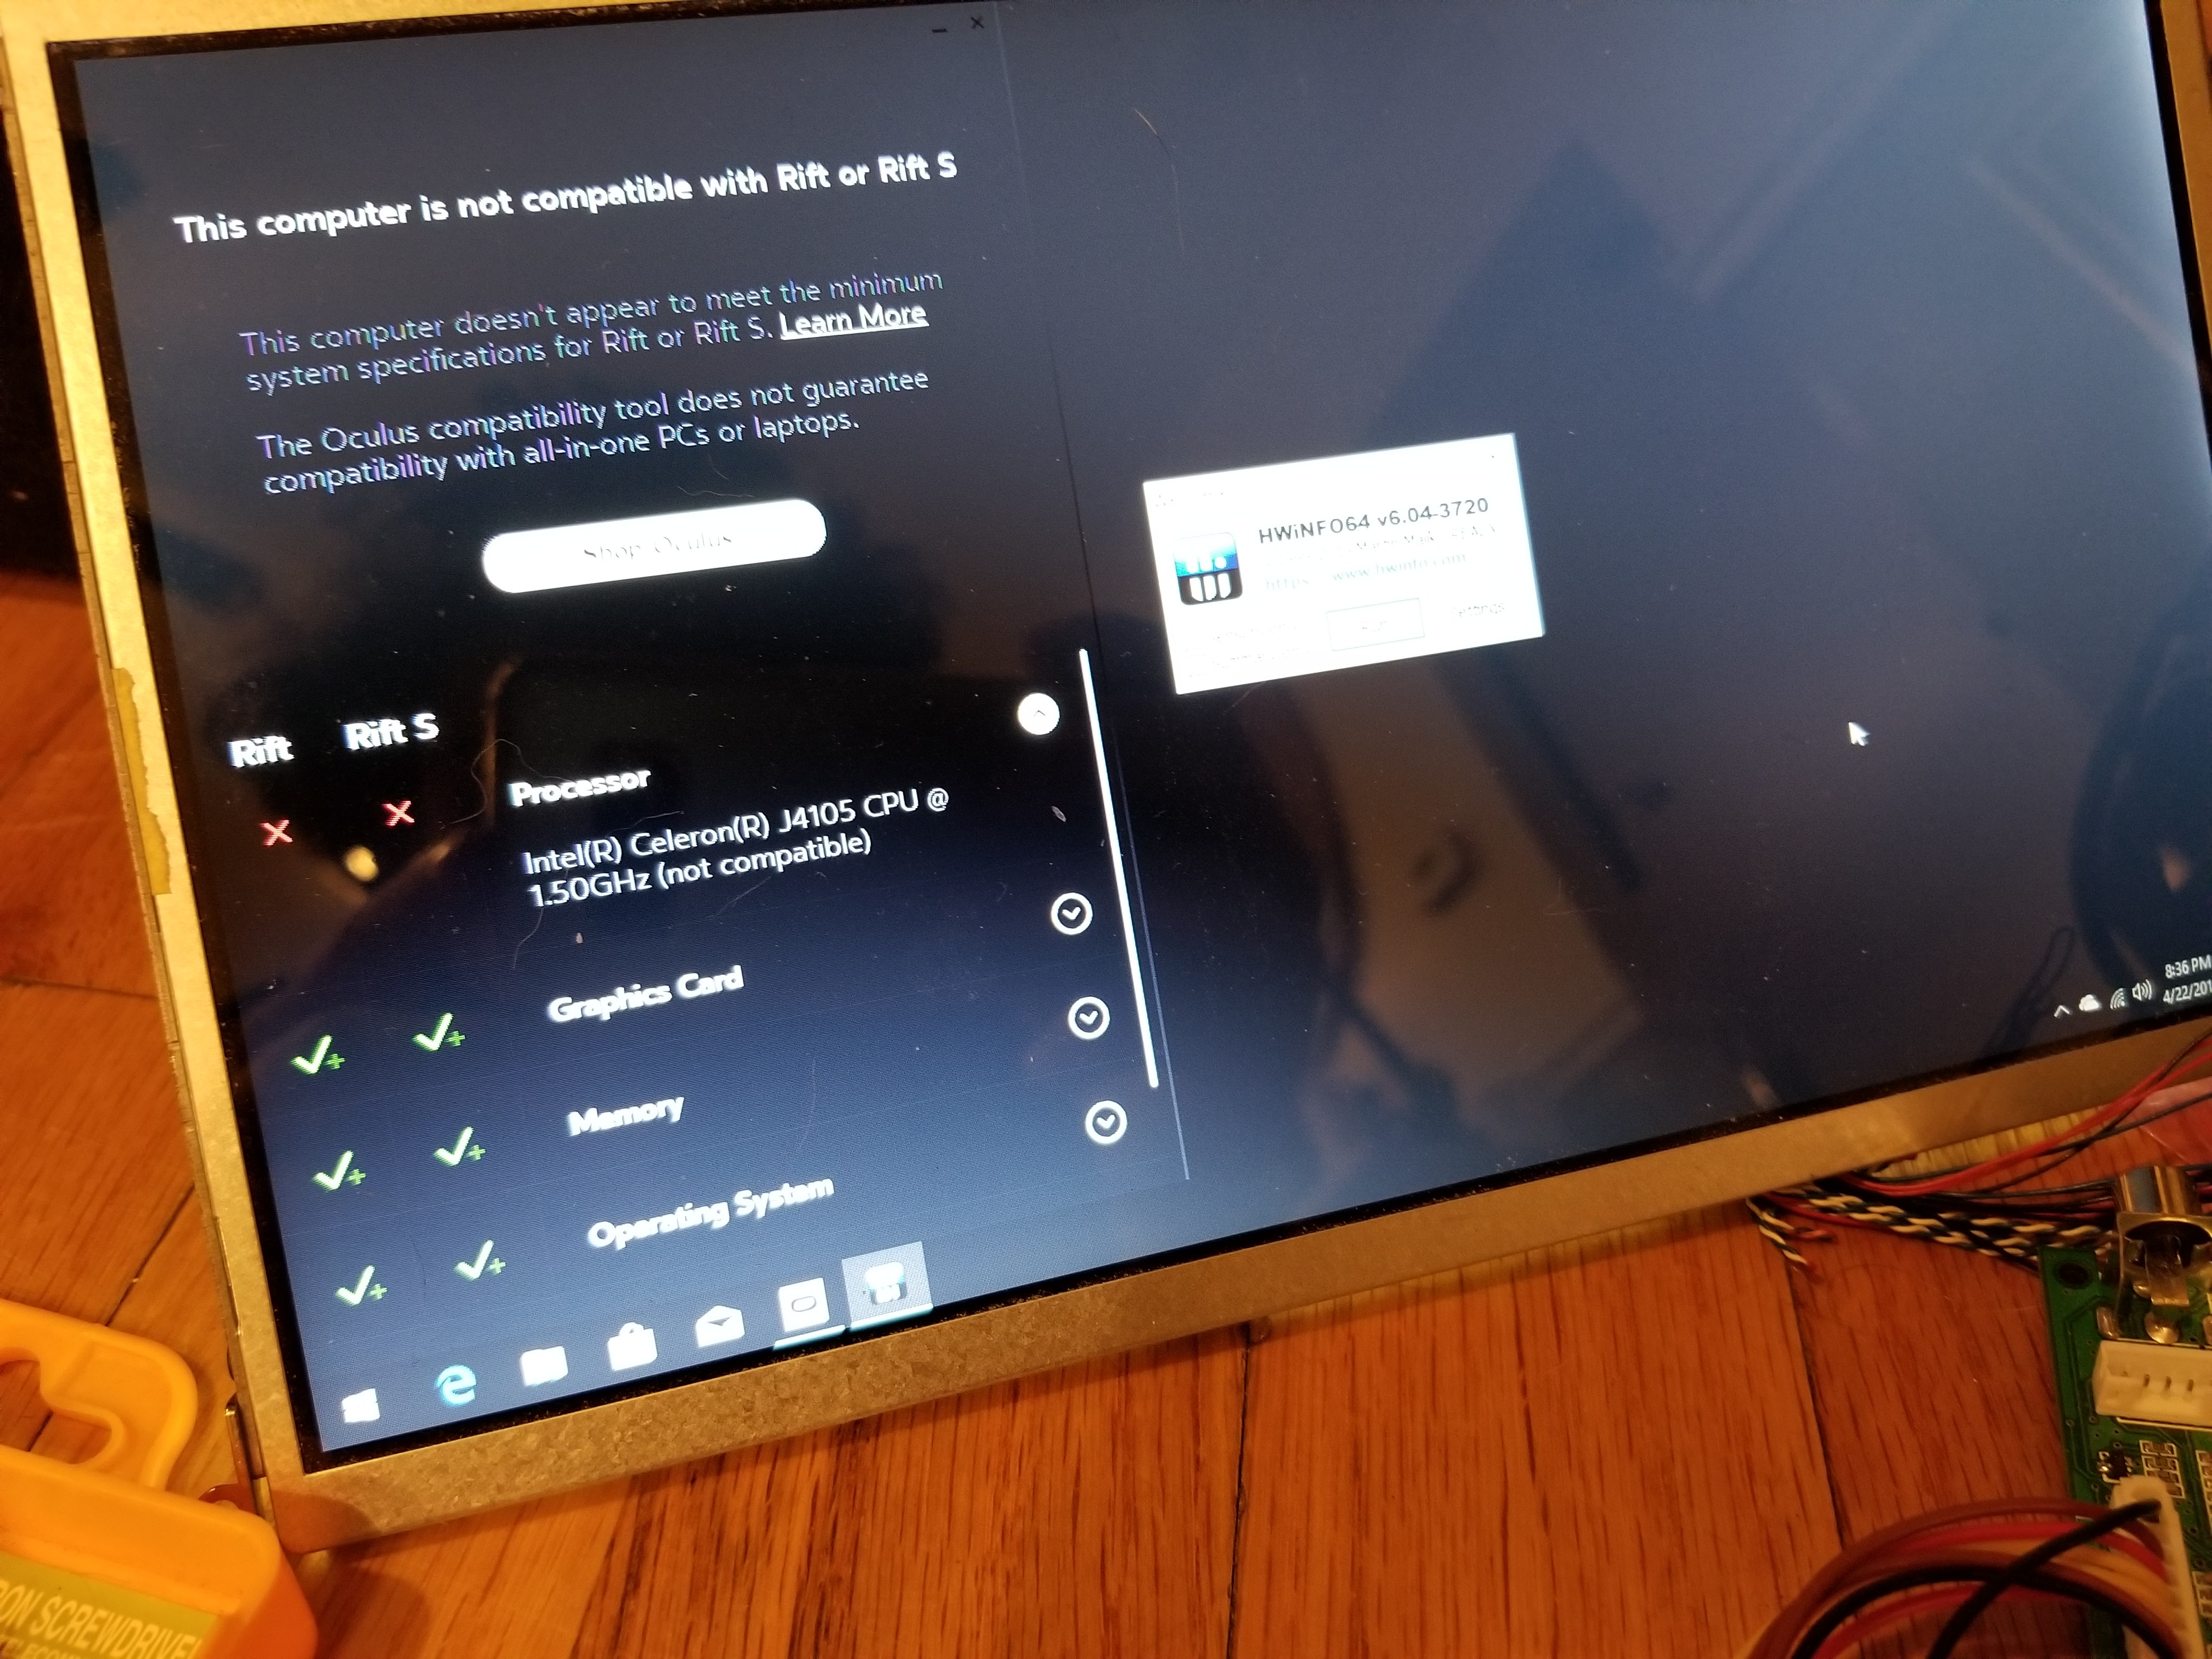
We traded one checkmark for another. Only thing left to do with this ridiculous build is to benchmark it and move on.
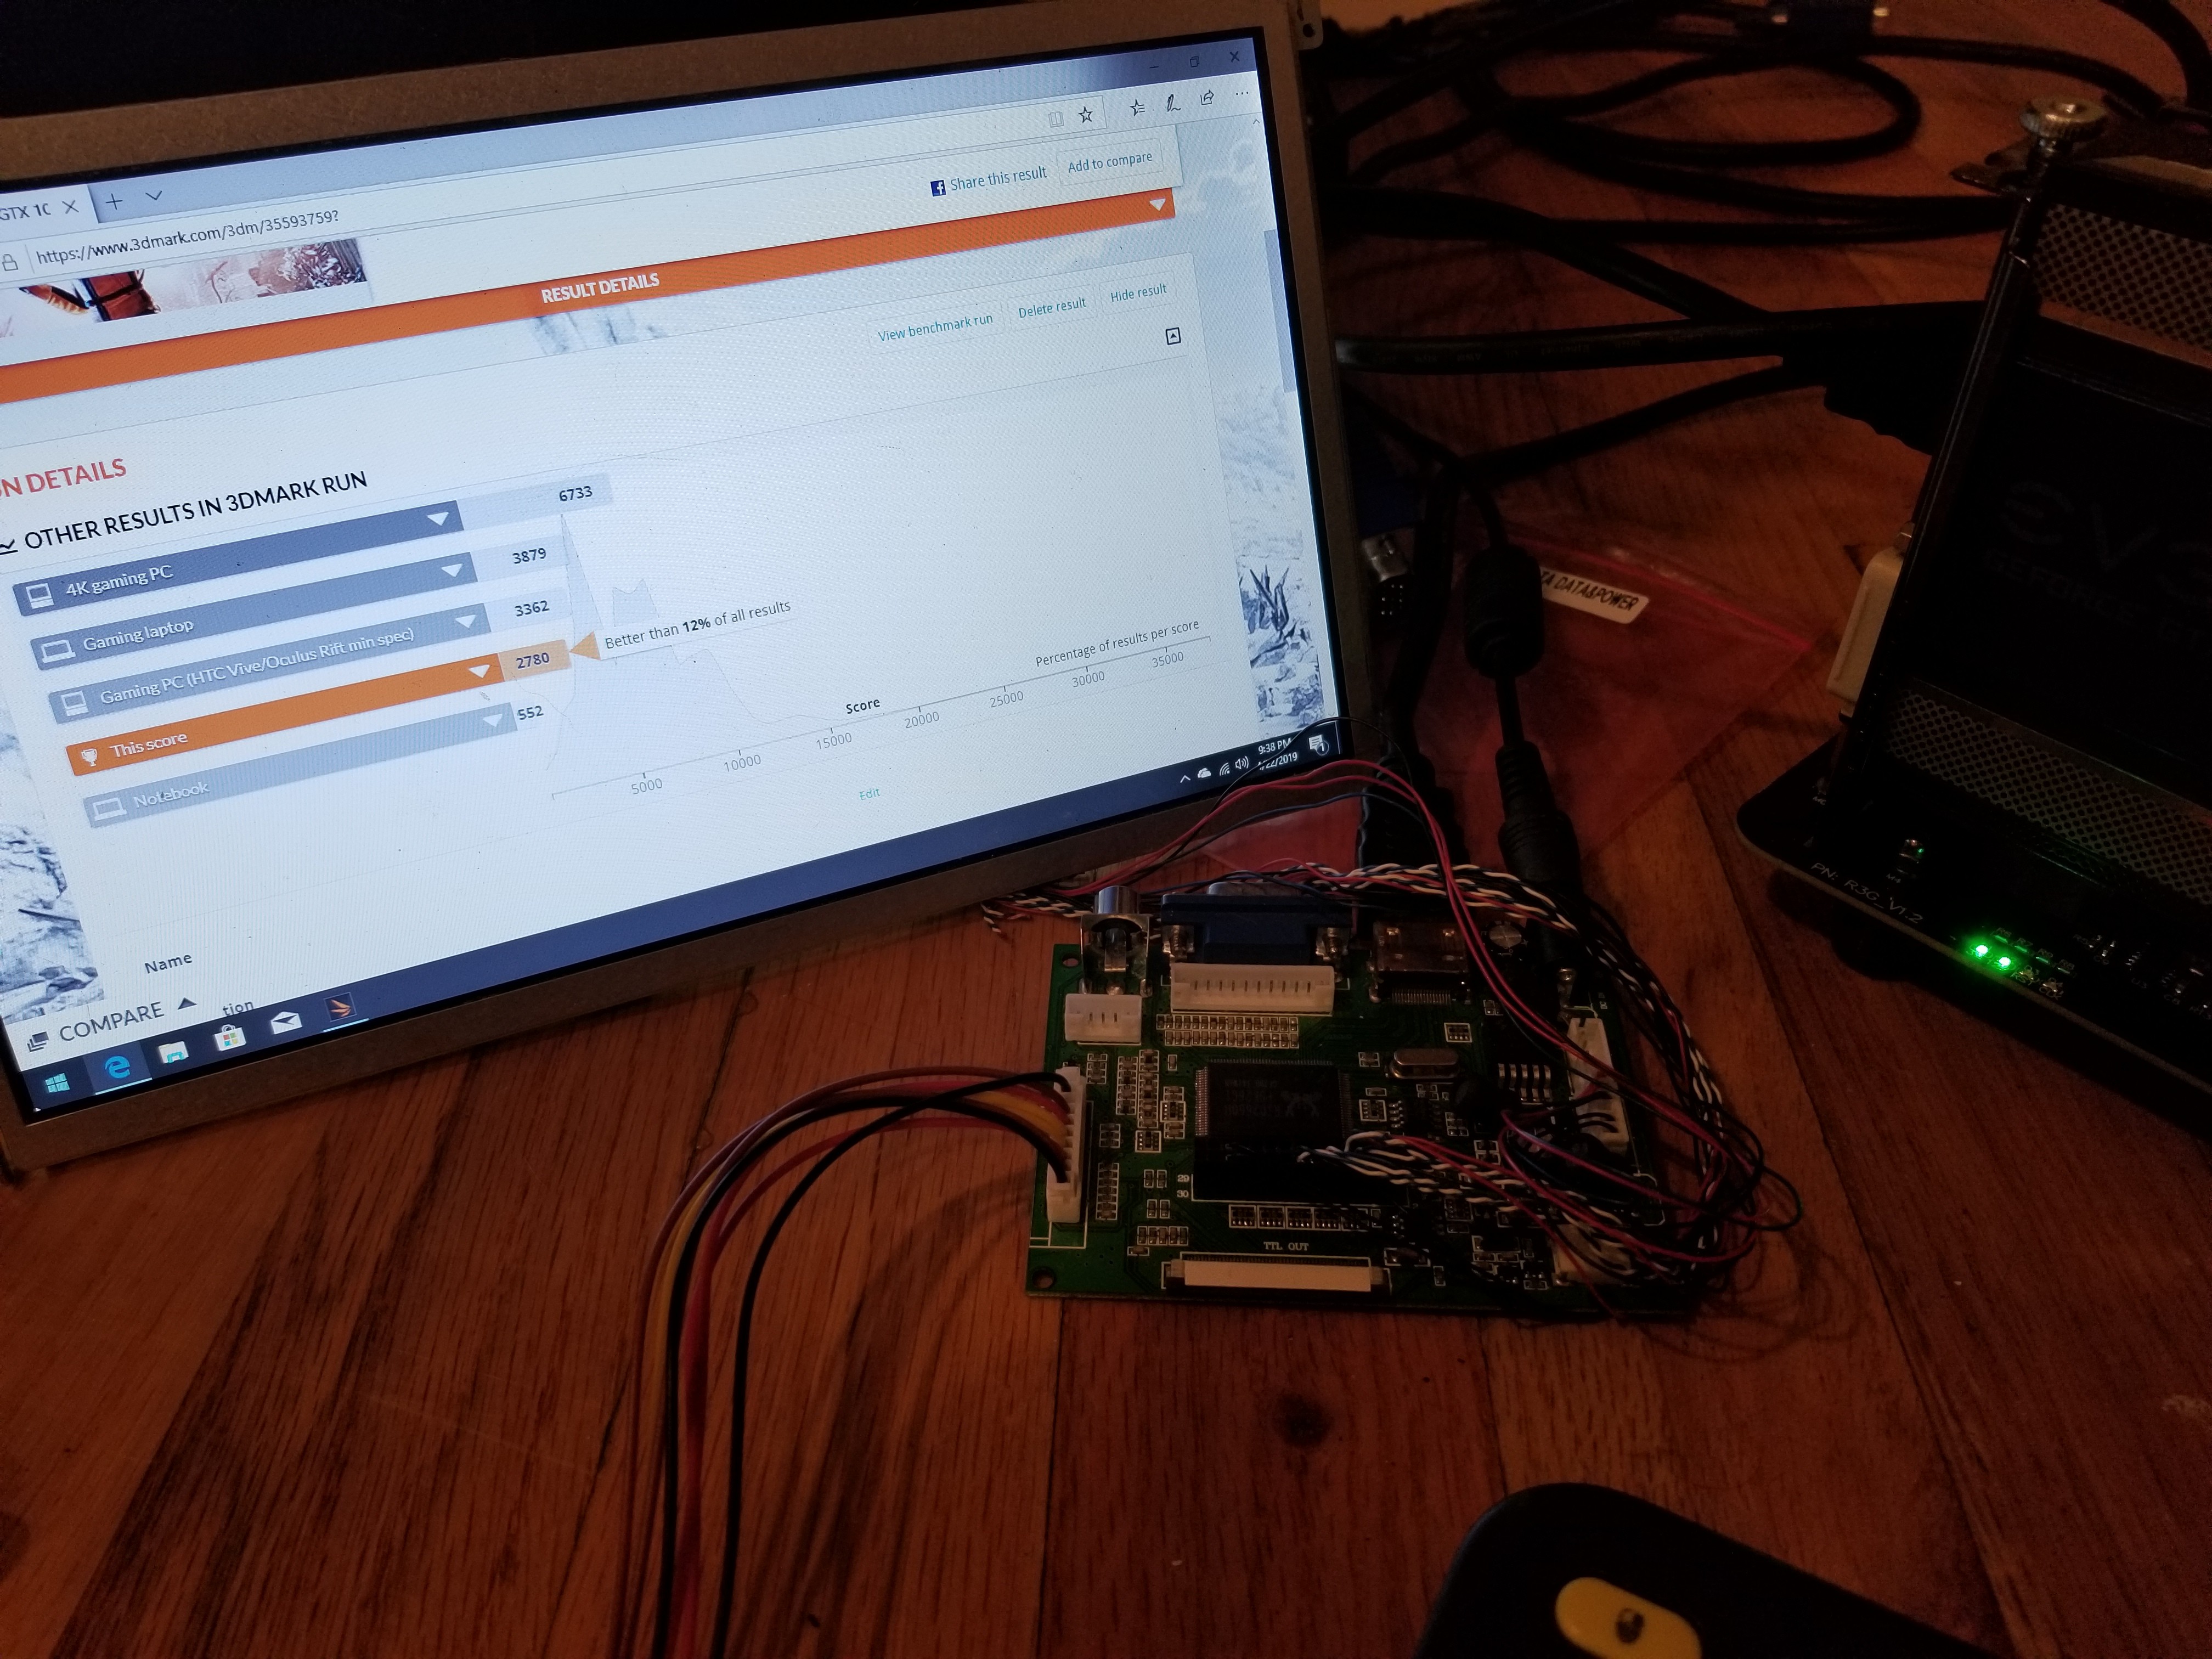
Look dad! I'm almost a gaming computer! Honestly it's not too far off from mininum spec. Maybe I could've actually played some very simple demos, but the point is to beat out what the Quest would've offered, not match it.
In the next log, we move on to more "standard" (and sane) components and try again.
Discussions
Become a Hackaday.io Member
Create an account to leave a comment. Already have an account? Log In.