 Patrick
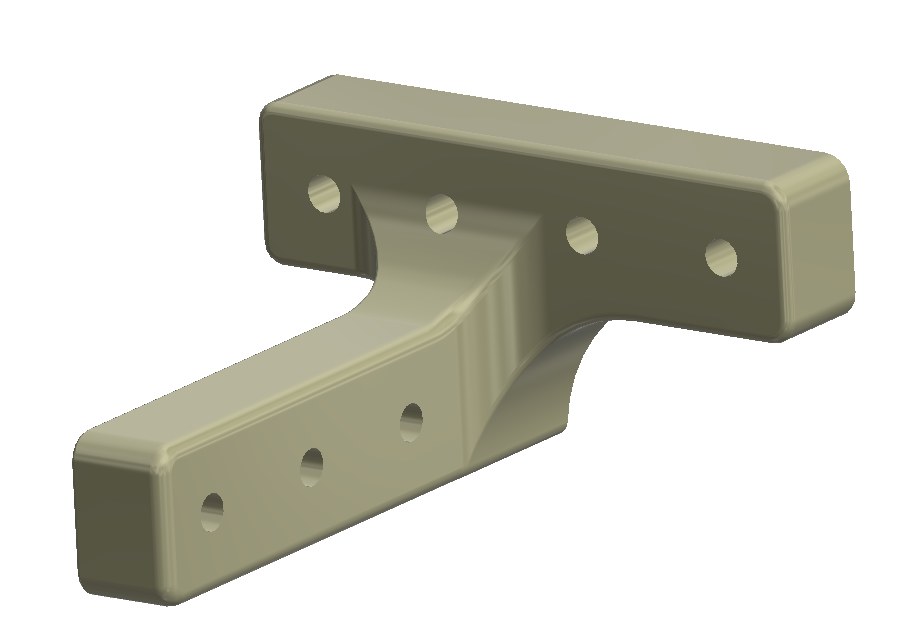
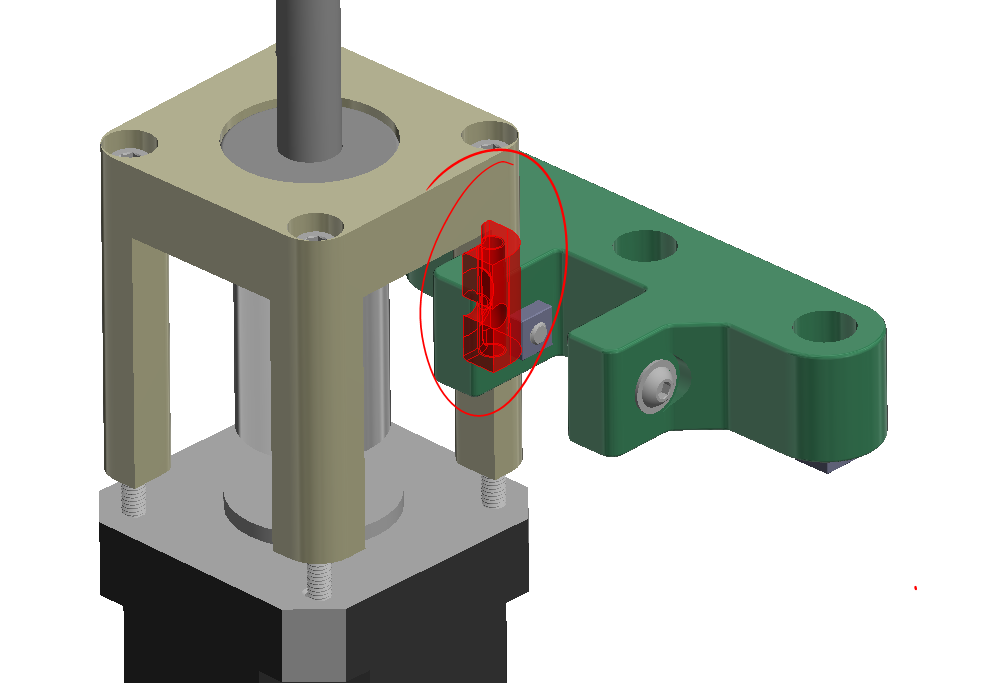
Looking at the Z Bracket, there are 6 of them, and you need 3 of them and 3 of a mirrored version.
The available aluminum versions are slightly different, but don't really address the fact that the design is lacking.
I'm guessing the designer's intention/purpose of these brackets are as follows:
- Mount the Z-Tower 1515 extrusion to the upper and lower 1515 extrusions
- Connect to both extrusions with 3 screws into each extrusion (printed version) , metal version is 3 & 2 screws
- Provide enough of a TEE to square up the 1515 extrusions
The reality is, these parts will have little effect on the squareness of the assembly, this is something that needs to be adjusted in the build to get everything square.
My idea here would be a part like I have below, that connects to the horizontal extrusion and wraps around the vertical. This part will be just as strong as the RailCore design and be easier to make, while being a stronger and more rigid part that can still be left as printed and not need to be made from aluminum.
I would also tap the ends of the vertical extrusions and tie them into the bottom plate
Here's my bracket concept.
Here's the initial design
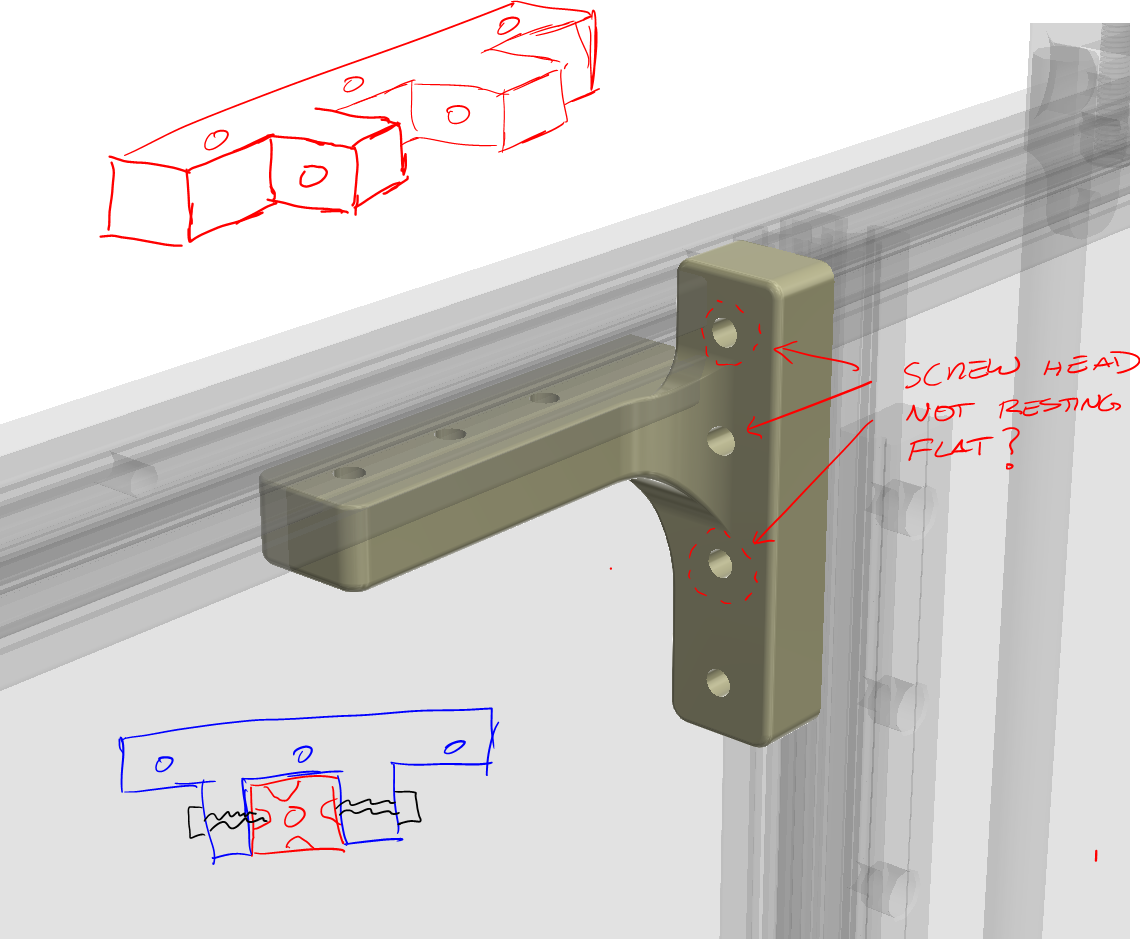
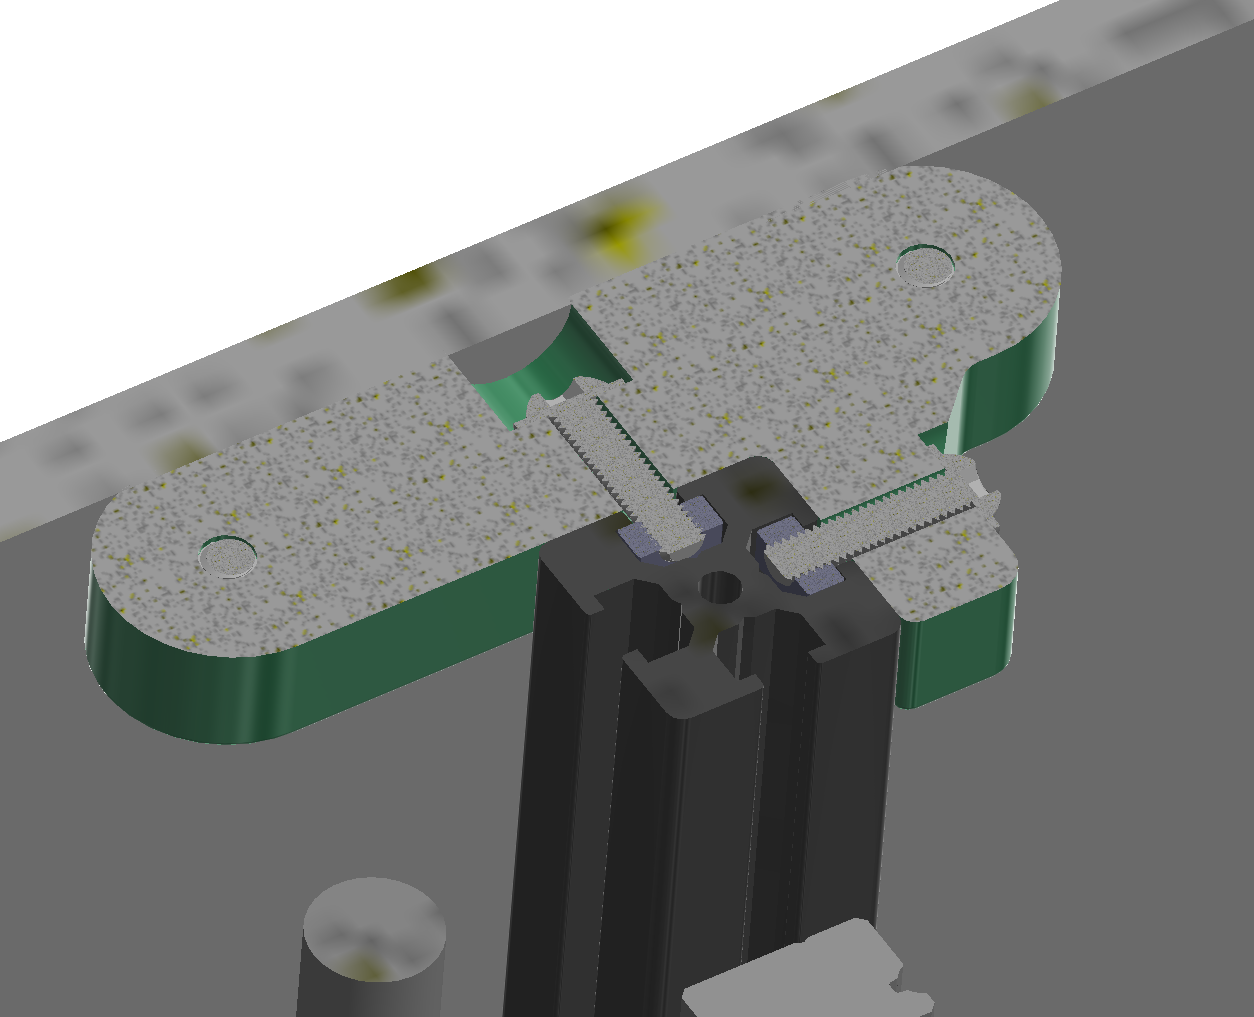
This will work good up top. I'm not digging the middle screw, getting to it will be a bit of a challenge. Maybe it should be deleted. Also, we're capturing the vertical rail fairly well from traveling parallel to the horizontal rail, but there is no screw force keeping the vertical rail in contact with the horizontal rail. So let's keep going for now, we'll think about that and adjust later.
For screws into 3D printed parts, I like big heads. I like the Flanged button head socket cap screws from McMaster-Carr. I generally dislike button heads as the size of the hex is undersized and strips easily, but at the same time, you don't want to be overtorqing screws into plastic. These screws are https://www.mcmaster.com/92137a254 and the nuts are https://us.misumi-ec.com/vona2/detail/110300465710/?HissuCode=HNSQ3-3
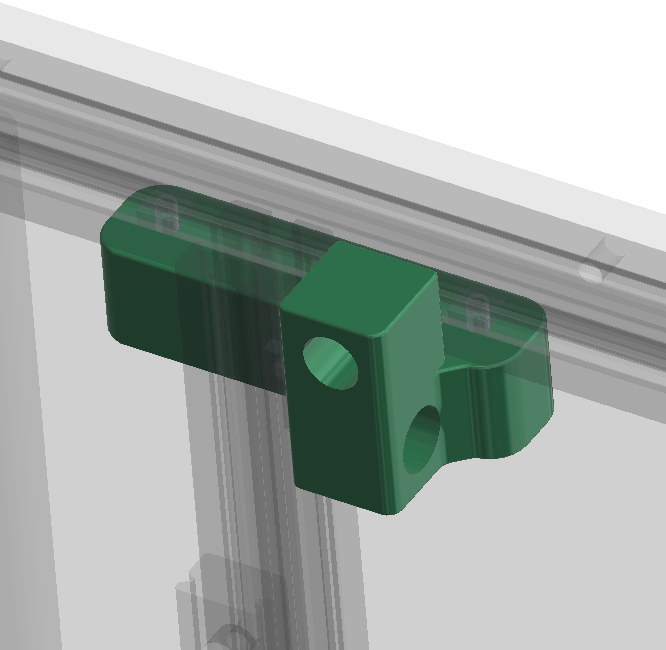
On the lower bracket, different story. The symmetric design hits the motor bearing block, so it will need to be adjusted. We'll have to create 2 parts after all.
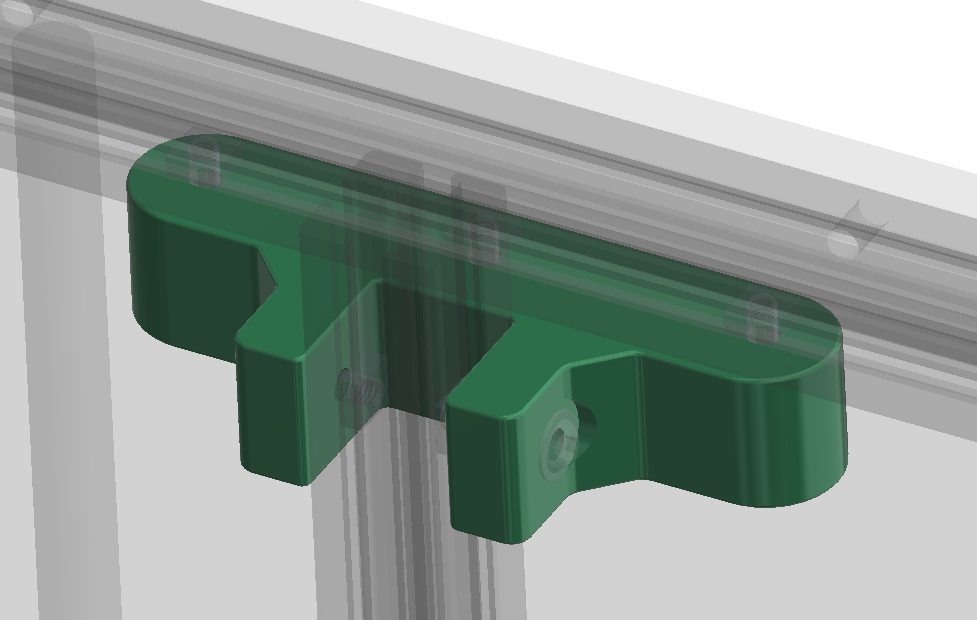
Quick adjustment to the design, I eliminated the U shape, deleted the middle screw into the horizontal rail and added a screw into the vertical. This will securely clamp the vertical in 2 axis. Now we're not really a precision joint here, we're relying on screw clearance to align everything. What's important is the center axis location of the vertical rail and it's angle. The Misumi rail has a 1.25mm diameter hole thru the center, so I'm going to look at pinning that with the bottom plate. I'm also leaning on adding a top plate to the design as well, in which case I'd pin that side as well.
Ideally the clamping force of the screws better hold the 2 intersecting rails together.
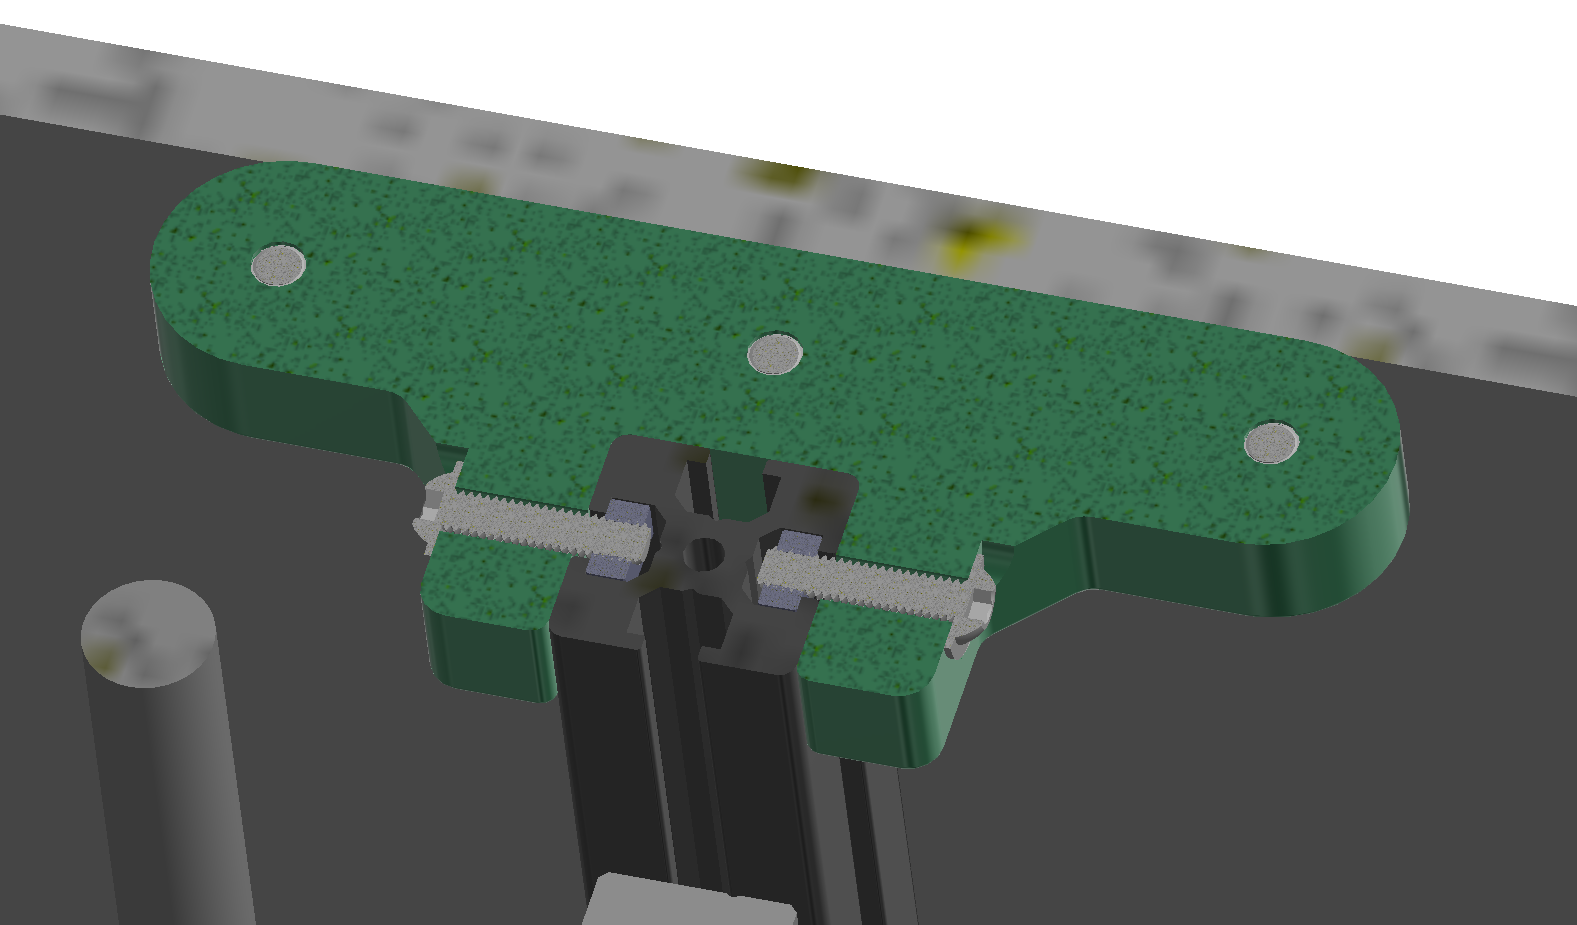
So I added a feature that allows me to screw into the vertical face of the horizontal rail. This will ensure the 2 rails are clamped face to face, regardless of the clearances in the screwsCreated a mirrored parts and added embossed part numbers. Ready to slice & print.
I feel pretty good about the part. I think we could shorten it up along the horizontal rail, but then getting to that 2nd screw might be a challenge. We're down to 5 screws from 6, but we're attaching to each extrusion on 2 faces. The part is very printable, but for CNC, it will require at least 3 setups, if you counterbore 2 of the screws on a drill press. Otherwise, it's 5 setups. If I were to make a CNC aluminum version, I'd thin out the walls so that counterbores are not necessary.
The only downside is the one screw that is coming from the backside of the vertical rail, this will be inaccessible when panels are installed, unless there is an access hole in the panel for these.
MCR-001-0 - MECHACORE Z BRACKET
MCR-002-0 - MECHACORE Z BRACKET MIR
Discussions
Become a Hackaday.io Member
Create an account to leave a comment. Already have an account? Log In.