 Nick Poole
I started this project by finding as many photos as I could of the SPHINX mock-up. The photos fell into three categories:
- Photos from Technical Aesthetics taken in 1987 - These photos are beautifully staged, but suffer the limitations of photography and printing reproduction at the time. There is one excellent detail photo of the keyboard on it's own (along with an alternate design?) which will come in handy for drafting the layout, but the legends are mostly illegible. One popular photo also appeared mirrored in the magazine, making the keyboard backwards.
- Smartphone photos taken of a replica currently on display at the Moscow Design Museum - I was only able to find two or three of these photos. They're much higher quality than the vintage photos, but they're also all taken at a relatively low angle through the glass surrounding the display case. In addition, after reviewing these photos (and the following category of photos) I'm convinced that the item currently on display at the MDM is actually a reproduction of the 1987 mock-up, reproduced from photograph without actual dimensions. I'll elaborate on this later.
- Modern promotional photos taken of the MDM replica - There is exactly one high-resolution photo taken of the modern replica system which was sent to me by @mwichary on Twitter (who is currently writing a book on the history of keyboards). This photo is absolutely beautiful, but the keyboard still appears at a very steep angle. After some transformation and squinting, however, I was able to transcribe and translate the key legends.
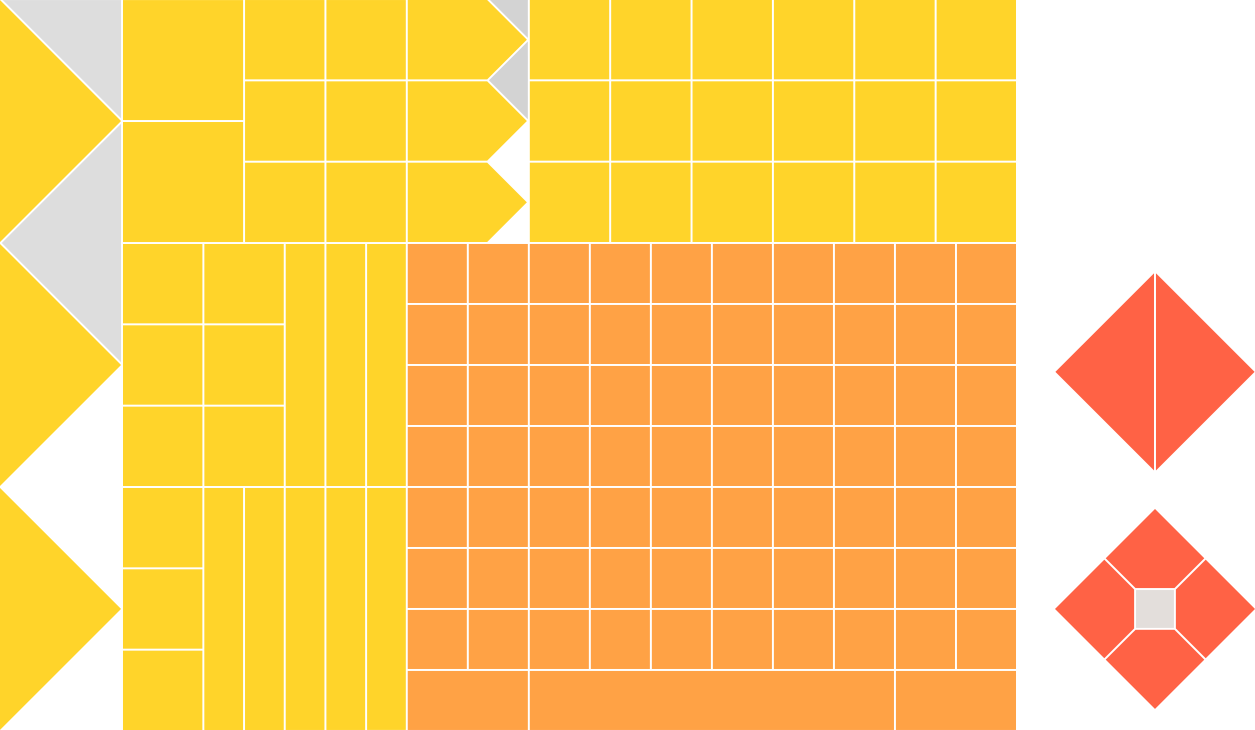
 Here is an ensmallened version of the hi-res I ended up working from to transcribe the legends. The full 3000x2473 pixel webp file is available in the files section of this project.
Here is the keyboard extracted as best I could manage from the image above:
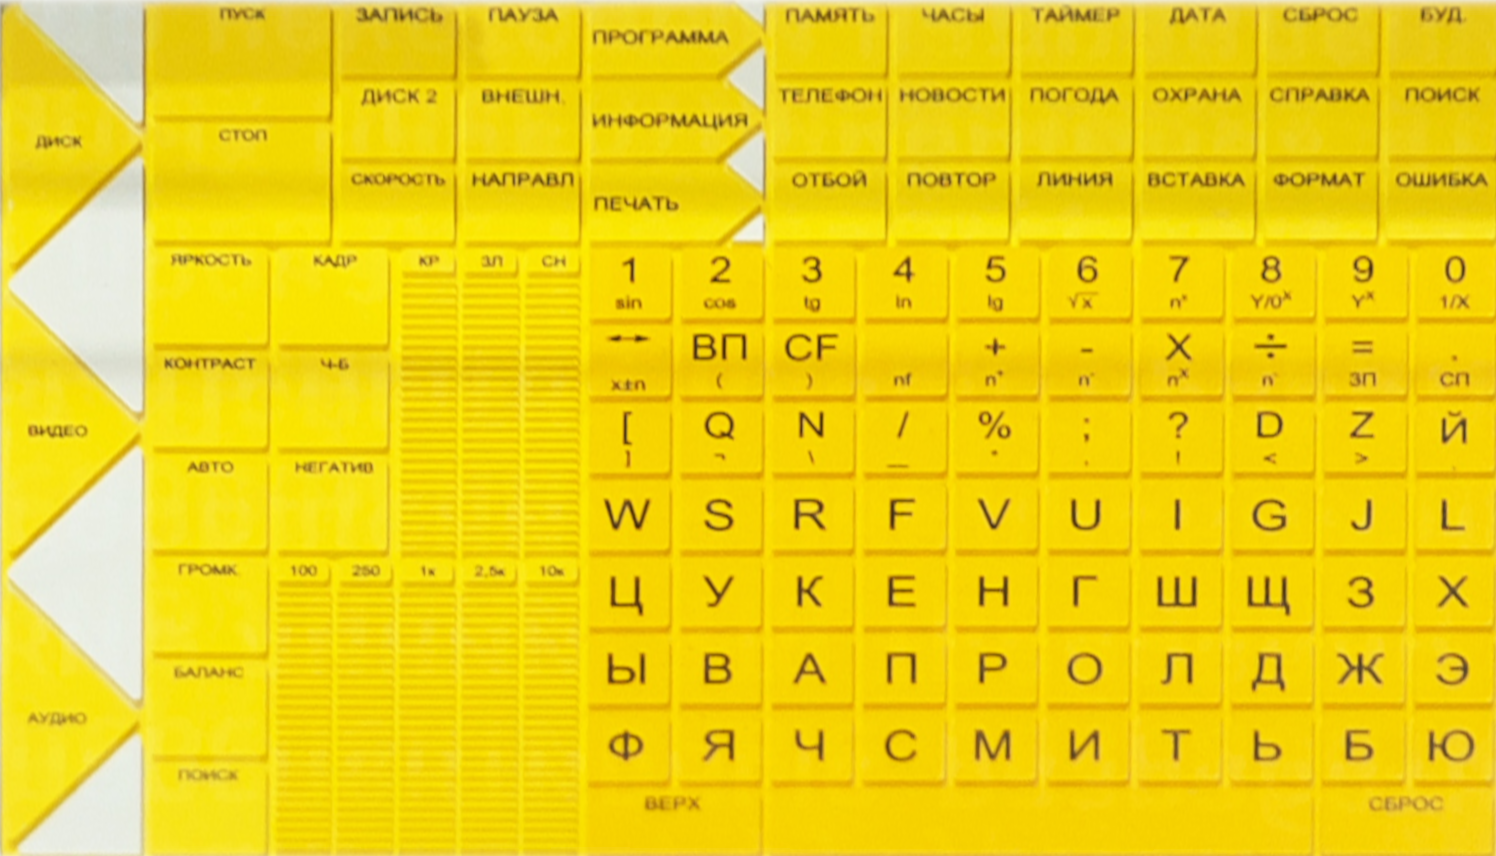
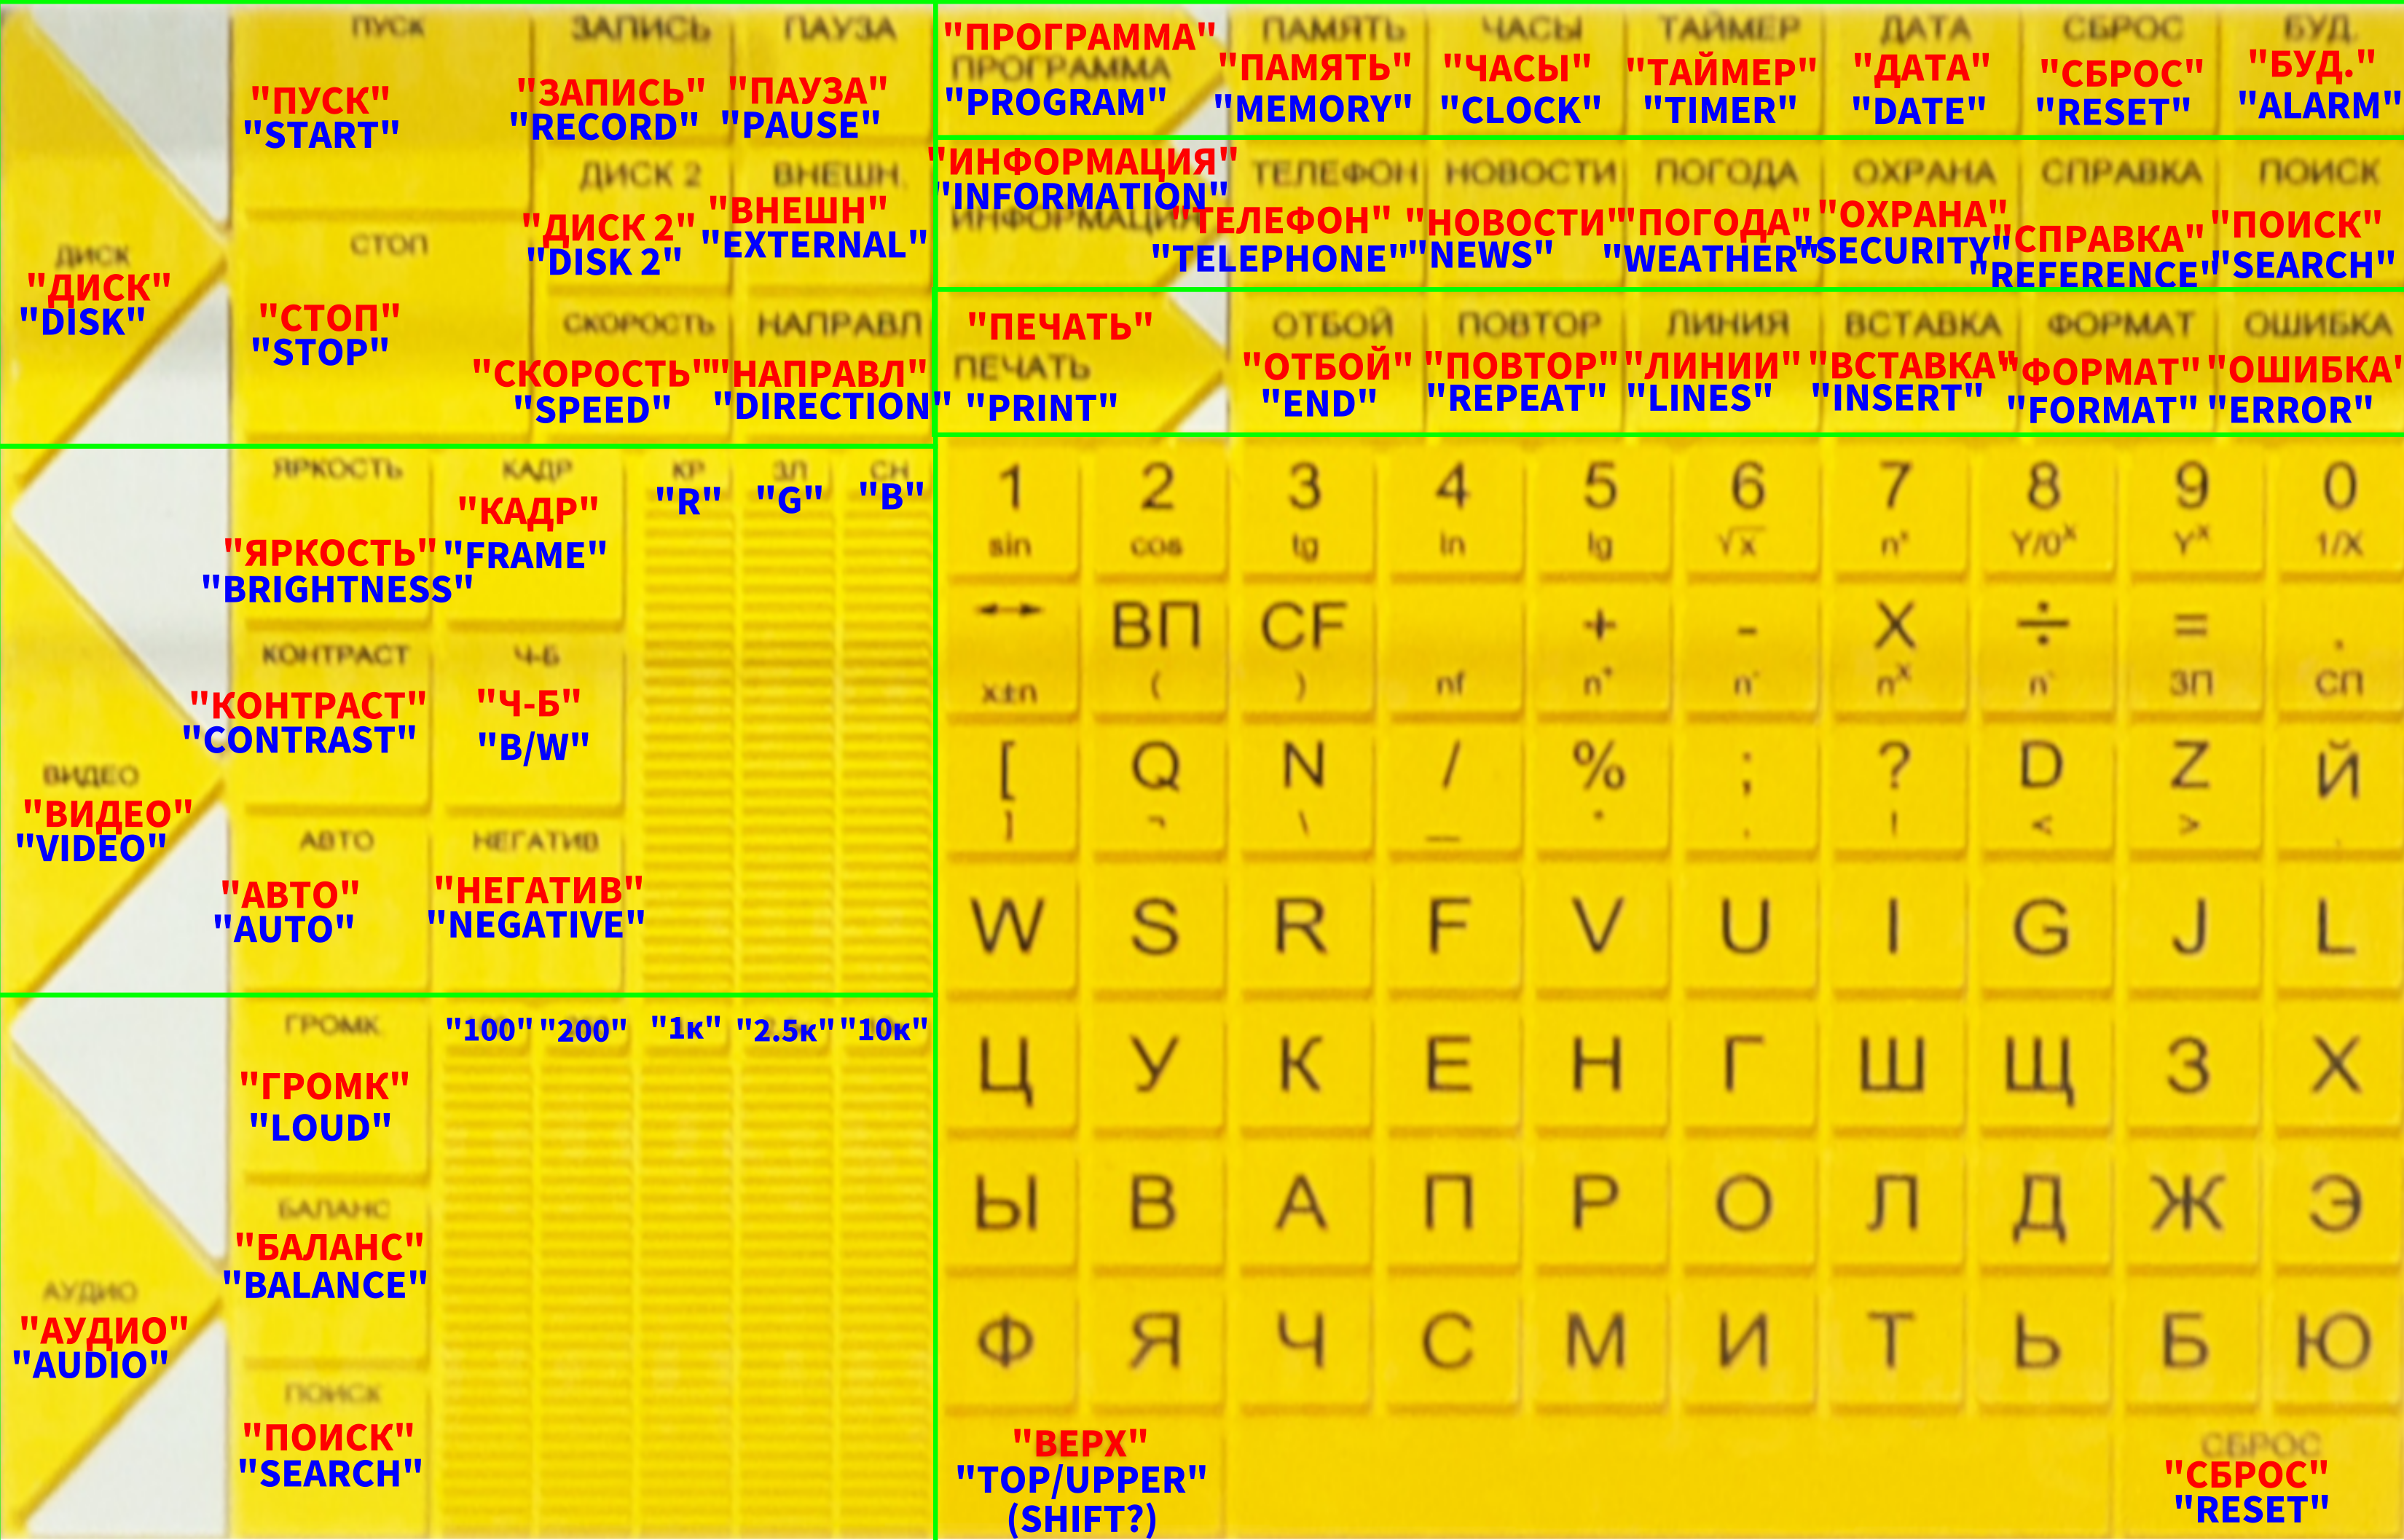
And finally, the transcribed and translated legends:
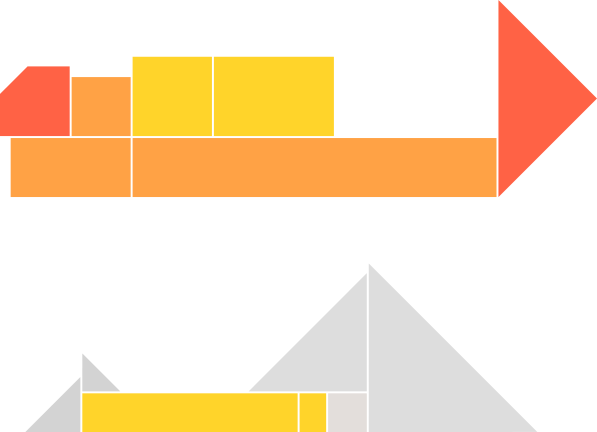
Now that we know the legend, we need to nail down the scale and layout. This is where the differences between the modern reproduction and the photographed mock-up from 1987 become much more clear. Notice in the above photo that the keyboard is laid out orthographically using very simple size relationships. Also notice that the triangles on the left-hand side fail to land neatly on the grid. Now, observe this photo from 1987:
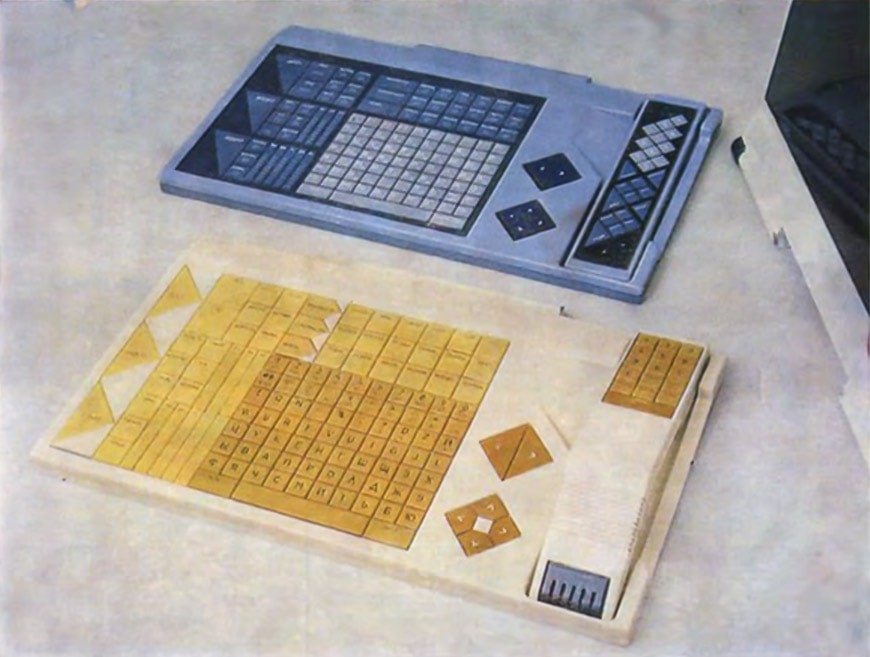
In this photo, the keyboard can be divided vertically into even thirds with the left-hand triangles pointing to the center of each row. This spacial relationship also makes those top-row keys the same size as the large left-hand keys, reducing the variety of key sizes overall. Obviously, this was the intention, an elegant design based on halves and thirds. The modern replica appears to squeeze the top third of the keyboard. So this, the 1987 original layout, will be our prototype.
Now that we understand the spacial relationship of the keys, we need to find the size. This is where we'll begin to compromise. There is nothing in any of these photos of a known size, so scaling is a little difficult, but there's one magazine photo that gives us a ballpark:
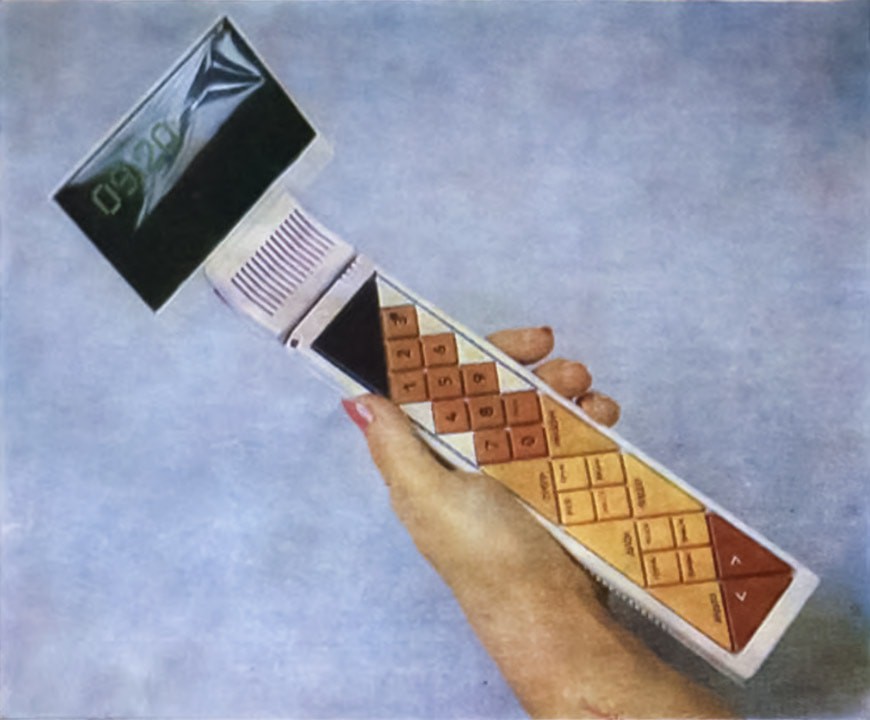
If we assume that these keys are to be the same size as those which appear on the main console, then they're actually somewhat small. There's no way of knowing how large this person's hand is, so an exact dimension is lost to time, but if we imagine the minimum key size for a modern mechanical key switch (about 15mm) it appears comparable.
Why a modern mechanical key switch? What evidence do we have that this device would have had a mechanical keyboard?
Absolutely none.
In fact, because of the way that the mock-ups are constructed, the keyboards actually appear to be silicone rubber keypads or some other type of membrane switch keypad. And some consideration was given to the idea that a custom rubber keypad could be fabricated for the project. However, there are a few factors which led me to believe that mechanical switches are the way forward:
- The computer was never built, so there's no "accurate" keyboard
- Rubber keypads feel like garbage to type on
- When I look at that wicked cool Soviet design, I want to type on it, and I want it to feel chunky and clicky like a proper keyboard.
However, if we assume that the smallest keys on the keyboard are roughly the size of a 1U DSA keycap, the overall size gets somewhat unwieldy (and dictates a strange size for proportionally dimensioned objects like the monitor and handset) so I've shrunk them down to the bare minimum size allowable by the bodies of the switches themselves. Because the keys appear to have no draft whatsoever, this size will not allow a traditional keycap design (which envelopes the switch body when you press it down) and will instead be a thick, rectangular cap entirely above the switch body. To compensate (and because of the comparatively simple stem) low profile switches will be used.
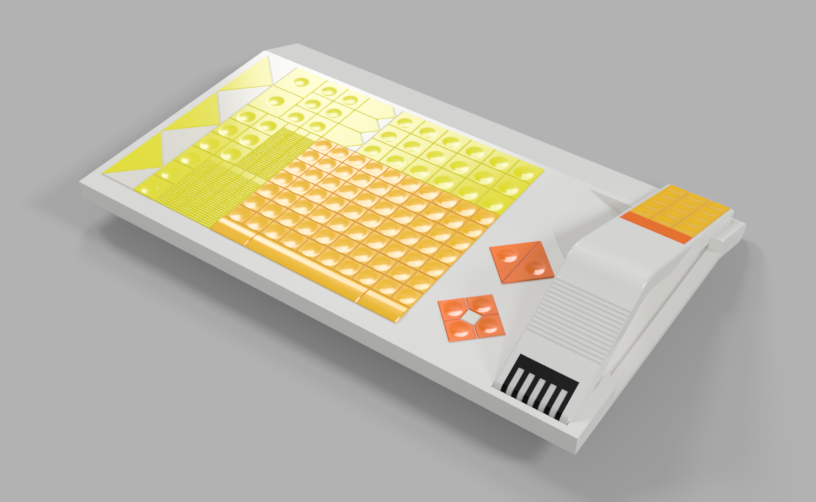
After studying the photos, I was able to make a vector drawing of the keyboard:
Which I reduced to a set of distinct key profiles:
And imported into Fusion 360 for modeling:
Although no indents are evident in any photo of the keyboard, it was decided that A) some of the original photos seemed to hint at some kind of indent and B) It would be unpleasant to use a flat keyboard. These models were then attached to models of key switches and arranged to model the complete keyboard:
And because the keyboard was modeled with switch bodies, the PCB plane could be intersected with those models to create a plane which I can export and use for PCB layout:
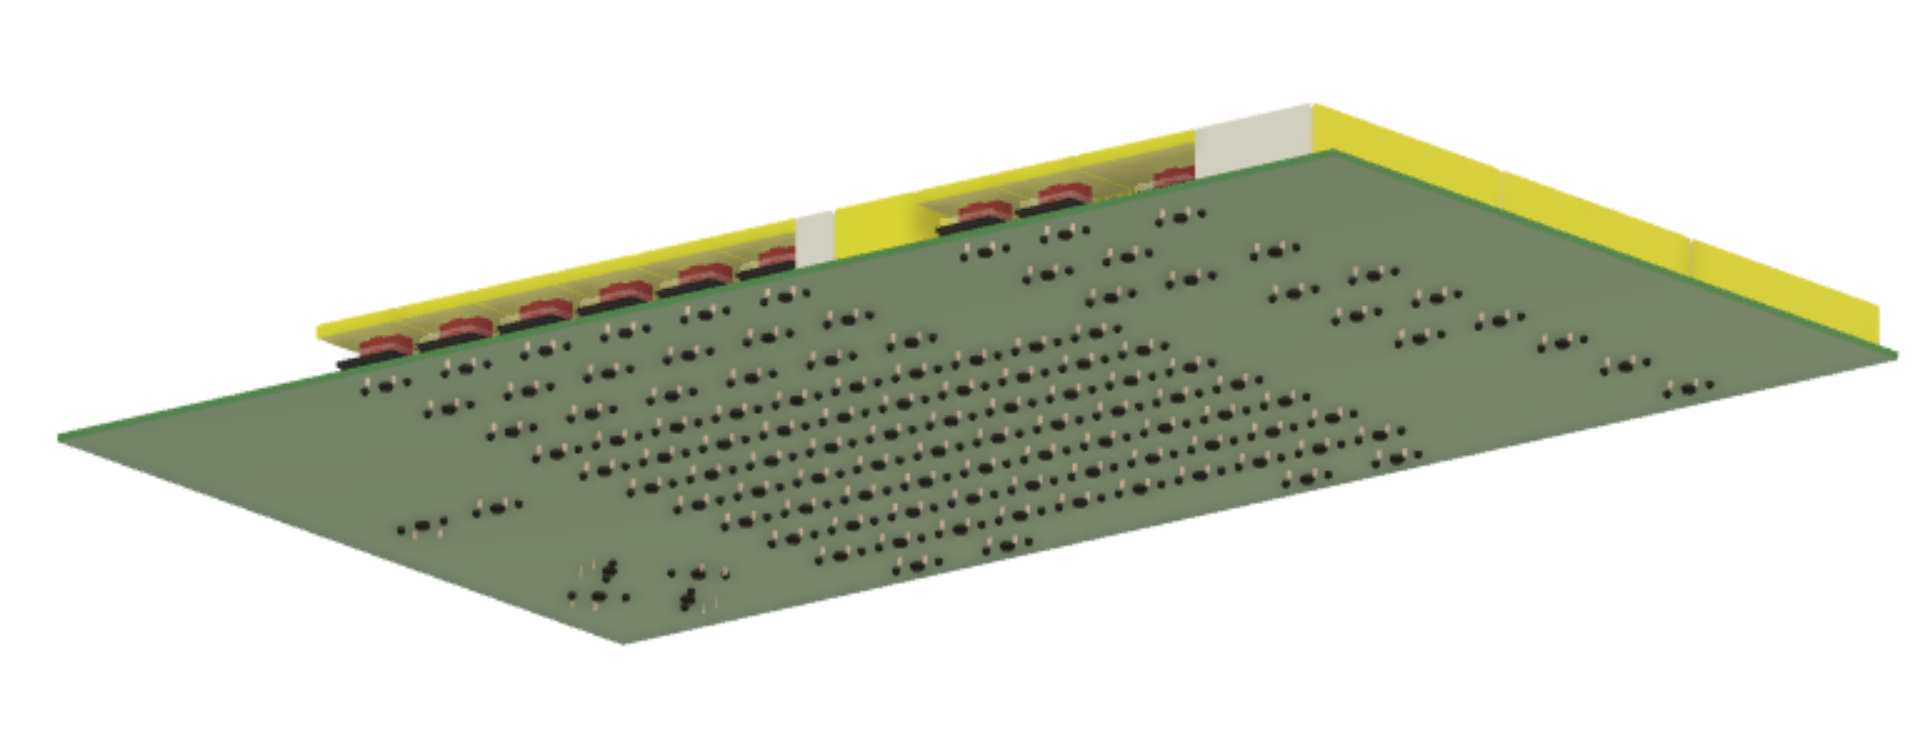
After layout is complete, I'll be able to import a model of the PCB back into this design and replace the dummy PCB for final enclosure fitting.
A preliminary model of the enclosure is also complete because it was necessary to determine the proportion of the keyboard:
However, this enclosure still needs aesthetic tweaking before I can shell it out and add all of the bosses and supports.
Now that we have key profiles, I can begin laying out the keyboard PCB and casting the keycaps. When I have a few spare bucks, I'll have prototypes of each key SLA printed. Those prototypes will be tested for fit and then a silicone mold will be made from which resin reproductions can be pulled. Key switches have already been selected for this project, they will be some flavor of NovelKeys' "Kailh Low Profile Choc Switches." and the keyboard portion of this project will require roughly 150 of them. Expect further updates when I can afford to begin fabrication.
Discussions
Become a Hackaday.io Member
Create an account to leave a comment. Already have an account? Log In.