 John Forsyth
The same system as demonstrated in the tutorial wired to a house lamp:
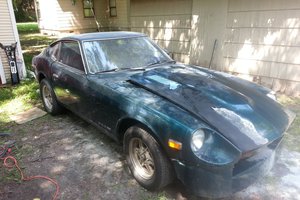
This is a project to start a 1976 Jeep CJ5 using a 2009 MacBook via Speech Recognition.
Already have an account? Log in.
To make the experience fit your profile, pick a username and tell us what interests you.
The same system as demonstrated in the tutorial wired to a house lamp:
JarvisMk5Startthecar.pyPython program for using Apple's dictation software to perform tasks based on keywordsx-python-script - 1.02 kB - 03/04/2020 at 21:52 |
|
In this tutorial you will be:
Turn on your MacBook and Log in. Once you are on the main desktop click the apple icon in the top left hand corner of the screen.
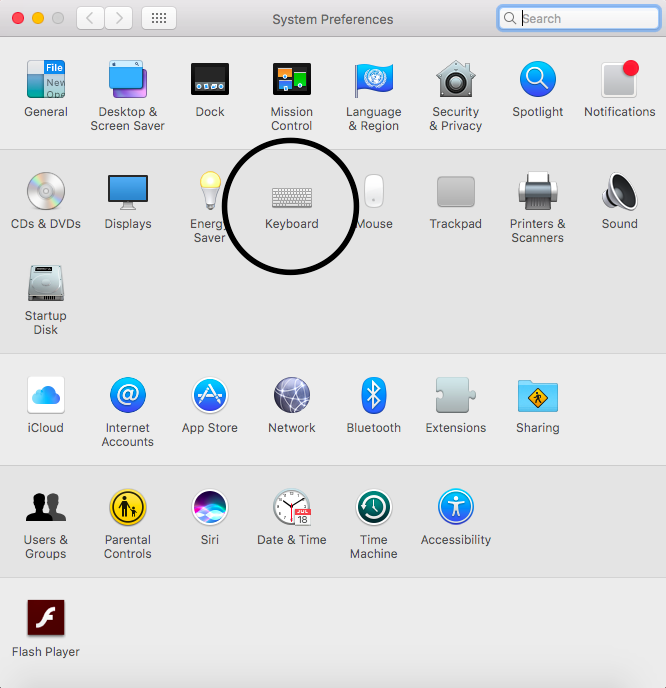
This will open a drop down menu. The option we are looking for should be the second from the top and is called "System Preferences". Click this and something like the following window should open:
Next, click the option labeled "keyboard"
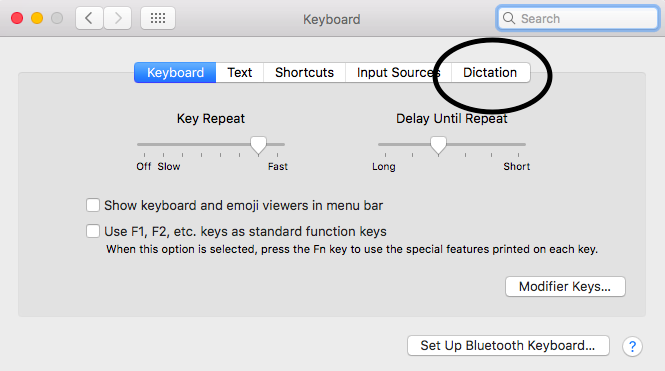
After clicking "keyboard" the following window should appear:
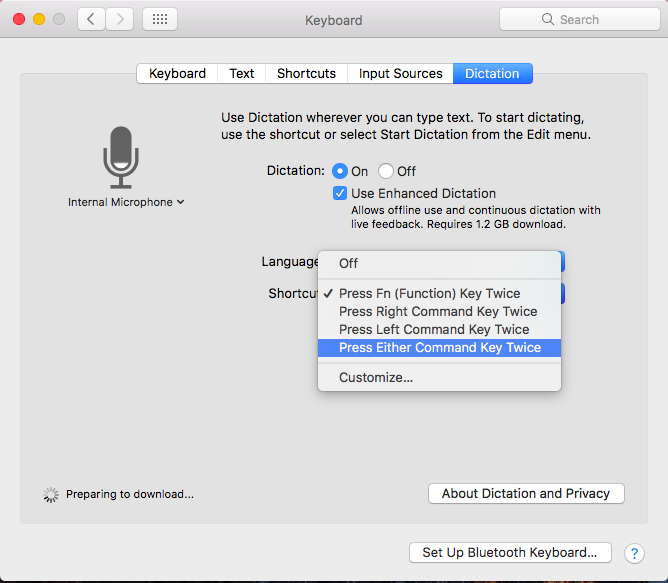
Select the option from the horizontal menu labeled "Dictation" and the following screen will appear:
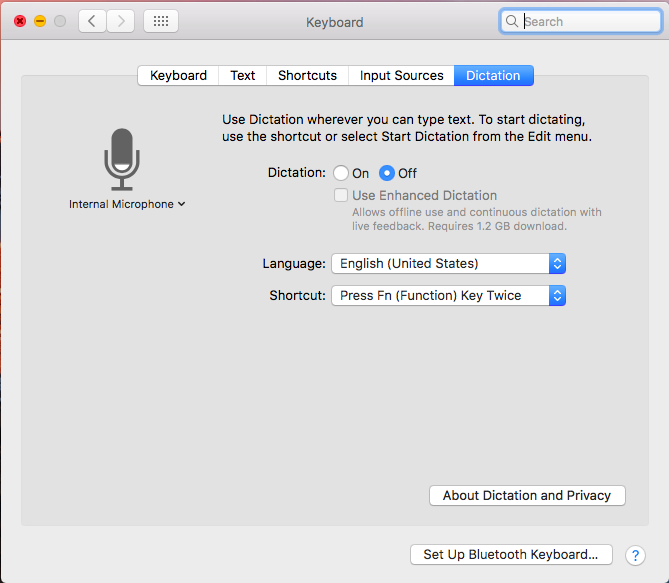
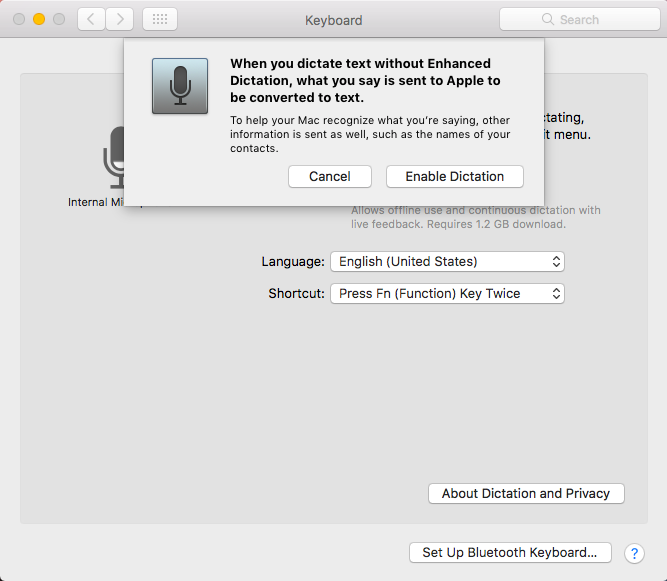
Turn on Dictation by clicking "on" and you will be prompted with this:
Click "Enable Dictation".
Now, the screen should look like this:
From here you are going to want to click the box beside "Use Enhanced Dictation" and if you are prompted with anything just agree and it should begin the download for using Enhanced Dictation. The reason that we want to use Enhanced Dictation is so that we can perform speech to text without having to be connected to the internet.
Finally, you need to change the option labeled "Shortcut" from its native setting to "Press Either Command Key Twice". You will do this by selecting the drop down menu next to the word "Shortcut" and selecting "Press Either Command Key Twice". Like so:
All done!!! Feel free to close your system preferences. ***IF EVERYTHING WENT SMOOTHLY STOP HERE AND PROCEED TO THE NEXT STEP, OTHERWISE CONTINUE READING BELOW***
------------------------------------------------------------------
*If you ran into problems like I did where the option to use dictation was not available on your machine follow these steps:
If you are having this issue you need to be sure you have the correct operating system for the MacBook. You MUST have an operating system loaded on the machine that both is supported on your MacBook and is capable of supporting Apple's Dictation in order for this tutorial to work.
If you are uncertain how to figure this out follow these steps as a starting point:
*The newer your Macintosh computer is the less likely it will be that you need to change its OS.*
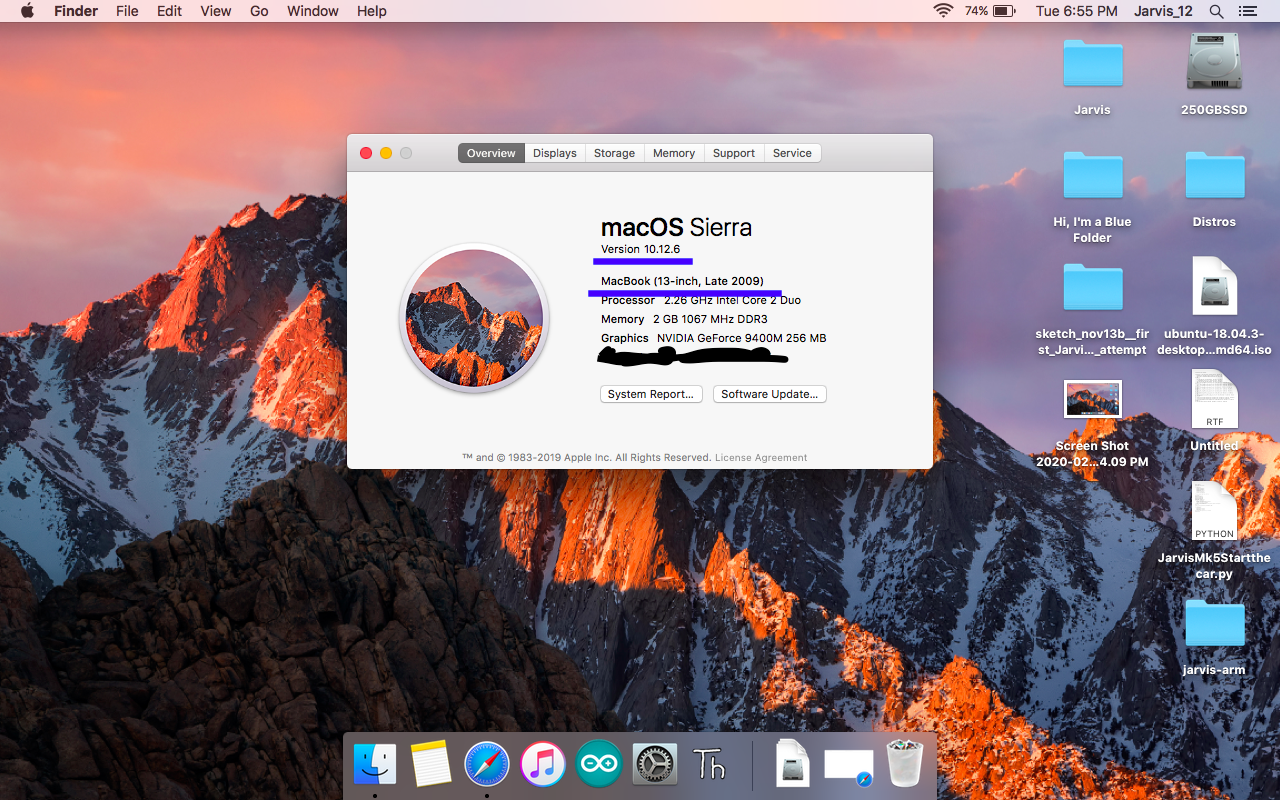
For this project I used a MacBook (13-inch, Late 2009) model. If you are unsure what model MacBook you have and/or which version of the Mac OS you are using go to the desktop, and click the apple icon in the upper left hand corner of the screen.
And select the option: "About this Mac"
After selecting "About this Mac" the following screen will appear:
I have underlined the 2 pieces of information that we care about in blue. The first is the Version of the operating system. In this case we are running Version 10.12.6 on a 13" Late 2009 MacBook.
This version of the Macintosh operating system is Sierra. If you are using a 13" Late 2009 MacBook you may need to go find a copy of Sierra and install/upgrade to it on your system. The reason I am running Sierra is that I looked around online and found that this was the only version of the Macintosh operating system that was both capable of running on my 2009 MacBook and also possessed Apple's Dictation feature.
For this project I decided to take a crack at using Python for the first time, so if there are better methodologies for accomplishing this goal software wise let me know.
The IDE that I chose is called "Thonny". If you would like to use this IDE it is free to download from https://thonny.org. If you have a different one that you would prefer to use I would assume that as long as you are capable of running the program everything should be fine.
This program is dependent on a project named pynput located here: https://pypi.org/project/pynput/
For controlling things via USB It also requires pySerial located here: https://pypi.org/project/pyserial/
For Thonny installing the pynput library goes like this:
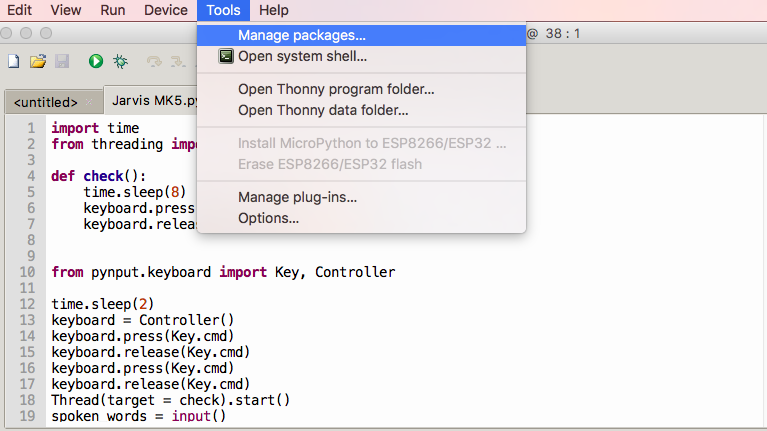
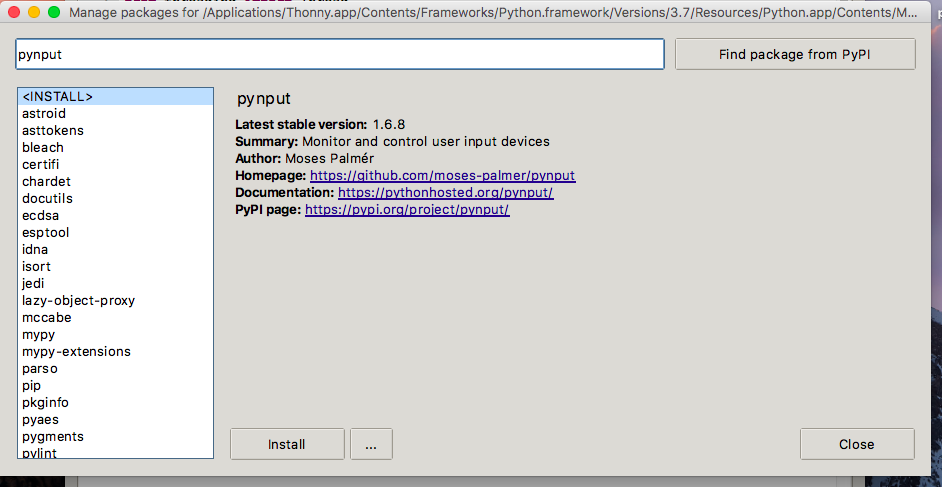
Open Thonny and then go to the Tools menu at the top of the screen. This will cause a drop down menu to appear, and the thing that we are looking for is "Manage packages". It should look like this:
Next, type into the search bar "pynput" and search for it. The screen should look like this:
Click "Install".
You may also need to install a package called "pySerial" if so, follow these instructions again, but instead of searching for "pynput" type "pySerial".


 MiDri
MiDri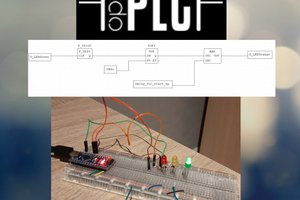
 Michael

 Sabas
Sabas