Close
0%
0%

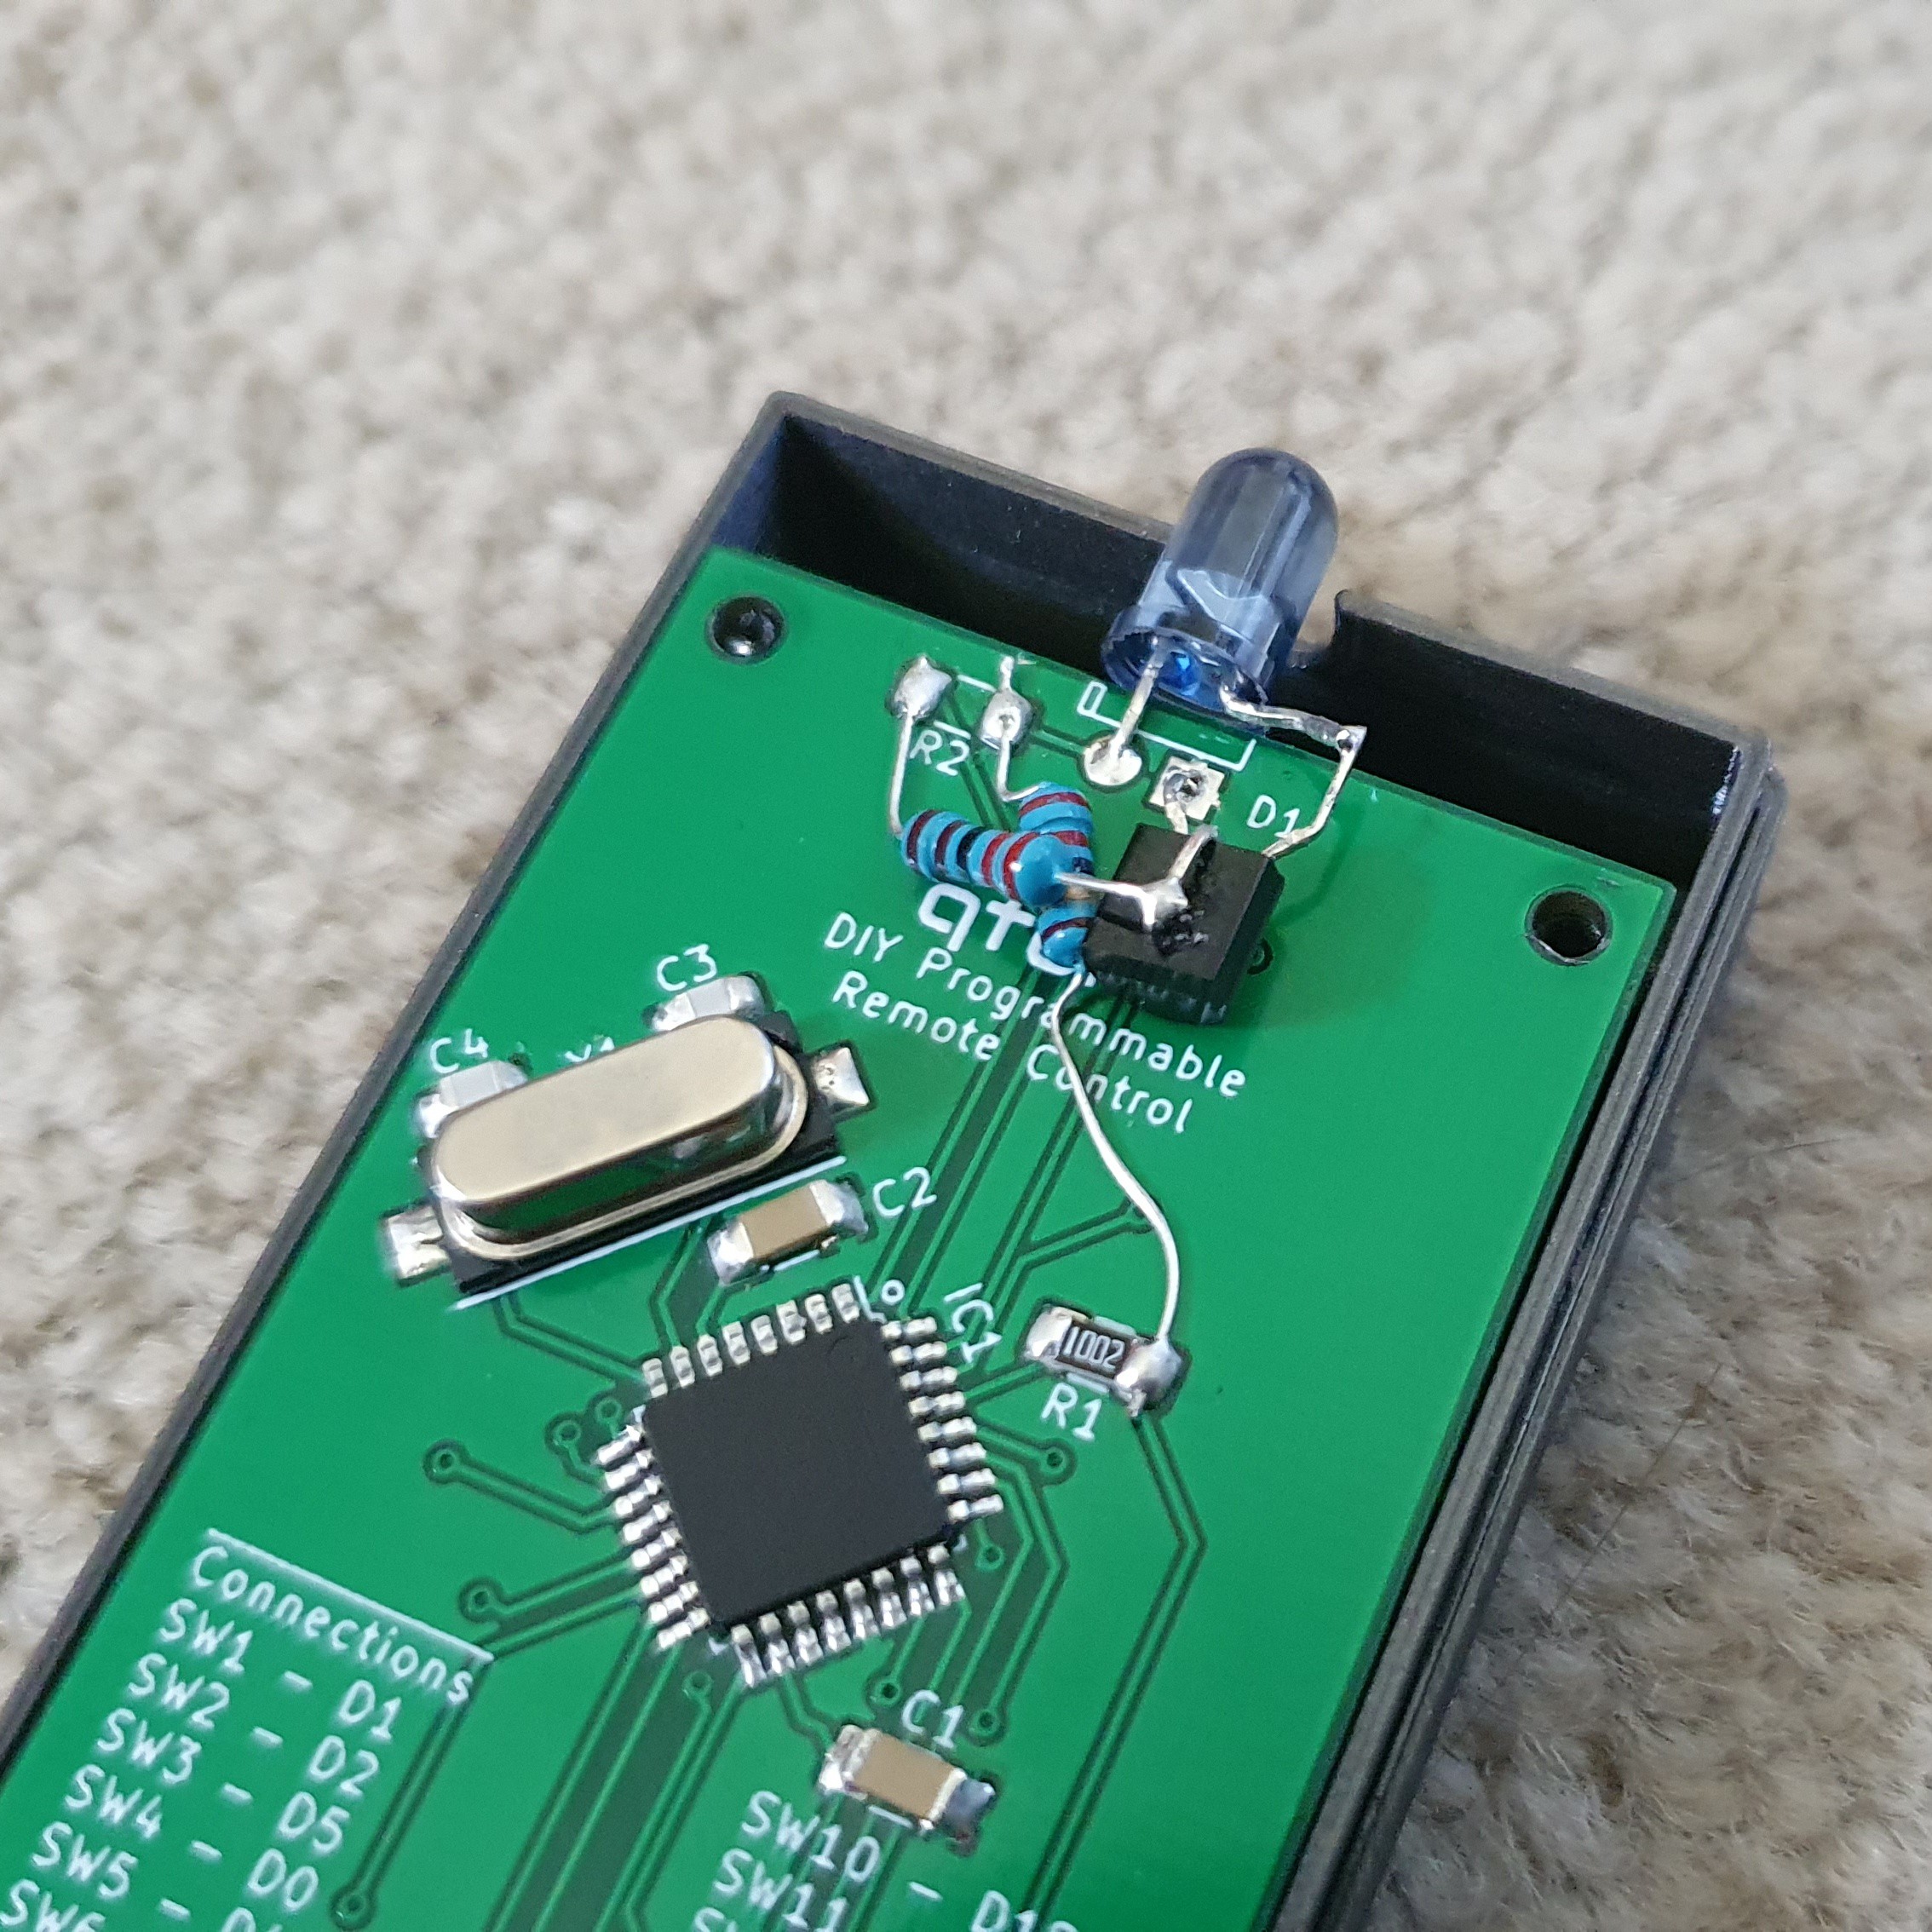
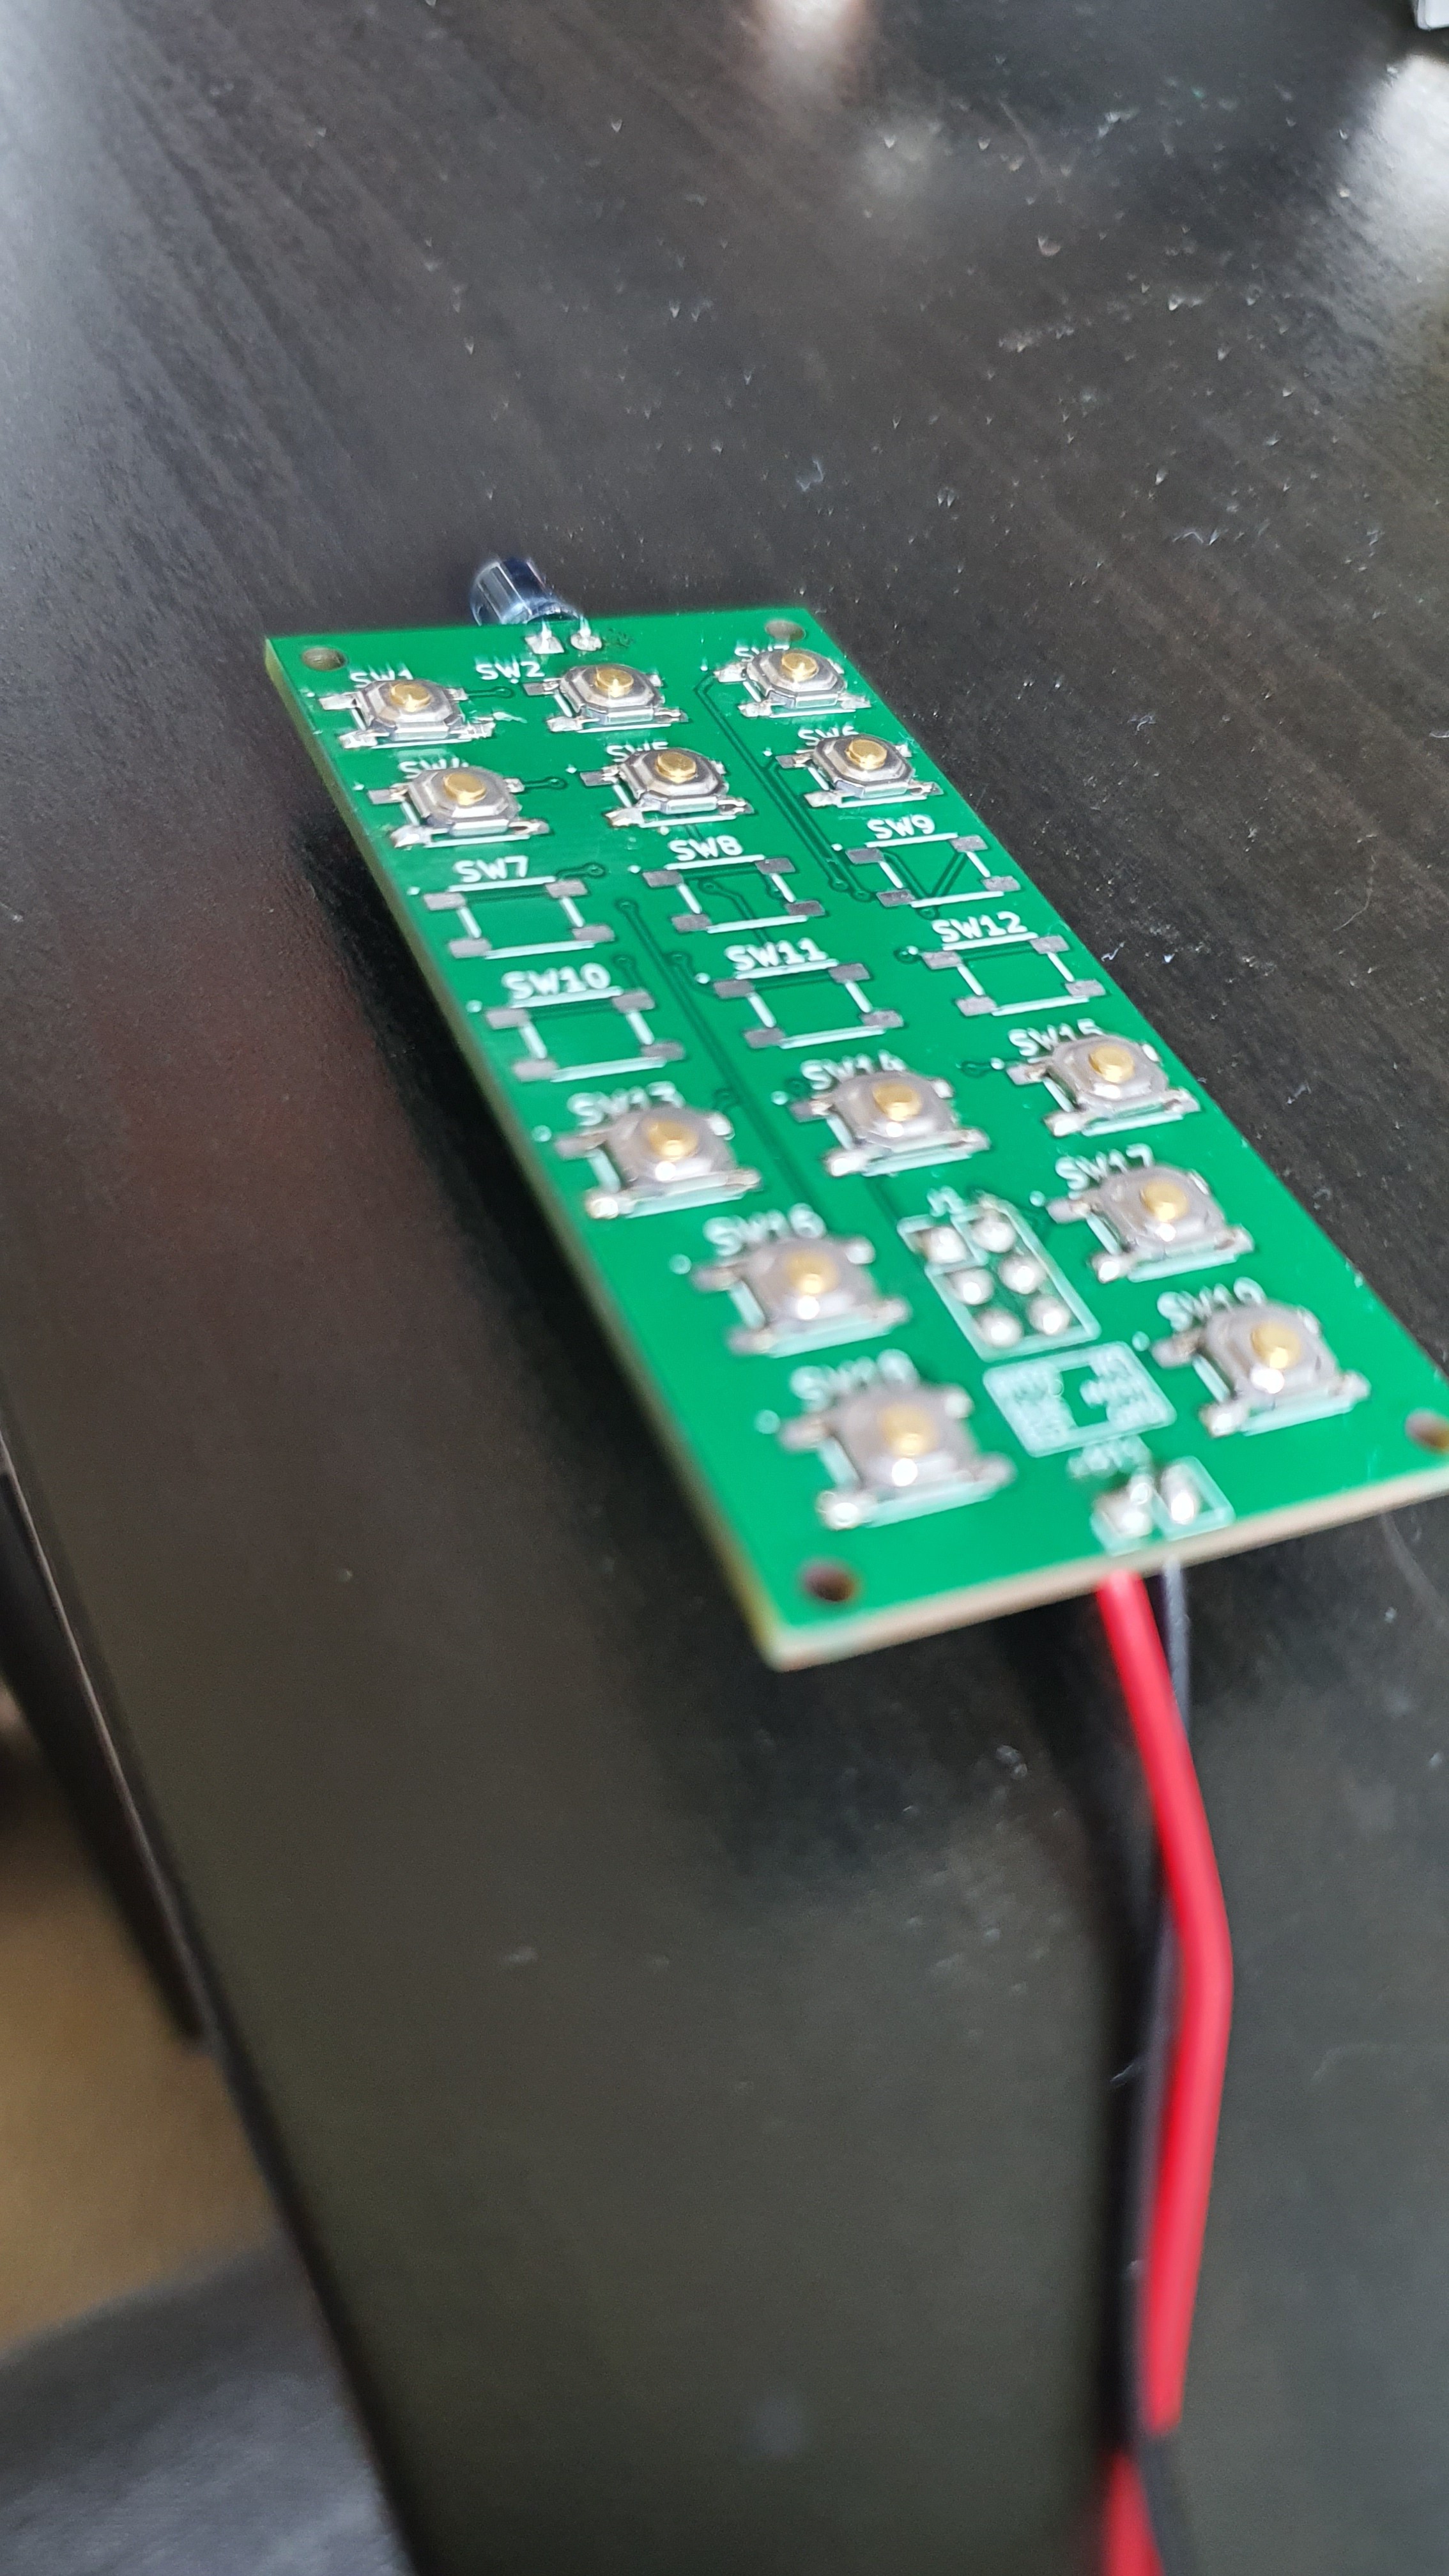
19 Button IR Remote Control

Make your own infra-red remote control

Public Chat
Similar projects worth following
Most of my projects have been able getting my old hifi equipment interfaced and working. My last purchase, a Sony CD player, was missing its remote control. This controller is based on the ATMEGA328 running at 4MHz, which allows it to run as low as 1.8V so the controller can run on 2 x rechargeable AA(A) batteries. The unit is programmed using the Arduino IDE (what else!) and using the MiniCore by MCUDude (as it allows for dropping the external clock to 4MHz).

Any IR code can be used, although the default code is using the Sony protocol and basic controls for CD players. The codes can be found at IRDB.tk for loads of devices, so the firmware can be modified. The button layout is customizable to be what you want.

The PCB is reasonably small using all surface mount components on both sides. Included is a Sketchup 3D model for the remote that has all 19 buttons which is free to be customized. The default

With the current global crisis this project is designed and should work but is untested as I am unable to spare the funds to buy the parts. However I wanted to release this out there anyway should anyone wish to use it or help finish the design!

UniversalRemote.ino

Needs following Libraries: PinChangeInterrupt and IRremote

ino - 4.05 kB - 04/30/2020 at 11:23

Download

SSEYO Koan Play File - 2.55 MB - 04/29/2020 at 15:13

Download

kicad_pcb - 298.99 kB - 04/29/2020 at 15:12

Download

sch - 16.14 kB - 04/29/2020 at 15:12

Download

pro - 688.00 bytes - 04/29/2020 at 15:12

Download

View all 7 files

  • 1 × ATMEGA328P Must be _P_ variant! Microprocessors, Microcontrollers, DSPs / ARM, RISC-Based Microcontrollers
  • 1 × IR Led 5mm
  • 1 × 4MHz Crystal
  • 2 × 22pF 0805 SMT Capacitor
  • 2 × 100nF 1206 SMT Capacitor

View all 8 components

  • More Power To The Emitters!

    smartroad05/02/2020 at 10:44 0 comments

    The current design has the IR LED connected directly to the ATMEGA via a resistor which sets the current in the LED to about 40mA(ish). That's the maximum amount the ATMEGA can provide per digital port. This does allow it to work reasonably well but the range is a little low. With the ATMEGA working at 4MHz it should work down to about 1.8V, meaning at that voltage the LED would be running at about 17mA making the range worse. The LED I am using has a continuous running current of 50mA and a pulse at 1A. Either way well above what the ATMEGA can provide. I have modified the circuit to use a transistor to bump the current up in the LED to 85mA when at 3.3V (limiting resistor of 27R) and at 1.8V the LED will still be running at 30mA.

    I used a BC548 (what I had available), connecting the base to the ATMEGA via a 2.2K resistor and the LED via a 27R resistor (although I only had a 22R to hand so it is running the LED at 100mA+). I'll be updating the circuit and PCB to use this arrangement in the coming days.

    Difference between without transistor (left side) and with:

    On another note, I have now made a second remote control for my cassette player which is working well to! Just need to get the stickers printed and attached!

  • PCB Arrival and Build

    smartroad04/29/2020 at 15:11 0 comments

    PCB order has arrived! I have built one circuit and it is programmed to control my Sony CD player. After a few issues (forgetting to set some pins as inputs and installing the wrong ATMEGA328!) it seems to be working well. Currently the enclosure is being printed and the hopefully it will be all ready to go.

  • PCBs on order

    smartroad04/21/2020 at 09:26 0 comments

    As I am still in lockdown I have ordered the PCBs and parts which hopefully will be with me soon. I can then get the prototype up and running soon!!

  • Case Prototype

    smartroad03/31/2020 at 16:14 0 comments

    While I wait for the world to return to something resembling normality I have been working on the remote control casing. Here is a sample of the current design of the remote control casing with buttons. This model shows all the buttons that would be available, obviously fewer can be used, the reason I made this for my CD player only uses 12 of them so some will be blanked.

View all 4 project logs

Enjoy this project?

Share

Discussions

Tom Nardi wrote 03/28/2020 at 16:12 point

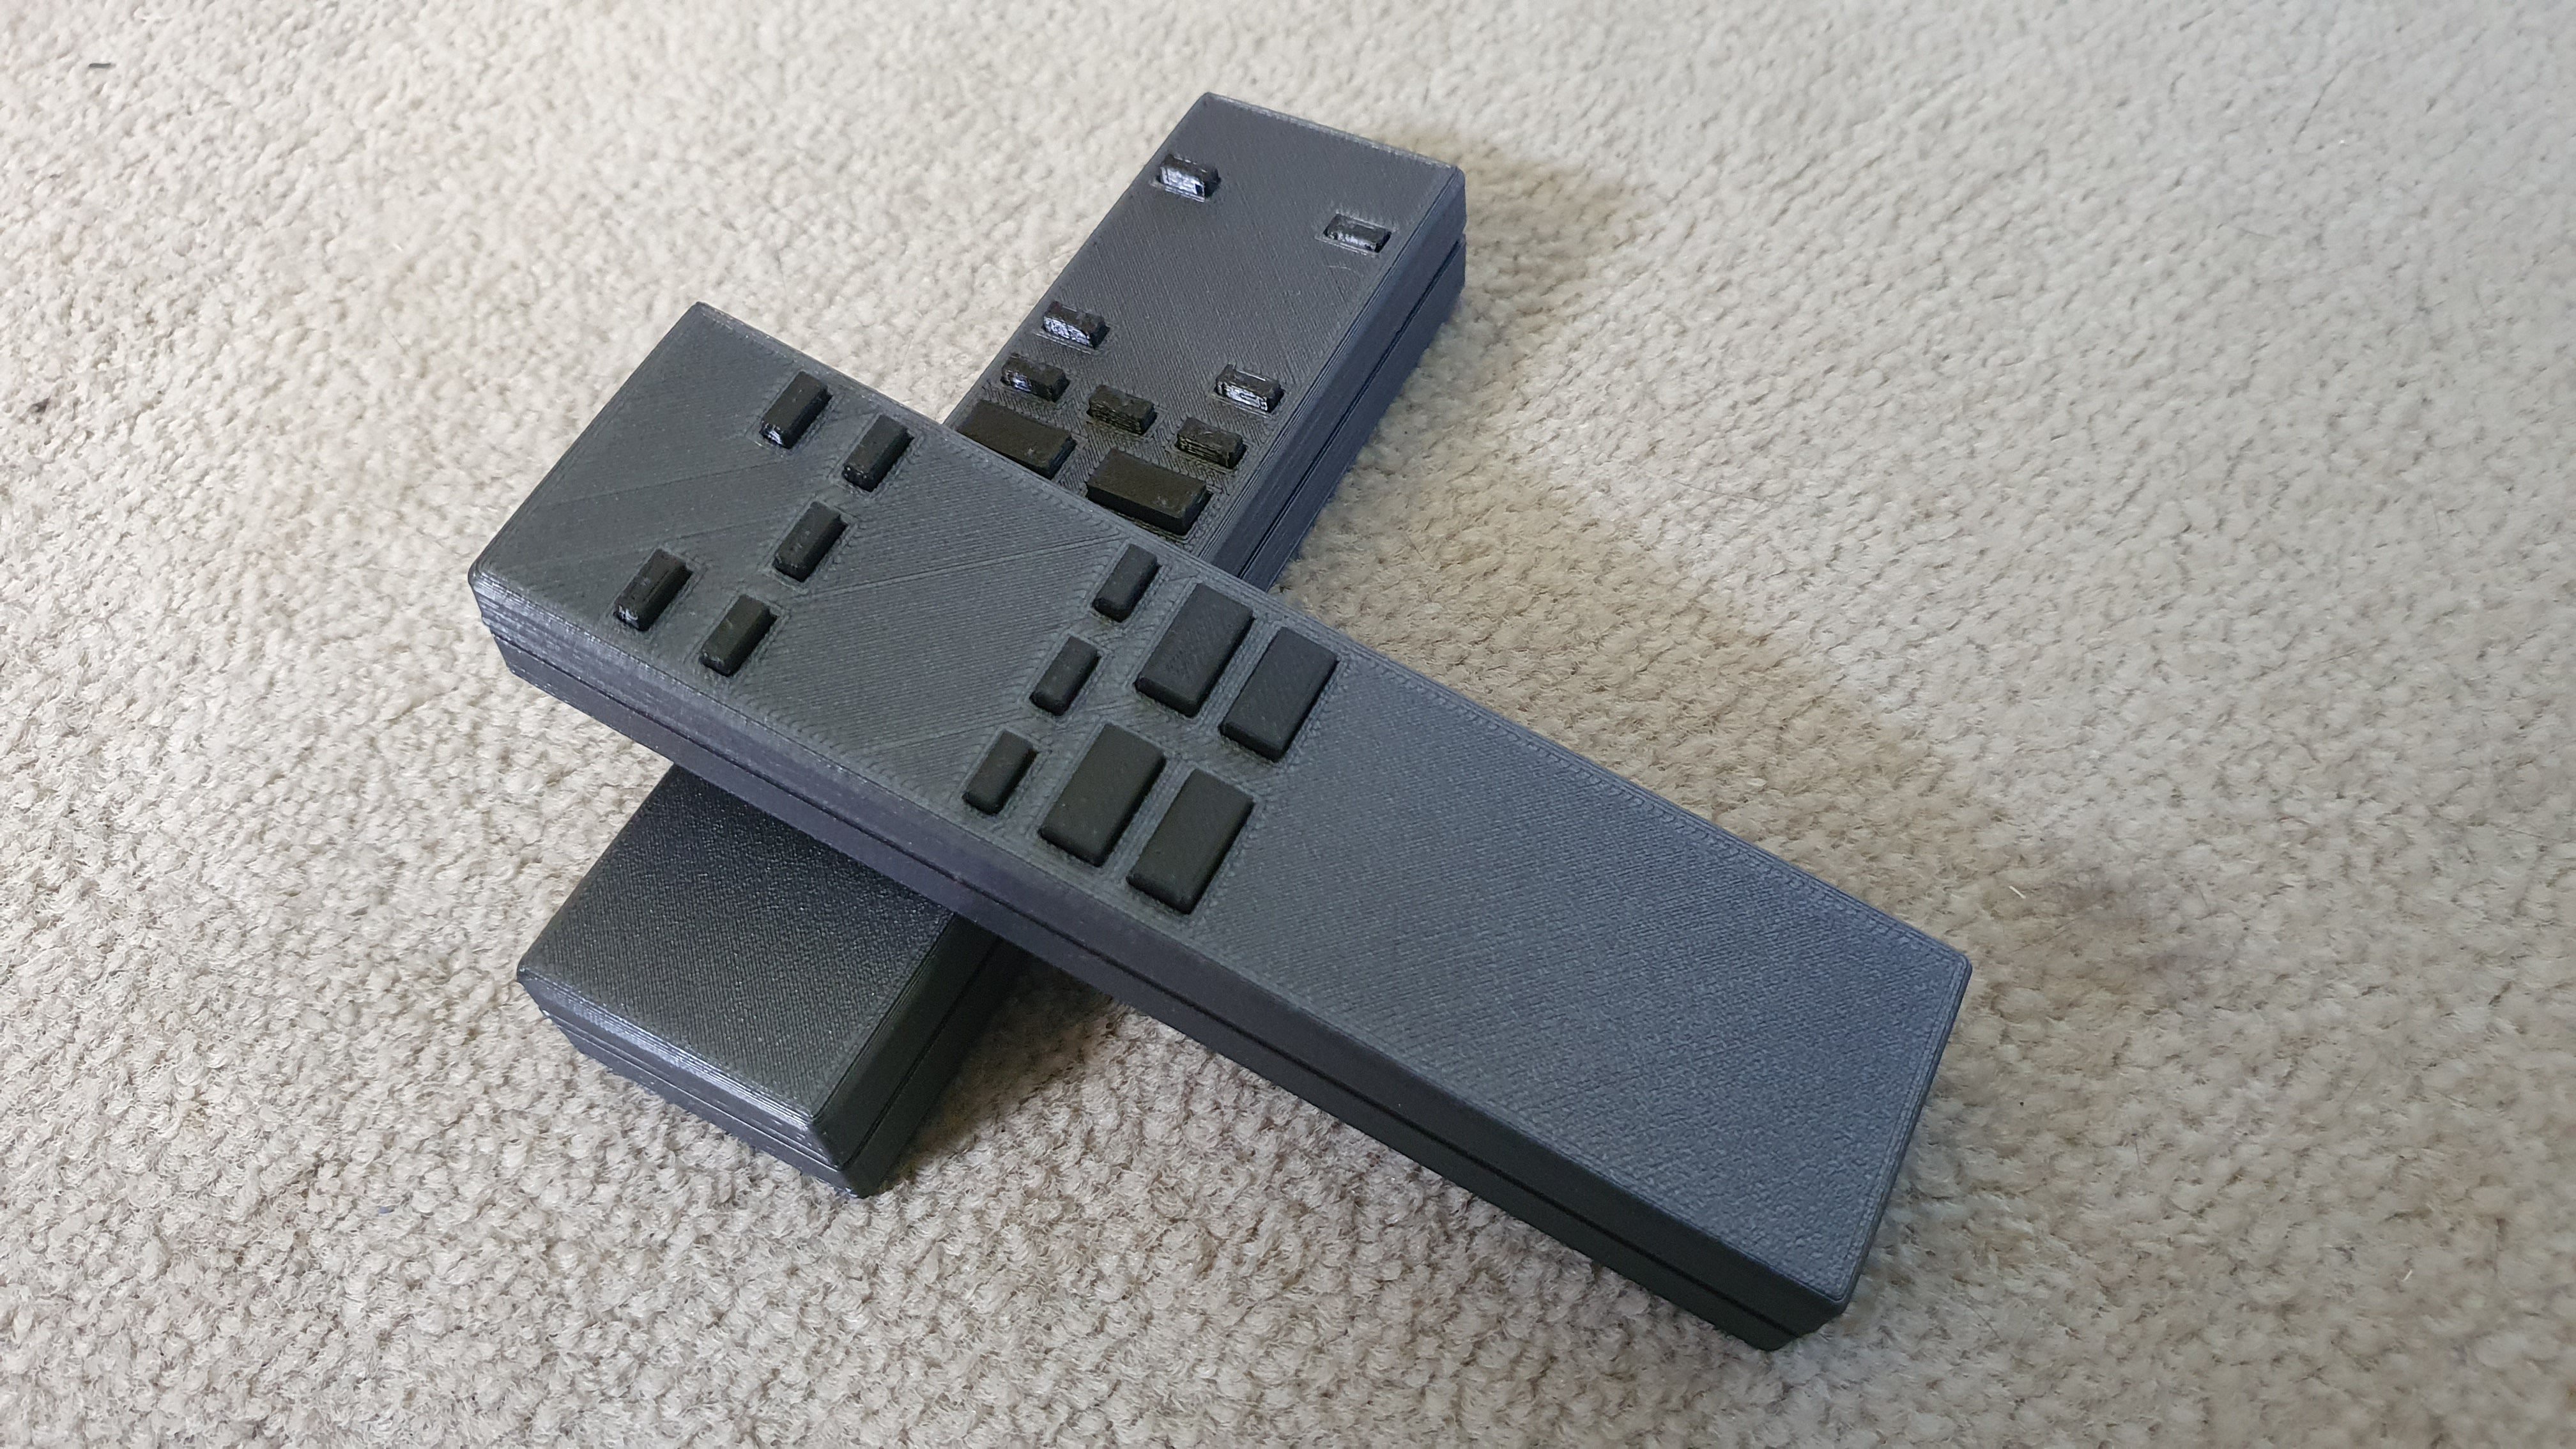
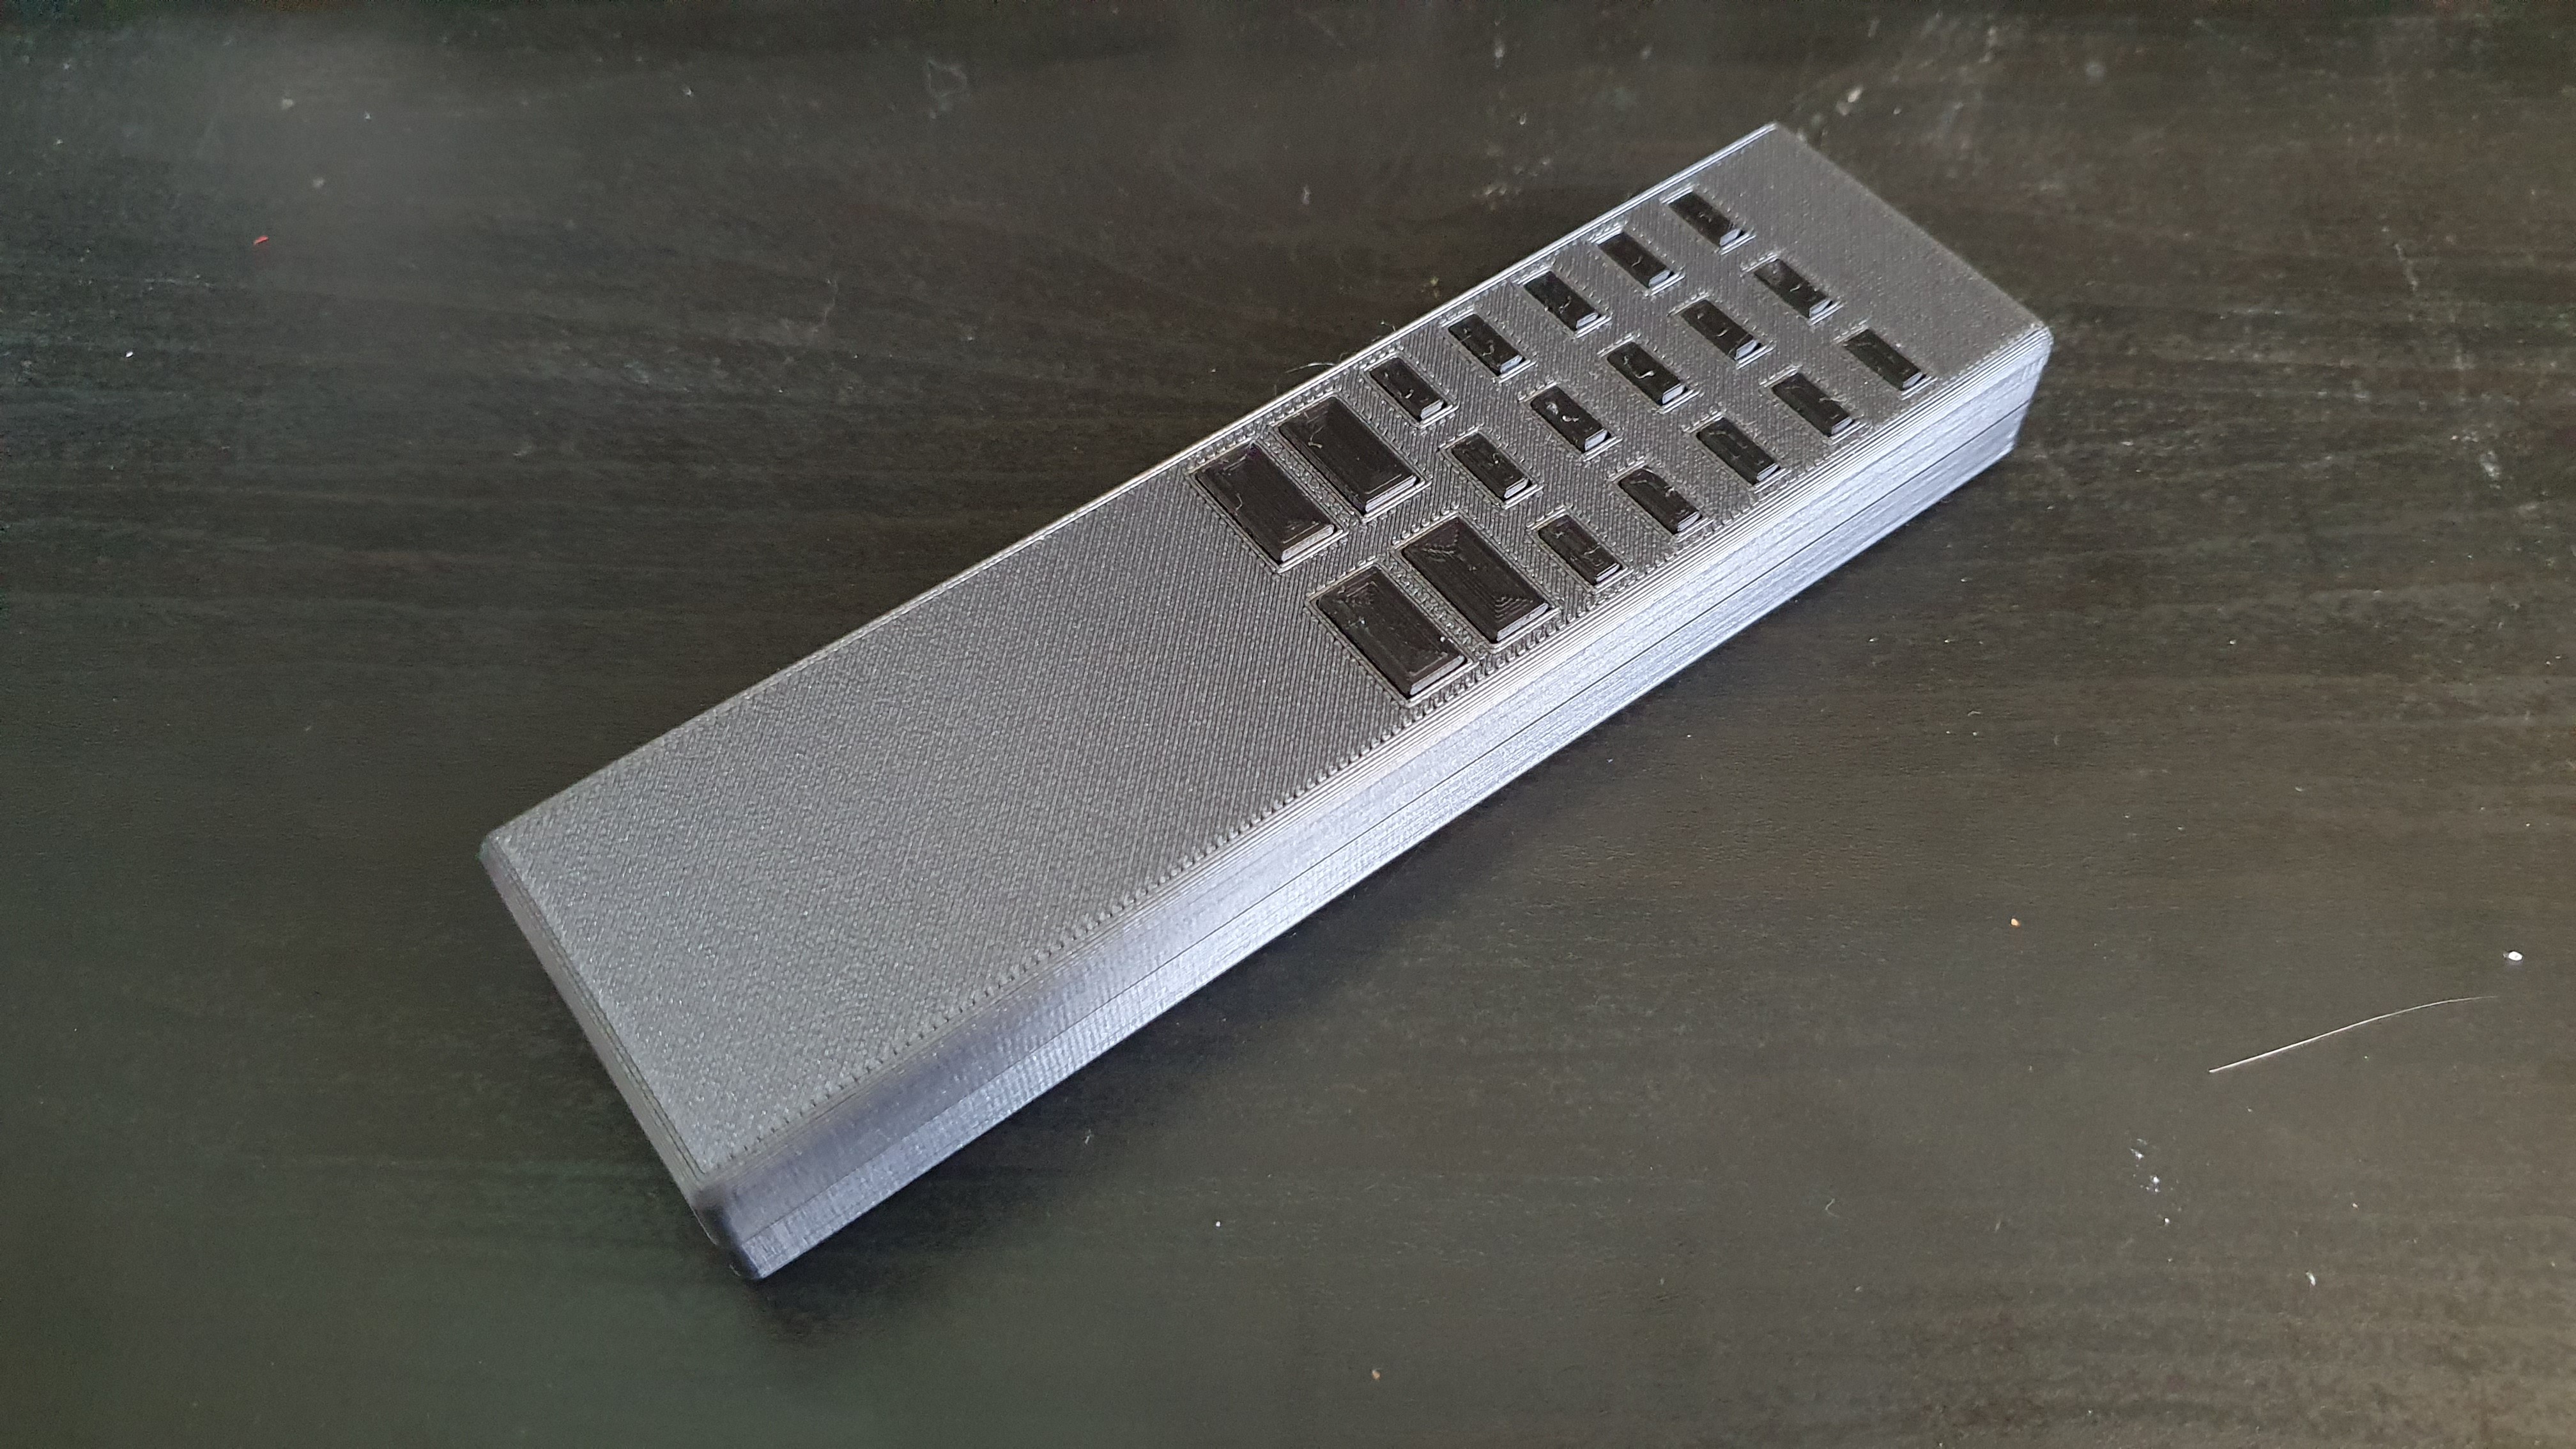
Really like the idea of the sticker overlay for different applications. Makes for a very professional look.

  Are you sure? yes | no

smartroad wrote 03/29/2020 at 20:37 point

Thanks! Hoping to get this prototype once the current crisis is over :)

  Are you sure? yes | no

Similar Projects

Does this project spark your interest?

Become a member to follow this project and never miss any updates